MA3092C - Oven Atag - Free user manual and instructions
Find the device manual for free MA3092C Atag in PDF.

User questions about MA3092C Atag
0 question about this device. Answer the ones you know or ask your own.
Ask a new question about this device
Download the instructions for your Oven in PDF format for free! Find your manual MA3092C - Atag and take your electronic device back in hand. On this page are published all the documents necessary for the use of your device. MA3092C by Atag.
USER MANUAL MA3092C Atag
instructions for use microwave oven
natural_image
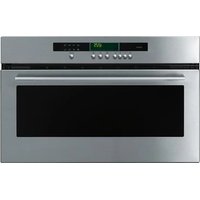
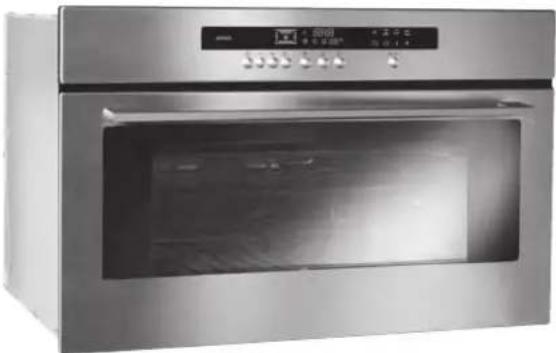
Exterior view of a stainless steel oven with open door and digital display (no visible text or symbols)MA3011C MA3092C
Geachte mevrouw,
Geachte heer,
HOE ZET IK DE DISPLAY "STANDBY"?
natural_image
Technical line drawing of a metal rack with a frame and mounting bracket (no text or symbols)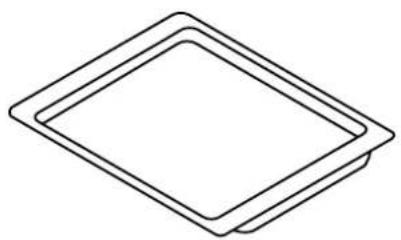
natural_image
Simple line drawing of a diamond shape with no text or symbols- 15 W
- 220/240 V
- 300°C
- schroeffitting E 14
natural_image
Technical line drawing of a metal grate structure with a gridded plate and frame (no text or symbols)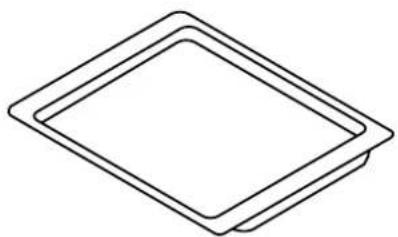
natural_image
Simple line drawing of a diamond shape with no text or symbolsnatural_image
Isometric line drawing of a structural frame with internal grid and support structure (no text or symbols)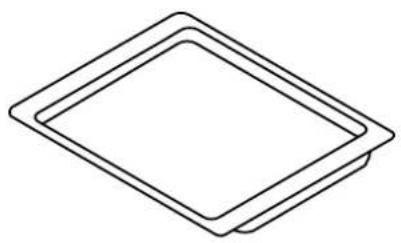
natural_image
Simple line drawing of a diamond shape with no text or symbolsmicrowave oven introduction
Thank you for choosing an Atag oven. You have made the right choice.
To get the most out of your new cooking aid we suggest you read and follow the advice contained in this manual.
Atag is continually improving its technology so that it can provide the best oven there is and the one you have chosen has the most innovative features. By combining the various functions and accessories you will get the greatest use out of your oven and produce the best results from your favourite recipes.
We hope you will find cooking with our oven an enjoyable experience that brings pleasure to all.
- Your apparatus is designed solely for household use - cooking, heating or defrosting foodstuffs. The manufacturer accepts no responsibility for any other inappropriate use of the oven.
- Before you use your microwave oven, make sure that all the recipients and accessories are suitable for use with it (e.g. flameproof glass, porcelain, etc.).
- To avoid damaging your unit never turn it on when it is empty or the support plate is not in place.
- Do not touch the openings in the locks on the front; this may create damage to the oven requiring outside repair.
- Keep a close eye on the oven when products to be heated or cooked are in containers made of throwaway plastic, paper or any other combustible material. They may be subject to spontaneous bur-ning.
- We do not recommend using metal recipients, knives, forks or spoons or metal staples used on defrosting sachets.
- However, it is possible to heat up food in covered aluminium trays provided they are fairly shallow (no more than 4 cm high). They will take slightly longer to heat. Make sure the tray is in the middle on the bottom and there is a gap of at least 1 cm between the sides of the tray and the metal walls and the door.
- For babies:
- Baby bottles must be heated without the teat, the liquid must be shaken and its temperature checked with the back of the hand before being given to the child.
- Baby food must be mixed and its temperature checked before being given to the child for avoiding any risks of possibly serious internal burning.
WARNING Do not let children use the oven unwatched unless they have received appropriate instructions and you are sure the child can use the oven correctly and that he understands the dangers of not using the oven as it should be.
- We recommend you to cover your food in most cases; it will be tastier and your unit will remain clean. However, before cooking food or heating drinks in a bottle or any hermetically closed container, remo-ve the cork or lid to avoid any risks of explosion.
- Heating or cooking eggs in their shells, poached or fried must be avoided. Eggs may burst, cause serious burning and damage your oven irreparably.
- When heating liquids, they may reach boiling temperature without any bubbles appearing on the surface. To avoid spilling and risks of burns, wait 20 seconds before taking the container out of the oven or putting anything whatsoever in it to prevent splashing.
- For small quantities (sausages, croissants, etc.) place a glass of water beside the food.
- Cooking times that are too long will dry out the food and burn it. To avoid this, never use the same cooking times as you use for your traditional oven.
- If you see any smoke coming out, keep the oven door closed, turn the oven off and disconnect it.
your oven, how it works
explanation of controls 5
how to use your oven
setting the time 6
cooking in the oven 7
automatic thawing 8
customising the power level 9
using the memory feature 9-10
using the child safety feature 10
setting the display to stand-by mode 10
different cooking methods
description of features 11
oven accessories
accessories 12
installer's information
connecting up 13
technical details 13
housing 14
general maintenance 15
changing the light bulb 15
troubleshooting 16
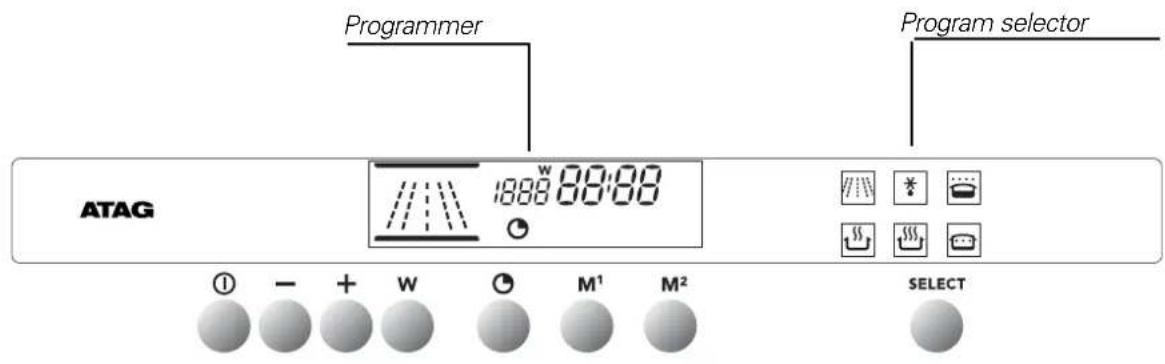
your oven, how it works explanation of controls
text_image
Programmer Program selector ATAG 1888 88:88 SELECT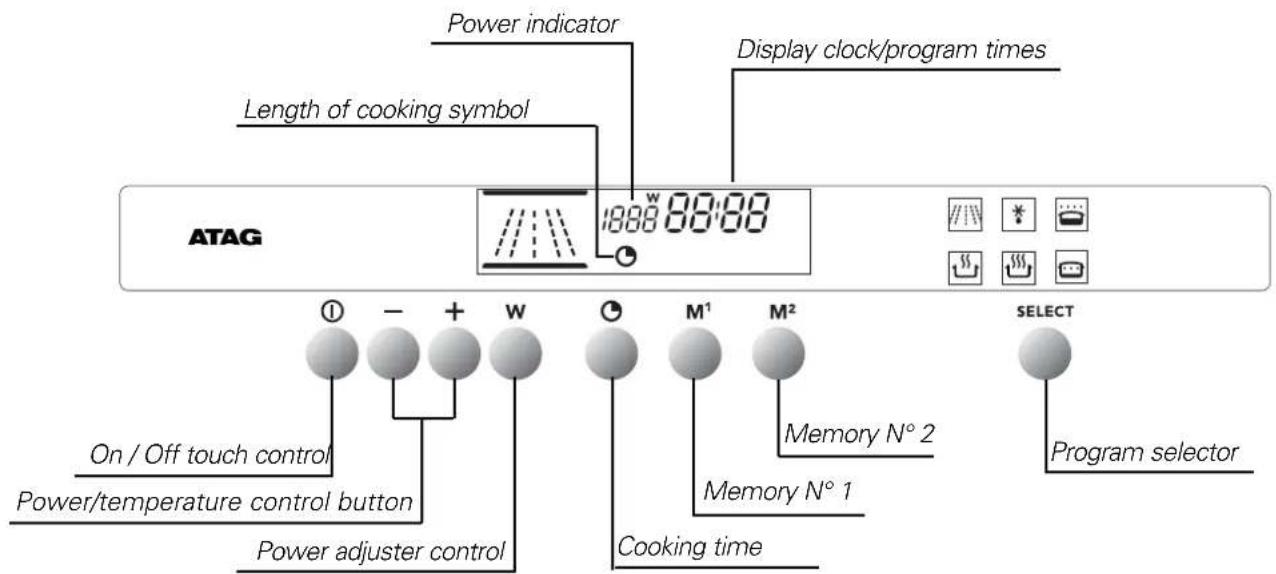
text_image
Power indicator Length of cooking symbol Display clock/program times ATAG 1888 88:88 On / Off touch control Power/temperature control button Power adjuster control M¹ M² Memory N° 2 Memory N° 1 Cooking time SELECT Program selectorhow to use your oven
setting the time
text_image
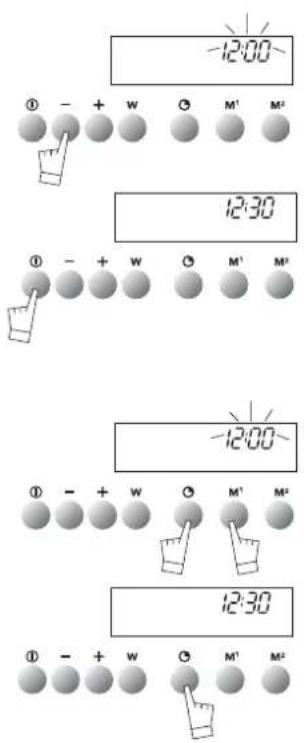
-12:00 ① - + W O M² M² 12:30 ① - + W O M¹ M² -12:00 ① - + W O M¹ M² 12:30 ① - + W O M² M²When the oven is installed
The time display flashes.
Set the time using + or - (holding the touch control down makes the numbers move on more quickly).
Example: 12:30.
Press the START/STOP touch control to confirm your setting.
NOTE: If the time is not confirmed using the START/STOP control within a few seconds, it is automatically memorized.
Resetting the time on the clock
Press touch controls and at the same time for a few seconds until the time display flashes.
Set the time using the + or - touch controls.
Press the touch control to memorize.
NOTE: If the time is not confirmed using the touch control within a few seconds, it is automatically memorized.
Your oven has 2 microwave cooking modes:
text_image
1000 00:00 ① - + W ○ M¹ M² SELECT 1000 0:30 ① - + W ○ M¹ M² SELECT 800 0:30 ① - + W ○ M¹ M² SELECT 800 0:29 ① - + W ○ M¹ M² SELECT
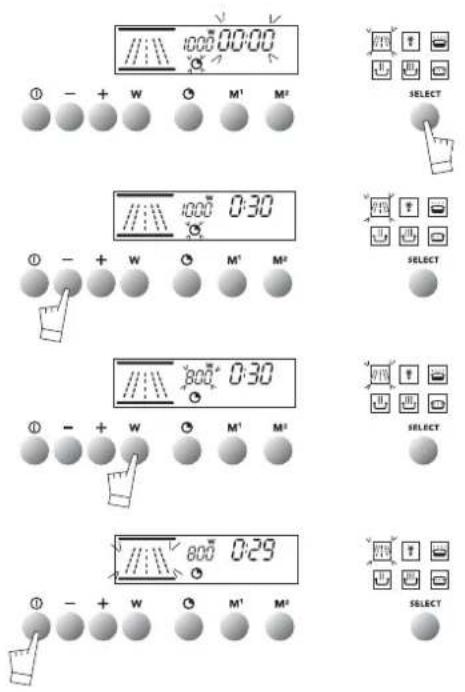
Warning: Do not turn your oven on under any circumstances in either of these two modes if it is empty.
- With touch control select your cooking mode

- Setting the cooking time:
- Press control which will start flashing.
- Set the time by pressing the + or - controls. E.g. 30 seconds
- Setting the power:
- Press control ^ C ^W 1000W which will start flashing.
- Set the power by pressing the + or - controls. Example : 800W
- Make sure the door is shut correctly. Confirm your setting with the START/STOP button. Your oven will then start up and count down the cooking time second by second.
If needs be, cooking can be stopped by pressing the START/STOP button for a second.
NOTE :
OPENING THE DOOR DURING COOKING
If you open the oven door when cooking, the cooking cycle will be stopped. To re-start cooking, close the door and press the START/STOP button.
The mode does not require its power to be reset.
how to use your oven
using the Microwave for automatic defrosting
The hours of waiting for your food to defrost are finished with your microwave oven! The microwave is the deep-freeze's best
ally, as it enables you to defrost your frozen food up to ten times quicker than by just leaving it in the open air.
Recommendations:
- Defrosting times vary depending on the type of apparatus. They also depend on the size, shape, initial temperature and quality of the food.
- Make sure that you remove any metallic attachments on food packaging when defrosting.
- If there are any ice crystals on the food, scrape them off beforehand with a knife. Otherwise the ice will create a screen and slow down defrosting.
- Put meat or fish on an overturned saucer for defrosting. This enables any juice liable to trigger off a cooking process by being in contact with the food to drip away.
- To make your defrosting as homogeneous as possible, separate chicken escalope, fish fillets, or pieces of meat as soon as you can.
- Turn the food over or mix it up when it is half-defrosted.
- Leave food to rest after defrosting it. Normally the rest time = defrosting time.
- Never refreeze any defrosted food before it has been cooked.
using the Microwave for automatic defrosting
| Defrosting-bread and pastry | Food | Quantity | Time |
| pain baguette | 100g | 45 s to 55 s | |
| round loaves | 200g | 1 to 1 min 30 s | |
| crusty and puff pastry | 400g | 2 min to 2 min 30 s | |
| 300g | 1 min | ||
| Defrosting sea food | Food | Quantity | Time |
| scallops | 500g | 5 min | |
| peeled shrimps | 100g | 1 min 30 s to 2 min | |
| whole shrimps | 200g | 5 to 7 min | |
| gambas (10) | 500g | 11 to 13 min | |
| prawns | 1000g | 10 to 11 min | |
| Defrosting fish | Food | Quantity | Time |
| cod or haddock fillets | 400g | 3 to 4 min | |
| whiting, codling | 500g | 3 to 4 min | |
| sole, plaice (2) | 300g | 2 min to 2 min 30 s | |
| fish steaks | 1 at a time | 1 min 30 s to 2 min | |
| hake salmon | 4 at a time | 4 to 5 min | |
| trout (3) | 540g | 4 to 5 min | |
| Defrosting meat | Food | Quantity | Time |
| small cockerel, pigeon | 500g to 600g | 5 to 7 min | |
| chicken escalope (2) | 200g | 3 to 4 min | |
| legs of chicken (4) | 1000g | 7 to 9 min...... | |
| whole chicken, | 1000g | 11 to 13 min | |
| veal chops | 600g | 5 min | |
| roast beef | 1000g | 10 min | |
| minced steaks (4) | 360g | 3 to 4 min | |
| meat in pieces | 600g | 6 to 7 min | |
| Defrosting fruit | Food | Quantity | Time |
| strawberries | 250g | 2 to 3 min | |
| raspberries, cherries | 250g | 2 to 3 min | |
| red currants, myrtle berries, black currants | 250g | 2 min 3 s to 4 min |
customising the power level
text_image
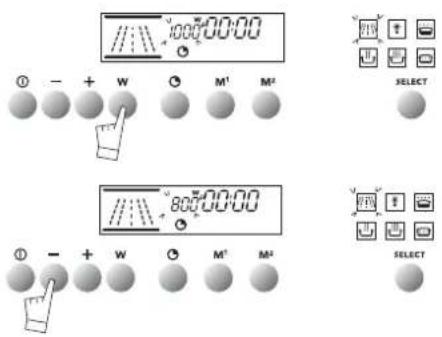
800:00:00 ① - + W ○ M¹ M² SELECT 800:00:00 ① - + W ○ M² M² SELECTYou can select the power you want to use in the first cooking mode. when
you select your cooking mode or during cooking
Press touch control W, for 2 seconds.
The oven will bleep, and the power read-out figures flash.
Programme the oven for the power you require using the + or - controls.
Confirm with the START/STOP button.
This programme will be kept in memory for subsequent cooking sessions.
You can re-programme your oven whenever you want.
how to use your oven
using the memory feature
text_image
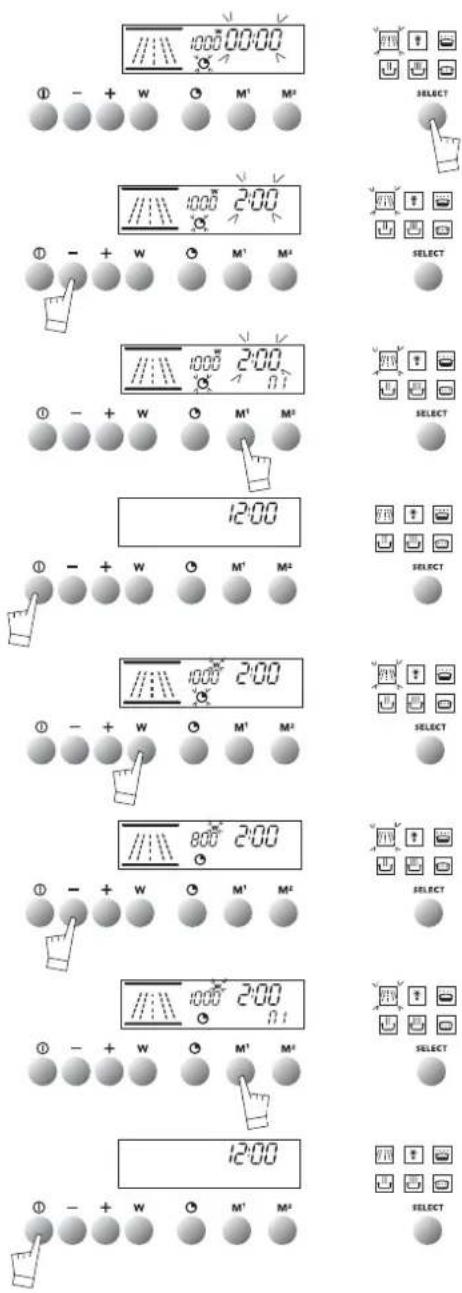
1000 00:00 ① - + W ○ M¹ M² SELECT 1000 2:00 ① - + W ○ M¹ M² SELECT 1000 2:00 ① - + W ○ M¹ M² SELECT 12:00 ① - + W ○ M¹ M² SELECT 1000 2:00 ① - + W ○ M¹ M² SELECT 800 2:00 ① - + W ○ M¹ M² SELECT 1000 2:00 ① - + W ○ M¹ M² SELECT 12:00 ① - + W ○ M¹ M²Your oven is equipped with two memorization touch controls, M1 and M2 for keeping your two most often used cooking programmes in memory.
Memorization can be used in the modes
In the mode you can memorize both the power and the cooking time.
allow you to memorize the cooking time only.
Example of use in mode

- Select mode

- Set your cooking time with the + and -controls,
E.g. 2 minutes
- You can record your setting by pressing M1 and M2 for 2 seconds.
- The oven will bleep twice to confirm your choice M1 or M2 will light up.
- You can leave the memorization mode by pressing START/STOP for a few seconds.
- After selecting your cooking time, if you are in mode, you can also memorize the cooking power.
- After selecting the cooking time, press the W. control W will flash.
- Set the power you require with the + and - controls.
E.g. 800w
- Register your setting by pressing M1 and M2 for a few seconds.
The oven will bleep twice to confirm your choice; M2 will light up.
- Leave the memorization mode by pressing START/STOP for a few seconds.
how to use your oven
using the memory feature
text_image
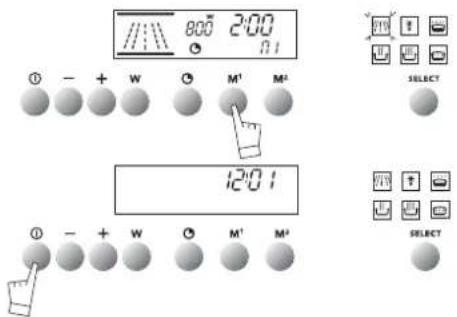
8:00 2:00 ① - + W ○ M¹ M² 12:01 ① - + W ○ M¹ M² SELECT SELECTFor starting off a memorized cooking program:
-Press on M1 or M2.
- Cooking starts immediately.
- To stop cooking during the program, press on the START/STOP control.
NOTE : Putting your favourite cooking programs into memory can be repeated as often as you want.
how to use your oven
using the child safety feature
text_image
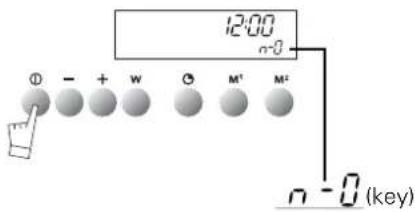
12:00 n-0 ① - + W ② M¹ M² n - 0 (key)In order to prevent your oven being turned on unintentionally, you may lock the controls.
To do this:
- Press on the START/STOP touch control until it bleeps.
Keep pressing on the touch control until the bleep stops and a key appears on the indicator panel.
-To unlock the controls, repeat the operation.
-Press the START/STOP touch control until you hear a long bleep.
Keep your finger on the touch control until the bleep stops and
the key disappears from the display panel.
NOTE: Only the "separate timer" program remains operational.
how to use your oven
setting the display to stand-by mode
text_image
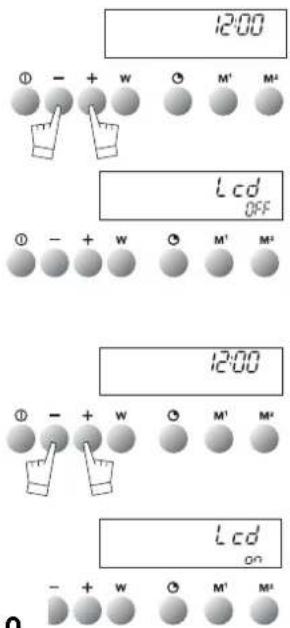
12:00 ① - + W ○ M' M² Lcd OFF ① - + W ○ M' M² 12:00 ① - + W ○ M' M² Lcd on - + W ○ M' M²To reduce your oven's power consumption to a minimum when it is not in use, you can put your readout system in STANDBY MODE.
To carry out this operation, proceed as follows:
GOING INTO STANDBY MODE:
- Your oven must be in normal time readout mode.
- Press both the + and - controls for five seconds at the same time.
- The display reads "Lcd off".
- Take your fingers off the two controls.
- 30 seconds later your readout will switch off.
Your oven is now in standby mode; whenever you are in the normal time readout mode, it will turn off automatically after 30 seconds.
COMING OUT OF STANDBY MODE:
- Your oven must be in the normal time readout mode.
- Press the + and - controls for five seconds at the same time.
- The display will then read "Lcd on".
- Take your fingers off the two controls.
- You are now out of the STANDBY MODE; the readout is now permanently lit.
| PROGRAMS | Parts of the oven in operation | DESCRIPTION OF FEATURES | Recommended positions | |
| PowerMin./ Preset / max100w / 1000w / 1000wMicrowave | Cuiss-- Réchauffage Réchauffage | Energy is supplied by the microwave system and is distributed by the upper and lower generators.Heating on two levels | 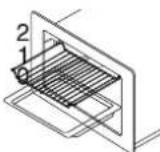 | |
| TimeAutomatic defrost |  | This position optimises defrosting | 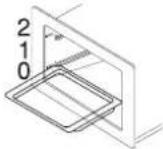 | |
| 80WKeeping warm |  | This position is used for:- Keeping all your dishes warm- Defrosting delicate products (e.g. butter fruit, cheese) | 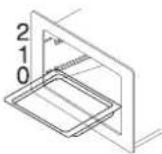 | |
| 750wSlow cooking | 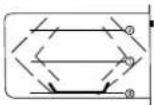 | This position is used for:- Heating or cooking all liquid or solid food together with ready-to-eat fresh or deep-frozen dishes | 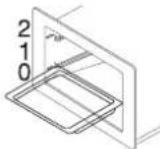 | |
| 1000wHigh-speed cooking | 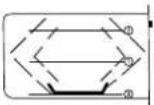 | This position is for speeding up cooking:- Liquids (e.g. soups)- Food with a large water content (tomatoes, courgettes, etc.) | 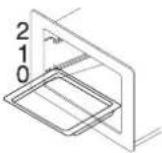 | |
| 500wSimmering and very slow cooking |  | This position is used for:- Finishing off cooking food that has been started at normal speed (haricot beans, lentils, dairy products)- Cooking fish- Heating two dishes at the same time, one in position 0 and the other on the grill in position 2. | 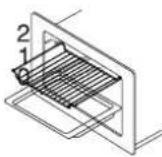 | |
oven accessories accessories
natural_image
Isometric line drawing of a metal grate or rack structure inside a rectangular frame (no text or symbols)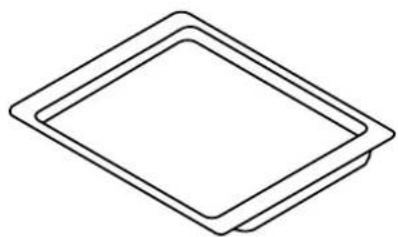
natural_image
Simple line drawing of two overlapping diamond-shaped frames (no text or symbols)Reversible oven shelf
By using this shelf the other way up you gain extra height inside the oven.
However it must only be used for reheating your dishes.
Glass dish
It can be put on the floor of your oven for catching any juice or fat dripping from food cooked on the grid. It can also be used for defrosting.
HINT: To keep your oven clean whatever cooking you are doing, put your glass dish on the bottom of the oven.
Important recommendations
Never touch your pans with bare hands when cooking is over.
As a specialist, you alone are competent to install and connect up Atag appliances.
Our guarantee therefore applies only and exclusively to appliances which have been installed and connected up by you in accordance with the provisions of current regulations.
Failure to meet this requirement would incur the fitter's liability and release the Atag company from any liability.
Electrical connections must be made as per the connection plate fixed to the back of the appliance, by an electrical fitter. Who must ensure that the appliance has been connected up in accordance with fitting instructions and local regulations.
Where the appliance is not connected to the mains electricity supply by a plug, an omni polar cutout device (with a contacts gap of at least 3 mm) must be fitted on the supply side of the connection to meet safety requirements.
NOTE: When power is connected, the electronics of the oven are initialised; this neutralizes the lighting for a few seconds.
If the oven is connected to the power supply by a plug, this must remain accessible once the oven has been fitted.
We cannot accept any liability in the event of an accident resulting from non-existent or faulty earthing.
WARNING: Some internal parts are capable of giving an electric shock even when the oven is disconnected from the power supply. Work that involves removing a plate allowing microwaves to be discharged should only be undertaken by a qualified electrician.
If the power supply cable is damaged, it presents a potential hazard. It must be replaced by the manufacturer, its after-sales service or a qualified electrician.
installer's information
technical details
Operating voltage....220-240 V \~ 50 Hz
Total power used in cooking....2,06 kW
Power output in microwaves....1000W
1000W microwaves for 1 hour....2,06 kWh
Inside dimensions of oven
Width....42 cm
Height....21 cm
Depth....37 cm
Effective volume....32 litres
installer's information housing
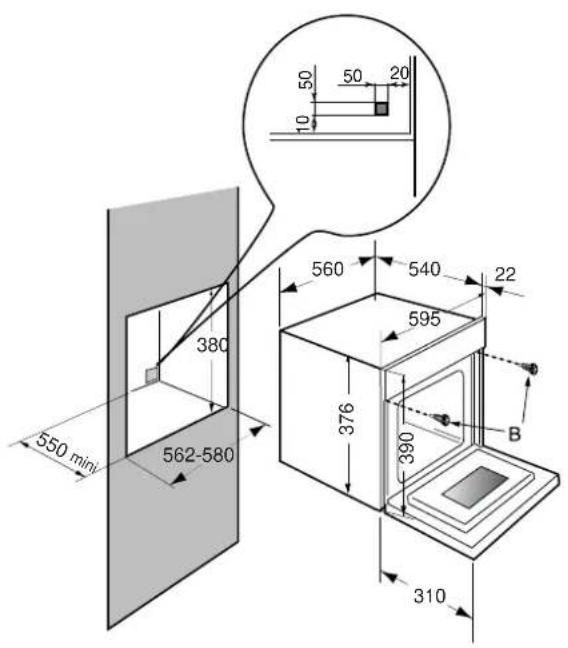
The oven has an high-performance air circulation system which gives remarkable results for cooking and cleaning, as long as the following points are applied:
- The oven may be fitted either underneath a work surface or in a suitable sized column unit. Cut a hole measuring 50 ~mm × 50 ~mm in the back wall of the insert space for the electric cable to pass through (See diagram, left).
- Centre the oven in the unit, and make that it is at least 2 mm from any other unit beside it.
- The unit must be heat-resistant (or covered with heat-resistant material).
- The oven must be disconnected from the power supply while it is being installed in the unit.
- For greater stability, fix the oven in the unit with 2 screws in the holes on the side uprights (see diagram). Make a 3mm diameter hole in the side of the unit first to prevent the wood from splitting.
Leave the oven to cool down before cleaning it manually.
In general, don't use any type of scouring powder or metal-backed sponge, or any sharp objects for cleaning.
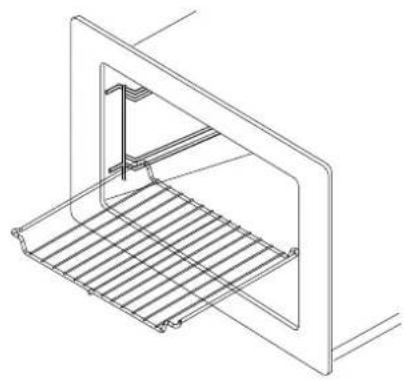
Removing the racks:
The racks may be removed for cleaning:
a) Raise slightly.
b) Rotate without forcing.
c) Rake the rack out.
- The surrounds to the door and the oven must always be kept clean. If these surfaces become damaged by excessive dirt, call in a specialist before using your unit.
- If your oven smells or is dirty inside, boil a cup of water containing some lemon juice or vinegar for two minutes and then wipe the inside walls clean using a few drops of washing-up liquid.
changing the light bulb
text_image
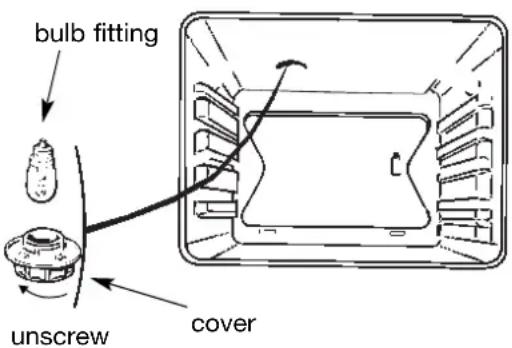
bulb fitting unscrew cover- The bulb is located in the top of the oven.
WARNING! Disconnect the oven before touching the bulb; leave the oven to cool down if necessary.
a) Turn the cover a quarter turn to the left.
b) Unscrew the bulb, turning it to the left.
Type of bulb:
- 15 W
- 220/240 V
- 300°C
- E14 fitting
c) Change the bulb, replace the cover and re-connect the oven to the power supply.
Hint: Using a rubber glove makes it easier to unscrew the cover and the bulb
If you're not sure that your oven is working properly, it doesn't necessarily mean that there's a problem. In all cases, check the following points:
| IFYOUREALIZETHAT | POSSIBLE CAUSES | WHAT SHOULD YOU DO? |
| The oven isn't heating | The oven isn't connected to the power supply.The fuse has blown.Other causes. | - Connect to power supply.- Change the fuse, checking that it is 16A.- Contact the After-Sales Service. |
| The light inside the oven isn't working. | The lamp is unusable.The oven isn't connected to the power supply or the fuse has blown. | - Change the bulb.- Connect to power supply or change fuse. |
| The cooling fan keeps working after the oven is turned off. | The fan will stop three minutes after the end of cooking.If it has not stopped after 1 hour | - NOTHING.- Contact the After-Sales Service. |
| The oven light stays on even when the oven is switched off | 1. The oven door is not closed correctly.2. There is a faulty component in the microwave circuit. | 1. Check that the door is completely closed.2. Call the After-Sales Service. |
| The oven makes noises after cooking is finished. | The fan in the top of the oven (invisible) works even when the oven has stopped. | - This is normal as your oven is fitted with a fan that runs for 3 minutes after the end of cooking. |
| The oven gives off sparks. | There is a metallic element too near a wall or the rack. | - Remove all metal elements from close to the walls.- Never use a metal element with the rack. |
| The food does not get hot when in microwave mode. | Microwaves are not reaching the food.The door is not shut correctly. | - Check that your utensils are compatible with microwave ovens.- Check that door shuts correctly. |
In all cases, if you are unable to solve the problem yourself, please contact the After-Sales Service without delay.