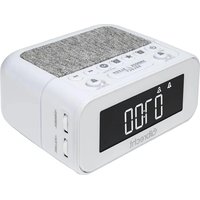
DR 451 - Radio ALBRECHT - Free user manual and instructions
Find the device manual for free DR 451 ALBRECHT in PDF.


User questions about DR 451 ALBRECHT
0 question about this device. Answer the ones you know or ask your own.
Ask a new question about this device
Download the instructions for your Radio in PDF format for free! Find your manual DR 451 - ALBRECHT and take your electronic device back in hand. On this page are published all the documents necessary for the use of your device. DR 451 by ALBRECHT.
USER MANUAL DR 451 ALBRECHT
natural_image
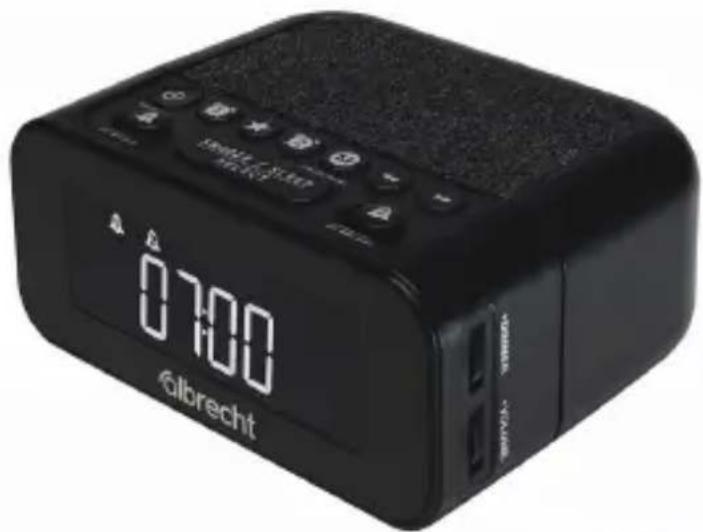
Simple line drawing of a trash bin with crossed diagonals and a blank bottom bar (no text or symbols)DAB+ radio alarm clock
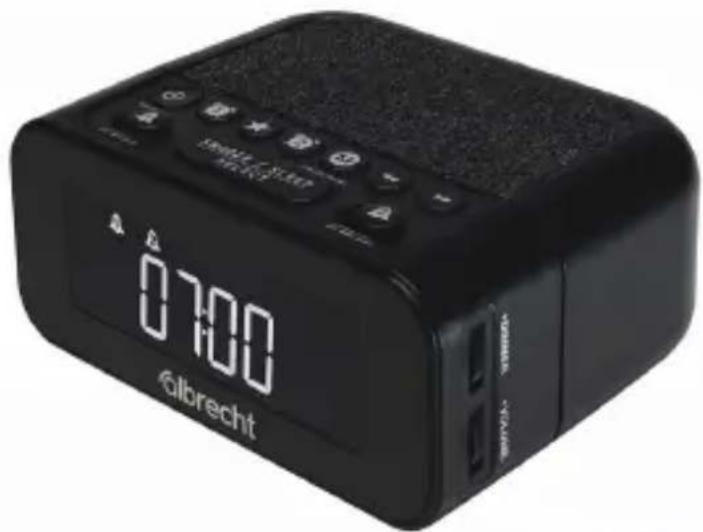
text_image
07:00 Albrecht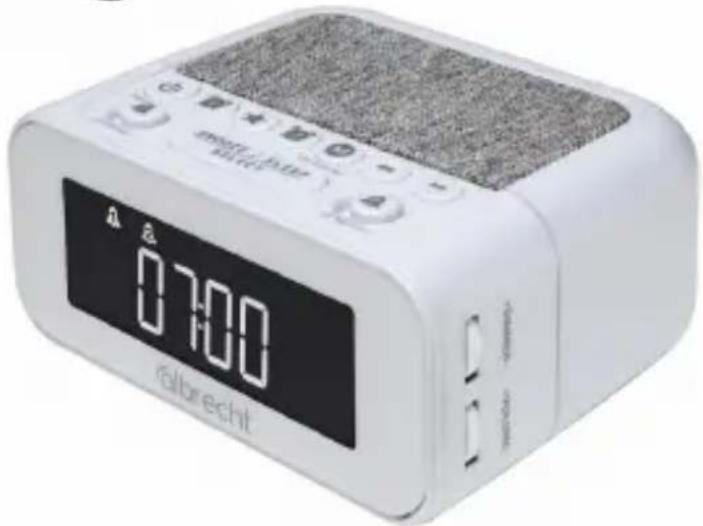
text_image
ralbrechtManual
English
Table of Contents
- Scope of delivery ...... 17
- First use....17
- Controls and connectors....18
- Basic functions .....20
- Operating modes....20
5.1. Standby....20
5.2. DAB....20
5.3.FM 21
5.4. Bluetooth....22
- Favourites (station memory)....22
- System settings ......22
7.1. Sleep timer....22
7.2. Alarm clock....22
7.3.Time 23
7.4. Reset to factory settings 23
7.5. Software version ......23
- ASA emergency announcements 24
- Radio specifications....25
9.1. Specifications Power supply unit 25
- Backup battery for time keeping....26
- Warranty and recycling information ......26
- CE declaration of conformity .....27
- WEEE and recycling....27
- Service address .....28
1. Scope of delivery
-
DR 451 DAB+ radio alarm clock
-
Plug-in power supply
-
Instructions
2. First use
- Place the DR 451 in the desired location.
- Connect the supplied power supply unit to the DC IN socket on the back of the radio, then plug the power supply unit into a mains socket.
- For the best reception, pull out the telescopic antenna completely and move the antenna until the radio has the strongest reception. In most cases, an antenna positioned as vertically as possible will give the best results.
- The radio is now ready for use. When used for the first time, the radio automatically performs a DAB+ station search to find all digital radio stations available in your region. Once the search is complete, you can scroll through the available stations using the arrow buttons ◀/▶
3. Controls and connectors
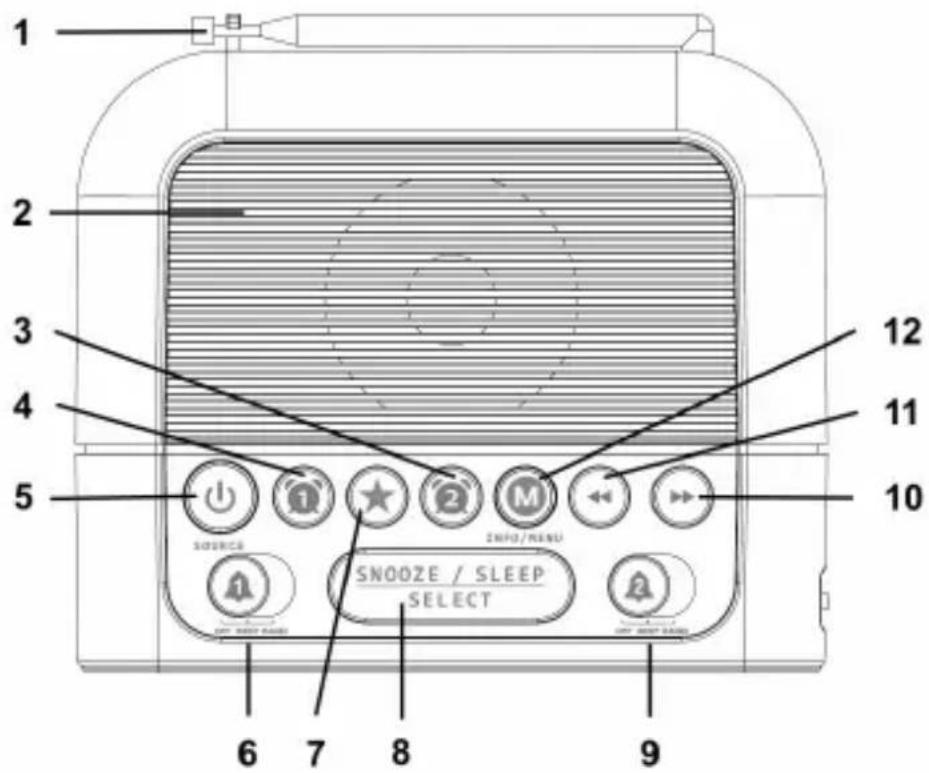
text_image
1 2 3 4 5 SOURCE INFO/MENU SNOOZE / SLEEP SELECT 6 7 8 9 10 11 12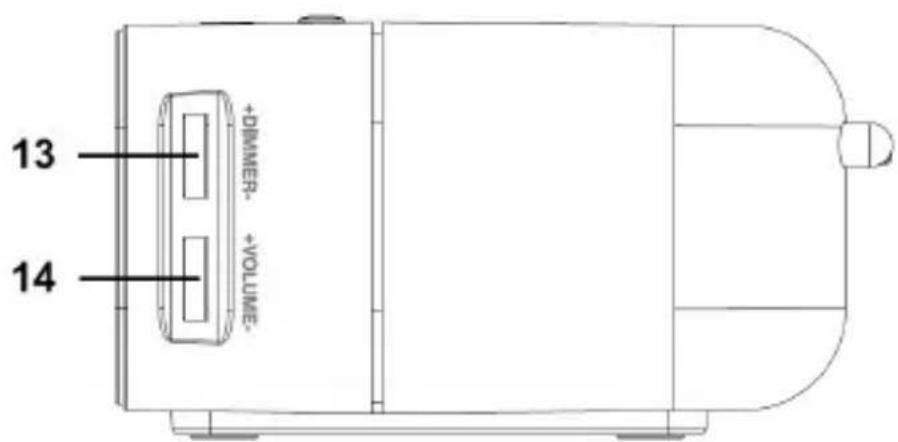
text_image
13 14 +DIMMER- +VOLUME-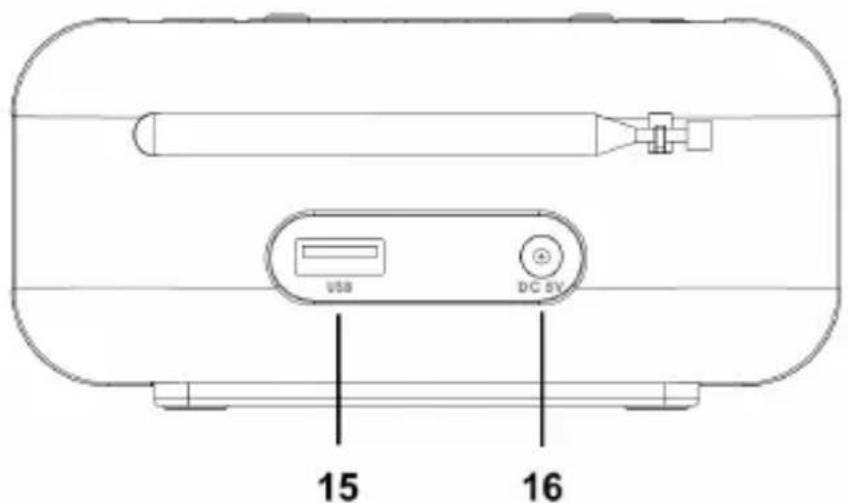
text_image
15 16| Label Function | ||
| 1 | Antenna Telescopic antenna for radio reception | |
| 2 | Loudspeaker Speaker opening for music playback | |
| 3 | Alarm clock 2 Settings for 2nd alarm time | |
| 4 | Alarm clock 1 Settings for 1st alarm time | |
| 5 | On/Off Source Switch on/offChange music source: DAB / FM / BT | |
| 6 | Alarm 1 Activates the alarm clock 1 | |
| 7 | ★ Favourites Save or call up favourite stations | |
| 8 | Snooze / Sleep / Select Snooze button /Sleep timer / Confirmation in menus | |
| 9 | Alarm 2 Activates the alarm clock 2 | |
| 10 | Change DAB+ station / Change FM frequency / Movement in menus | |
| 11 | Change DAB+ station / Change FM frequency / Movement in menus | |
| 12 | Information / Menu Changing the channel informationPress and hold to open the menu | |
| 13 | Dimmer Adjust display brightness | |
| 14 | Volume Adjust volume | |
| 15 | USB Connection for charging USB devices (max. 1 A / 5 W) | |
| 16 | 5V DC Connection for the plug-in power supply unit | |
4. Basic functions
Press and hold the INFO/MENU button to access the radio's main menu. Use the arrow buttons (◀/▶) to navigate through the menus and press the SELECT button to access a menu.
There are two rotary controls on the right-hand side of the radio. The upper rotary control allows you to dim the display or switch it off completely. The lower rotary control allows you to adjust the volume.
5. Operating modes
5.1. Standby
In standby mode, the device displays the current time and date. If an alarm time is configured, it will sound at the set time. If a warning message (ASA) is received, the device switches on automatically.
Press the power button ⏻ to switch on the radio or return it to standby mode.
5.2. DAB
Switch between DAB and FM mode by briefly pressing the Source button ⏻.
This mode plays digital radio (DAB+). When you use this mode for the first time, it will automatically start searching for all available stations.
Once the search is complete, you can scroll through the available channels using the arrow keys (◀/▶)
Press the INFO/MENU button briefly to switch between the available station information (e.g. station name, current track, artist, etc.).
Open the DAB menu by pressing and holding the INFO/MENU button. Here you can:
• Full scan: start a new DAB+ station search (can also be done by pressing and holding the SNOOZE button)
• DAB List: call up the complete station list
• Manual: setting a DAB ensemble manually
- PRUNE: Delete channels that are no longer receivable from the channel list
• DRC: Here you can compress the dynamic range. This makes quiet sounds louder and loud sounds quieter.
• ASA: configure the following settings to receive ASA alerts:
- ASA Sta: Switch ASA on or off
- ASA Code: Enter ASA Area Code
- ASA Vol: Volume of the warning message
Further explanations can be found in the chapter „8.
ASA emergency announcements" on page 24
• System: open the system settings
Note: Under normal circumstances, you do not need to perform a DAB search every time you use the DAB+ radio. Perform a new search if you wish to use the radio in a different transmission area or if there are new stations available.
5.3. FM
In FM mode, you can listen to classic analogue radio stations. Set the desired frequency using the arrow buttons (◀/▶), or press and hold to automatically search for the next available station.
Open the FM menu by pressing and holding the INFO/MENU button. Here you can start a complete FM station scan (SCAN) or open the system settings (System).
5.4.
Bluetooth
Switch to Bluetooth mode using the Source ⏻ button. In Bluetooth mode, you can play music from mobile devices such as smartphones or tablets.
When "BT" flashes on the display, the radio is in pairing mode. Search for the Bluetooth device "Albrecht DR 451" on your mobile device and connect to it.
6. Favourites (station memory)
There are 40 memory slots available for DAB and FM respectively. Press the FAVOURITE button ★ briefly to call up a favourite. Press and hold the FAVOURITE ★ button to save the currently playing station as a favourite. Change the memory location using the arrow buttons ( ◀/▶ ) and confirm with the SELECT button.
You can overwrite a memory location with a new station at any time.
7. System settings
Select "System" from the DAB or FM menu to access the system settings.
7.1. Sleep timer
If you want to fall asleep to music, you can set a time period here after which the device will automatically switch to standby mode.
7.2. Alarm clock
You can set two separate alarm times, Alarm 1 or Alarm 2. Set an alarm time using the arrow buttons ◀/▶, and confirm your selection with Snooze/Select.
Now select when you want the alarm to sound: Daily, Once, Weekdays, Weekend.
To activate an alarm time, move one of the sliders (No. 6 or 9,
see page 18) to the right. When an alarm is active, a symbol appears in the display.
The alarm clock plays the last station you listened to. When the alarm sounds, you can either press the snooze button to be woken up again after 9 minutes or press the on/off button to deactivate the alarm clock.
7.3. Time
Here you can adjust the time settings. You can choose between a 12-hour and 24-hour display, as well as change the date format from day-month-year to month-day-year.
You can specify whether the radio should set the time automatically via DAB, FM or not at all.
If you have deactivated the automatic time setting or there is no radio reception, you can also set the time and date manually. If a time signal is received and the automatic setting is active, your manual time setting will be overwritten.
7.4. Reset to factory settings
Select this menu item to reset the device to factory settings. The process must be confirmed again. All stations and settings will be deleted and the device will restart.
7.5. Software version
Here you can see the current software version of the device. Please include this information in all service requests.
8.
ASA emergency anr
ASA (Automatic Safety Alert) is the new standard for official emergency announcements via the DAB network.
The DR 451 automatically receives all emergency announcements and plays them back if the current transmitter participates in the ASA system.
The DR 451 also searches for emergency announcements in the background in standby mode and switches on the radio automatically if necessary. This ensures that you are always optimally informed of any warnings. We therefore recommend that you always operate the device in standby mode and never disconnect it completely from the mains.
ASA alerts can be marked with a specific warning area so that only listeners in certain relevant local areas receive an alert. To do this, your location must be stored in the device.
You can set up your ASA area code in the DAB settings. The area code consists of three blocks, each with four numbers from 1 to 8. This code indicates your location to within approximately one kilometre.
You can calculate your ASA area code at https://asa.radio/. There you can search for your address or use the GPS function on your smartphone.
ATTENTION: If you do not enter an area code in the device, it will ignore all local messages and only play back national messages. This means you may miss important messages that only affect your place of residence. We strongly recommend that you programme your area code in order to receive all important messages.
https://asa.radio/
Web portal for generating ASA areacodes
text_image
albrecht9. Radio specifications
| 1 | Model: DR 451 |
| 2 | Supported radio format: DAB+, FM |
| 3 | DAB+ frequency: Band III (174.00 - 240.00 MHz) |
| 4 | FM frequency: 87.5–108.0 MHz |
| 5 | Antenna: permanently connected |
| 6 | Speaker: 1.5 Watts RMS |
| 7 | Power supply: 5 V / 1 A |
| 8 | Operating temperature: 0 - 40 °C |
| 9 | Dimensions (WxHxD): 105 x 120 x 55 mm |
| 10 | Net weight: 300 g |
9.1. Specifications Power supply unit
| Zhongshan MLS Electrical Appliance Co., Ltd.5F, Building 10, No. 1, Mu Lin Sen Road, Xiaolan Town, Zhongshan City, Guangdong Province, China | |
| Model No.: M050100-S86EUU | |
| Input voltage / frequency: 100 | -240 V ~ 50–60 Hz |
| Output voltage: 5.0 V DC | |
| Output current: 1.0 A | |
| Output power: 5.0 Watts | |
| Average efficiency: 85.0 % | |
| Power consumption in standby mode: | < 0.1 Watts |
10. Backup battery for time keeping
If there is a power failure during the night, the DR 451 will lose the current time until it is next switched on. This means that you will not be woken up, even if the power supply is restored in the morning.
To prevent this, you can insert two AAA batteries (alkaline, type LR03) into the bottom of the device. Pay attention to the +/- symbols. We recommend replacing the batteries every 12 months to prevent damage caused by old batteries.
Note: The batteries only maintain the current time; an external power supply is always required to activate the alarm clock.
11. Warranty and recycling information
We are legally obliged to include information on disposal and warranty with every device, as well as an EU declaration of conformity with instructions for use in different countries. This information can be found on the following pages.
2-year warranty from date of purchase
The manufacturer/distributor provides a two-year warranty for this product from the date of purchase. This warranty covers all failures due to defective components or malfunctions within the warranty period, except for wear and tear such as scratches on the display, defective casings, defective antennas and defects due to external influences such as corrosion, overvoltage due to improper external power supply or the use of unsuitable accessories. Defects caused by improper use are also excluded from the warranty.
In the event of a warranty claim, please contact your dealer. The dealer will repair or replace the device or forward it to an authorised service centre.
You can also contact our service partner directly. Please enclose your proof of purchase with the device and describe the malfunction as precisely as possible.
12. CE declaration of conformity
Standards and guidelines

text_image
C€Alan Electronics GmbH hereby declares that the radio equipment model DR 451 complies with Regulation 2014/53/EU. The full text of the EU Declaration of Conformity can be found at the following internet address:
http://service.alan-electronics.de/CE-Papiere/
13. WEEE and recycling
natural_image
Simple line drawing of a trash bin with crossed lines indicating no waste or plastic discharge (no text or symbols)European legislation prohibits the disposal of old or defective electrical or electronic equipment in household waste. To dispose of the equipment, take it to a collection point in your local authority area for recycling. This system is financed by the industry and ensures environmentally sound disposal and recycling of valuable raw materials.
14. Service address
Technical hotline (for devices sold in Germany)
Please call our service hotline on +49 (0) 6103/9481 - 66 (standard rate for German landlines) or send us an email:
service@albrecht-midland.de
Before sending in the device, please contact our service department by email or via the hotline.
Subject to printing errors.
The information in this manual is subject to change without prior notice.
albrecht
DR 451
Radio-réveil DAB+
text_image
07:00 Albrecht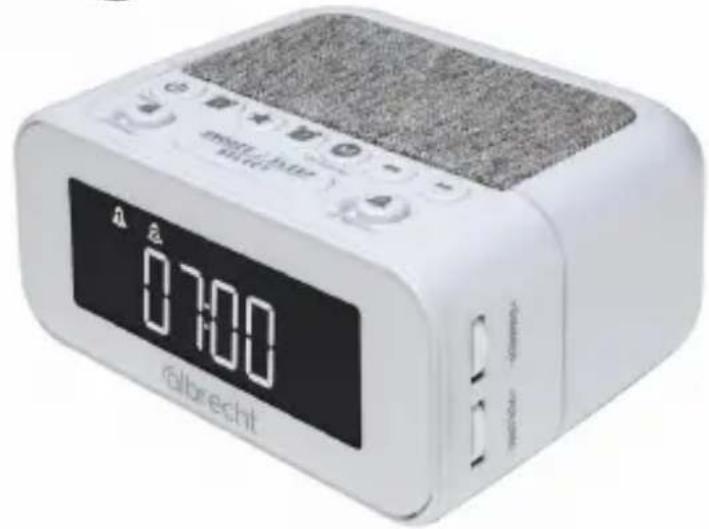
text_image
ralbrecht 07:00Manuel
Français