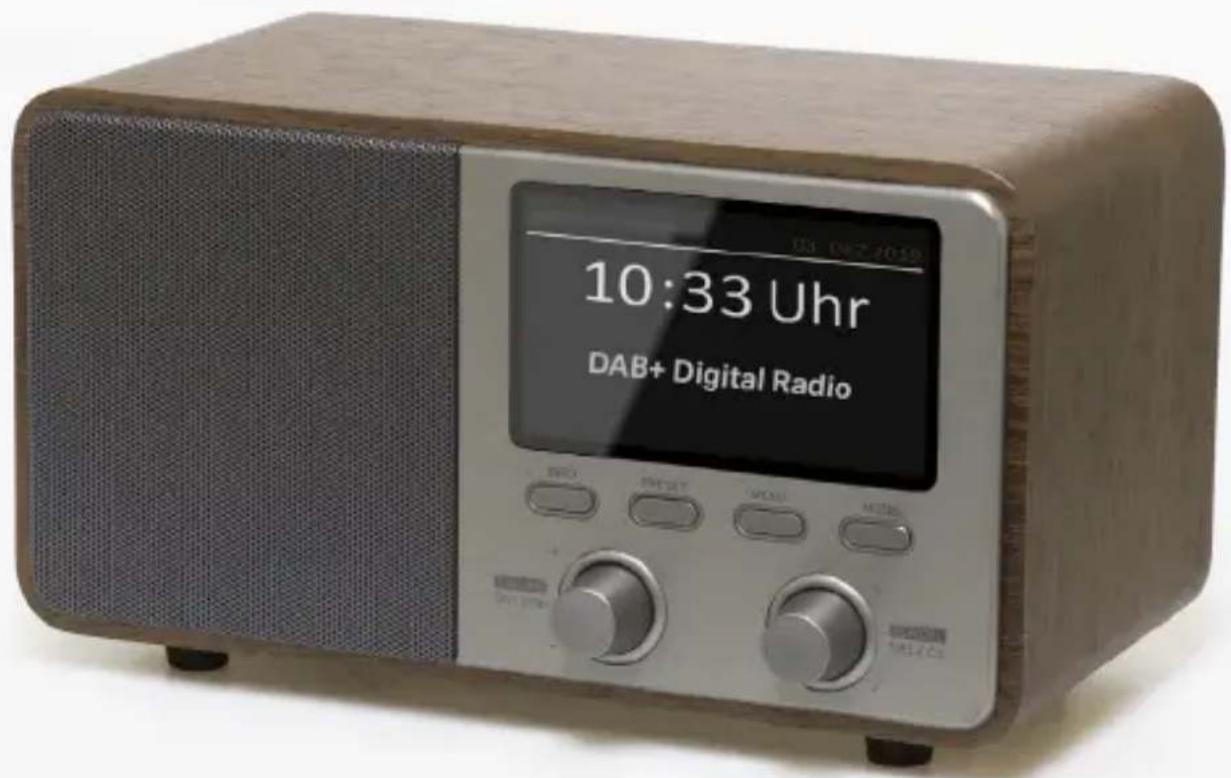
DR 760 - Radio ALBRECHT - Free user manual and instructions
Find the device manual for free DR 760 ALBRECHT in PDF.


User questions about DR 760 ALBRECHT
0 question about this device. Answer the ones you know or ask your own.
Ask a new question about this device
Download the instructions for your Radio in PDF format for free! Find your manual DR 760 - ALBRECHT and take your electronic device back in hand. On this page are published all the documents necessary for the use of your device. DR 760 by ALBRECHT.
USER MANUAL DR 760 ALBRECHT
text_image
Full Scan 11:15 Scanning... Stations: 34| ASA Alerts | 16:04 |
| Location | Not set> |
| Alert Volume | 16> |
| Alert Monitor | None> |
text_image
Enter your address and postal code: Share location Q search
text_image
Your DAB+ location code: Enter this code into your DAB+ radio.
text_image
Great Balkan Leeds Sheffield Lakewood Münchener Borussia Möller Copenhagen Lindien Lübrin Südamer Kurzheim Kurzheim Ludwig Ludwig Ludwig Ludwig Ludwig Ludwig Ludwig Ludwig Ludwig Ludwig Ludwig Ludwig Ludwig Ludwig Ludwig Ludwig Ludwig Ludwig Ludwig Ludwig Ludwig Ludwig Ludwig Ludwig Ludwig Lud Lig Lud Lig Lud Lig Lud Lig Lud Lig Lud Lig Lud Lig Lud Lig Lud Lig Lud Lig Lud Lig Lud Lig Lud Lig Lud Lig Lud Lig Lud Lig Lud Lig Lud Lig Lud Lig Lud Lig Lud Lig Lud Lig Lud Lig Lud Lig Lud Lig Lud Lutwig/Lutwig/Lutwig/Lutwig/Lutwig/Lutwig/Lutwig/Lutwig/Lutwig/Lutwig/Lutwig/Lutwig/Lutwig/Lutwig/Lutwig/Lutwig/Lutwig/Lutwig/Lutwig/Lutwig/Lutwig/Lutwig/Lutwig/Lutwig/Lutwig/Lutwig/Lutwig/Lutwig/Lutwig/Lutwig/Lutwig/Lutwig/Lutwig/Lutwig/Lulwig/Lutwig/Lutwig/Lutwig/Lutwig/Lutwig/Lutwig/Lutwig/Lutwig/Lutwig/Lutwig/Lutwig/Lutwig/Lutwig/Lutwig/Lutwig/Lutwig/Lutwig/Lutwig/Lutwig/Lutwig/Lutwig/Lutwig/Lutwig/Lutwig/Lutwig/Lutwig/Lutwig/Lutwig/Lutwig/Lutwig/Lutwig/Lutwig/Lutig/Lutig/Lutig/Lutig/Lutig/Lutig/Lutig/Lutig/Lutig/Lutig/Lutig/Lutig/Lutig/Lutig/Lutig/Lutig/Lutig/Lutig/Lutig/Lutig/Lutig/Lutig/Lutig/Lutig/Lutig/Lutig/Lutig/Lutig/Lutig/Lutig/Lutig/Lutig/Lutig/Lutig/Anta/Bau/Sun/Sun/Sun/Sun/Sun/Sun/Sun/Sun/Sun/Sun/Sun/Sun/Sun/Sun/Sun/Sun/Sun/Sun/Sun/Sun/Sun/Sun/Sun/Sun/Sun/Sun/Sun/Sun/Sun/Sun/Sun/Sun/Sun/Sun/Sun/Sun/Sun/Sun/Sun/Sun/Sun/Sun/Sun/Sun/Sun/Sun/Sun/Sun/Sun/Sun/SUn/Sun/Sun/Sun/Sun/Sun/Sun/Sun/Sun/Sun/Sun/Sun/Sun/Sun/Sun/Sun/Sun/Sun/Sun/Sun/Sun/Sun/Sun/Sun/Sun/Sun/Sun/Sun/Sun/Sun/Sun/Sun/Sun/Sun/Sun/Sun/Sun/Sun/Sun/Sun/Sun/Sun/Sun/Sun/Sun/Sun/Sun/Sun/Sun/Sun/San/Bau/Bau/Bau/Bau/Bau/Bau/Bau/Bau/Bau/Bau/Bau/Bau/Bau/Bau/Bau/Bau/Bau/Bau/Bau/Bau/Bau/Bau/Bau/Bau/Bau/Bau/Bau/Bau/Bau/Bau/Bau/Bau/Bau/Bau/Bau/Bau/Bau/Bau/Bau/Bau/Bau/Bau/Bau/Bau/Bau/Bau/Bau/Bau/Bau/Bau/Bauta/Bau/Bau/Bau/Bau/Bau/Bau/Bau/Bau/Bau/Bau/Bau/Bau/Bau/Bau/Bau/Bau/Bau/Bau/Bau/Bau/Bau/Bau/Bau/Bau/Bau/Bau/Bau/Bau/Bau/Bau/Bau/Bau/Bau/Bau/Bau/Bau/Bau/Bau/Bau/Bau/Bau/Bau/Bau/Bau/Bau/Bau/Bau/Bau/Bau/Hansbuk/Bratislal/Bratislal/Bratislal/Bratislal/Bratislal/Bratislal/Bratislal/Bratislal/Bratislal/Bratislal/Bratislal/Bratislal/Bratislal/Bratislal/Bratislal/Bratislal/Bratislal/Bratislal/Bratislal/Bratislal/Bratislalln/Bratislalln/Bratislalln/Bratislalln/Bratislalln/Bratislalln/Bratislalln/Bratislalln/Bratislalln/Bratislalln/Bratislalln/Bratislalln/Bratislalln/Bratislalln/Bratislalln/Bratislalln/Bratislalln/Bratislln/Bratislln/Bratislln/Bratislln/Bratislln/Bratislln/Bratislln/Bratislln/Bratislln/Bratislln/Bratislln/Bratislln/Bratislln/Bratislln/Bratislln/Bratislln/Bratislln/Bratislln/Bratislln/Bratislln/Bratislla/Narbe/Narbe/Narbe/Narbe/Narbe/Narbe/Narbe/Narbe/Narbe/Narbe/Narbe/Narbe/Narbe/Narbe/Narbe/Narbe/Narbe/Narbe/Narbe/Narbe/Narbe/Narbe/Narbe/Narbe/Narbe/Narbe/Narbe/Narbe/Narbe/Narbe/Narbe/Narbe/Narbe/Narbe/Müller/Nuern/Kurzheim/Kurzheim/Kurzheim/Kurzheim/Kurzheim/Kurzheim/Kurzheim/Kurzheim/Kurzheim/Kurzheim/Kurzheim/Kurzheim/Kurzheim/Kurzheim/Kurzheim/Kurzheim/Kurzheim/Kurzheim/Kurzheim/Kurzheim/Kurzheim/Kurzheim/Kurzheim/Kurzheim/Kurzheim/Kurzham/Anta/Anta/Anta/Anta/Anta/Anta/Anta/Anta/Anta/Anta/Anta/Anta/Anta/Anta/Anta/Anta/Anta/Anta/Anta/Anta/Anta/Anta/Anta/Anta/Anta/Anta/Anta/Anta/Anta/Anta/Anta/Anta/Anta/Anta /Auntab /Auntab /Auntab /Auntab /Auntab /Auntab /Auntab /Auntab /Auntab /Auntab /Auntab /Auntab /Auntab /Auntab /Auntab /Auntab /Auntab /Auntab /Auntab /Auntab /Auntab /Auntab /Auntab /Auntab /Auntab /Auntable /Auntable /Auntable /Auntable /Auntable /Auntable /Auntable /Auntable /Auntable /Auntable /Auntable /Auntable /Auntable /Auntable /Auntable /Auntable /Auntable /Auntable /Auntable /Auntable /Auntable /Auntable /Auntable /Auntable /Auntable /Aunttable /Aunttable /Aunttable /Aunttable /Aunttable /Aunttable /Aunttable /Aunttable /Aunttable /Aunttable /Aunttable /Aunttable /Aunttable /Aunttable /Aunttable /Aunttable /Aunttable /Aunttable /Aunttable /Aunttable /Aunttable /Aunttable /Aunttable /Aunttable /Aunttable /Aunt table / Aunt table / Aunt table / Aunt table / Aunt table / Aunt table / Aunt table / Aunt table / Aunt table / Aunt table / Aunt table / Aunt table / Aunt table / Aunt table / Aunt table / Aunt table / Aunt table / Aunt table / Aunt table / Aunt table / Aunt table / Aunt table / Aunt table / Aunt table / Aunt table / Aunt table / Bantelbitalenbitalenbitalenbitalenbitalenbitalenbitalenbitalenbitalenbitalenbitalenbitalenbitalenbitalenbitalenbitalenbitalenbitalenbitalenbitalenbitalenbitalenbitalenbitalenbitalenbitalenbitalenbitalenbitalenbitalenbitalenbitalenbitalenbitalen bitalenbitalen bitalen bitalen bitalen bitalen bitalen bitalen bitalen bitalen bitalen bitalen bitalen bitalen bitalen bitalen bitalen bitalen bitalen bitalen bitalen bitalen bitalen bitalen bitalen bitalen bitalen bitalen bitalen bitalen bitalen bitalen bitalen bitalen bitalen baltanLot Lon
natural_image
Simple line drawing of a trash bin with crossed lines indicating no waste or restriction (no text or symbols)- Scope of delivery ......23
- First steps....23
- Operating elements and connections....24
- Standby 26
- DAB+ mode....26
5.1.DAB+main menu 26
5.1.1. Station list....26
5.1.2.Full scan 27
5.1.3. Manual tune....27
5.1.4. Prune invalid....27
5.1.5. DRC....27
5.1.6. ASA emergency warnings ...... 27
5.1.7. Alarm clock....27
5.1.8. Sleep timer 27
5.1.9. System settings....27
- FM mode 28
6.1.FM main menu 28
6.1.1. Scan settings....28
6.1.2. Audio settings....28
6.1.3. Alarm clock....28
6.1.4. Sleep timer 28
6.1.5. System settings....28
- Favourites (station memory)......28
7.1. Store a preset station 28
7.2. Recall a preset station....29
- System settings ......29
8.1. Equalizer 29
8.2.Time/Date 29
8.3. Backlight 30
8.4. Language 30
8.5. Factory Reset 30
8.6. Software version....30
- Alarm clock 30
9.1. Snooze 31
- Sleep Timer ....31
Bluetooth mode....32
-
AUX In Mode 32
-
ASA emergency announcements ....34
-
Specifications radio ....36
14.1. Specifications power adapter 37
-
Troubleshooting....37
-
Safety instructions ....38
-
Warranty and recycling information....38
-
CE Declaration of Conformity ....39
-
EEAG and recycling 39
-
Service address 40
1. Scope of delivery
- DR 760 DAB+ radio
- Plug-in power supply
- Manual
2. First steps
- Set up the DR 760 at the desired location.
- Extend the telescopic antenna completely.
- Connect the supplied mains adapter to the DC IN socket on the backside of the radio and then plug it into a wall socket.
When the DR 760 is started for the first time or after a factory reset, the device starts with the initial setup.
First set the desired menu language using the SELECT dial and confirm this by pressing the dial.
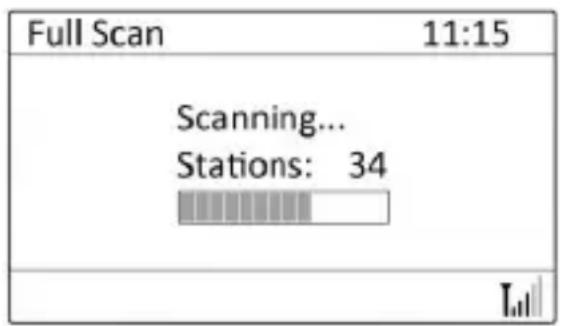
Afterwards the radio will start automatically a full scan to search all available DAB+ stations in your area and save these into the station list.
text_image
Full Scan 11:15 Scanning... Stations: 34Now you are ready to enjoy your new radio!
Attention: We strongly recommend, that you set the location of the radio to receive localized ASA warnings (see „13. ASA emergency announcements“ on page 34). If you set no location, you will only receive country-wide warnings.
3. Operating elements and connections
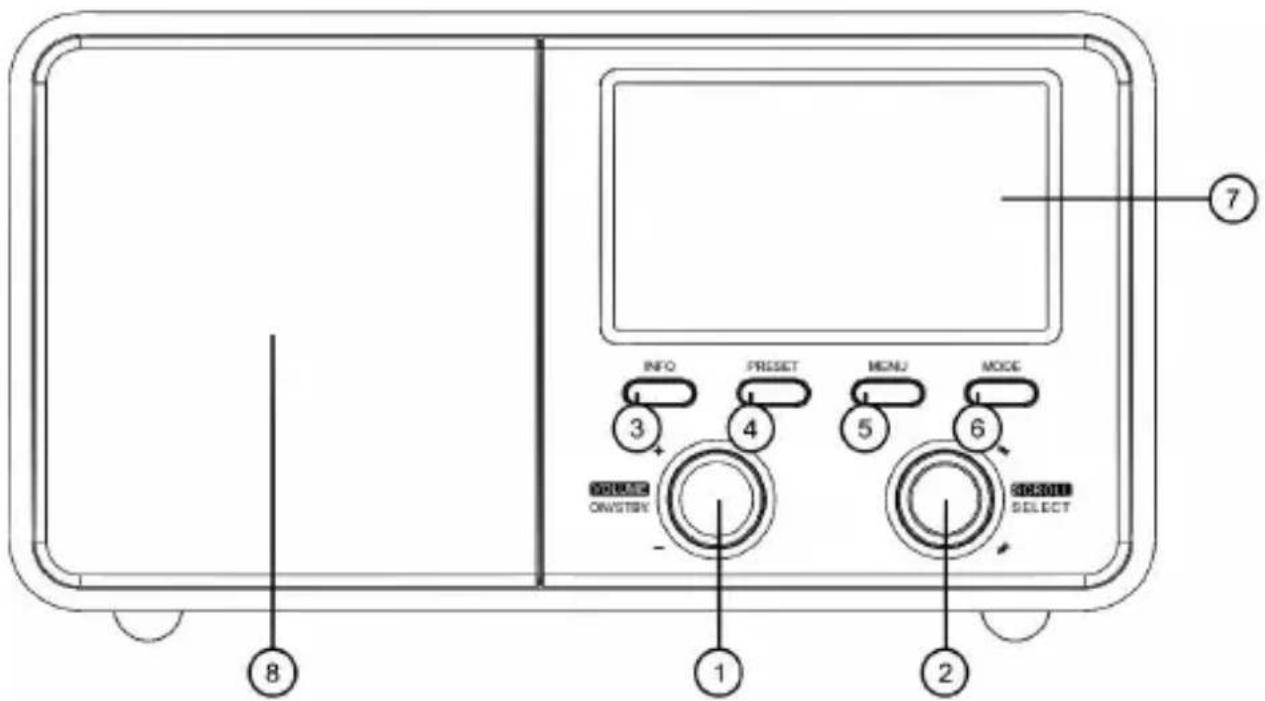
text_image
INFO 3 4 5 6 CREATE ONSTRY TITLE SELECT 1 2 8 7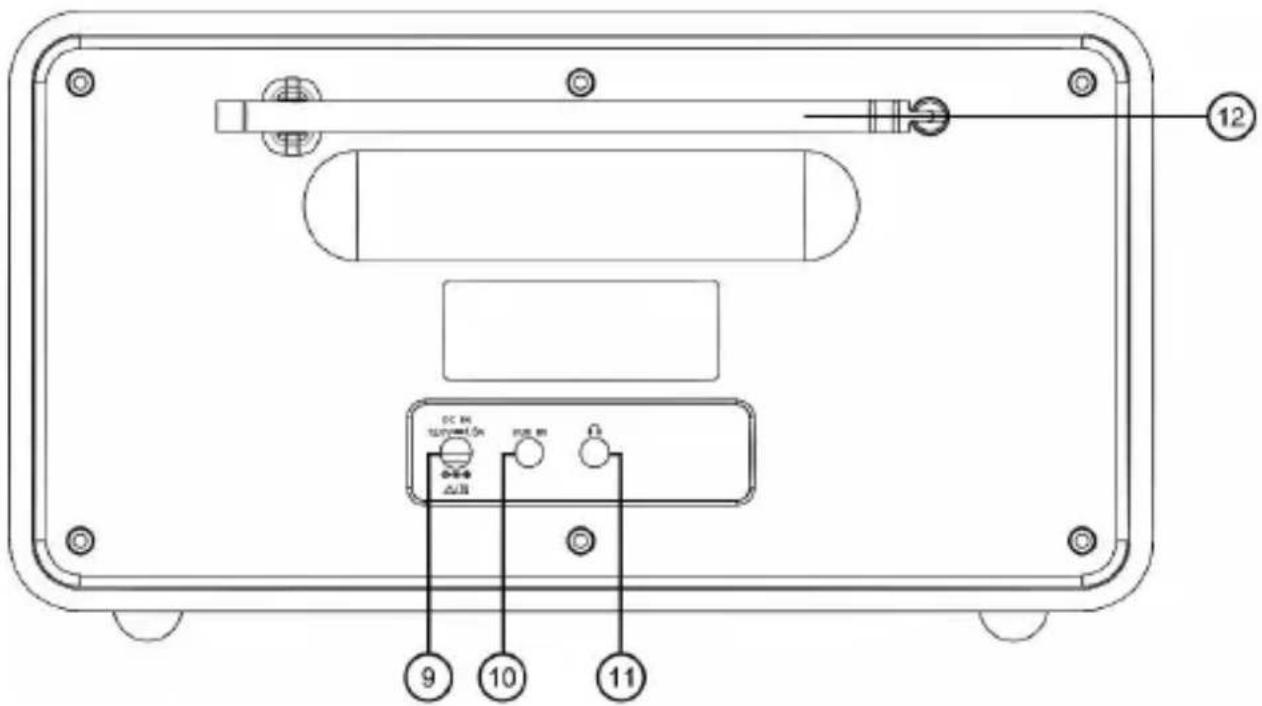
text_image
12 DC IN TOMM 50 MAX M Ω Δ/Ω 9 10 11| Control Function | ||
| 1 | 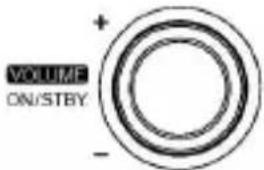 | Press to turn on/standby the radio. Rotate to adjust the Volume. |
| 2 |  | In All modes: turn to browse options. Press SELECT to confirm. In FM mode: while frequency shows up, turn to manual scan, press to auto-scan. |
| 3 |  | In DAB+/DAB and FM mode: Press to browse the broadcasting station information. |
| 4 |  | Press and hold to store preset, short press to recall. |
| 5 |  | Press to enter menu options. In menus, press to go back one step. |
| 6 |  | Press to change the mode |
| 7 | Display 4.3' | color TFT display |
| 8 | Speaker Speaker 5 Watt RMS output | |
| 9 | DC socket Connect to DC adapter (12.0 V) | |
| 10 | AUX In | This socket allows your radio to be used as an external amplifier for MP3 players, smart phone, compact disc players and similar devices through 3.5mm cable. |
| 11 | Earphone For enjoying the radio by earphones. | |
| 12 | Antenna | Position and extend antenna for better signal reception of DAB+/FM programs. |
4. Standby
In standby mode, the device displays the current time and date. If an alarm clock is configured, it will go off at the set time. If a warning message (ASA) is received, the device switches on automatically.
Press the VOLUME dial to switch the device on and also to switch it back to standby mode.
5. DAB+ mode
Switch between modes by briefly pressing the MODE button.
Digital radio (DAB+) is played in this mode. If the DAB station list is empty, a DAB scan is started automatically.
You can scroll through the available stations using the SCROLL dial.
Press the INFO button briefly to switch between the available station information (e.g. station name, current title, artist, etc.).
To extend the DAB slide show (station logo or album cover) to full screen, press the SELECT dial.
5.1. DAB+ main menu
To open the DAB main menu press MENU button. Here you can go to the station list, initiate a new DAB scan, set a DAB ensemble manually, prune invalid stations, select DRC function, change ASA alarm settings, set the Alarm, set a sleep timer or go the system settings.
5.1.1. Station list
Scroll through the station list with the SCROLL button and press it to select your desired station.
5.1.2. Full scan
Select Full Scan to search for all available DAB+ stations in your area.
Note: In normal use, you do not need to perform the DAB scan every time you use the DAB+ radio. Perform a new scan if you want to use the radio in a different broadcasting area or if there are new stations.
5.1.3. Manual tune
Here you can select a DAB+ multiplex manually by frequency.
5.1.4. Prune invalid
This function deletes all stations, which are currently not available, from your station list.
5.1.5. DRC
If you are listening to music with a high dynamic range in a noisy environment, you may wish to compress the audio dynamic range. This makes quiet sounds louder, and loud sounds quieter.
5.1.6. ASA emergency warnings
See chapter „13. ASA emergency announcements“ on page 34.
5.1.7. Alarm clock
See chapter „9. Alarm clock“ on p
5.1.8. Sleep timer
See chapter „10. Sleep Timer“
5.1.9. System settings
See chapter „8. System setting
6. FM mode
In FM mode, you can listen to classic analogue radio stations.
Set the desired frequency by turning the SCROLL dial or press
it to scan for the next available I
6.1. FM main menu
Open the FM menu by pressing the MENU button. Here you can select the scan settings, the audio settings, set the alarm, set the sleep timer or go to the system settings.
6.1.1. Scan settings
Select if the SCAN should find „Strong stations only“ or „all stations“.
6.1.2. Audio settings
Select if you would like to have „Stereo“ sound or „Forced Mono“.
6.1.3. Alarm clock
See chapter „9. Alarm clock“ on page 30.
6.1.4. Sleep timer
See chapter „10. Sleep Timer“ on page 31.
6.1.5. System settings
See chapter „8. System settings“ on page 29.
7. Favourites (station memory)
There are 40 memory locations each for DAB and FM.
7.1. Store a preset station
To save the current station to your favourite list, long press the PRESET button and select a memory slot. Press SELECT to save the station.
You can overwrite a memory location with a new station at any time.
7.2. Recall a preset station
To recall a previously saved station, short press the PRESET button and select your desired station with the SELECT button.
8. System settings
Select the "System settings" entry in the DAB or FM menu to open the selection.
8.1. Equalizer
Several preset EQ modes are available: Normal, Flat, Jazz, Rock, Movie, Classic, Pop and News.
Also a user-defined setting is available; create your own EQ with custom bass and treble settings.
Default setting is Normal.
8.2. Time/Date
You can choose between 12-hour and 24-hour display and change the date format from day-month-year to month-day-year.
You can also change the appearance of the standby clock display here.
The current time and date are set automatically via DAB and FM radio station.
If there is no radio reception, you can also set the time and date manually. If a time signal is received your manual time will be automatically corrected.
8.3. Backlight
You can set different brightness levels for active operation and standby mode.
8.4. Language
Here you can set the menu language of the device. The following languages are available: German, English, Dutch, French, Italian, Spanish, Portuguese, Polish, Czech, Danish, Swedish, Norwegian, Finnish, Turkish.
8.5. Factory Reset
Select this menu item to reset the device to factory settings. The process must be confirmed once again. All channels and settings are deleted and the device restarts with the initial setup.
8.6. Software version
Here you can see the current software version of the device. Please include this information with all service requests.
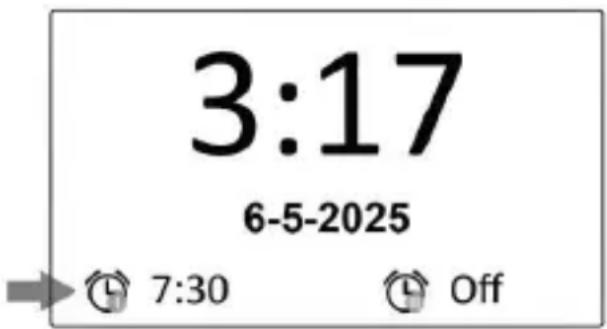
9. Alarm clock
You can set two separate alarm times.
Select Alarm 1 or Alarm 2 and make the following selections:
- Alarm: On / Off
• Frequency: Daily, Once, Weekends, Weekdays
- Wake Up Time: enter your desired wake up time
• Source: Buzzer, DAB or FM
- Preset: When using DAB or FM, select the station here.
• Duration time: 15/30/45/60/90/120 minutes (alarm
text_image
3:17 6-5-2025 7:30 Offsounding lasting time)
• Volume: turn SCROLL knob to select the maximum alarm volume. The volume will slowly rise to this level.
After completed the Alarm set up, the Alarm icon will be shown on the display bottom.
When the alarm turns on, you can deactivate it by pressing ON/STBY.
9.1. Snooze
When the Alarm wakes up, press the SELECT knob to activate SNOOZE and postpone the alarm for 5 minutes, or press SELECT knob repeatedly to have a longer snooze time.
While in SNOOZE period, the relevant alarm icon will be blinking and shows how much Snooze time is elapsed. During this time you also can press ON/STBY to stop the SNOOZE.
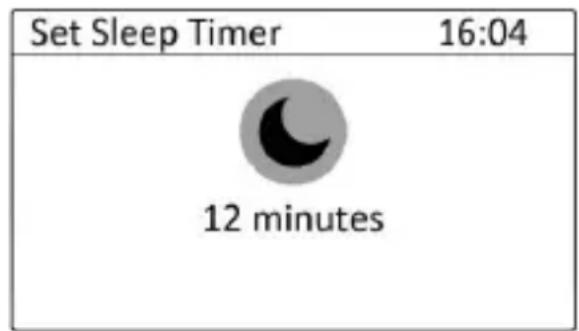
10. Sleep Timer
If you want to fall asleep to music, you can set a time period here after which the device automatically switches to standby mode.
text_image
Set Sleep Timer 16:04 12 minutes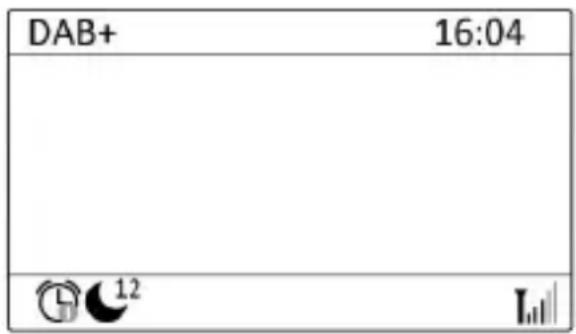
text_image
DAB+ 16:04 1211. Bluetooth mode
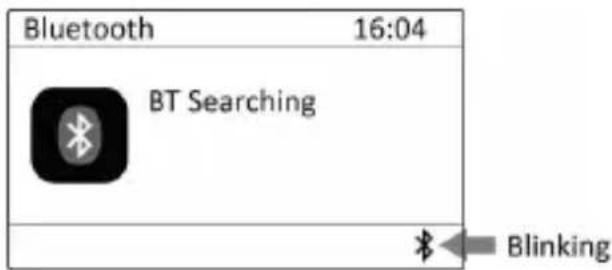
Pair your DR 760 with a Bluetooth device to listen to music:
- Press MODE button to select Bluetooth mode, press the SELECT knob to confirm.
text_image
Bluetooth 16:04 BT Searching BlinkingThe display will show 'BT Searching' with the bottom Bluetooth logo blinking.
-
Activate your Bluetooth device and look for "ALBRECHT DR 760" in the Bluetooth list. Select it.
-
Your DR 760 display will show your Bluetooth device name with the bottom logo stopped blinking, that's mean the successful Bluetooth connection.
-
You can enjoy to play the sound from your Bluetooth device via DR 760 speaker. Use the SELECT knob to skip to the next or previous track. Press SELCET to play and pause the music.
-
If want to disconnect the current Bluetooth device, press MENU button, and then turn SCROLL knob to select 'Pair New Device', press SELECT knob to confirm. The display will resume to step 1
12. AUX In Mode
AUX IN allows for quick and easy connection to an MP3 player, smart phone or other external audio sources.
-
Before connecting to the mains socket, use a 3.5mm audio cable (not supplied) to connect to your external audio device through the AUX IN socket at the rear of unit.
-
Connect power adapter to mains socket, press ON/STBY knob to switch unit on.
-
Press MODE button to select Auxiliary Input mode.
-
In Aux in mode, you must operate your audio device directly to control playback.
- To optimal the volume levels, you can adjust by both DR 760 and the input sound source.
13. ASA emergency announcements
ASA (Automatic Safety Alert) is the new standard for official emergency announcements via the DAB network.
The DR 760 automatically receives all emergency announcements and plays them back if the current station is participating in the ASA system.
| ASA Alerts | 16:04 |
| Location | Not set> |
| Alert Volume | 16> |
| Alert Monitor | None> |
Even in standby mode, the DR 760 searches for emergency announcements in the background and switches the radio on automatically if necessary. This means you are always optimally supplied with warning messages. We therefore recommend to always operate the device in standby mode and never disconnecting it completely from the mains.
ASA warning messages can be labelled with a specific warning area so that only listeners in certain local, relevant areas receive a warning message. To do this, your location must be stored in the device.
You can set up your ASA area code during the initial setup or at any time in the DAB settings. The area code consists of three blocks, each with four numbers from 1 to 8. This code contains your position to an accuracy of approximately one kilometre.
You can calculate your ASA Area Code at https://asa.radio/. You can search for your address there or use the GPS function on your smartphone.
ATTENTION: If you do not store an area code in the device, the device will ignore all local messages and only play back nationwide messages. You may therefore miss important messages that only affect your area. We strongly recommend that you programme in your area code in order to receive all important messages.
https://asa.radio/
Web portal for the generation of ASA Area Codes

text_image
albrecht
text_image
Enter your address and postal code: Share location Q search
text_image
Your DAB+ location code: Enter this code into your DAB+ radio.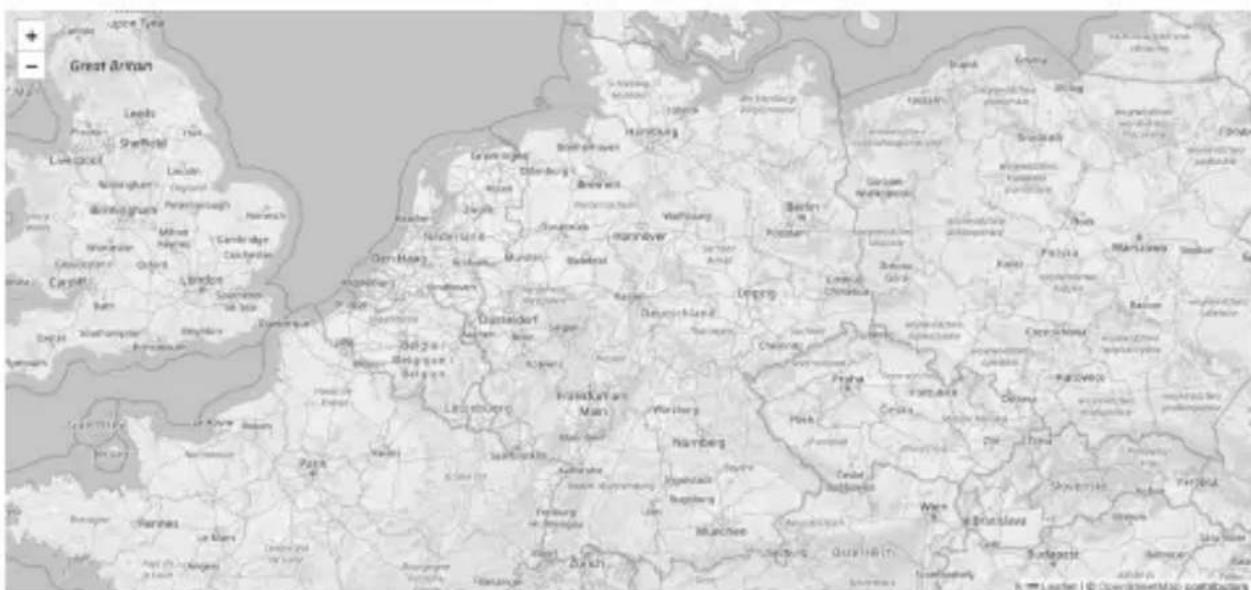
| 1 | Model: DR 760 |
| 2 | Supported radio format: DAB+, FM, Bluetooth |
| 3 | DAB+ frequency: Band III (174.00 - 240.00 MHz) |
| 4 | FM frequency: 87.5-108.0 MHz |
| 5 | Bluetooth frequency: 2.402 - 2.480 GHz |
| 6 | Headphone output: 3.5 mm stereo jack |
| 7 | Antenna: permanently connected |
| 8 | Loudspeaker: 5 Watt RMS |
| 9 | Power Consumption: Operation 18 W / Standby <1.5 W |
| 10 | Operating temperature: 0 - 40 °C |
| 11 | Dimensions (WxHxD): 250 x 160 x 135 mm |
| 12 | Net weight: approx. 1860 g |
The information in these operating instructions is subject to change without prior notice.
14.1. Specifications power adapter
| Manufacturer's name and address: Dongguan Jin Jin Electronic Technology Co., Ltd. Room 801, building 2, No. 150, Fenxi Road, Wanjiang street, Dongguan City, Guangdong Province | |
| Model No. JJ018W1-120 | 150VX |
| Input Voltage / Freq. 100 | -240V ~ 50-60Hz |
| Output Voltage DC 12.0 V | |
| Output Current 1.5 A | |
| Output Power 18.0 Watt | |
| Avg. Active Efficiency 85.0 % | |
| Power Cons. Standby < 0.1 Watt | |
15. Troubleshooting
Poor DAB reception in some locations.
As the DAB network is not yet fully developed, this can lead to poor reception, especially in rural areas that are not yet fully developed. You should therefore test the DR 760 radio at a different location before sending it in for repair due to poor reception.
No indication on the display
- Make sure that the display brightness is not switched off.
- Check that the power supply unit is plugged in at both ends and has firm contact.
Unexpected behaviour / display
- Restart the appliance completely by unplugging the mains plug, waiting 10 seconds and then plugging it back in.
- Carry out a factory reset (see „8.5. Factory Reset“ on page 30).
- Contact our customer support.
16. Safety instructions
- Only clean the appliance with a dry cloth.
- Do not block any ventilation openings.
- Only use the accessories supplied by the manufacturer.
- Do not expose this radio to rain or moisture.
- Do not expose the radio to excessive heat.
17. Warranty and recycling information
We are required by law to include disposal and warranty information with each device, as well as an EU Declaration of Conformity with instructions for use in various countries. This information can be found on the following pages.
2-year guarantee from date of purchase
The manufacturer/retailer provides a two-year warranty for this product from the date of purchase. This warranty covers all failures due to defective components or faulty functions within this period, with the exception of wear and tear such as scratches on the display, defective housing, defective antenna and defects due to external influences such as corrosion, overvoltage due to improper external power supply or the use of unsuitable accessories. Defects caused by improper use are also excluded from the warranty.
In the event of a warranty claim, please contact your dealer.
The dealer will repair or replace the device or forward it to an authorised service centre.
You can also contact our service partner directly. Please enclose your proof of purchase with the device and describe the malfunction as precisely as possible.
18. CE Declaration of Conformity
Standards and guidelines
CE Hereby, Alan Electronics GmbH declares that the radio equipment model DR 760 is in compliance with Regulation 2014/53/EU. The full text of the EU Declaration of Conformity can be found at the following internet address:
http://service.alan-electronics.de/CE-Papiere/
19. EEAG and recycling

European legislation prohibits the disposal of old or defective electrical or electronic appliances with household waste. To dispose of the appliance, take it to a collection centre in your municipality for recycling. This system is financed by the industry and ensures environmentally friendly disposal and the recycling of valuable raw materials.
20. Service address
Technical hotline (for devices sold in Germany)
Please call our service hotline on +49 (0) 6103/9481 - 66 (normal rate on the German landline network) or send us an e-mail:
service@albrecht-midland.de
Before returning the device, please read chapter „15. Troubleshooting“ on page 37.
There you will find some tips and tests. Alternatively, you can contact our hotline.
Subject to printing errors.
albrecht
DR 760
Radio numérique DAB
text_image
10:33 Uhr DAB+ Digital RadioManuel
Français
Table des matières
text_image
Full Scan 11:15 Scanning... Stations: 34text_image
12 DC 50 DC 50 DC 50 DC 50 DC 50 DC 50 DC 50 DC 50 DC 50 DC 50 DC 50 DC 50 DC 50 DC 50 DC 50 DC 50 DC 50 DC 50 DC 50 DC 50 DC 51 DC 51 DC 51 DC 51 DC 51 DC 51 DC 51 DC 51 DC 51 DC 51 DC 51 DC 51 DC 51 DC 51 DC 51 DC 51 DC 51 DC 51 DC 51 DC 51 DC 52 DC 52 DC 52 DC 52 DC 52 DC 52 DC 52 DC 52 DC 52 DC 52 DC 52 DC 52 DC 52 DC 52 DC 52 DC 52 DC 52 DC 52 DC 53 DC 53 DC 53 DC 53 DC 53 DC 53 DC 53 DC 53 DC 53 DC 53 DC 53 DC 53 DC 53 DC 53 DC 53 DC 54 DC 54 DC 54 DC 54 DC 54 DC 54 DC 54 DC 54 DC 54 DC 54 DC 54 DC 54 DC 54 DC 54 DC 54 DC 54 DC 54 DC 54 DC 54 DC 54 DC 56 DC 56 DC 56 DC 56 DC 56 DC 56 DC 56 DC 56 DC 56 DC 56 DC 56 DC 56 DC 56 DC 56 DC 56 DC 56 DC 566.1. Menu principal FM
| ASA Alerts | 16:04 |
| Location | Not set> |
| Alert Volume | 16> |
| Alert Monitor | None> |