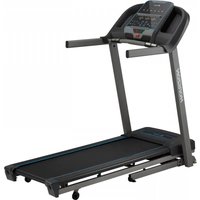
HF-5.0AT - Treadmills Horizon - Free user manual and instructions
Find the device manual for free HF-5.0AT Horizon in PDF.


User questions about HF-5.0AT Horizon
0 question about this device. Answer the ones you know or ask your own.
Ask a new question about this device
Download the instructions for your Treadmills in PDF format for free! Find your manual HF-5.0AT - Horizon and take your electronic device back in hand. On this page are published all the documents necessary for the use of your device. HF-5.0AT by Horizon.
USER MANUAL HF-5.0AT Horizon
Read the TREADMILL GUIDE before using this OWNER'S MANUAL.
There are several steps during the assembly process where special attention must be paid. It is very important to follow the assembly instructions and to ensure the product is assembled correctly to reduce the risk of injury. Make sure all parts are firmly tightened before using the treadmill to ensure that the treadmill is stable and structurally sound.
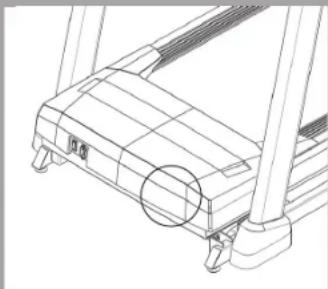
Before proceeding, find your treadmill's serial number located on a white barcode sticker near the on/off power switch and power cord and enter it in the space provided below.
ENTER YOUR SERIAL NUMBER AND MODEL NAME IN THE BOXES BELOW:
SERIAL NUMBER:
TM
MODEL NAME: HORIZON 5.0AT TREADMILL
» Refer to the SERIAL NUMBER and MODEL NAME when calling for service.
SERIAL NUMBER LOCATION
natural_image
Line drawing of a treadmill with a circular highlight on the side panel (no text or symbols)
text_image
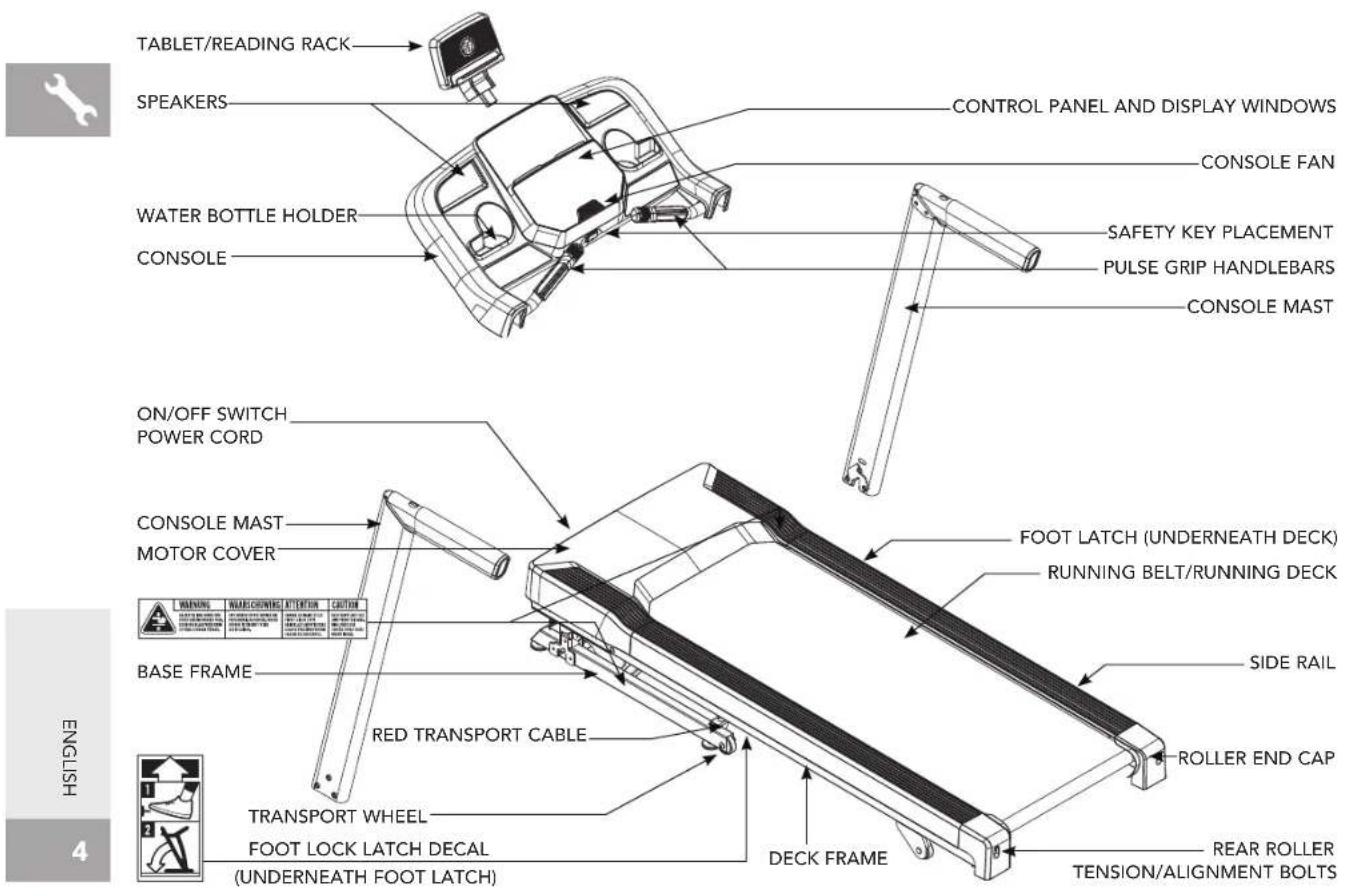
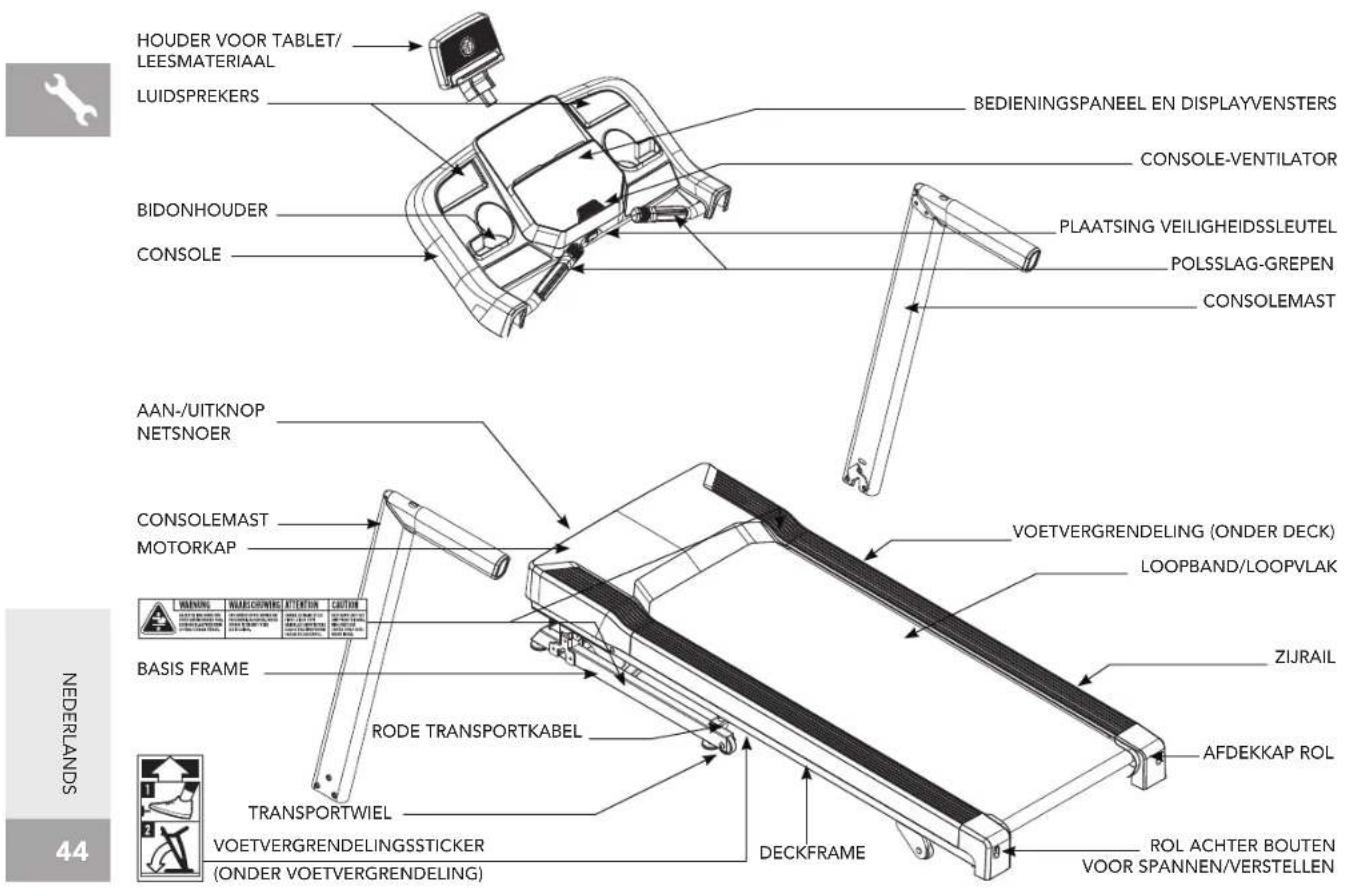
TABLET/READING RACK SPEAKERS CONTROL PANEL AND DISPLAY WINDOWS CONSOLE FAN WATER BOTTLE HOLDER SAFETY KEY PLACEMENT CONSOLE PULSE GRIP HANDLEBARS CONSOLE MAST ON/OFF SWITCH POWER CORD CONSOLE MAST MOTOR COVER FOOT LATCH (UNDERNEATH DECK) RUNNING BELT/RUNNING DECK WARNING WARNING: WARNING: WARNING: WARNING: WARNING: WARNING: WARNING: WARNING: WARNING: WARNING: WARNING: WARNING: WARNING: WARNING: WARNING: WARNING: WARNING: WARNING: WARNING: WARNING: WARNING: WARNING: WARNING: WARNING: WARNING: WARNING: WARNING: WARNING: WARNING: WARNING: WARNING: WARNING: WARNING: WARNING: WARNING: WARNING: WARNING: WARNING: WARNING: WARNING: WARNING: WARNING: WARNING: WARNING: WARNING: WARNING: WARNING: WARNING: WARNING: WARNING: WARNING: Warning BASE FRAME RED TRANSPORT CABLE SIDE RAIL ROLLER END CAP TRANSPORT WHEEL FOOT LOCK LATCH DECAL (UNDERNEATH FOOT LATCH) DECK FRAME REAR ROLLER TENSION/ALIGNMENT BOLTSMAIN PARTS INCLUDED:
1 Main Frame
□ 1 Console Assembly
□ 2 Console Masts
1 Tablet Holder
1 Hardware Kit
□ 1 Safety Key
☐ 1 Bottle of Silicone Lubricant
(for 2 applications)
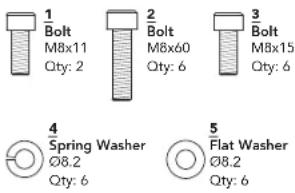
HARDWARE KIT:
text_image
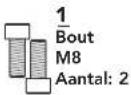
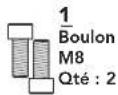
1 Bolt M8x11 Qty: 2 2 Bolt M8x60 Qty: 6 3 Bolt M8x15 Qty: 6 4 Spring Washer Ø8.2 Qty: 6 5 Flat Washer Ø8.2 Qty: 6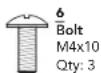
WARNING
FAILURE TO FOLLOW THESE INSTRUCTIONS COULD RESULT IN INJURY!
WARNING
DO NOT ATTEMPT TO LIFT THE TREADMILL! Do not move or lift treadmill from packaging until specified to do so in the assembly instructions. You may remove the plastic wrap from console masts.
WARNING
Never open box when it is positioned upside-down or on its side.
Unpack and assemble the unit where it will be used.
The enclosed treadmill is equipped with high-pressure springs which can cause the lower base frame to spring open if mishandled.
The red transport cables are installed between the upper deck frame and the lower base frame to prevent the movement of the lower base frame. DO NOT remove red transport cables until instructed to do so.
NOTE: During each assembly step, ensure that ALL nuts and bolts are in place and partially threaded in before completely tightening any ONE bolt.
NOTE: A light application of grease may aid in the installation of hardware. Any grease, such as lithium bike grease is recommended.

NEED HELP?
If you have questions or if there are any missing parts, contact Customer Tech Support. Contact information is located on the back panel of this manual.
text_image
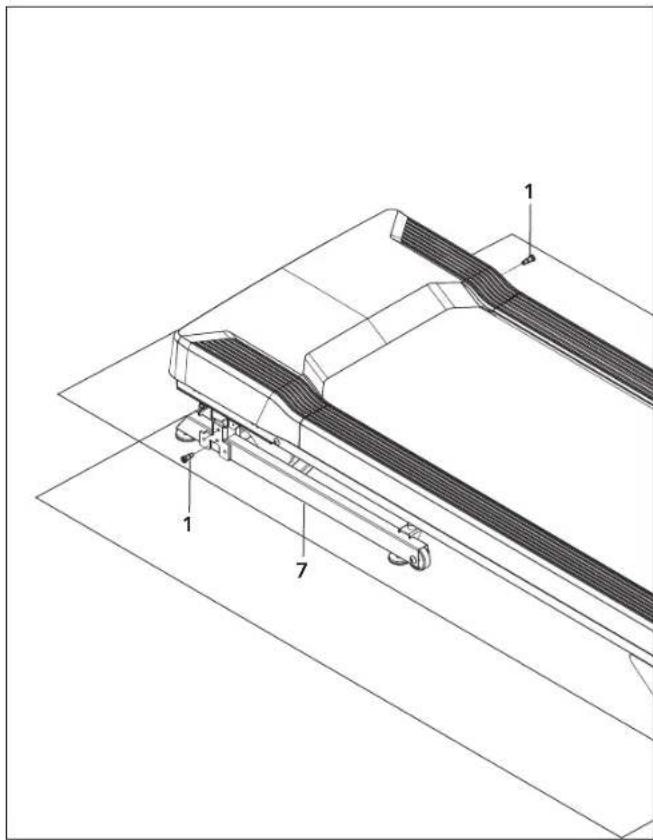
Technical diagram of a mechanical assembly with numbered components labeled 1, 7, and 1ASSEMBLY STEP 1
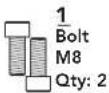
STEP 1 HARDWARE :
1.1 Open hardware for Step 1.
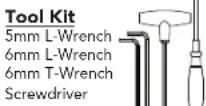
1.2 Insert 2 Bolts (1) into the Base Frame (7) using the 5mm L-Wrench. Tighten firmly.
text_image
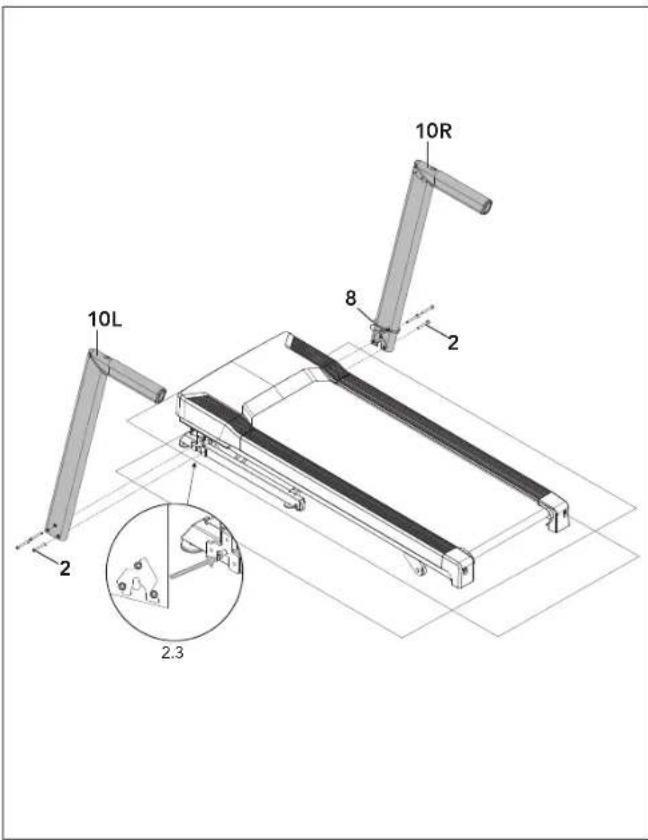
10L 8 10R 2 2.3ASSEMBLY STEP 2
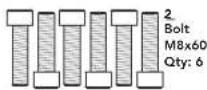
STEP 2 HARDWARE :
2.1 Open hardware for Step 2.
2.2 Move Lead Wire (8) above console mast bracket to avoid pinching.
2.3 Using the bolts from step 1, align each Console Mast (10L&R) and attach with 6 Bolts (2). DO NOT FULLY tighten bolts.
NOTE: Be careful not to pinch any wires while assembling the masts.
NOTE: Do not fully tighten bolts until the end of STEP 3.
text_image
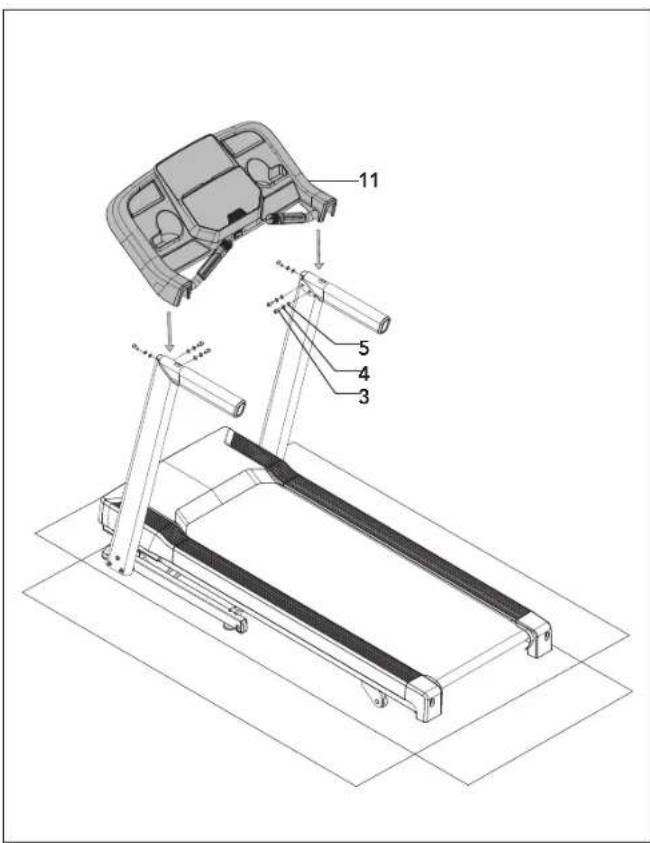
11 5 4 3ASSEMBLY STEP 3
STEP 3 HARDWARE :

3.1 Open hardware for Step 3.
3.2 Carefully place the Console (11) on top of the console masts and attach using 6 Bolts (3), 6 Spring Washers (4), and 6 Flat Washers (5).
3.3 Tighten down all bolts from Step 2 and Step 3 using 6mm T-wrench and 6mm L-wrench.
NOTE: Be careful not to pinch any wires while assembling the console.
text_image
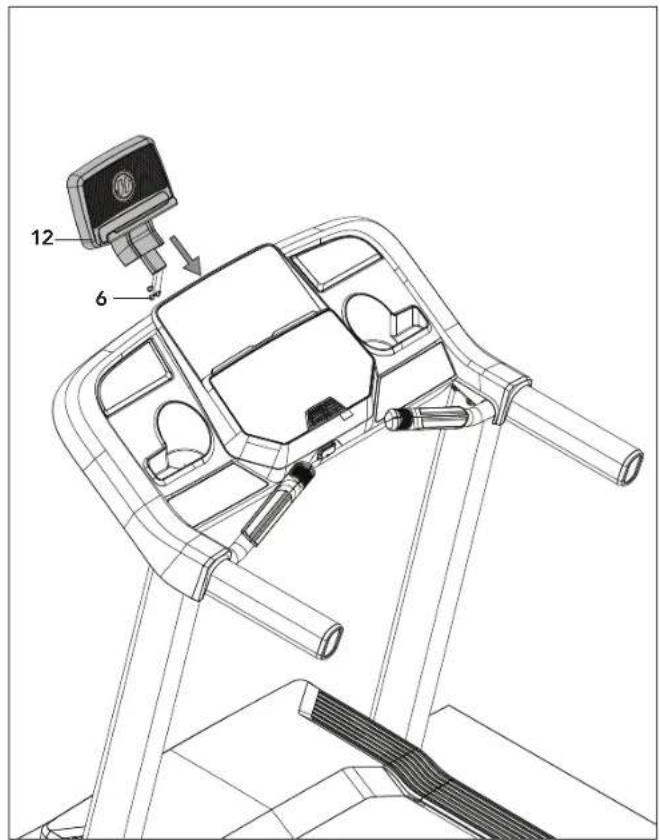
Technical diagram of a treadmill with labeled parts including 12 and 6, showing mechanical components and assembly.ASSEMBLY STEP 4
STEP 4 HARDWARE :
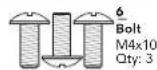
4.1 Open hardware for Step 4.
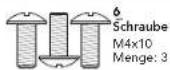
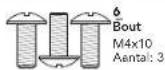
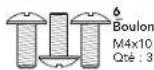
4.2 Attach the Tablet/Reading Rack (12) to the console using 3 Bolts (6). Tighten firmly using provided screwdriver.
text_image
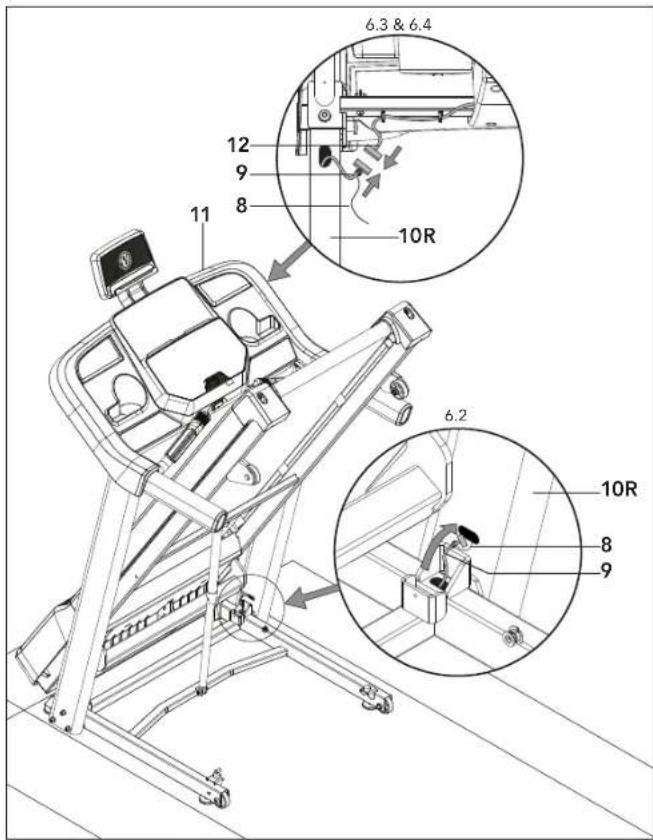
6.3 & 6.4 12 9 8 10R 11 6.2 10R 8 9ASSEMBLY STEP 5
5.1 Fold up the treadmill. Make sure the deck is securely latched.
5.2 Wrap Lead Wire (8) around the Console Cable (9) and feed through opening at the bottom of the Right Console Mast (10R).
5.3 Pull Lead Wire (8) and Console Cable (9) through opening on front of Right Console Mast (10R). Detach and discard Lead Wire (8).
5.4 Untie the Upper Console Cable (12) from the back of the Console (11). Connect the Console Cable (9) from the Right Console Mast (10R) to the Upper Console Cable (12). Tuck away any cable slack into the console mast.
NOTE: Be careful not to pinch any wires while assembling the console.
WARNING: Do not stand/crouch under deck when in upright position.
text_image
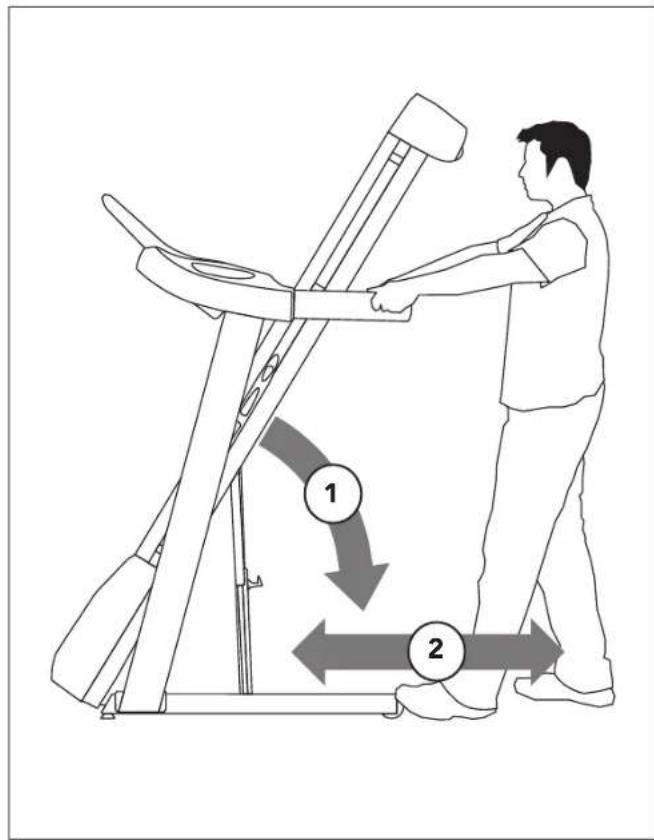
Diagram illustrating a person using a treadmill with two directional arrows labeled 1 and 2 indicating movement or movement.ASSEMBLY STEP 6
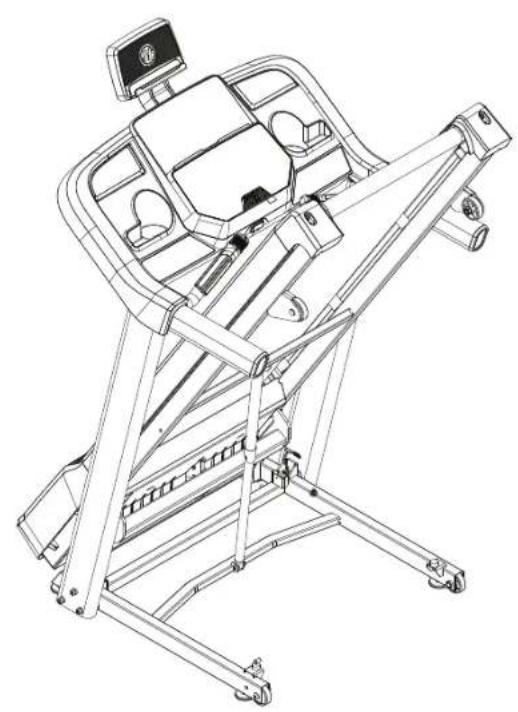
6.1 To move, make sure the treadmill is folded and securely latched. Then firmly grasp the handlebars, tilt the treadmill back (1) and roll (2).
6.2 Move treadmill off flattened box and into its final position, ready for use. Dispose of cardboard box.
NOTE: If treadmill must be disassembled or lifted in the future, use the 5mm L-wrench to re-attach red transport cables to the upper deck frame and lower base frame on both the left side and right side of the treadmill. Check to ensure that the lower base frame cannot spring open before lifting or disassembling treadmill.
natural_image
Line drawing of a mechanical device with no visible text, numbers, or symbolsASSEMBLY COMPLETE!
Before the first use, lubricate the treadmill deck by following the instructions in the maintenance section in the TREADMILL GUIDE.
TECH SPECS
| Assembled Dimensions (L x W x H) | 179 x 85 x 150 cm / 71" x 33.5" x 59" |
| Product Weight 81.5 kg / 180 lbs. | |
| Max User Weight 124 kg / 275 lbs. | |
TREADMILL OPERATION
This section explains how to use your treadmill's console and programming.
The BASIC OPERATION section in the TREADMILL GUIDE has instructions for the following:
• LOCATION OF THE TREADMILL
• USING THE SAFETY KEY
• FOLDING THE TREADMILL
• MOVING THE TREADMILL
• LEVELING THE TREADMILL
• TENSIONING THE RUNNING BELT
• CENTERING THE RUNNING BELT
• USING THE HEART RATE FUNCTION

text_image
S A C O HORIZON S FITNESS P B L I G H E M T F Q 47912 16 2681014CONSOLE OPERATION
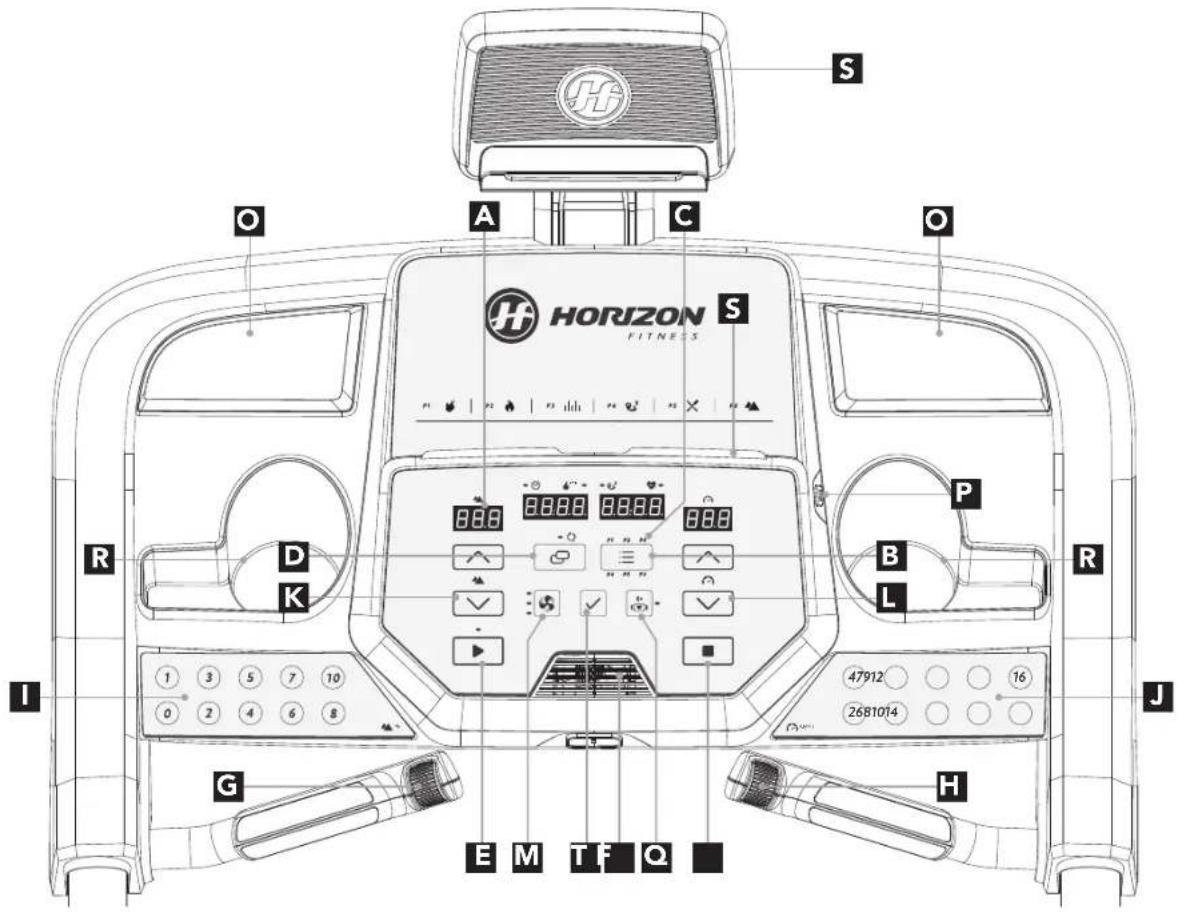
Note: There is a thin protective sheet of clear plastic on the overlay of the console that should be removed before use.
A) LED DISPLAY: Time, Distance, Calories, Heart Rate, Incline, Speed.
B) PROGRAMS: Toggles through the preset programs.
C) WORKOUT LED INDICATORS: indicates what workout is set for the current program.
D) CHANGE DISPLAY: Toggles between TIME/CALS and DISTANCE/HR on the LED displays. When SCAN is illuminated, the displays will switch every 5 seconds.
E) START: press to START workout.
F) STOP: press to pause/end your workout. Hold for 3 seconds to reset the console.
G) INCLINE SCROLL WHEEL: used to adjust incline in small increments (0.5%).
H) SPEED SCROLL WHEEL: used to adjust speed in small increments (0.1 km/h increments).
I) INCLINE QUICK KEYS: used to reach desired incline more quickly.
J) SPEED QUICK KEYS: used to reach desired speed more quickly.
K) INCLINE +/- KEYS: used to adjust incline in small increments (0.5%).
L) SPEED +/- KEYS: used to adjust speed in small increments (0.1 km/h increments).
M) FAN KEY: press to change fan level.
N) FAN: personal workout fan.
O) SPEAKERS: music plays through speakers when your device is connected to the console.
P) USB INPUT: 1A/5V USB output power.
Q) BLUETOOTH: allows a bluetooth device to be connected to the treadmill. LED will illuminate when a bluetooth device is connected.
R) WATER BOTTLE POCKETS: holds personal workout equipment.
S) TABLET/READING RACK: holds tablet or reading material.
T) ENTER KEY: Press to confirm selection.

text_image
8.8.0 - √ KCAL - 8.8.8.0 - 9° 8.8.8.0 8.8.0 8.8.0DISPLAY WINDOWS
• INCLINE: Shown as percent. Indicates the incline of your walking or running surface.
- SPEED: Shown as km/h. Indicates how fast your walking or running surface is moving.
TIME: Shows either the total time elapsed or remaining; depending on the workout selected.
• KCAL CALORIES (CALS): Total calories burned during your workout.
• 9° DISTANCE: Shown as kilometers. Indicates distance traveled during your workout.
• HEART RATE (HR): Shown as BPM (beats per minute). Used to monitor your heart rate (displayed when contact is made with both pulse grips).
GETTING STARTED
1) Check to make sure no objects are placed on the belt that will hinder the movement of the treadmill.
2) Plug in the power cord and turn the treadmill ON. (The ON/OFF switch is next to the power cord.)
3) Stand on the side rails of the treadmill.
4) Attach the safety key clip to part of your clothing making sure that it is secure and will not become detached during operation.
5) Insert the safety key into the safety keyhole in the console.
6) You have two options to start your workout:
A) QUICK START UP
Simply press the START key to begin working out.
Time, distance, and calories will all count up from zero. OR...
B) SELECT A WORKOUT OR TARGET
1) Press the PROGRAMS key to select your desired program and press ENTER.
2) Adjust the SETTING with the +/- buttons and press ENTER when your desired SETTING is displayed.
3) Once the GO LED is flashing, press START to begin.
WORKOUT PROFILES
P1) MANUAL: Adjust your speed and incline manually during your workout.
P2) FAT BURN: A workout designed specifically to target fat. Promotes weight loss by increasing and decreasing the speed and incline, while keeping you in your fat burning zone. Includes 10 levels.
Speed and Incline changes, segments repeat every 30 seconds.
| Segment Warm Up 1 2 3 4 5 6 7 8 | |||||||||||
| Time 4:00 Mins 30 Sec 30 Sec 30 Sec 30 Sec 30 Sec 30 Sec 30 Sec | |||||||||||
| Level 1 | Incline 0 0.5 1.5 1 | 5 1 0.5 0.5 | 0.5 1 1.5 | ||||||||
| Speed (mph) 0.5 | 1.5 2 2.5 3 | 3.5 4 3.5 3 2.5 | |||||||||
| Speed (km/h) 0.8 | 2.4 3.2 4 4.8 | 5.6 6.4 5.6 | 4.8 4 | ||||||||
| Level 2 | Incline 0 0.5 1.5 1 | 5 1 0.5 1 0 | 5 1 1.5 | ||||||||
| Speed (mph) 0.5 | 1.9 2.5 3 3.5 | 4 4.5 4 3.5 | 3 | ||||||||
| Speed (km/h) 0.8 | 3 4 4.8 5.6 | 6.4 7.2 6.4 | 5.6 4.8 | ||||||||
| Level 3 | Incline 0.5 1 2 2 1 | 5 1 1 1 1.5 | 2 | ||||||||
| Speed (mph) 0.5 | 2.3 3 3.5 4 | 4.5 5 4.5 4 | 3.5 | ||||||||
| Speed (km/h) 0.8 | 3.7 4.8 5.6 | 6.4 7.2 8 7.2 | 6.4 5.6 | ||||||||
| Level 4 | Incline 0.5 1 2 2 1 | 5 1 1 1 1.5 | 2 | ||||||||
| Speed (mph) 1 2.6 | 3.5 4 4.5 | 5 5.5 4 5.4 | |||||||||
| Speed (km/h) 1.6 | 4.2 5.6 6.4 | 7.2 8 8.8 8 | 7.2 6.4 | ||||||||
| Level 5 | Incline 1 1.5 2.5 2 | 5 2 1.5 1.5 | 1.5 2 2.5 | ||||||||
| Speed (mph) 1 3 4 | 4.5 5 5.5 | 6 5.5 5 4.5 | |||||||||
| Speed (km/h) 1.6 | 4.8 6.4 7.2 | 8 8.8 9.6 8 | 8 8 7.2 | ||||||||
| Level 6 | Incline 1 1.5 2.5 2 | 5 2 1.5 1.5 | 1.5 2 2.5 | ||||||||
| Speed (mph) 1 3.4 | 4.5 5 5.5 | 6 6.5 6 5.5 | |||||||||
| Speed (km/h) 1.6 | 5.4 7.2 8 8 | 8 9.6 | 10.4 | 9.6 8.8 8 | |||||||
| Level 7 | Incline 1.5 2 3 3 2 | 5 2 2 2 2.5 | 3 | ||||||||
| Speed (mph) 1.4 | 3.8 5 5.5 6 | 6.5 7 6.5 6 | 5.5 | ||||||||
| Speed (km/h) | 2.2 | 6.1 | 8 | 8.8 | 9.6 | 10.4 | 11.2 | 10.4 | 9.6 | 8.8 | |
| Level 8 | Incline 1.5 2 3 3 2 | 5 2 2 2 2.5 | 3 | ||||||||
| Speed (mph) 1.4 | 4.1 5.5 6 6.5 | 7 7.5 7 6.5 | 6 | ||||||||
| Speed (km/h) | 2.2 | 6.6 | 8.8 | 9.6 | 10.4 | 11.2 | 12 | 11.2 | 10.4 | 9.6 | |
| Segment Warm Up 1 2 3 4 5 6 7 8 | ||||||||||||
| Time 4:00 Mins 30 Sec 30 Sec 30 Sec 30 Sec 30 Sec 30 Sec 30 Sec 30 Sec | ||||||||||||
| Level 9 | Incline 2 2.5 3.5 3.5 3 2.5 2.5 | 2.5 3 3.5 | ||||||||||
| Speed (mph) 1.4 4.5 6 6.5 7 7.5 8 7.5 7 6.5 | ||||||||||||
| Speed (km/h) 2.2 7.2 9.6 10.4 11.2 12 12.8 12 11.2 10.4 | ||||||||||||
| Level 10 | Incline 2 2.5 3.5 3.5 3 2.5 2.5 | 2.5 3 3.5 | ||||||||||
| Speed (mph) 1.4 4.9 6.5 7 7.5 8 8.5 8 7.5 7 | ||||||||||||
| Speed (km/h) 2.2 7.8 10.4 11 2 12 12.8 13.6 12.8 12 11.2 | ||||||||||||
P3) INTERVALS: Improves your strength, speed and endurance by increasing and decreasing the speed throughout your workout to involve your heart and other muscles. Includes 10 levels.
Speed and Incline changes, segments repeat every 30 seconds.
| Segment | Warm Up | 1 | 2 | Cool Down | |||
| Time | 4:00 Mins | 90 sec | 30 sec | 4:00 Mins | |||
| Level 1 | mph | 0.5 | 1.5 | 2 | 4 | 1.5 | 1 |
| km/h | 0.8 | 2.4 | 3.2 | 6.4 | 2.4 | 1.6 | |
| Level 2 | mph | 0.5 | 1.5 | 2 | 4.5 | 1.5 | 1 |
| km/h | 0.8 | 2.4 | 3.2 | 7.2 | 2.4 | 1.6 | |
| Level 3 | mph | 0.5 | 1.9 | 2.5 | 5 | 1.9 | 1.3 |
| km/h | 0.8 | 3 | 4 | 8 | 3 | 2.1 | |
| Level 4 | mph | 1 | 1.9 | 2.5 | 5.5 | 1.9 | 1.3 |
| km/h | 1.6 | 3 | 4 | 8.8 | 3 | 2.1 | |
| Level 5 | mph | 1 | 2.3 | 3 | 6 | 2.3 | 1.5 |
| km/h | 1.6 | 3.7 | 4.8 | 9.6 | 3.7 | 2.4 | |
| Level 6 | mph | 1 | 2.3 | 3 | 6.5 | 2.3 | 1.5 |
| km/h | 1.6 | 3.7 | 4.8 | 10.4 | 3.7 | 2.4 | |
| Level 7 | mph | 1.4 | 2.6 | 3.5 | 7 | 2.6 | 1.8 |
| km/h | 2.2 | 4.2 | 5.6 | 11.2 | 4.2 | 2.9 | |
| Level 8 | mph | 1.4 | 2.6 | 3.5 | 7.5 | 2.6 | 1.8 |
| km/h | 2.2 | 4.2 | 5.6 | 12 | 4.2 | 2.9 | |
| Level 9 | mph | 1.4 | 3 | 4 | 8 | 3 | 2 |
| km/h | 2.2 | 4.8 | 6.4 | 12.8 | 4.8 | 3.2 | |
| Level 10 | mph | 1.4 | 3 | 4 | 8.5 | 3 | 2 |
| km/h | 2.2 | 4.8 | 6.4 | 13.6 | 4.8 | 3.2 | |
P4) DISTANCE: Push yourself and go further during your workout with 13 distance levels. Choose from L1-L13 from 1 mile, 2 miles, 5k, 5 miles, 10k, 8 miles, 15k, 10 miles, 20k, half marathon, 15 miles, 20 miles and marathon goals. User sets starting speed levels.
P5) CALORIES: Set goals for burning calories. Calories burned are calculated using distance and speed.
P6) HILL CLIMB: Simulates a hill ascent and descent. This program helps tone muscle and improve cardiovascular ability.
Incline changes and segments repeat every 30 seconds.
| Segment Warm | Up 1 2 3 4 5 6 7 8 9 10 | ||||||||
| Time 4:00 Mins | 30 sec 30 sec 30 sec 30 sec 30 sec 30 sec 30 sec 30 sec 30 sec 30 sec 30 sec 30 sec 30 sec 30 sec 30 sec 30 sec 30 sec 30 sec 30 sec 30 sec 30 sec 30 sec 30 sec 30 sec 30 sec 30 sec. | ||||||||
| Level 1 | 0 0 1 1.5 2 2.5 3 3 2.5 2 1.5 1 | ||||||||
| Level 2 | 0 0 1.5 2 2.5 3 3.5 3.5 3 2.5 2 1.5 | ||||||||
| Level 3 | 0 1 2 2.5 3 3.5 4 4 3.5 3 2.5 2 | ||||||||
| Level 4 | 0 1.5 2.5 3 3.5 4 4.5 4.5 4 3.5 3 2.5 | ||||||||
| Level 5 | 0 1.5 3.5 4 4.5 5 5 4.5 4 3.5 3 | ||||||||
| Level 6 | 0 1.5 3.5 4 4.5 5 5.5 5 4.5 4 3.5 | ||||||||
| Level 7 | 0 1.5 4 4.5 5 5.5 6 6.5 5.5 4.5 4 | ||||||||
| Level 8 | 0 2 4.5 5 5.5 6 6.5 6.5 6 5.5 5 4.5 | ||||||||
| Level 9 | 0 2 5 5.5 6 6.5 7 7 6.5 6 5.5 5 | ||||||||
| Level 10 | 0 2 5.5 6 6.5 7 7.5 7.5 7 6.5 6 5.5 | ||||||||
TO RESET THE CONSOLE
Hold STOP key for 3 seconds.
When your workout is complete, the unit will beep. Your workout information will stay displayed on the console for 30 seconds and then reset.
BLUETOOTH HEART RATE MONITORING
The 5.0AT is equipped with multi-channel Bluetooth which enables you to wirelessly connect compatible Bluetooth heart rate monitoring devices to this treadmill. You will need to ensure that your wireless heart rate monitoring device is Bluetooth 4.0 compatible and is also "open" to sharing data. Non-"open" or "closed" devices typically only share data with their proprietary apps. The 5.0AT needs an "open" device to receive data from the device. You may need to consult with your device's owner's manual or the manufacturer to confirm if it is an open device.
Pair the receiver to the app and the console will receive the information from the tablet. To use the Bluetooth HR monitor without a tablet, press and hold the Bluetooth button to enable the console to communicate with the receiver. When paired with the Bluetooth HR monitor the console will not pair with a tablet. To enable tablet communication press and hold the Bluetooth button for 5 seconds or reset power.
The 5.0AT treadmill will connect and stream music form your compatible music device. This includes many smart phones and tablets.
Your 5.0AT comes equipped with Bluetooth speakers. Bluetooth compatible devices can stream music wirelessly from your device to the speakers. Instructions for audio connection are detailed below.
CONNECTING VIA BLUETOOTH 4.0LE
1) Check to ensure that your music device is Bluetooth 4.0 compatible.
2) Go into your device's Bluetooth settings and scan for devices.
3) On your music device, locate the Bluetooth device list. Select your treadmill or elliptical unit that appears on this list. Wait for your music device to finish pairing with the unit.
4) You will know when pairing is successful when your music device shows the treadmill or elliptical unit as now being a paired device.
WHEN UNIT IS POWERED OFF THEN BACK ON
If you turn your treadmill or elliptical unit off, or if it goes into sleep mode, the next time it is powered on the unit will look to pair with the last music device with which it was paired. It will automatically pair at this time.
RE-PAIRING MUSIC DEVICES
In the event that the unit cannot find the last paired music device (for example, the music device is off or not being used) then the unit will stop looking to pair with the music device. If this happens, and if you wish to use your music device again, then you will need to go through the pairing process listed above and re-pair through your music device's settings.
USING MULTIPLE MUSIC DEVICES
If multiple devices are being paired with the unit (i.e.: multiple users are using the treadmill or elliptical unit and pairing their music devices with it) then the unit will look to pair with the last device used and "forget" other devices. If you wish to re-pair a "forgotten" music device, then you will need to un-pair the current paired device and then re-pair your device through the pairing procedure noted above.
atZone
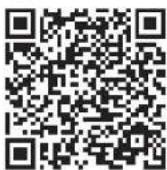
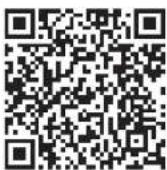
Exercise with atZone via Bluetooth, scan QR code to download and for more information.
©ZONE

AUFBAU

WARNUNG
natural_image
Line drawing of a treadmill with a circular highlight on the side panel (no text or symbols)text_image
Technical diagram of a mechanical assembly with labeled components 1, 7, and 1AUFBAU SCHRITT 1
HARDWARE FÜR SCHRITT 1:

text_image
Technical diagram of a treadmill with labeled parts including 12 and 6, showing mechanical components and assembly.AUFBAU SCHRITT 4
HARDWARE FÜR SCHRITT 4:
text_image
Diagram illustrating a person using a treadmill with two directional arrows labeled 1 and 2 indicating movement or movement.AUFBAU SCHRITT 6
natural_image
Line drawing of a mechanical device with no visible text, numbers, or symbolsnatural_image
Line drawing of a treadmill with a circular highlight on the side panel (no text or symbols)
text_image
HOUDER VOOR TABLET/ LEESMATERIAAL LUIDSPREKERS BEDIENINGSPANEL EN DISPLAYVENSTERS CONSOLE-VENTILATOR BIDONHOUDER PLAATSING VEILIGHEIDSSLEUTEL POLSSLAG-GREPEN CONSOLEMAST AAN-/UITKNOP NETSNOER CONSOLEMAST MOTORKAP VOETVERGRENDeling (ONDER DECK) LOOPBAND/LOOPVLAK ZIJRAIL AFDEKKAP ROL BASIS FRAME RODE TRANSPORTKABEL RONE VEOTVERGRENDELINGSSTICKER (ONDER VOETVERGRENDeling) DECKFRAME ROL ACHTER BOUTEN VOOR SPANNEN/VERSTELLEN NEDERLANDS 44BELANGRIJKSTE ONDERDELEN:
text_image
Technical diagram of a mechanical assembly with numbered components, likely a conveyor or lift mechanism.MONTAGE STAP 1
STAP 1 MONTAGEMATERIAAL:
text_image
Technical diagram of a treadmill with labeled parts including 12 and 6, showing mechanical components and assembly.MONTAGE STAP 4
STAP 4 MONTAGEMATERIAAL:
text_image
Diagram illustrating a person using a treadmill with two directional arrows labeled 1 and 2 indicating movement or movement.MONTAGE STAP 6
natural_image
Line drawing of a mechanical exercise machine with control panel and support frame (no text or symbols)MONTAGE VOLTOOID!
natural_image
Line drawing of a treadmill base with ladder and legs, no text or symbols present
text_image
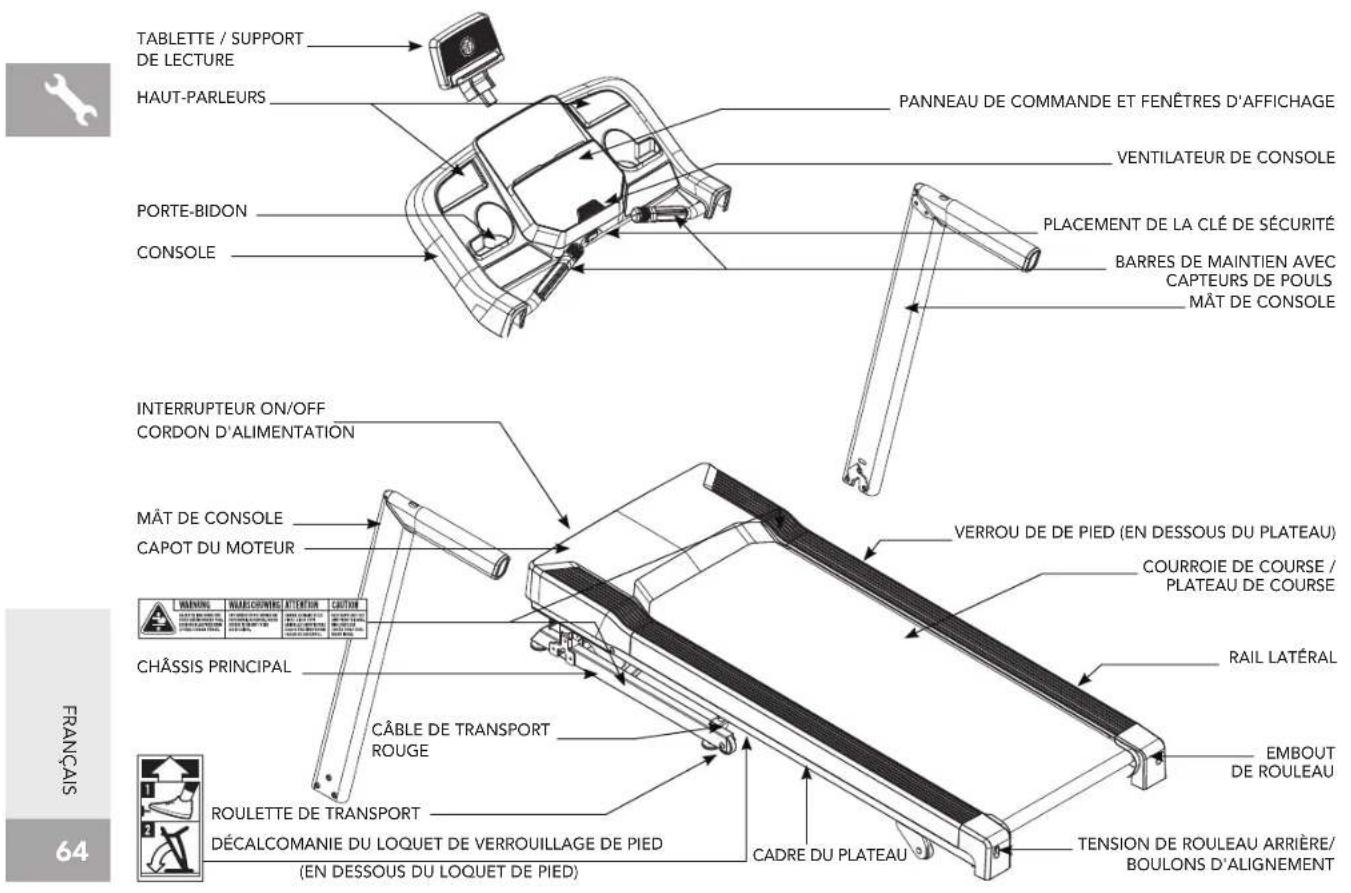
TABLETTE / SUPPORT DE LECTURE HAUT-PARLEURS PORTE-BIDON CONSOLE INTERRUPTEUR ON/OFF CORDON D'ALIMENTATION MÄT DE CONSOLE CAPOT DU MOTEUR CHÂSSIS PRINCIPAL ROULETTE DE TRANSPORT DÉCALCOMANIE DU LOQUET DE VERROUILLAGE DE PIED (EN DEDSOUS DU LOQUET DE PIED) PANNEAU DE COMMANDE ET FENÊTRES D'AFFICHAGE VENTILATEUR DE CONSOLE PLACEMENT DE LA CLÉ DE SÉCURITÉ BARRES DE MAINTIEN AVEC CAPTEURS DE POULS MÄT DE CONSOLE VERROU DE DE PIED (EN DEDSOUS DU PLATEAU) COURROIE DE COURSE / PLATEAU DE COURSE RAIL LATÉRAL EMBOUT DE ROULEAU TENSION DE ROULEAU ARRIÈRE/ BOULONS D'ALIGNEMENTPIÈCES PRINCIPALES INCLUDES :
text_image
Technical diagram of a mechanical assembly with numbered components, likely a conveyor or cutting tool.MONTAGE - ÉTAPE 1
ÉTAPE 1 MATÉRIELS :
text_image
Technical diagram of a treadmill with labeled parts including 12 and 6, showing mechanical components and assembly.MONTAGE - ÉTAPE 4
ÉTAPE 4 MATÉRIELS :
text_image
Diagram showing a person using a treadmill with two directional arrows labeled 1 and 2 indicating movement or movement steps.MONTAGE - ÉTAPE 6
natural_image
Technical line drawing of a mechanical device with no visible text or symbolsLE MONTAGE EST TERMINÉ !
natural_image
Blank white image with no visible content, text, or symbols.
natural_image
Blank white image with no visible content, text, or symbols
natural_image
Blank white image with no visible content, text, or symbols
natural_image
Blank white image with no visible content, text, or symbols
natural_image
Blank white image with no visible content, text, or symbols
natural_image
Blank white image with no visible content, text, or symbols
natural_image
Blank white image with no visible content, text, or symbols
natural_image
Blank white image with no visible content, text, or symbols
natural_image
Blank white image with no visible content, text, or symbols
natural_image
Blank white image with no visible content, text, or symbols
natural_image
Blank white image with no visible content, text, or symbols.Horizon 5.0AT | 5.0AT-21 Rev. 1.0 A| 1000510138
©2024 Horizon Fitness