Jarves K-5056 - Toilet KOHLER - Free user manual and instructions
Find the device manual for free Jarves K-5056 KOHLER in PDF.


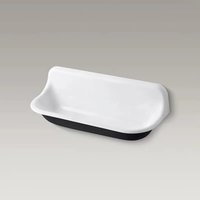
| Product Type | Wall-mounted Urinal |
| Brand | Kohler |
| Model | Jarves K-5056 |
| Main Material | Cast Iron |
| Overall Height | 121.9 cm (48 in) |
| Width | 20.3 cm (8 in) |
| Depth | 25.4 cm (10 in) |
| Outlet Diameter | 1-1/2 in (3.81 cm) |
| Water Supply | To be connected (flush valve not included) |
| Installation Type | Wall-mounted |
| Wall Brackets | Included |
| Recommended Tools | Adjustable wrench, screwdriver, level, tape measure, plumber's tape |
| Standards Met | ANSI A112.19.1M |
| ADA Compliance | Yes (when rim height ≤ 43.2 cm) |
| Usage | Sanitary, public or residential |
| Maintenance | Clean with a soft cloth and non-abrasive cleaner |
| Safety | Caution for heavy loads, wear gloves and goggles |
| Spare Parts | Seals, drains available through Kohler distributors |
| Repairability | Standard parts, repairable |
Frequently Asked Questions - Jarves K-5056 KOHLER
User questions about Jarves K-5056 KOHLER
0 question about this device. Answer the ones you know or ask your own.
Ask a new question about this device
Download the instructions for your Toilet in PDF format for free! Find your manual Jarves K-5056 - KOHLER and take your electronic device back in hand. On this page are published all the documents necessary for the use of your device. Jarves K-5056 by KOHLER.
USER MANUAL Jarves K-5056 KOHLER
K-5055, K-5056, K-5057, K-5058
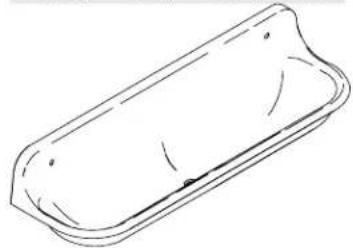
natural_image
Simple line drawing of a rectangular object with rounded edges and internal markings (no text or symbols)M product numbers are for Mexico (i.e. K-12345M)
• Hole Cutting Equipment
Thank You For Choosing Kohler Company
We appreciate your commitment to Kohler quality. Please take a few minutes to review this manual before you start installation. If you encounter any installation or performance problems, please don't hesitate to contact us. Our phone numbers and website are listed on the back cover. Thanks again for choosing Kohler Company.
Before You Begin
□ Observe all local plumbing and building codes.
□ Refer to local codes and manufacturer's instructions for flush valve requirements.
□ Carefully inspect the new urinal for damage.

CAUTION: Risk of personal injury or product damage. Cast iron urinals are extremely heavy. Wear appropriate safety apparel when installing this product.
☐ Fixture dimensions are nominal and conform to tolerances by ANSI Standard A112.19.1M.
□ Site preparation may require additional tools and hardware.
text_image
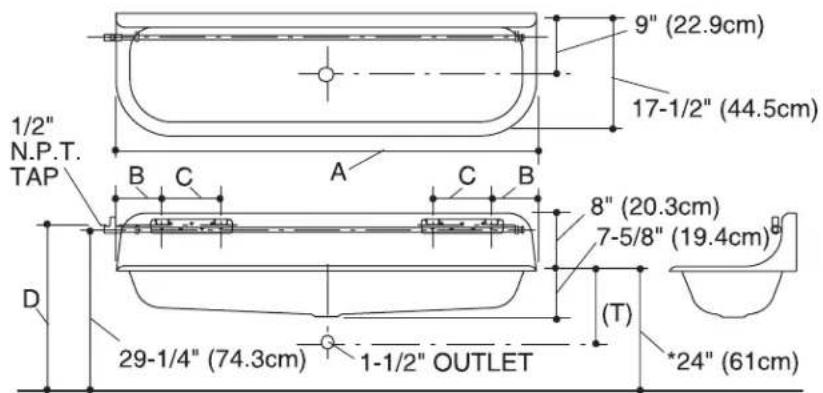
9" (22.9cm) 17-1/2" (44.5cm) 1/2" N.P.T. TAP B C A C B 8" (20.3cm) 7-5/8" (19.4cm) (D) 29-1/4" (74.3cm) 1-1/2" OUTLET *(T) *24" (61cm)The dimensions listed above are the same on all four models.
| Product Number | Product Dimensions | |||
| A | B | C | D | |
| K-5055 | 36" (91.4cm) | 6-1/2" (16.5cm) | 7-1/2" (19.1cm) | 31" (78.7cm) |
| K-5056 | 48" (121.9cm) | 8" (20.3cm) | 10" (25.4cm) | 30-1/2" (77.5cm) |
| K-5057 | 60" (152.4cm) | 8" (20.3cm) | 10" (25.4cm) | 30-1/2" (77.5cm) |
| K-5058 | 72" (182.9cm) | 8" (20.3cm) | 10" (25.4cm) | 30-1/2" (77.5cm) |
Roughing-In Dimensions
* The urinal complies with ADA requirements when the rim is mounted no higher than 17" (43.2cm) from the finished floor.
• (T) Drain is typically 11-7/8" (30.2cm).
1. Preparation
□ Turn the water supply off.
☐ Install or relocate the supply tubing and waste pipe as necessary to conform to the roughing-in dimensions.
□ Install the shut-off valve.
□ Install adequate support framing as needed.
2. Install the Urinal
□ Install the hangers according to the roughing-in illustration.
□ Apply thread sealant tape to the pipe threads and install the female collar to the waste pipe.
□ Place the gasket onto the female collar with the beveled surface facing away from the collar.
Install the Urinal (cont.)

CAUTION: Risk of personal injury or product damage. Cast iron urinals are extremely heavy. Wear appropriate safety apparel when installing this product.
□ Carefully position the urinal on the wall hangers.
□ Install the strainer and washdown pipe (not included) to the urinal according to the manufacturer's instructions.
3. Complete the Installation
□ Install the flush valve according to the manufacturer's instructions.
□ Connect the water supply and complete the waste pipe connections.
□ Turn on the water supply.
☐ Flush and check the entire installation for leaks.
□ Repair as needed.