Cimarron K-6419 - Toilet KOHLER - Free user manual and instructions
Find the device manual for free Cimarron K-6419 KOHLER in PDF.

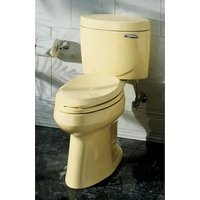
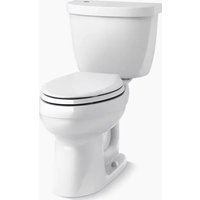
| Product type | Toilet with touchless flush |
| Brand | Kohler |
| Model | Cimarron K-6419 |
| Power supply | 4 AA alkaline batteries |
| Main function | Flush activated by touchless infrared sensor |
| Flush system | Electronic module with cartridge and wheel |
| Sensor range | 1 to 2 inches (25 to 51 mm) above the module |
| Safety delay | 10 seconds after each flush |
| Lid stabilization | 4 foam cushions provided |
| Maintenance | Do not use cleaners in the tank |
| Safety | Turn off water supply if toilet is clogged |
| Warranty | 1 year limited |
| Compliance | FCC Part 15, IC NMB-003 |
| Manufacturer | Kohler Co., USA |
Frequently Asked Questions - Cimarron K-6419 KOHLER
User questions about Cimarron K-6419 KOHLER
0 question about this device. Answer the ones you know or ask your own.
Ask a new question about this device
Download the instructions for your Toilet in PDF format for free! Find your manual Cimarron K-6419 - KOHLER and take your electronic device back in hand. On this page are published all the documents necessary for the use of your device. Cimarron K-6419 by KOHLER.
USER MANUAL Cimarron K-6419 KOHLER
Installation and Care Guide
Touchless Flush
K-4000, K-6418, K-6419, K-18202, K-99249, K-99250
Provided Components
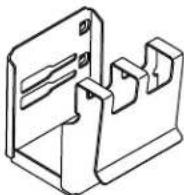
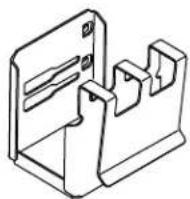
Bracket
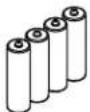
(4) AA Batteries
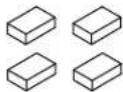
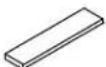
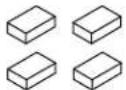
(4) Pads
Before You Begin

CAUTION: Riskofpropertydamage: Do not use lithium ion batteries with this product. Exposing lithium ion batteries to water can result in a fire.
NOTICE: Riskofpropertydamage. If the toilet is plugged, turn off the water supply before attempting to unplug it. The sensor can be inadvertently activated while unplugging the toilet, resulting in an overflow.
NOTICE: Riskofproductdamage. Use of in-tank toilet cleaners will damage this product. In-tank cleaners emit gases which will damage the seals and corrode the interior components. Damage caused by in-tank cleaners voids the warranty.
For product videos and more information visit KOHLER.com/TouchlessToilet.
This device complies with part 15 of the FCC Rules. Operation is subject to the following two conditions: (1) This device may not cause harmful interference, and (2) this device must accept any interference received, including interference that may cause undesired operation.
ThisClassBdigitalapparatuscomplieswithCanadianICES-003.
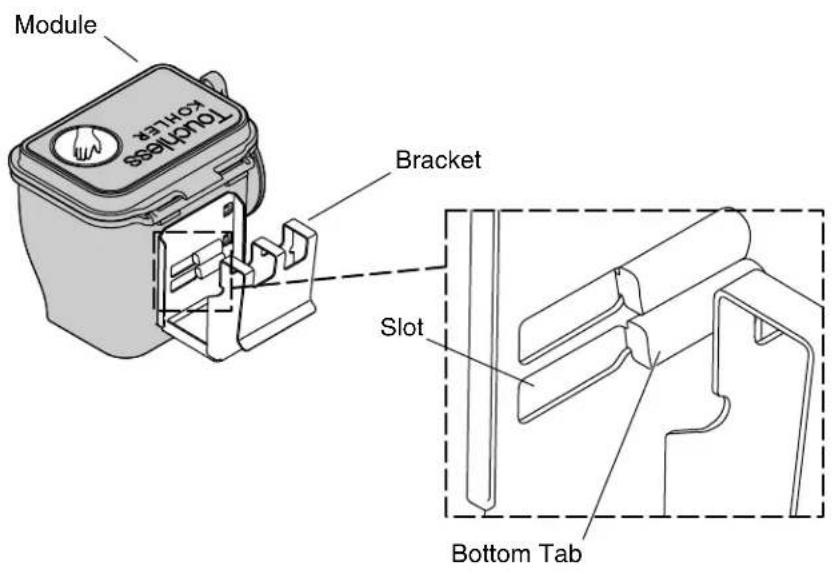
1. Install Bracket in Slots
☐ Install the bracket on the module, with the bottom tab in the bottom slot.
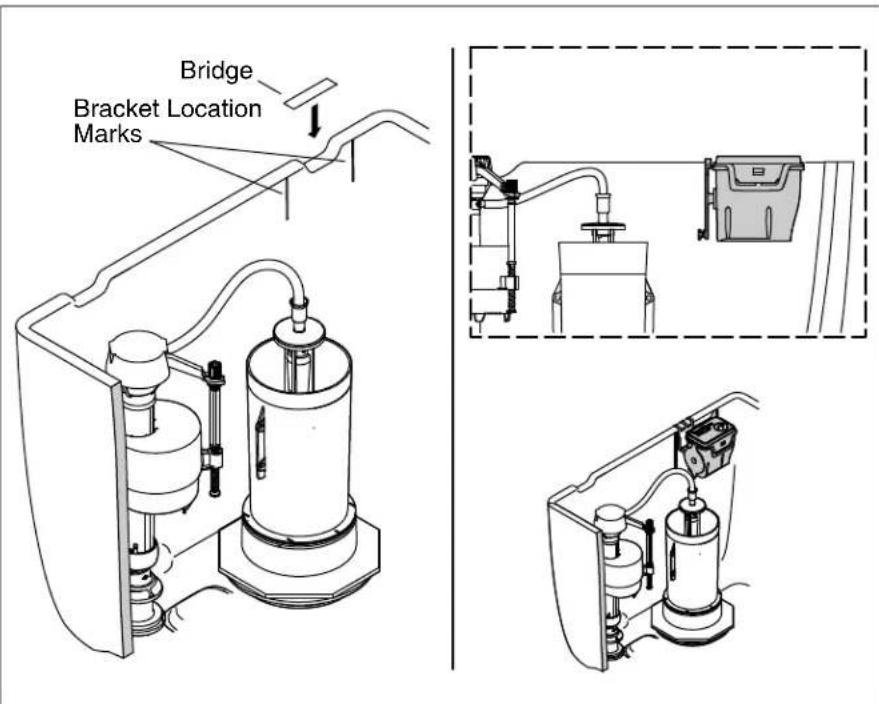
2. Install and Connect the Module
NOTE: If the toilet tank does not have vent holes, discard the bridge.
NOTE: The orientation of the bracket location marks to the vent or other tank features will vary on different models of toilets.
☐ Install the bridge over the vent if the vent is aligned with the bracket marks.
☐ Install the module so the bracket aligns with the bracket location marks.
□ Connect the chain from the canister to the wheel.
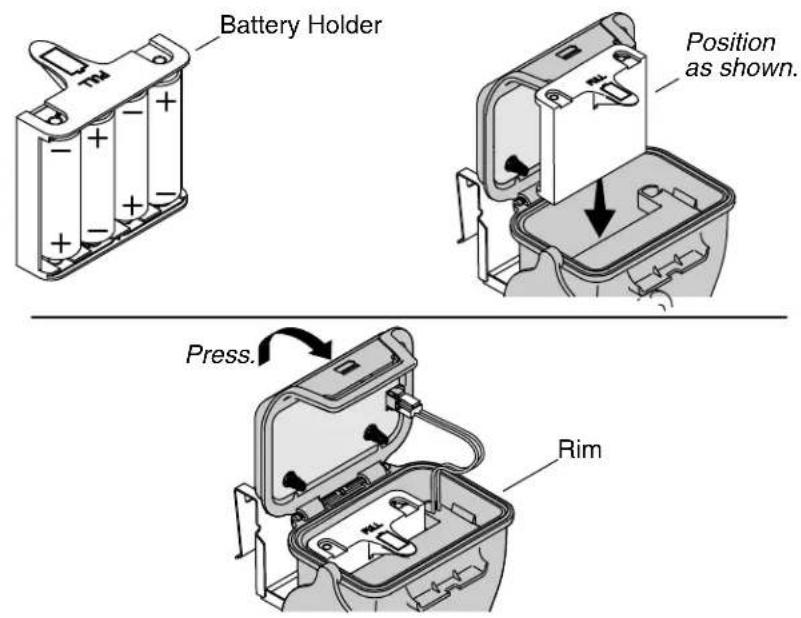
3. Install the Batteries

CAUTION: Riskofpropertydamage: Do not use lithium ion batteries with this product. Exposing lithium ion batteries to water can result in a fire.
NOTE: When the batteries are low, the unit will beep five times at half second intervals. Replace the batteries when this happens.
☐ Install the batteries in the battery holder. Orient them as shown in the battery holder diagram.
□ Open the module lid.
☐ Install the battery holder with the open side facing the back of the module and press down until it stops.
☐ Confirm the top edge of the battery holder is below the rim of the module.
☐ Close the module lid and press on the front ledge until the clasp engages.
natural_image
Line drawing of a hand holding a touchless device with a valve, next to a water tank (no text or symbols)
natural_image
Diagram of a mechanical assembly with arrows indicating force or movement (no text or symbols present)4. Check Operation
□ Turn the water supply back on and allow the tank to fill.
□ Check for leaks.
NOTE: To prevent accidental flushes, the sensor remains inactive for 10 seconds after each flush.
☐ Flush the toilet repeatedly using the module.
□ Observe the canister.
☐ Ensure the bracket is positioned between the location marks.
☐ Ensure that the canister fully closes when the flush is complete.
□ Observe the movement of the wheel.
☐ Ensure that the wheel does not come into contact with anything when rotating.
5. Complete the Installation
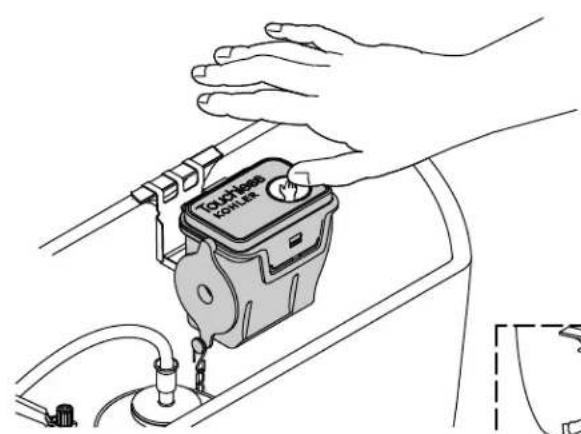
IMPORTANT!Wait at least 10 seconds after the last test flush before installing the tank lid. Hold your hand over the sensor for 1-2 seconds after installing the lid to confirm proper operation.
NOTE: If you are unable to activate the sensor immediately after installing the tank lid, wait a minimum of 5 minutes for the sensor to calibrate.
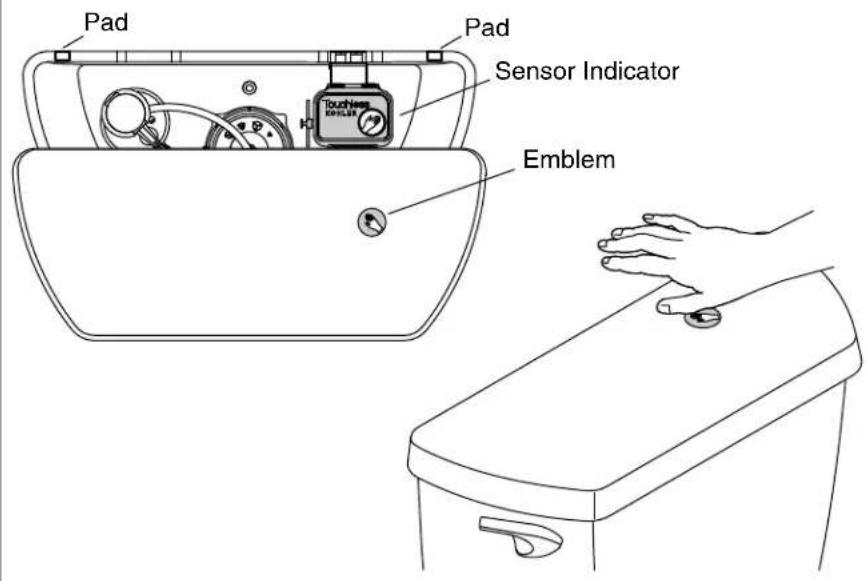
☐ Install four pads, two on the front (not shown) and two on the back, near each corner of the tank lid or tank rim where the lid contacts the tank rim. The pads stabilize the lid to prevent false flushes when the lid is bumped.
□ Install the tank lid.
☐ Hold your hand approximately 1"(25 mm) above the module. The toilet will flush.
□ Consult the troubleshooting chart for operation or performance issues.
| Troubleshooting | |
| NOTICE:Riskofpropertydamage.If the toilet is plugged, turn off the water supply before attempting to unplug it. The sensor can be inadvertently activated while unplugging the toilet, resulting in an overflow. NOTE:For service parts information, visit your product page at www.kohler.com/serviceparts. | |
| SymptomsRecommendedAction | |
| 1.The toilet is blocked. A.Turn off | the water supply then clear the blockage using a plunger. Consult the toilet troubleshooting for further information. |
| 2.Nothing happens when the user attempts to activate the sensor. | A.Confirm the batteries are correctly installed. |
| B.Confirm the batteries have a charge. Install new batteries if necessary. | |
| C.Confirm the wires are not blocking spring contacts. | |
| 3.The module works, there is a beep, the wheel rotates, and the chain moves, but the toilet does not flush. | A.Confirm the chain is attached to the wheel and canister. |
| B.Remove any twists in the chain. | |
| 4.The wheel contacts the canister when flushing. | A.Confirm the bracket is positioned between the location marks. |
| 5.The toilet flushes, but the flush is weak. | A.Consult the toilet troubleshooting. |
| 6.The sensor does not activate a flush despite the user's hand being within 1" (25 mm) - 2"(51 mm). | A.Confirm the batteries have a charge. |
| B.Confirm the sensor emblem is located directly above the icon on the module. Relocate the emblem if it is not located correctly. | |
| 7.The toilet flushes while in use. | A.Confirm nothing is interfering with the tank lid. Bumping the tank lid may cause the toilet to flush. |
| B.Confirm the provided foam pads are installed on the tank's four corners to stabilize the tank lid. | |
1224637-2-E 8 Kohler Co.
| Troubleshooting (cont.) | |
| SymptomsRecommendedAction | |
| 8.The toilet flushes while opening the seat cover. | A.Confirm the seat cover does not strike the tank lid when opening.Moving the tank lid may cause the toilet to flush. |
| B.Confirm the provided foam pads are installed on the tank's four corners to stabilize the tank lid. | |
| Warranty | |
| ONE-YEAR LIMITED WARRANTYKOHLER plumbing products are warranted to be free of defects in material and workmanship for one year from date of installation.Kohler Co. will, at its election, repair, replace or make appropriate adjustment where Kohler Co. inspection discloses any such defects occurring in normal usage within one (1) year after installation. Kohler Co. is not responsible for removal or installation costs.Useofin-tank toiletcleanerswillvoidthewarranty.To obtain warranty service contact Kohler Co. either through your Dealer, Plumbing Contractor, Home Center or E-tailer, or by writing Kohler Co., Attn.: Customer Care Center, 444 Highland Drive, Kohler, WI 53044, USA, or by calling 1-800-4-KOHLER (1-800-456-4537) from within the USA and Canada, and 001-800-456-4537 from within Mexico, or visit www.kohler.com within the USA, www.ca.kohler.com from within Canada, or www.mx.kohler.com in Mexico.IMPLIEDWARRANTIESINCLUDINGTHATOF MERCHANTABILITYANDFITNESSFORAPARTICULAR PURPOSEAREEXPRESSLYLIMITEDINDURATIONTOTHE DURATIONOFTHISWARRANTY.KOHLERCO.AND/OR SELLERDISCLAIMANYLIABILITYFORSPECIAL,INCIDENTAL ORCONSEQUENTIALDAMAGES.Some states/provinces do not allow limitations on how long an implied warranty lasts, or the exclusion or limitation of special, incidental or consequential damages, so these limitations and exclusions may not apply to you. This warranty gives you specific legal rights. You may also have other rights which vary from state/province to state/province.ThisisKohlerCo.'sexclusivewrittenwarranty. | |
Kohler Co. 9 1224637-2-E
Module
Pont d'évent
Composants fournis
Support
(4) piles AA
Coussinets
Avant de commencer

natural_image
Line drawing of a hand holding a touchless device with a valve, next to a water tank (no text or symbols)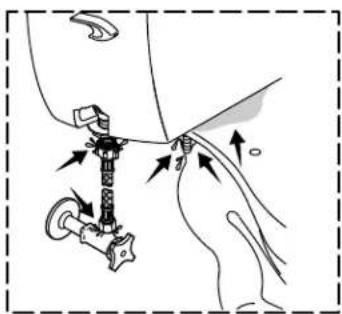
natural_image
Diagram of a mechanical assembly with arrows indicating force or movement (no text or symbols present)natural_image
Line drawing of a hand holding a touchless device with a valve, next to a water tank (no text or symbols)