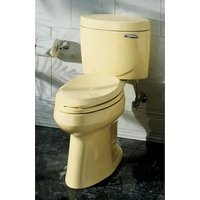
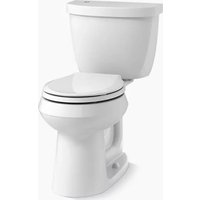
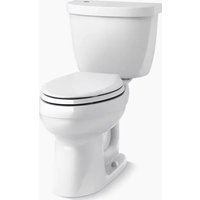
Devonshire K-3503 - Toilet KOHLER - Free user manual and instructions
Find the device manual for free Devonshire K-3503 KOHLER in PDF.

| Product Type | Two-piece toilet |
| Brand | Kohler |
| Model | Devonshire K-3503 |
| Material | Vitreous china |
| Flush volume | Adjustable from 1.4 to 1.6 gallons (5.3 to 6.0 L) |
| Flush lever | Included (to install according to provided instructions) |
| Floor seal | Wax ring included |
| Mounting bolts | 5/16" T-bolts with nuts and washers |
| Water connection | Requires a shut-off valve (not included) |
| Water supply | Cold water via shut-off valve |
| Features | Gravity flush, water level adjustment |
| Maintenance | Cleaning with sponge, periodic leak check |
| Safety | Avoid over-tightening (risk of porcelain breakage) |
| Common replacement parts | Wax ring, T-bolts, bolt caps, tank gasket |
| Required tools | Adjustable wrench, bubble level, tape measure, putty knife, hacksaw |
| Installation | Compatible with standard floor flange; follow step-by-step instructions |
| Adjustments | Threaded rod to adjust water level in tank |
| Recommended use | Residential |
| Warranty | Limited manufacturer's warranty (not specified in these instructions) |
| Manufacturer | Kohler Co. |
Frequently Asked Questions - Devonshire K-3503 KOHLER
User questions about Devonshire K-3503 KOHLER
0 question about this device. Answer the ones you know or ask your own.
Ask a new question about this device
Download the instructions for your Toilet in PDF format for free! Find your manual Devonshire K-3503 - KOHLER and take your electronic device back in hand. On this page are published all the documents necessary for the use of your device. Devonshire K-3503 by KOHLER.
USER MANUAL Devonshire K-3503 KOHLER
Mproduct numbers are for Mexico (i.e. K-12345M)
10" Adjustable Wrench

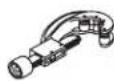
Supply Shut-Off Valve

Tape Measure

Level

Sponge
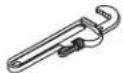
Pipe Wrench
Tubing Cutter

Wax Seal

Safety Glasses
Plus:
- 5/16" T-Bolts w/ Nuts and Washers
- Putty Knife
- Metal File
• 1/2" Nut Driver/Socket - Hacksaw
- Screwdriver
Thank You For Choosing Kohler Company
We appreciate your commitment to Kohler quality. Please take a few minutes to review this manual before you start installation. If you encounter any installation or performance problems, please don't hesitate to contact us. Our phone numbers and website are listed on the back cover. Thanks again for choosing Kohler Company.
Before You Begin
IMPORTANT! Record the model number (from the label on the box) in the Homeowners Guide for reference.
□ Observe all local plumbing and building codes.
□ Carefully inspect the new toilet for damage.
☐ If the existing toilet does not have a supply shut-off valve below the tank, install one before installing the new toilet.
1. Remove the Existing Toilet

CAUTION: Riskofhazardousgases. If the new toilet is not installed immediately, temporarily place a rag in the closet flange.
□ Turn off the water supply.
□ Flush the toilet.
□ Sponge out all remaining water from the tank.
☐ Disconnect the supply shut-off valve, if present.
□ Remove the old toilet.
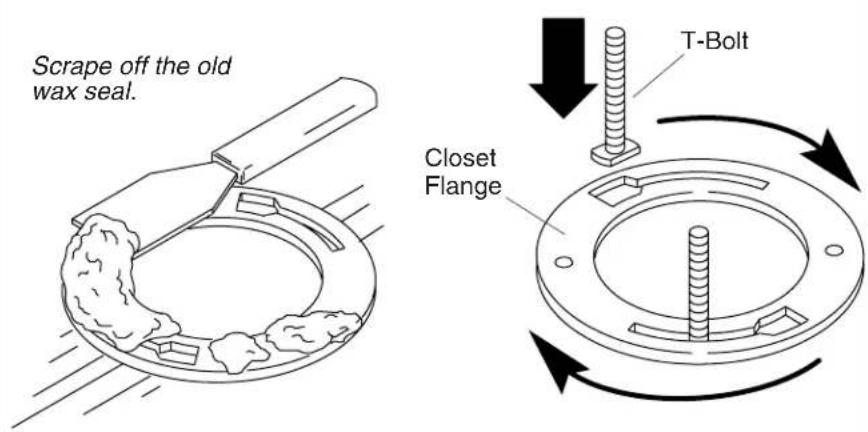
□ Remove the old wax seal from the floor with a putty knife.
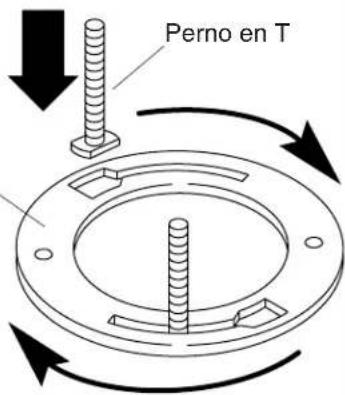
☐ Replace the old T-bolts with the new 5/16" diameter T-bolts.

2. Install the New Toilet
☐ Install or relocate the supply and outlet as necessary to conform to the roughing-in dimensions.
□ Install a supply shut-off valve.
□ Lay the toilet down onto a padded surface.
□ From the bottom of the toilet, firmly press a new wax seal around the toilet outlet.
☐ Remove the temporary rag (if used) from the toilet flange hole.
□ Align and lower the toilet over the flange and T-bolts.
IMPORTANT! Do not lift or rock the bowl after placement. If you break the watertight seal, you must install a new wax seal.
□ Apply your full body weight around the toilet to set the seal.
☐ Place the bolt cap bases over the T-bolts in the "up" position as marked.
☐ Place the washers and nuts on the bolt cap bases and T-bolts.
IMPORTANT!Donotovertightenthenut.Overtightening may cause breakage or chipping of vitreous china.
□ Carefully tighten the nuts.
IMPORTANT!Riskofproductdamage.Protect the vitreous china from the saw blade when cutting off excess T-bolt length.
Install the New Toilet (cont.)
☐ Measure the length of the T-bolts from the top of the nuts. If the bolts extend 1/4"(6 mm) or more, cut off the excess.
□ Attach the bolt caps.

3. Install the Tank
☐ Slide the tank retaining bolts into the bracket attached to the bottom of the tank. The bracket is shipped in place. Install the tank-to-bowl gasket.
□ Position the tank on the bowl by centering the gasket on the bowl inlet.

CAUTION: Riskofproductdamage. Overtightening may cause breakage or chipping of the vitreous china.
☐ Assemble the washers and nuts to the tank bolts. Alternately tighten the nuts so the tank is level and the mounting bracket tabs contact the bowl.
□ Be sure the nuts are tight enough to achieve a watertight seal. Do notovertighten.
4. Complete the Installation
☐ Install the trip lever if one is not already installed. Follow the instructions packed with the trip lever.
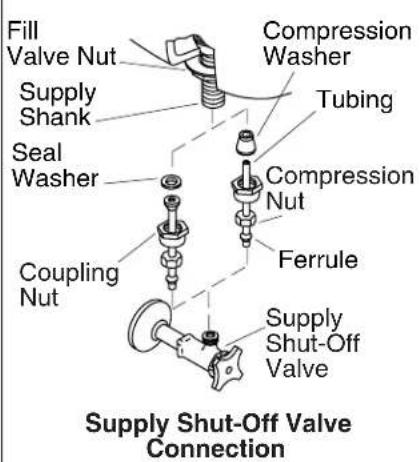
□ Connect the supply shut-off valve to the toilet supply shank.
☐ Open the supply shut-off valve slowly to check for leaks. If the connections have been properly assembled, a slight tightening of the nuts should stop leakage.
□ Install the toilet seat according to the packed instructions.
□ Carefully set the cover onto the tank.
☐ Flush the toilet several times and check all connections for leaks.
☐ Periodically check for leaks for several days following the installation.
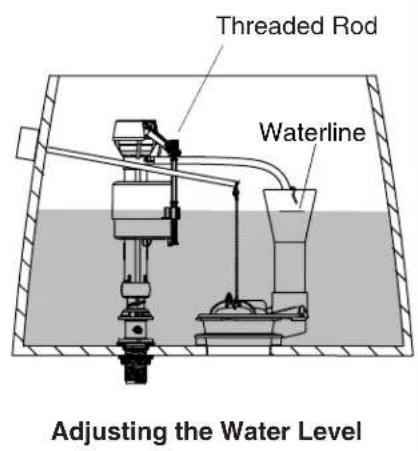
Adjustments
NOTE: The flush volume may be adjusted to 1.6 gallons (6 L) per flush or 1.4 gallons (5.3 L) per flush by adjusting the water level in the tank.
□ Adjust the water level in the tank to the marked waterline.
☐ Rotate the threaded rod clockwise to raise the water level or counterclockwise to lower the water level as needed.
☐ Periodically check for leaks for several days following the installation.
natural_image
Line drawing of a mechanical component with textured surfaces and a handle (no text or symbols)Brida de inodoros