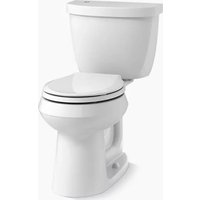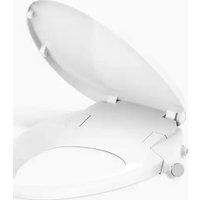
PureWash K-98804 - Toilet KOHLER - Free user manual and instructions
Find the device manual for free PureWash K-98804 KOHLER in PDF.


| Product Type | Cleaning Toilet Seat (Bidet) |
| Brand | KOHLER |
| Model | PureWash K-98804 |
| Category | Toilet - Seat |
| Dimensions (approx.) | Length: 50-55 cm, Width: 35-40 cm, Height: 10-15 cm |
| Weight (approx.) | 5.5 kg |
| Supply | Cold water only (no electrical power) |
| Recommended Water Pressure | 20 psi (139 kPa) to 80 psi (551 kPa) |
| Maximum Water Temperature | 40 °C (104 °F) |
| Main Functions | Front and rear wash, pressure adjustment (by turning knob) |
| Spray Wands | Removable for nozzle cleaning |
| Strainer Maintenance | Every 6 months or if flow rate decreases |
| Safety | Anti-scald protection (temperature limited to 40 °C), freeze precautions |
| Cleaning | Remove seat via release button; clean nozzles with soft brush |
| Warranty | KOHLER Limited Warranty (see kohler.com/warranty) |
| Customer Service | USA/Canada: 1-800-4KOHLER, Mexico: 001-800-456-4537 |
| Spare Parts | T-valve, gasket, strainer, spray wands (see kohler.com/serviceparts) |
| Bowl Compatibility | Mounting plate with bolts and adjustable insert parts |
Frequently Asked Questions - PureWash K-98804 KOHLER
User questions about PureWash K-98804 KOHLER
0 question about this device. Answer the ones you know or ask your own.
Ask a new question about this device
Download the instructions for your Toilet in PDF format for free! Find your manual PureWash K-98804 - KOHLER and take your electronic device back in hand. On this page are published all the documents necessary for the use of your device. PureWash K-98804 by KOHLER.
USER MANUAL PureWash K-98804 KOHLER
Installation Instructions
Cleansing Seat
Record your model number:
Need help? Contact our Customer Care Center.
• USA/Canada: 1-800-4KOHLER (1-800-456-4537)
• Mexico: 001-800-456-4537
- For service parts information, visit kohler.com/serviceparts.
- For care and cleaning information, visit kohler.com/clean.
• Patents: kohlercompany.com/patents
Share your experience! Customer delight and a gracious product experience is our top priority and we want to know how we did. Post a review on the kohler.com product page for your product or on the website where you purchased your product.
Warranty
This product is covered under the KOHLER® Toilets and Seats Limited Warranty, found at kohler.com/warranty. For a hardcopy of warranty terms, contact the Customer Care Center.
Tools and Materials

natural_image
Illustration of four different wrenches and screwdrivers (no text or symbols)Plastic Wrap

WARNING: Risk of scalding. High water temperature can cause severe burns. Do not connect this device to a water supply with a maximum temperature above 104^ F ( 40^ C).

CAUTION: Risk of property or product damage. Pushing or pulling on the water connection may cause water leakage.

CAUTION: Risk of product damage. Do not apply excessive force to the spray wands.

CAUTION: Risk of product damage. In areas where water may freeze in the pipes, make arrangements to keep the pipes warm. Any water remaining in the seat may freeze during winter storage. Allow the unit to warm to room temperature before reinstalling or using.
Follow all local plumbing and building codes.
Connect the seat to a cold water supply of drinking quality with a pressure of 20 psi (139 kPa) - 80 psi (551 kPa).
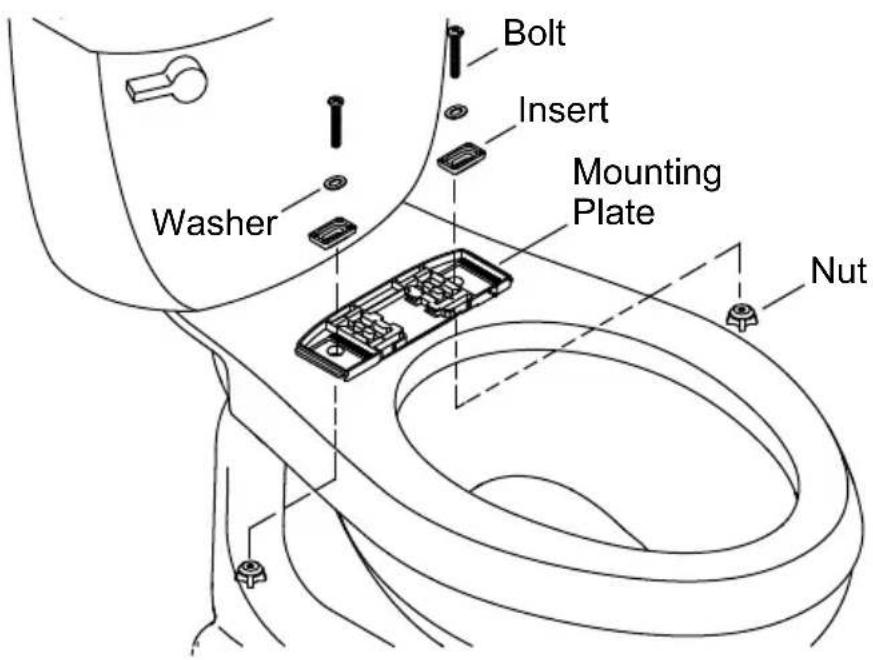
1. Install the Mounting Plate
text_image
Bolt Insert Mounting Plate Washer Nut□ Position the mounting plate over the mounting holes on the bowl.
☐ Position the left and right inserts in the grooves on the mounting plate.
Toilets with Threaded Mounting Holes
☐ Insert the bolts through the inserts and thread into the mounting holes.
□ Do not fully tighten at this time.
All Other Installations
☐ Insert the bolts through the inserts and into the mounting holes.
□ Thread a nut onto each bolt.
□ Do not fully tighten at this time.
2. Install the Seat
text_image
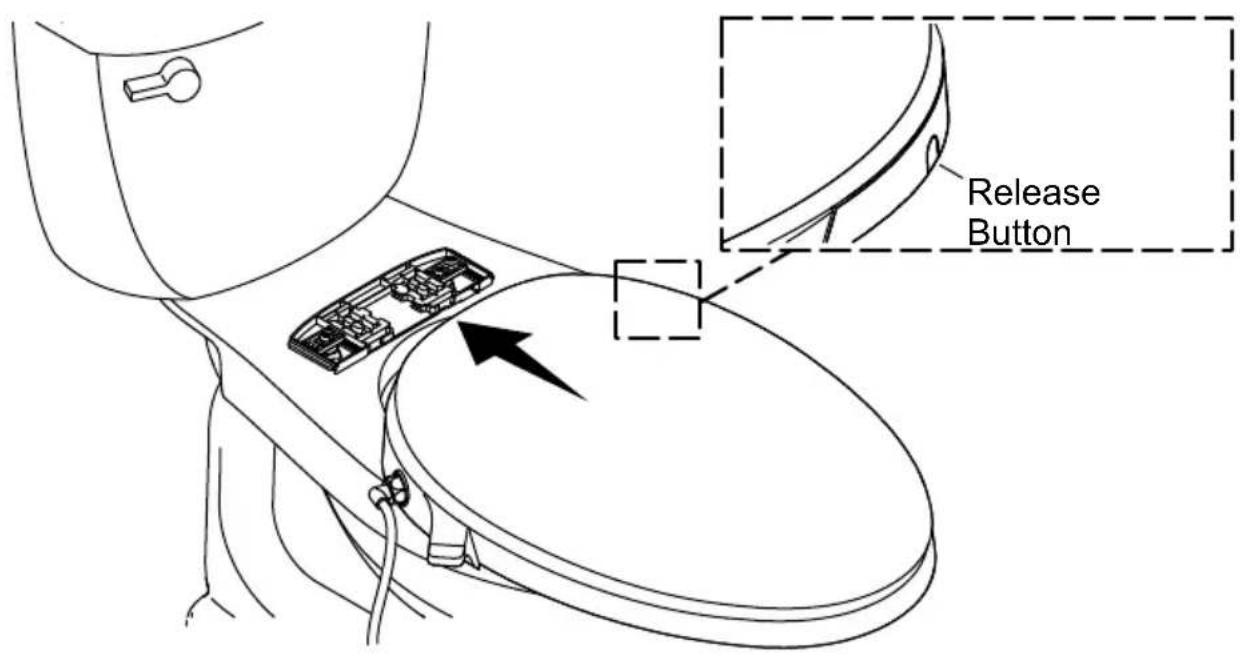
Release ButtonPosition the Seat
☐ Slide the seat onto the mounting plate until you feel it snap into place.
☐ Check the positioning of the seat. Adjust the position as needed until the seat aligns with the front edge of the bowl.
Adjust the Seat
□ Remove the seat by pressing in the release button and sliding the seat forward.
□ Reposition the mounting plate as needed.
Secure the Seat
□ Securely tighten the mounting plate bolts and nuts.
□ Slide the seat onto the mounting plate until you feel it snap into place.
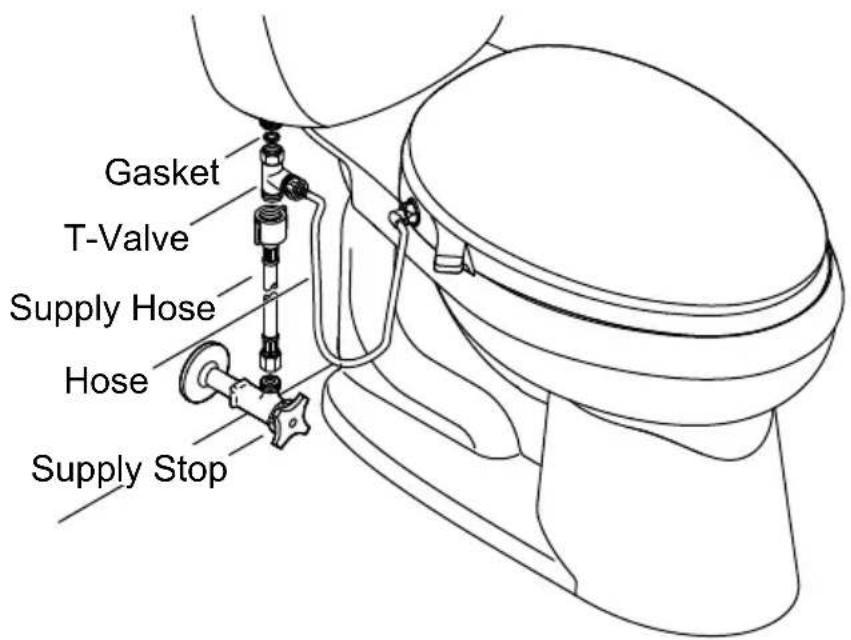
3. Connect the Water Supply
text_image
Gasket T-Valve Supply Hose Hose Supply Stop
CAUTION: Risk of property or product damage. Pushing or pulling on the water connection may cause water leakage.
NOTICE: Use care to avoid cross-threading or overtightening the connections. Use an adjustable wrench to tighten one-quarter turn past hand-tight.
□ Connect the T-valve to the seat hose.
☐ If needed, connect the supply hose to the supply stop.
□ Connect the supply hose to the T-valve.
□ Verify that the gasket is installed inside the T-valve.
□ Connect the T-valve to the water inlet on the toilet tank.
□ Turn ON the water supply.
☐ Check all connections for leaks, and make adjustments as needed.
4. Check the Installation
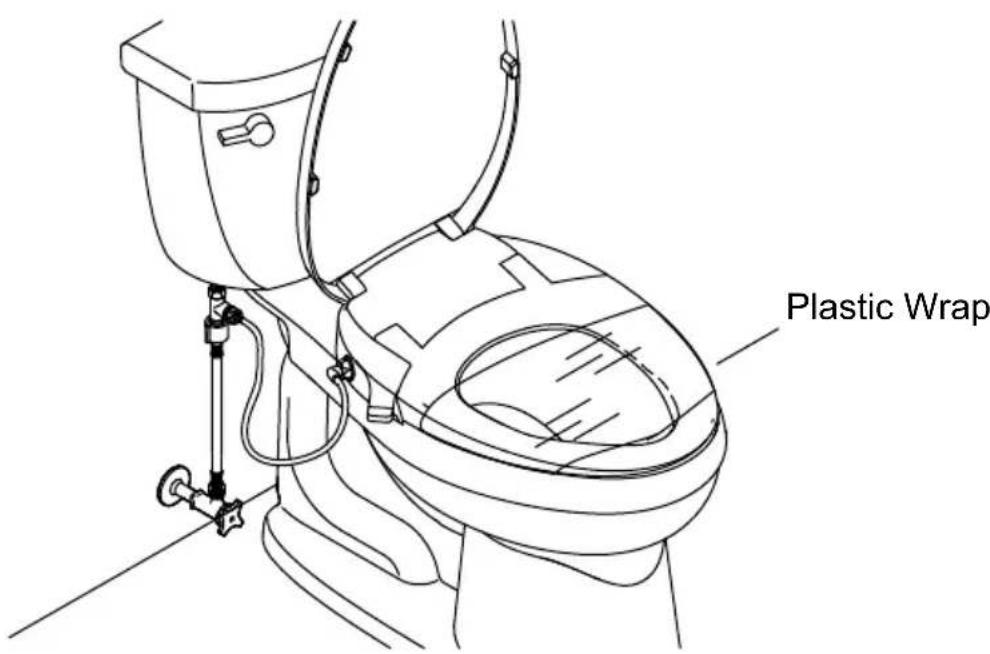
text_image
Plastic WrapNOTE: Covering the seat with plastic wrap is optional. The features can be tested while sitting on the cleansing seat or covering the wand with your hand.
□ Wrap the seat with plastic wrap. This will prevent water from spraying beyond the toilet while testing.
☐ Refer to the "Operation" section to test the features.
Operation
text_image
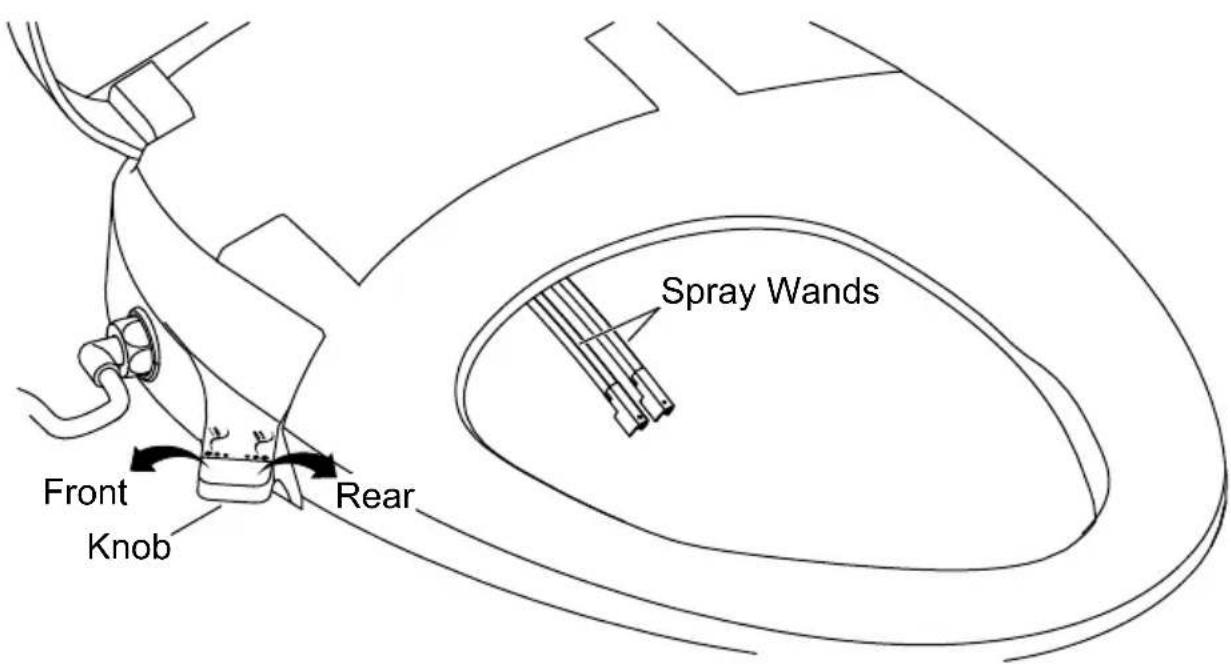
Front Knob Rear Spray WandsFront Wash
□ Twist the knob counterclockwise to activate the front wash feature and adjust the front wash water pressure.
Rear Wash
□ Twist the knob clockwise to activate the rear wash feature and adjust the rear wash water pressure.
Stop
□ Restore the knob to the default position to stop the front/rear wash.
Cleaning the Wands
text_image
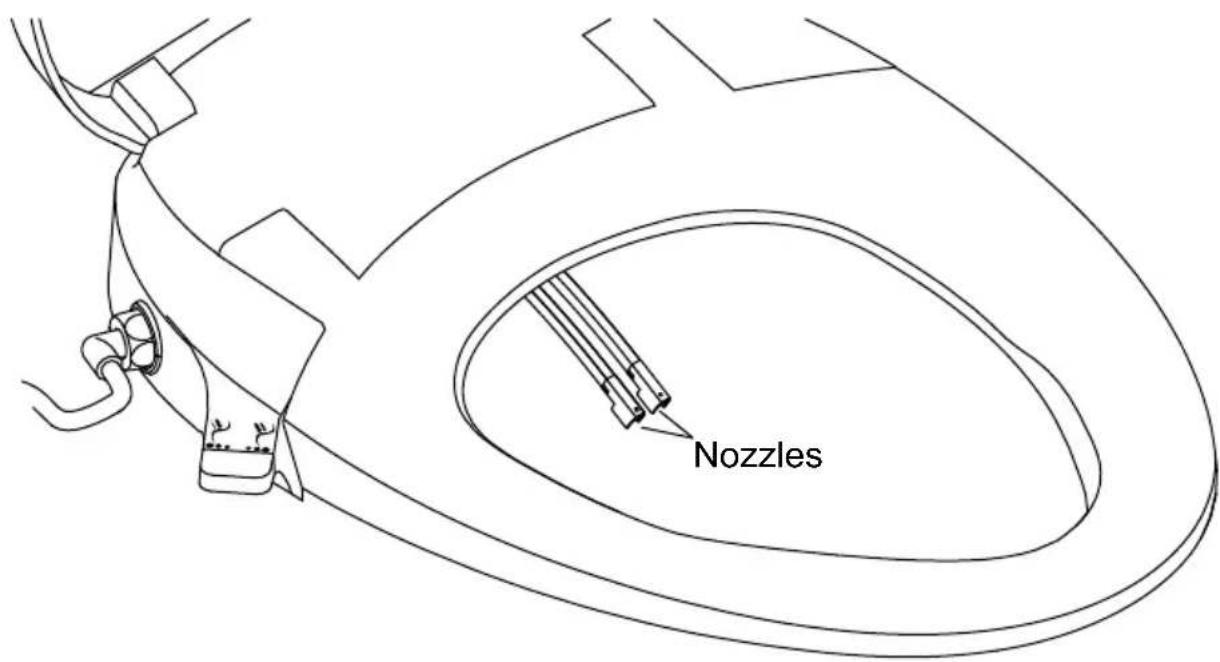
Nozzles□ Raise the lid and seat.
□ Manually extend one of the spray wands.
□ Firmly grip the wand, then pull the nozzle and remove.
□ Clean the nozzle with a soft-bristled brush and hot water.
□ With the outlet holes facing up, grasp the wand and firmly push the nozzle back into place.
□ Repeat for the remaining spray wand.
text_image
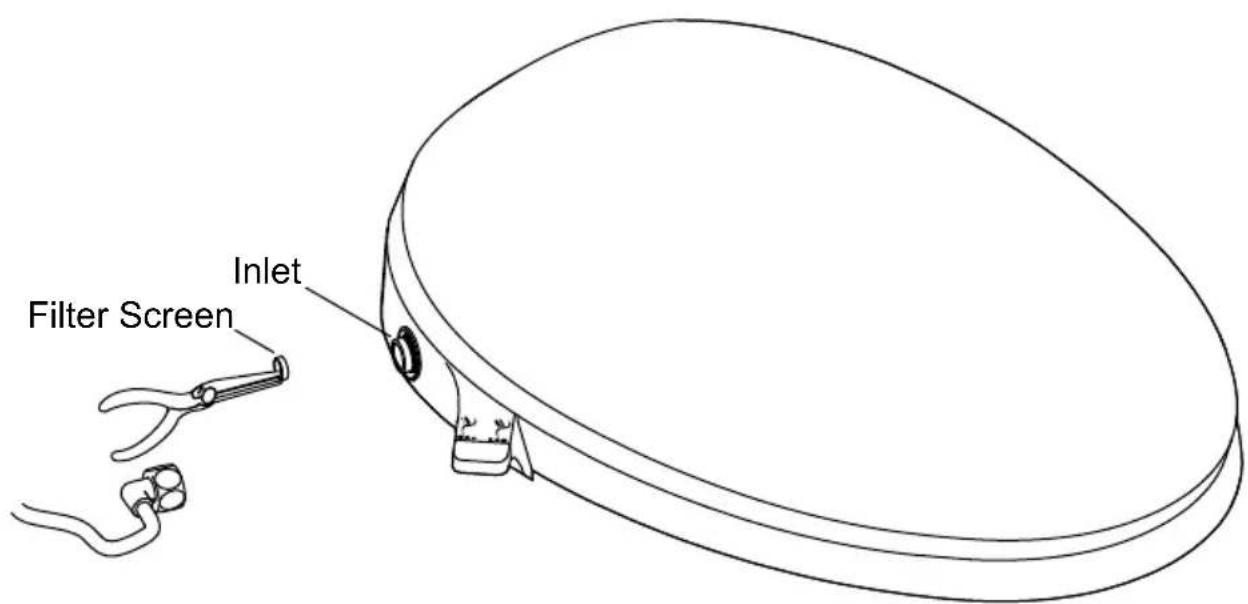
Inlet Filter Screen
CAUTION: Risk of product damage. Do not cross-thread the hose connection to the inlet.
NOTE: Clean the filter screen every 6 months or when there is a reduction in the maximum water flow from the spray wand.
□ Turn OFF the water at the supply stop.
☐ Disconnect the water supply hose from the seat connection.
□ Using long-nosed pliers, carefully remove the filter screen from the inlet.
□ Clean the filter screen with a soft-bristled brush.
□ Reinstall the filter screen.
□ Reconnect the water supply hose to the inlet, one-quarter turn past hand-tight.
□ Turn ON the water supply.
□ Check all connections for leaks, and make adjustments as needed.
text_image
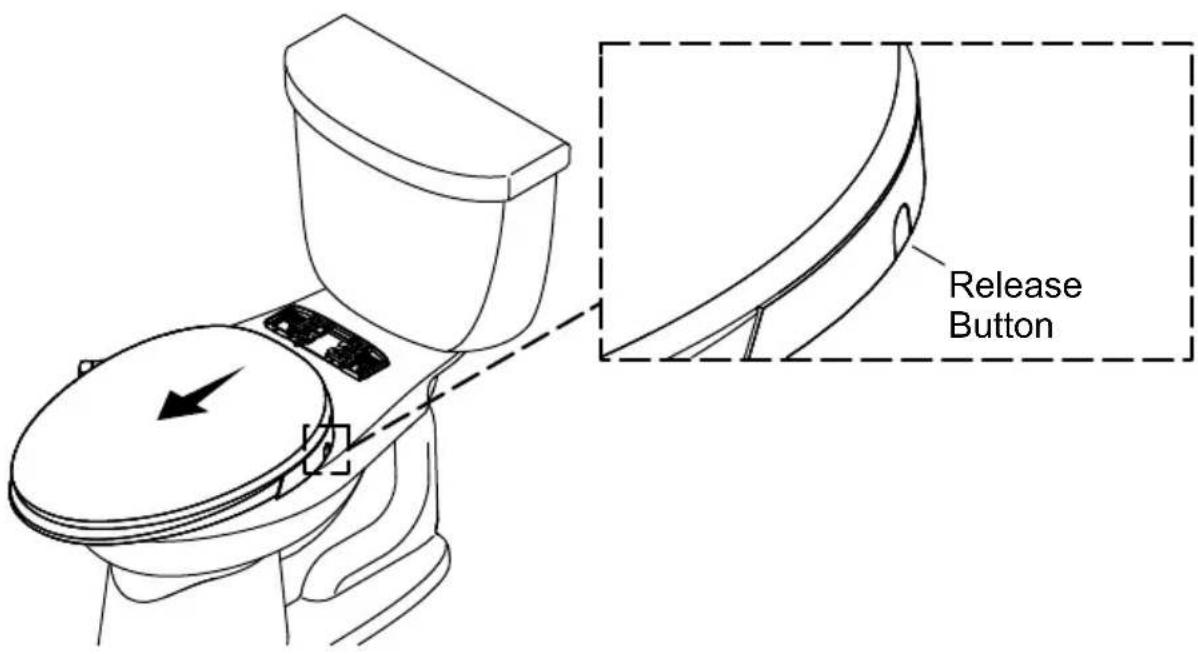
Release ButtonIMPORTANT! When removing the seat for cleaning, take care to avoid exerting any force on the hose connections.
For Cleaning
□ Press and hold the release button.
☐ Slide the seat forward to remove. Avoid putting pressure on the hoses.
□ Clean the area as needed.
☐ To reinstall, slide the seat on the mounting bracket.
For Servicing
□ Turn OFF the water at the supply stop.
☐ Flush the toilet to relieve any pressure from the supply hose.
☐ Disconnect the water supply hose from the T-valve.
☐ Slide the seat forward to remove.
□ When servicing is complete, reinstall the seat and reconnect all components.
natural_image
Illustration of four different tools: an adjustable wrench, screwdriver, screwdriver with screw holes, and a rolled-up sheet (no text or symbols)natural_image
Illustration of four different tools: a wrench, screwdriver, screwdriver with screw, and rolled-up sheet (no text or symbols)Envoltura de plástico
Antes de comenzar