
Apollo P10 - Projector ULTIMEA - Free user manual and instructions
Find the device manual for free Apollo P10 ULTIMEA in PDF.

| Brand | ULTIMEA |
| Model | Apollo P10 |
| Product type | Projector |
| Physical resolution | 1280 x 720p (HD) |
| Projection ratio | 1.35:1 |
| Recommended image size | 60" - 120" (diagonal) |
| Image formats | 16:9 / 4:3 |
| Built-in speaker | 1 x 3W |
| Power supply | 100-240V AC, 50/60Hz, 1.5A |
| Connectivity | HDMI, USB, AUX, Bluetooth, Wi-Fi (screen mirroring) |
| Keystone correction | Manual (vertical) |
| Focus | Manual via remote control (F-F^+ keys) |
| Screen mirroring | Wireless, wired (HDMI) or via app |
| Remote control | Yes, with 2 AAA batteries (included) |
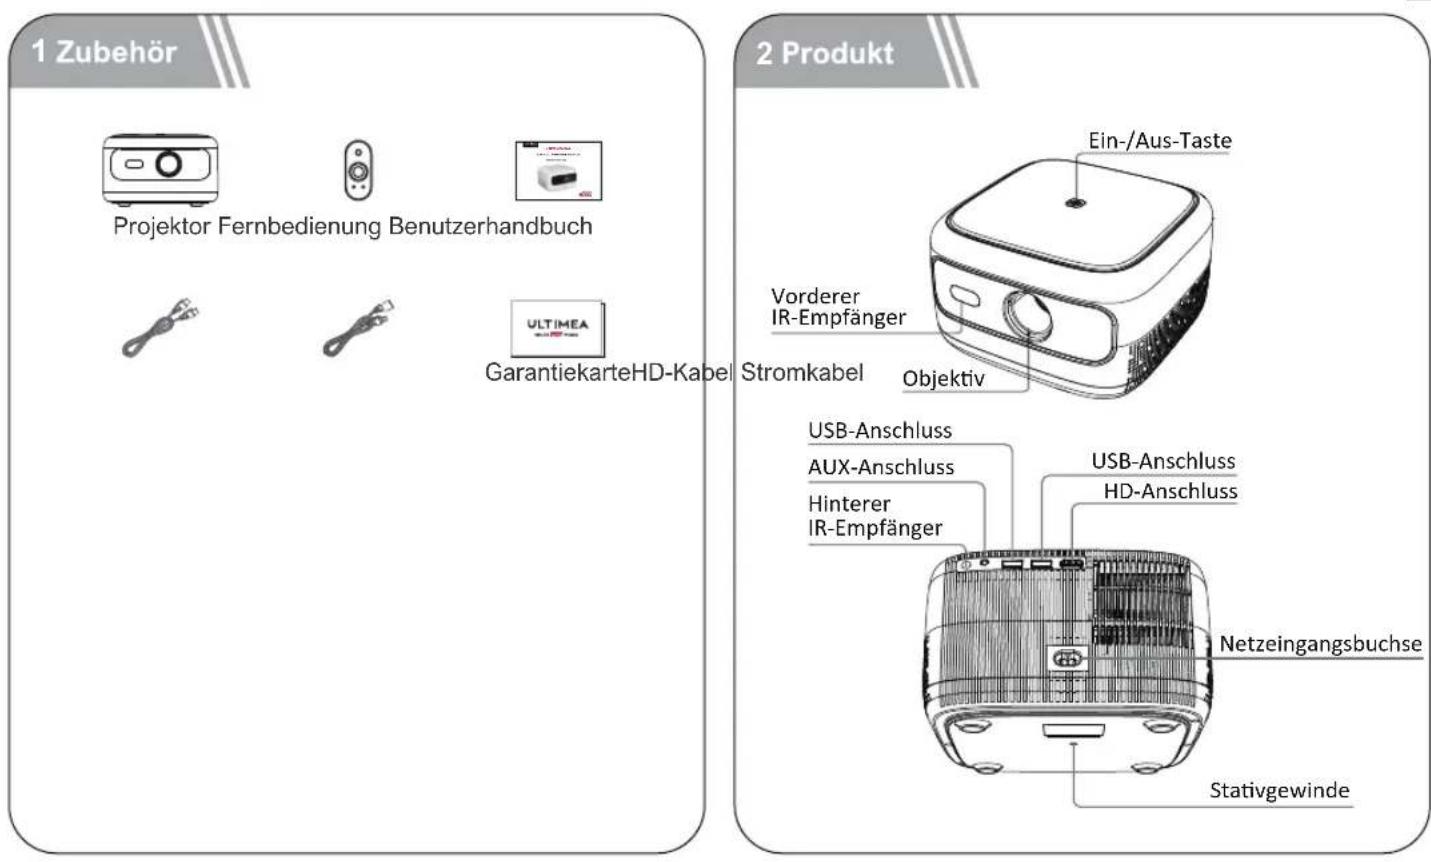
| Included accessories | Projector, remote control, power cable, HDMI cable, user manual |
| Safety distance | 20 cm minimum from body |
| Maintenance | Clean with a soft, dry cloth. Do not use chemicals. |
| Repairability | Spare parts available through after-sales service |
Frequently Asked Questions - Apollo P10 ULTIMEA
User questions about Apollo P10 ULTIMEA
0 question about this device. Answer the ones you know or ask your own.
Ask a new question about this device
Download the instructions for your Projector in PDF format for free! Find your manual Apollo P10 - ULTIMEA and take your electronic device back in hand. On this page are published all the documents necessary for the use of your device. Apollo P10 by ULTIMEA.
USER MANUAL Apollo P10 ULTIMEA
Warranty CardHD Cable
2 Product
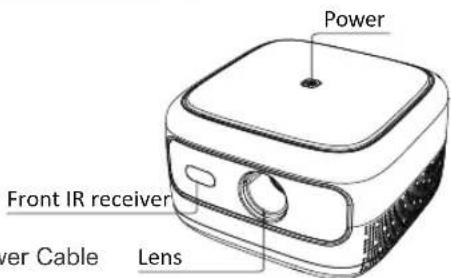
USB port
3.5mm AUX port
Back IR receiver
USB port
HD port
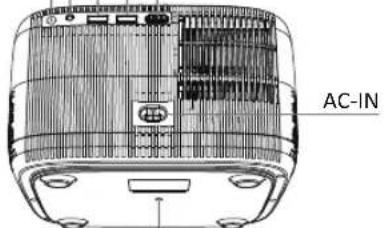
1/4 inch bracket screw hole
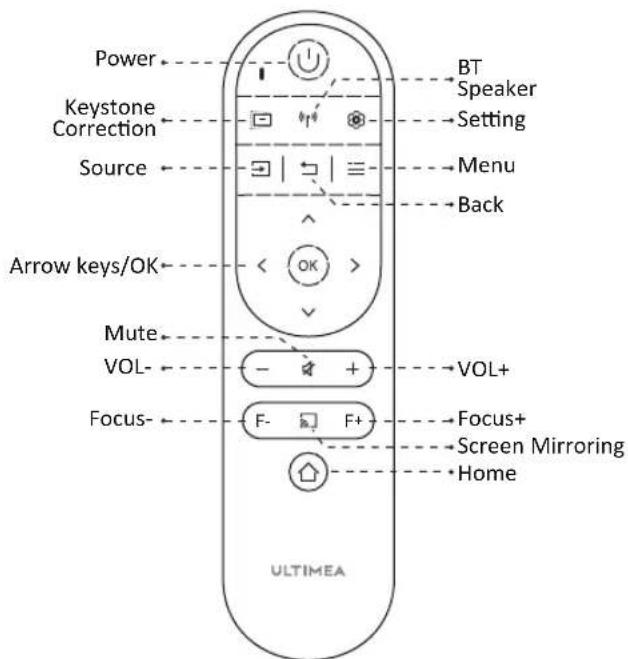
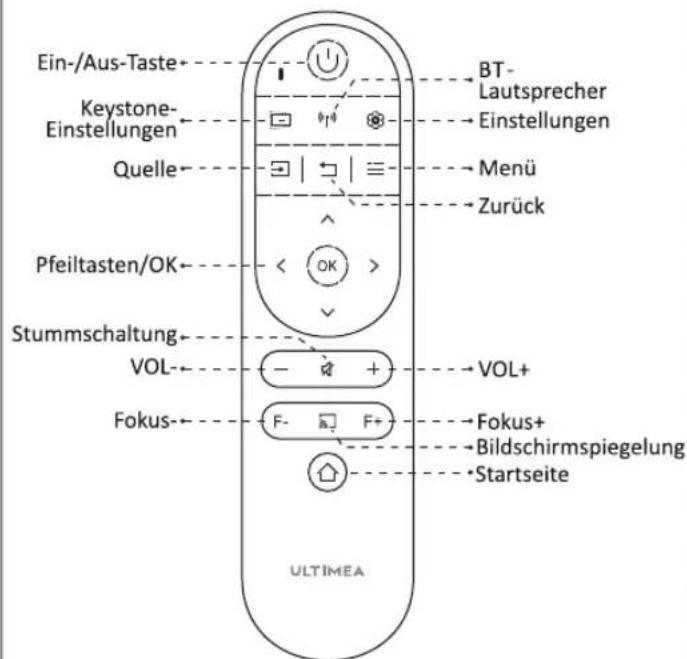
3 Remote Control
EN
LED Indication
| LED Status Description | |
| Steady Blue | Powered On |
| Steady Red | Standby Mode |
| Light Off | Powered Off |
4 Get Started
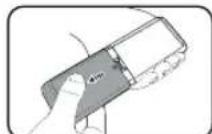
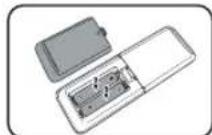
Prepare the Remote Control
- Open the battery holder cover of the remote control.
- Install two AAA batteries. Make sure to match the polarity (+/-) indicated and put back the cover.
- Please refer to the on-screen instructions to pair the remote control with Apollo P10.
- The distance between the remote and the projector should not exceed 10m / 33 ft.
EN
Power On/Off
- Inserting the power plug using the provided adapter.
- Press the power button or remote control power button once to power on.
- Press the power button or remote control power button twice to power off.
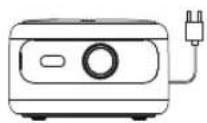
Plug the power cord into an outlet.
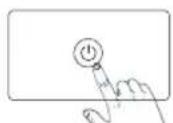
Press the power button to turn on the projector.

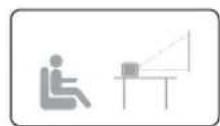
- Place Apollo P10 on a stable, flat surface in front of the projection surface.
- Please adjust the distance between Apollo P10 and the projection surface to get the desired projection image.
Projection Distance and Projection Image Size
| Projection Image Size (inch) | Distance (m) | Distance (ft) |
| 60 | 1.8 | 5.91 |
| 70 | 2.1 | 6.89 |
| 80 | 2.4 | 7.87 |
| 90 | 2.7 | 8.86 |
| 100 | 3 | 9.84 |
| 110 | 3.3 | 10.83 |
| 120 | 3.6 | 11.81 |
- Tips: The projection image size refers to the distance of the diagonal of the image size instead of the length of the image size.
Focus Manual
Press F^+ or F on the remote control to manually adjust the focus.Please carefully observe the focus icon until get a clear image.
Keystone Correction
When positioning your projector in a fixed location, use manual keystone correction. Press the keystone correction button to enter the Adjust menu and make vertical adjustments.
Keystone Correction Reset
To restore the default settings, press the button to go to enter the Adjust menu, select [Reset] and confirm.
Zoom in/out
Press, Select [window zoom] on the Option menu to adjust the screen size.
5 Projection Settings
Desktop Front Projection Ceiling Front Projection

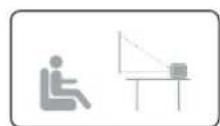
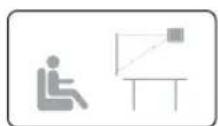
Desktop Rear Projection Ceiling Rear Projection
Press, select [Flip] on the Option menu, and select the projection direction.
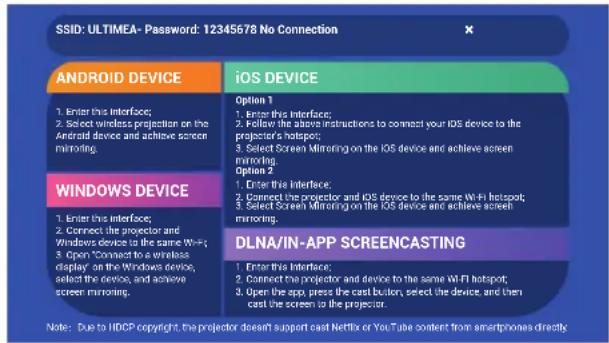
6 Screen Mirroring
Wireless Screen Mirroring
- Open to enter the interface.
- Follow the UI prompts to connect different devices.
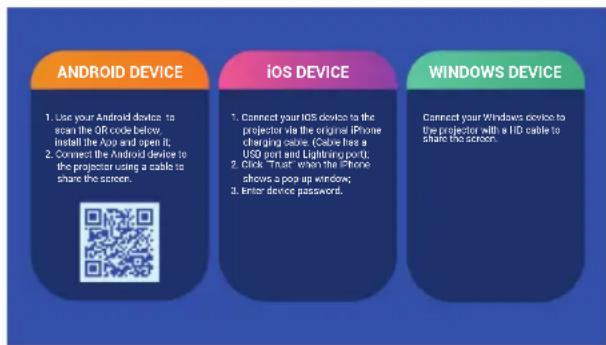
Wired Screen Mirroring
- Open E to enter the interface.
- Follow the UI prompts to connect different devices.
In-app Screen Mirroring
- Open to enter the interface.
- Make sure that the projector and devices are connected to the same wifi, and follow the UI prompts to use in-app screen mirroring.
Note: Due to HDCP copyright, the projector doesn't support cast Netflix or YouTube content directly.
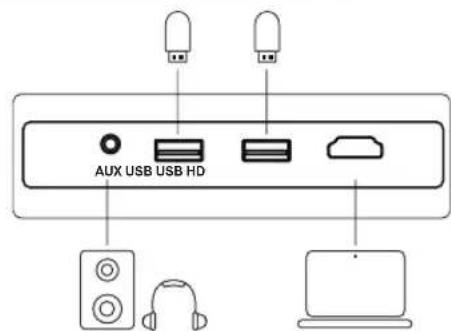
7 Wired Connections
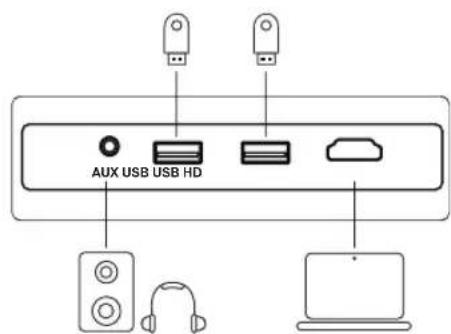
Play from an HD Playback Device
This Apollo P10 supports connections with various HD playback devices
such as PC, TV stick, TV box, DVD player, set-top box (STB), game console or other devices.
① Connect this projector to an HD playback device with an HD cable.
② Press the Souce button on the remote control, select [HD] and confirm.
Play from USB Storage Device
With Apollo P10, you can enjoy music, video, and pictures, or install apps that are stored on a USB storage device.
Insert the USB storage device, select the type you want to play on the home page, select and confirm the file you plan to play.
Play Through External Sound Devices Via AUX Cable
① Connect one end of the 3.5mm AUX cable to the AUX port on this projector.
② Connect the other end of the 3.5mm AUX cable to the AUX port on headphones or external speakers.
③ Playback on the projector.
8 BT Connection
Connect external sound devices via BT
If you want to connect BT speakers/headphones, select on the home page, find the BT device and pair it.
BT speaker
Press source, select [BT Speaker] to enter the page, and connect your device to the projector.
9 Specifications
Native Resolution: 1280^*720p
Speaker Drivers: 3W*1
Throw Ratio: 1.35:1
Aspect Ratio: 16:9 / 4:3
Recommended Screen Size: 60"-120"
Power Consumption: 45W
Power Input: 100-240V AC, 50-60Hz 1.5A
3 Fernbedienung
LED-Anzeige

Port USB
Port AUX 3.5mm
Consummation electrode: 45W
7 Concessioni cablate
This device contains licence-exempt transmitter(s)/receiver(s) that comply with Innovation, Science and Economic Development Canada's licence-exempt RSS(s).
Operation is subject to the following two conditions:
(1) This device may not cause interference.
(2) This device must accept any interference, including interference that may cause undesired operation of the device.
This device complies with Part 15 of the FCC Rules. Operation is subject to the following two conditions:
(1) This device may not cause harmful interference.
(2) This device must accept any interference received, including interference that may cause undesired operation.
FCC Radiation Exposure Statement:
This equipment complies with FCC radiation exposure limits set forth for an uncontrolled environment. This equipment should be installed and operated with minimum distance 20cm between the radiator&your body.
WARNING
Changes or modifications not expressly approved by the party responsible for compliance could void the user's authority to operate the equipment.
NOTE: This equipment has been tested and found to comply with the limits for Class B digital device, pursuant to Part 15 of the FCC Rules. These limits are designed to provide reasonable protection against harmful interference in a residential installation. This equipment generates uses and can radiate radio frequency energy and, if not installed and use in accordance with the instructions, may cause harmful interference to radio communications.
However there is no guarantee that interference will not occur in a particular installation. If this equipment does cause harmful interference to radio or television reception, which can be determined by turning the equipment off and on, the user is encouraged to try to correct the interference by one or more of the following measures: Reorient or relocate the receiving antenna.
Increase the separation between the equipment and receiver.
Connect the equipment into an outlet on a circuit different from that to which the receiver is connected.
Consult the dealer or an experienced radio/TV technician for help.
The device has been evaluated to meet general RF exposure requirement. The device can be used in portable exposure condition without restriction.
Declaration of Conformity
We (Manufacturer is responsible for this declaration) Ultimea Technology (Shenzhen) Limited 20th Floor, Building 4, Tianan Cloud Park, Bantian St., Longgang District, Shenzhen, China Declare under our sole responsibility that the product
Trade name: ULTIMEA
Equipment: Projector
Model No.: U0200
To which this declaration relates is in conformity with the essential requirement set out in the Council Directive on the Approximation of the laws of the Member States relating to LVD Directive (2014/53/EU)&Rohs (2011/65/EU) product is responsible to affix CE marking, the following standards were applied:
EN IEC 62311:2020
IEC 62321-3-1:2013
ETSI EN 301 489-1
IEC 62321-5:2013
V2.2.3(2019-11)ETSI EN 301 489-17
IEC 62321-4:2013+AMD1:2017
V3.2.4(2020-09)EN 55032:2015
IEC 62321-6:2015
EN 55035:2017
IEC 62321-7-2:2017
EN 61000-3-2:2019
IEC 62321-6:2015
EN 61000-3-3:2013+A1:2019
IEC 62321-8:2017

Date: 2024.03.01
ULTIMEA
Apollo P10 Video Projector Model No.:U0200

Ultimea GmbH
Buchenring 57,22359 Hamburg, Germany

UK CROSSBORDER LIMITED
7 Bell Yard London WC2A 2JR, UK United Kingdom
Made in China
Manufacturer: Ultima Technology (Shenzhen) Limited
Address: 20th Floor, Building 4, Tianan Cloud Park, Bantian St., Longgang District, Shenzhen, China 518000
@Dynamic Inc. All rights reserved, registered in the United States and other countries.
9804 Crescent Center Drive, Suite 604, Rancho Cucamonga, CA 91730

- Product
- Remote Control
- Get Started
- Prepare the Remote Control
- EN
- Power On/Off
- Focus Manual
- Keystone Correction
- Keystone Correction Reset
- Zoom in/out
- Projection Settings
- Screen Mirroring
- Wireless Screen Mirroring
- Wired Screen Mirroring
- In-app Screen Mirroring
- Wired Connections
- Play from an HD Playback Device
- Play from USB Storage Device
- Play Through External Sound Devices Via AUX Cable
- BT Connection
- Connect external sound devices via BT
- BT speaker
- Specifications
- Fernbedienung
- FCC Radiation Exposure Statement:
- WARNING
- Declaration of Conformity
- ULTIMEA
Brand : ULTIMEA
Model : Apollo P10
Category : Projector