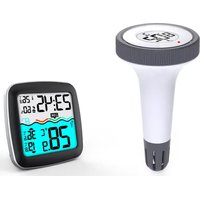
WS 9059 - Temperature Controller Techno Line - Free user manual and instructions
Find the device manual for free WS 9059 Techno Line in PDF.


| Product Type | Wireless temperature controller with outdoor sensor |
| Brand | Techno Line |
| Model | WS 9059 |
| Station power supply | 2 AAA batteries (LR03) |
| Outdoor sensor power supply | 2 AAA batteries (LR03) |
| Indoor temperature range | -9.9 °C to 49.9 °C |
| Outdoor temperature range | -39.9 °C to 69.9 °C |
| Indoor humidity range | 20 % to 95 % RH |
| Transmission frequency | 433.92 MHz |
| Number of channels | 3 |
| Transmission range in open field | 60 m |
| Display | Time, temperature, humidity, comfort icon, MAX/MIN indicators |
| Time format | 12 h or 24 h |
| Daily alarm | Yes, with snooze |
| Memory of max/min values | Yes, cleared at midnight |
| Low battery indicator | Yes, for station and sensor |
| Sensor usage | Submerged to measure pool temperature |
| Cleaning | Soft dry cloth, avoid chemical products |
| Safety | Do not immerse the station, respect battery polarities, keep out of reach of children |
| Repairability | Replaceable batteries, no other user-serviceable parts |
Frequently Asked Questions - WS 9059 Techno Line
User questions about WS 9059 Techno Line
0 question about this device. Answer the ones you know or ask your own.
Ask a new question about this device
Download the instructions for your Temperature Controller in PDF format for free! Find your manual WS 9059 - Techno Line and take your electronic device back in hand. On this page are published all the documents necessary for the use of your device. WS 9059 by Techno Line.
USER MANUAL WS 9059 Techno Line
WS 9059 – instruction manual
Overview:

Station
1 - Touch button (snooze/alarm ON or OFF)
2 - Time
3 - Comfort level display
4 - Remote sensor channel
5 - TX temperature
6 - INDOOR temperature
7 - INDOOR humidity
8 - TX temperature MAX. value
9 - TX temperature MIN. value
10 - Battery compartment cover
11 - Wall mounting hole
Outdoor sensor
A - Temperature sensor
B - Battery box
C - Main control module
D - Waterproof rubber ring
E - Lens
F - Locking cover
G - Positioning pin A
H - Positioning pin B
I - Transmitting antenna
J - °C/°F selection switch
K - Channel selection switch
L - LED indicator for signal transmitting
M - Channel
N - Temperature value
O - Opening direction
P - Closing direction
Features:
• Time in optional 12/24 hour format
• Daily alarm with snooze function
• Swimming pool temperature detection
- Comfort level display
- Low battery indicate
• Temperature display in optional °C /°F
- Maximum / Minimum temperature and humidity record and query
- Can take up to three outdoor transmitters
- Indoor humidity range: 20%RH \~ 95%RH
- Temperature measurement ranges: Indoor: -9.9°C \~ 49.9°C Outdoor: -39.9°C \~ 69.9°C
- Wireless parameter:
3 Channels selectable
433.92MHz RF transmitting frequency
60 meter transmission range in an open area
• Power Supply: Station: 2 x LR03 size AAA Sensor: 2 x LR03 size AAA
Initial operation
- Open the Main Station battery compartment cover
- Insert 2 x AAA batteries observing polarity 【 “+” and “-” marks】
- When you insert the batteries, all icons on the LCD will light up for 3 seconds, and you will hear a beep tone, then detect indoor temperature & humidity.
- The Main Station will now start to make a connection to the remote sensor, this operation takes about 3 minutes and will display by a flashing reception RF antenna symbol
- This now, Open the remote sensor battery box, Insert 2 x AAA batteries observing polarity 【 “+” and “−” marks】, Choose the temperature unit and channel you need.
- The temperature unit °C/°F can be selected by turning the switch “J”, the channel can be selected by turning the switch “K”
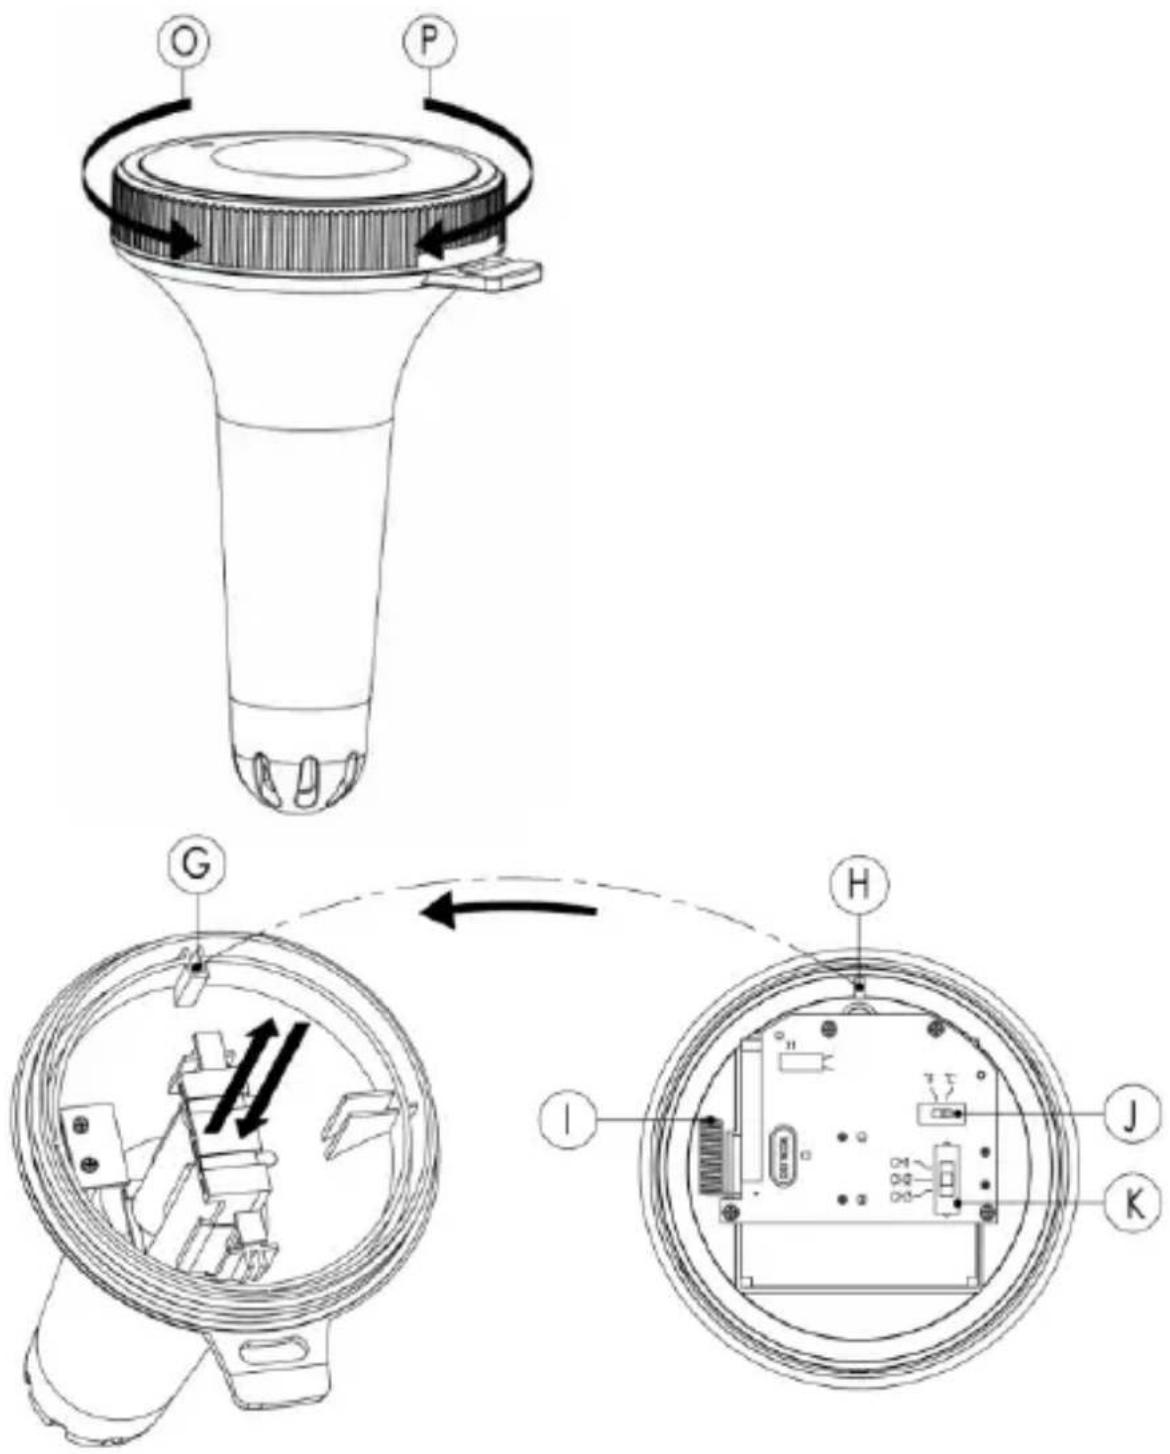
- After disassembly, do not touch other components, especially the antenna "I", pay attention to the direction of the slot when installing the battery box. After setting, align "H" with "G", cover the lens and waterproof ring, and lock the cover tightly.
- This pairing mode only takes 3 minutes, if the pairing fails after more than 3 minutes, you need to press and hold the "CH" button for 2 seconds to re-enter 3 minutes pairing mode.
• After successful pairing, the remote sensor can be put into
the swimming pool to detect its water temperature.
Manual time setting
- In normal mode, press and hold MODE button for 2 seconds, into the setting mode, the set item will blink display. Press “+” or “-” buttons to adjustment the value, Press the MODE button to confirm the item has been set and go to the next one, the sequence of setting items is as follows: TIME format(12/24HR) → HOUR → MINUTE
- Press the MODE button to confirm the last item to end the setting procedures, then it will return to the normal mode.
Note:
If there is no valid operation within 20 seconds, it will automatically return to normal time mode from the set mode.
Setting the daily alarms
- In normal mode, touch the button “ z^z · ” once, can set the alarm ON or OFF, LCD display the “icon, the alarm function is ON, Then touch once “” button, the “” icon will disappears from the display, the alarm function is OFF.
- In normal mode, press the “MODE” button, LCD displays alarm time. Within 5 seconds of the alarm time display, press and hold the “MODE” button for 2 seconds until hour of the alarm time starts to flash. Use the “+” and “-” buttons to set the required hour.
- Press the “MODE” button to confirm your setting, the minute of the alarm time starts to flash. Use the “+” and “-” buttons to set the required minute.
- Press the “MODE” button to confirm your setting and to end the setting procedure.
Notes:
- If there is no valid operation within 20 seconds, it will automatically return to normal time mode from the alarm time set mode.
- The alarm will sound for 2 minutes if you do not deactivate it by pressing any button. In this case the alarm will be repeated automatically after 24 hours.
- Rising alarm sound (crescendo, duration: 2 minutes)
changes the volume 4 times whilst the alarm signal is heard.
Switching off the alarm signal
When the alarm is ringing, press any button except the “z”·Ω to stop the alarm signal. It is not necessary to reactivate the alarm. It will ring again this time next day.
Snooze function
When the alarm is ringing, touch the “z” button and the alarm mode will to get to SNOOZE mode. The alarm signal sounds again after 8 minutes.
RF Transmission Procedure
- The RX automatically start receiving transmission from remote sensor for pool temperature after batteries inserted.
- The remote sensor will automatically transmit temperature signal to the RX Station after batteries inserted.
- If the RX failed to receive transmission from remote sensor (“- -.-”display on the LCD), press and hold “CH” button for
2 seconds to receive transmission manually, RF icon flashes on the LCD.

- Press "CH" button to query CH2, CH3 data or cyclic display, When the symbol G appears, it means that the data of three channels will be displayed circularly.
Query Maximum/minimum numerical value
- When the indoor / outdoor temperature and humidity are shown in the LCD, The production began to record temperature and humidity maximum and minimum numerical value.
- Press once MEM button, the LCD will display maximum value of temperature and humidity, The LCD will display the minimum value of temperature and humidity if you press once MEM button again when the maximum value is displayed. At the same time, there are “MAX” or “MIN” displayed on the LCD.
-
The arrow in the lower right corner of the screen indicates the maximum and minimum outdoor temperature:
-
The symbol indicates the maximum temperature
- The symbol indicates the minimum temperature
- The temperature and humidity maximum/minimum value will RE records after press and hold MEM button 2 seconds, at the same time, there will be "- - ." displayed in the LCD 2 second.
- The memory value of the day will be automatically cleared at 0:00 every night.
Note:
If the temperature reading is below ranges, the LL.L will be displayed. If the temperature reading is above ranges, the HH.H will be displayed.
Comfort level
The temperature of the remote sensor is below 20^ C
The temperature of the remote sensor is Between 20^ C and 30^ C
The temperature of the remote sensor is above 30^ C
Low battery indicate
- When the symbol of low battery appears in the INDOOR, it means that the RX needs to be replaced with new batteries.
- When the symbol of low battery appears in the OUTDOOR, it means that the remote sensor needs to be replaced with new batteries.
Declaration of conformity
Hereby, Technotrade declares that this product WS 9059 is in compliance with the essential requirements and other relevant provisions of Directive 2014/53/EU and ROHS 2011/65/EC. The original EU declaration of conformity may be found at: www.technoline.de/doc/4029665090597
Specifications
Station:
Batteries: 2 x AAA Micro LR03
(not included)
Temperature measuring range: -9.9^ to 49.9^
Humidity measuring range: 20%RH to 95%RH
Pool sensor:
Batteries: 2 x AAA Micro LR03
(not included)
Temperature measuring range: -39.9^ to 69.9^
Transmission frequency: 433 MHz
Maximum transmission power: 8 dBm
Precautions
- This unit is intended to be used only indoors.
- Do not subject the unit to excessive force or shock.
- Do not expose the unit to extreme temperatures, direct sunlight, dust or humidity.
- Do not immerse in water.
- Avoid contact with any corrosive materials.
- Do not dispose this unit in a fire as it may explode.
- Do not open the inner back case or tamper with any components of this unit.
Batteries safety warnings
- Use only alkaline batteries, not rechargeable batteries.
• Install batteries correctly by matching the polarities (+/-).
• Always replace a complete set of batteries. - Never mix used and new batteries.
- Remove exhausted batteries immediately.
- Remove batteries when not in use.
- Do not recharge and do not dispose of batteries in fire as the batteries may explode.
- Ensure batteries are stored away from metal objects as contact may cause a short circuit.
- Avoid exposing batteries to extreme temperature or humidity or direct sunlight.
- Keep all batteries out of reach from children. They are a choking hazard.
Use the product only for its intended purpose!
Consideration of duty according to the battery law
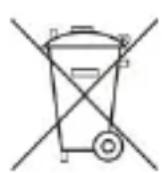
Old batteries do not belong to domestic waste because they could cause damages of health and environment. You can return used batteries free of charge to your dealer and collection points. As end-user you are committed by law to bring back needed batteries to distributors and other collecting points!
Consideration of duty according to the law of electrical devices

This symbol means that you must dispose of electrical devices separated from the General household waste when it reaches the end of its useful life. Take your unit to your local waste collection point or recycling centre. This applies to all countries of the European Union, and to other European countries with a separate waste collection system.
Piles : 2 piles LR03 AAA Micro (non fournies)
Piles : 2 piles LR03 AAA Micro (non fournies)
natural_image
Symbolic icon of a person walking with arrows, enclosed in a circle (no text or symbols)- WS 9059 – instruction manual
- Station
- Outdoor sensor
- Features:
- Initial operation
- Manual time setting
- Setting the daily alarms
- Notes:
- Switching off the alarm signal
- Snooze function
- RF Transmission Procedure
- Query Maximum/minimum numerical value
- Comfort level
- Low battery indicate
- Declaration of conformity
- Specifications
- Pool sensor:
- Precautions
- Batteries safety warnings
Brand : Techno Line
Model : WS 9059
Category : Temperature Controller