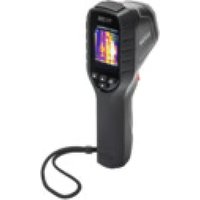
TV 298 - Infrared thermometer Testboy - Free user manual and instructions
Find the device manual for free TV 298 Testboy in PDF.


| Product Type | Infrared Thermal Camera |
| Brand | Testboy |
| Model | TV 298 |
| Infrared Resolution | 96 x 96 pixels |
| Visual Camera Resolution | 640 x 480 pixels |
| SuperIR (Contour Optimization) | 240 x 240 pixels |
| Temperature Range | -20 °C to 550 °C (-4 °F to 1022 °F) |
| Accuracy | ±2 °C or ±2% (whichever is greater) |
| Adjustable Emissivity | 0.01 to 1.00 |
| Frame Rate | 25 Hz |
| Spectral Band | 7.5 - 14 μm |
| Display | 2.4 inch color LCD screen (240 x 320 pixels) |
| Image Modes | Thermal, Visual, Fusion |
| Color Palettes | White Hot, Black Hot, Rainbow, Iron Arc, Red Hot, Fusion |
| Internal Storage | 2 GB (internal flash memory) |
| Power Supply | Rechargeable battery 3.6 V / 3350 mAh, charging via USB-C (5 V/2 A) |
| Weight | 290 g |
| Dimensions | 196 x 117 x 59 mm |
| Protection Rating | IP54 |
| Operating Temperature | -10 °C to 50 °C |
| Storage Temperature | -40 °C to 70 °C |
| Package Contents | Carrying strap, USB-C cable |
| Care and Cleaning | Clean the lens with a soft, dry cloth. Do not use solvents. Protect from dust and moisture. |
| Safety | Do not point the laser or LED beam at eyes. Avoid explosive environments. |
| Repairability | Any unauthorized modification voids the warranty. Contact after-sales service for repairs. |
Frequently Asked Questions - TV 298 Testboy
User questions about TV 298 Testboy
0 question about this device. Answer the ones you know or ask your own.
Ask a new question about this device
Download the instructions for your Infrared thermometer in PDF format for free! Find your manual TV 298 - Testboy and take your electronic device back in hand. On this page are published all the documents necessary for the use of your device. TV 298 by Testboy.
USER MANUAL TV 298 Testboy

Taste
Function
Table of contents 19
Notes 20
Safety 20
General safety instructions 20
Introduction 23
Operation 23
Features 23
Operating environment 23
Camera structure 24
Charging the device 25
Switching on/off 25
Setting automatic shutdown 25
Live view 26
Display settings 27
Set image modes 27
Set colour palettes 28
Set level and span 28
Colour distribution 28
Display screen information 29
Temperature measurement 30
Set temperature measurement parameters 30
Set measuring tools 30
Set temperature alarm 31
Take and manage pictures 31
Take pictures 31
Display images 32
Export photos 32
Transfer device screen to PC 32
Maintenance 33
Set time and date 33
Set language 33
Save process logs 33
Format memory 33
Display device data 33
Restore device 33
Emission coefficient table 34
Technical 34
Notes
Safety

WARN
Sources of danger include mechanical parts that can cause serious injury to persons. There is also a risk of damage to objects (e.g. damage to the device).
WARNING
Electric shock can cause death or serious injury to persons and may also endanger the function of objects (e.g. damage to the device).
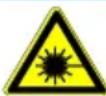
WARNING
Never point the laser beam/LED beam directly or indirectly at the eye through reflective surfaces. Laser radiation can cause irreparable damage to the eye.
General safety instructions

WARN
For safety and approval reasons (CE), unauthorised modification and/or alteration of the device is not permitted. To ensure safe operation of the device, you must observe the safety instructions, warning notices and the chapter "Intended use".
WARN
Please observe the following instructions before using the device:
Avoid operating the device near electric welding equipment, induction heaters and other electromagnetic fields. After abrupt temperature changes, the device must be allowed to adjust to the new ambient temperature for approx. 30 minutes before use in order to stabilise the IR sensor. Do not expose the device to high temperatures for long periods of time. Avoid dusty and humid environments. Measuring devices and accessories are not toys and must be kept out of the reach of children! In commercial facilities, the accident prevention regulations of the Association of Professional Safety Organisations for Electrical Installations and Equipment must be observed.

Please observe the five safety rules:
- Disconnect
- Secure against reconnection
- Check that the power is off (check that both poles are off)
- Earthing and short-circuiting
- Cover adjacent live parts
Intended use
The device is only intended for the applications described in the operating instructions. Any other use is not permitted and may result in accidents or destruction of the device. Such use will result in the immediate expiry of all warranty and guarantee claims of the operator against the manufacturer.

To protect the device from damage, please remove the batteries if the device is not going to be used for a long period of time.

We accept no liability for damage to property or personal injury caused by improper handling or failure to observe the safety instructions. In such cases, all warranty claims are void. An exclamation mark in a triangle indicates safety instructions in the operating instructions. Read the instructions completely before use. This device is CE-approved and therefore complies with the necessary guidelines.
We reserve the right to change specifications without prior notice. © 2025 Testboy GmbH, Germany.
Disclaimer

Damage caused by failure to follow the instructions will void the warranty! We accept no liability for any consequential damage resulting from this!
Testboy is not liable for damage resulting from
failure to follow the instructions, unauthorized modifications to the product, or replacement parts not manufactured or approved by Testboy, or the influence of alcohol, drugs, or medication.
result.
Accuracy of the operating instructions
These operating instructions have been compiled with great care. No liability is accepted for the accuracy and completeness of the data, illustrations and drawings. Subject to changes, printing errors and mistakes.
Disposal
Dear Testboy customer, with the purchase of our product, you have the option of returning the device to suitable collection points for electronic waste at the end of its life cycle.
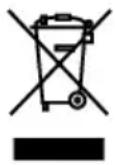
The WEEE regulates the return and recycling of old electrical appliances. Manufacturers of electrical appliances are obliged to take back and recycle electrical appliances that are sold free of charge. Electrical appliances must then no longer be disposed of in the "normal" waste stream. Electrical appliances must be recycled and disposed of separately. All appliances covered by this directive are marked with this logo.
Disposal of used batteries
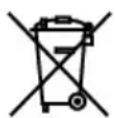
As an end user, you are legally obliged (Battery Act) to return all used batteries and rechargeable batteries; disposal in household waste is prohibited!
Batteries/rechargeable batteries containing harmful substances are marked with the symbols shown opposite, which indicate that they must not be disposed of with household waste.
The designations for the relevant heavy metal are:
Cd = cadmium, Hg = mercury, Pb = lead.
You can return your used batteries/rechargeable batteries free of charge to your local collection point or anywhere where batteries/rechargeable batteries are sold!
Quality certificate
All quality-related activities and processes carried out within the Testboy GmbH () are continuously monitored by a quality management system. The Testboy GmbH () also confirms that the test equipment and instruments used during calibration are subject to continuous test equipment monitoring.
Declaration of conformity
The product complies with the latest guidelines. Further information is available at www.testboy.de
Introduction
The product is a thermal imaging camera that combines centre point temperature measurement with a digital image overlaid with a heat map.
The thermal imaging function eliminates the need for time-consuming measurements of individual components, as is necessary with conventional spot thermometers (radiometers). Scan a wide area to display it as a mixed digital image with a superimposed thermal image, allowing you to quickly identify temperature problems that require closer investigation.
The device has a visual camera for better identification of problem areas. This allows you to switch from the thermal image to the visual display. Thermal images and visual images can be stored on the integrated memory to create measurement reports or print out the images. The product is very user-friendly. Simply switch it on and an image will be displayed after just a few seconds. The product is particularly suitable for maintaining electrical systems, heating, ventilation and air conditioning systems and other equipment, and enables problem areas to be identified quickly.
Operation
Features
- Colour display
- The adjustable emissivity and background reflection compensation improve measurement accuracy on partially reflective surfaces.
- Hot and cold spot marking allows the user to identify the areas with the highest and lowest temperatures in the infrared thermal image. The device supports multiple colour palettes, and you can select different palettes for vivid images. Alignment of visual and thermal image display. The device supports SuperIR for optimising object contours for better image display.
Operating environment
- Ensure that the operating environment meets the requirements of the device. The operating temperature of the device is -10 °C to 50 °C and the operating humidity must not exceed 95%. This device can only be used safely in regions below 2000 metres above sea level.
- Place the device in a cool and well-ventilated location.
- Do NOT expose the device to high electromagnetic radiation or dusty environments.
- Do NOT point the lens at the sun or any other bright light source.
- When using a laser device, ensure that the lens of the device is not exposed to the laser beam. Otherwise, it may burn out. The device is suitable for indoor and outdoor use, but must not be used in damp environments. The protection class is IP 54. The degree of contamination is 2.
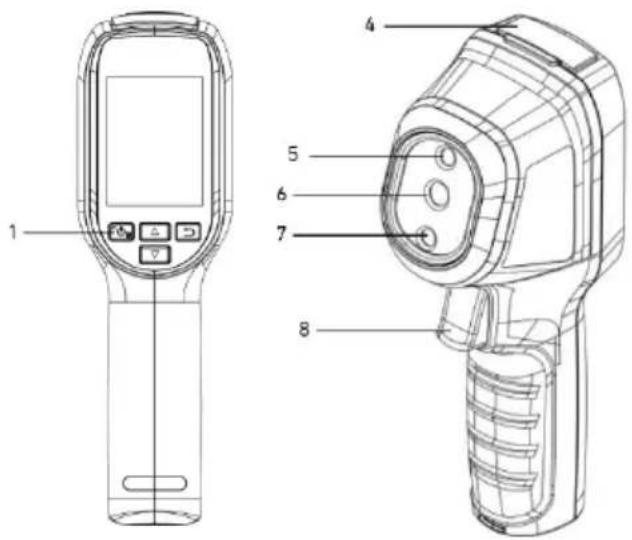
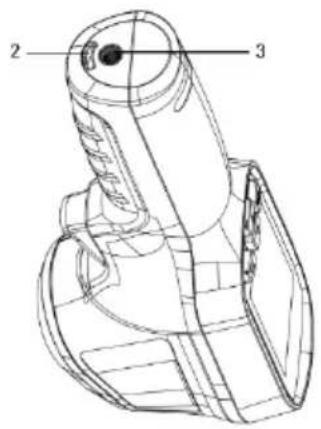
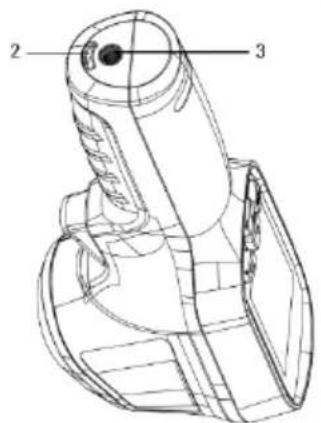
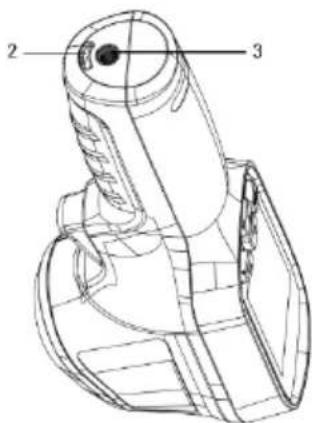
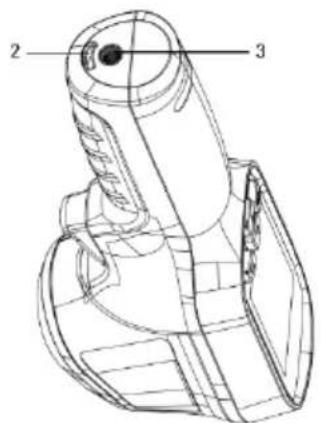
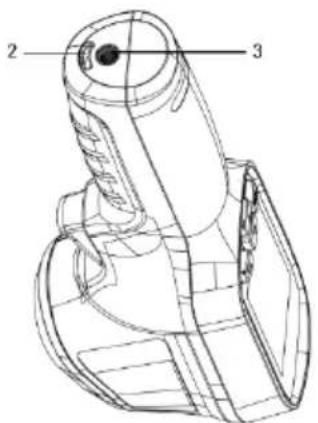
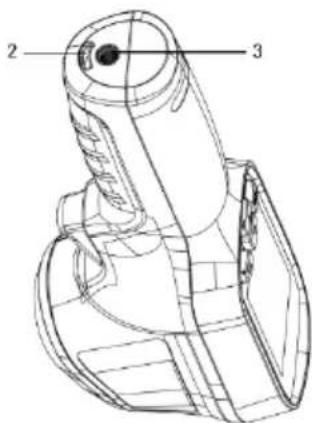
Camera structure
- Charge indicator:
Solid red: Charging cycle
Green light: Fully charged
- Hole for the wrist strap:
For attaching the hand strap
- Tripod mount:
Suitable for a 1/4"-20 tripod
- Type-C interface:
For charging the battery or exporting files
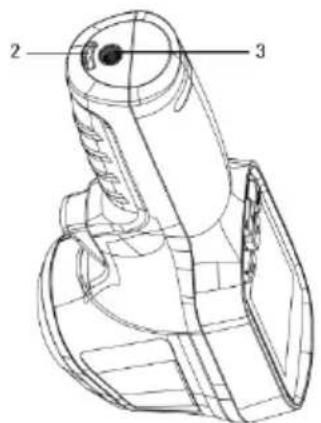
- Laser
- Thermal imaging lens
- Optical lens
- Shutter
In live view:
- Press: Take snapshots
- Press and hold: Locates the target with the laser light and triggers to take snapshots
In menu mode, press the shutter button to return to live view.
| Button | Function |
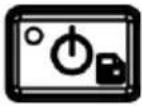 | Press and hold: Switch on/offPress: Display menu or confirm action |
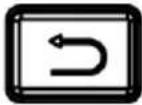 | Exit menu or return to previous menu |
 | In menu mode: Use △ and ▽ to select the Settings option.In live view mode: Press △ to change the image mode. Press ▽ to switch between palettes. |
 |
Charging the device
Connect the supplied USB cable and connect the device to the power supply via a power adapter to charge the device.
The power supply (not included) should meet the following standards:
• Output voltage/current: 5 VDC/2 A • Minimum output power: 10 W
Check the charging status on the power indicator:
• Red light: normal charging process • Flashing red: error during charging • Green light: fully charged

- The device has a built-in rechargeable battery. When charging the device for the first time, charge it for at least 3 hours while it is switched on.
- If the camera has not been used for a long time and is too low on power, we recommend charging it for at least 30 minutes before turning it on again.
- We recommend using the USB cable supplied for both charging and data transfer.
Switching on/off
Switching
Press and hold the power button for at least six seconds to turn on the device.

After switching on, it may take at least 30 seconds for the device to be ready for use.
Switching off
When the device is switched on, press and hold 📋 for about six seconds to switch it off.
Set automatic shutdown
In the Live view, press 🔍 and go to More settings > Auto power off to set the time until the device automatically turns off as required.
Set automatic sleep mode
In Live View, press and go to More settings > Auto sleep mode to set the wait time before the device automatically goes into sleep mode. If no button is pressed for a period longer than the set wait time, the device will automatically go into sleep mode. Press any button to wake up the device.
Live view
- Core temperature
- Status icons
- Display temperature range
- Max. temperature
- Min. temperature
- Real-time temperature
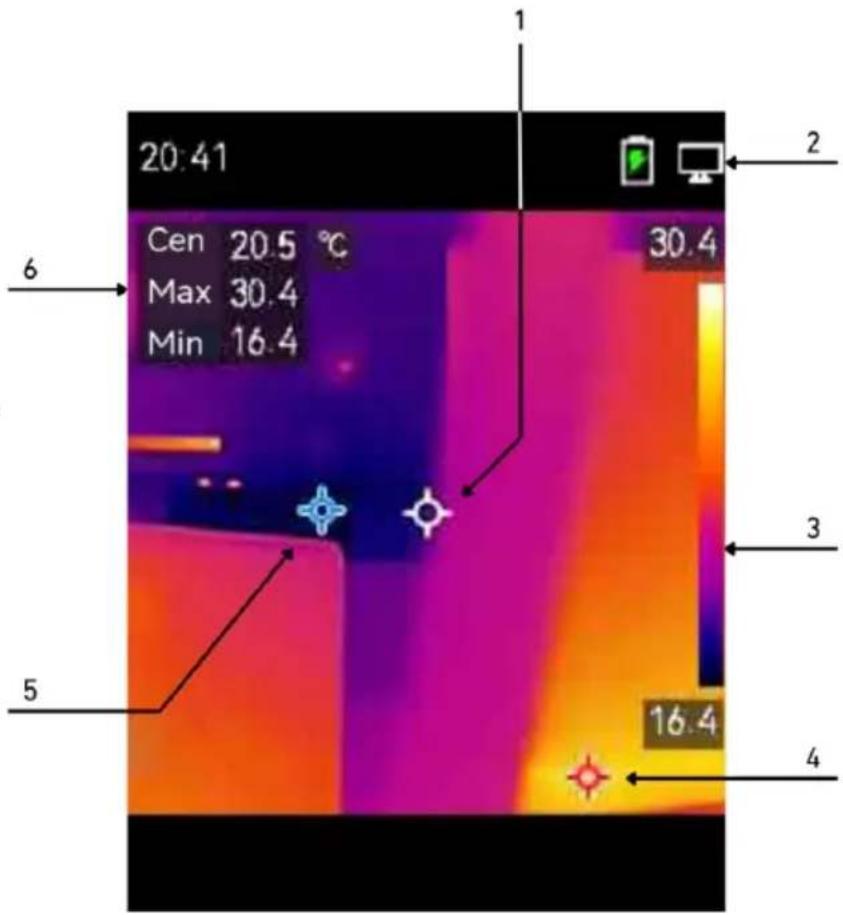
As this manual is updated regularly, the live view may differ slightly from the version for your specific camera model. Please refer to your camera for guidance.

Your camera performs self-calibration at regular intervals to optimise image quality and measurement accuracy. During this process, the image stops briefly and you will hear a "click" sound when a shutter moves in front of the detector. The message "Image is being calibrated..." appears in the top centre of the screen while the device is calibrating itself. Self-calibration occurs more frequently during the start-up process or in very cold or hot environments.
Display settings
Setting image modes
You can set different image modes for the device.
- You can select an image mode in the following way:
- Go to Settings > Image settings > Image mode and select a preferred image mode.
- Press △ in Live View to switch the image mode.
| Image modes | Description | Example |
| Thermal | In thermal mode, the device displays the thermal image view. | 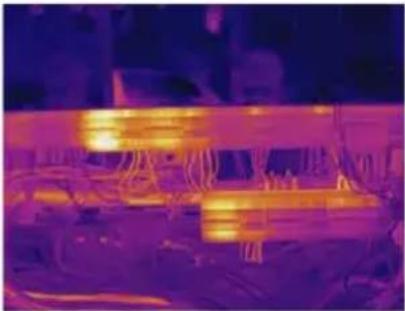 |
| Fusion | Thermal object image with visual contours. | 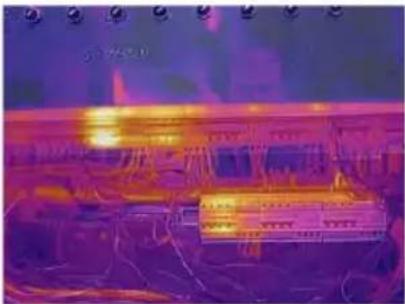 |
| Visual | Visual object image only. | 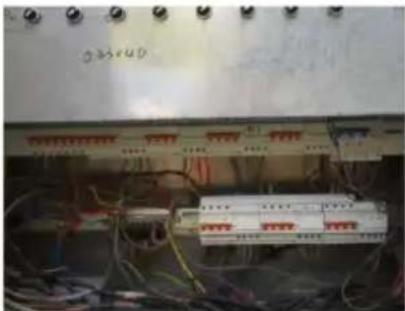 |
- When selecting fusion mode, you must select the distance under Image settings > Parallax correction according to the distance to the target so that the thermal and visual images overlap better.
- Press to save and exit
Set colour palettes
You can use the palettes to select the colours you want. You can switch palettes in the following ways:
- Go to Settings > Colour palettes to select a specific colour palette and press 📋 to save and exit.
- Press ▼ in Live View to switch palettes.
Set level and span
Set a display temperature range and the palette will only work for targets within that temperature range. You can achieve better image contrast by adjusting the Level and Span settings.
- In Live View, press 🔍 to display the menu.
- Press △ and select "Level & Span".
- Select Adjustment Mode and press to switch between automatic and manual adjustment.
• In Auto mode, the device automatically sets the display temperature range.
- In Manual mode, select Settings to open the settings menu. Press to lock or unlock the maximum and minimum temperatures, and press to set the unlocked value. Or unlock the maximum and minimum temperatures and press to increase or decrease the individual values while maintaining the temperature range.
- Press ↻ to save and exit.
Colour distribution
The colour distribution function automatically provides various image display effects in terms of level and range. The linear and histogram colour distribution modes can be selected for different application scenarios.
- Go to Image Settings > Colour Distribution.
- Select a colour distribution mode.
| Mode | Description | Example |
| Linear | Linear mode is used to detect small targets with high temperatures in a background with low temperatures. The linear colour distribution highlights and displays more details of high-temperature targets, which is useful for checking small, high-temperature defects such as cable connectors. | 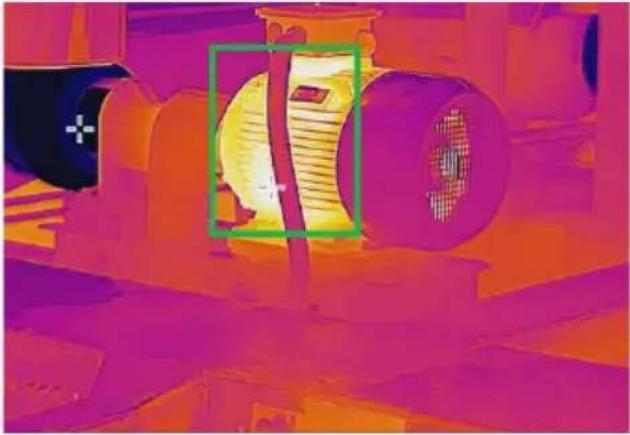 |
| Histogram | Histogram mode is used to detect temperature distribution over large areas. The histogram colour distribution highlights high-temperature targets and retains details of low-temperature objects in the area. This is well suited for detecting small, low-temperature targets such as cracks. | 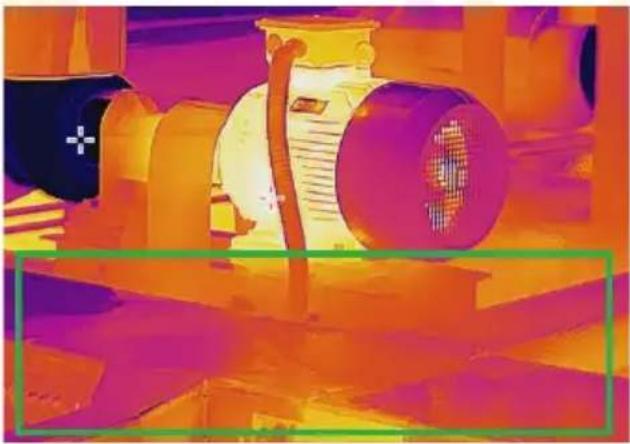 |
3. Tap ⇔ to save and exit the function.
Display screen information
Go to Settings > Display settings to enable or disable the display of information on the screen.
- Parameters: Temperature measurement settings such as target emissivity, temperature unit, etc.
Temperature measurement
The temperature measurement function provides the real-time temperature. The device displays the measurement results on the left side of the screen. This function is enabled by default.
Setting temperature measurement parameters
You can adjust the temperature measurement settings to increase the accuracy of the temperature measurement.
- Press in the live view to display the menu.
- Select the desired parameters with △ ▽
- Temperature range: Select the temperature measurement range. In auto switch mode, the device can detect the temperature and automatically switch the temperature measurement range.
- Emissivity: Activate Custom and select Emissivity to set the emissivity of the target, i.e. its effectiveness in emitting energy in the form of heat radiation, by pressing △. You can also select a preset emissivity. • Distance: Here you can set the distance between the target and the device.
- Unit: Go to Display settings > Unit and press 🔊 to set the temperature unit.
- Press ☐ to save and exit.
Set measurement tools
The device measures the temperature and can be set to display the centre spot, hot spot and cold spot.
- In Live View, press 🔍 to display the menu.
- Press △ to select display settings.
- Select the desired points to display their temperatures and press 🔍 to activate them.
• Hot: Display the hotspot in the scene and the maximum temperature. • Cold: Display the cold spot in the scene and the minimum temperature. • Centre: Display the centre spot in the scene and the average temperature.
- Press ☐ to save and exit.
Result:
The device displays the real-time temperature in the top left corner of the live view.
Set temperature alarm
Set the alarm rules and the device will sound an alarm when the temperature triggers the rule.
- In the Live View, press to display the menu.
- Press △ and select Alarm.
- Press to activate the function.
- Select Measurement to set the alarm rule. Select Alarm threshold to set the temperature threshold.
- Press ☐ to save and exit.
| Configure alarm rules | Set the alarm rule to Less than or Greater than.Set the threshold temperature for triggering the alarm. |
| Measure target temperature | Point the camera at the target in Live View to measure the temperature. |
| Output alarms | If the target temperature is above/below the threshold temperature, it is marked red/blue in the temperature display at the top left of the live view. |
Take and manage images
Take pictures
- In Live View, you can take pictures in the following ways:
• Press the shutter button in the live view to take a picture. - In the live view, press and hold the shutter button to aim the laser light at the target and release the shutter button to take a picture.

- Go to More settings > Laser to turn the laser light on or off. • You cannot take snapshots when the device is connected to a PC.
- Optional: Go to Settings > SuperIR and enable SuperIR in the menu before shooting to optimise the contours of objects in images.
- Optional: If you want to save a visual image separately, enable Save visual image in Settings > Capture mode.
View images
- In Live View, press 🔍 to display the menu.
- Press to open the album.
- Press △ to select the image and press °⊕ to display it.
- Optional: Press to delete the image in the picture-in-picture view. Press to switch images.
- Press → to exit.
Export photos
- Connect the device to the PC using the supplied USB cable and select USB drive mode on the device prompt.
- Open the detected drive and transfer the files to your PC using copy and paste to view them.
- Disconnect the device from your PC.

- The driver will be installed automatically when you connect the device for the first time.
Transfer device screen to PC
The device supports transferring the screen to the PC via software or a player. You can connect the device to your PC using the supplied USB cable and transfer the real-time live view of the device to your PC.
- Download the client software based on the UVC protocol from our official website: https://www.testboy.de/
- Connect the device to the PC using the supplied USB cable and select USB monitor display as the USB mode on the device prompt. During screen transfer, it is not possible to export files via a USB connection.
- Open the editor on your PC.
Maintenance
Set the time and date
In Live View, press

and go to Display Settings > Time and Date to set the information.
Set language
Go to More settings > Language to select the required language.
Save operation logs
The device can collect its operation logs and save them for troubleshooting purposes only. You can enable/disable this feature in Settings > More settings > Save logs.
You can connect the camera to your PC using the supplied USB-C to USB-A cable and select "USB drive" as the USB mode on the camera to export the operation logs to the root directory of the camera if necessary.
Format memory
- In Live View, press 📷, go to More Settings >
Format storage.
- Press ☐ and select "OK" to format the memory.

• Format the memory before using it for the first time
View device data
Go to More settings > About to view detailed information about the camera, such as firmware version, serial number, etc.
Restore device
In Live View, press 🔍, and go to More settings >Restore device to reset the device and restore the default settings.
Emission table
| Material | Heat emission | Material | Heat emission |
| Aluminium | 0.30 | Glass | 0.90 to 0.95 |
| Asphalt | 0.90 to 0.98 | Iron oxides | 0.78 to 0.82 |
| Concrete | 0.95 | Paint | 0.80 to 0.95 |
| Leather | 0.95 | Plastic | 0.85 to 0.95 |
| Ceramic | 0.90 to 0.95 | Paper | 0.70 to 0.94 |
| Copper | 0.50 | Sand | 0.90 |
| Brick | 0.90 | Rubber | 0.95 |
| Carbon | 0.85 | Wood | 0.94 |
| Fatty sealant | 0.94 | Textiles | 0.94 |
| Frozen food | 0.90 | Lead | 0.50 |
| Hot meals | 0.93 | Marble | 0.94 |
| Ice cream | 0.96 to 0.98 | Fabric (black) | 0.98 |
| Snow | 0.83 | Mortar | 0.8 to 0.90 |
| Human skin | 0.9 | Water | 0.92 to 0.96 |
Technical
| Display | 2.4" colour LCD display (240 x 320 pixels) |
| IR resolution | 96 x 96 pixels |
| Normal camera resolution | 640 x 480 pixels |
| Super IR | 240 x 240 pixels |
| Emission | 0.01 – 1.00 |
| Temperature | -20°C – 550°C / -4°F – 1022°F |
| Accuracy | ±2°C or ±2% |
| Frame rate | 25 Hz |
| Spectral band | 7.5 - 14μm |
| Colour palettes | White hot, black hot, rainbow, ironbow, red hot, fusion |
| Display options | Thermal, visual, fusion |
| Image storage | Internal flash memory (2 GB) |
| Auto power off | 0-60 min. adjustable in 10 min. increments |
| Operating | -10 – 50°C / 14 – 122°F |
| Storage | -40 – 70°C / -40 – 158°F |
| Power | Integrated rechargeable battery (3.6 V, 3350 mAh), USB-C interface |
| Protection | IP54 |
| Weight | 290 |
| Dimensions | 196 x 117 x 59 mm |
| Scope | Carrying strap, USB-C cable |
Cd = cadmium, Hg = mercury, Pb = lead.
Cd = cadmium, Hg = mercury, Pb = lead.
Cd = cadmium, Hg = mercury, Pb = lead.
Germany info@testboy.de


- TASTE
- FUNCTION
- TABLE OF CONTENTS 19
- NOTES 20
- OPERATION 23
- DISPLAY SETTINGS 27
- TEMPERATURE MEASUREMENT 30
- TAKE AND MANAGE PICTURES 31
- MAINTENANCE 33
- NOTES
- SAFETY
- WARN
- WARNING
- GENERAL SAFETY INSTRUCTIONS
- INTENDED USE
- DISCLAIMER
- ACCURACY OF THE OPERATING INSTRUCTIONS
- DISPOSAL
- DISPOSAL OF USED BATTERIES
- QUALITY CERTIFICATE
- DECLARATION OF CONFORMITY
- INTRODUCTION
- OPERATION
- FEATURES
- OPERATING ENVIRONMENT
- CAMERA STRUCTURE
- CHARGING THE DEVICE
- SWITCHING ON/OFF
- SWITCHING
- SWITCHING OFF
- SET AUTOMATIC SHUTDOWN
- SET AUTOMATIC SLEEP MODE
- LIVE VIEW
- DISPLAY SETTINGS
- SETTING IMAGE MODES
- SET COLOUR PALETTES
- SET LEVEL AND SPAN
- COLOUR DISTRIBUTION
- TAP ⇔ TO SAVE AND EXIT THE FUNCTION
- DISPLAY SCREEN INFORMATION
- TEMPERATURE MEASUREMENT
- SETTING TEMPERATURE MEASUREMENT PARAMETERS
- SET MEASUREMENT TOOLS
- RESULT
- SET TEMPERATURE ALARM
- TAKE AND MANAGE IMAGES
- TAKE PICTURES
- VIEW IMAGES
- EXPORT PHOTOS
- TRANSFER DEVICE SCREEN TO PC
- MAINTENANCE
- SET THE TIME AND DATE
- SET LANGUAGE
- SAVE OPERATION LOGS
- FORMAT MEMORY
- VIEW DEVICE DATA
- RESTORE DEVICE
Brand : Testboy
Model : TV 298
Category : Infrared thermometer