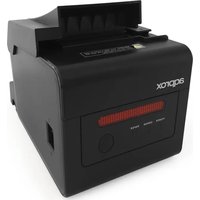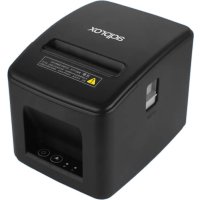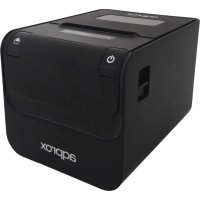
appPOS80AM3 - Printer Aqprox - Free user manual and instructions
Find the device manual for free appPOS80AM3 Aqprox in PDF.


User questions about appPOS80AM3 Aqprox
0 question about this device. Answer the ones you know or ask your own.
Ask a new question about this device
Download the instructions for your Printer in PDF format for free! Find your manual appPOS80AM3 - Aqprox and take your electronic device back in hand. On this page are published all the documents necessary for the use of your device. appPOS80AM3 by Aqprox.
USER MANUAL appPOS80AM3 Aqprox
natural_image
Abstract composition of red geometric shapes (circle and angular line) on white background, no text or symbols presentUser Guide
text_image
A Power cord Power adaptor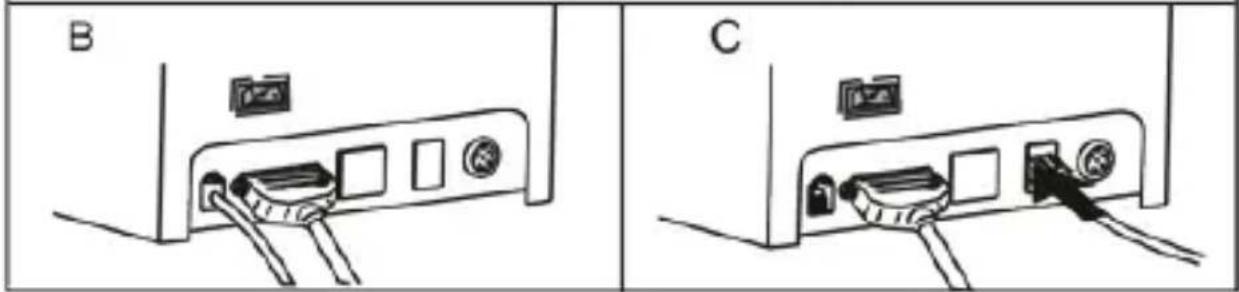
text_image
B CCarga de papel
| DIP Function | ||||
| No. | Function | ON | OFF | |
| SW-1 | Select cutter | NO | YES | |
| SW-2 | Select beeper | YES | NO | |
| SW-3 | Select print density | DARK | LIGHT | |
| SW-4 | Two-byte character code | NO | YES | |
| SW-5 | Character per line | 42 | 48 | |
| SW-6 | Cutter with cash drawer | YES | NO | |
| SW-7 | ON | OFF | ON | OFF |
| SW-8 | ON | ON | OFF | OFF |
| Transmission speed (bps) - bit/s | 38400 | 115200 | 9600 | 19200 |
Indicadores
Thank you for choosing appPOS80AM3 thermal printer.
Product description:
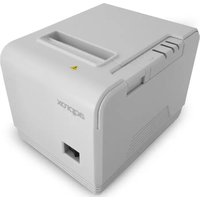
The appPOS80AM3 thermal printer is compact, reliable and fast. Compatible with the POS system. It offers important features of easy handling for retail, restaurants and hotels.
It incorporates an automatic tickets cutting system, works with standard 80mm wide thermal paper. No cartridges needed and can print barcodes and logo.
Make it your favorite printer for your business!
Package contents
- appPOS80AM3
• Usb and serial cable
• A roll of paper
• Quick installation guide
• Installation Cd
• Power adapter
Make sure your package contains the elements described above. If you find any items are missing or damaged, please contact your dealer.
System requirements
• Computer with a free USB / serial / LAN interface.
• Electrical outlet 230VAC.
Installation and configuration
Connections
-
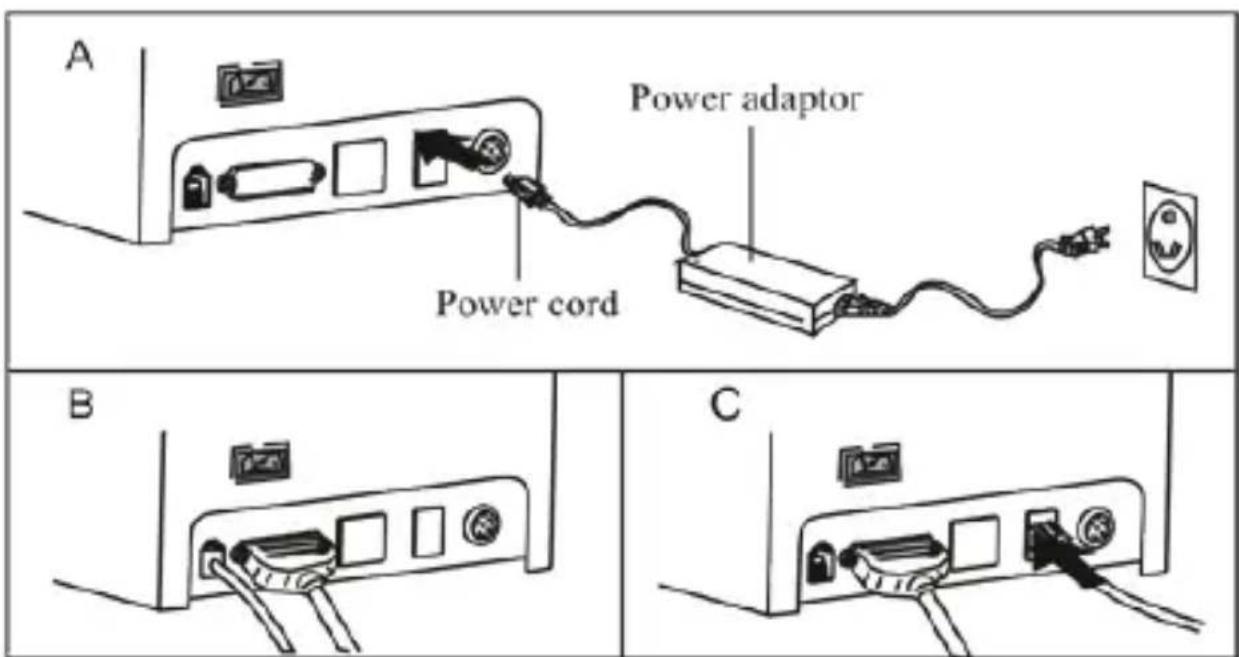
Connect the power adapter from the electrical outlet to the DC port on the printer.
-
Connect the printer to the PC with the USB / serial / LAN cable.
-
Connect the printer to any cash drawer device if necessary through its RJ11 port.
-
Change the switch to the ON position.
text_image
A Power adaptor Power cord B CLoading Paper
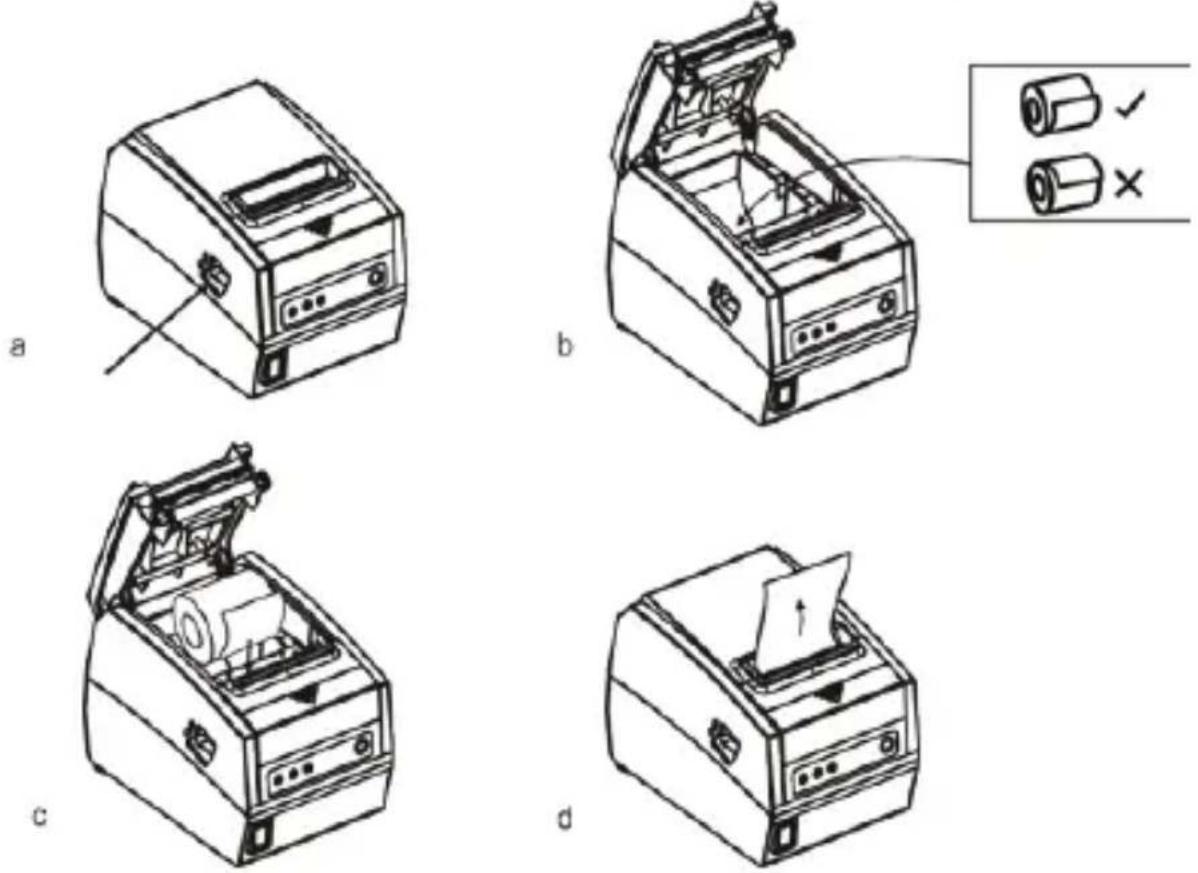
- Open the top cover by pressing the lower button opening.
- Remove the middle bar and insert it into the hole in the paper roll. Place the paper as shown.
- Insert paper roll with the middle bar in your location and close the lid.
- Print a test to check that everything was installed correctly.
Printer settings, manual mode
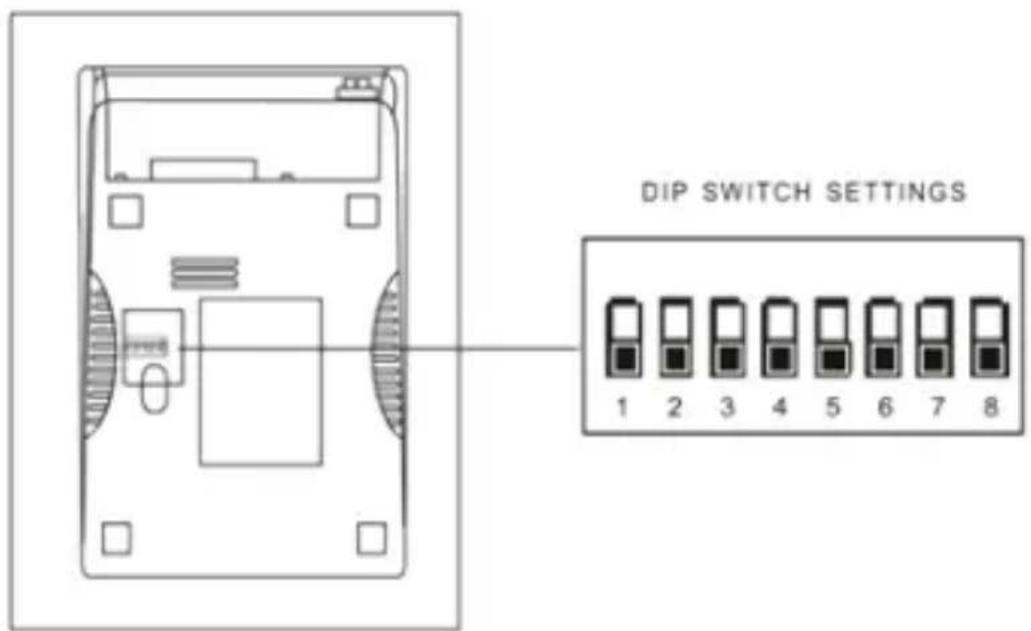
With the switch settings you can change printer settings, type cuter, languages, sounds, speed, etc.
Remove the bottom cover and select the desired setting according to the following table.
text_image
DIP SWITCH SETTINGS 1 2 3 4 5 6 7 8| DIP Function | ||||
| No. | Function | ON | OFF | |
| SW-1 | Select cutter | NO | YES | |
| SW-2 | Select beeper | YES | NO | |
| SW-3 | Select print density | DARK | LIGHT | |
| SW-4 | Two-byte character code | NO | YES | |
| SW-5 | Character per line | 42 | 48 | |
| SW-6 | Cutter with cash drawer | YES | NO | |
| SW-7 | ON | OFF | ON | OFF |
| SW-8 | ON | ON | OFF | OFF |
| Transmission speed (bps) - bit/s | 38400 | 115200 | 9600 | 19200 |
Indicators
At the top there is a left panel with a series of LED indicators and a button.
Power Indicator, when lit it indicates that it is connected to its corresponding power.
Error indicator when lit it indicates some kind of error, the paper is not loaded correctly, failure cutter, head, etc.
Indicator Paper when shines in blue and red it means there is no paper
Forward button, press the button to feed the paper manually.
Make test
With the printer off, press the forward button and turn the printer, hold down the forward button for 2 seconds, then release the button. The test will be printed.
Mode to enter hexadecimal mode
With the printer off, press the forward button and turn the printer, hold down the forward button for 10 seconds, then release the button. One hexadecimal dump will be printed.
Reset
With the printer off, press the forward button and turn the printer, hold down the forward button for 20s, then release the button. The printer will reset.
Installing drivers
- Insert the installation CD printer.
- Run autorun.exe.
• Run the driver installer.
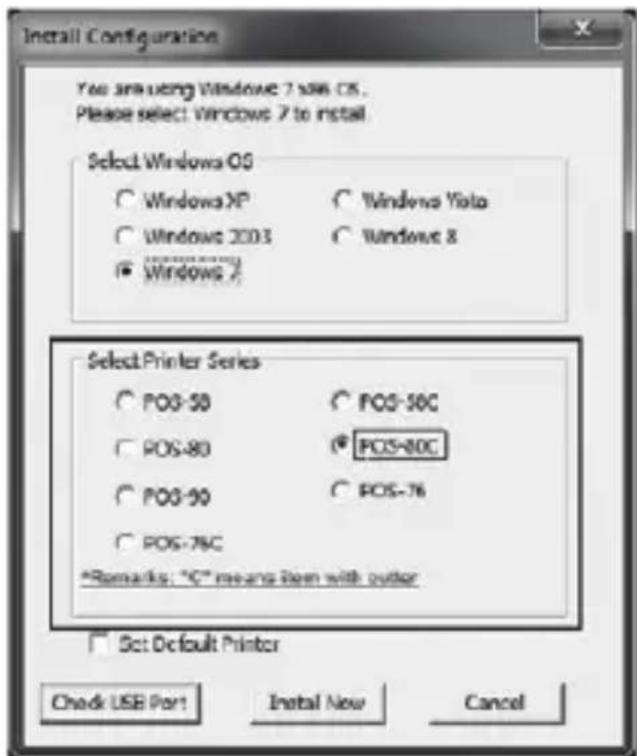
- Follow the steps in the installation wizard until the next window.
- Select the desired operating system and POS-80C printer.
text_image
Install Configuration You are using Windows 7 will OS. Please select Windows 7 to install Select Windows OS ○ Windows XP ○ Windows Yoto ○ Windows 2003 ○ Windows 8 ● Windows ? Select Printer Series ○ POS-50 ○ POS-50C ○ POS-80 ● POS-80C ○ POS-90 ○ POS-76 ○ POS-76C *Remarks: "C" means item with outer □ Set Default Printer Check USB Port Install New Cancel- To complete the installation click on "Install Now" and a message that the installation has been successful will show.
- Once the installation is complete, go to Control Panel, Hardware and Sound, printers and devices. Click with the right mouse button on the printer icon created POS-80C, select Printer Properties, go to the Ports tab and manually select the appropriate USB port. Finally click the OK button.
Printing via port directly
For direct printing requires printer control commands. Command ESC / POS are integrated internally.
Note: If your computer is connected to serial port, after installing the driver you need to change the COM port in the printer properties and set the COM port to printer to obtain the same bits per second as the default printer comes to 19200. For LAN interface printer refer to user manual you will find in intallation CD.
Safety and maintenance instructions
- Attention: Never open the device, the internal parts have a shock hazard.
- Do not use this unit near water, for example, in a wet basement, in an unprotected outdoor installation or in any area classified as a wet.
- Do not introduce objects of any kind into this unit through openings as they may touch voltage points and short out parts that could result in fire or electric shock. Do not spill any liquid on the unit.
- Always use approved cables and recommended by the manufacturer for charging the device.
- Never connect the power adapter to a higher voltage than recommended.
- Keep the product at room temperature, maximum 30°C.
-
If you are not using the product for a period of time, turn it off.
-
Do not not touch the filament print, burn hazard.
-
Clean the product with a soft, dry cloth. Always with the device off!
-
Follow local regulations for disposal of the product.
Recycled
AEEREI-RAE 558 - In this manual, the container (bien) symbol indicates that the product is subject to the European directive 2002/96/EC, electrical and electronic products, batteries, and other accessories must necessarily be subject to a selective collection.
At the end of the life of the devise, make use of the recycling bins. This gesture will help reduce the health risks and preserve the environment.
Municipalities and distributor, will provide essential details on recycling your old device. If this device carries an internal battery, it must be removed and deposited separately for proper management.

Technical support
For more information on installing and configuring this product please contact our support section on our website www.approxtpv.es or write an email to the following address: soporte@approxpv.es.
text_image
A Power adaptor Power cord B Ctext_image
Technical diagram showing four different types of printer devices (a, b, c, d) with open and closed views, including a magnified view of the device's internal structure.| DIP Function | ||||
| No. | Function | ON | OFF | |
| SW-1 | Select cutter | NO | YES | |
| SW-2 | Select beeper | YES | NO | |
| SW-3 | Select print density | DARK | LIGHT | |
| SW-4 | Two-byte character code | NO | YES | |
| SW-5 | Character per line | 42 | 48 | |
| SW-6 | Cutter with cash drawer | YES | NO | |
| SW-7 | ON | OFF | ON | OFF |
| SW-8 | ON | ON | OFF | OFF |
| Transmission speed (bps) - bit/s | 38400 | 115200 | 9600 | 19200 |
Indicateurs
text_image
A Power adaptor Power cord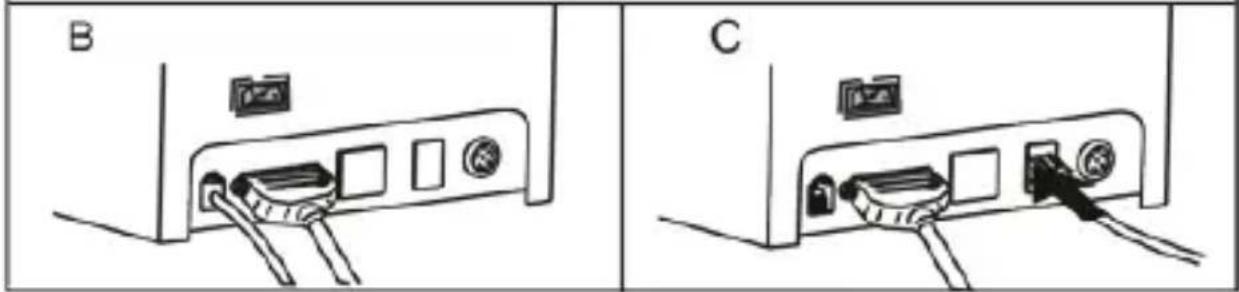
text_image
B CRecarga de papel
text_image
Technical diagram showing four different types of electronic devices (a, b, c, d) with open and closed views, including a battery icon and checkmark indicators.Ajustes de impressora, modo manual
| DIP Function | ||||
| No. | Function | ON | OFF | |
| SW-1 | Select cutter | NO | YES | |
| SW-2 | Select beeper | YES | NO | |
| SW-3 | Select print density | DARK | LIGHT | |
| SW-4 | Two-byte character code | NO | YES | |
| SW-5 | Character per line | 42 | 48 | |
| SW-6 | Cutter with cash drawer | YES | NO | |
| SW-7 | ON | OFF | ON | OFF |
| SW-8 | ON | ON | OFF | OFF |
| Transmission speed (bps) - bit/s | 38400 | 115200 | 9600 | 19200 |