appPOS80AMUSE - Printer Aqprox - Free user manual and instructions
Find the device manual for free appPOS80AMUSE Aqprox in PDF.
| Product type | Thermal printer |
| Brand | Aqprox |
| Model | appPOS80AMUSE |
| Dimensions (L x W x H) | 192 x 144 x 135,3 mm |
| Net weight | 1,36 kg (without paper roll) |
| Power supply | AC 220V / DC 24V power adapter |
| Printing method | Direct thermal |
| Paper width | 79,5 ± 0,5 mm |
| Effective print width | 72 mm |
| Print speed | 250 mm/s |
| Resolution | 512 or 576 dots/line |
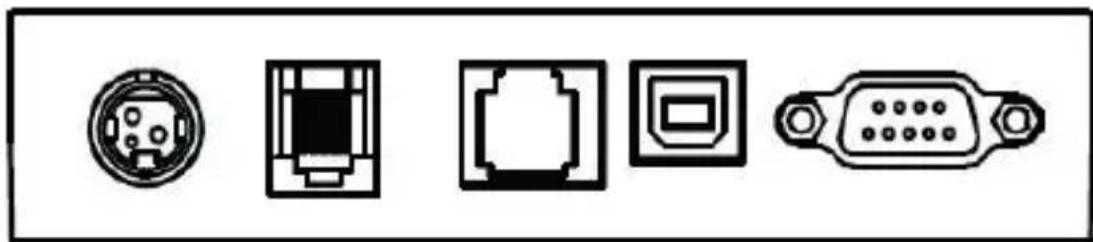
| Available interfaces | USB, RS232 Serial, Ethernet, cash drawer (RJ-11) |
| Emulation | ESC/POS |
| Supported barcodes | UPC-A, UPC-E, EAN13, EAN8, CODE39, CODABAR, ITF, CODE93, CODE128 |
| Character sets | ASCII 12x24, Chinese 24x24, international codes (PC437, PC850, etc.) |
| Mechanical reliability (MCBF) | 6 × 10⁶ lines |
| Operating temperature | 0 to 40 °C |
| Operating humidity | 20 to 85 % |
| Storage temperature | -20 to 70 °C |
| Storage humidity | 5 to 95 % |
| Maintenance | Cleaning the print head, sensor, and roller with ethyl alcohol |
| Safety | Do not open, avoid moisture, use the supplied adapter, follow recycling instructions |
| Included accessories | Printer, power supply, power cable, paper roll, CD, RS232 cable, USB cable |
Frequently Asked Questions - appPOS80AMUSE Aqprox
User questions about appPOS80AMUSE Aqprox
0 question about this device. Answer the ones you know or ask your own.
Ask a new question about this device
Download the instructions for your Printer in PDF format for free! Find your manual appPOS80AMUSE - Aqprox and take your electronic device back in hand. On this page are published all the documents necessary for the use of your device. appPOS80AMUSE by Aqprox.
USER MANUAL appPOS80AMUSE Aqprox
natural_image
Two solid red circles of different sizes on a white background (no text or symbols)User Guide
1. INTRODUCCIÓN
natural_image
Five electronic component symbols in a row: circular, rectangular, square, square, and VGA connector (no text or labels)Alimentación
Cajón
Ethernet

USB

Serial
portamonedas
natural_image
Line drawing of a power outlet cable connecting a socket to an electrical outlet (no text or symbols)Nota:
natural_image
Illustration of a printer with roll and sheeting, showing mechanical components and packaging (no text or symbols)natural_image
Line drawing of a mechanical device with an open lid and internal compartments, showing a curved arrow indicating rotation (no text or symbols present)natural_image
Line drawing of a portable electronic device with buttons and lid (no text or symbols)natural_image
Simple line drawing of a device with two control panels and a horizontal line (no text or symbols)natural_image
Line drawing of a portable electronic device with internal components and a blue directional arrow indicating rotation (no text or symbols)1. PRODUCT INTRODUCTION
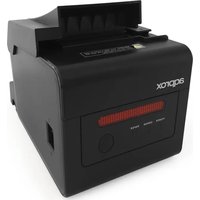
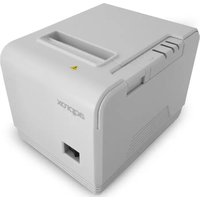
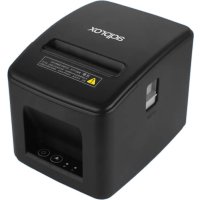
appPOS80AMUSE is a POS direct thermal receipt printer with easy operation and high cost effective, which is widely used in supermarket, hospital, restaurant, bank, oil station, turnpike, etc.
Safety Notice
Please read carefully and strict compliance with use of following instructions before operating the printer.
Warnings
Warning: Do not touch the cutter of printer.
Warning: The print head is heating component; do not touch it and its peripheral parts during the printing process or the print just ended.
Warning: Do not touch the surface of the print head and its connecting parts to avoid damage it.
Notice
- The printer should be installed at a firm place and avoid it in vibration and shake.
- Do not use or store the printer in the location of high temperature, humidity or heavy pollution.
- The power adapter of printer should be connected to a properly grounded receptacle. Avoid using the same socket with other large electronic machines or the equipment which could cause the voltage fluctuation.
- Do not let water or conductive material like metal get inside the printer, if it happens, please turn off the power supply immediately.
- Printer could not be worked when there is no paper; otherwise it would seriously damage the print roll and the thermal print head.
- Please disconnect the power supply if do not use the printer for a long time.
- The user should not dismantle the printer by self for repairing or remolding.
- Use only the standard power adapter supplied together with the printer.
- In order to ensure the printing quality and extend the life of printer, please use the recommendatory thermal paper or the one which has the same quality.
- Please make sure the power of printer is off when plugging the connecting line.
- Please keep the user manual for reference when needed.
2. SUMMARY
Main Features
- High print quality.
- Low noise.
- Supports cash drawer driver.
- Exquisite and lightweight, pretty outside design.
- Reasonable structure, easy using.
- The font could be magnified, bolded or underlined, and also the character line spacing and left and right spacing can be adjusted before printing.
- Supports the print of different density bitmap and download figure.
- To realize and call built-in and cartridge font high speed printing in driver printing(dot printing).
- Low power consumption and operation cost (no need ribbon or ink box).
- Emulation: ESC/POS.
3. SPECIFICATION
- Printing Method: Direct thermal printing
- Paper Width: 79.5±0.5mm
- Effective Printing Width: 72mm
- Printing Speed: 250mm/s
- Print head performance
Resolution: 512 dots/line or 576 dots/line
TPH: 150KM
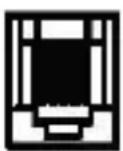
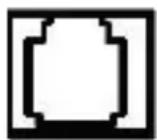
- Interface:
natural_image
Five electronic component symbols in a row: circular connector, square connector, rectangular connector, and 3-pin connector (no text or labels)Power supply
Cash drawer
Ethernet
USB
Serial
- Cash Drawer Control: 6 lines RJ-11 socket, output: DC24V/1A
- Character:
ASCII code character set: 12×24 dots, 1.25 (W) ×3.00 (H) mm
Chinese character: 24×24 dots, 3.00 (W) ×3.00 (H) mm
International Code page: 10 types of international language--- PC437,
Katakana, PC850, PC860, PC863, PC865, WPC1252, PC866, PC852,
PC858 and so on.
Printing Barcode: Supports 9 types of barcode printing, UPC-A, UPC-E, EAN(JAN)13, EAN(JAN)8, CODE39, CODABAR, ITF, CODE93, CODE128 and so on.
- Printing paper:
Paper Type: Thermal paper
Note
- Don't use the paper roll which the end of paper is pasted at the axis core, it would cause the damage to the printer.
- If the thermal paper is polluted by the chemical or oil, it would fading or decreases the feeling of heat and influence the print result finally.
- It would result the fading of thermal paper if to use the hard material to chafe the surface.
-
Please pay attention to the temperature, humidity and illumination of the storage for thermal paper. The paper would fade if the storage temperature is over 70 centigrade.
-
(MCBFM) Mechanical reliability: 6×10⁶ lines
- Emulation: ESC/POS
Print Font: Support ANK. The font could be magnified, bolded or underlined and
the user also could adjust the character spacing before printing.
Print Dot/Map: Supports the printing of different dots and graphic.
- Power Adapter
Adapter Input: AC 110V/220V, 50\~60Hz
Adapter Output: DC 24V/2.5A
Printer Input: DC 24V/2.5A
- Net Weight: About 1.36KG (exclude the paper roll)
- Dimension: 192(L) × 144(W) × 135.3(H) mm
- Environmental Adaption
Operation Temperature: 0\~40°C / Operation Humidity: 20\~85%
Storage Temperature: -20\~70°C / Storage Humidity: 5\~95%
4. INSTALLATION AND OPERATION
Contents in the package
Please check the parts when opening the box, if there is something missed, please contact with the supplier or the manufacturer.
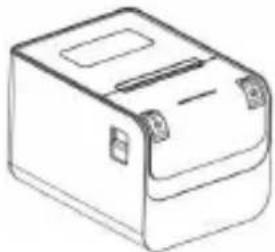 Printer Printer | 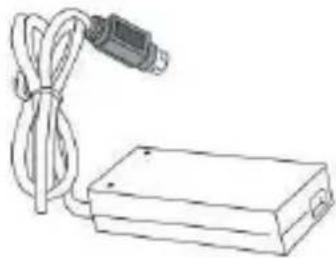 Power supply Power supply | 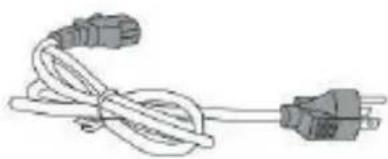 Power cord Power cord | |||
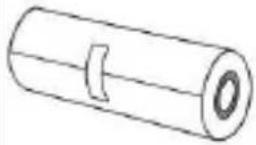 Paper roll Paper roll |  CD CD | 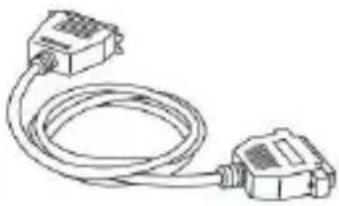 Com. cable RS232 Com. cable RS232 | 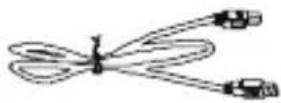 USB cable USB cable | ||
Printer Connection
- To ensure the printer and PC is powered off and then insert the matched data
connection lines to the interfaces (USB/Serial) of the printer, the other ends are to the PC.
-
If the user fit out the electric opened cash drawer for the printer that could insert the RJ-11 connection line of it to the corresponding interface of the printer. (PS: The specification of cash drawer should be accorded with the driver requirement of printer).
-
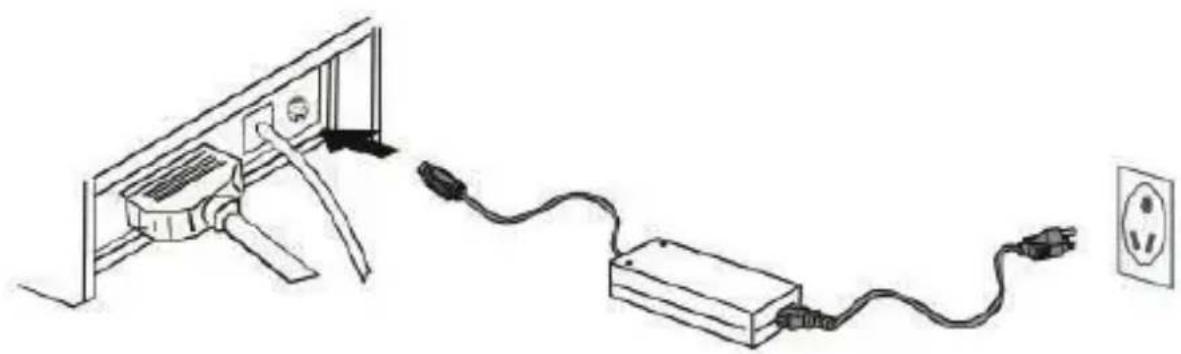
Connect to the supplied power adapter.
Please only use the supplied power adapter. Such as the following picture:
natural_image
Line drawing of an electrical outlet connected to a power strip and a socket (no text or symbols)Notice:
- Firstly, insert the power supply plug DC24V of printer; then connect the AC220V power; lastly, turn on the switch. Please operate it by the instruction steps; otherwise, it would damage the printer.
- Using unsuitable power adapter would cause the bad print result; even may cause the breakdown of printer.
- Do not connect the telephone line to the interface of cash drawer; because it may result in the damage for printer and telephone.
- Do not pull the power soft wire when unplugging. If the user does it by force, it may result in the breakdown of the printer and power adapter.
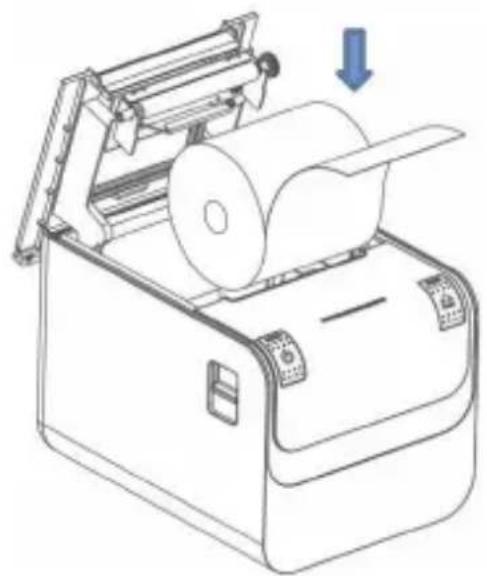
4.3 Load the Paper Roll
The loading instruction is listed as below:
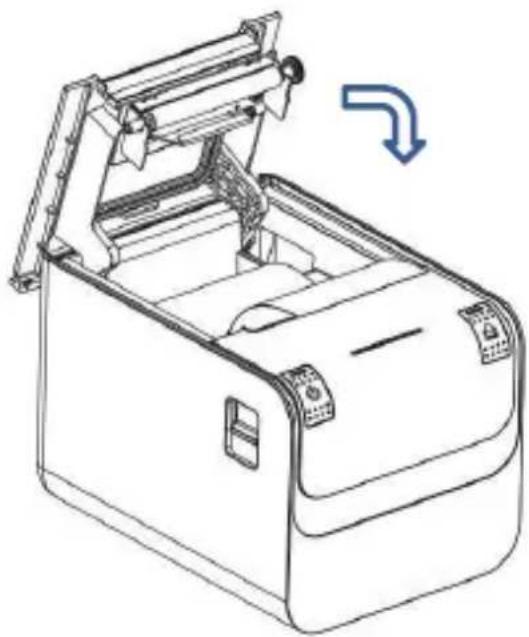
- Open the top cover of printer.
- Load the thermal paper into printer as the following picture.
natural_image
Line drawing of a mechanical device with rollers and a handle, showing a downward arrow indicating motion (no text or symbols)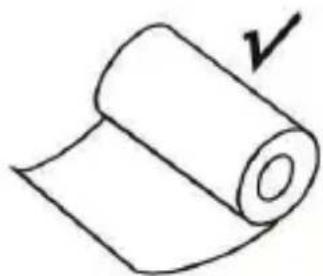
natural_image
Simple line drawing of a rolled-up document with a checkmark indicating completion (no text or symbols present)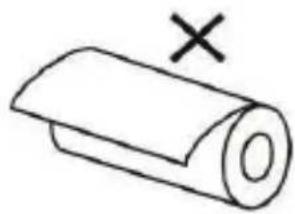
natural_image
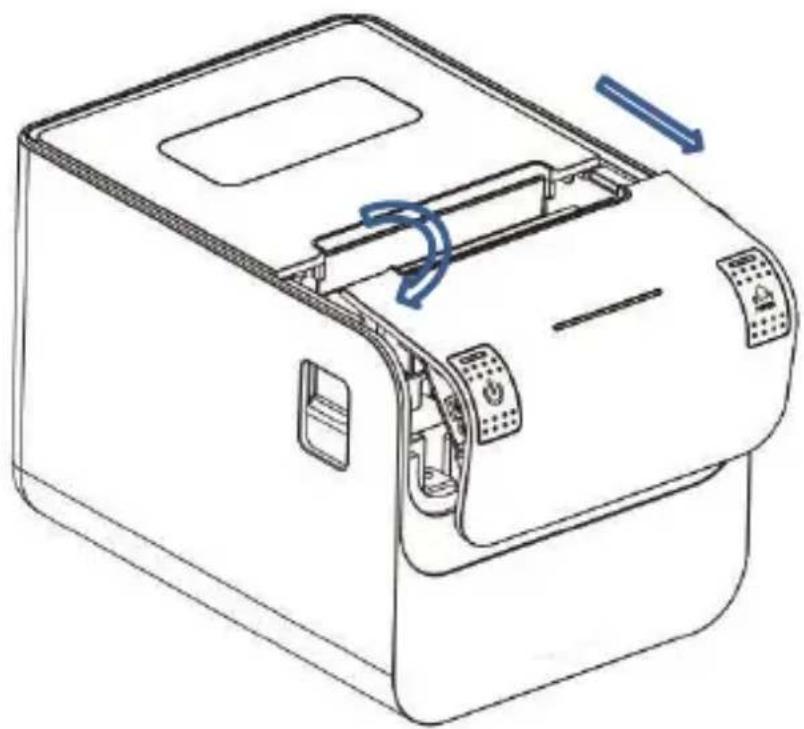
Simple line drawing of a rolled paper or document with a cross mark above it (no text or symbols)- Pull a part of paper out and then close the top cover.
natural_image
Line drawing of a mechanical device with an open lid and handle, showing internal components and a blue arrow indicating rotation (no text or symbols)- Use the cutter of printer to tear off the extra paper

natural_image
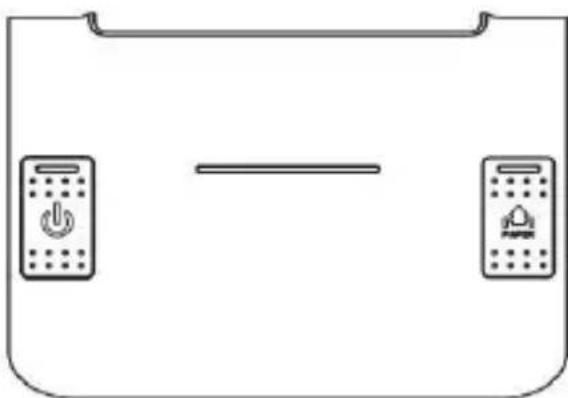
Line drawing of a rectangular electronic device with a lid and buttons (no text or symbols)V. KEYSTROKE AND INDICATOR LIGHT Keystroke and Indicator Light
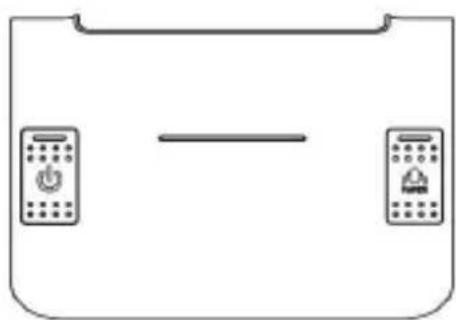
Keystroke and indicator board is shown as below:

natural_image
Simple line drawing of a device with two control panels and a horizontal line (no text or symbols)FEED Key:
In the standby status, the printer would be continuous feed when pressing the feed key. Of course, the key is inefficacy when the printer is working.
Press the feed key and switch on the power supply while the key is still under pressing, then the user could do the self-checking of printer.
POWER Key: Close/Open
Power switch is used to turn on/off the printer. Press the switch for several seconds, the printer will be turned on. When the printer in on, do the same and it will be off. (Switch can only work when the printer is connected to power source.)
Status Indicator (Blue):
Paperless, paper jam, print head overheat, print head error or other situations, the printer buzzer will report wrong, and the power indicator will blink.
Self-checking
Self-checking can test whether the printer is working well or not, if it can print the test list correctly, that means the printer is good enough (which is excluding the problem with the connected interface to PC); otherwise, it needs repair.
Self-checking could print software version number, print density, interface type, English character and some Chinese characters by order.
Self-checking procedure: Make sure the printer is connected to the power, then press the feed key and switch on the power supply while the key is still under pressing. At the same time, the printer begins to self-checking. Please loosen the key within five seconds and the printer would print the self-testing list after it.
VI. CASH DRAWER INTERFACE
Cash drawer interface adopt RJ-11 standard, 6 lines socket and it outputs DC 24V/1A. Insert the RJ-11 socket to the corresponding interface which could through the printer to open the cash drawer.
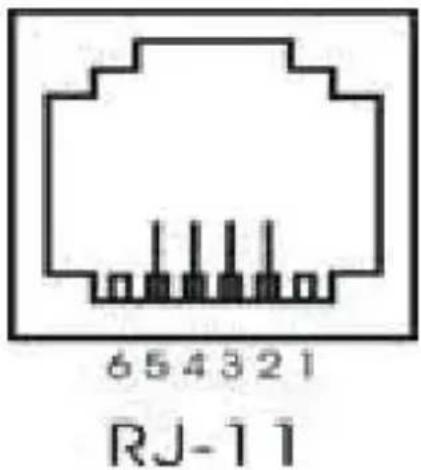
Pin function of cash drawer interface is listed as below:
| Pin Number Signal Flow Direction | |||
| 1 | Empty | Empty | |
| 2 | Electrical grounding Output | ||
| 3 | Empty | Empty | |
| 4 | Driver Signal of Cash Drawer Output | ||
| 5 | Empty | Empty | |
| 6 | Empty | Empty | |
7. PRINTER MAINTENANCE
Print Head Maintenance
When the printer has following circumstances, the user should clean the print head:
- Printing is not clear;
- Some longitudinal columns on the printing page is vague;
- Loud noise when feeding.
Procedure of maintaining the print head is listed below:
- Turn off the power supply and open the top cover. Remove the paper if necessary.
- Please wait for the cooling of print head if it just finishes printing.
- Use the cotton cloth and dip it in the absolute ethyl alcohol to clean the surface of print head.
- When the absolute ethyl alcohol is completely volatilized, please close the top cover and restart the printer.
Sensor Maintenance
When the printer has following circumstance, the user should clean the paperless sensor:
- During the printing, the printer occasionally stops print and the paperless alarm is beeping.
- No paperless alarm.
Procedure of maintaining the sensor is listed below:
- Turn off the power supply and open the top cover. Remove the paper if necessary.
- Use the cotton cloth and dip it in the absolute ethyl alcohol to clean the surface of sensor.
- When the absolute ethyl alcohol is completely volatilized, please close the top cover and restart the printer.
Print Roll Maintenance
When the printer has following circumstance, the user should clean the print roll:
- Printing is not clear;
- Some longitudinal columns on the printing page is vague;
- Loud noise when feeding.
Procedure of maintaining the print roll is listed below:
- Turn off the power supply and open the top cover.
- Use the cotton cloth and dip it in the absolute ethyl alcohol to clean the surface of print roll.
- When the absolute ethyl alcohol is completely volatilized, please close the top cover.
Notice:
- The power supply of printer should be turned off when the routine maintenance.
- Do not use hand or metal to touch the surface of print head and not use tweezers to scratch the superficies of print head, print roll or sensor.
- Do not use oil or acetone to do the maintenance.
- When the absolute ethyl alcohol is completed volatilized, then turn on the power to print.
8. FIX THE PAPER JAM
When paper jam happens, turn off the power supply and open the top
cover, wait for the cooling of print head then remove the jammed paper. After that, reload the paper roll and close the top cover.
natural_image
Line drawing of a portable electronic device with internal components and a blue directional arrow indicating motion (no text or symbols)9. FAULT TREATMENT
When the printer appears faults, please fix them correspondingly referring to this section. If it still can't work, please contact the distributor or manufacturer.
When indicators light on the control board is out
Check whether the power wire inserts the printer, power adaptor or power socket correctly. Check whether the power switch is on or off.
The indicator light is on, while the printer can't work
Do the self-checking to check whether the printer can work normally. If not, please contact the distributor or technical support.
If the self-checking can work, please check the following contents:
- Check the interfaces of printer and computer and also check whether the connected line between them is to their specification requirement.
- The setting of data transmission between printer and computer may be different. You know the printer's interface setting through the self-testing page. Please contact the agent or technical support if the printer cannot print.
10. PRINTER DRIVER
Two types of drivers: one is installed directly under Window /XP/WIN7/WIN8/WIN10, the other is to drive through Ethernet.
- Install driver under Windows
Add printer in the Windows, and appoint the driver documents in the driver disk to Windows. It can print once you start print command in the program. In this way, Windows' printer driver turns characters to graphics dot-matrix for printing.
- Install driver by Interface
In this way, no need for drive program. It can print just when it output character to port and the hard font inside printer realizes the character exchange printing.
11. SAFETY, MAINTENANCE AND RECYCLING INSTRUCTIONS
- Caution: Never open the device, the internal parts are danger, electrical shock.
- Do not install this unit near water, for example, in a wet basement, in an unprotected outdoor installation or in any area classified as a wet.
- Do not insert objects of any kind into this unit through openings as they may touch voltage points and short out parts that could result in fire or electric shock.
- Do not spill any liquid on the unit. Danger of explosion!
- Do not crush power cables, danger of short circuit!
- Always connect to the manufacturer's recommended tension.
- Clean the product with a soft and dry cloth.
- Follow local regulations for disposing of the product.
12. RECYCLED
AEE REI-RAEE 5548 In this manual, the container (bin) symbol indicates that the product is subject to the European directive 2002/96 / EC, electrical and electronic products, batteries, and batteries and other accessories must necessarily be subject to a selective collection.
At the end of the life of the device, make use of the recycling bins. This gesture Will help reduce the health risks and preserve the environment.
Municipalities and distributors, Will provide essential details on recycling your old device. If this device carries an internal battery, it must be removed and deposited separately for proper management.
1. INTRODUCTION
natural_image
Five electronic component symbols in a row: circular, rectangular, square, square, and VGA connector (no text or labels)- Emulation: ESC/POS
- Alimentation:
Entrée: AC 110V/220V, 50\~60Hz
Sortie: DC 24V/2.5A
Entrée d'imprimante: DC 24V/2,5A
4. INSTALLATION ET MANUTENTION
Contenu du paquet
natural_image
Line drawing of a power cord connection to an electrical outlet (no text or symbols)Note:
natural_image
Line drawing of a mechanical device with an open lid and internal compartments, showing a blue curved arrow indicating rotation (no text or symbols)natural_image
Line drawing of a portable electronic device with front panel and buttons (no text or symbols)5. BOUTON ET VOYANT LUMINEUX
natural_image
Simple line drawing of a device with two control panels and a horizontal line (no text or symbols)Bouton (FEED):
natural_image
Line drawing of a portable electronic device with internal components and a blue directional arrow indicating rotation (no text or symbols)9. RÉSOLUTION DES PROBLÈMES
natural_image
Five electronic component symbols in a row: circular connector, rectangular socket, square port, square button, and VGA connector (no text or labels)natural_image
Line drawing of a cable and plug connection (no text or symbols)Repare:
natural_image
Line drawing of a mechanical device with rollers and a paper roll, showing no text or symbols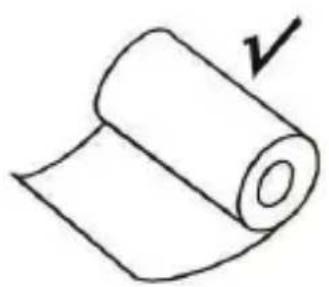
natural_image
Simple line drawing of a rolled-up sheet with a checkmark indicating completion (no text or symbols present)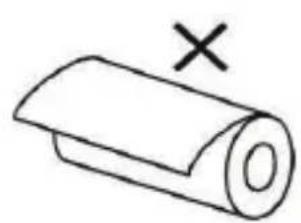
natural_image
Simple line drawing of a rolled paper or scroll with a black 'X' mark above it (no text or symbols on the scroll itself)natural_image
Line drawing of a mechanical device with an open lid and internal compartments, showing a curved arrow indicating rotation (no text or symbols)natural_image
Line drawing of a rectangular electronic device with ports and a lid (no text or symbols)- TECLADO Y LUZ INDICADORA