
PizzaProfi XXL - Pizza oven Sommertal - Free user manual and instructions
Find the device manual for free PizzaProfi XXL Sommertal in PDF.

| Product type | Electric pizza oven |
| Brand | Sommertal |
| Model | PizzaProfi XXL (VAR.ID.4039) |
| Power supply | 220-240 V ~ 50-60 Hz |
| Power | 1600 W |
| Maximum temperature | 350-380 °C |
| Capacity (stone diameter) | 30 cm |
| Stone type | Removable and reversible ceramic stone |
| Timer | 0 to 15 minutes |
| Temperature levels | 5 levels (thermostat setting) |
| Heating switch | Dual heating (top, bottom, both) |
| Included accessories | Pizza roller, serving peel, deep pan |
| Viewing window | Large viewing window |
| Cool-touch handle | Yes |
| Safety | Hot surface indicated; do not immerse; unplug before cleaning |
| Stone maintenance | Do not use water or detergent; scrape off residue |
| Exterior maintenance | Damp cloth only |
| Warranty | 24 months |
| After-sales service | Albatros International GmbH, Germany |
| Intended use | Domestic and indoor use only |
Frequently Asked Questions - PizzaProfi XXL Sommertal
User questions about PizzaProfi XXL Sommertal
0 question about this device. Answer the ones you know or ask your own.
Ask a new question about this device
Download the instructions for your Pizza oven in PDF format for free! Find your manual PizzaProfi XXL - Sommertal and take your electronic device back in hand. On this page are published all the documents necessary for the use of your device. PizzaProfi XXL by Sommertal.
USER MANUAL PizzaProfi XXL Sommertal
natural_image
Technical line drawing of a mechanical device with circular components and mounting brackets (no text or symbols)Albatros International GmbH Konrad-Zuse-Str. 3, D-54452 Nerdlen, Germany info@Albatros-International.eu
Einführung
Sicherheitshinweise
natural_image
Simple line drawing of a circular frame with two side handles, no text or symbols present.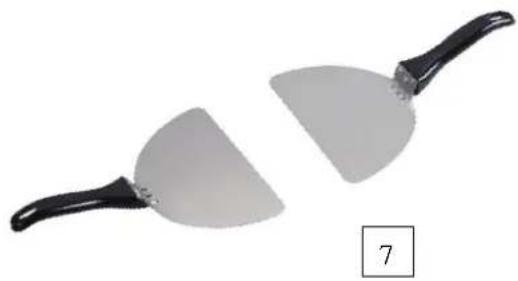
natural_image
Two kitchen spatulas with black handles and white glaze, one slightly tilted and one slightly tilted (no text or symbols)D-54552 Nerdlen (Germany)
Tel: +49 (0)6592-1730200
Fax: +49 (0)6592-1730209
www.albatros-international.de
info@albatros-international.eu
natural_image
Technical line drawing of a mechanical device with circular components and mounting brackets (no text or symbols)Albatros International GmbH
Konrad-Zuse-Str. 3, D-54452 Nerdlen, Germany
info@Albatros-International.eu
EN
Introduction
- Safety Instructions
- Using your Pizza Oven
- Trouble Shooting Guide
- Cooking on the Stone
- Care and Cleaning
- Making Pizza
- Styles of Pizza Bases
- Pizza Recipes
DESCRIPTION Technical Data
- •Model : PizzaProfi 39cm Pizzaoven, VAR.ID.4039
- • Voltage:220-240V\~50-60Hz
- • Power consumption: 1600W
- • Heats to over 350-380°C
- Temperature adjustable knob with 5 grades
- • Heater switch knob: Dual heater work /bottom heater work/ top heat work
- • Timer: 0 \~ 15 minutes
- Pizza Oven with removable ceramic stone plate 39cm
- Accessories: pizza cutter, serving paddles, deep pan
CAUTION: Hot surface.
The surfaces are liable to get hot during use.
CHARACTERISTIC FEATURES
• Cook a nice pizza in 3-5 minutes
- Step switch to control the top, bottom, and both top & bottom heating elements.
- Dual M heating elements cook the pizza more evenly, chewier and crispy
- Removable reversible baking pizza stone for easy clean
- Cool touch handle
- Deep dish pan with handle
- Includes pizza cutter and serving paddles.
- Adjustable temperature control, max 350-380°C
• 15 minutes' timer control
- Big view window
• Power indicator light
THE SURFACES ARE LIABLE TO GET HOT DURING USE
- The appliances are not intended to be operated by means of an external timer or separate remote-control system.
- If the supply cord is damaged, it must be replaced by the manufacturer, its service agent or similarly qualified persons in order to avoid a hazard.
- Regarding the instructions for cleaning, thanks to refer to the relevant paragraph of the manual.
- This appliance can be used by adults aged from 18 years and above and persons with reduced physical, sensory or mental capabilities or lack of experience and knowledge, if they have been given supervision or instruction concerning use of the appliance in a safe way and understand the hazards involved. Children (aged below 18 years) shall not play with the appliance.
- Cleaning and user maintenance shall not be made by children, aged below 18 years.
- Keep the appliance and its cord out of reach of children, aged below 18 years.
• Household and indoor use only.
IMPORTANT SAFETY INSTRUCTIONS
When using electrical appliances, basic safety precautions should always be followed. Please read the safeguards below before using your product.
- Read all instructions.
- Do not touch hot surfaces. The knobs and handles will become hot while the oven is being heated. Please use oven mitts or gloves when opening the lid of the pizza maker.
- Extreme caution is needed when opening the Pizza Maker as built up steam may be quickly released. Gloves or oven mitts are recommended when opening the pizza oven to ensure safety
- To protect against electrical shock do not immerse the cord, plugs, or appliance in water or other liquids.
- Close supervision is necessary when any appliance is used near children.
- Unplug from outlet when not in use and before cleaning. Allow to cool before putting away.
- Do not operate any appliance with a damaged cord or plug or after the appliance malfunctions or has been damaged in any manner. Return the appliance to the nearest authorized service facility for examination, repair or adjustment.
- The use of accessory attachments is not recommended by the appliance manufacturer as they may cause injuries.
- Do not let the cord hang over edge of table, counter or touch hot surfaces.
- Do not place on or near a hot gas or electric burner or in a heater oven.
- Extreme caution must be used when moving an appliance containing hot oil or other hot liquids.
- Always attach the plug to the appliance first, then plug the cord into the wall outlet.
- To disconnect, turn any control to the "OFF" position, then remove the plug from wall outlet.
- Do not use appliance for anything other than intended use.
- Save this instruction manual.
- This appliance is not intended for use by people under the age of 18 years or infirm persons without supervision.
Children should be supervised to ensure that they do not play with appliance.
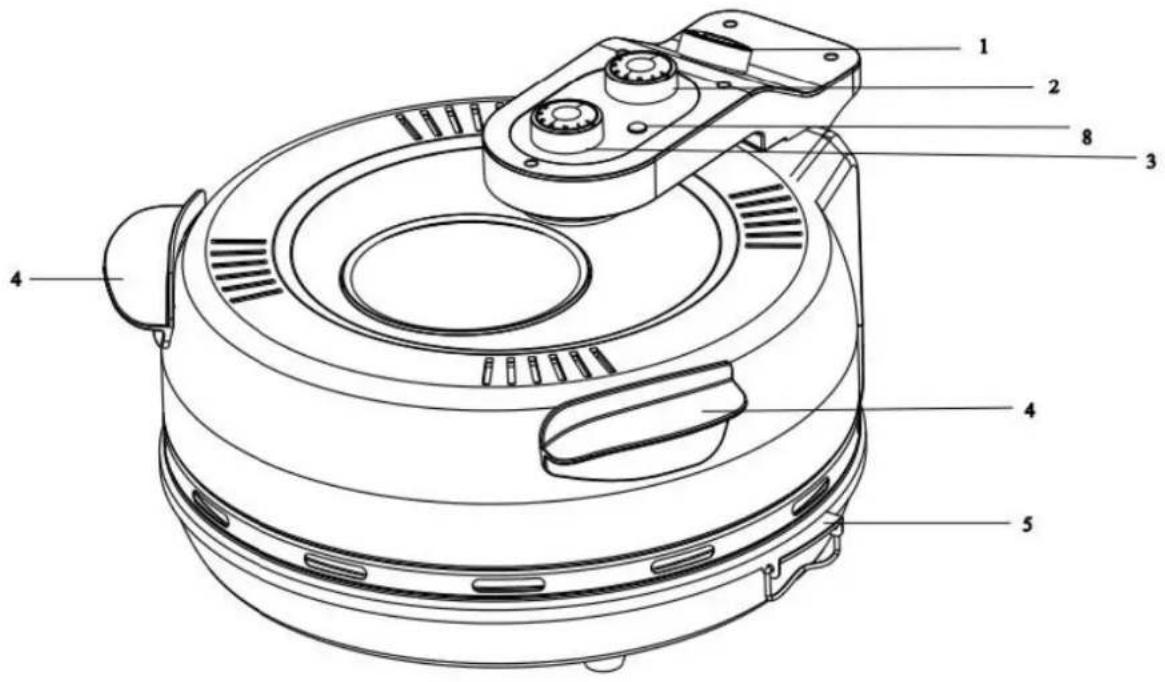
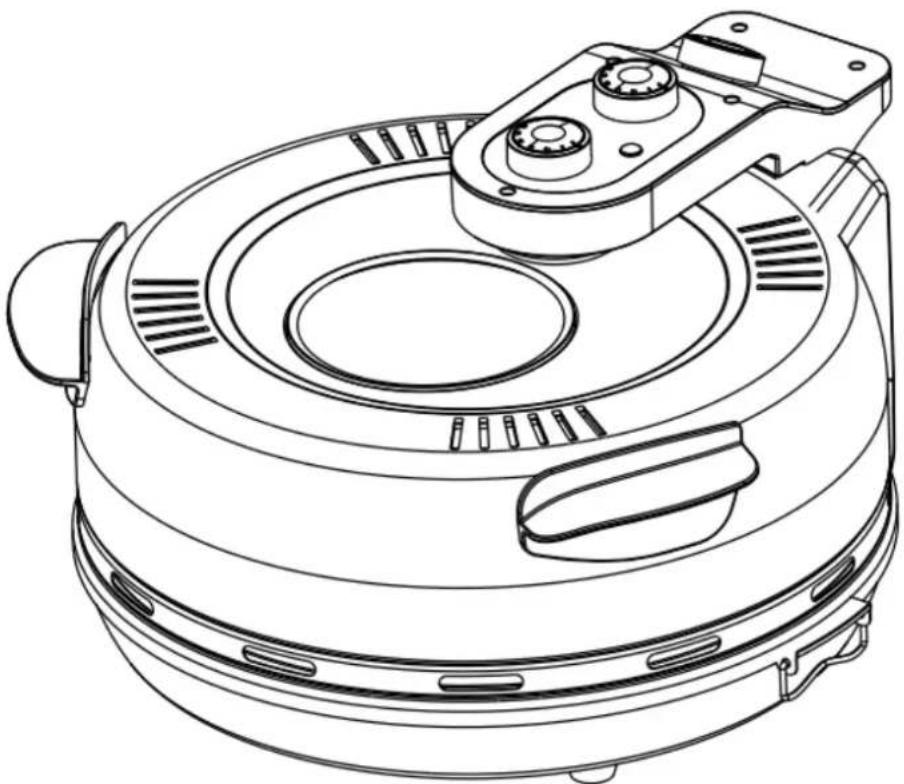
DESCRIPTION OF PARTS

natural_image
Simple line drawing of a circular frame with two side handles, no text or symbols present.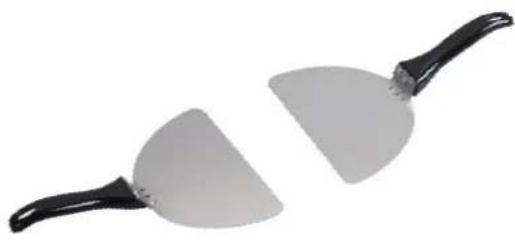
natural_image
Two kitchen spatulas with black handles, one semi-circular and one flat, shown against a white background (no text or symbols)7
- Heater Switch knob with 4 setting as below:

Dual heater work

Bottom heater work

Upper heater work

- Temperature control knob (0\~5) grade
- Timer 0-15 minutes
- Top cover Handle
- Cooking plate handle
- Deep pan
- serving paddles
- Power indicator
- When using your Pizza Maker for the first time, please read the instructions contained in this manual. Before cooking, let your oven run for 10 minutes with the lid closed on setting 4 to warm up the pizza stone to 320°C. This will burn off any lubricants from the oven's heating elements and will also help to preheat your pizza stone. This will not affect the performance of your oven, nor will it be necessary to repeat this process any time in the future.
- Never use cooking oil or water directly on the cooking stone when cooking, seasoning or cleaning. When cooking with the stone, place the uncooked foods (pizza) directly on the stone surface. Do not worry about small scratches or that your stone surface has turned a darker color. This is a sign that your stone has been well seasoned.
- Never use a knife or pizza cutter on the stone as this could damage the fine-grained cooking surface.
- The Pizza Maker is designed to make delicious pizza from fresh dough and frozen pizza bases. When using a frozen pizza base, allow the base to thaw before placing in the oven. This will result in a crispy cooked pizza. When cooking fresh dough, lightly flour the stone before placing the dough directly onto the stone. If you have sticky dough, add more flour to your dough as it will stick to the stone.
- You can choice the heating elements by step switch to control the top heating elements, bottom heating elements, and both top and bottom heating elements.
- Make any of the delicious recipes included in this booklet or you can make your own exciting new recipes.
- Extreme caution is needed when opening the Pizza Maker as built up steam may be quickly released. Gloves are recommended when opening the pizza oven to ensure safety
- This appliance can be used by people aged from 18 years and above and persons with reduced physical, sensory or mental capabilities or lack of experience and knowledge, if they have been given supervision or instruction concerning use of the appliance in a safe way and understand the hazards involved. Children shall not play with the appliance. Cleaning and user maintenance shall not be made by children.
- Keep the appliance and its cord out of reach of people less than 18 years.
Trouble Shooting Guide
PROBLEM Top of pizza burns.
CAUSE Temperature of oven is too high.
SOLUTION When checking the pizza, if you think the top is cooking quicker than
the bottom, turn the oven setting back to 4, leaving the pizza to continue cooking without the thermostat light on. Alternatively leave the lid open for a couple of minutes so you can watch the pizza finish cooking.
PROBLEM Bottom of pizza burns.
CAUSE Temperature of oven is too high.
SOLUTION Make sure the oven has been pre-heated on setting 5. When the
oven light goes out, allow a couple of minutes for the stone to rest before adding the pizza. When cooking additional pizzas one after the other it is best to leave the lid open for a few minutes in between cooking pizzas with the setting back to 4.
PROBLEM Dirty Stone Base.
CAUSE Moisture on bottom of base.
SOLUTION Don't worry, if stone stains. The greater the stains, the better the
flavor it gives the pizza. Just scrape off any excess material with the metal paddles.
COOKING ON THE STONE
- First, ensure the control knob is set to OFF and have a quick check inside your Pizza Maker to see that nothing is inside your oven other than the cooking stone.
- Plug the power cord into plug base. To turn your Pizza Maker appliance on, simply turn the cooking temperature control knob to the max heat setting 5. You will notice the heat indicator light go ON, This indicates that your Pizza Maker is pre-heating. By pre-heating your oven before using, you will achieve better baking results.
- Setting the timer for 10 minutes for pre-heating, after that your pizza maker is ready for use.
- Place your cooked or un-cooked pizza dough directly onto the pizza paddles and add your favorite toppings.
- Never over-fill or mount your topping too high on your pizza. The topping should always be below the height of the top-heating coil to avoid burning.
- Making sure your Pizza Maker is pre-heated, slide your pizza off the pizza paddles and directly onto the heated stone. ⚠Warning, the pizza stone and the handles will be extremely hot. Do not touch it at any time until it has had a chance to cool down.
- Close the lid of your Pizza Maker and keep the knob on setting 5 and allow your pizza to bake for 4-5 minutes, or until the desired taste. Remember, every pizza may have a different crust thickness or topping, some pizzas may cook quicker than others. It is recommended that you open the lid of your Pizza Maker after 3 minutes
to check the progress, if your pizza is not ready, simply close the lid and continue to cook until your desired taste.
- If your pizza is cooking too quickly, simply turn the cooking temperature counter clockwise to a lower setting to reduce the cooking temperature. To raise the cooking temperature, turn the cooking temperature clockwise to a higher setting.
- When cooking with a frozen pizza base, allow the dough to thaw before use. Once thoroughly thawed, slide your pizza directly onto the heated stone.
- Do not use sticky dough on the stone or pizza paddles. If your dough is sticky, we recommend you use a pizza tray to par-cook the pizza then slide directly off onto the stone, or flour the stone and place dough directly on top.
- If you want to cook more pizza, repeat above process.
- Care and Cleaning
CLEANING INSTRUCTIONS
- If properly taken care of, your Pizza Maker will provide you with many years of use. After each use, unplug your Pizza Maker and let the appliance cool. Be careful not to touch or try to clean your Pizza Maker until all parts have cooled down to room temperature.
- To clean the outside of the Pizza Maker only use a damp cloth. Never dip or immerse your Pizza Maker into water or any other liquids. This could cause an electrical shock and/or damage to the oven.
- To clean the stone, never use cooking oil or water or any detergents. Scrape off any excess food with a spatula or a stiff bristled brush & wipe clean with paper towel or a clean dishcloth. To clean the paddles, wash in warm water and mild dish washing liquid. Never allow them to stand in water as water saturation will damage the paddles.
- Never use the stone for any other purpose than intended use. Do not use as a trivet as a cuffing stone. Never put liquids on the stone whether it is hot or cold. By following these simple points of care, your Pizza Maker will provide you with many years of use.
- Extreme caution is needed when opening the Pizza Maker as built up steam may be quickly released. Pot holders or oven mitts are recommended when opening the pizza oven to ensure safety.
- Clean the pizza cutter with warm water and mild dish soap
Recycling

- This marking indicates that this product should not be disposed with other household wastes throughout the 2012/19/EU. To prevent possible harm to the environment or human health from uncontrolled waste disposal, recycle it responsibly to promote the sustainable reuse of material resources. To return your used device, please use the return and collection systems or contact the
retailer where the product was purchased. They can take this product for environmental safe recycling.
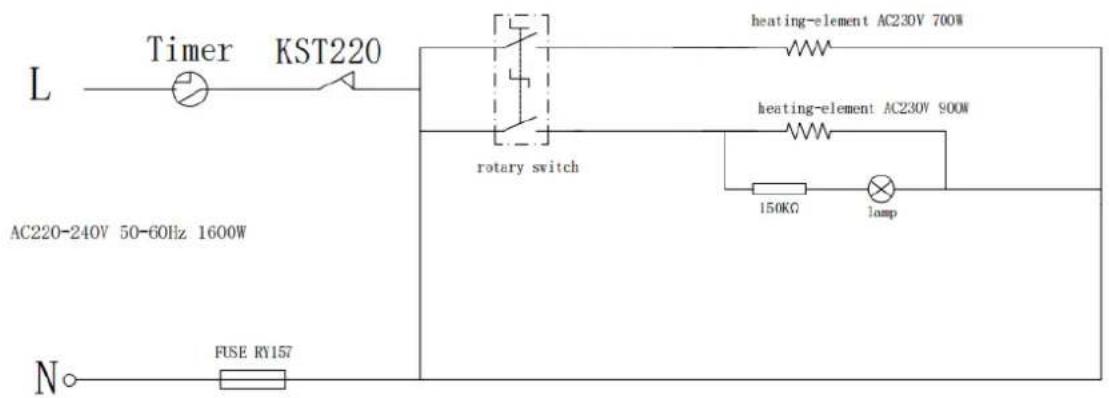
CIRCUIT DIAGRAM
Pizza Oven Recipes
Basic pizza dough
Ingredients (Makes 1 Pizza)
- 0.25 ounce sachet dry yeast
- 1 teaspoon caster sugar
- 1/2 teaspoon salt
- 2 cups of plain flour
- 2 tablespoons olive oil
Method
- Combine 3/4 cup warm water, yeast, sugar and salt in a jug. Whisk with a fork to dissolve. Cover with plastic wrap. Set aside in a warm place for 5 minutes or until bubbles appear on the surface.
- Sift flour into a bowl. Add yeast mixture and oil. Mix to form a soft dough. Turn onto a lightly floured surface. Knead for 10 minutes or until elastic. Place in a lightly greased bowl. Cover with plastic wrap. Stand in a warm place for 25 to 30 minutes or until dough has doubled in size.
- Use your fist to punch dough down. Knead on a lightly floured surface until smooth.
Styles of Pizza Bases
Frozen-topped Pizza
Its quick and easy to cook your frozen pizza straight from the freezer in the Pizza Oven. 1. Turn your oven onto the 3 setting. Once the light has turned off place you frozen pizza directly onto the stone and close the lid. Leave the frozen pizza in the pizza oven for approximately 4 minutes to defrost/ Once the base has defrosted turn the setting up to 5 and cook for approximately 5 minutes.
Pizza Mix or Bread Mix
It is better if you use a quality bread mix. Most of them will have a pizza dough recipe on the pack which will say to use 10% less water.
Pitta Bread
This is a great healthy alternative. They are readily available in every supermarket and will only take 2-3mins to cook in the PIZZA OVEN.
Pre-made Base (Fresh)
They normally take a few minutes longer because they tend to have a thicker base. Use less topping to ensure a quicker cooking time.
Pre-made Base (Frozen)
For best results make sure the base is defrosted. For a quick defrost method; turn oven setting to 3. Add topping to frozen base. Once the light is off, add topped frozen pizza to stone base and close the lid. After 2-3 minutes turn the setting to 5 and cook pizza.
Calzone
A different way to eat a pizza. Make sure they are not too thick. You can cook them on the stone or in the deep dish. Ricotta cheese is a great filling as you can make dessert calzone by adding banana, stewed apples etc. and serve it with ice cream.
The components are quality products. They were designed taking into consideration the latest technical knowledge, and carefully constructed using a standard, good quality material.
The warranty period is 24 months from the time of handover, which must be confirmed through a sales receipt, invoice or delivery note. Within the warranty period, any functional defects in the components will be fixed by our customer service team if these can be shown to be the result of a material defect that has arisen despite prudent handling in accordance with our operating instructions.
The warranty will include repairing defective parts or providing properly functioning replacements free of charge and at our discretion. Any parts that are replaced will become our property. The repair or replacement of individual parts does not result in an extension to the warranty period, nor is there a new warranty period for the specific components affected. There is no separate warranty period for built-in spare parts. We offer no warranty for damage or defects affecting components or their parts if these are caused by excessive use, or incorrect handling or maintenance. The same applies for failure to follow the operating instructions and for the installation of spare parts or accessories not listed in our range. Warranty claims shall be void in the event of interference or modifications to components by unauthorised individuals.
The warranty does not cover parts that are subject to natural wear and tear. In the event of a warranty claim, fault, need for a spare part or accessory, please contact the customer support centre specified here:
Customer support centre:
Albatros International GmbH
Konrad-Zuse-Str. 3
D-54552 Nerdlen (Germany)
Tel: +49 (0)6592-1730200
Fax: +49 (0)6592-1730209
www.albatros-international.de
info@albatros-international.eu
Subject to modification.
Model:
Purchased at:
In (town/city, street):
Buyer's name:
Street, building number:
Postcode, town/city:
Telephone:
Date, signature:
Fault description:
Sommertal

PizzaProfi XXL
MODE D'EMPLOI
PIZZA FOUR

Model: PizzaProfi XXL 39cm Pizza FOUR
VAR.ID: 4039
natural_image
Technical line drawing of a mechanical device with circular components and mounting brackets (no text or symbols)Albatros International GmbH
Konrad-Zuse-Str. 3, D-54452 Nerdlen, Germany
info@Albatros-International.eu
Introduction
natural_image
Technical line drawing of a mechanical device with circular components and mounting brackets (no text or symbols)Albatros International GmbH
Konrad-Zuse-Str. 3, D-54452 Nerdlen, Germany
info@Albatros-International.eu

Introduzione
D-54552 Nerdlen (Germania)
Tel: +49 (0) 6592-1730200
Fax: +49 (0) 6592-1730209
www.albatros-international.de
info@albatros-international.eu
natural_image
Technical line drawing of a mechanical device with circular components and mounting brackets (no text or symbols)Albatros International GmbH
Konrad-Zuse-Str. 3, D-54452 Nerdlen, Germany
info@Albatros-International.eu

Introducción

natural_image
Simple line drawing of a circular frame with two side handles, no text or symbols present.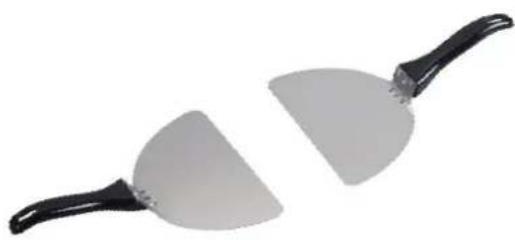
natural_image
Two kitchen spatulas with black handles and silver blades, shown against a white background (no text or symbols)7
EC-DECLARATION OF CONFORMITY
We herewith declare in our sole responsibility that this product complies with the following standards (1) in accordance with the regulations of the undermentioned Directives (2) test report (3) issuing test office (4)
FR Français
CE-DÉCLARATION DE CONFORMITÉ
Serial No.: 230600001.....230699999
(1) EN IEC 55014-1: 2021; EN IEC 55014-2: 2021; EN IEC 61000-3-2: 2019+A1: 2021; EN 61000-3-3: 2013+A1: 2019+A2: 2021; EN 60335-1: 2012+A11: 2014+A13: 2017+A1: 2019+A2: 2019+A14: 2019+A15: 2021; EN 60335-2-9: 2003+A1: 2004+A2: 2006+A12: 2007+A13: 2010; EN 62233: 2008; EN 50564: 2011
(2) 2011/65/EU; 2014/30/EU; 2014/35/EU; (EU) 2016/2282; (EC) 1275/2008; (EU) 2015/863; (EC) 1907/2006; (EU) 801/2013;
(3) TLE-13SE0260HTSPB-A4; TLE-13MY1832HTSP-A7, A8, A9; TLE-ESH-Q21042901-A0; TLE-ESH-Q22061401-A0; TLE-ESH-P22081325;
(4) LCIE China Company Limited
GB Importer and technical documents responsible
FR Manufacture Conservation des documents techniques
Dokumentationsbevollmä chtigter:
Authorized person for the compilation of the technical documentation:


- Einführung
- Introduction
- DESCRIPTION Technical Data
- CHARACTERISTIC FEATURES
- THE SURFACES ARE LIABLE TO GET HOT DURING USE
- IMPORTANT SAFETY INSTRUCTIONS
- DESCRIPTION OF PARTS
- Trouble Shooting Guide
- COOKING ON THE STONE
- CLEANING INSTRUCTIONS
- CIRCUIT DIAGRAM
- Pizza Oven Recipes
- Basic pizza dough
- Ingredients (Makes 1 Pizza)
- Method
- Styles of Pizza Bases
- Frozen-topped Pizza
- Pizza Mix or Bread Mix
- Pitta Bread
- Pre-made Base (Fresh)
- Pre-made Base (Frozen)
- Calzone
- Customer support centre:
- Model:
- Sommertal
- PizzaProfi XXL
- MODE D'EMPLOI
- PIZZA FOUR
- Introduzione
- Introducción
- FR Français
- Serial No.: 230600001.....230699999
Brand : Sommertal
Model : PizzaProfi XXL
Category : Pizza oven