
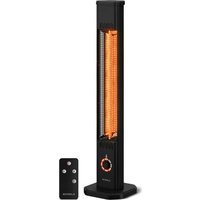
Wonderwall Santorini Smart 1000W - Heating Klarstein - Free user manual and instructions
Find the device manual for free Wonderwall Santorini Smart 1000W Klarstein in PDF.

| Brand | Klarstein |
| Model | Wonderwall Santorini Smart 1000W |
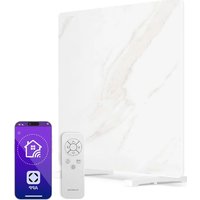
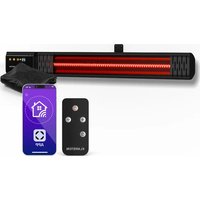
| Product type | Connected wall heater |
| Power | 1000 W (models 10041819/10041820) |
| Power supply | 220-240 V ~ 50 Hz |
| Wi-Fi | 802.11 b/g/n, 2.4 GHz |
| Mounting type | Vertical or horizontal wall mount |
| Safety distance | Minimum 20 cm from objects and walls |
| Functions | Manual control, smartphone app, timer, child lock, open window detection |
| App | Klarstein (iOS/Android) |
| Thermostat | Electronic with weekly programming |
| Maintenance | Vacuum dusting, damp cloth |
| Safety | Open window detection, automatic shutdown, overheat protection |
| Repairability | Repairs only by the manufacturer or an authorized professional |
| Usage | Indoor, well-insulated rooms |
| References | 10041817, 10041818, 10041819, 10041820 |
Frequently Asked Questions - Wonderwall Santorini Smart 1000W Klarstein
User questions about Wonderwall Santorini Smart 1000W Klarstein
0 question about this device. Answer the ones you know or ask your own.
Ask a new question about this device
Download the instructions for your Heating in PDF format for free! Find your manual Wonderwall Santorini Smart 1000W - Klarstein and take your electronic device back in hand. On this page are published all the documents necessary for the use of your device. Wonderwall Santorini Smart 1000W by Klarstein.
USER MANUAL Wonderwall Santorini Smart 1000W Klarstein
WONDERWALL SANTORINI SMART
Heizung
Heater
Radiador
Radiateur
Radiatore
10041817 10041818 10041819 10041820
COMFORTING OMFORTING FORTINGCON TINGCOMFO COMFORTING OMFORTING FORTINGCON TINGCOMFO

KLARSTEIN
www.klarstein.com
Note: This product is only suitable for well insulated spaces or occasional use.
INHALTSVERZEICHNIS
Technische Daten 3
natural_image
Three white L-shaped metal bars arranged vertically against a gray background (no text or symbols)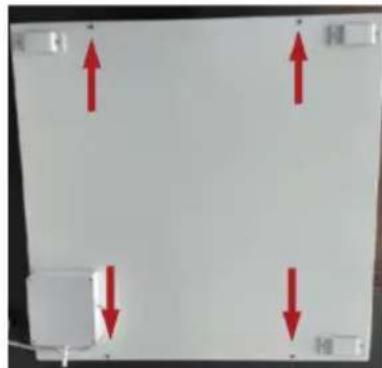
natural_image
Pure electrical circuit lines without any symbolsMember of Berlin Brands Group
Handwerkerstr. 11
15366 Dahlwitz-Hoppegarten
Deutschland
natural_image
Symbol of a trash bin crossed with a diagonal line, no text or numbers presentBerlin Brands Group UK Ltd
PO Box 1145
Oxford, OX1 9UW
United Kingdom
Congratulations on your purchase. Please read the following instructions carefully and follow them to prevent potential damage. We accept no liability for damage caused by disregarding the instructions and improper use. Please scan the QR code to access the latest operating instructions and further information about the product.
CONTENTS
Safety Instructions 20
Product data sheet 22
Product data sheet 23
Installation 24
Operation 26
Device control via smartphone 29
Cleaning and Care 31
Disposal Considerations 32
Declaration of Conformity 32
TECHNICAL DATA
| Article number | 1004181710041818 | 1004181910041820 |
| Power 500 W 1000 W | ||
| Power supply 220-240 V ~ 50 Hz | ||
| WiFi standard | 802.11 b/g/n | |
| WiFi frequency | 2.4 GHz | |
| WiFi transmission power (max.) | < 20 dBm | |
SAFETYINSTRUCTIONS
- Before use, check the voltage on the appliance label and only plug the appliance into sockets that correspond to the voltage of the appliance.
- If the power cord is damaged, have it replaced by a trained professional.
- Do not place the heater directly under a power socket.
- Ensure the appliance is kept one metre away from combustible materials such as furniture, curtains or similar.
- Use the appliance out of the reach of children. Children may only operate the device under supervision.
- The appliance is intended for use in the home and similar environments only. It is not intended for commercial use.
- Do not use the device if it malfunctions or has been damaged in any way.
• Repairs may only be carried out by trained specialists. - Incorrectly or independently performed repairs pose a risk of injury.
- Do not run the power cord under carpets or rugs.
- Make sure that the power cord does not come into contact with sharp edges or hot surfaces.
- Do not cover the heater to prevent it from overheating.
- Do not use the appliance with an external timer, a remote-controlled socket or any other device that automatically switches the heating on and off.
- Do not immerse the device in water or other liquids.
- Do not use the appliance near bathtubs, showers or swimming pools.
- Do not use the device outdoors.
- Do not use the device with wet hands.
- Do not use the appliance on or near hot surfaces.
- Do not use the device with a damaged power cord.
- Before cleaning, unplug the appliance from the wall outlet and allow it to cool completely.
- Do not use abrasive cleaners for cleaning.
- Only use accessories that are expressly approved for this purpose by the manufacturer.
- Children over 8 years as well as mentally, sensory and physically impaired persons may only use the device if they have been informed in detail about the functions and safety precautions by a supervisor responsible for them beforehand and understand the associated risks.
- Make sure that children do not play with the appliance.
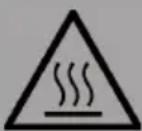
CAUTION
Risk of burns! Some parts of the appliance can become very hot. Be careful not to burn yourself or your children with it.
Cleaning
Always unplug the appliance from the wall outlet and allow it to cool completely before cleaning. Never immerse the unit in water or splash it with water. Clean the heater with a soft and damp cloth. For glass models, a soft cloth and glass cleaner should be used. Never use a wet cloth, and dry the heater with a dry cloth after cleaning. Do not use abrasive cleaners, solvents or scouring pads as this may cause scratches or other irreparable damage. The heater must be completely dry before it is put back into operation.
Use / Operation
Note that the heater may become discoloured during use. This is due to air pollution and is not a fault. Do not cover the heater with picture film and do not paint or print on it yourself. Otherwise, the heating element may be damaged and the warranty will be void.
If you notice any noise, odour, visual changes or abnormally high temperature, stop using and contact the manufacturer or its customer service.
Repairs
Repairs may only be carried out by authorised dealers or directly by the manufacturer. If you attempt to modify the product or carry out repairs yourself, your warranty will be invalidated.
PRODUCT DATA SHEET
| Model identifier(s) | 10041817, 10041818 | |||||
| Specification Symbol Value Unit Specification Unit | ||||||
| Heat output Only for electric storage room heaters: Type of heat supply control | ||||||
| Nominal heat output P | nom | 0.5 kW | Manual control | of the heat supply with integrated thermostat | N/A | |
| Minimum heat output (guide value) | P_min | 0.0 kW | Manual control | of the heat supply with feedback of the room and/or outside temperature | N/A | |
| Maximum continuous heat output | P_max,c | N/A kW | Electronic control | of the heat supply with feedback of the room and/or outside temperature | N/A | |
| Auxiliary power consumption Heat output with fan support N/A | ||||||
| Nominal heat output el | max | 0.5 kW | Type of heat output/room temperature control | |||
| With minimum heat output el | min | 0.0 kW | Single stage heat output, no room temperature control | no | ||
| Standby mode el | SB | 0.001 W | Two or more manually adjustable levels, no room temperature control | no | ||
| Room temperature control with mechanical thermostat | no | |||||
| With electronic room temperature control | no | |||||
| With electronic room temperature control and time of day control | no | |||||
| With electronic room temperature control and day of week control | yes | |||||
| Other regulatory options | ||||||
| Room temperature control with presence detection | no | |||||
| Room temperature control with open window detection | yes | |||||
| With remote control option | no | |||||
| With adaptive control of the heating start | no | |||||
| With operating time limit | no | |||||
| With black ball sensor | no | |||||
| Contact details | Chal-Tec GmbH, Wallstraße 16, 10179 Berlin, Germany. | |||||
PRODUCT DATA SHEET
| Model identifier(s) | 10041819, 10041820 | |||||
| Specification Symbol Value Unit | Specification Unit | |||||
| Heat output Only for electric storage room heaters: Type of heat supply control | ||||||
| Nominal heat output P | nom | 1 kW | Manual control | of the heat supply with integrated thermostat | N/A | |
| Minimum heat output (guide value) | Pmin | 0.0 kW | Manual control | of the heat supply with feedback of the room and/or outside temperature | N/A | |
| Maximum continuous heat output | Pmax,c | N/A kW | Electronic control | of the heat supply with feedback of the room and/or outside temperature | N/A | |
| Auxiliary power consumption Heat output with fan support N/A | ||||||
| Nominal heat output el | max | 1 kW | Type of heat output/room temperature control | |||
| With minimum heat output el | min | 0.0 kW | Single stage heat output, no room temperature control | no | ||
| Standby mode el | SB | 0.001 | W | Two or more manually adjustable levels, no room temperature control | no | |
| Room temperature control with mechanical thermostat | no | |||||
| With electronic room temperature control | no | |||||
| With electronic room temperature control and time of day control | no | |||||
| With electronic room temperature control and day of week control | yes | |||||
| Other regulatory options | ||||||
| Room temperature control with presence detection | no | |||||
| Room temperature control with open window detection | yes | |||||
| With remote control option | no | |||||
| With adaptive control of the heating start | no | |||||
| With operating time limit | no | |||||
| With black ball sensor | no | |||||
| Contact details | Chal-Tec GmbH, Wallstraße 16, 10179 Berlin, Germany. | |||||
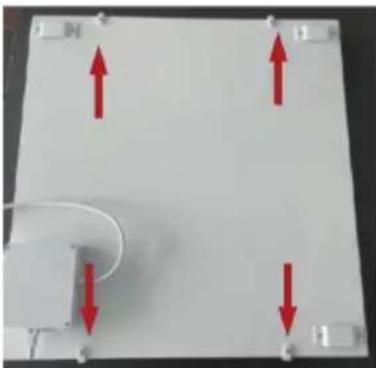
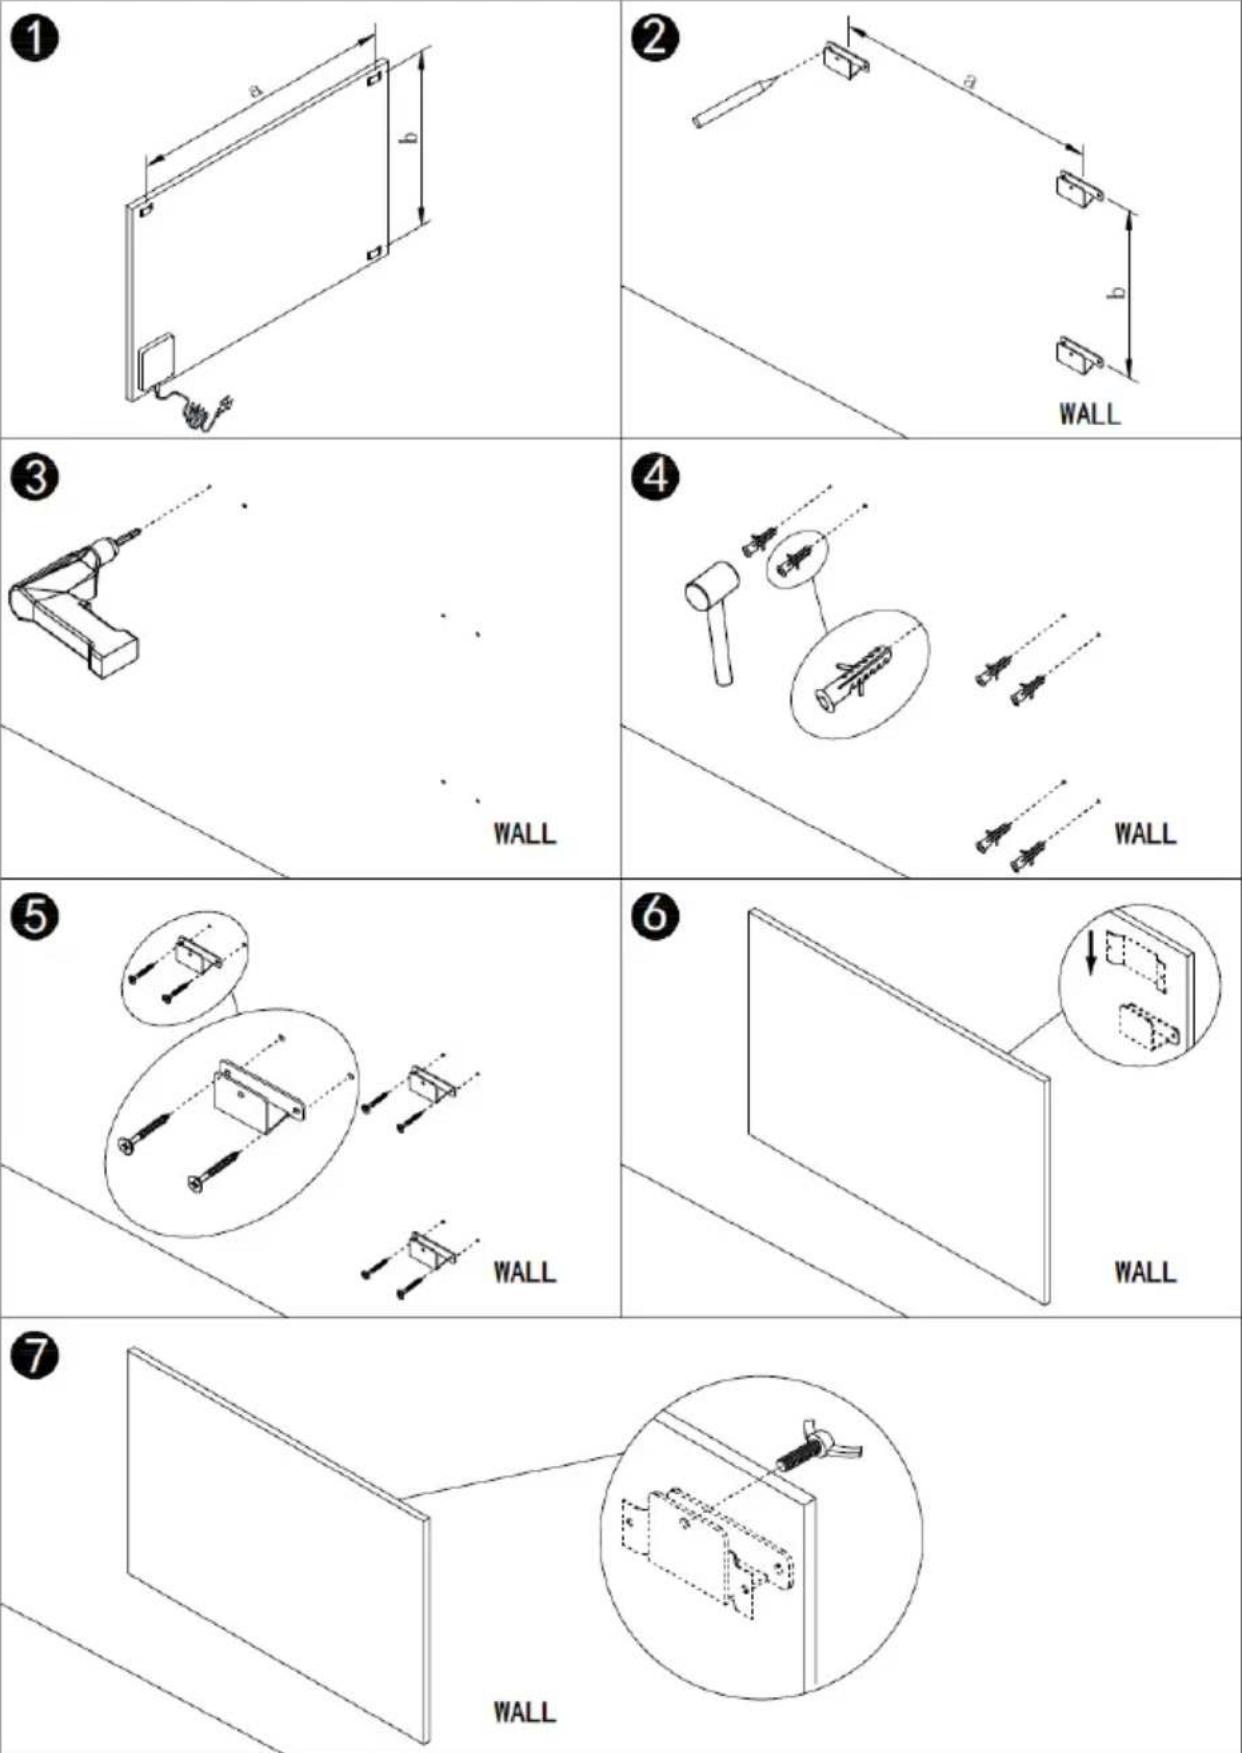
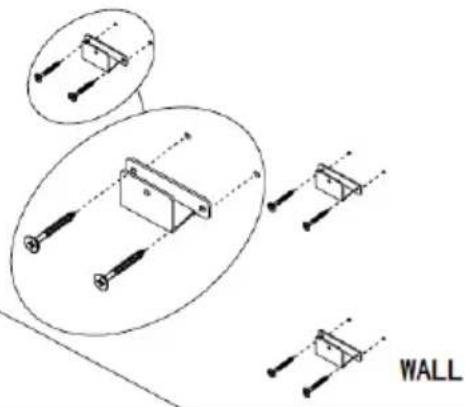
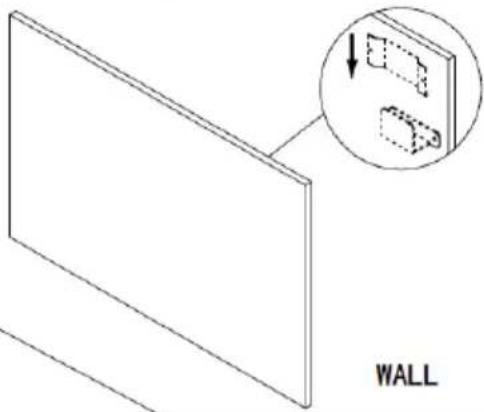
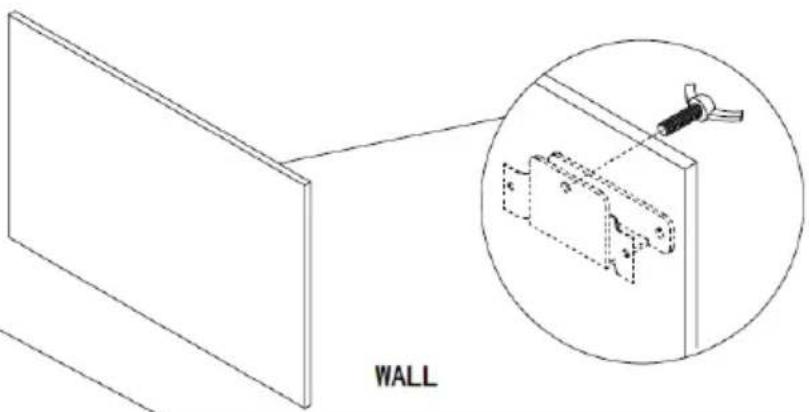
INSTALLATION
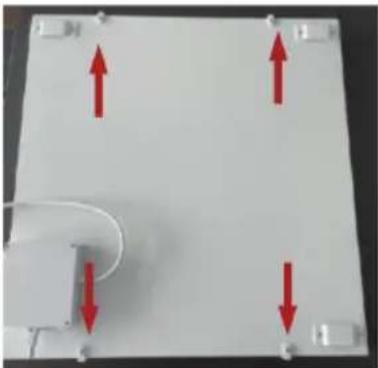
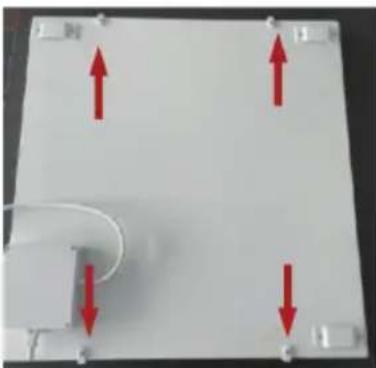
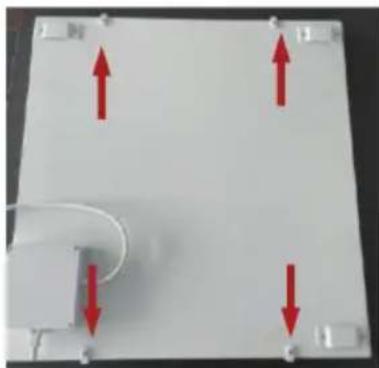
The kit supplied is designed for vertical or horizontal mounting on a solid wall. For mounting on other walls, you need suitable fasteners (not included in the scope of delivery). Make sure that the wall is suitable for mounting. We strongly recommend having the panel installed by a qualified electrician or an authorised specialist company. The heater must be at least 20 cm away from all objects, walls, etc. The distance to the floor must be at least 20 cm.
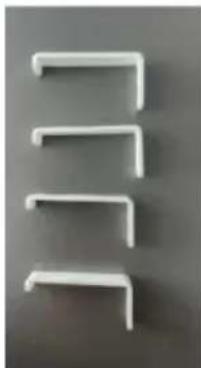
Note: Before installation, you should attach the guard to the heater for safety reasons.
natural_image
Three white L-shaped metal clips arranged vertically on a gray background (no text or symbols)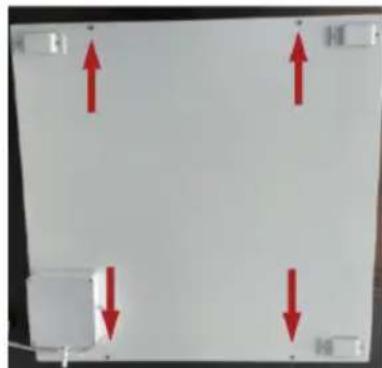
natural_image
Pure electrical circuit lines without any symbolsNote: This heater is designed for horizontal or vertical wall mounting only. It is not permitted to mount the unit in any other position.
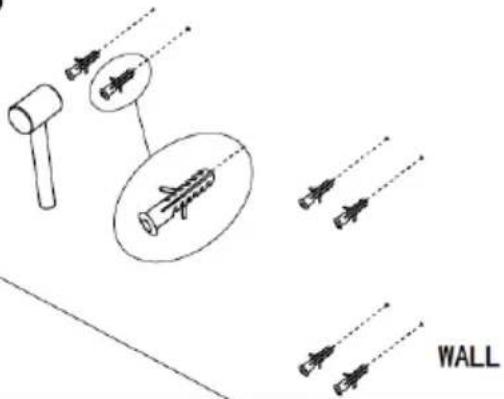
- Measure the distance between a and b.
- Mark the position on the wall.
- Drill the holes in the wall.
- Insert the dowels into the holes.
- Screw the supplied bracket to the wall.
- Hang the panel in the holder.
- Tighten the screw to ensure that the panel is securely fastened.
OPERATION
General introduction to the control system
The series has built-in WLAN control, which means that no additional thermostat is required to control the heater. As soon as the heater is connected to the app, the smartphone will take over control and communicate with the control unit. If the internet is not working at home, it is still possible to operate the heating manually via the control panel or the remote control. As soon as the heater is connected to the WLAN again, the smartphone takes over the control again.
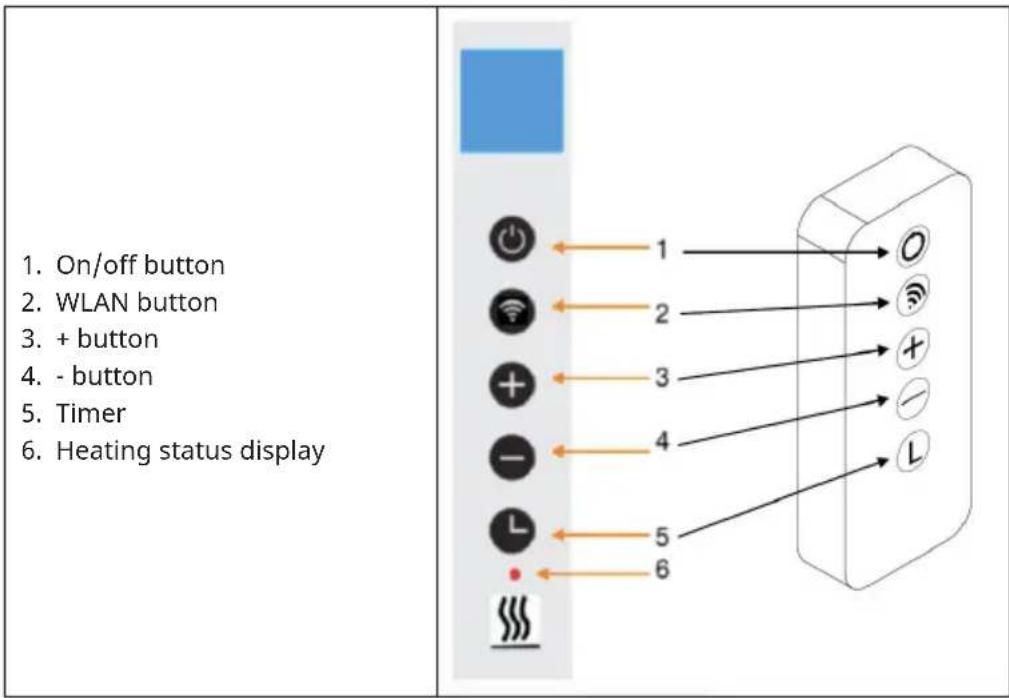
Button descriptions
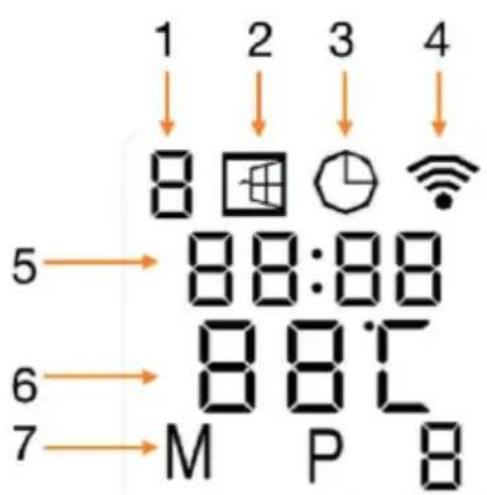
Screen display
- Weekday
- Open window detection
- Timer symbol
- WLAN symbol
- Time
- Temperature
Open window detection
This heater is equipped with an open window detection function. If the control system detects that the room temperature has dropped drastically in a short period of time while the heater is in heating status, it detects that a window is open. The window sign on the screen will start flashing and the heater will turn off for 30 minutes. After 30 minutes, the unit automatically returns to the previous setting.
You can deactivate and activate this function by pressing and holding the - button for 5 seconds, whereupon the open window symbol on the screen disappears or reappears.
Resetting the WLAN
Switch on the unit and press the WIFI button for 5 seconds until the WLAN indicator starts flashing to reset the WLAN connection.
Activate / deactivate WLAN function
Press the Timer button for 10 seconds to deactivate the WLAN function of the heater. The WLAN symbol on the screen disappears. Press the Timer button for 10 seconds to reactivate it.
Manual control
To enter manual mode, activate the power switch and press the power button to switch on the heater. The symbol "M" is displayed on the screen. Set the desired temperature by pressing the - or + button. 2 seconds later, the screen will show the current room temperature again. If you want to set the timer, press the Timer button. The screen displays "00H" and you can set the timer by pressing the - and + buttons to start the countdown.
Child safety lock
Press and hold the power button for 5 seconds. "CL" is displayed on the screen to enter the child lock mode. Press and hold the power button for 5 seconds to exit the child lock mode.
DEVICE CONTROL VIA SMARTPHONE
If you integrate your Klarstein appliance into your home WLAN, you can operate it conveniently via the associated Klarstein app. The app not only allows you to control the appliance remotely via your smartphone, but also gives you access to recipes and further information.
Follow these steps to connect your smartphone to your Klarstein appliance:
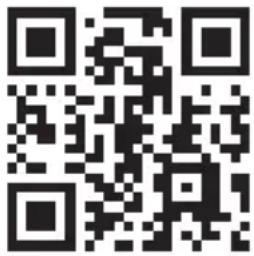
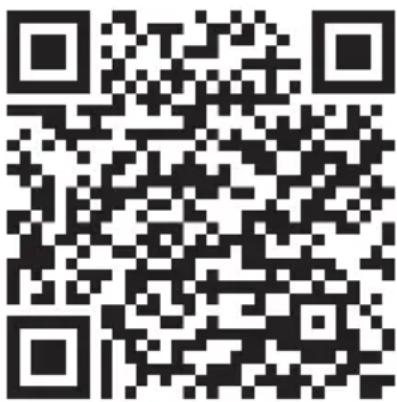
- First download the Klarstein app by scanning the QR code with your smartphone (see below) or download it directly from the App Store or Google Play.
- Make sure that your smartphone is connected to the same WiFi network that your Klarstein device is to be connected to.
- Open the Klarstein app.
- Log in with your account. If you don't have an account yet, register in the Klarstein app.
- Follow the instructions in the app.
App download
Use the scan function of your mobile phone to scan the QR code and save the app on your smartphone.
Note: Further instructions on how to use the app and help on how to connect to your device are provided by the app when you open it for the first time.
| iOS Android | |
 |  |
Troubleshooting connection problems
If your Klarstein device cannot be found in the WLAN, check the following:
- Is the unit plugged in?
- Is the WLAN function of the smartphone activated?
- Is the WLAN function of the Klarstein device activated? (Follow the instructions in the app)
- Has the WiFi password been entered correctly?
- Are the router, Klarstein device and smartphone in close proximity during the pairing attempt? (Ideally no more than 5 m apart)
- If you have deactivated the 2.4 GHz band in the settings of your WLAN router, activate it in your router settings.
Note: For further assistance, follow the app's instructions when establishing the connection.
CLEANING AND CARE
Note: Switch off the device and remove the plug from the socket. Wait until the device has cooled down completely before cleaning it.
- Use a vacuum cleaner to clean the ventilation slots and grilles.
- Remove dust from the exterior surfaces with a damp (not wet) cloth.
- Do not use harsh cleaning agents or abrasive cleaners.
- Do not spray or immerse the device in water or any other liquid.
- Never open the heater housing.
DISPOSAL CONSIDERATIONS
natural_image
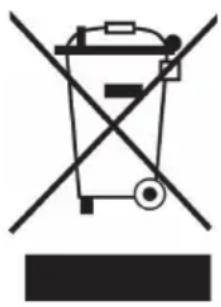
Symbol of a trash bin crossed with a diagonal line, no text or numbers presentIf there is a legal regulation in your country regarding the disposal of electrical and electronic equipment, this symbol on the product or on the packaging indicates that this product must not be disposed of with household waste. Instead, it must be taken to a collection point for the recycling of electrical and electronic equipment. By disposing of this product in accordance with the regulations, you protect the environment and the health of those around you from negative consequences. For information on recycling and disposal of this product, contact your local government or household waste disposal service.
This product contains batteries. If there is a legal regulation in your country regarding the disposal of batteries, the batteries must not be disposed of in household waste. Consult your local regulations for the disposal of batteries. By disposing of this product in accordance with the regulations, you are protecting the environment and the health of those around you from negative consequences.
DECLARATION OF CONFORMITY

Manufacturer:
Chal-Tec GmbH, Wallstrasse 16, 10179 Berlin, Germany.
Importer for Great Britain:
Berlin Brands Group UK Ltd
PO Box 1145
Oxford, OX1 9UW
United Kingdom
Chal-Tec GmbH hereby declares that the radio equipment type Wonderwall Santorini complies with Directive 2014/53/EU. The complete text of the EU declaration of conformity is available at the following internet address: use.berlin/10041820
Estimado cliente:
ÍNDICE
natural_image
Three white L-shaped metal bars arranged vertically on a gray background (no text or symbols)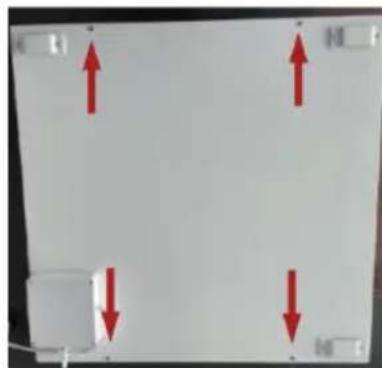
natural_image
Pure electrical circuit lines without any symbolsnatural_image
Symbol of a trash bin crossed with a diagonal line, no text or numbers presentBerlin Brands Group UK Ltd
PO Box 1145
Oxford, OX1 9UW
Reino Unido
Cher client, chère cliente,
SOMMAIRE
FICHE DE DONNÉES PRODUIT
FICHE DE DONNÉES PRODUIT
natural_image
Three white L-shaped metal bars arranged vertically on a gray background (no text or symbols)

natural_image
Pure electrical circuit lines without any symbolsnatural_image
Symbol of a trash bin crossed with a diagonal line, no text or numbers presentDÉCLARATION DE CONFORMITÉ

Fabricant :
Chal-Tec GmbH, Wallstraße 16, 10179 Berlin, Allemagne.
Berlin Brands Group UK Ltd
PO Box 1145
Oxford, OX1 9UW
United Kingdom
INDICE
natural_image
Three white L-shaped metal bars arranged vertically on a gray background (no text or symbols)
natural_image
Pure electrical circuit lines without any symbolsnatural_image
Simple line drawing of a mechanical tool or bracket with a dotted line extending from it (no text or symbols)4
5
natural_image
Technical line drawing of a wall-mounted electronic component with mounting holes and wiring (no text or symbols)6
natural_image
Diagram showing a 3D panel with an inset magnified view of two labeled components (no text or symbols present)7
natural_image
Technical line drawing of a wall-mounted electrical switch with an inset close-up showing internal components (no text or symbols)UTILIZZO
natural_image
Symbol of a trash bin crossed with a diagonal line, no text or numbers presentBerlin Brands Group UK Ltd
PO Box 1145
Oxford, OX1 9UW
United Kingdom
- WONDERWALL SANTORINI SMART
- INHALTSVERZEICHNIS
- Member of Berlin Brands Group
- Handwerkerstr. 11
- Dahlwitz-Hoppegarten
- Deutschland
- CONTENTS
- SAFETYINSTRUCTIONS
- CAUTION
- Cleaning
- Use / Operation
- Repairs
- PRODUCT DATA SHEET
- INSTALLATION
- OPERATION
- General introduction to the control system
- Button descriptions
- Screen display
- Open window detection
- Resetting the WLAN
- Activate / deactivate WLAN function
- Manual control
- Child safety lock
- DEVICE CONTROL VIA SMARTPHONE
- App download
- Troubleshooting connection problems
- CLEANING AND CARE
- DISPOSAL CONSIDERATIONS
- DECLARATION OF CONFORMITY
- Manufacturer:
- Importer for Great Britain:
- Estimado cliente:
- ÍNDICE
- SOMMAIRE
- FICHE DE DONNÉES PRODUIT
- DÉCLARATION DE CONFORMITÉ
- Fabricant :
- INDICE
- UTILIZZO
Brand : Klarstein
Model : Wonderwall Santorini Smart 1000W
Category : Heating