USER MANUAL AL-K07 Vevor
Technical Support and E-Warranty Certificate www.vevor.com/support
Bill Counter
User Manual
AL-K07
We continue to be committed to provide you tools with competitive price. "Save Half", "Half Price" or any other similar expressions used by us only represents an estimate of savings you might benefit from buying certain tools with us compared to the major top brands and does not necessarily mean to cover all categories of tools offered by us. You are kindly reminded to verify carefully when you are placing an order with us if you are actually saving half in comparison with the top major brands.
VEVOR®
TOUGH TOOLS, HALF PRICE
BILL COUNTER
MODEL:AL-K07
Have product questions? Need technical support? Please feel free to contact us:
Technical Support and E-Warranty Certificate
www.vevor.com/support
This is the original instruction, please read all manual instructions carefully before operating. VEVOR reserves a clear interpretation of our user manual. The appearance of the product shall be subject to the product you received. Please forgive us that we won't inform you again if there are any technology or software updates on our product.
 | This device complies with Part 15 of the FCC Rules. Operation is subject to the following two conditions: (1)This device may not cause harmful interference, and (2)this device must accept any interference received, including interference that may cause undesired operation. |
 | CORRECT DISPOSALThis product is subject to the provision of european Directive 2012/19/EU. The symbol showing a wheelie bin crossed through indicates that the product requires separate refuse collection in the European Union. This applies to the product and all accessories marked with this symbol. Products marked as such may not be discarded with normal domestic waste, but must be taken to acollection point for recycling electrical and electronic devices. |
 | Compliance is a EC security certification. |
Contents
1. General Introduction 1 2. Important Safety Instructions ....1 3. Operation Method 2 4. Correct Feeding of Banknotes 2 5. Display Introduction 6. Functions Introduction 5 7. Hopper Plate Adjustment 10 8. Error Code and Solution 11 9. Common Troubles and Solution 12 10. Machine Settings 13 11. Maintenance 14 12. Features and Specifications 15
1. General Introduction
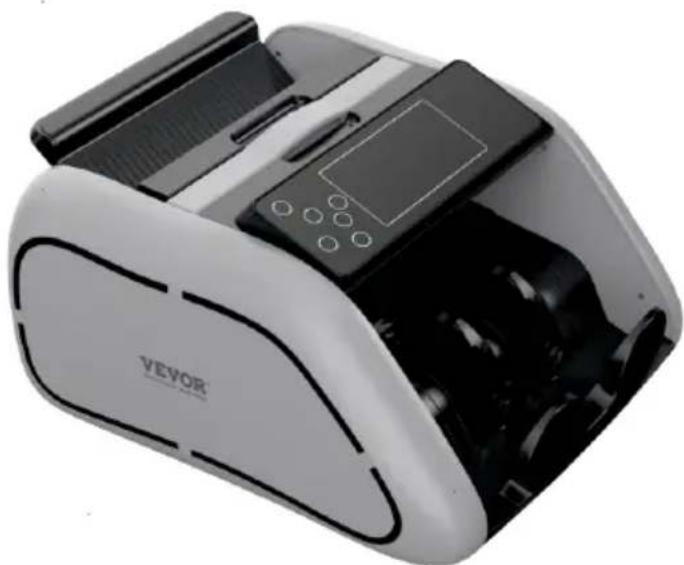
The bill counter is the perfect solution for a fast, accurate and reliable banknote counting process. This machine is the vanguard of our evolution in currency counting technology. Its compact and stylish design is as remarkable as its integrated electronics and multi-function capabilities. But it is more than just looks and hi-tech electronics. It is ready to process the most demanding tasks, from counting large amounts of cash, to batching custom bill quantities. The power to dramatically reduce labor and counting losses is now at the reach of your hands.
This machine makes an invaluable aid in banks, casinos, supermarkets, movie theaters, retail shops and many other environments where money is used.
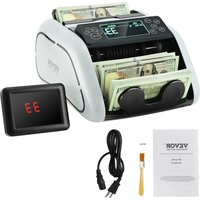
When opening the box, verify that all of the items described below are included. If any item is damaged or missing, contact the dealer where the unit was purchased.
- Machine*1
- User manual*1 3. Power cord*1
- Cleaning brush*1 5. Fuse*1 6. External display*1
2. Important Safety Instructions
When using this bill counter, basic safety precautions should always be followed to reduce the risk of fire, electric shock or injury to persons; including the following:
| Warning |
| Do not use this product in areas where it may be exposed to water or other liquids. |
| Unplug this product from the wall outlet before cleaning. Do not use liquid or aerosol cleaners. Use a damp cloth for cleaning. |
| To reduce the risk of electric shock, do not disassemble this product. Take it to qualified service personnel when service or repair work is required. Opening or removing covers -like the rear cover plate- may expose you to dangerous voltages or other risks. Incorrect re-assembly can cause electric shock when the appliance is subsequently used. |
| Only use the cable provided with the unit. The use of other cables may result in electric shock, fire or cause serious damage to the unit. |
| Do not operate the unit in areas with high temperature or high humidity since it may prevent it from working correctly. |
| Caution |
| When unplugging the power plug, do not pull it by the cord but rather grip the plug to pull it out. Not following these instructions may result in electric shock, fire or damage to the unit. |
| Do not use the unit if the power cord is damaged or if the plug socket contact is loose. Not following these instructions may result in electric shock, fire or other hazards. |
| Do not place heavy objects over the cord and do not bend it excessively since it could get damaged. Not following these instructions may result in electric shock, fire or other hazards. |
| When not using the unit for a long period of time, remove the power plug from the wall outlet. |
3. Operation Method
- Connect the power cord to the unit, then to a power source and turn the power switch on; the unit will conduct a self-check by spinning the counting wheels several times. The counting number display will show "0" when the unit is ready. • To avoid wrong detecting, please check and take out the banknotes before counting which are as following:
- Mended notes with paper
- Washed notes
- Very dirty notes
- Broken notes
4. Correct Feeding of Banknotes
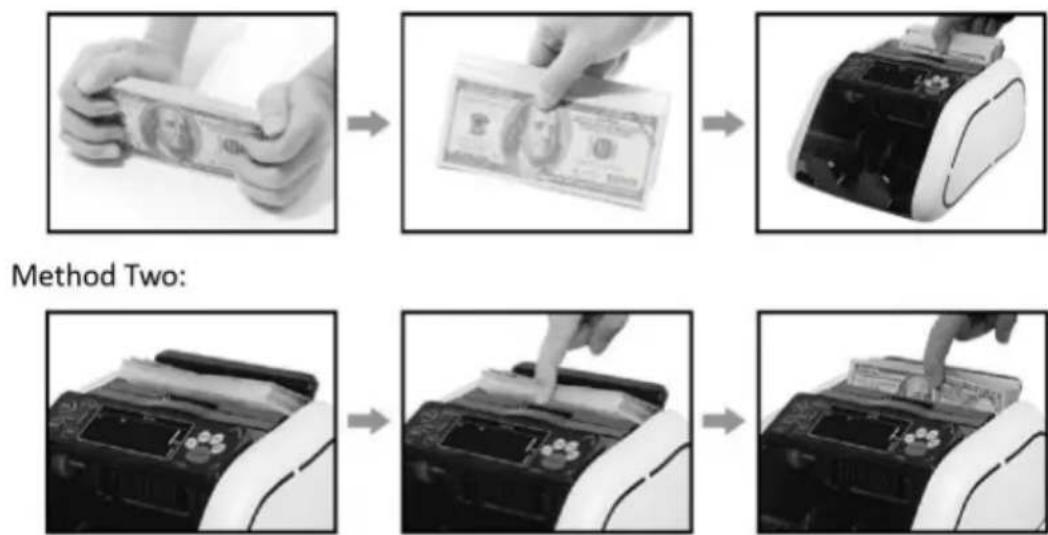
Banknotes need to be put orderly and placed between the counting guides, please refer to the following pictures:
Method One:
5. Display Introduction
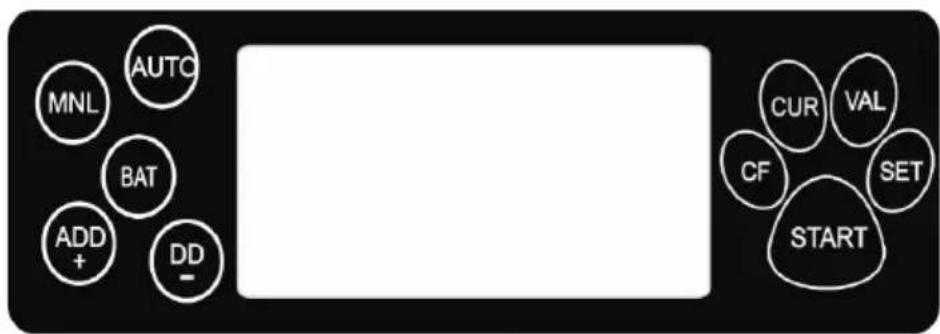
"MNL" button: Press "START" button to start counting after banknotes are placed in the hopper.
"ADD" button: press this button to turn on/off the ADD function.
"+" button: when in SET mode, press "+" once to add "1". If you keep pressing continuously, the parameter number will be added continuously. When in Value Calculation mode, press "+" to choose denomination.
"BAT" button: press this button to turn on/off the BATCH function. First press is 100→50-20 quit batch mode.
"AUTO" button: The machine begins counting automatically when banknotes are placed in the hopper.
"DD" button: press this button to turn on/off the DD detection. DD detection can sort the notes which width is more than 5mm different from first note counted.
"- " button: when in SET mode, press "-" once to reduce "1". If you keep pressing continuously, the parameter number will be reduced continuously. When in Value Calculation mode, press "-" to choose denomination.
"CF" button: press this button to turn on/off the UV, MG IR detection.
"CUR" button: press this button to choose currency.
"VAL" button: press this button to enter denomination calculation mode circulatory, press the button 3 seconds to quit Value Calculation mode. Meanwhile you can press ADD button to add up the total value.
"SET" button: press this button to enter sensitivity adjustment of sensors.
"START" button: press this button to clear the counting number or start counting.
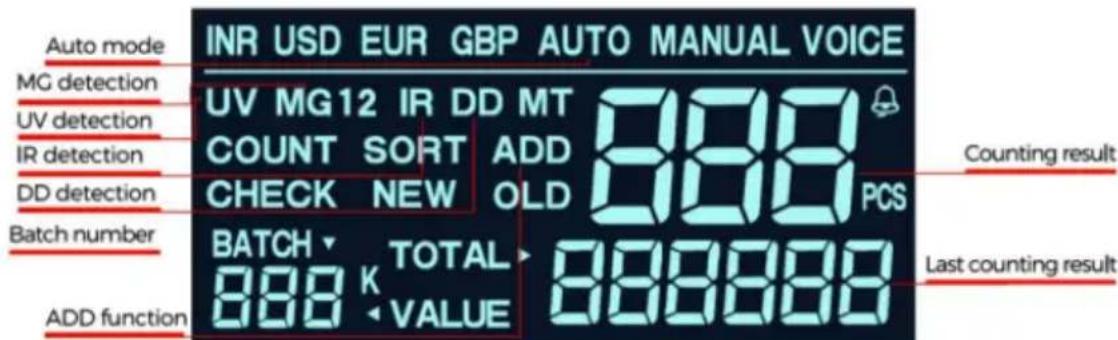
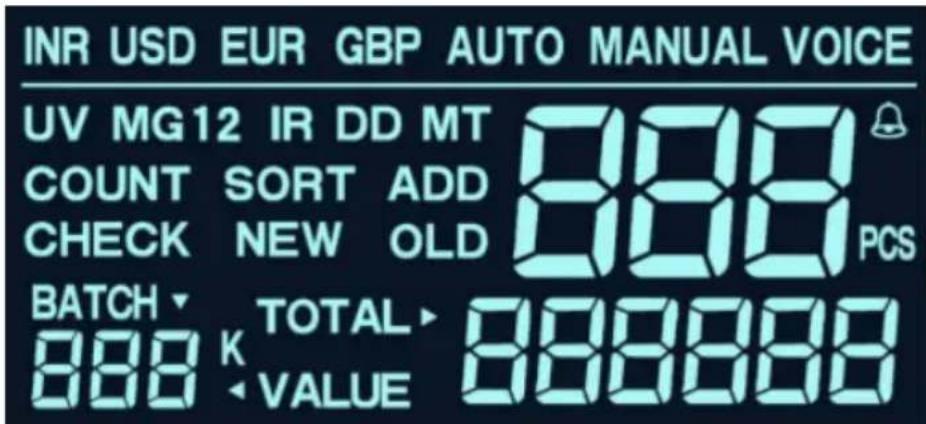
Display image:
6.Functions Introduction
Counting Function
Once the bills are correctly placed in the hopper plate, the machine will start counting automatically. The number of counted bills will be shown on the counter display. Moreover, once the bills are removed from the stacker, the counter display will clear and the batch display in turn will show the number of last counted bills instead.
UV (Ultraviolet) Detection Function
The UV detection function is selected or deselected by pressing the UV button in the function console. The UV function is able to check all types of banknotes which contain UV features.
By default, the UV function is automatically turned on when the unit is powered up. If the machine detects a counterfeit bill, it will stop counting and emit beeping sound. The display will show the message “A” or “E10”, alerting the user of the presence of a suspicious bill. Remove the counterfeit bill and press “START” to continue counting.
MG (Magnetic) Detection Function
The MG detection function is selected or deselected by pressing the MG button in the function console. The MG function is able to check all types of banknotes which contain MG features.
By default, the MG function is automatically turned on when the unit is powered up. If the machine detects a counterfeit bill, it will stop counting and emit a beeping sound. The display will show the message "b" or "E6X", alerting the user of the presence of a suspicious bill. Remove the suspicious bill and press "START" to continue counting.
IR (Infrared) Detection Function
The IR detection function is selected or deselected by pressing the IR button in the function console. The IR detection is also used to detect a double-note.
By default, the IR function is automatically turned on when the unit is powered up. If the machine detects a double-note, it will stop counting and emit a beeping sound. The display will show the message "C or ECO", alerting the user of the presence of suspicious money. Remove the counterfeit money and press "START" to continue counting.
DD Detection Function
The DD detection function is selected or deselected by pressing the DD button in the function console. The DD detection is used to detect banknotes with different widths.
Through this function, the width of the first counted banknote will be memorized, and if a wider or narrower one is detected (width difference must be more than 5mm), it will stop counting and emit a beeping sound. The display will show the message "d or E8X", alerting the user of the presence of suspicious money. Remove the counterfeit money and press "START" to continue counting.
Total Value Calculation Function
The Total Value Calculation function is selected or deselected by pressing the VALUE button in the function console. Keep pressing the VALUE button for 2 seconds to exit this function.
Through this function, the user needs to press the A button to choose the denomination manually. For example, when you choose 100 and count 30 pieces of 100, the display will show the total value 3000. Note that when you choose 100, you must count 100s, because if you put other denominations such as 50 or 20, the machine will also memorize them as 100.
Under the calculation function, the user can turn on the AD function if they want to count many denominations, so the user can press the VA button or the "-" button to choose the denomination accordingly and the total value will not clear. In this case, the next banknotes placed in the hopper will be counted and added to the previous total value.
Automatic or Manual Start Mode Function
Automatic Start Mode:
The machine begins counting automatically when banknotes are placed in the hopper.
Manual Start Mode:
Press the "S button" to start counting after banknotes are placed in the hopper.
Batch Function
The batch function can be selected or deselected by pressing the "Batch" button. The batch number is indicated on the batch display.
First Press: the batch number is 100
Second Press: the batch number is 50
Third Press: the batch number is 20
Fourth Press: the batch number is 10
Fifth Press: the batch function is canceled.
The custom quantity can be set by pressing the "+" or "-" button to increase or decrease the batch number. If you keep pressing the "+" or "-" button for about 2 seconds, the batch number will increase or decrease continuously. If the machine has number keys, you can set the batch number much more conveniently. To clear this function, press the "BATCH" button until the indicator is off.
Under the batch counting mode, once the hopper is loaded, the machine will start counting and will stop when the counted quantity reaches the preset batch quantity.
To repeat the batch counting operation under the same preset batch quantity, just remove the counted banknotes from the stacker. The machine will batch the next group of banknotes under the same settings.
If you wish to keep batching without removing the banknotes from the stacker, press the "START" button.
ADD Function
The add function can be performed by pressing the "ADD" button (the indicator must light up). In this case, the next banknotes placed in the hopper will be counted and added to the previous counted quantity. The total amount of added banknotes will be shown on the counter screen. To close the function, press the "ADD" button again (the indicator must be OFF).
Half-note Detection Function
The half-note detection is automatically turned on by default when the machine is powered up. If the machine detects a half-note when counting, it will stop and emit a beeping sound, while the display will show the message "For E4 X" alerting the user to the presence of a suspicious note. Remove the suspicious note and press the "START" button to continue counting. Please note that the suspicious money will be added to the counted quantity.
Chained-note Detection Function
The chained-note detection is automatically turned on by default when the machine is powered up. If the machine detects a chained-note when counting, it will stop and emit a beeping sound, while the display will show the message "d or E8X", alerting the user to the presence of a suspicious note. Remove the suspicious note and press the "START" button to continue counting. Please note that the suspicious money will be added to the counted quantity.
Double-note Detection Function
The double-note detection is automatically turned on by default when the machine is powered up. If the machine detects a double-note when counting, it will stop and emit a beeping sound, while the display will show the message "C" or "ECO", alerting the user to the presence of a suspicious note. Remove the suspicious note and press the "START" button to continue counting. Please note that the suspicious bill will be added to the counted quantity.
7. Hopper Plate Adjustment
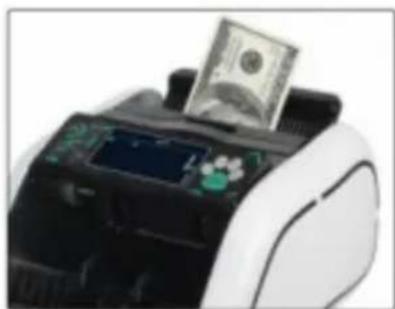
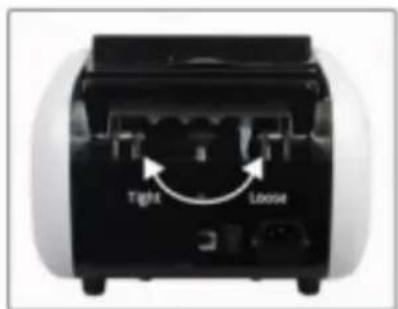
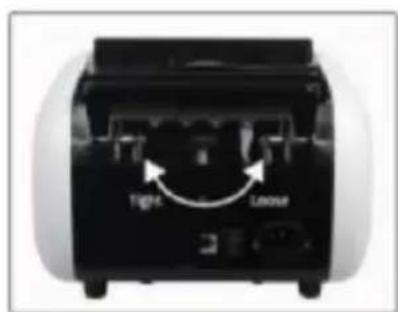
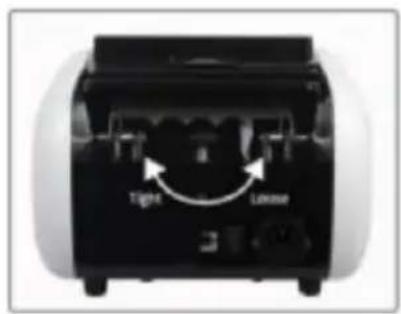
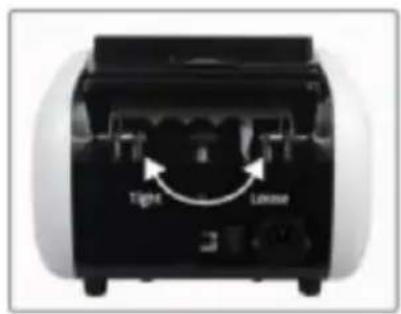
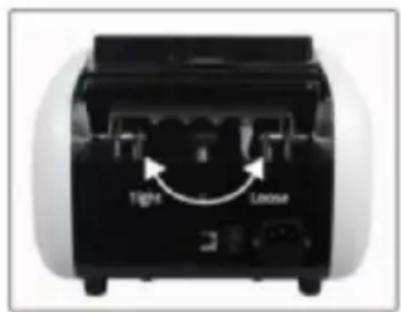
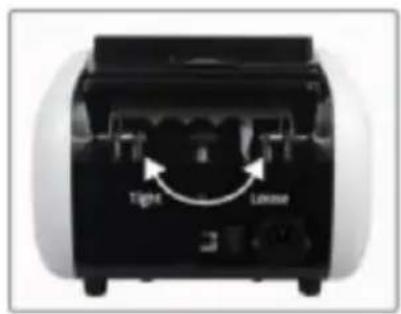
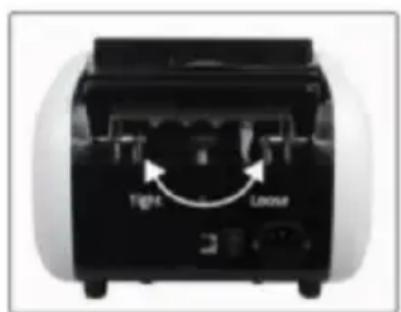
When banknote feeding is unsmooth or banknote counting is inaccurate, it can be solved by adjusting the vertical adjusting screw as well as the gap between the resistance rubber and rubber wheel. Then you can put in a banknote and hold it; if you feel the pull, the machine is workable.
Turn it clockwise to decrease the gap in order to add friction (tight).
Turn it anticlockwise to increase the gap in order to reduce friction (loose).
8. Error Code and Solution
The display may show an error code when counting, which means there is a problem with the machine. Refer to the following sheet to find a way to solve it.
| Error Code | Reason | Solution |
| A or E10 | Fake note detected by UV | Remove the fake note from the stacker, press “START” to continue |
| b or E6X | Fake note detected by MG | Remove the fake note from the stacker, press “START” to continue |
| C or EC0 | Double note detected by IR | Remove the double note from the stacker, press “START” to continue |
| d or E8X | Chain note or different width note detected | Remove the suspicious note from the stacker, press “START” to continue |
| F or E4X | Half note detected | Remove the half note from the stacker, press “START” to continue |
| CE1 | Problem with the UV sensor | Clean the sensor or replace it |
| CE2 | Problem with code disc sensor or big motor | Replace the sensor or big motor |
| CE3 | Problem with left counting sensor | Clean the sensor or replace it |
| CE4 | Problem with right counting sensor | Clean the sensor or replace it |
| CE5 | Problem with hopper sensor | Clean the sensor or replace it |
| CE7 | Problem with MG sensor | Replace the MG sensor |
| CE8 | Problem with stacker sensor | Clean the sensor or replace it |
Generally speaking, most of the above-mentioned problems may be caused by dust or dirt inside the machine. So keeping the machine clean is highly recommended.
9. Common Troubles and Solution
Before maintenance, please check the problems as below:
Note: before solving the problem, you must turn off the power switch and unplug the outlet.
| Not working |
Check if the plug is well inserted into socket.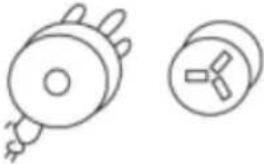 | Check if the power fails or fuse burn out.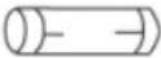  |
| Fail to start or stop normally |
Feeding Sensor covered in d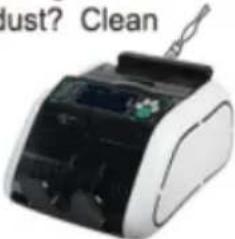 | Feeding sensor not in connection with electric circuit?Check and connect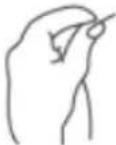 | Transmission belt of the motor not proper in tension, too tight or loose Adjust well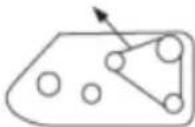 |
| Counting Error |
Hopper position adjusted improperly?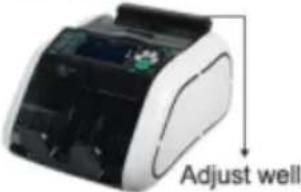 | Counting sensor covered in dust?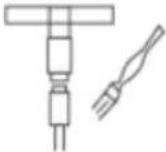 Clean Clean | Drag rubber and feeding wheel worn too much?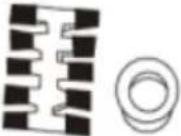 Change Change |
| False Alarm |
Fluorescent sensitivity adjusted improperly?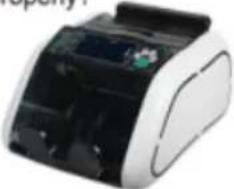 Adjust well Adjust well | Verifying sensor covered in dust?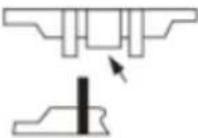 Clean Clean | Fluorescent lighting diode aged? Change Change |
10. Machine Settings
UV Sensitivity Adjustment:
UV sensitivity adjustment: press the "SET" button for about seconds, the display will show "A---", then press "+" or "-" to increase or decrease the parameter.
If the parameter is larger, the sensitivity will be lower; if the parameter is smaller, the UV sensitivity will be higher.
USD MG sensitivity adjustment: press the "SET" button for about seconds, the display will show "A---", continue to press the "SET" button until the display shows "b 2-2", then press "+" or "-" to increase or decrease the parameter.
If the parameter is larger, the sensitivity will be higher; if the parameter is smaller, the sensitivity will be lower.
EUR MG sensitivity adjustment: press the "SET" button for about 1.5 seconds, the display will show "A---", continue to press the "SET" button until the display shows "b 3-2", then press "+" or "-" to increase or decrease the parameter.
If the parameter is larger, the MG sensitivity will be higher; if the parameter is smaller, the MG sensitivity will be lower.
NOTE: after you finish the setting, please put your finger on the hopper sensor and the roller will run, then the setting will be saved.
Fake Note Included or Not Setting:
Turn on the machine, then press "D" and "BA" at the same time until the display shows "H-C00", then press "SET" times, the display will show "-C", press "-" to change " " to " ". Then put your finger on the hopper sensor and the roller will run, the setting will be saved and the counting result will not include fake notes.
Turn on or off Voice Function:
Method one: press "START/VOICE" for a while, when the display shows "VOICE", it means the voice function is on; when the display does not show "VOICE", it means the voice function is off.
Method two: keep pressing the "START/VOICE" button, then switch on the machine to turn on/off the voice function.
Factory Setting:
Press "DD", "BATCH", and "START" buttons simultaneously, then turn on the machine. When the display shows "dEF", it means the machine has been restored to factory settings.
11. Maintenance
Do not operate the unit in areas with high temperature or high humidity, as this may cause the machine to malfunction or prevent it from counting accurately.
When not using the unit for a long period of time, remove the power plug from the wall outlet.
Never operate the unit under strong light.
Clean the machine frequently after switching it off and unplugging it.
Do not use this product in areas where it may be exposed to water or other liquids.
Unplug this product from the wall outlet before cleaning. Do not use liquid cleaners or aerosol cleaners. Use a damp cloth for cleaning.
12. Features and Specifications
Features:
Automatic start, stop, and clear
Automatic detection with UV (ultraviolet), magnetic, and metal thread
while counting
Automatic half-note and chained-note detection
Double-note detection with IR infrared detection system
With batch, add, and self-examination function
LCD color changes to red when detecting fake notes
Suitable for most currencies in the world
Specification:
• Ambient Temperature: 0°C-40°C
• Ambient Humidity: 25%-80%
- Feeding System: Roller Friction System
• Hopper Capacity: 100 old bills or 200 new bills
• Stacker Capacity: 100 old bills or 200 new bills
- Counting Speed: 1000 pcs/minute
• Thickness of Countable Bills: 0.075mm-0.15mm
- Counting Display: 4 digits
- Batch Display: 3 digits
• Power Supply: USA: AC110V + 10% /60Hz EUR: AC220V /50Hz
• Power Consumption: ≤80 Watts
• Gross Weight: 5.25 kg
Manufacturer: Shanghai Muxin Muye Youxiangongsi
Address: Baoshanqu Shuangchenglu 803long 11hao 1602A-1609shi Shanghai
Imported to USA: Sanven Technology Ltd.
Suite 250, 9166 Anaheim Place, Rancho Cucamonga, CA 91730
SHUNSHUN GmbH
Römeräcker 9 Z2021, 76351
Technical Support and E-Warranty Certificate
www.vevor.com/support
VEVOR®
Have product questions? Need technical support? Please feel free to contact us:
Technical Support and E-Warranty Certificate
www.vevor.com/support
| Warning |
| Do not use this product in areas where it may be exposed to water or other liquids. |
| Unplug this product from the wall outlet before cleaning. Do not use liquid or aerosol cleaners. Use a damp cloth for cleaning. |
| To reduce the risk of electric shock, do not disassemble this product. Take it to qualified service personnel when service or repair work is required. Opening or removing covers -like the rear cover plate- may expose you to dangerous voltages or other risks. Incorrect re-assembly can cause electric shock when the appliance is subsequently used. |
| Only use the cable provided with the unit. The use of other cables may result in electric shock, fire or cause serious damage to the unit. |
| Do not operate the unit in areas with high temperature or high humidity since it may prevent it from working correctly. |
| Caution |
| When unplugging the power plug, do not pull it by the cord but rather grip the plug to pull it out. Not following these instructions may result in electric shock, fire or damage to the unit. |
| Do not use the unit if the power cord is damaged or if the plug socket contact is loose. Not following these instructions may result in electric shock, fire or other hazards. |
| Do not place heavy objects over the cord and do not bend it excessively since it could get damaged. Not following these instructions may result in electric shock, fire or other hazards. |
| When not using the unit for a long period of time, remove the power plug from the wall outlet. |
| Error Code | Reason | Solution |
| A or E10 | Fake note detected by UV | Remove the fake note from the stacker, press "START" to continue |
| b or E6X | Fake note detected by MG | Remove the fake note from the stacker, press "START" to continue |
| C or EC0 | Double note detected by IR | Remove the double note from the stacker, press "START" to continue |
| d or E8X | Chain note or different width note detected | Remove the suspicious note from the stacker, press "START" to continue |
| F or E4X | Half note detected | Remove the half note from the stacker, press "START" to continue |
| CE1 | Problem with the UV sensor | Clean the sensor or replace it |
| CE2 | Problem with code disc sensor or big motor | Replace the sensor or big motor |
| CE3 | Problem with left counting sensor | Clean the sensor or replace it |
| CE4 | Problem with right counting sensor | Clean the sensor or replace it |
| CE5 | Problem with hopper sensor | Clean the sensor or replace it |
| CE7 | Problem with MG sensor | Replace the MG sensor |
| CE8 | Problem with stacker sensor | Clean the sensor or replace it |
| Not working |
Check if the plug is well inserted into socket.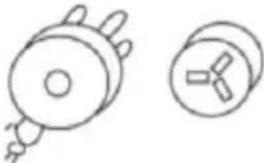 | Check if the power fails or fuse burn out.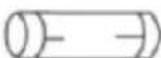  |
| Fail to start or stop normally |
Feeding Sensor covered in c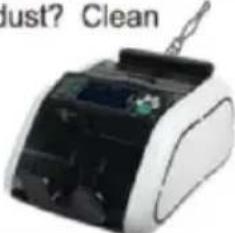 | Feeding sensor not in connection with electric circuit?Check and connect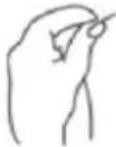 | Transmission belt of the motor not proper in tension, too tight or loose Adjust well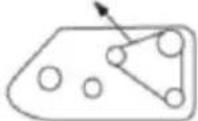 |
| Counting Error |
Hopper position adjusted improperly?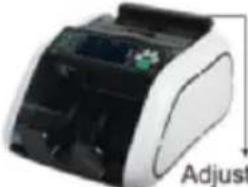 well well | Counting sensor covered in dust?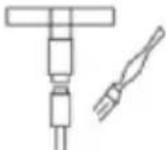 Clean Clean | Drag rubber and feeding wheel worn too much?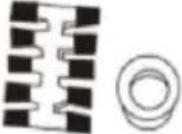 Change Change |
| False Alarm |
Fluorescent sensitivity adjusted improperly?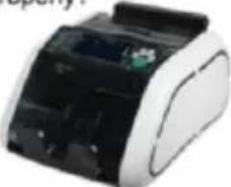 Adjust well Adjust well | Verifying sensor covered in dust? Clean Clean | Fluorescent lighting diode aged? Change Change |
• Power Consumption: ≤80 Watts
www.vevor.com/support
VEVOR®
Have product questions? Need technical support? Please feel free to contact us:
Technical Support and E-Warranty Certificate
www.vevor.com/support
| Warning |
| Do not use this product in areas where it may be exposed to water or other liquids. |
| Unplug this product from the wall outlet before cleaning. Do not use liquid or aerosol cleaners. Use a damp cloth for cleaning. |
| To reduce the risk of electric shock, do not disassemble this product. Take it to qualified service personnel when service or repair work is required. Opening or removing covers -like the rear cover plate- may expose you to dangerous voltages or other risks. Incorrect re-assembly can cause electric shock when the appliance is subsequently used. |
| Only use the cable provided with the unit. The use of other cables may result in electric shock, fire or cause serious damage to the unit. |
| Do not operate the unit in areas with high temperature or high humidity since it may prevent it from working correctly. |
| Caution |
| When unplugging the power plug, do not pull it by the cord but rather grip the plug to pull it out. Not following these instructions may result in electric shock, fire or damage to the unit. |
| Do not use the unit if the power cord is damaged or if the plug socket contact is loose. Not following these instructions may result in electric shock, fire or other hazards. |
| Do not place heavy objects over the cord and do not bend it excessively since it could get damaged. Not following these instructions may result in electric shock, fire or other hazards. |
| When not using the unit for a long period of time, remove the power plug from the wall outlet. |
3. Operating Method

| Error Code | Reason | Solution |
| A or E10 | Fake note detected by UV | Remove the fake note from the stacker, press "START" to continue |
| b or E6X | Fake note detected by MG | Remove the fake note from the stacker, press "START" to continue |
| C or EC0 | Double note detected by IR | Remove the double note from the stacker, press "START" to continue |
| d or E8X | Chain note or different width note detected | Remove the suspicious note from the stacker, press "START" to continue |
| F or E4X | Half note detected | Remove the half note from the stacker, press "START" to continue |
| CE1 | Problem with the UV sensor | Clean the sensor or replace it |
| CE2 | Problem with code disc sensor or big motor | Replace the sensor or big motor |
| CE3 | Problem with left counting sensor | Clean the sensor or replace it |
| CE4 | Problem with right counting sensor | Clean the sensor or replace it |
| CE5 | Problem with hopper sensor | Clean the sensor or replace it |
| CE7 | Problem with MG sensor | Replace the MG sensor |
| CE8 | Problem with stacker sensor | Clean the sensor or replace it |
| Not working |
Check if the plug is well inserted into socket.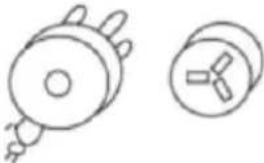 | Check if the power fails or fuse burn out.  |
| Fail to start or stop normally |
Feeding Sensor covered in c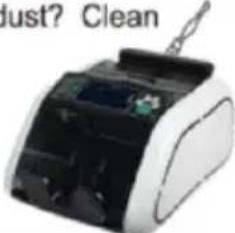 | Feeding sensor not in connection with electric circuit?Check and connect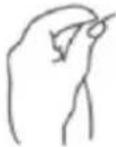 | Transmission belt of the motor not proper in tension, too tight or loose Adjust well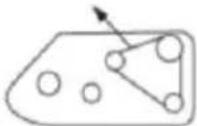 |
| Counting Error |
Hopper position adjusted improperly?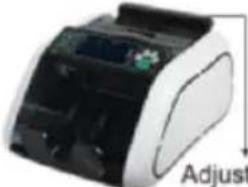 well well | Counting sensor covered in dust?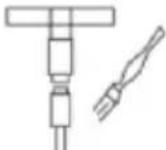 Clean Clean | Drag rubber and feeding wheel worn too much?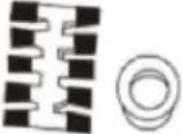 Change Change |
| False Alarm |
Fluorescent sensitivity adjusted improperly? Adjust well Adjust well | Verifying sensor covered in dust?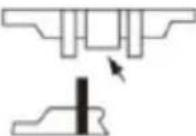 Clean Clean | Fluorescent lighting diode aged? Change Change |
• Power Consumption: ≤80 Watts
- Gross Weight: 5.25 kg
Manufacturer: Shanghaimuxi nmuyeyouxiangongsi
Address: Baoshanqu Shuangchenglu 803lang 11hao 1602A-16 09shi
Shanghai
www.vevor.com/support
VEVOR®
Have product questions? Need technical support? Please feel free to contact us:
Technical Support and E-Warranty Certificate www.vevor.com/support
| Warning |
| Do not use this product in areas where it may be exposed to water or other liquids. |
| Unplug this product from the wall outlet before cleaning. Do not use liquid or aerosol cleaners. Use a damp cloth for cleaning. |
| To reduce the risk of electric shock, do not disassemble this product. Take it to qualified service personnel when service or repair work is required. Opening or removing covers -like the rear cover plate- may expose you to dangerous voltages or other risks. Incorrect re-assembly can cause electric shock when the appliance is subsequently used. |
| Only use the cable provided with the unit. The use of other cables may result in electric shock, fire or cause serious damage to the unit. |
| Do not operate the unit in areas with high temperature or high humidity since it may prevent it from working correctly. |
| Caution |
| When unplugging the power plug, do not pull it by the cord but rather grip the plug to pull it out. Not following these instructions may result in electric shock, fire or damage to the unit. |
| Do not use the unit if the power cord is damaged or if the plug socket contact is loose. Not following these instructions may result in electric shock, fire or other hazards. |
| Do not place heavy objects over the cord and do not bend it excessively since it could get damaged. Not following these instructions may result in electric shock, fire or other hazards. |
| When not using the unit for a long period of time, remove the power plug from the wall outlet. |
3. Operation Method
| Error Code | Reason | Solution |
| A or E10 | Fake note detected by UV | Remove the fake note from the stacker, press "START" to continue |
| b or E6X | Fake note detected by MG | Remove the fake note from the stacker, press "START" to continue |
| C or EC0 | Double note detected by IR | Remove the double note from the stacker, press "START" to continue |
| d or E8X | Chain note or different width note detected | Remove the suspicious note from the stacker, press "START" to continue |
| F or E4X | Half note detected | Remove the half note from the stacker, press "START" to continue |
| CE1 | Problem with the UV sensor | Clean the sensor or replace it |
| CE2 | Problem with code disc sensor or big motor | Replace the sensor or big motor |
| CE3 | Problem with left counting sensor | Clean the sensor or replace it |
| CE4 | Problem with right counting sensor | Clean the sensor or replace it |
| CE5 | Problem with hopper sensor | Clean the sensor or replace it |
| CE7 | Problem with MG sensor | Replace the MG sensor |
| CE8 | Problem with stacker sensor | Clean the sensor or replace it |
| Not working |
| Check if the plug is well inserted into socket. | Check if the power fails or fuse burn out. |
| Fail to start or stop normally |
Feeding Sensor covered in c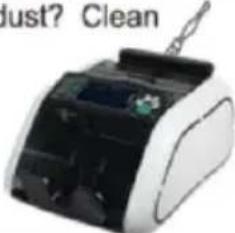 | Feeding sensor not in connection with electric circuit?Check and connect | Transmission belt of the motor not proper in tension, too tight or loose Adjust well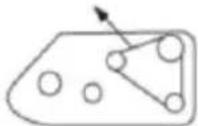 |
| Counting Error |
Hopper position adjusted improperly?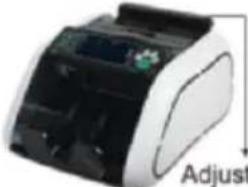 well well | Counting sensor covered in dust?Clean | Drag rubber and feeding wheel worn too much?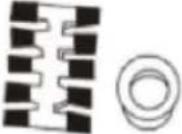 Change Change |
| False Alarm |
Fluorescent sensitivity adjusted improperly? Adjust well Adjust well | Verifying sensor covered in dust? Clean Clean | Fluorescent lighting diode aged? Change Change |
•Power Consumption: ≤80 Watts
Have product questions? Need technical support? Please feel free to contact us:
Technical Support and E-Warranty Certificate www.vevor.com/support
| Warning |
| Do not use this product in areas where it may be exposed to water or other liquids. |
| Unplug this product from the wall outlet before cleaning. Do not use liquid or aerosol cleaners. Use a damp cloth for cleaning. |
| To reduce the risk of electric shock, do not disassemble this product. Take it to qualified service personnel when service or repair work is required. Opening or removing covers -like the rear cover plate- may expose you to dangerous voltages or other risks. Incorrect re-assembly can cause electric shock when the appliance is subsequently used. |
| Only use the cable provided with the unit. The use of other cables may result in electric shock, fire or cause serious damage to the unit. |
| Do not operate the unit in areas with high temperature or high humidity since it may prevent it from working correctly. |
| Caution |
| When unplugging the power plug, do not pull it by the cord but rather grip the plug to pull it out. Not following these instructions may result in electric shock, fire or damage to the unit. |
| Do not use the unit if the power cord is damaged or if the plug socket contact is loose. Not following these instructions may result in electric shock, fire or other hazards. |
| Do not place heavy objects over the cord and do not bend it excessively since it could get damaged. Not following these instructions may result in electric shock, fire or other hazards. |
| When not using the unit for a long period of time, remove the power plug from the wall outlet. |
3. Operation Method
8. Error Code and Solution
| Error Code | Reason | Solution |
| A or E10 | Fake note detected by UV | Remove the fake note from the stacker, press "START" to continue |
| b or E6X | Fake note detected by MG | Remove the fake note from the stacker, press "START" to continue |
| C or EC0 | Double note detected by IR | Remove the double note from the stacker, press "START" to continue |
| d or E8X | Chain note or different width note detected | Remove the suspicious note from the stacker, press "START" to continue |
| F or E4X | Half note detected | Remove the half note from the stacker, press "START" to continue |
| CE1 | Problem with the UV sensor | Clean the sensor or replace it |
| CE2 | Problem with code disc sensor or big motor | Replace the sensor or big motor |
| CE3 | Problem with left counting sensor | Clean the sensor or replace it |
| CE4 | Problem with right counting sensor | Clean the sensor or replace it |
| CE5 | Problem with hopper sensor | Clean the sensor or replace it |
| CE7 | Problem with MG sensor | Replace the MG sensor |
| CE8 | Problem with stacker sensor | Clean the sensor or replace it |
| Not working |
Check if the plug is well inserted into socket.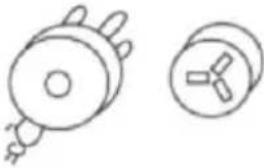 | Check if the power fails or fuse burn out.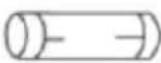  |
| Fail to start or stop normally |
Feeding Sensor covered in dust? Clean 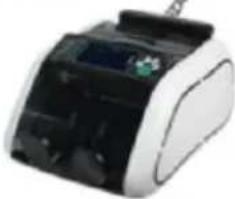 | Feeding sensor not in connection with electric circuit? Check and connect | Transmission belt of the motor not proper in tension, too tight or loose Adjust well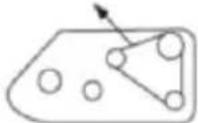 |
| Counting Error |
Hopper position adjusted improperly?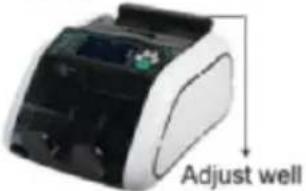 | Counting sensor covered in dust?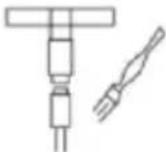 Clean Clean | Drag rubber and feeding wheel worn too much?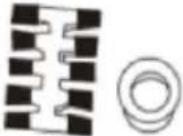 Change Change |
| False Alarm |
Fluorescent sensitivity adjusted improperly? Adjust well Adjust well | Verifying sensor covered in dust?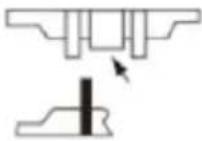 Clean Clean | Fluorescent lighting diode aged?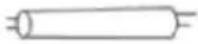 Change Change |
10. Machine Settings
Have product questions? Need technical support? Please feel free to contact us:
Technical Support and E-Warranty Certificate
www.vevor.com/support
| Warning |
| Do not use this product in areas where it may be exposed to water or other liquids. |
| Unplug this product from the wall outlet before cleaning. Do not use liquid or aerosol cleaners. Use a damp cloth for cleaning. |
| To reduce the risk of electric shock, do not disassemble this product. Take it to qualified service personnel when service or repair work is required. Opening or removing covers -like the rear cover plate- may expose you to dangerous voltages or other risks. Incorrect re-assembly can cause electric shock when the appliance is subsequently used. |
| Only use the cable provided with the unit. The use of other cables may result in electric shock, fire or cause serious damage to the unit. |
| Do not operate the unit in areas with high temperature or high humidity since it may prevent it from working correctly. |
| Caution |
| When unplugging the power plug, do not pull it by the cord but rather grip the plug to pull it out. Not following these instructions may result in electric shock, fire or damage to the unit. |
| Do not use the unit if the power cord is damaged or if the plug socket contact is loose. Not following these instructions may result in electric shock, fire or other hazards. |
| Do not place heavy objects over the cord and do not bend it excessively since it could get damaged. Not following these instructions may result in electric shock, fire or other hazards. |
| When not using the unit for a long period of time, remove the power plug from the wall outlet. |
3. Operation Method
| Error Code | Reason | Solution |
| A or E10 | Fake note detected by UV | Remove the fake note from the stacker, press "START" to continue |
| b or E6X | Fake note detected by MG | Remove the fake note from the stacker, press "START" to continue |
| C or EC0 | Double note detected by IR | Remove the double note from the stacker, press "START" to continue |
| d or E8X | Chain note or different width note detected | Remove the suspicious note from the stacker, press "START" to continue |
| F or E4X | Half note detected | Remove the half note from the stacker, press "START" to continue |
| CE1 | Problem with the UV sensor | Clean the sensor or replace it |
| CE2 | Problem with code disc sensor or big motor | Replace the sensor or big motor |
| CE3 | Problem with left counting sensor | Clean the sensor or replace it |
| CE4 | Problem with right counting sensor | Clean the sensor or replace it |
| CE5 | Problem with hopper sensor | Clean the sensor or replace it |
| CE7 | Problem with MG sensor | Replace the MG sensor |
| CE8 | Problem with stacker sensor | Clean the sensor or replace it |
| Not working |
Check if the plug is well inserted into socket.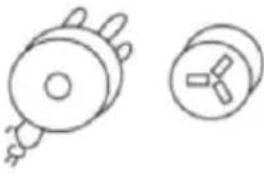 | Check if the power fails or fuse burn out.  |
| Fail to start or stop normally |
Feeding Sensor covered in c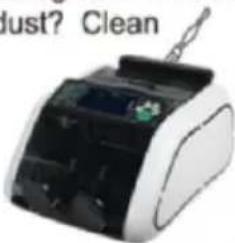 | Feeding sensor not in connection with electric circuit?Check and connect | Transmission belt of the motor not proper in tension, too tight or loose Adjust well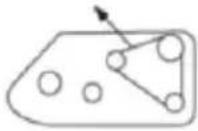 |
| Counting Error |
Hopper position adjusted improperly?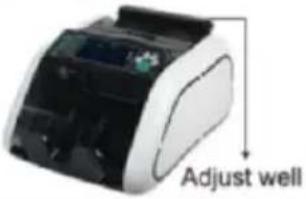 | Counting sensor covered in dust?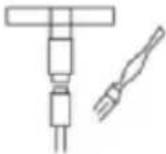 Clean Clean | Drag rubber and feeding wheel worn too much?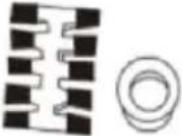 Change Change |
| False Alarm |
Fluorescent sensitivity adjusted improperly? Adjust well Adjust well | Verifying sensor covered in dust? Clean Clean | Fluorescent lighting diode aged? Change Change |
•Power Consumption: ≤80 Watts
- Gross weight: 5.25 kg
Manufacturer: Shanghaimuxi nmuyeyouxiangongsi
Address: Baoshanqu Shuangchenglu 803 long 11 hao 1602A-16 09 shi Shanghai Imported to USA: Sanven Technology Ltd.
Suite 250 9166 Anaheim Place, Rancho Cucamonga, CA 91730
Stöbndsdken Gm2021,76351
Have product questions? Need technical support? Please feel free to contact us:
Technical Support and E-Warranty Certificate www.vevor.com/support
7.Hopper Plate Adjustment 10
| Warning |
| Do not use this product in areas where it may be exposed to water or other liquids. |
| Unplug this product from the wall outlet before cleaning. Do not use liquid or aerosol cleaners. Use a damp cloth for cleaning. |
| To reduce the risk of electric shock, do not disassemble this product. Take it to qualified service personnel when service or repair work is required. Opening or removing covers -like the rear cover plate- may expose you to dangerous voltages or other risks. Incorrect re-assembly can cause electric shock when the appliance is subsequently used. |
| Only use the cable provided with the unit. The use of other cables may result in electric shock, fire or cause serious damage to the unit. |
| Do not operate the unit in areas with high temperature or high humidity since it may prevent it from working correctly. |
| Caution |
| When unplugging the power plug, do not pull it by the cord but rather grip the plug to pull it out. Not following these instructions may result in electric shock, fire or damage to the unit. |
| Do not use the unit if the power cord is damaged or if the plug socket contact is loose. Not following these instructions may result in electric shock, fire or other hazards. |
| Do not place heavy objects over the cord and do not bend it excessively since it could get damaged. Not following these instructions may result in electric shock, fire or other hazards. |
| When not using the unit for a long period of time, remove the power plug from the wall outlet. |
| Error Code | Reason | Solution |
| A or E10 | Fake note detected by UV | Remove the fake note from the stacker, press "START" to continue |
| b or E6X | Fake note detected by MG | Remove the fake note from the stacker, press "START" to continue |
| C or EC0 | Double note detected by IR | Remove the double note from the stacker, press "START" to continue |
| d or E8X | Chain note or different width note detected | Remove the suspicious note from the stacker, press "START" to continue |
| F or E4X | Half note detected | Remove the half note from the stacker, press "START" to continue |
| CE1 | Problem with the UV sensor | Clean the sensor or replace it |
| CE2 | Problem with code disc sensor or big motor | Replace the sensor or big motor |
| CE3 | Problem with left counting sensor | Clean the sensor or replace it |
| CE4 | Problem with right counting sensor | Clean the sensor or replace it |
| CE5 | Problem with hopper sensor | Clean the sensor or replace it |
| CE7 | Problem with MG sensor | Replace the MG sensor |
| CE8 | Problem with stacker sensor | Clean the sensor or replace it |
| Not working |
| Check if the plug is well inserted into socket. | Check if the power fails or fuse burn out. |
| Fail to start or stop normally |
| Feeding Sensor covered in c | Feeding sensor not in connection with electric circuit?Check and connect | Transmission belt of the motor not proper in tension, too tight or loose Adjust well |
| Counting Error |
| Hopper position adjusted improperly?well | Counting sensor covered in dust?Clean | Drag rubber and feeding wheel worn too much?Change |
| False Alarm |
| Fluorescent sensitivity adjusted improperly?Adjust well | Verifying sensor covered in dust?Clean | Fluorescent lighting diode aged?Change |
•Power Consumption: ≤80 Watts
- Gross weight: 5.25 kilograms
Manufacturer: Shanghaimuxi nmuyeyouxiangongsi
Have product questions? Need technical support? Please feel free to contact us:
Technical Support and E-Warranty Certificate www.vevor.com/support
7. Hopper Plate Adjustment 10
| Warning |
| Do not use this product in areas where it may be exposed to water or other liquids. |
| Unplug this product from the wall outlet before cleaning. Do not use liquid or aerosol cleaners. Use a damp cloth for cleaning. |
| To reduce the risk of electric shock, do not disassemble this product. Take it to qualified service personnel when service or repair work is required. Opening or removing covers -like the rear cover plate- may expose you to dangerous voltages or other risks. Incorrect re-assembly can cause electric shock when the appliance is subsequently used. |
| Only use the cable provided with the unit. The use of other cables may result in electric shock, fire or cause serious damage to the unit. |
| Do not operate the unit in areas with high temperature or high humidity since it may prevent it from working correctly. |
| Caution |
| When unplugging the power plug, do not pull it by the cord but rather grip the plug to pull it out. Not following these instructions may result in electric shock, fire or damage to the unit. |
| Do not use the unit if the power cord is damaged or if the plug socket contact is loose. Not following these instructions may result in electric shock, fire or other hazards. |
| Do not place heavy objects over the cord and do not bend it excessively since it could get damaged. Not following these instructions may result in electric shock, fire or other hazards. |
| When not using the unit for a long period of time, remove the power plug from the wall outlet. |
| Error Code | Reason | Solution |
| A or E10 | Fake note detected by UV | Remove the fake note from the stacker, press "START" to continue |
| b or E6X | Fake note detected by MG | Remove the fake note from the stacker, press "START" to continue |
| C or EC0 | Double note detected by IR | Remove the double note from the stacker, press "START" to continue |
| d or E8X | Chain note or different width note detected | Remove the suspicious note from the stacker, press "START" to continue |
| F or E4X | Half note detected | Remove the half note from the stacker, press "START" to continue |
| CE1 | Problem with the UV sensor | Clean the sensor or replace it |
| CE2 | Problem with code disc sensor or big motor | Replace the sensor or big motor |
| CE3 | Problem with left counting sensor | Clean the sensor or replace it |
| CE4 | Problem with right counting sensor | Clean the sensor or replace it |
| CE5 | Problem with hopper sensor | Clean the sensor or replace it |
| CE7 | Problem with MG sensor | Replace the MG sensor |
| CE8 | Problem with stacker sensor | Clean the sensor or replace it |
| Not working |
Check if the plug is well inserted into socket.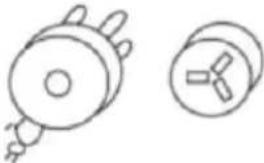 | Check if the power fails or fuse burn out.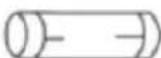  |
| Fail to start or stop normally |
Feeding Sensor covered in c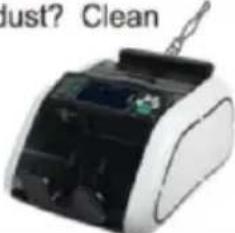 | Feeding sensor not in connection with electric circuit?Check and connect | Transmission belt of the motor not proper in tension, too tight or loose Adjust well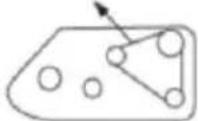 |
| Counting Error |
Hopper position adjusted improperly?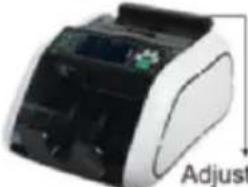 well well | Counting sensor covered in dust?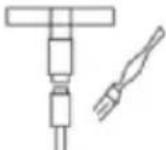 Clean Clean | Drag rubber and feeding wheel worn too much?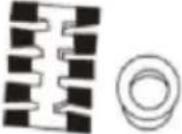 Change Change |
| False Alarm |
Fluorescent sensitivity adjusted improperly?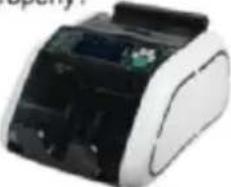 Adjust well Adjust well | Verifying sensor covered in dust?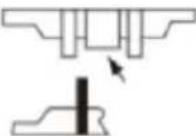 Clean Clean | Fluorescent lighting diode aged? Change Change |
• Power Consumption: ≤80 Watts