
8124FL - Shower column Vevor - Free user manual and instructions
Find the device manual for free 8124FL Vevor in PDF.
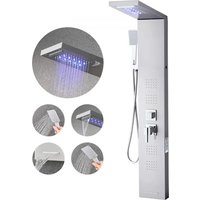


| Product Type | Shower Panel Tower |
| Model | 8124FL |
| Mounting Type | Wall Mount |
| Connection Thread | G1/2" |
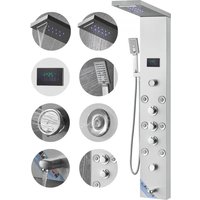
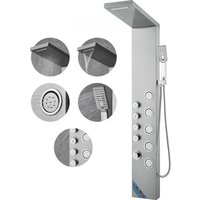
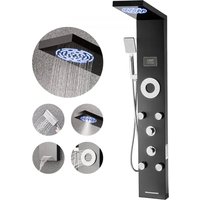
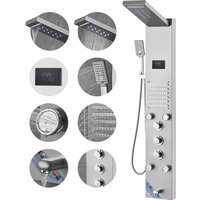
| Functions | 5 Modes: Rainfall, Waterfall, Hand Shower, Massage Jets, Waterfall Style |
| Hand Shower | 1-Setting |
| Tub Spout | Yes |
| Temperature Display | No |
| LED Lamp | Yes (with switch) |
| Power | Dry Cell (DC 3V, 2x AA batteries) |
| Finish | Fingerprint-free Brushed Nickel |
| Material | 304 Stainless Steel, Brass, PVC, ABS |
| Panel Height | 130 cm (approx.) |
| Hand Spray Hose Length | 1.5 m |
| Included Parts | Handheld Shower, 1.5m Hose, Hand Spray Seat, 2x 1/2" Right Angle Adapter, 4-Point Rubber, Self Tapping Screws, Fasteners, Grommet, Hexagon Nut, Brass Shower Arm, Panel Cotton Bag, Batteries |
| Assembly Required | Yes (see manual for detailed instructions) |
| Maintenance | Clean with water or mild detergent and soft cloth. Regularly clean hidden areas. |
| Safety Warnings | Wear gloves during installation; tighten all joints to avoid leaks; close switch when not in use. |
| FCC Compliance | This device complies with Part 15 of the FCC Rules. |
Frequently Asked Questions - 8124FL Vevor
User questions about 8124FL Vevor
0 question about this device. Answer the ones you know or ask your own.
Ask a new question about this device
Download the instructions for your Shower column in PDF format for free! Find your manual 8124FL - Vevor and take your electronic device back in hand. On this page are published all the documents necessary for the use of your device. 8124FL by Vevor.
USER MANUAL 8124FL Vevor
Affordable. Reliable. Home Improvement.
SHOWER PANEL TOWER
MODEL:
Technical Support and E-Warranty Certificate
www.vevor.com/support
VEVOR
SHOWER PANEL TOWER
Affordable. Reliable. Home Improvement.
This is the original instruction. Please read all manual instructions carefully before operating. VEVOR reserves a clear interpretation of the user manual. The appearance of the product shall be subject to the product you received. Please forgive us that we won't inform you again if there are any technology or software updates on our product.
 | Warning-To reduce the risk of injury, user must re instructions manual carefully. |
 | This device complies with Part 15 of the FCC Rules. Open subject to the following two conditions:(1)This device may not harmful interference, and (2)this device must accept any inter received, including interference that may cause undesired open |
 | This product is subject to the provision of European Direc 2012/19/EC. The symbol showing a wheelie bin crossed thr indicates that the product requires separate refuse collection European Union. This applies to the product and all acces marked with this symbol. Products marked as such may n discarded with normal domestic waste, but must be taken collection point for recycling electrical and electronic device |
INSTRUCTIONS
Warning Tips:

- During the installation process, it is best to wear gloves to prevent sharp corners on the panel from scratching the palm of the hand.
- When installing the shower, ensure that all joints are tightened to avoid water leakage.
- Ensure that the red and blue water inlet pipes inside the panel are in a folded state to avoid affecting water pressure.
- When the shower is not in use, please close the switch valve of the shower.
SAVE THESE INSTRUCTIONS
INSTALLATION INSTRUCTIONS
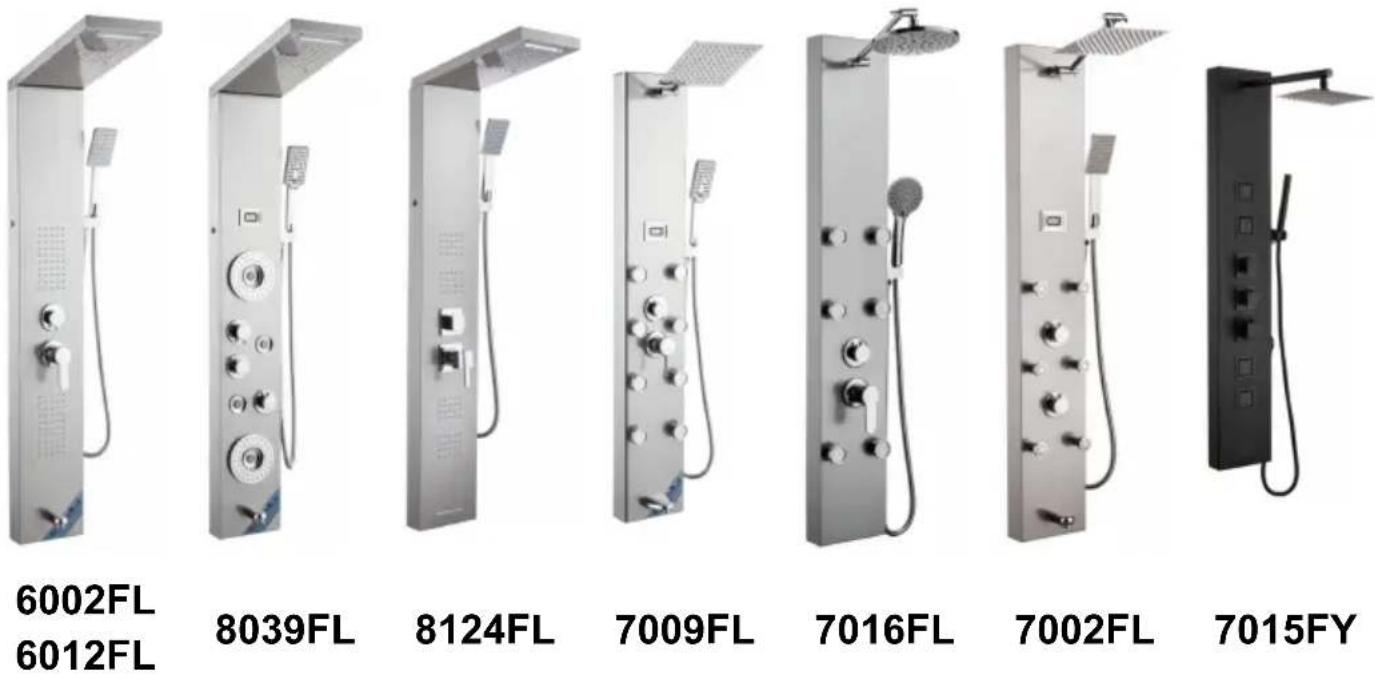
| Model | 6002FL | 8039FL | 6012FL | 8124FL | 7009FL | 7016FL | 7002FL | 7015FY |
| Mounting Type | Wall Mount | |||||||
| Connection Thread | G1/2" | |||||||
| Functions | Four Modes | Six Modes | Five Modes | Five Modes | Five Modes | Three Modes | Four Modes | Four Modes |
| Tub Spout | √ | √ | √ | √ | √ | × | √ | √ |
| Temperature Display | × | √ | × | × | √ | × | √ | × |
| LED Lamp | √ | √ | √ | √ | × | × | × | × |
| Power | Dry Cell (DC3V) | Dry Cell (DC3V) | Dry Cell (DC3V) | Dry Cell (DC3V) | Dry Cell (DC3V) | × | Dry Cell (DC3V) | × |
| Hand Shower | 1-Setting | 3-Setting | 1-Setting | 1-Setting | 3-Setting | 5-Setting | 1-Setting | 1-Setting |
| Finish | Fingerprint-free Brushed Nickel shower system | Black-Painting | ||||||
| Material | 304 Stainless Steel, Brass, PVC, ABS | 201 Stainless Steel, Brass, PVC, ABS | 304 Stainless Steel, Brass, PVC, | |||||
PARTS LIST
| MODEL | 8039FL | 6002FL 6012FL 8124FL | 7009FL | 7016FL | 7002FL | 7015FY | |
| Handheld Shower | 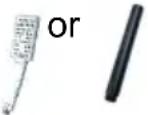 | 1pcs | 1pcs | 1pcs | 1pcs | 1pcs | 1pcs |
| 1.5 Meter Hand Spray Hose | 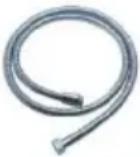 | 1pcs | 1pcs | 1pcs | 1pcs | 1pcs | 1pcs |
| Hand Spray Seat | 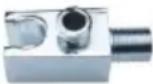 | 1pcs | 1pcs | 1pcs | 1pcs | 1pcs | 0pcs |
| 1/2 Right Angle Adapter | 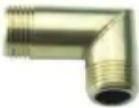 | 2pcs | 2pcs | 2pcs | 2pcs | 2pcs | 2pcs |
| 4-Point Rubber |  | 2pcs | 2pcs | 2pcs | 2pcs | 2pcs | 2pcs |
| Self Tapping Screw | 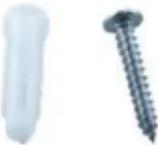 | 4pcs | 4pcs | 4pcs | 4pcs | 4pcs | 4pcs |
| Fastener | 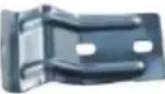 | 2pcs | 2pcs | 2pcs | 2pcs | 2pcs | 2pcs |
| Grommet |  | 1pcs | 1pcs | 1pcs | 1pcs | 1pcs | 2pcs |
| Hexagon Nut | 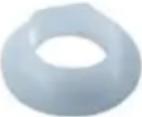 | 1pcs | 1pcs | 1pcs | 1pcs | 1pcs | 1pcs |
| M6 Nut | 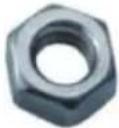 | 4pcs | 4pcs | 0pcs | 0pcs | 0pcs | 0pcs |
| M6*10 Screw | 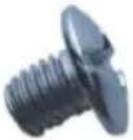 | 4pcs | 4pcs | 0pcs | 0pcs | 0pcs | 0pcs |
| Hose Clamp |  | 2pcs | 2pcs | 0pcs | 0pcs | 0pcs | 0pcs |
| Brass Shower Arm | 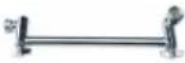 | 0pcs | 0pcs | 1pcs | 1pcs | 1pcs | 0pcs |
| Panel Cotton Bag |  | 1pcs | 1pcs | 1pcs | 1pcs | 1pcs | 1pcs |
| Top Spray Cotton Bag |  | 1pcs | 1pcs | 0pcs | 0pcs | 0pcs | 0pcs |
| Battery AA1.5V |  | 2pcs | 2pcs | 2pcs | 0pcs | 2pcs | 0pcs |
| Stainless Steel Water Outlet Arm |  | 0pcs | 0pcs | 0pcs | 0pcs | 0pcs | 1pcs |
| Brass Hex Nut | 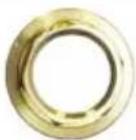 | 0pcs | 0pcs | 0pcs | 0pcs | 0pcs | 1pcs |
| Water Outlet Adapter | 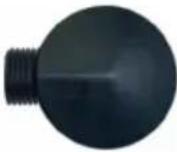 | 0pcs | 0pcs | 0pcs | 0pcs | 0pcs | 1pcs |
| Wall Mounted Spray Booth | 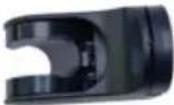 | 0pcs | 0pcs | 0pcs | 0pcs | 0pcs | 1pcs |
ASSEMBLY INSTRUCTIONS
MODEL 6012FL/6002FL/8039FL/8124FL
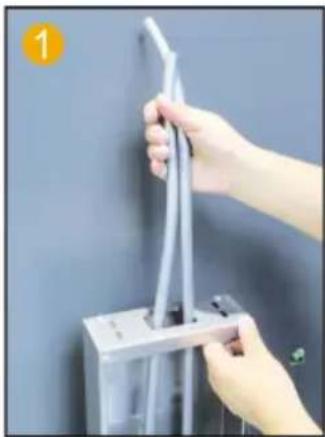
Insert the PVC pipe from the top opening to pierce out.
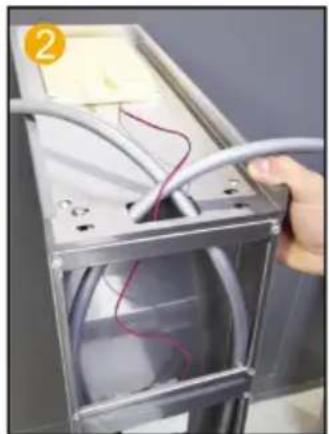
Route the LED light wire along the hole and insert it into the motherboard.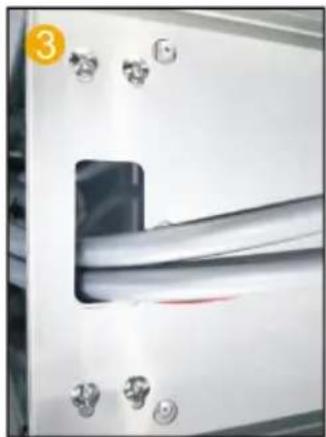
Fix the motherboard and top spray with pairs of M6 screws and nuts.
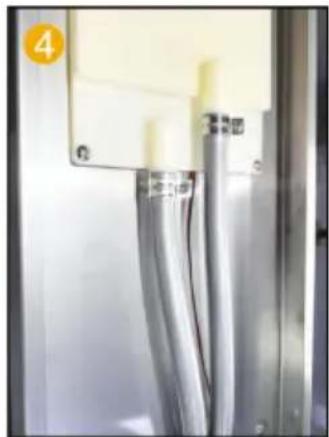
Fix the PVC pipe with a throat clamp on the top spray joint.
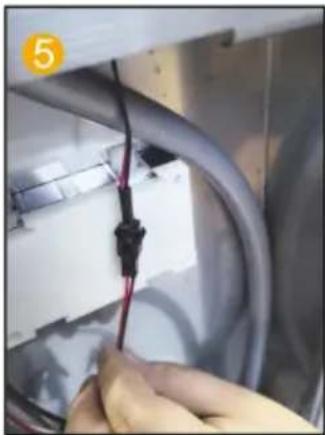
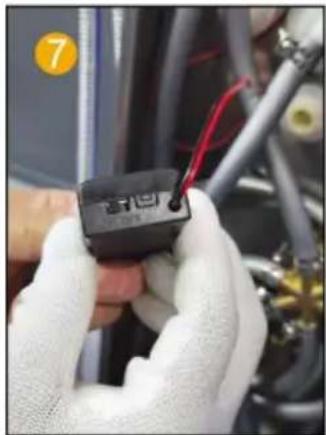
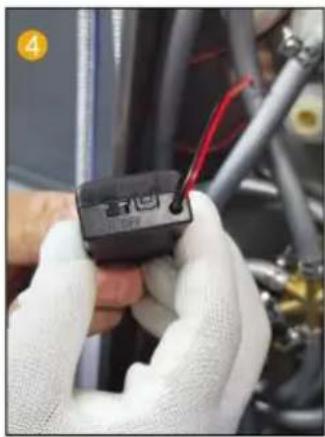
Connect the LED light cable and power supply line.
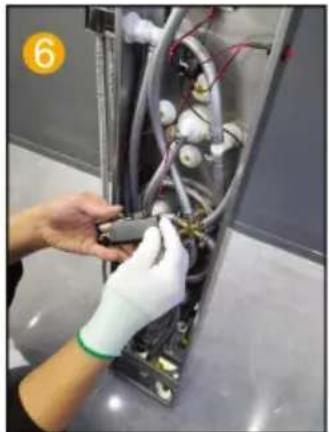
Load 2 AA batteries into the battery compartment.
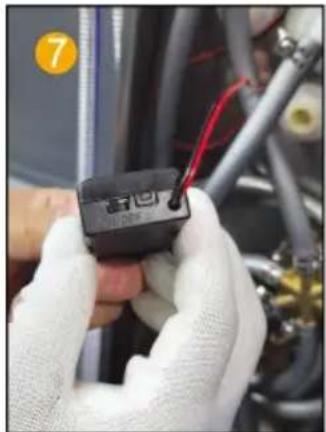
Switch the battery box to ON.
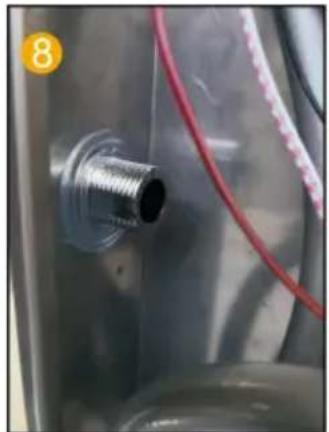
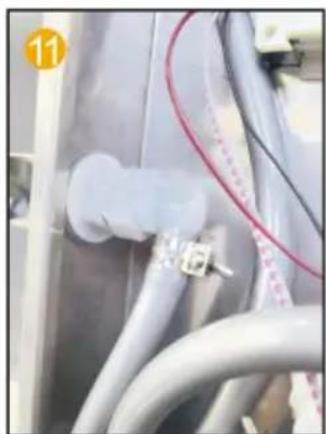
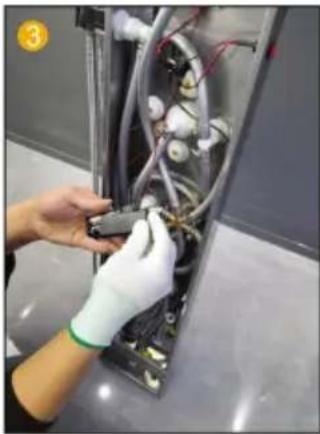
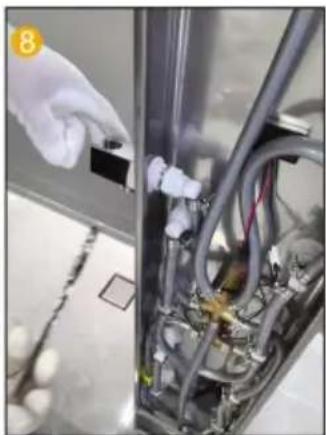
Insert the hand spray nozzle into the panel and install the gasket.
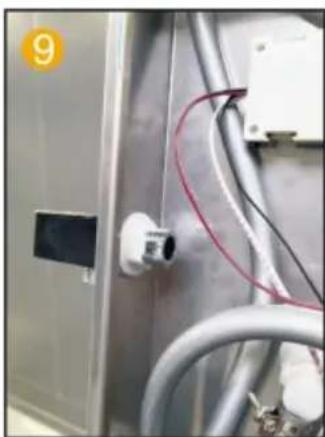
Insert the hand nozzle into the panel and install the gasket.
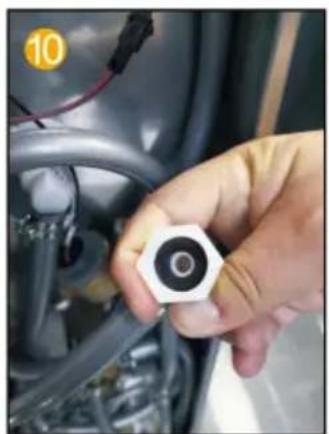
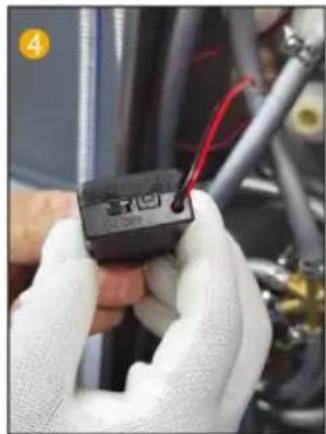
Put the 4-point rubber gasket into the hand spray outlet connector and inside the joint of the hand spray seat joint.
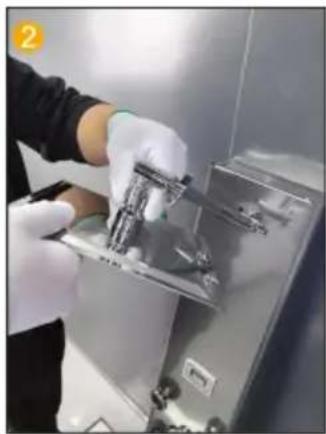
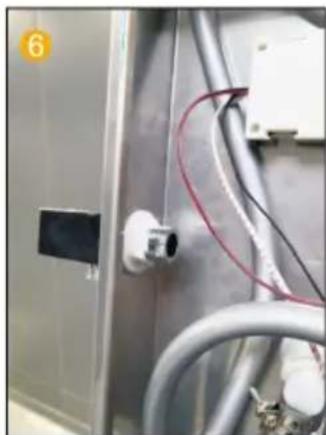
Connect the water outlet connector and hand spray seat joint.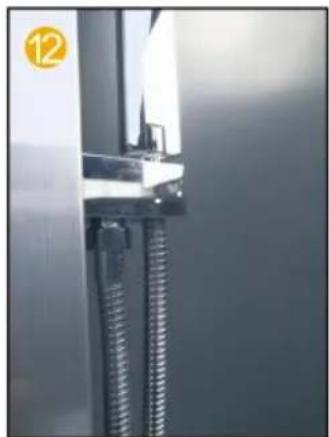
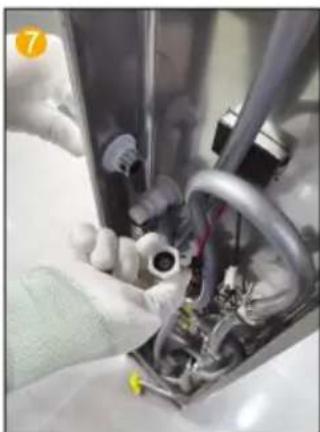
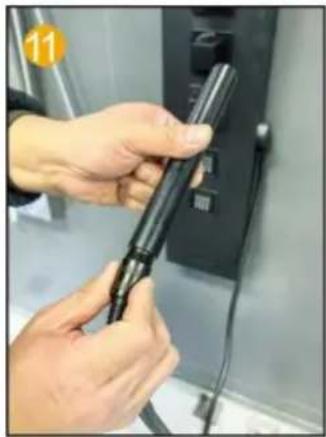
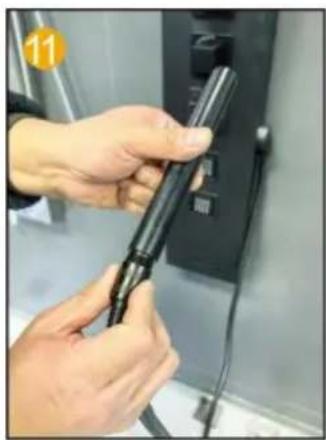
Connect the hand spray hose to the handheld shower head.
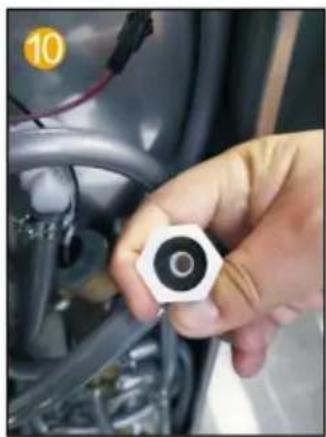
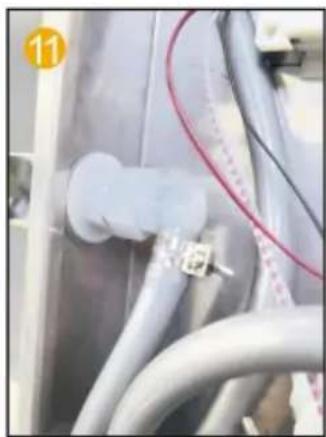
Fix the water outlet to the main board.
Connect the top spray and the water outlet joint.
Load 2 AA batteries into the battery compartment.
Switch the battery box to ON.

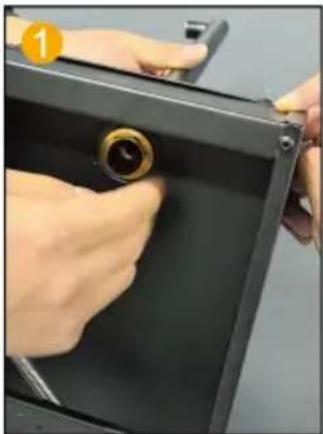
Insert the hand spray nozzle into the panel and install the gasket.
Insert the hand spray nozzle into the panel and install the gasket.
Put the 4-way rubber into the connector of hand spray seat.
Connect the water outlet connector to the hand spray seat connector.
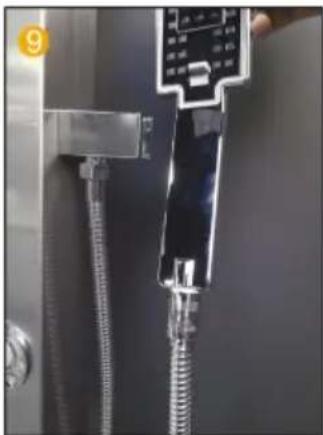
Connect the hand-held shower hose and the hand-held shower head. Note: 7016FL no step 3 and 4.
MODEL 7015FY
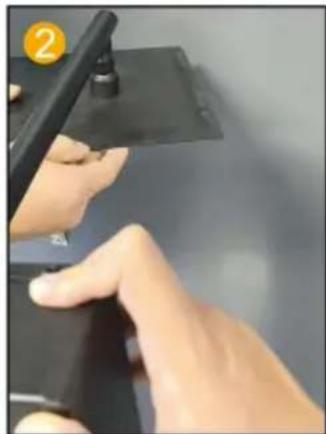
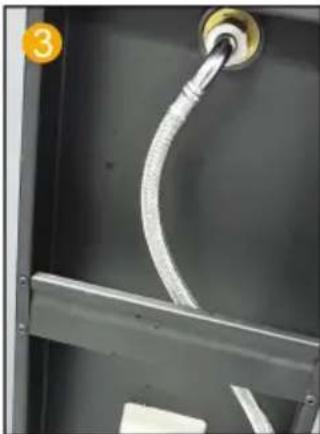
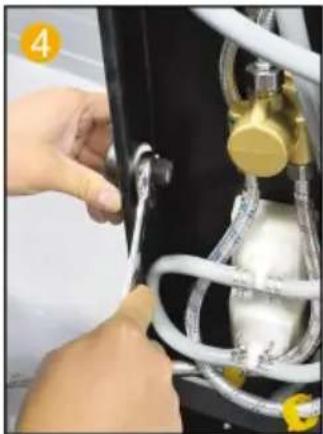
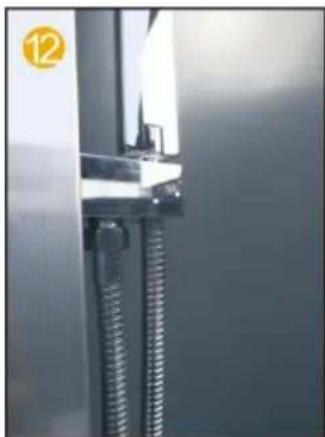
Fix the water outlet to the main board with nuts and washers. Connect the top spray and the water outlet joint. Connect the steel wire pipe and the shower connector to the panel with a nut. Fix the shower outlet to the panel and tighten it.
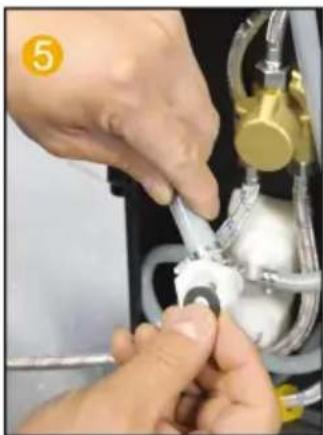
Put the 4-way rubber into the shower head connector.
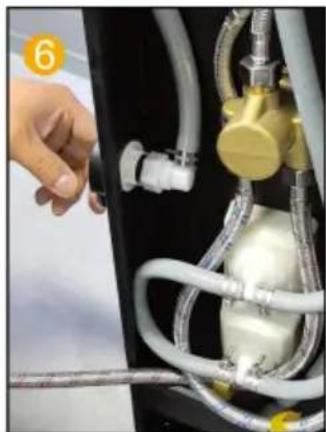
Connect the water outlet connector and the shower head water outlet connector.
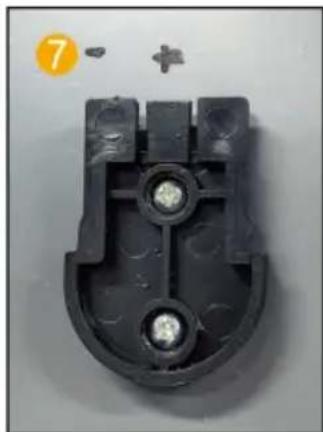
Fix the shower head bracket to the wall at the appropriate position. The installation will be completed with screws and nuts.
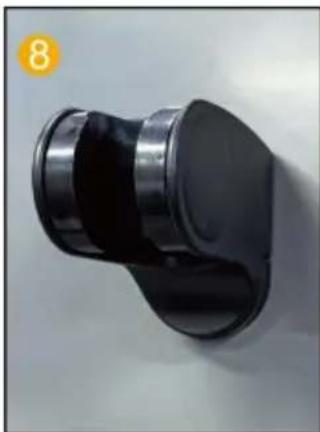
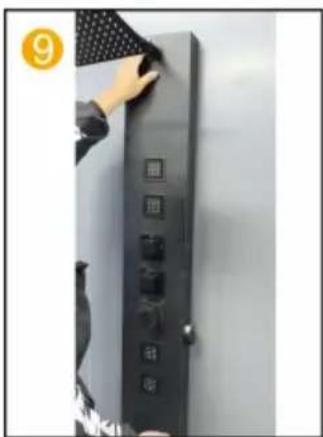
Fix the panel to the bracket. Connect the handheld shower head to the hose at the appropriate height.
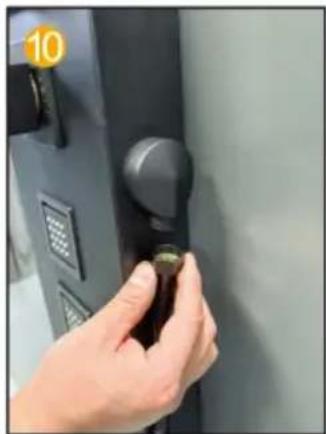
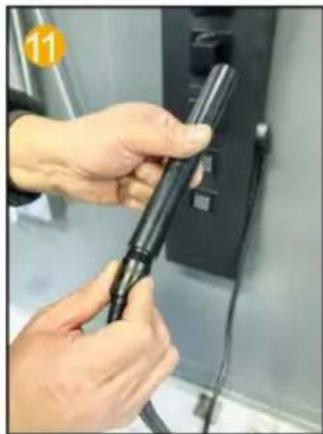
Connect to the handheld shower head.
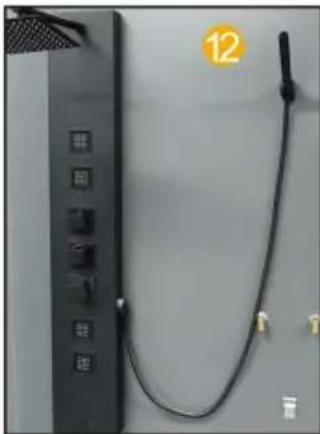
Installation completed.
INSTALLATION STEPS (GENERAL)
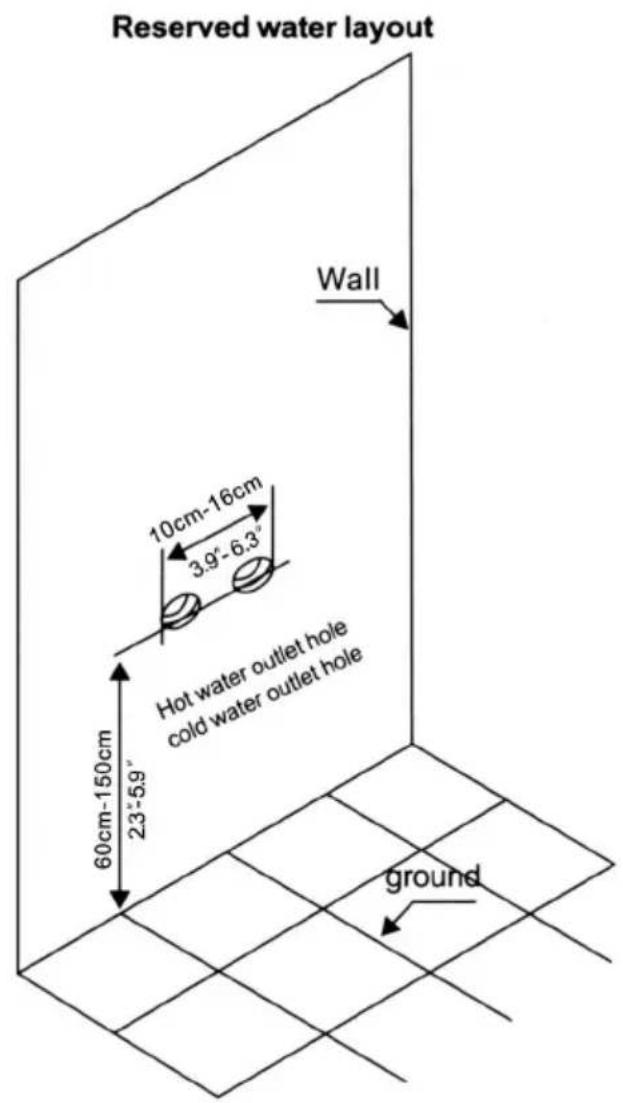
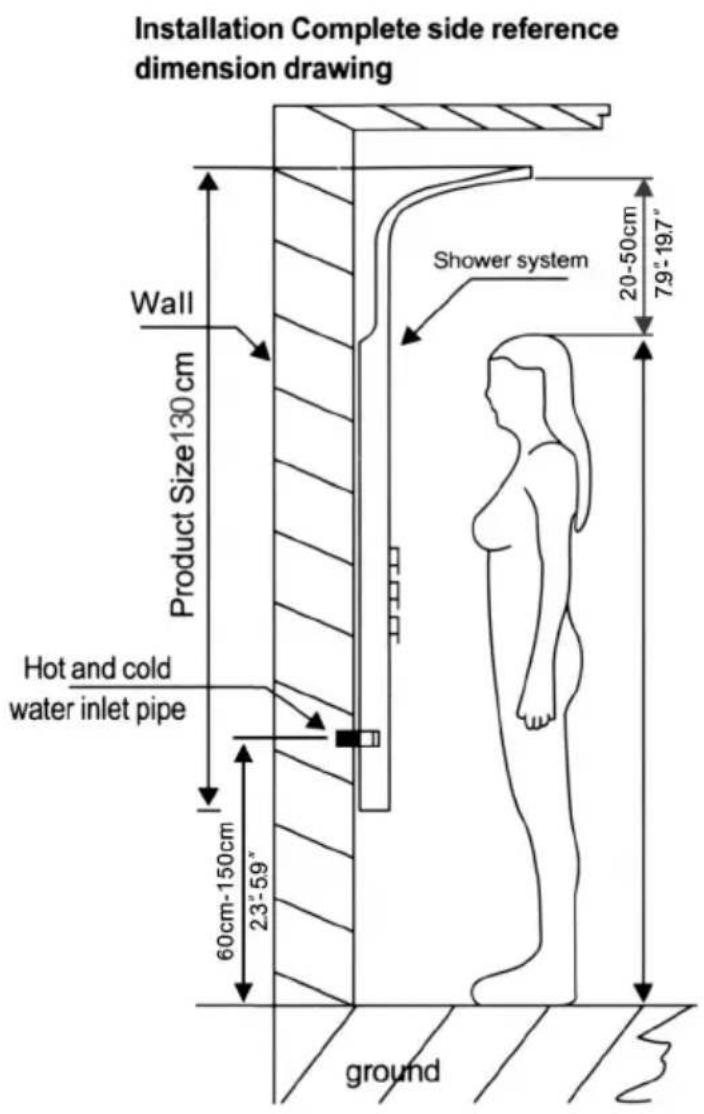
Installation Notes
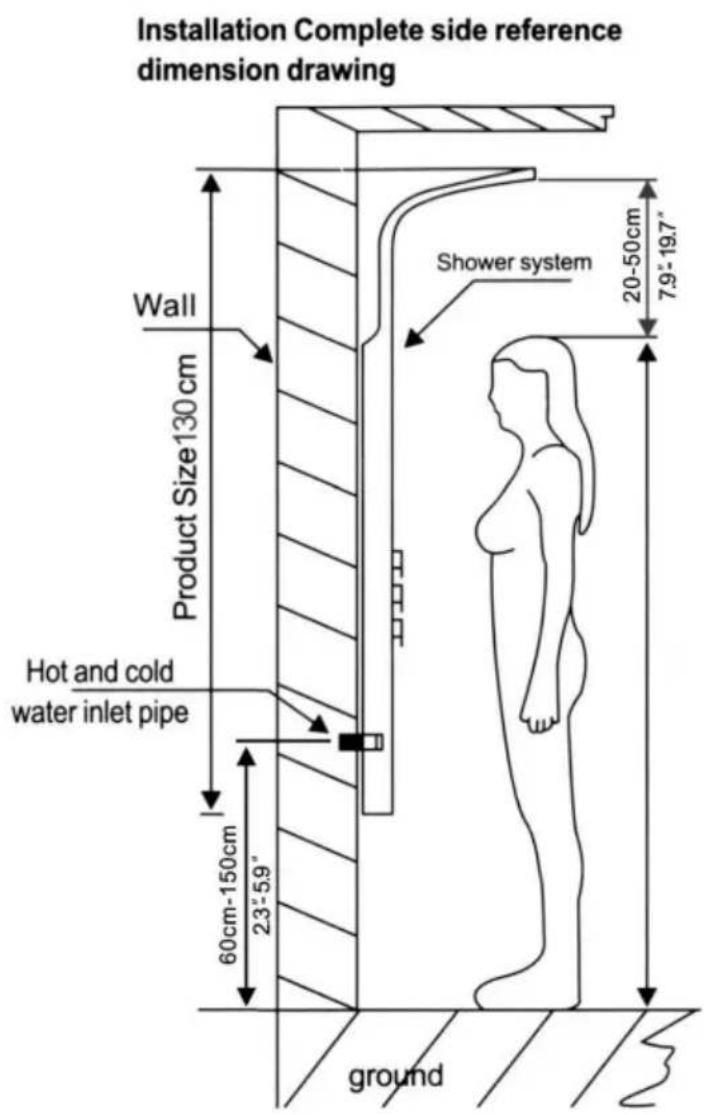
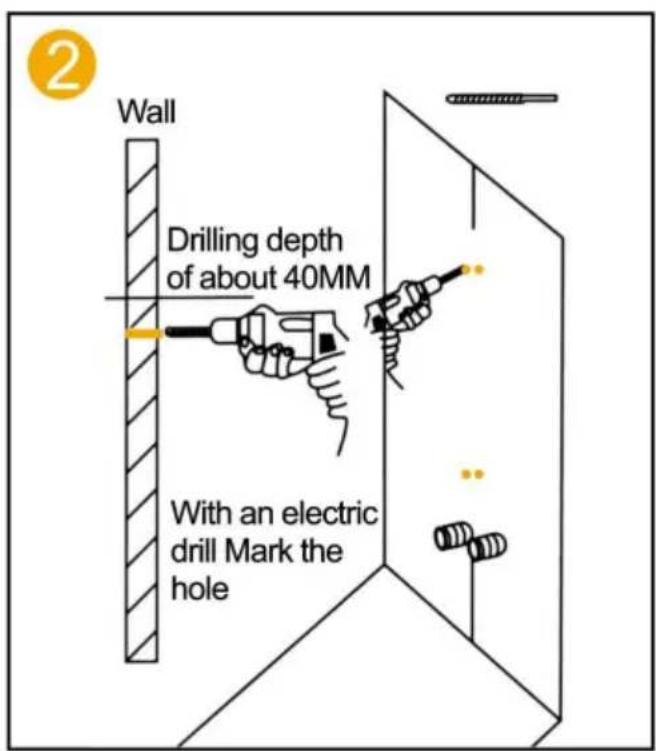
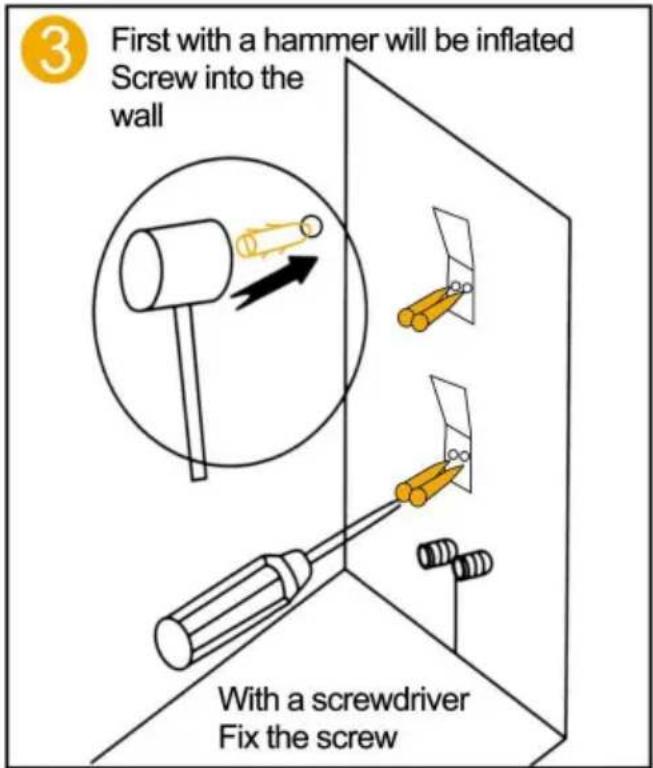
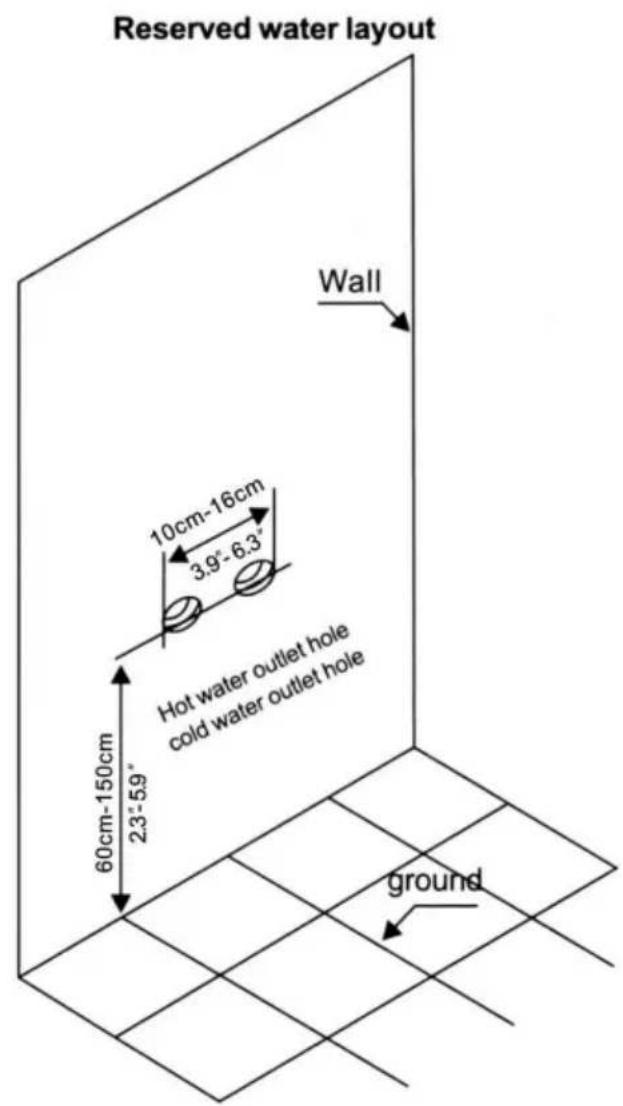
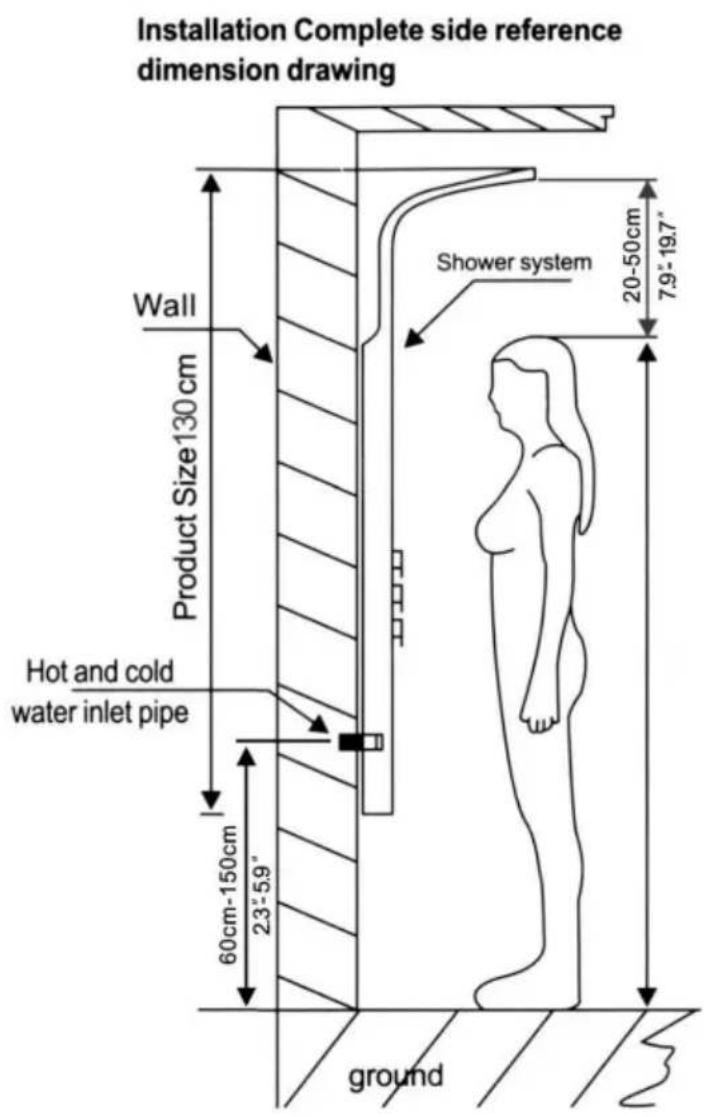
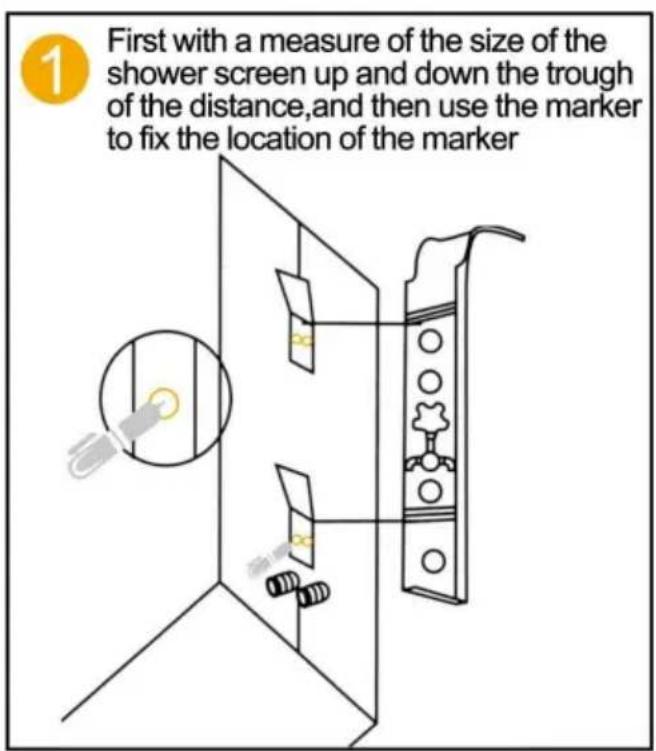
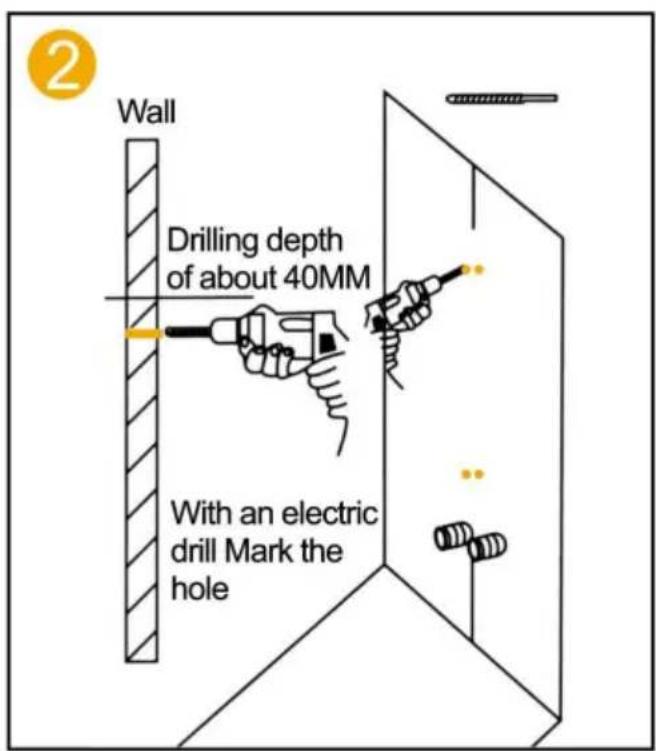
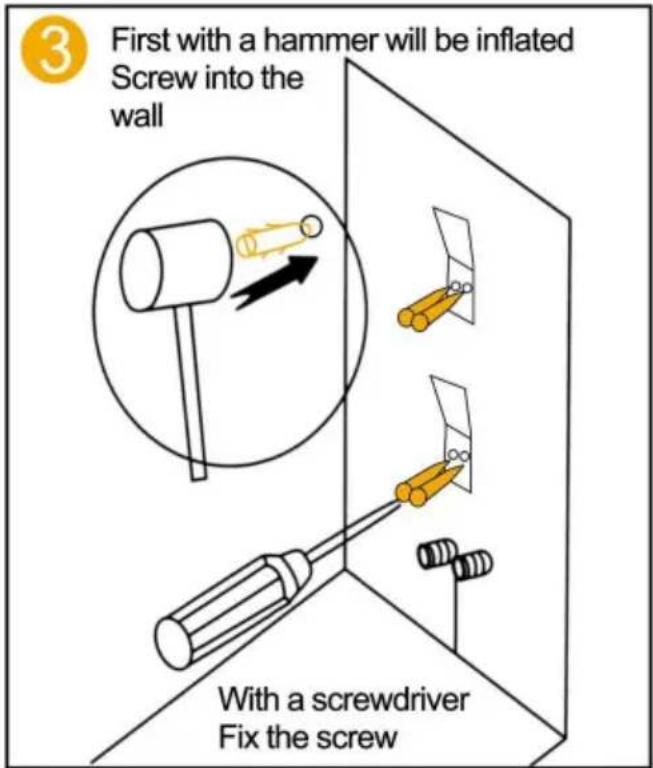
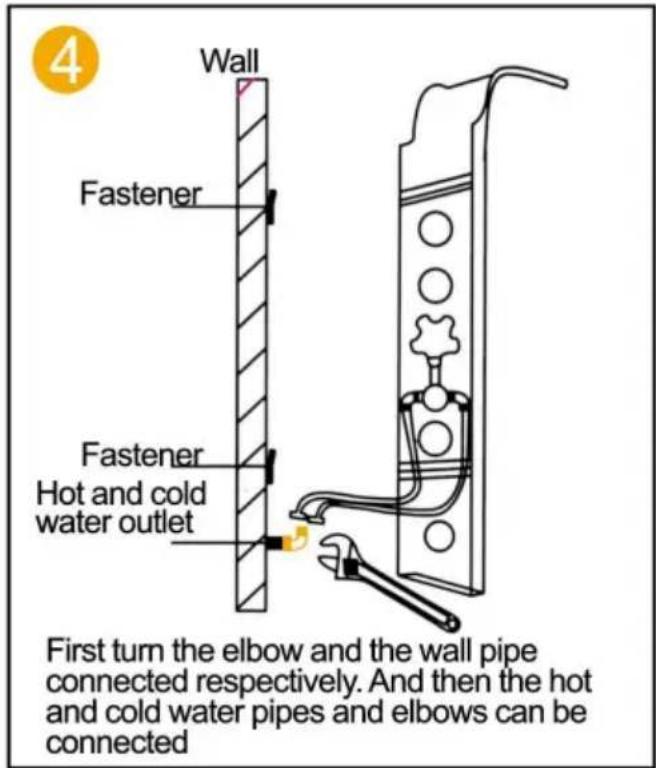
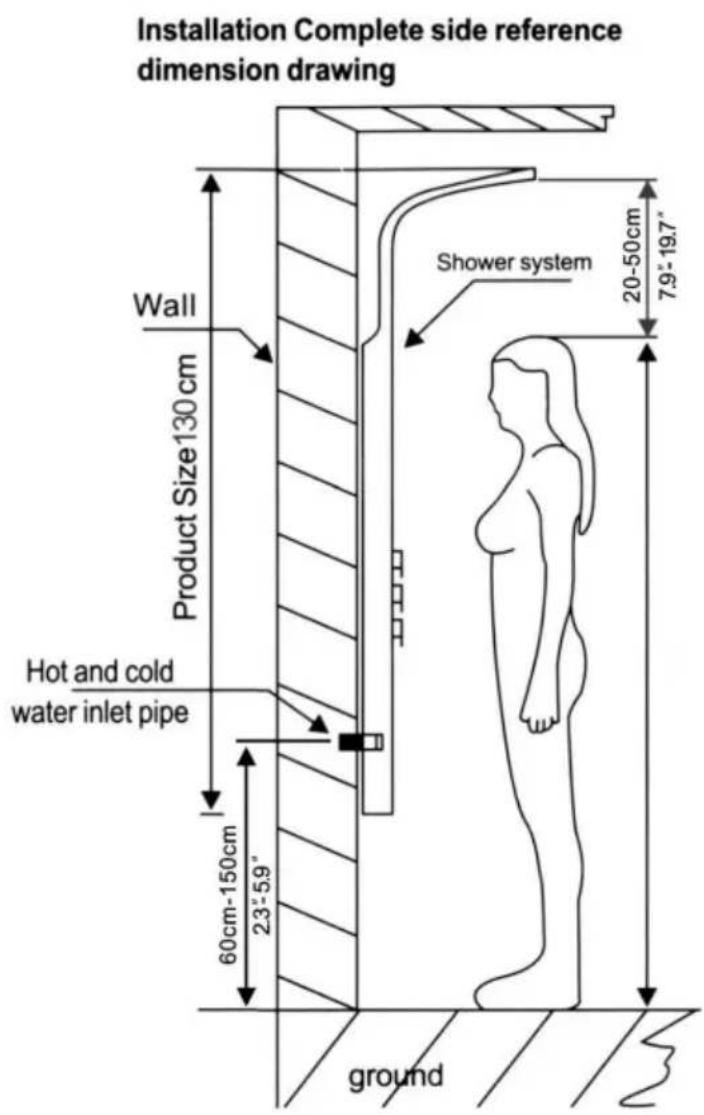
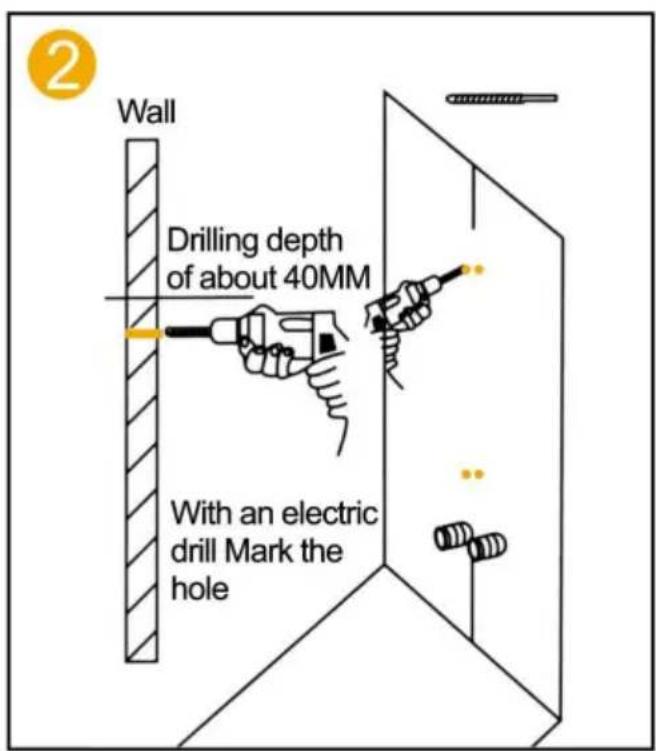
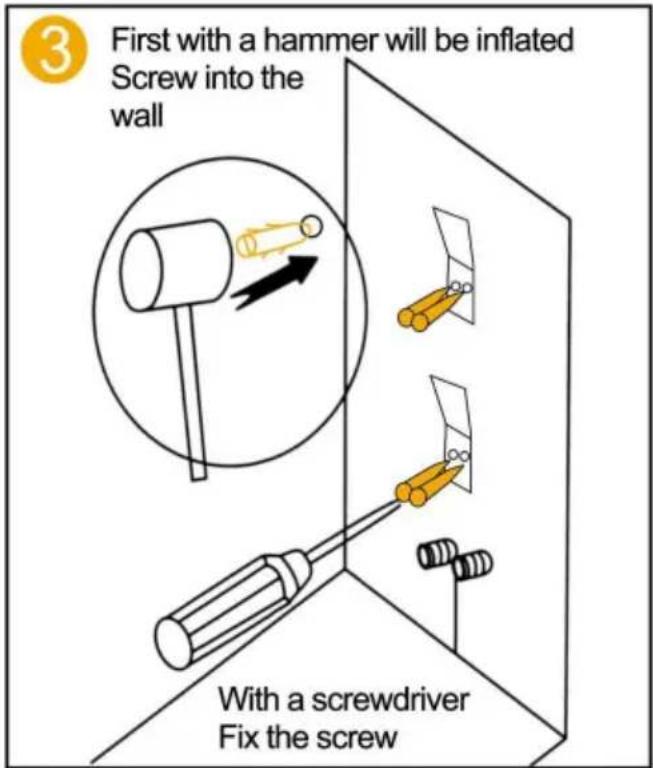
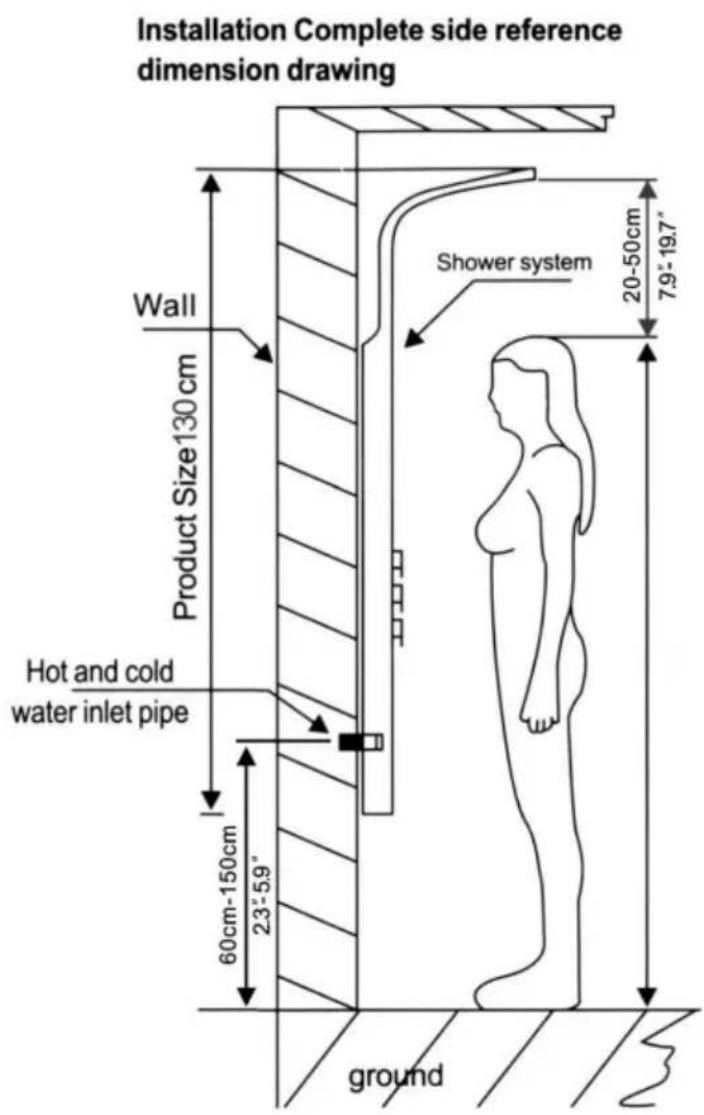
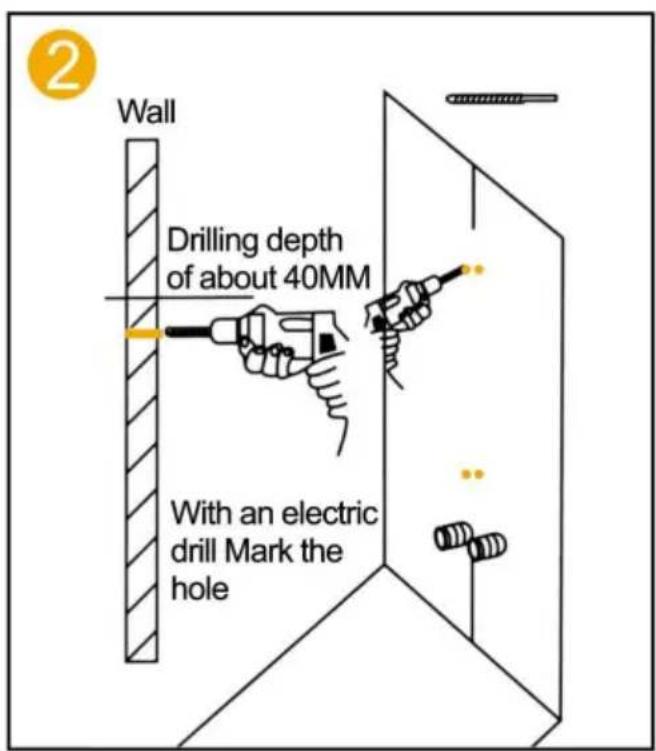
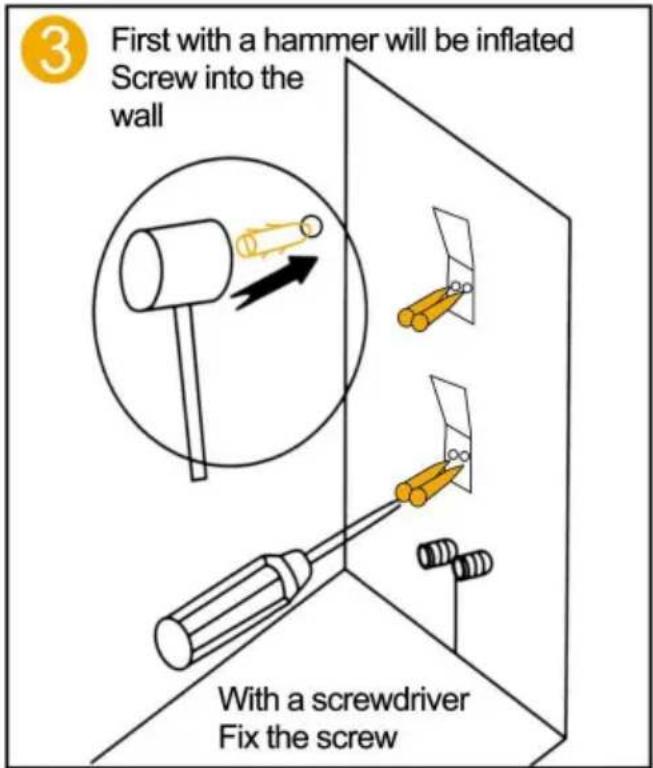
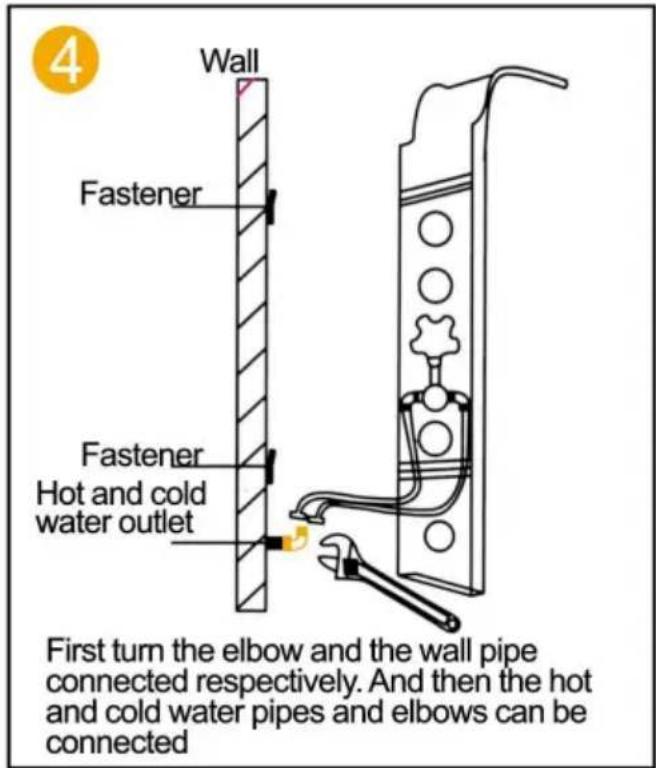
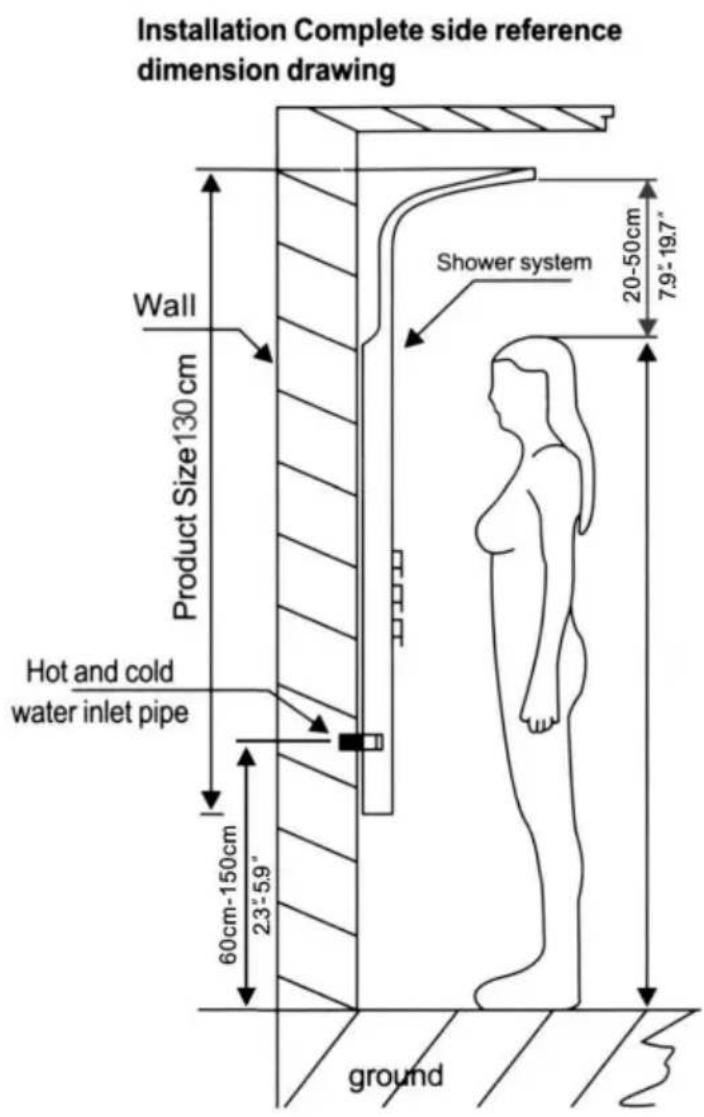
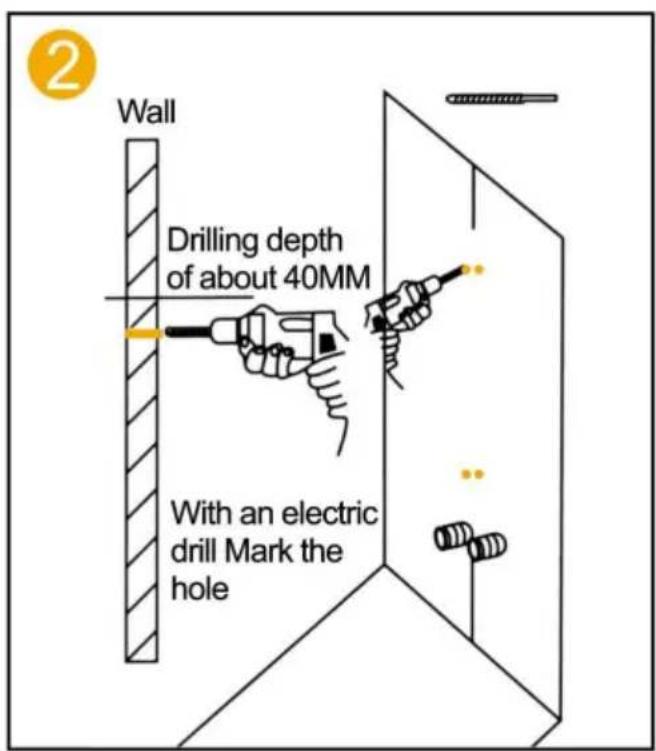
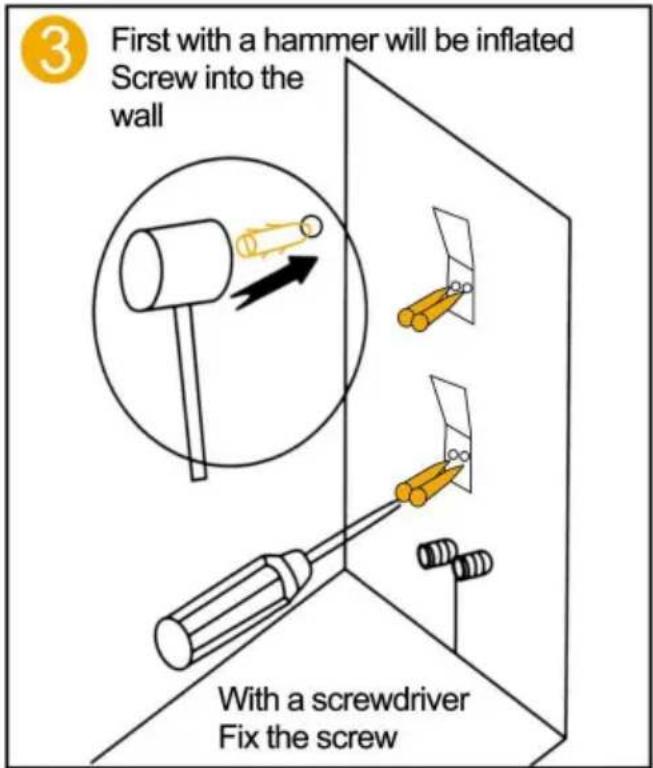
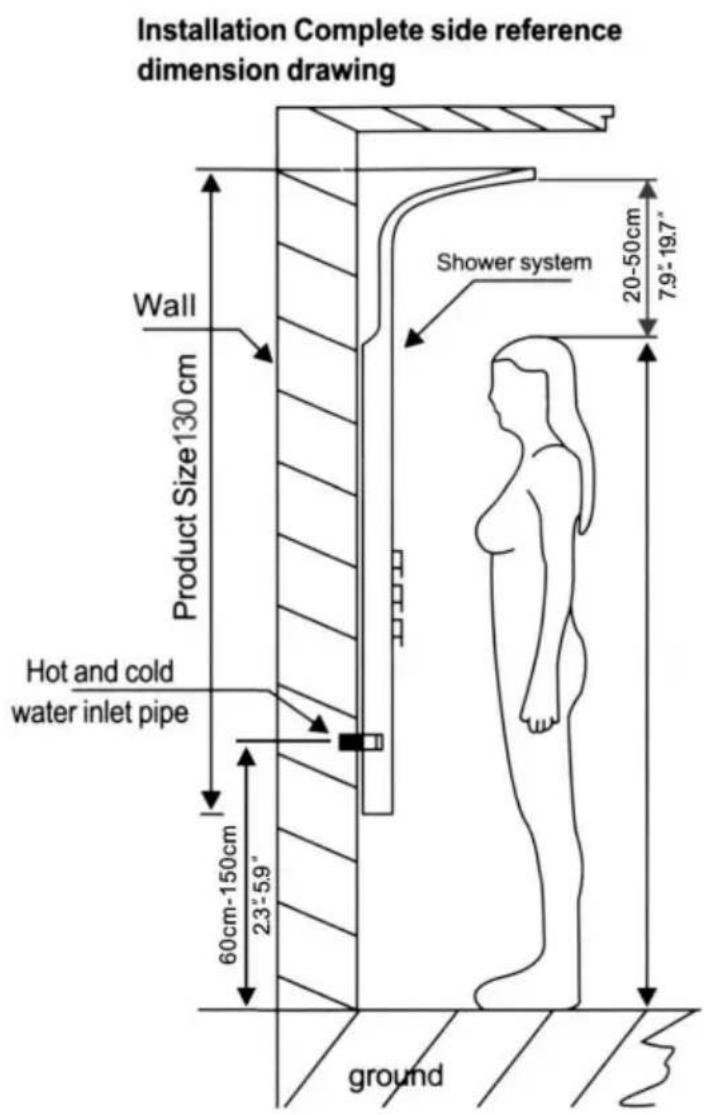
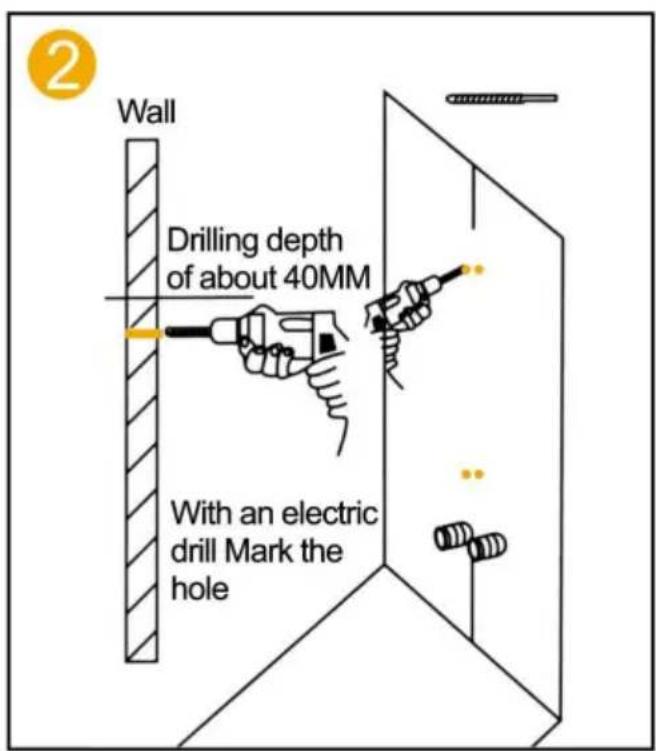
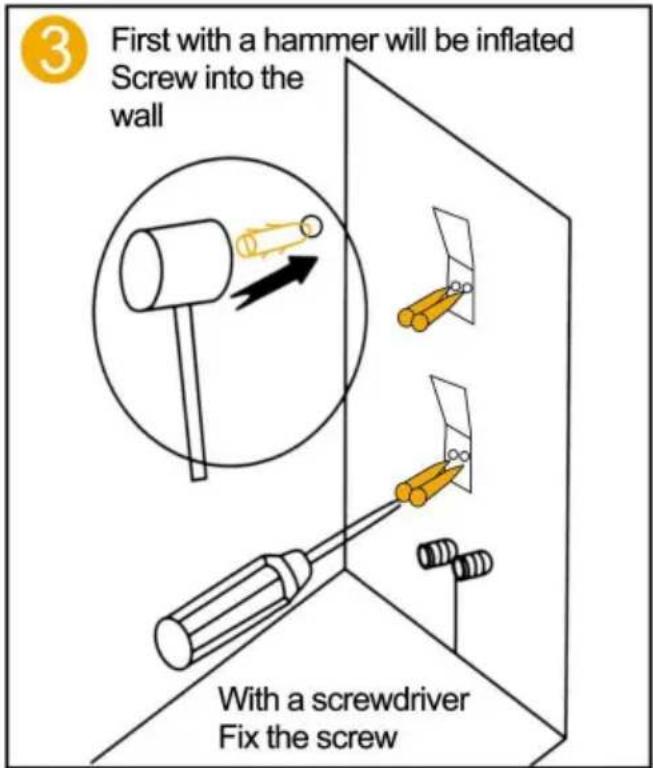
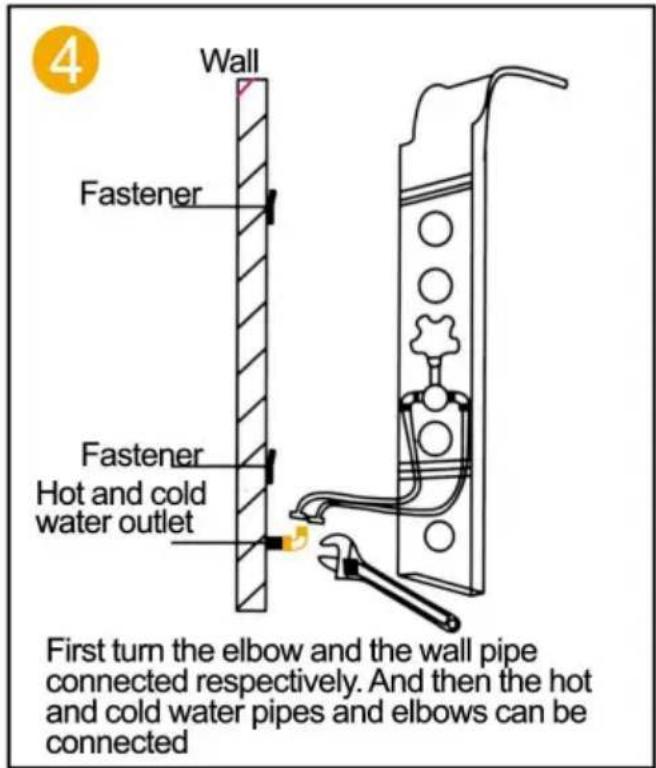
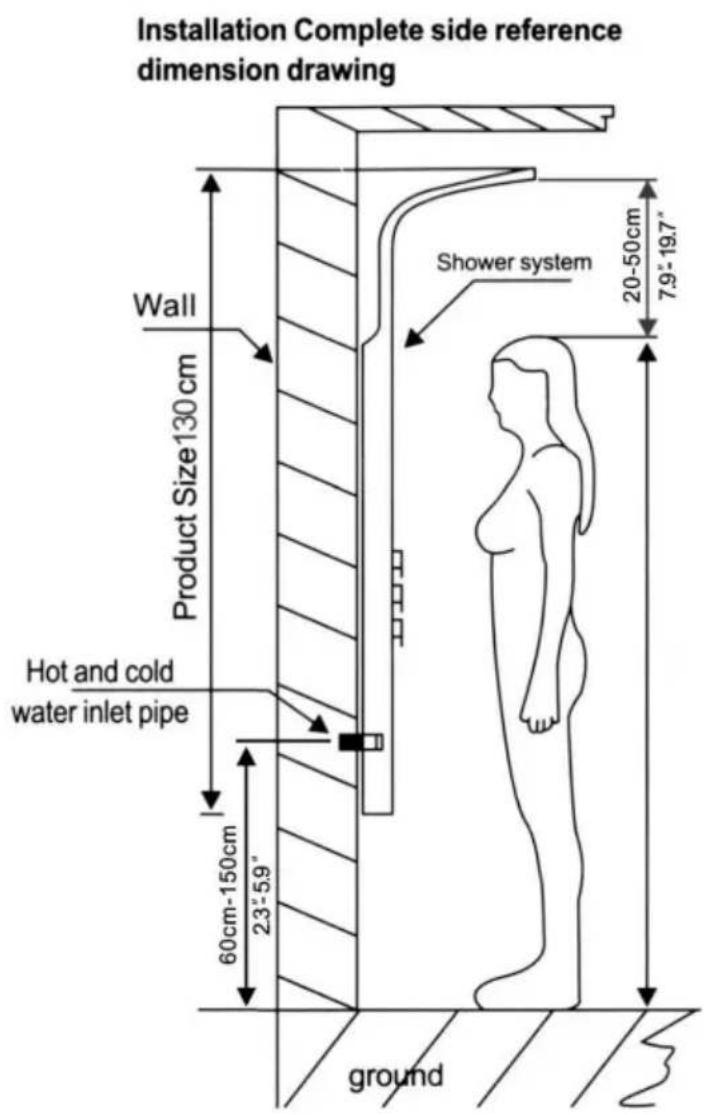
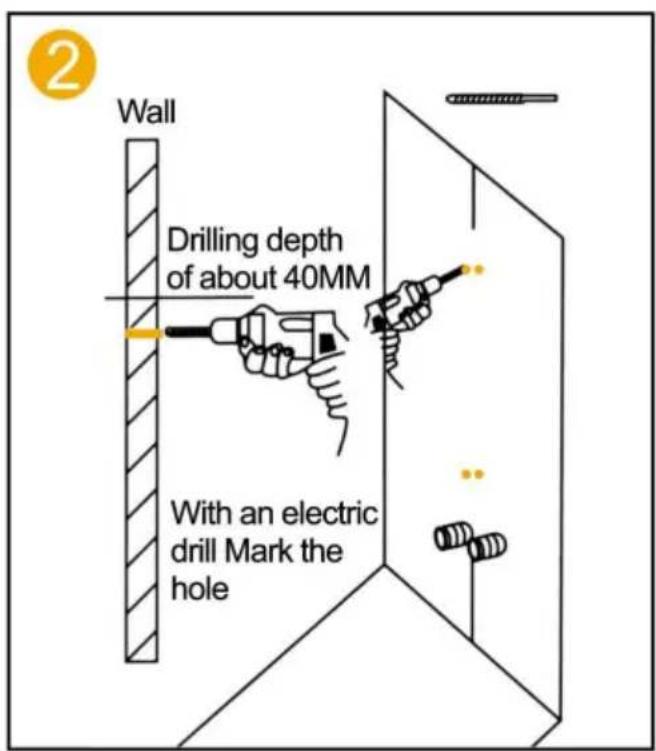
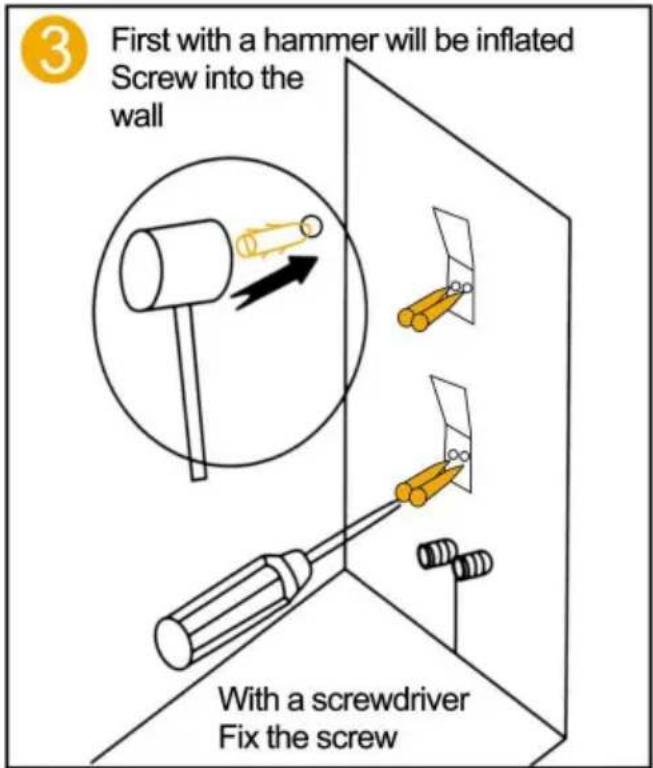
- According to the height of the family, budget the shower system installation height. Measure the distance on the back of the bar, mark the wall, and in the corresponding position fix the hanging iron (up and down one).
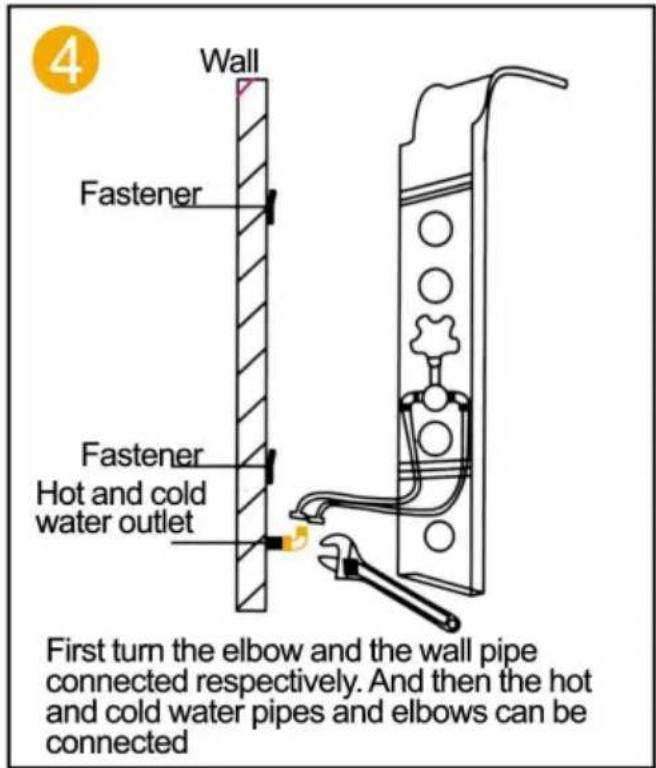
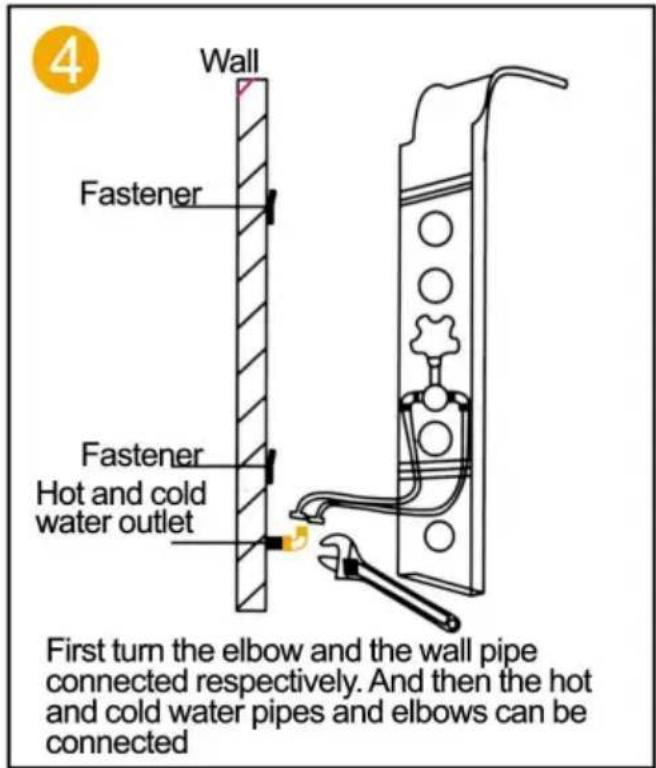
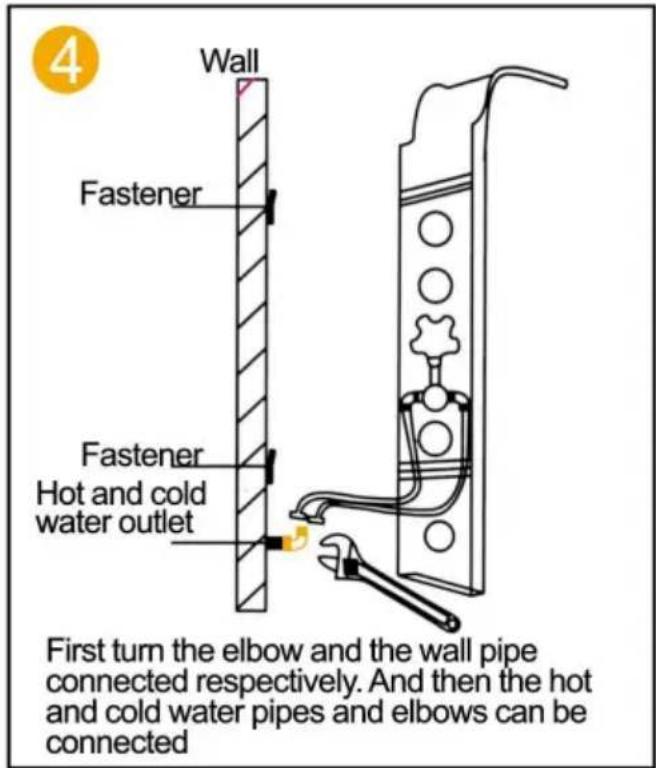
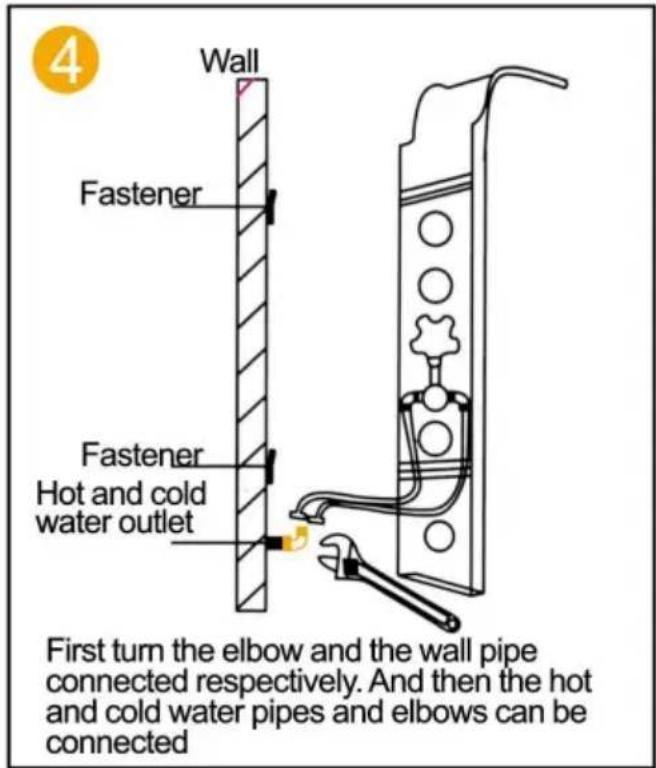
- Connect the hot and cold water hose (be sure to clean the scale and dirt in the wall so as not to block, affecting the water effect).
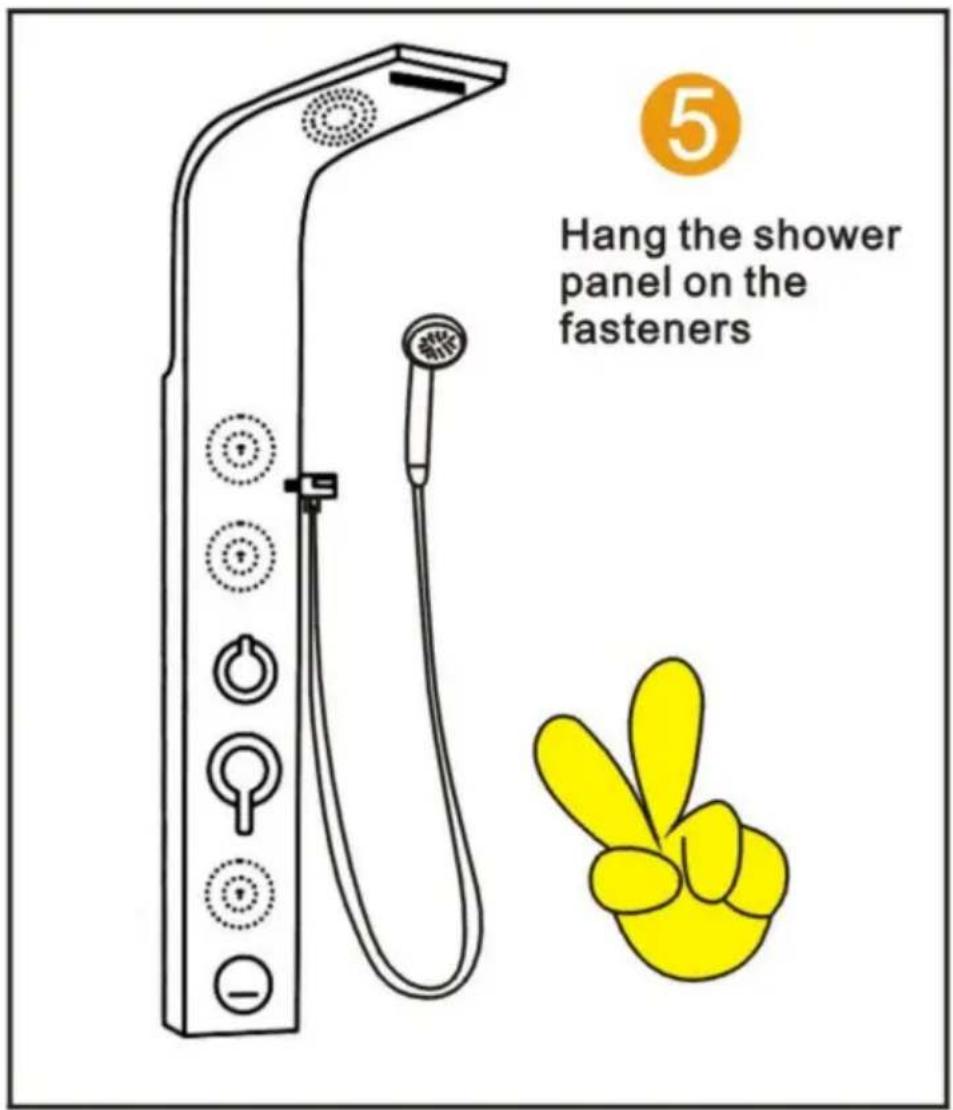
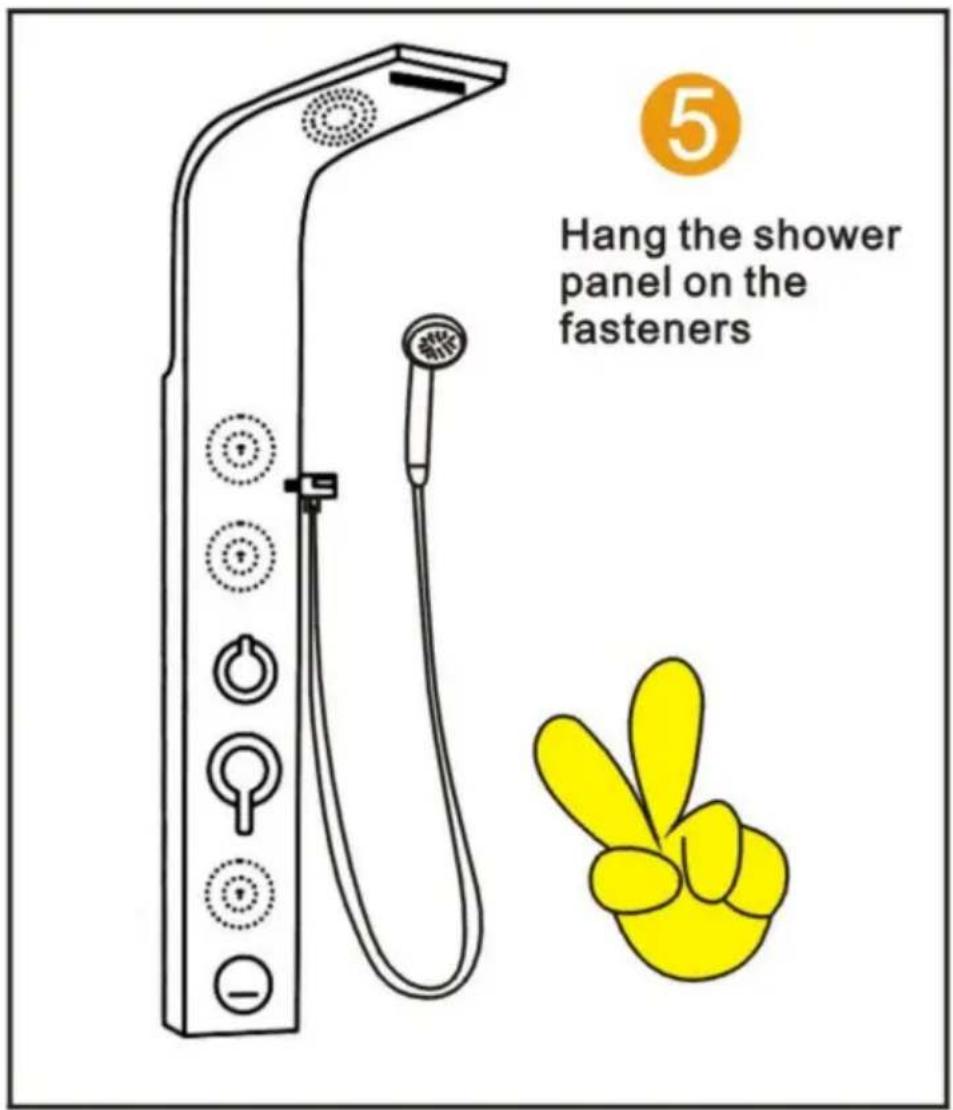
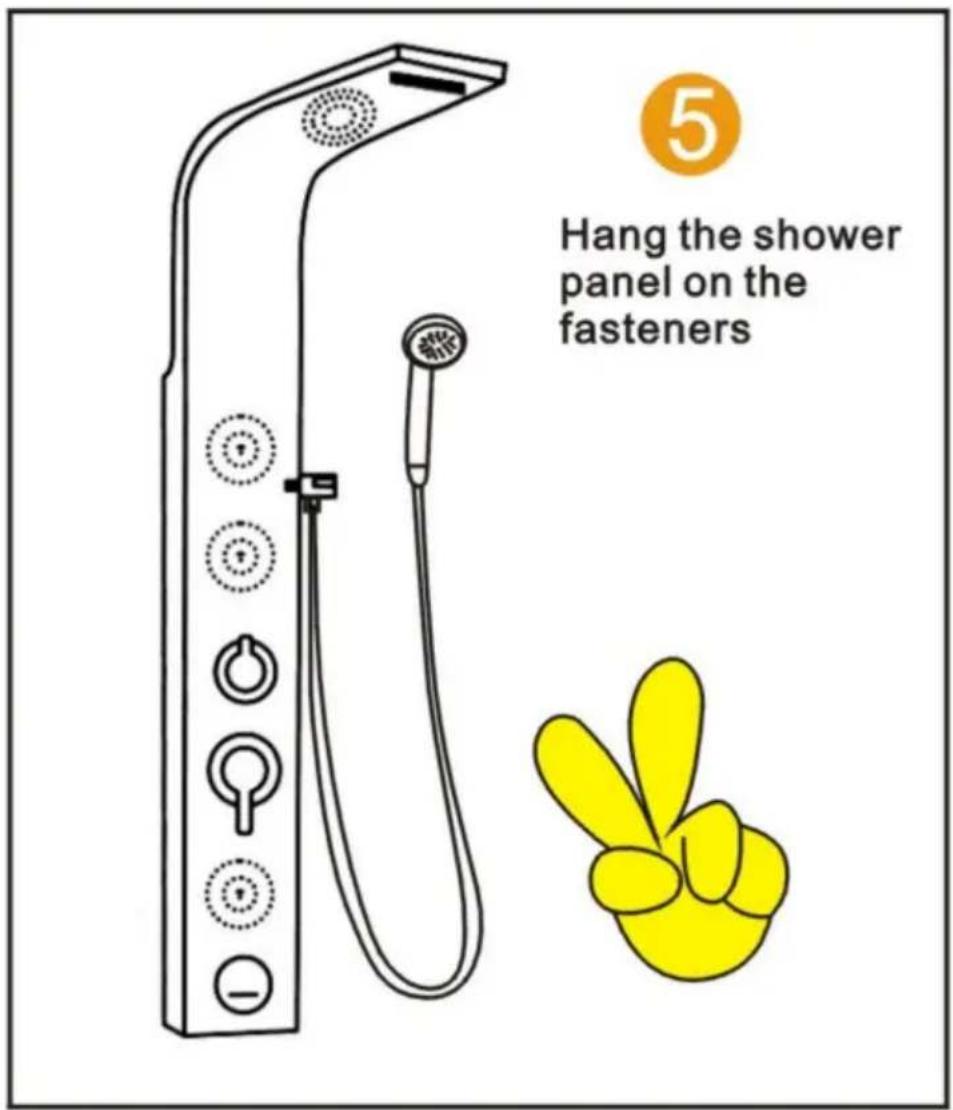
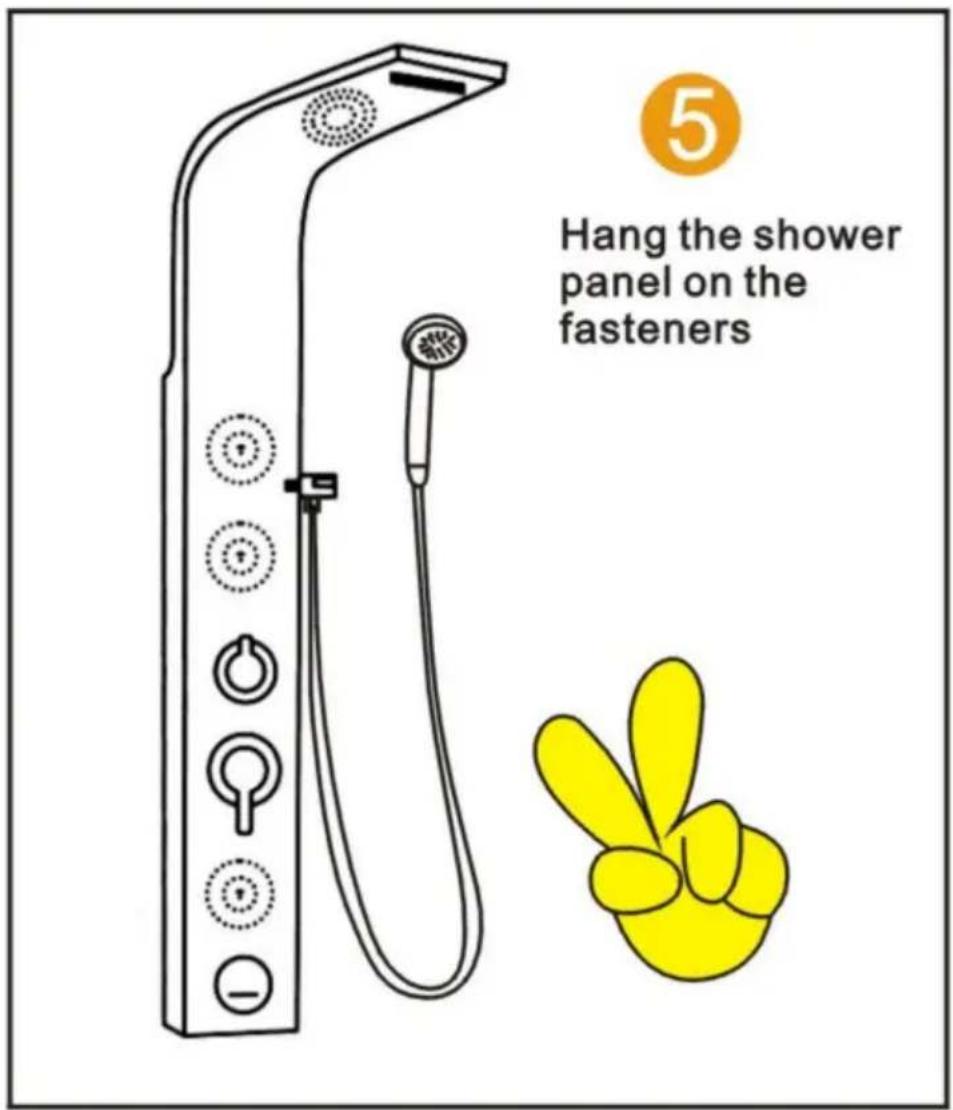
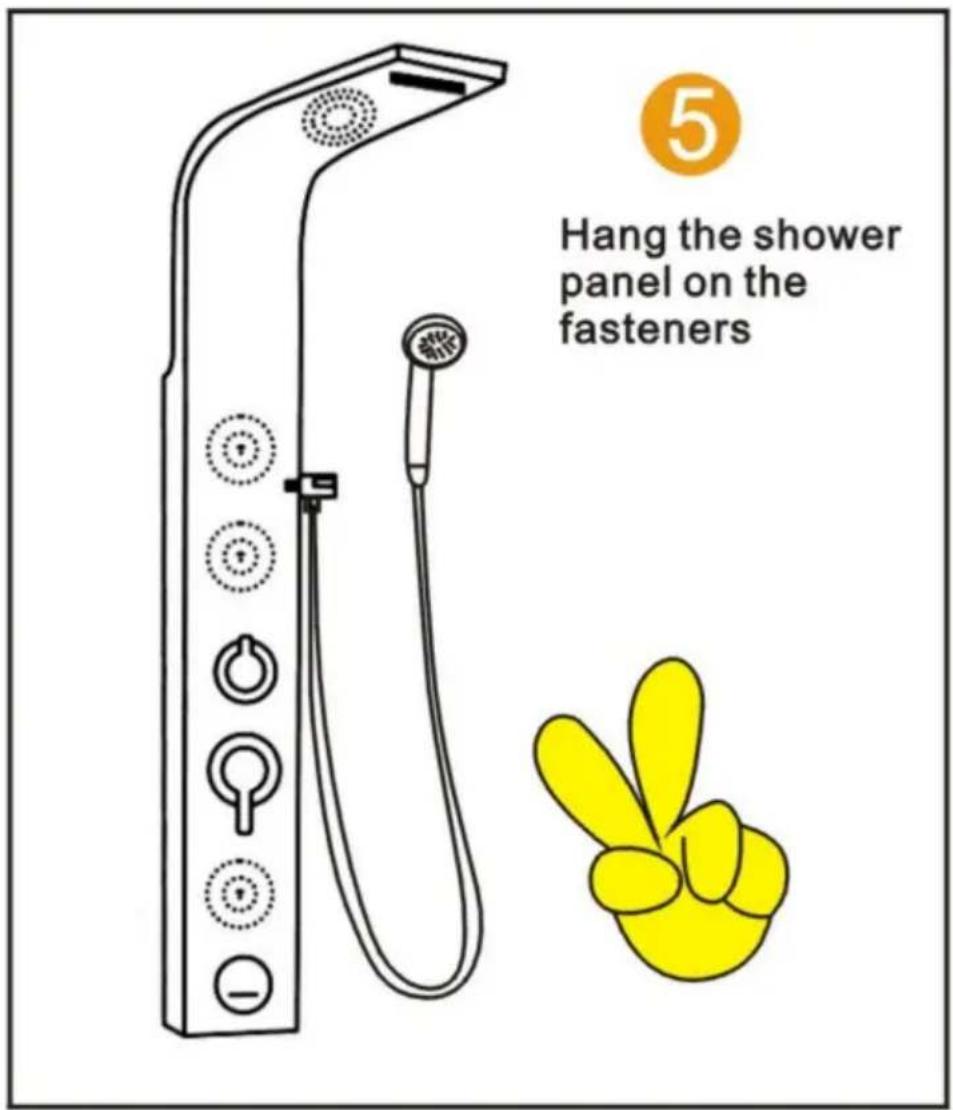
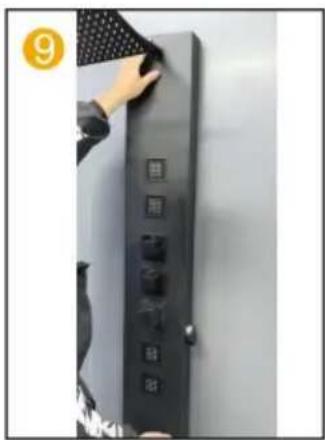
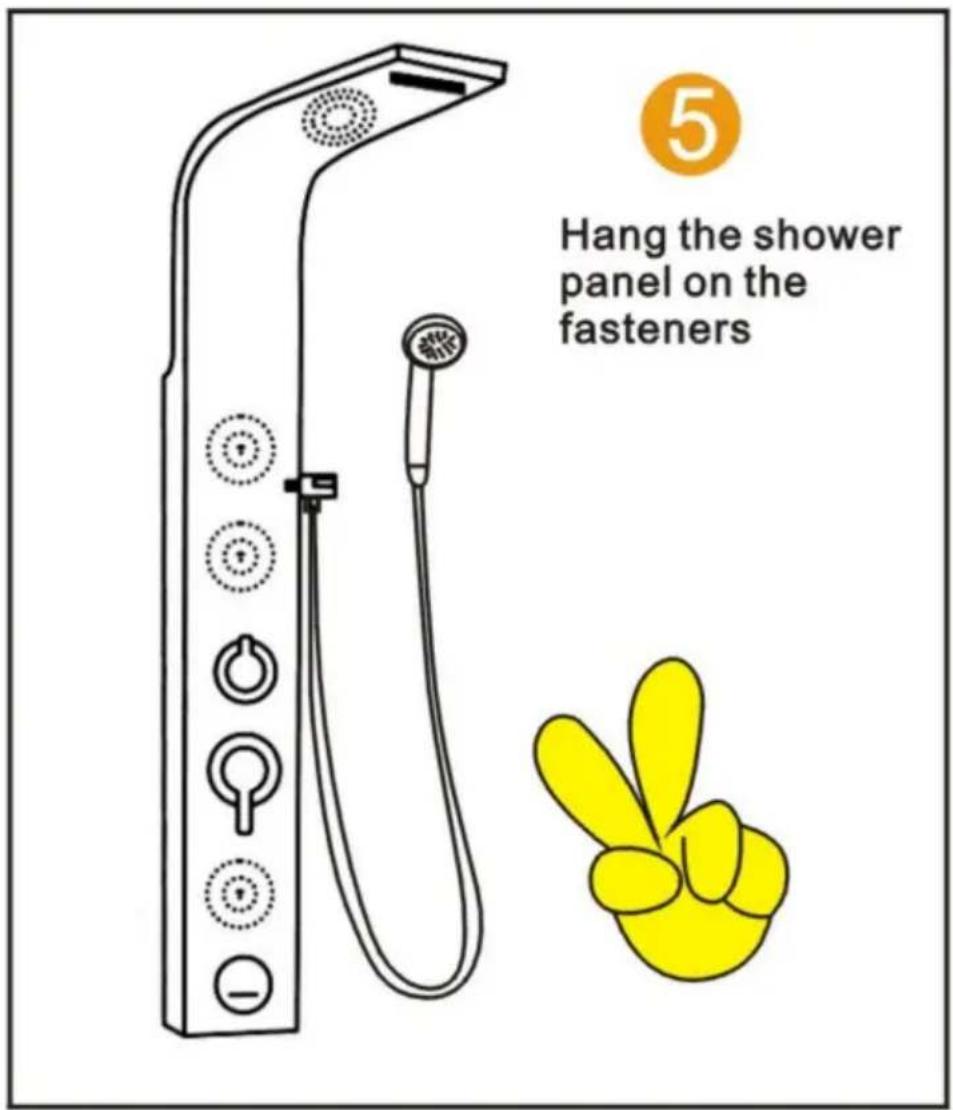
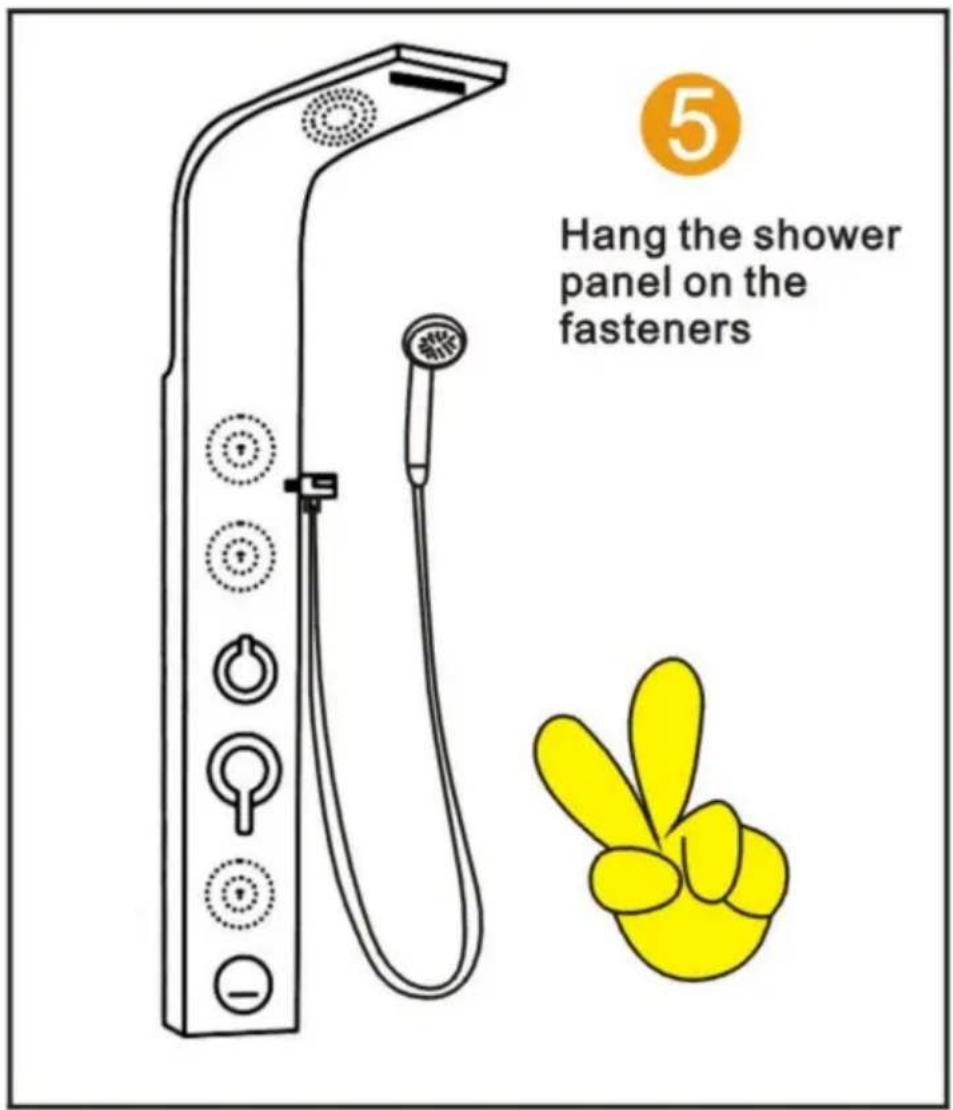
- Hang the shower system on the wall, clamping the upper and lower two cards into the two hanging pastes (Note: after the shower system is on the wall, the main body should be close to the wall without shaking; do not need to use another glass glue or tools to fix it).
Stainless steel shower system maintenance methods:
- Regularly clean the product to keep its appearance bright and clean.
- Clean the surface with water or a mild detergent and wipe it with a soft cloth.
- Note the cleaning of hidden positions; timely cleaning can make the product last longer.
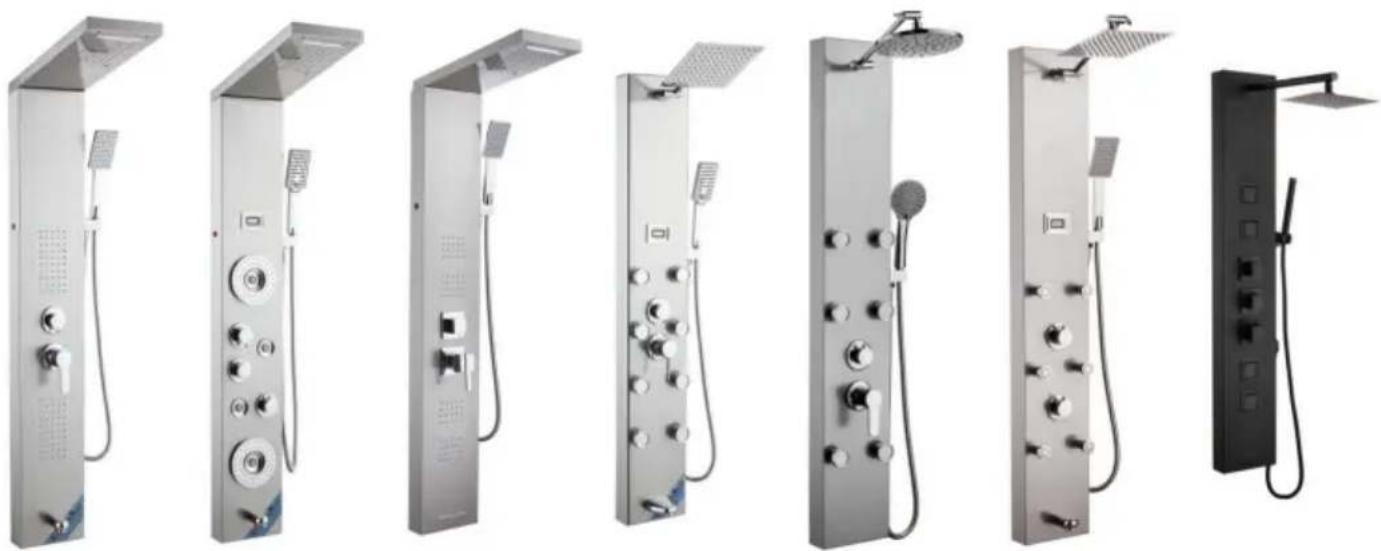
SHOWER PANEL SERIES INSTALLATION DIAGRAM
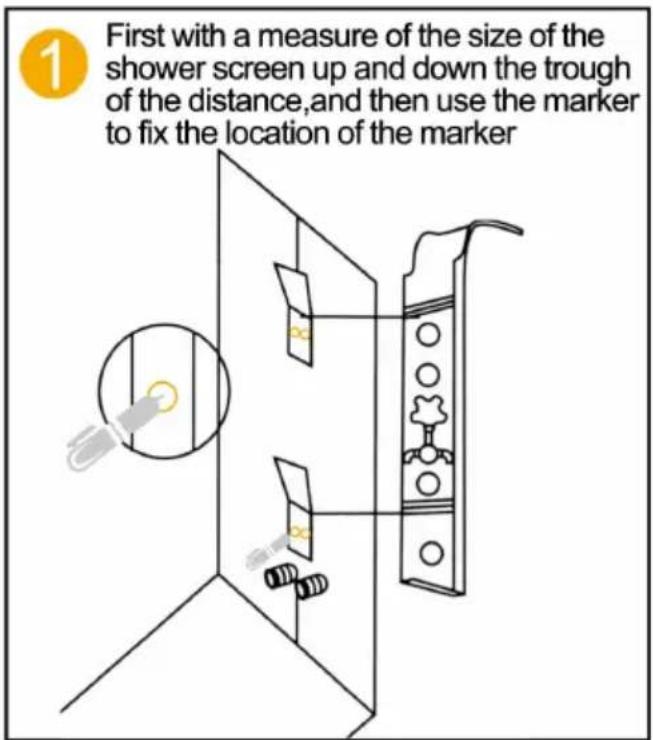
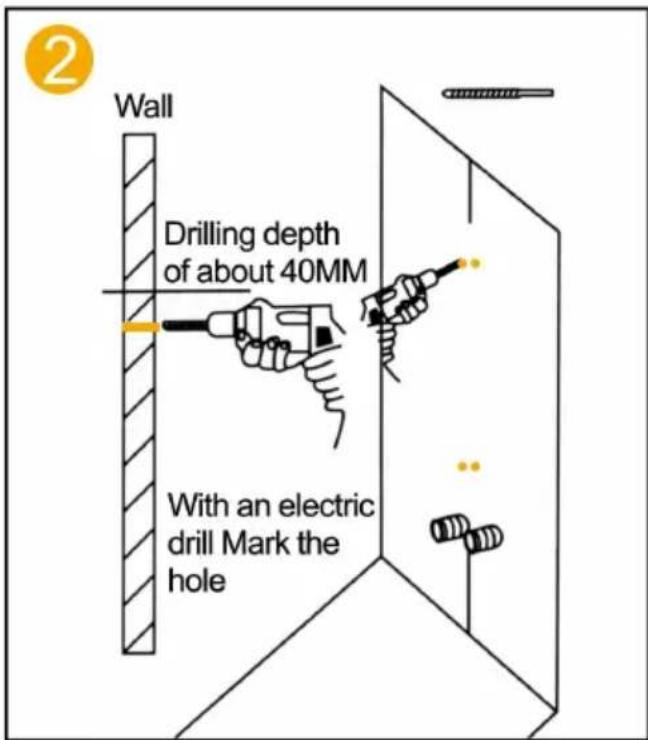
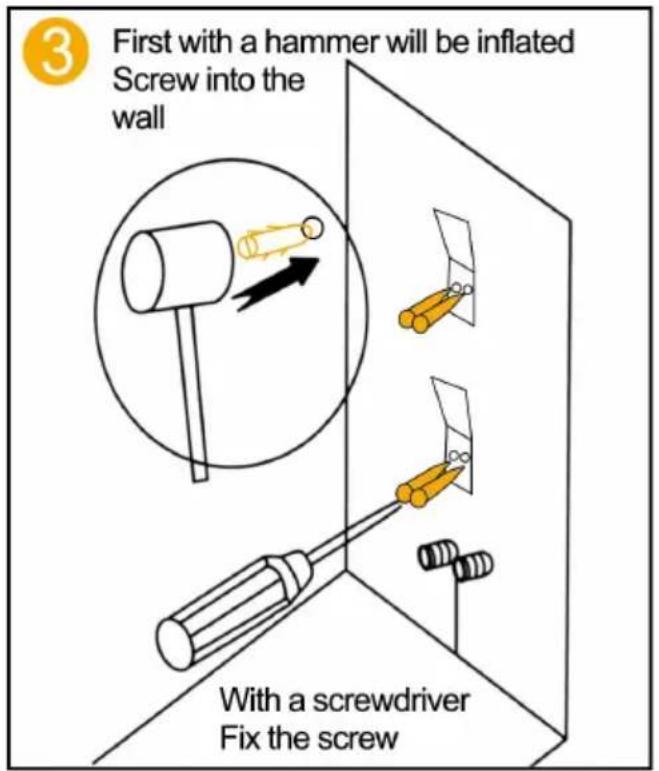
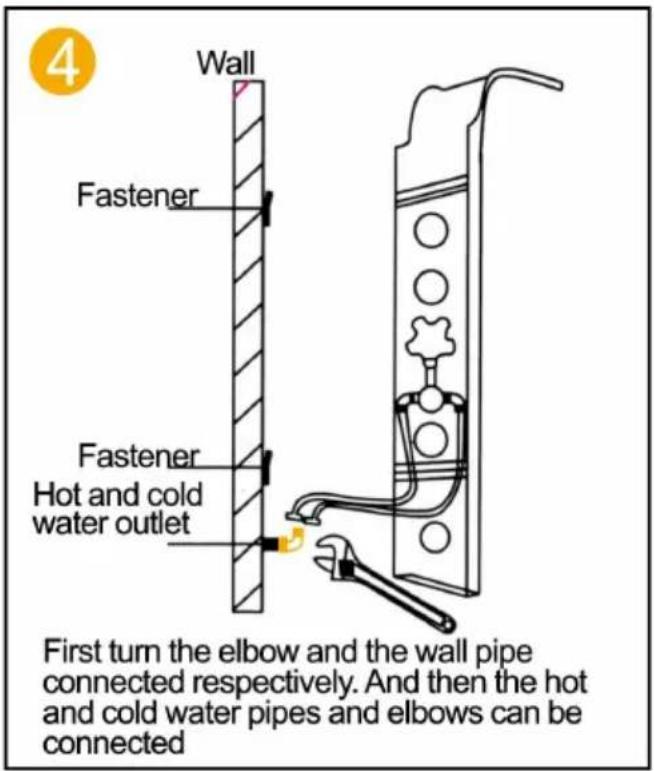
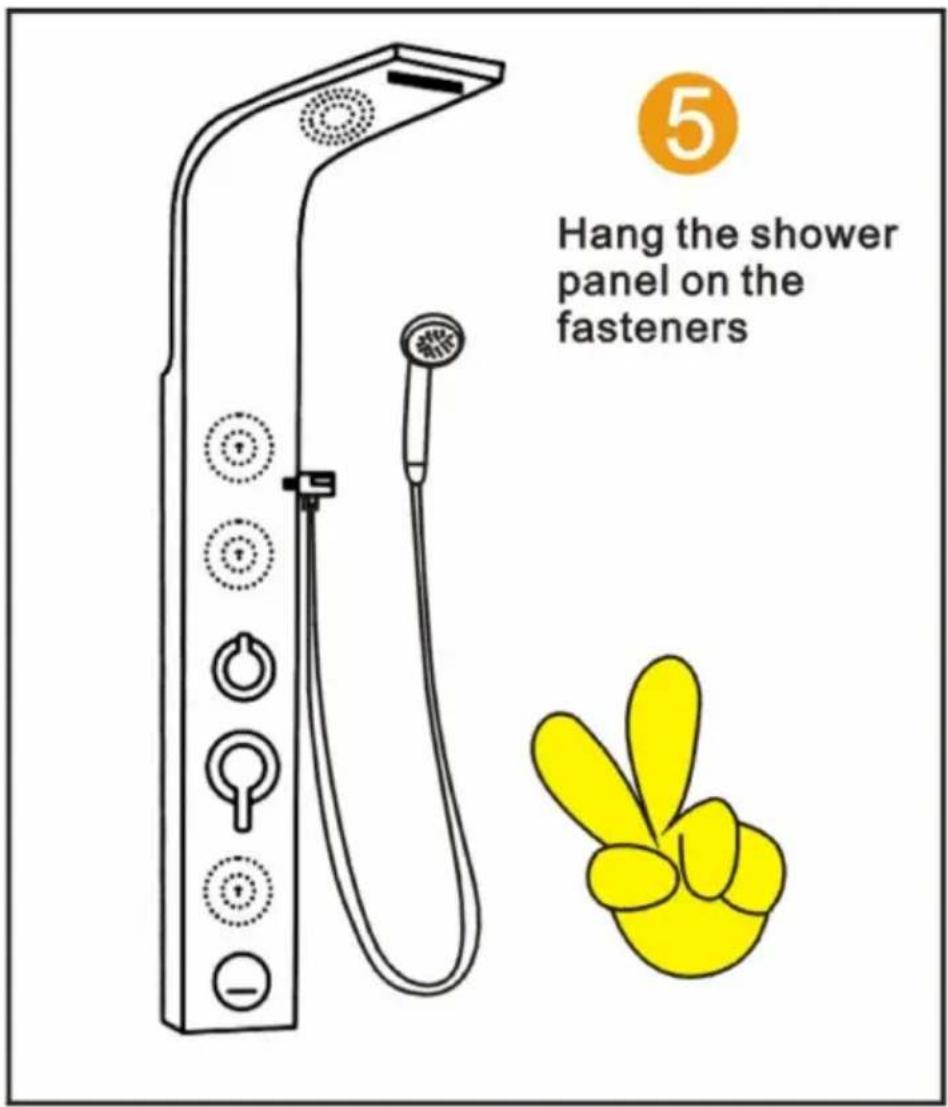
6002FL / 6012FL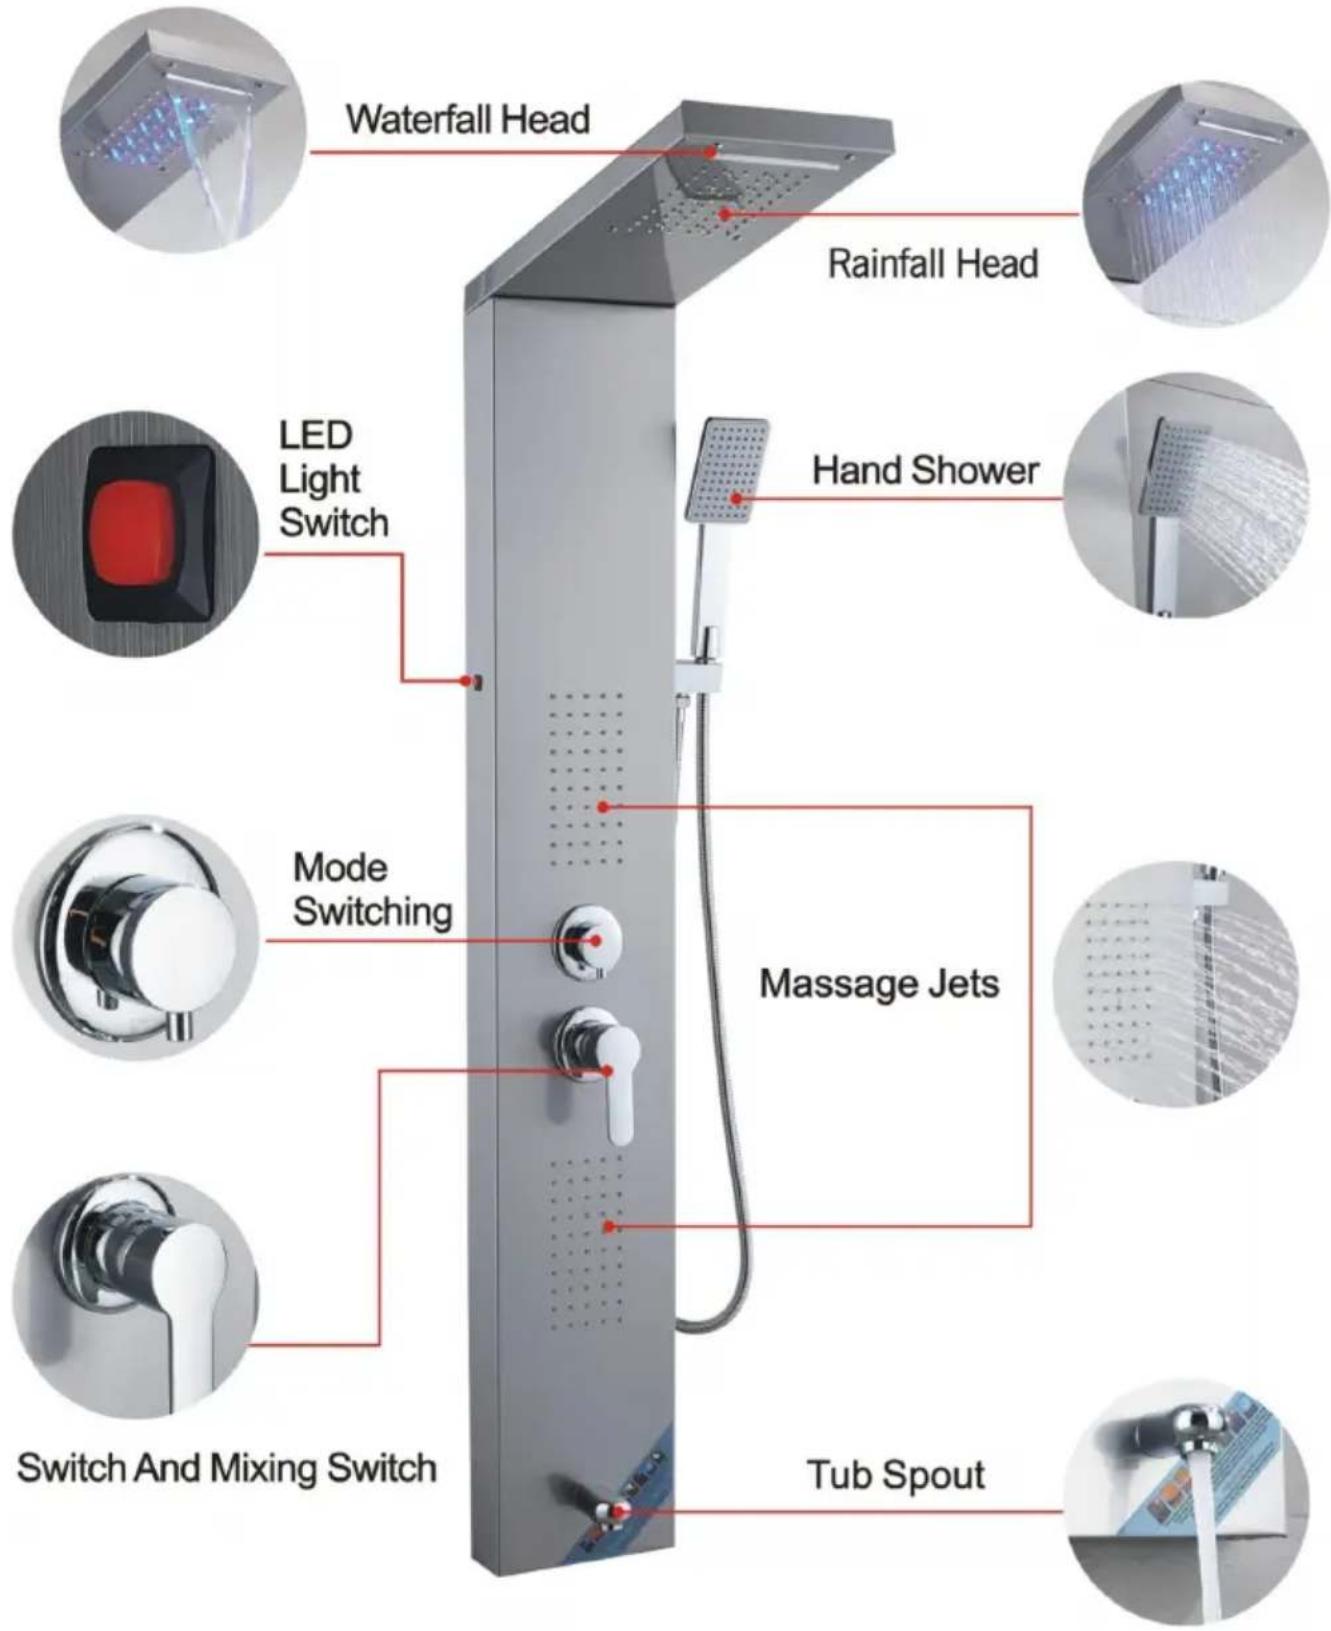
8039FL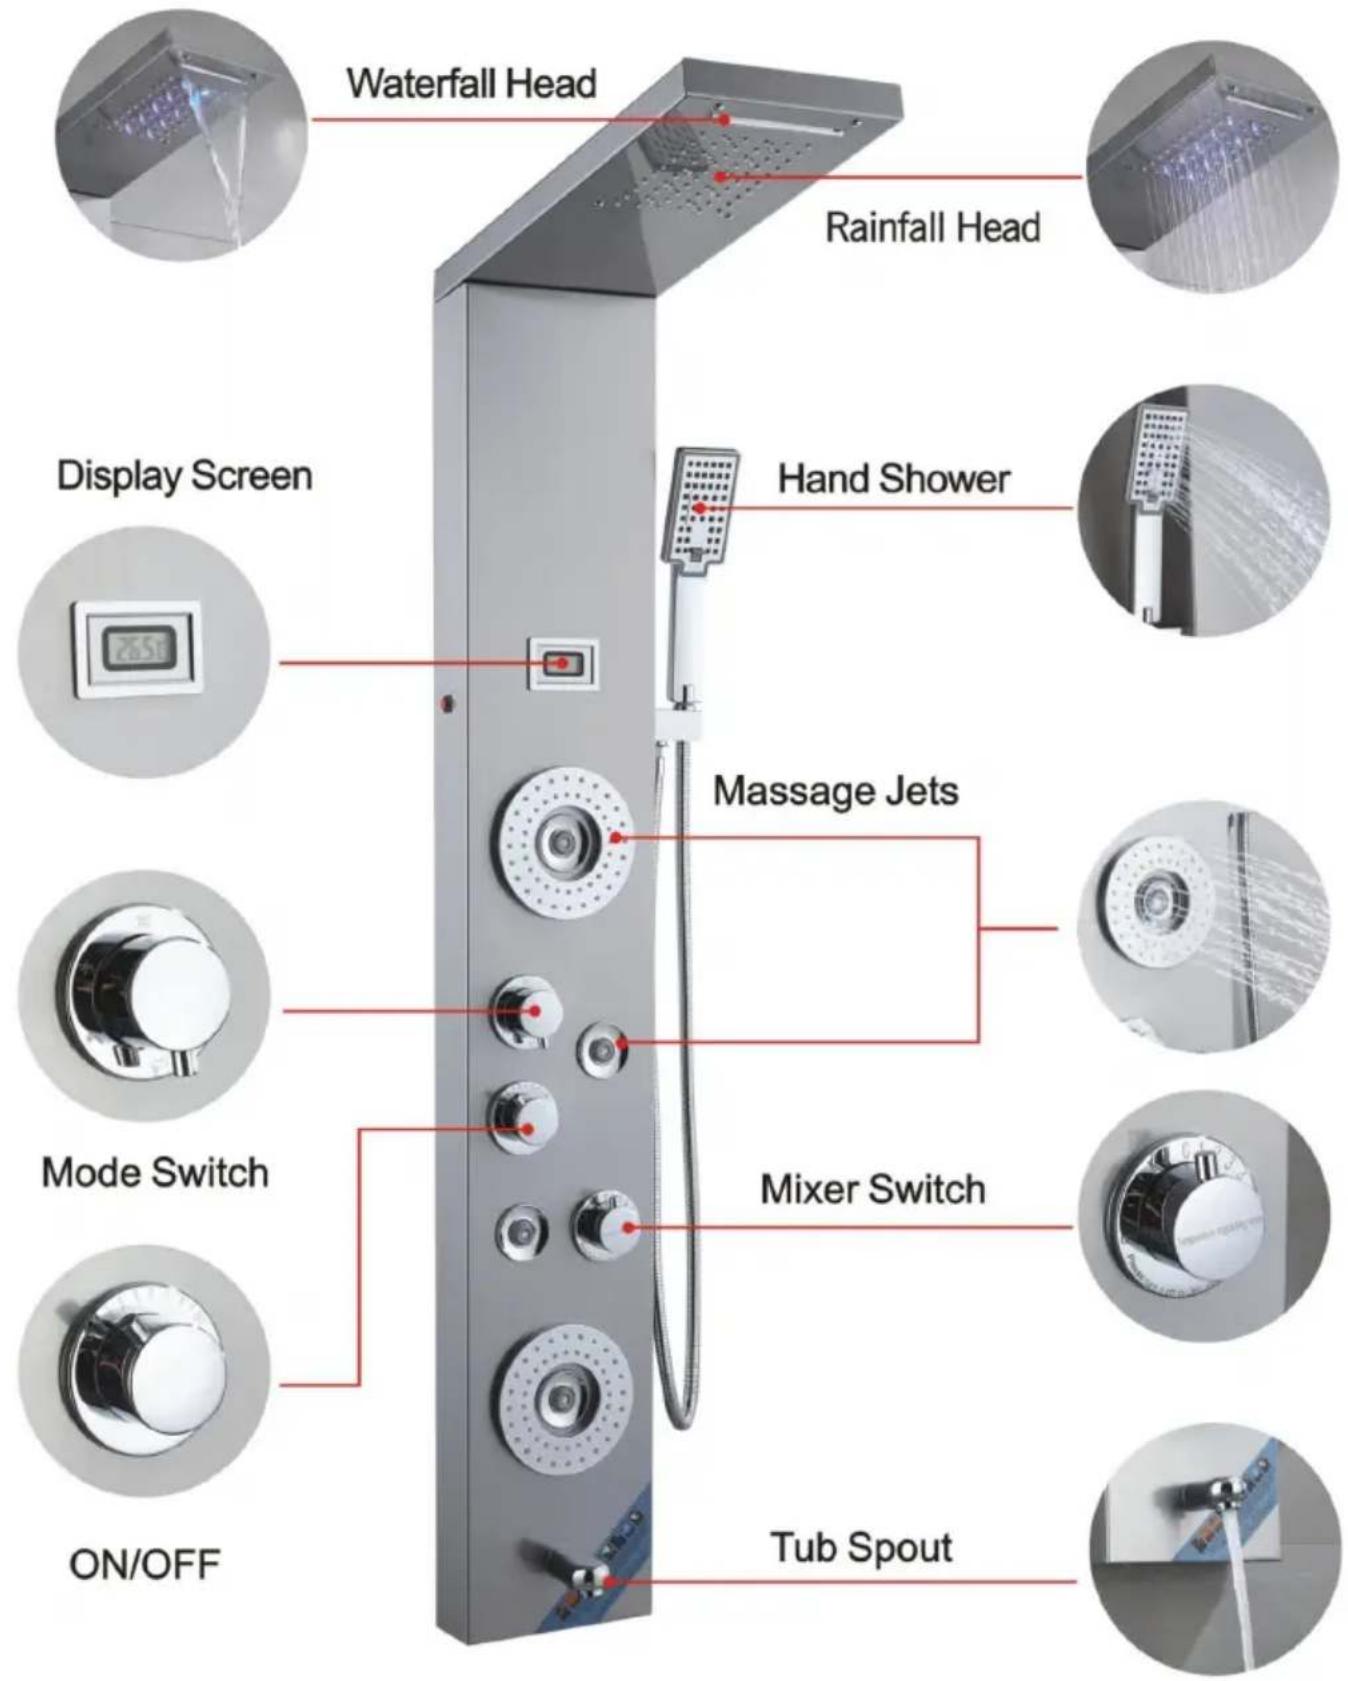
7009FL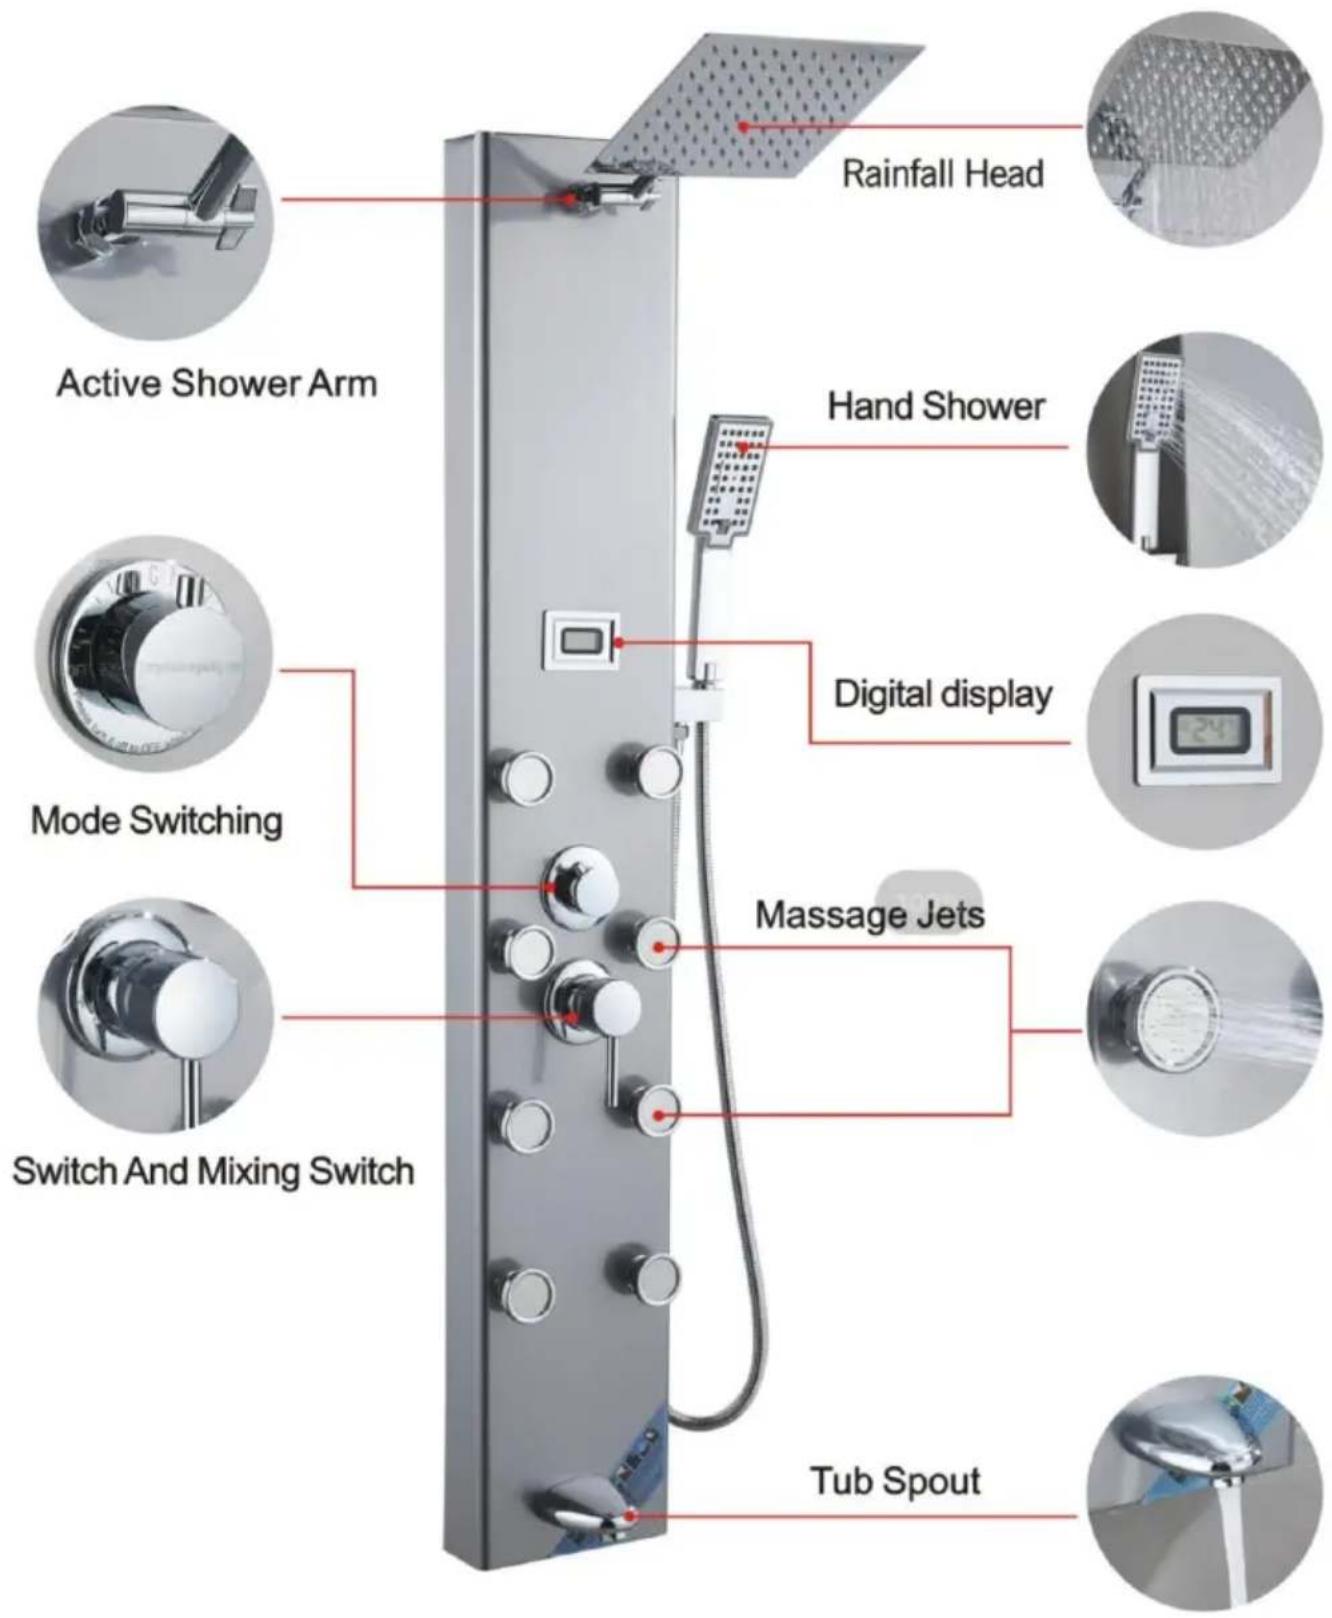
FUNCTION INTRODUCTION
8124FL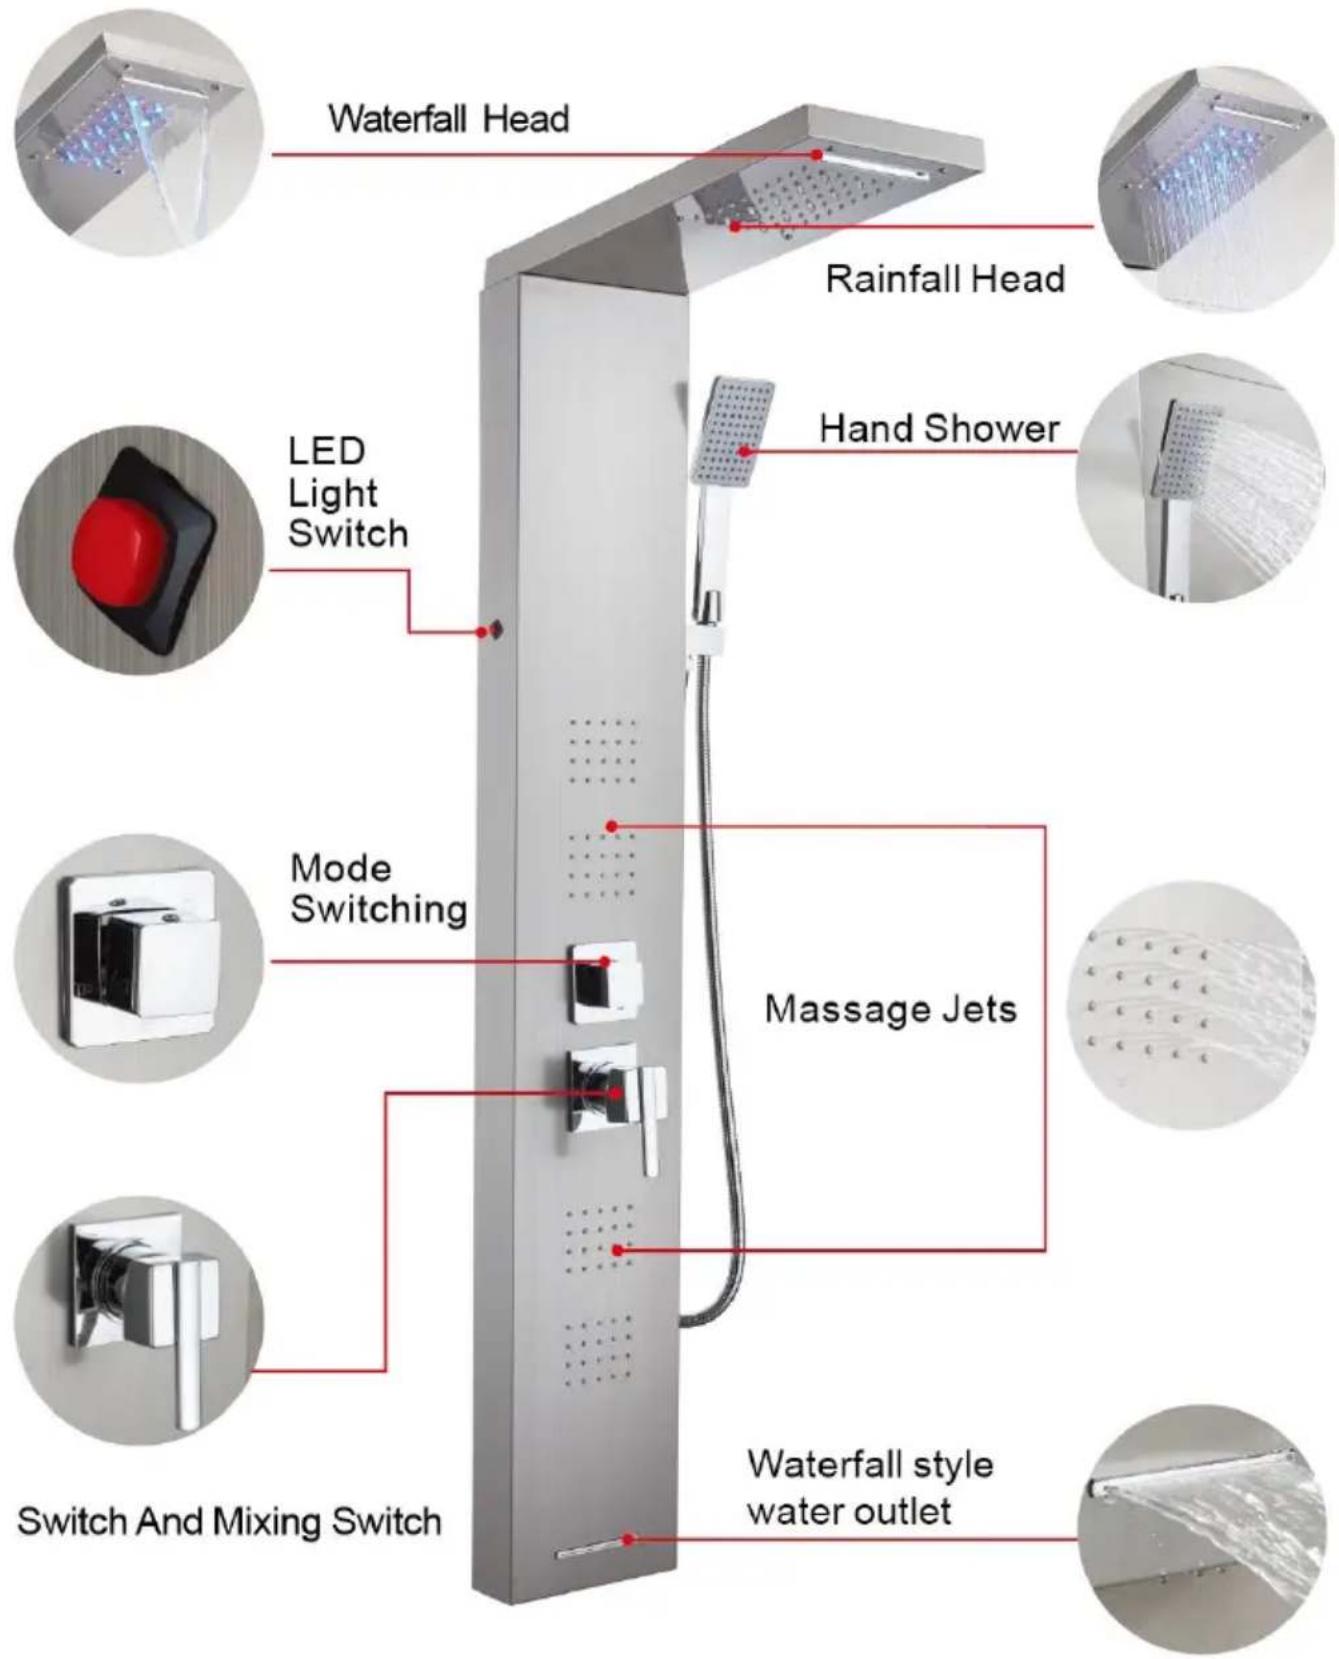
FUNCTION INTRODUCTION
7016FL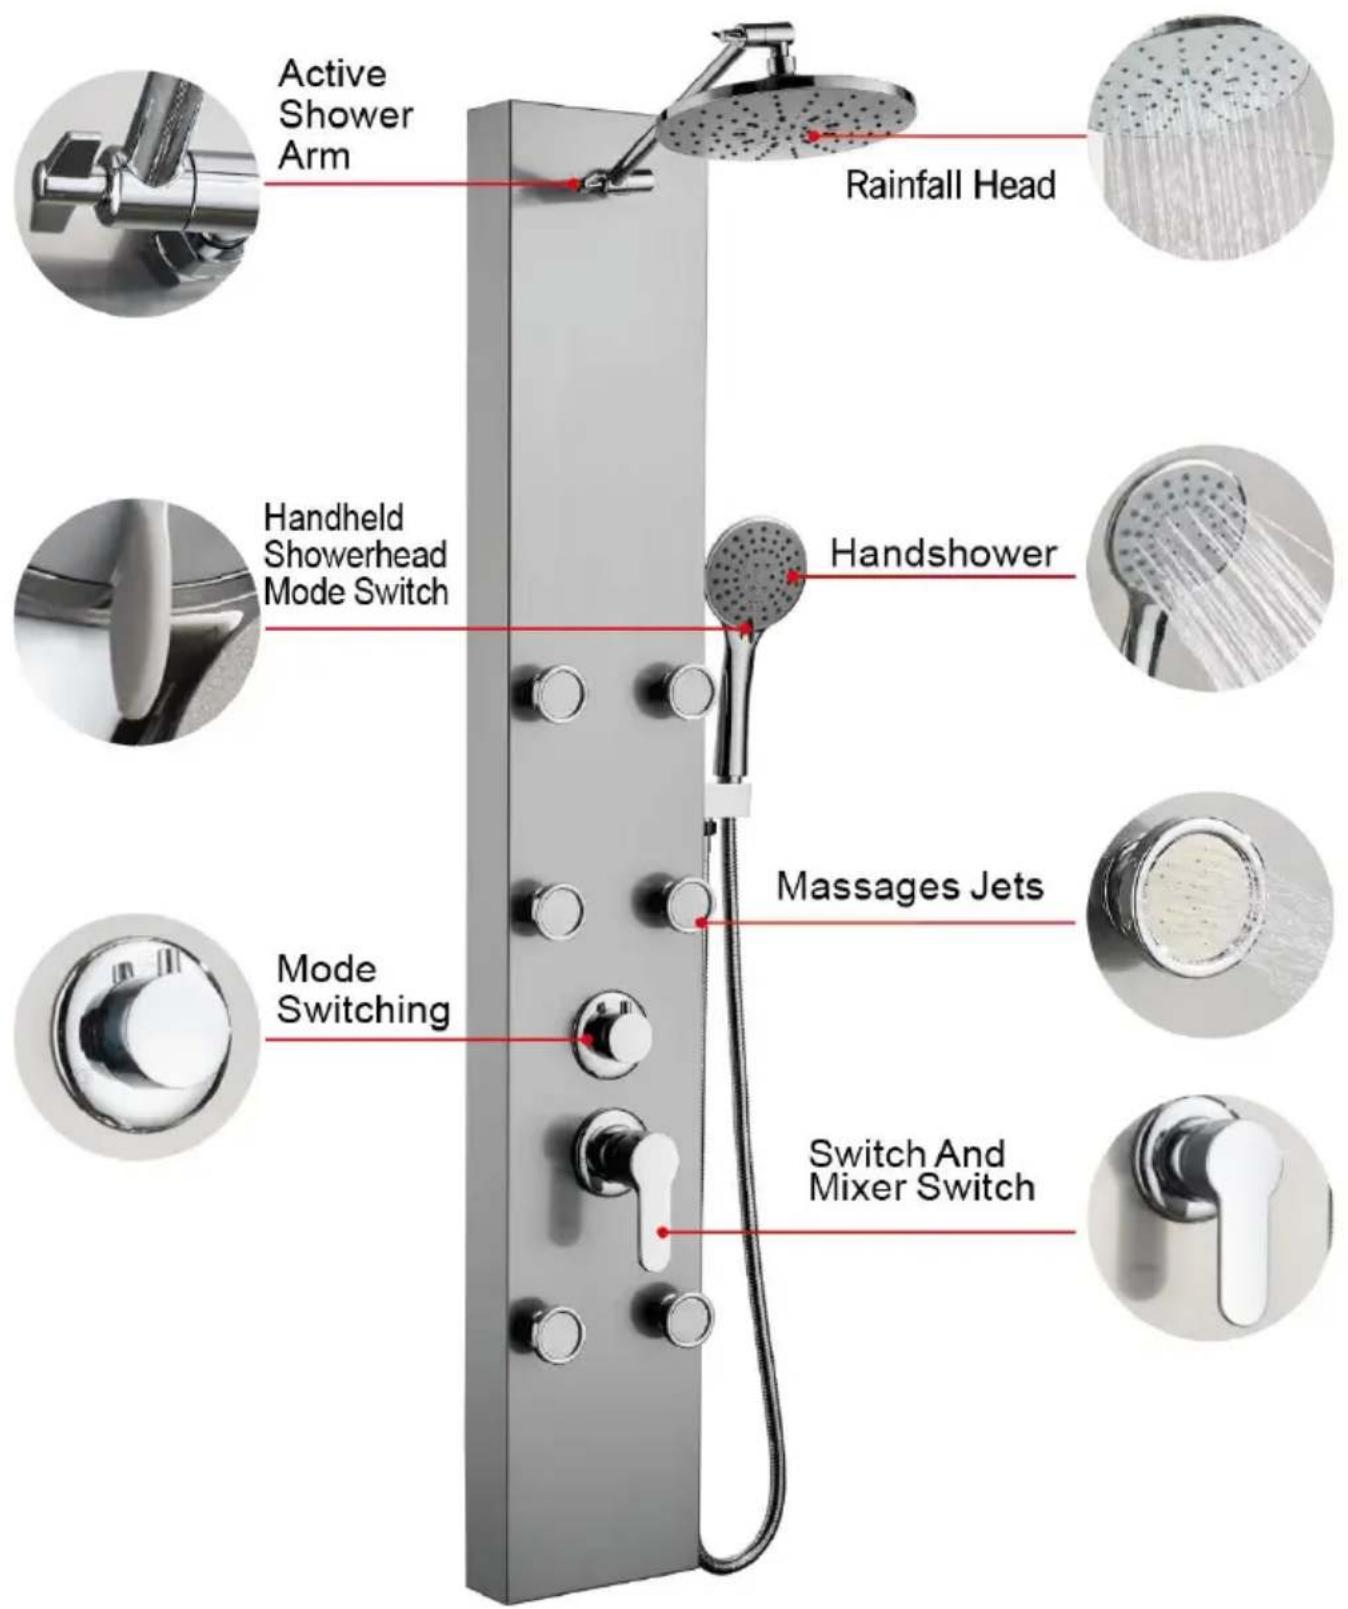
FUNCTION INTRODUCTION
7002FL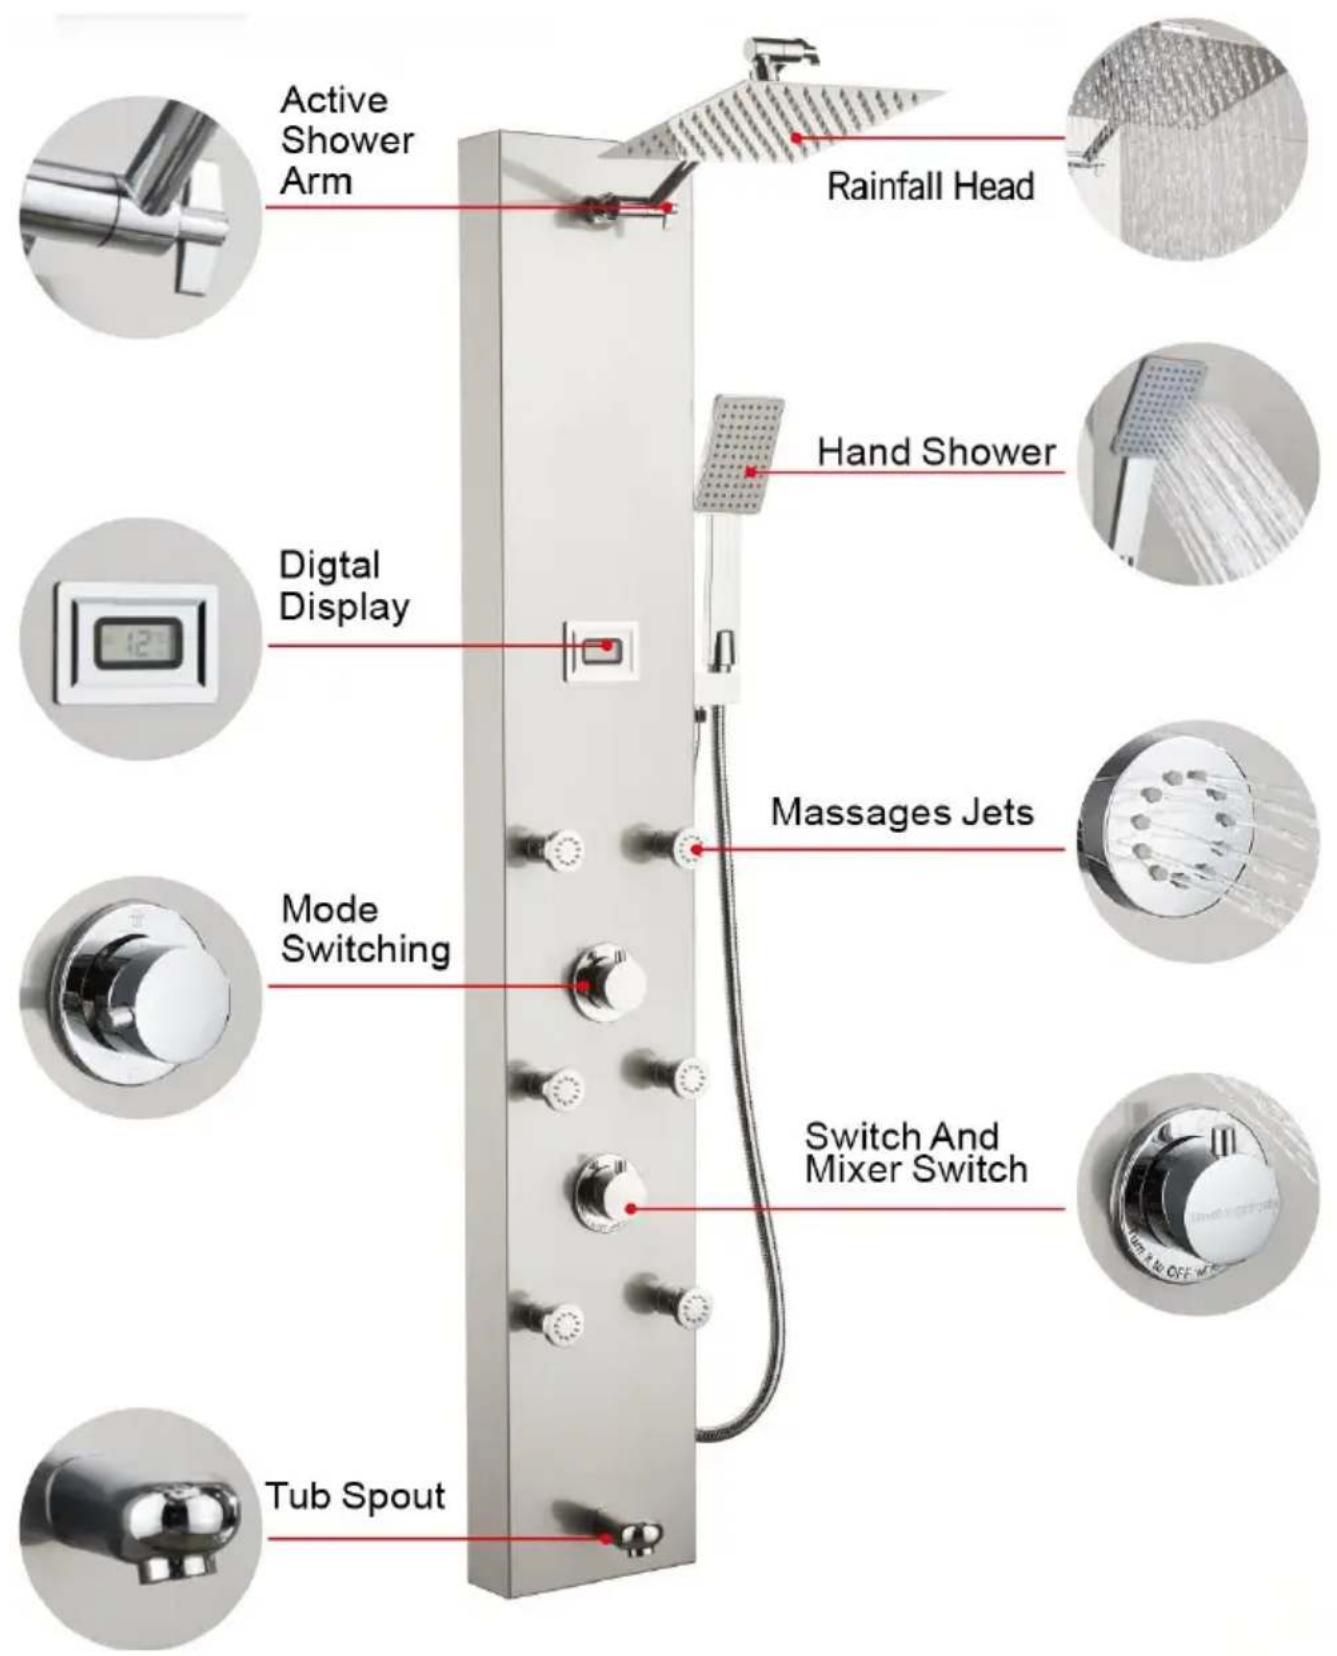
7015FY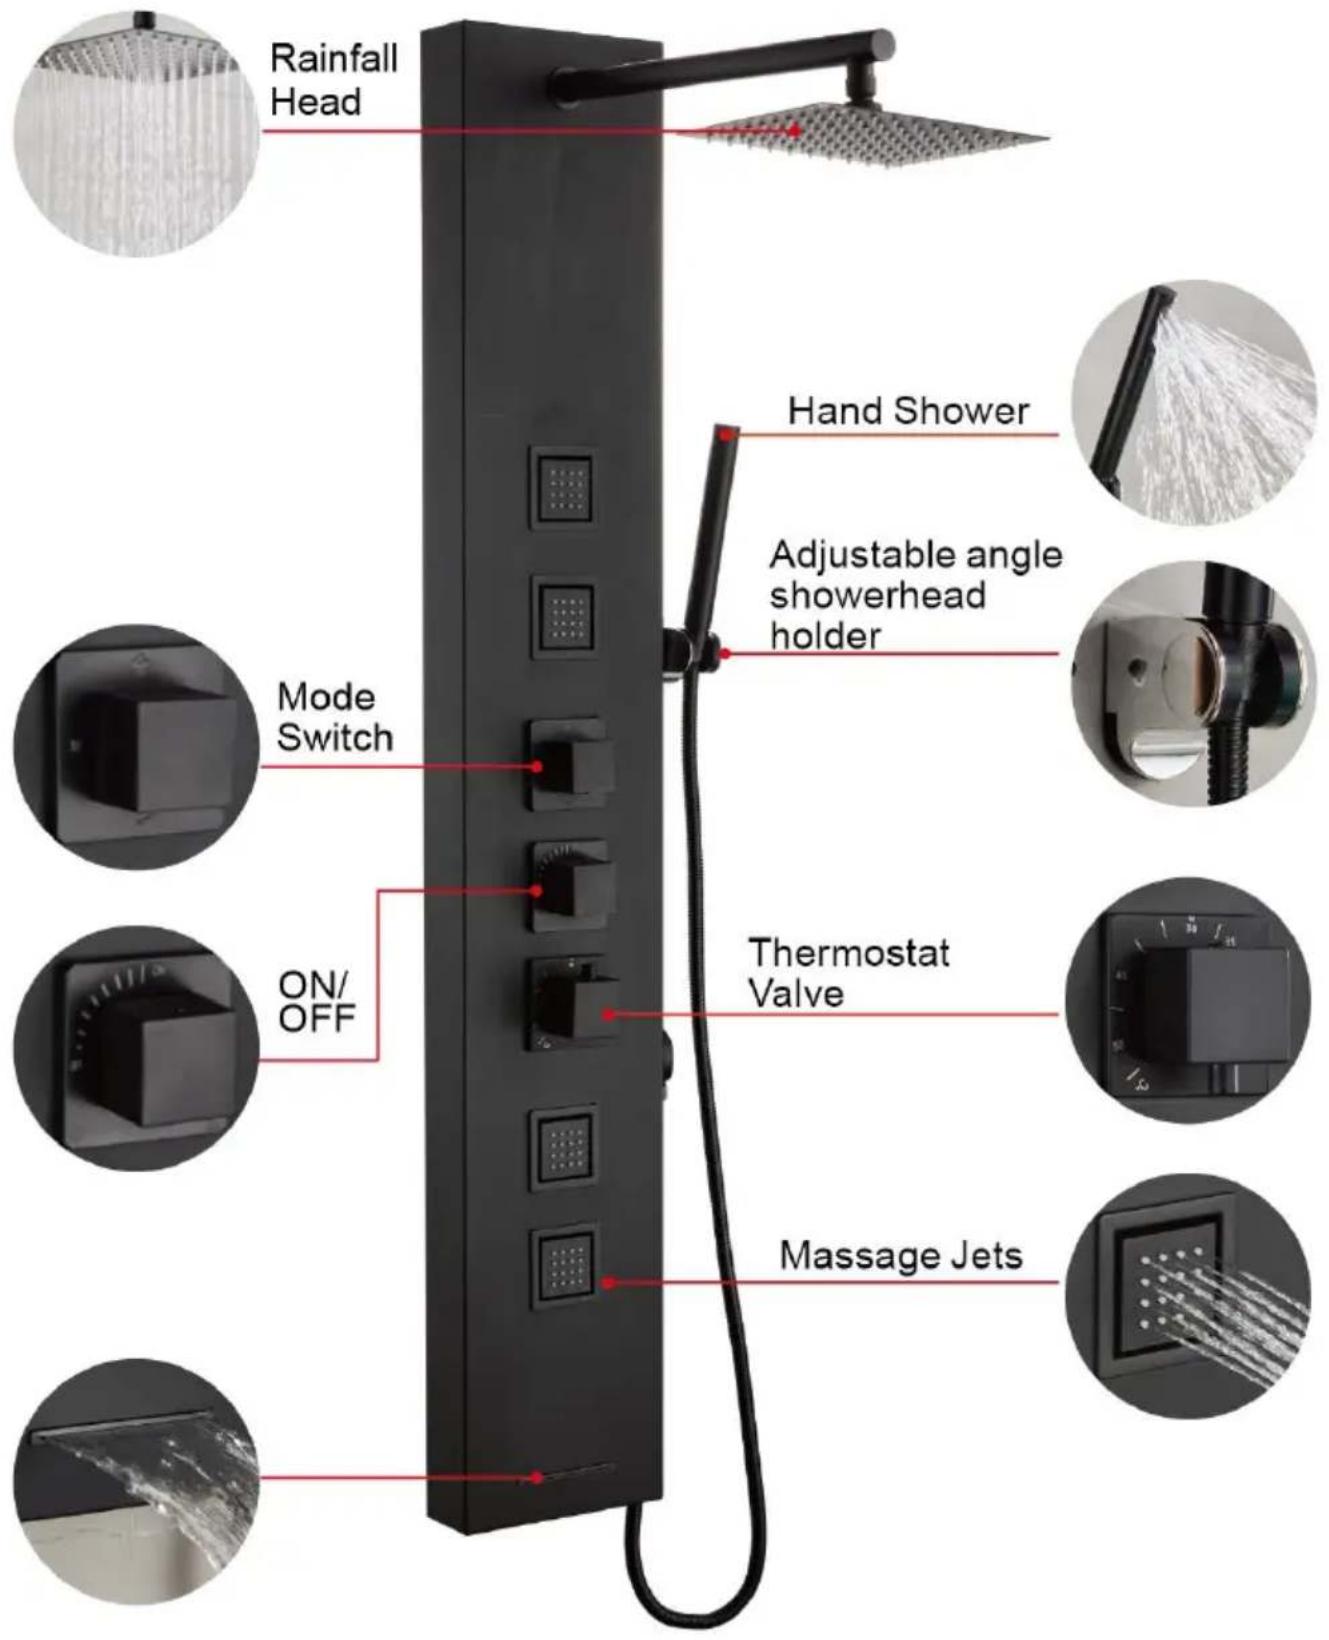
Note: For the detailed installation video, please refer to the corresponding model and scan the QR code below to view.
6002FL / 6012FL
8039FL
8124FL
7009FL
7016FL
7002FL
7015FY

Technical Support and E-Warranty Certificate www.vevor.com/support
VEVOR
Affordable. Reliable. Home Improvement.
Affordable. Reliable. Home Improvement.
INTRODUCTION TO FUNCTIONS
6002FL / 6012FL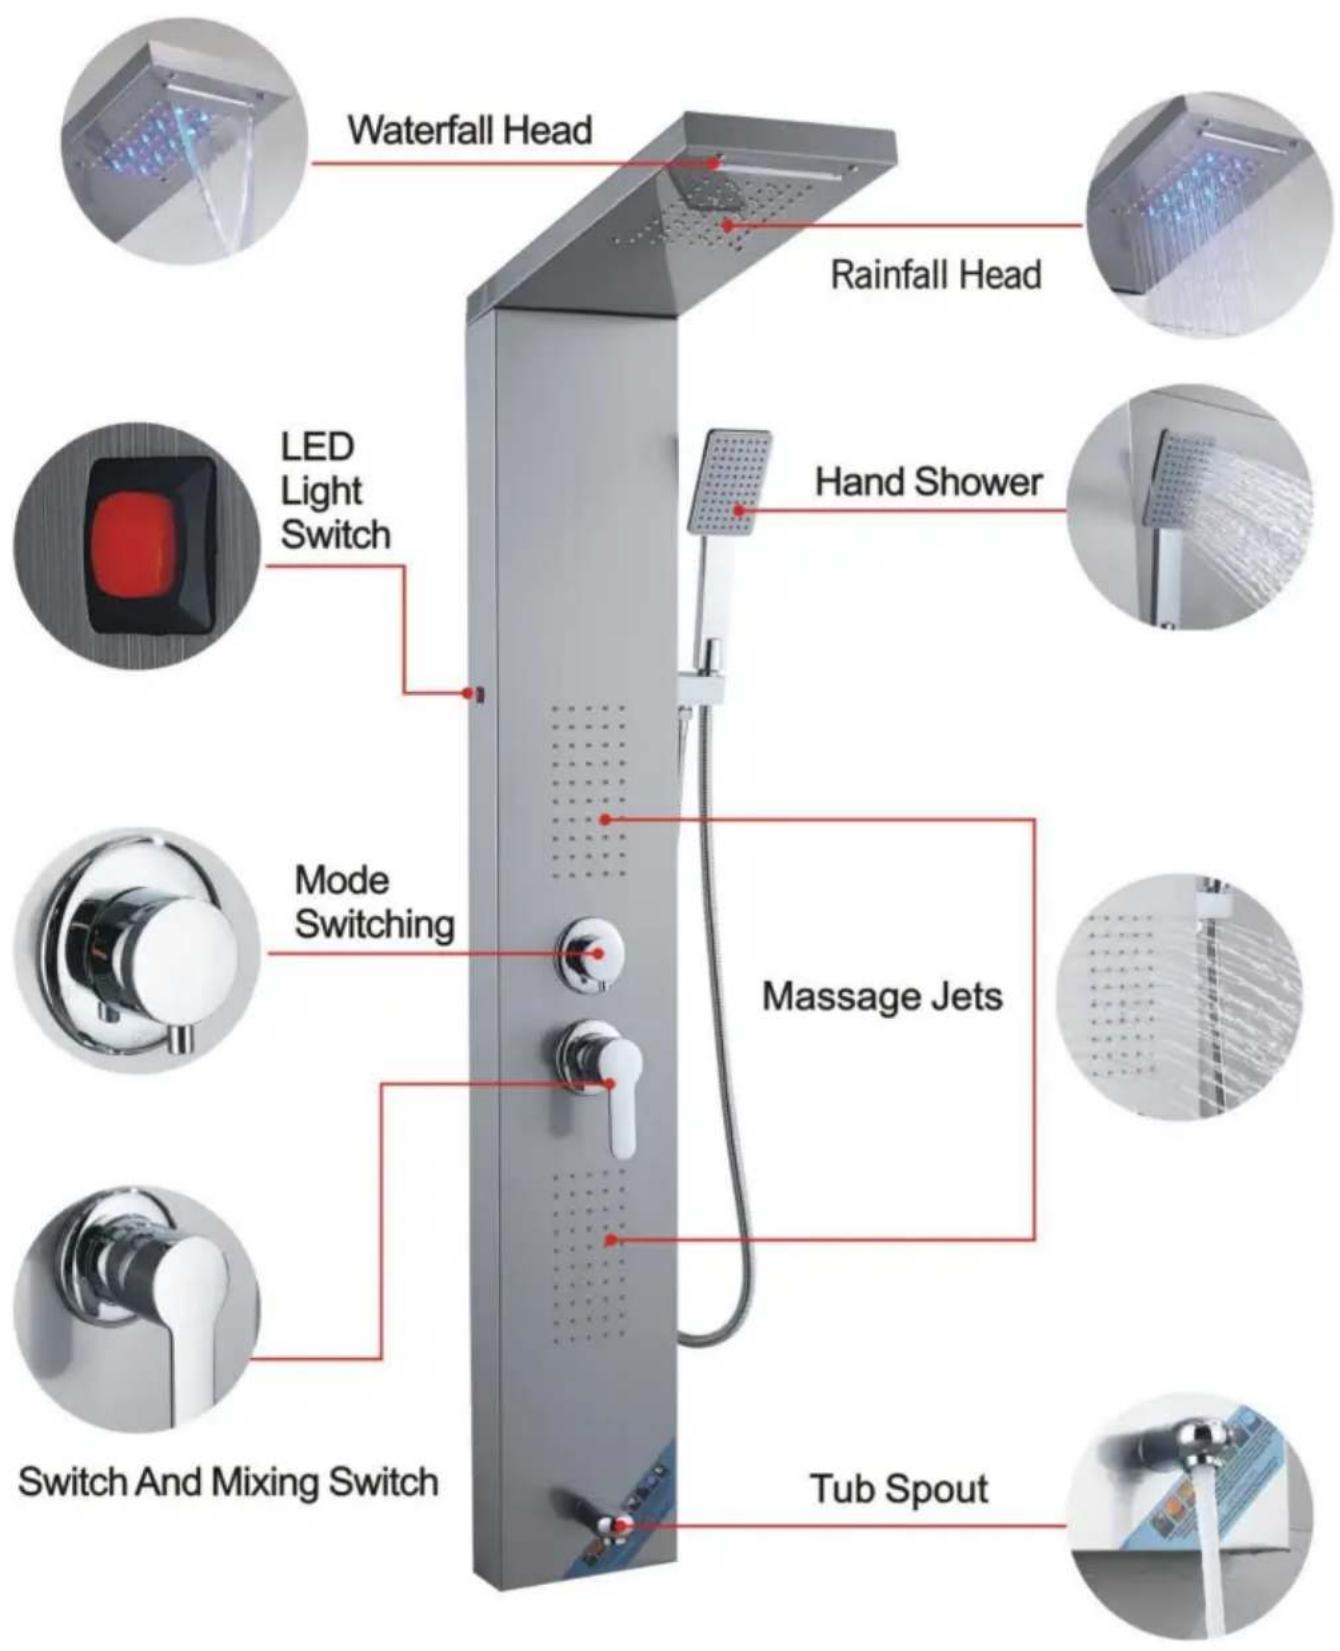
INTRODUCTION TO FUNCTIONS
8039FL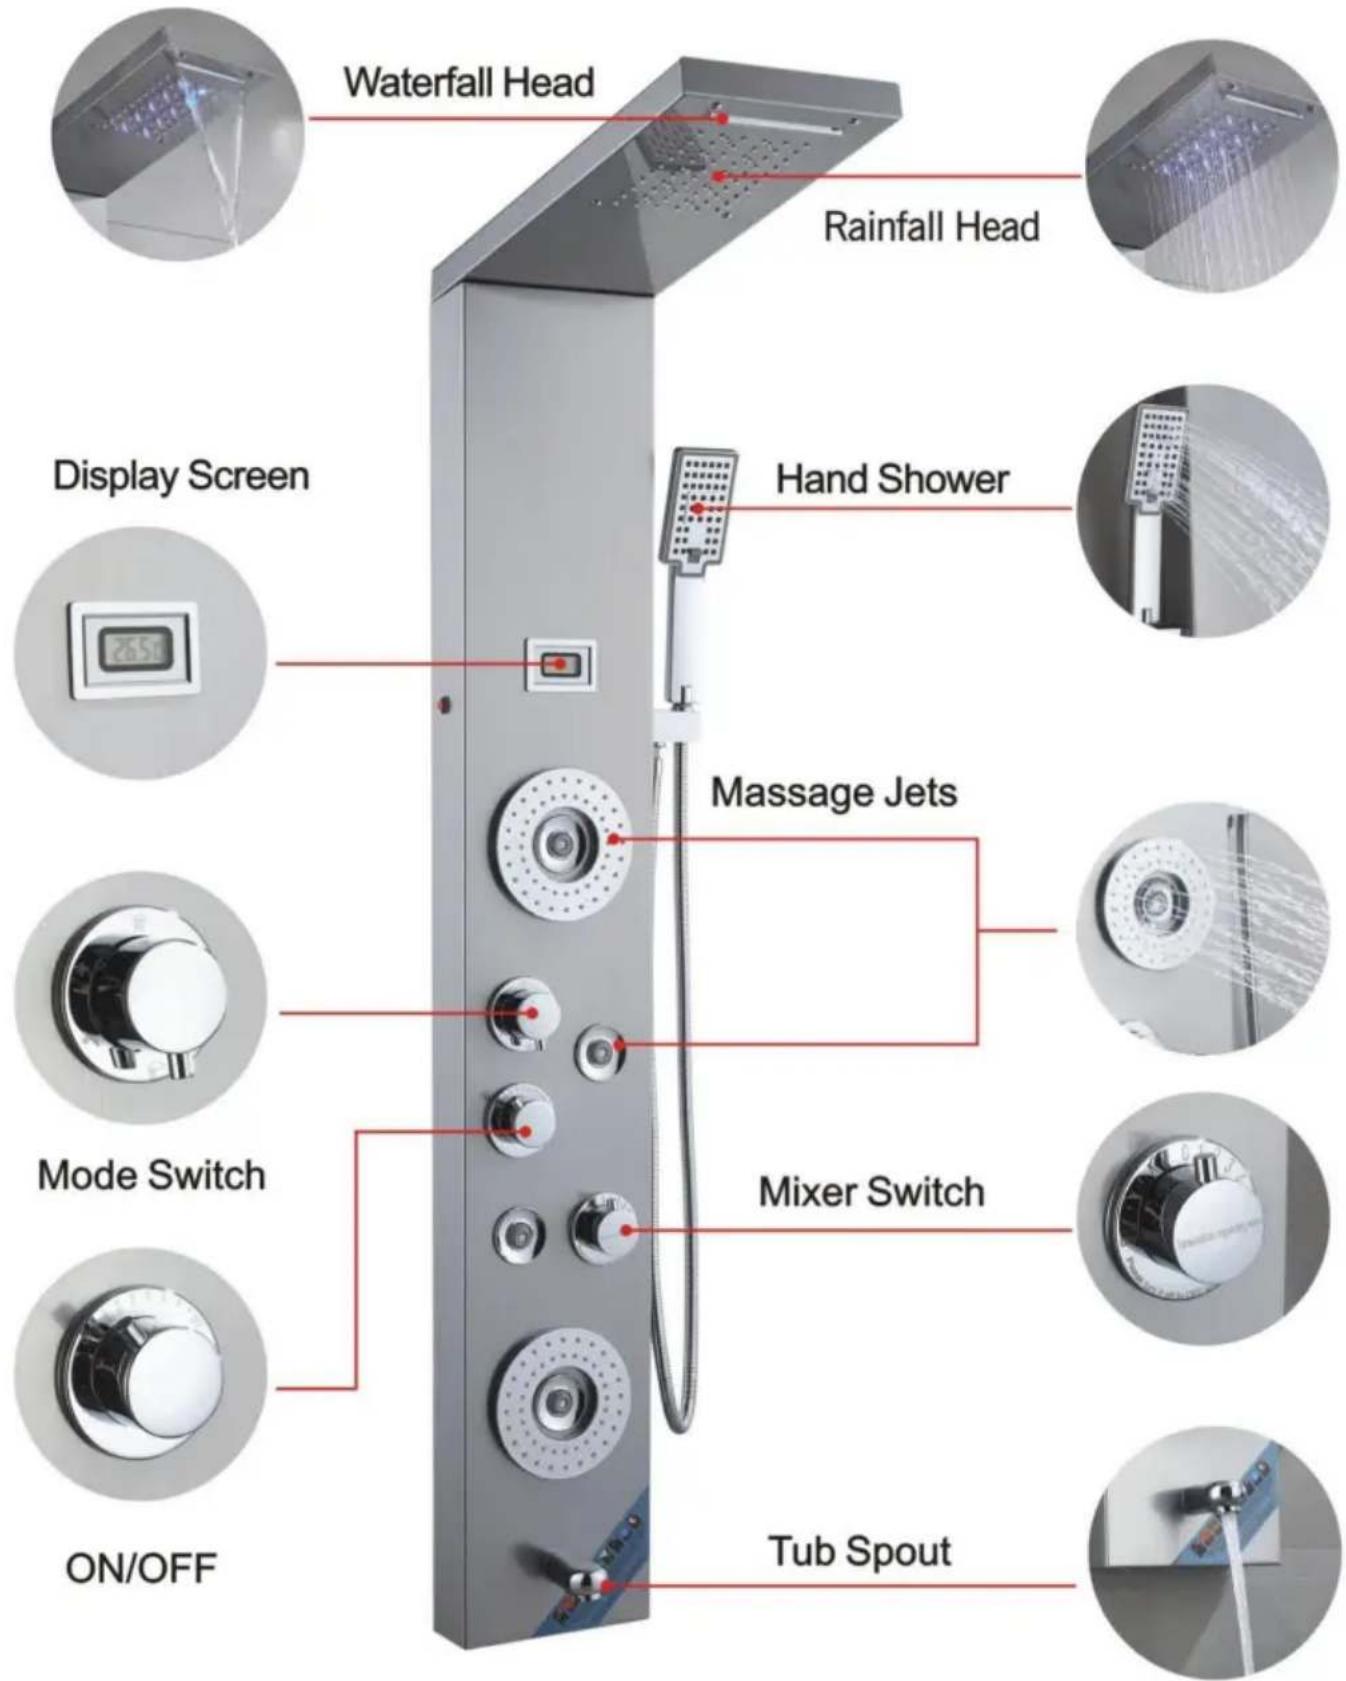
INTRODUCTION TO FUNCTIONS
7009FL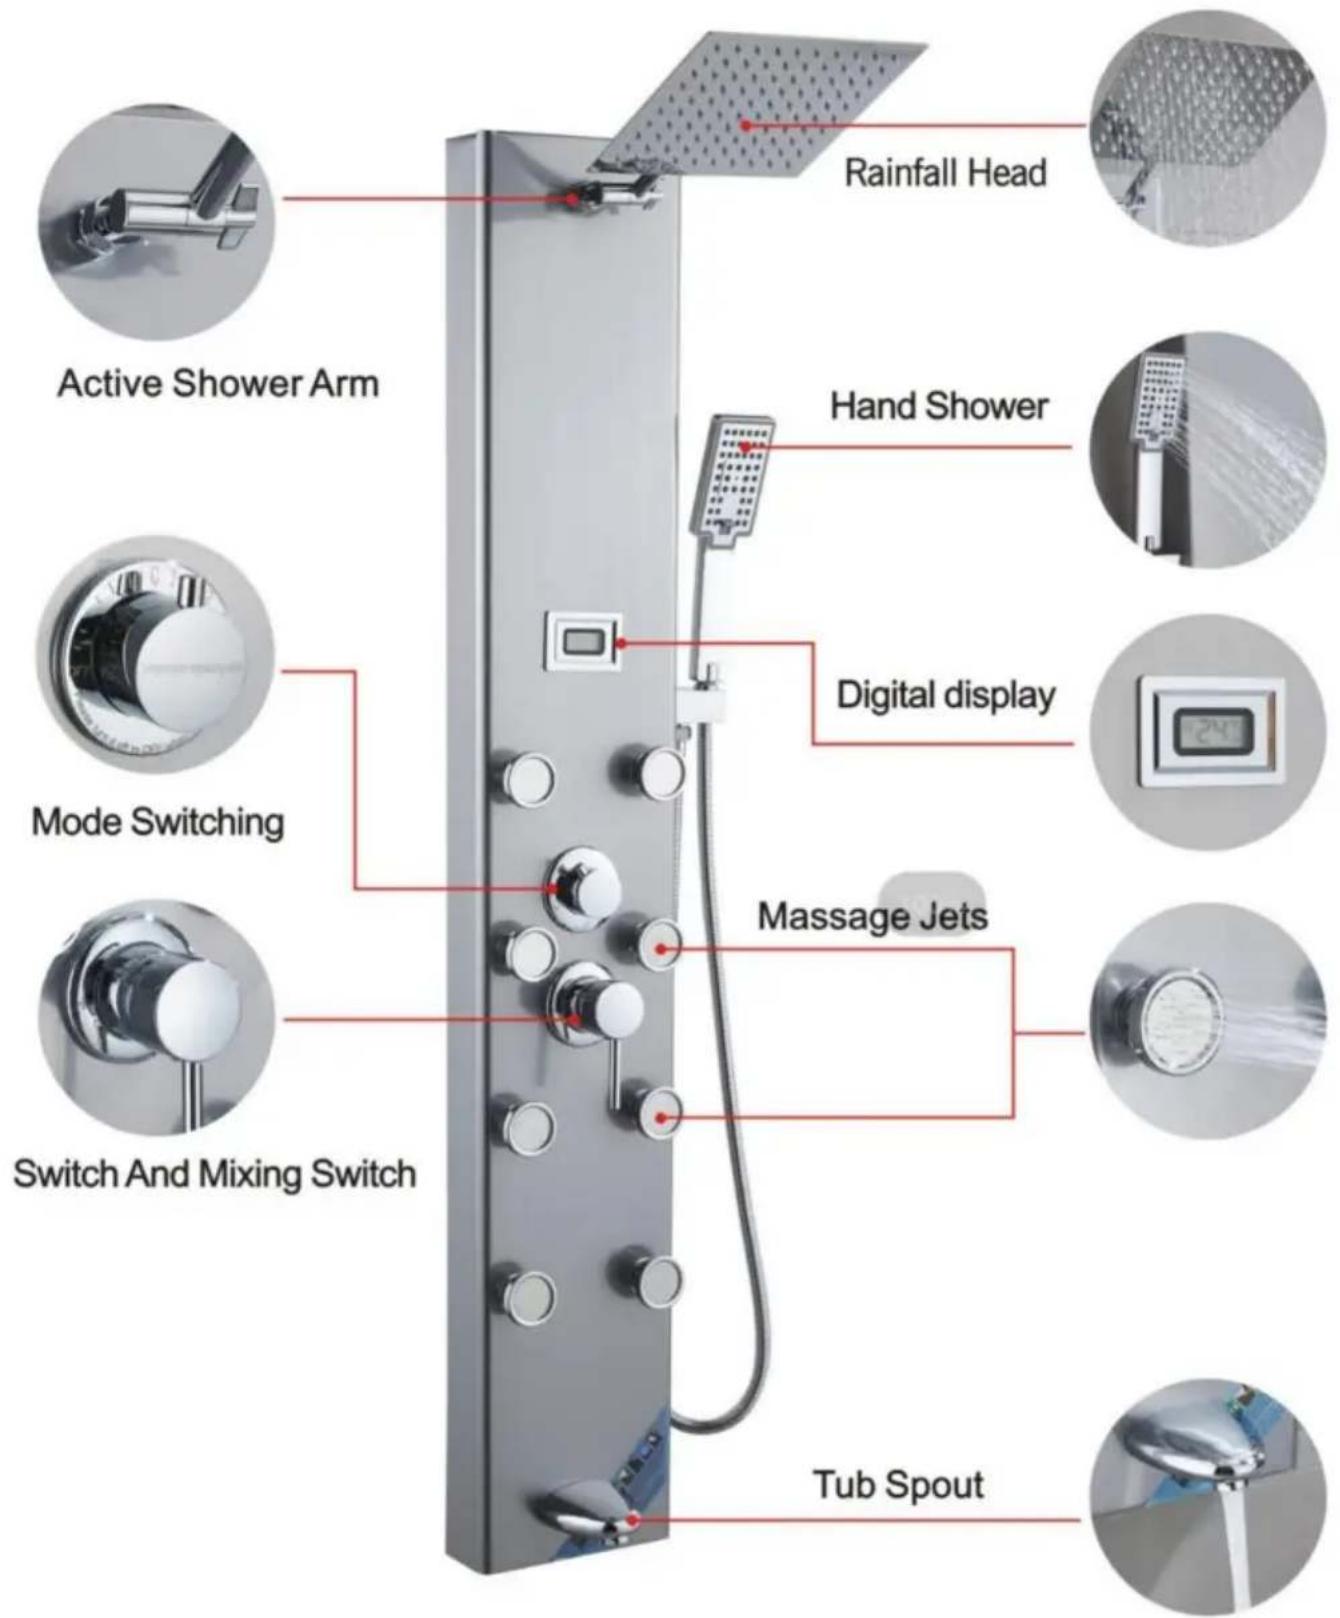
INTRODUCTION TO FUNCTIONS
8124FL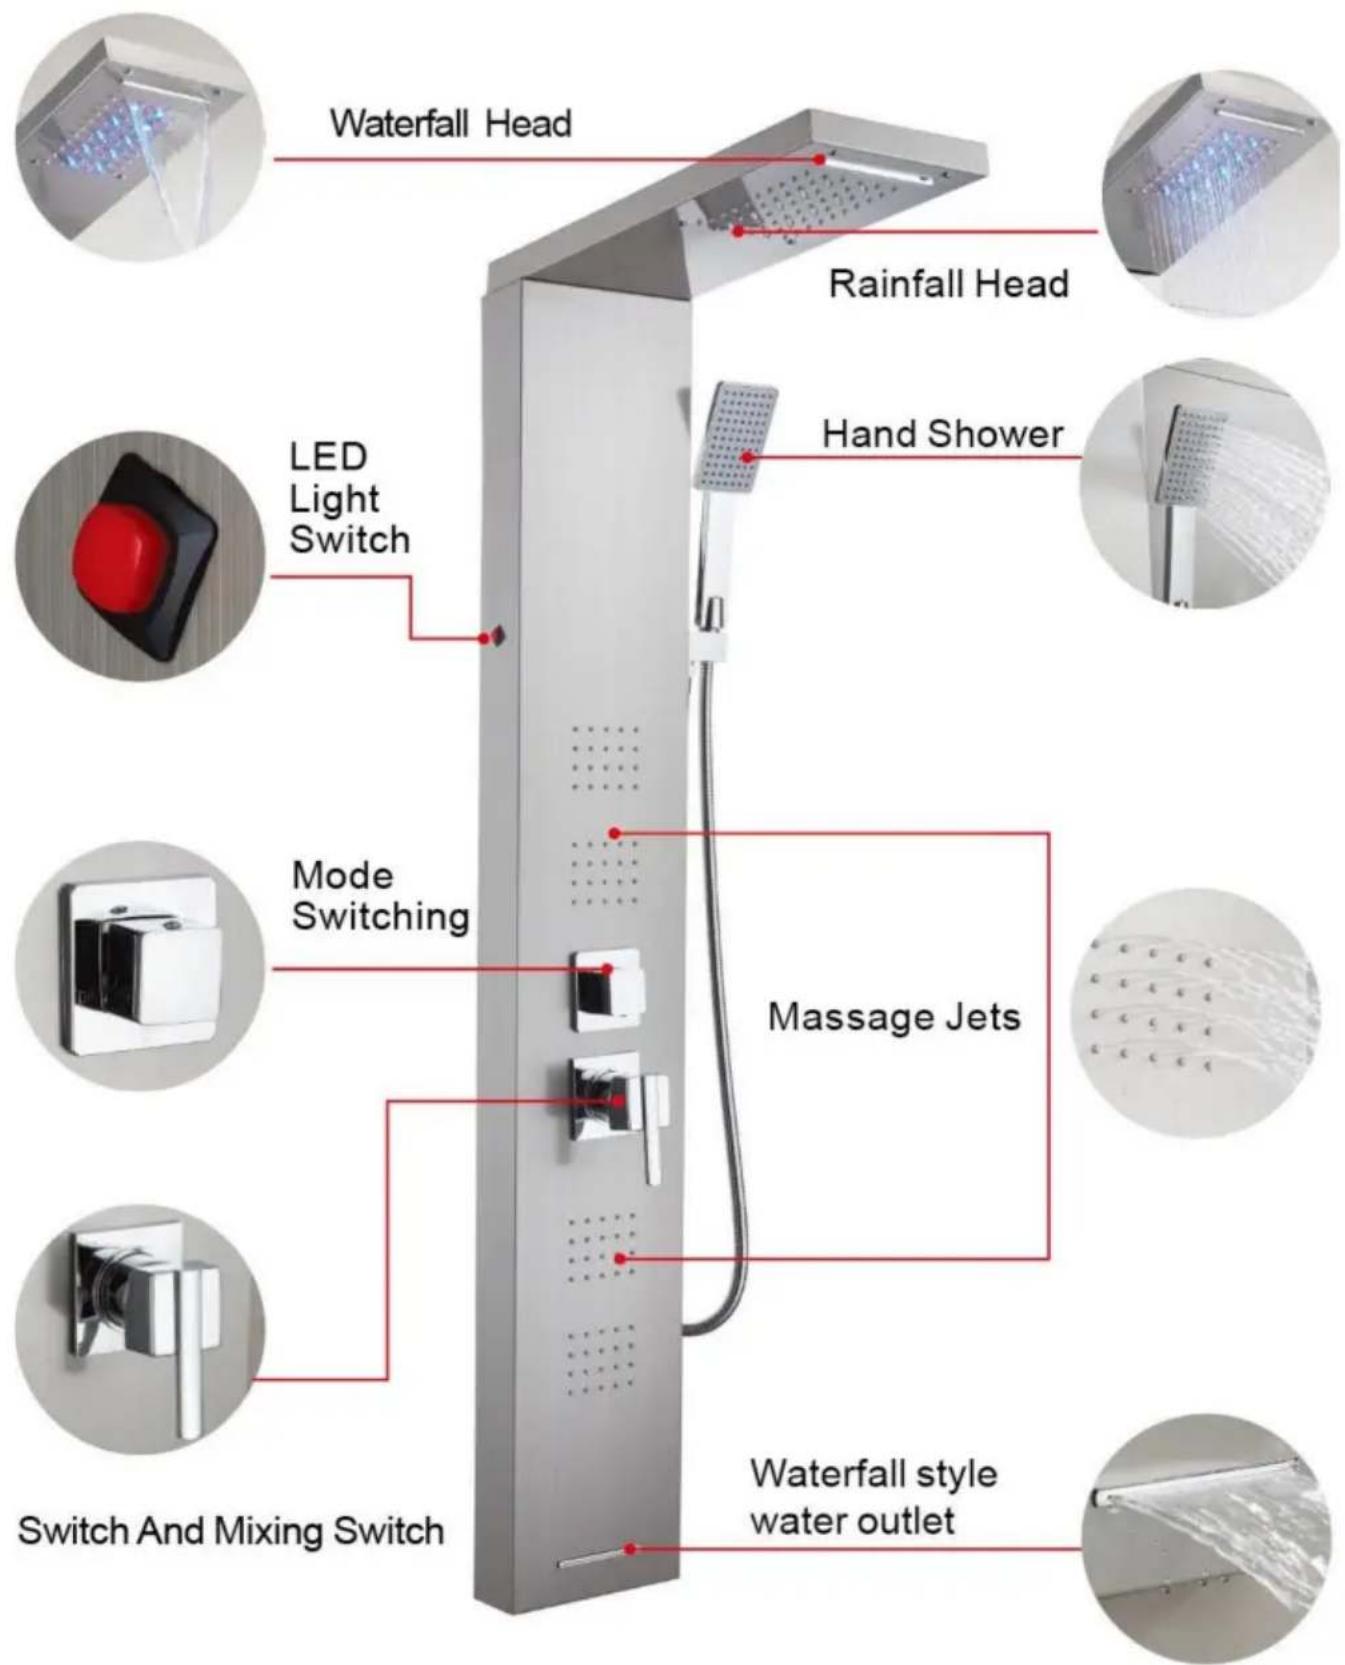
INTRODUCTION TO FUNCTIONS
7016FL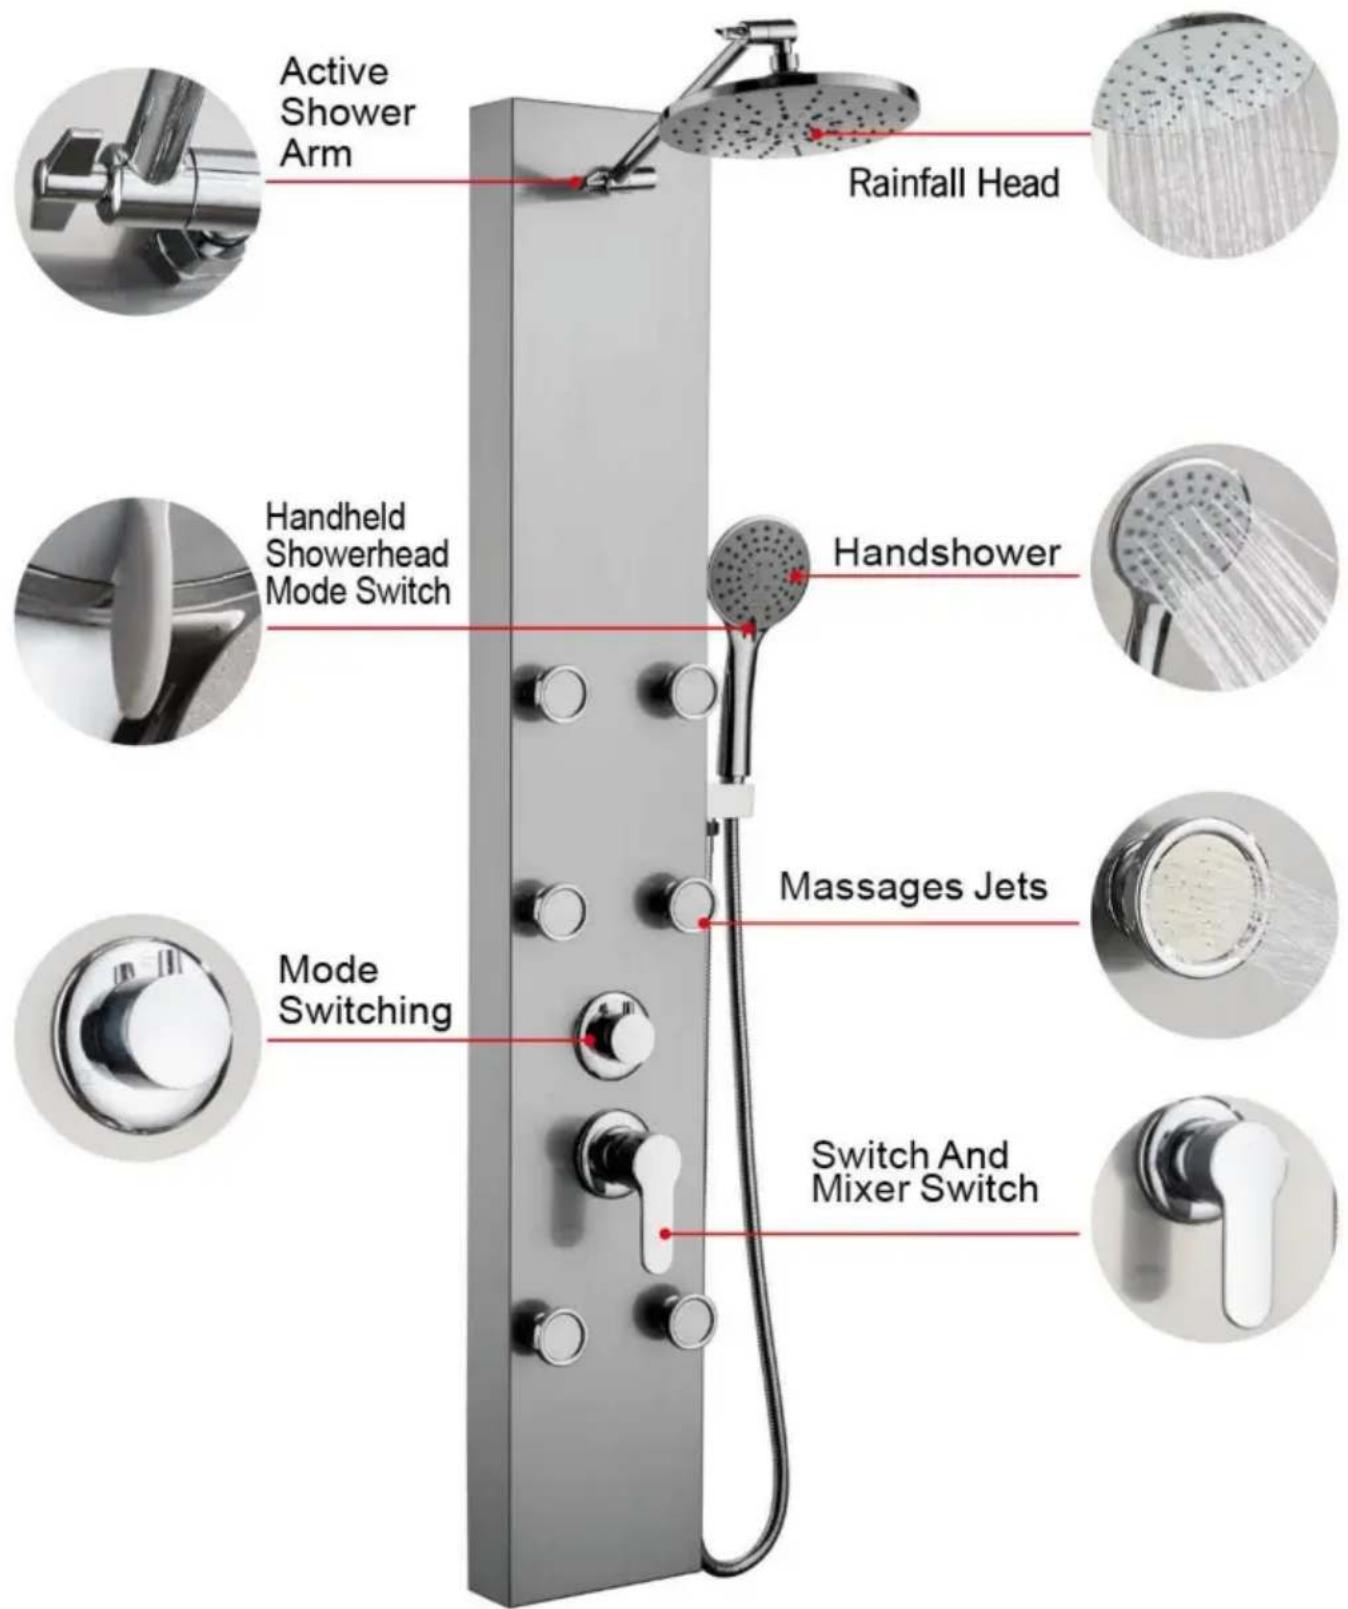
INTRODUCTION TO FUNCTIONS
7002FL
INTRODUCTION TO FUNCTIONS
7015FY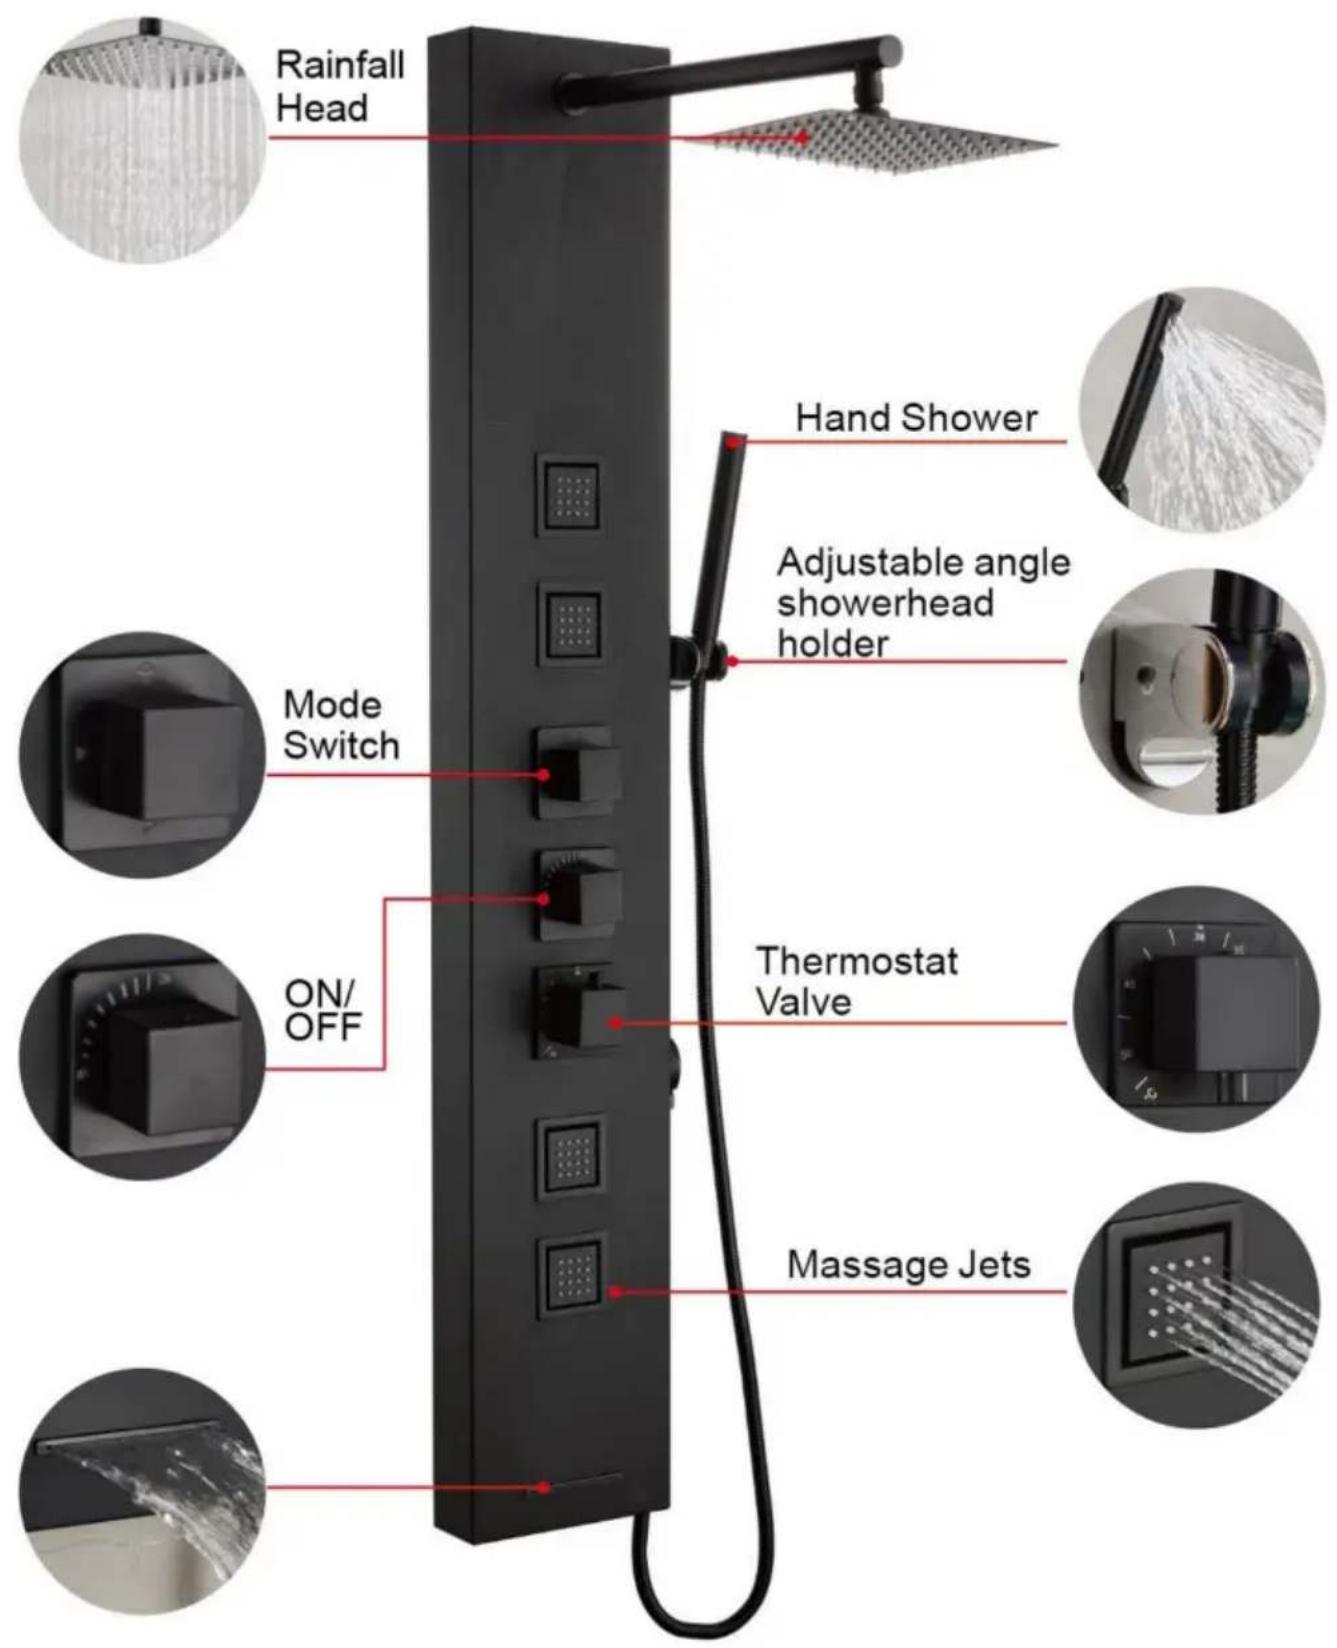
8039FL
8124FL
7009FL
7016FL
7002FL
7015FY

Affordable. Reliable. Home Improvement.
SHOWER PANEL TOWER
MODEL:
6002FL, 8039FL, 7009FL, 6012FL, 8124FL, 7016FL, 7002FL, 7015FY
www.vevor.com/support
VEVOR
SHOWER PANEL TOWER
Affordable. Reliable. Home Improvement.
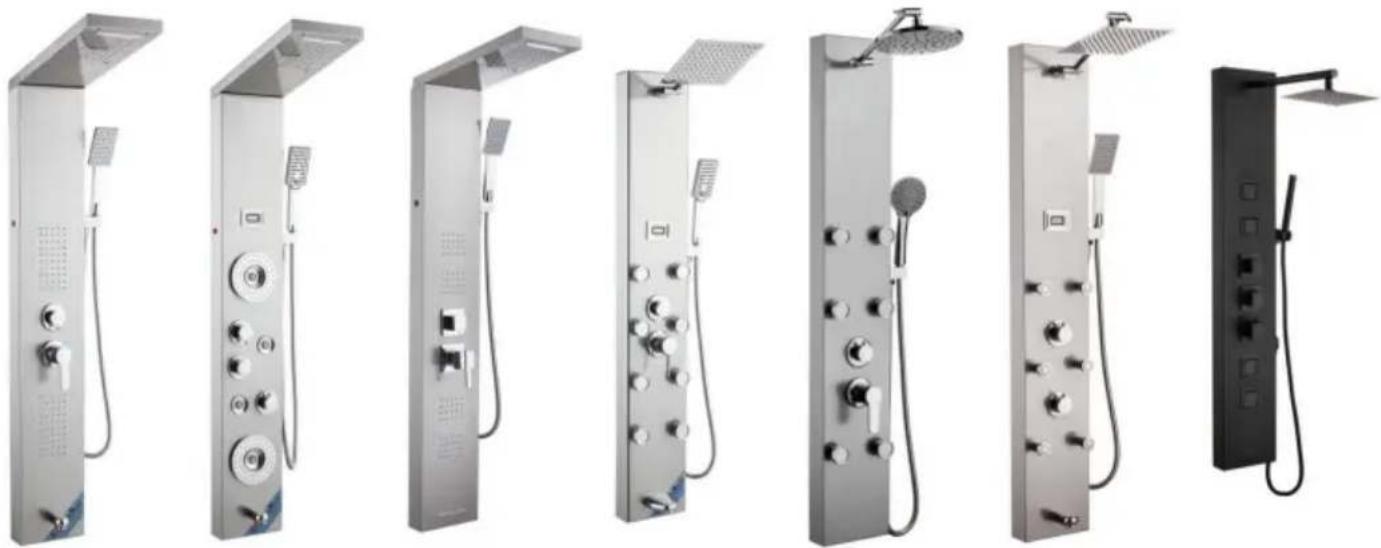
6002FL 6012FL
8039FL 8124FL 7009FL 7016FL 7002FL 7015FY
INSTALLATION STEPS (GENERAL)
Installation Notes
SHOWER PANEL SERIES - INSTALLATION DIAGRAM
FUNCTION INTRODUCTION
6002FL / 6012FL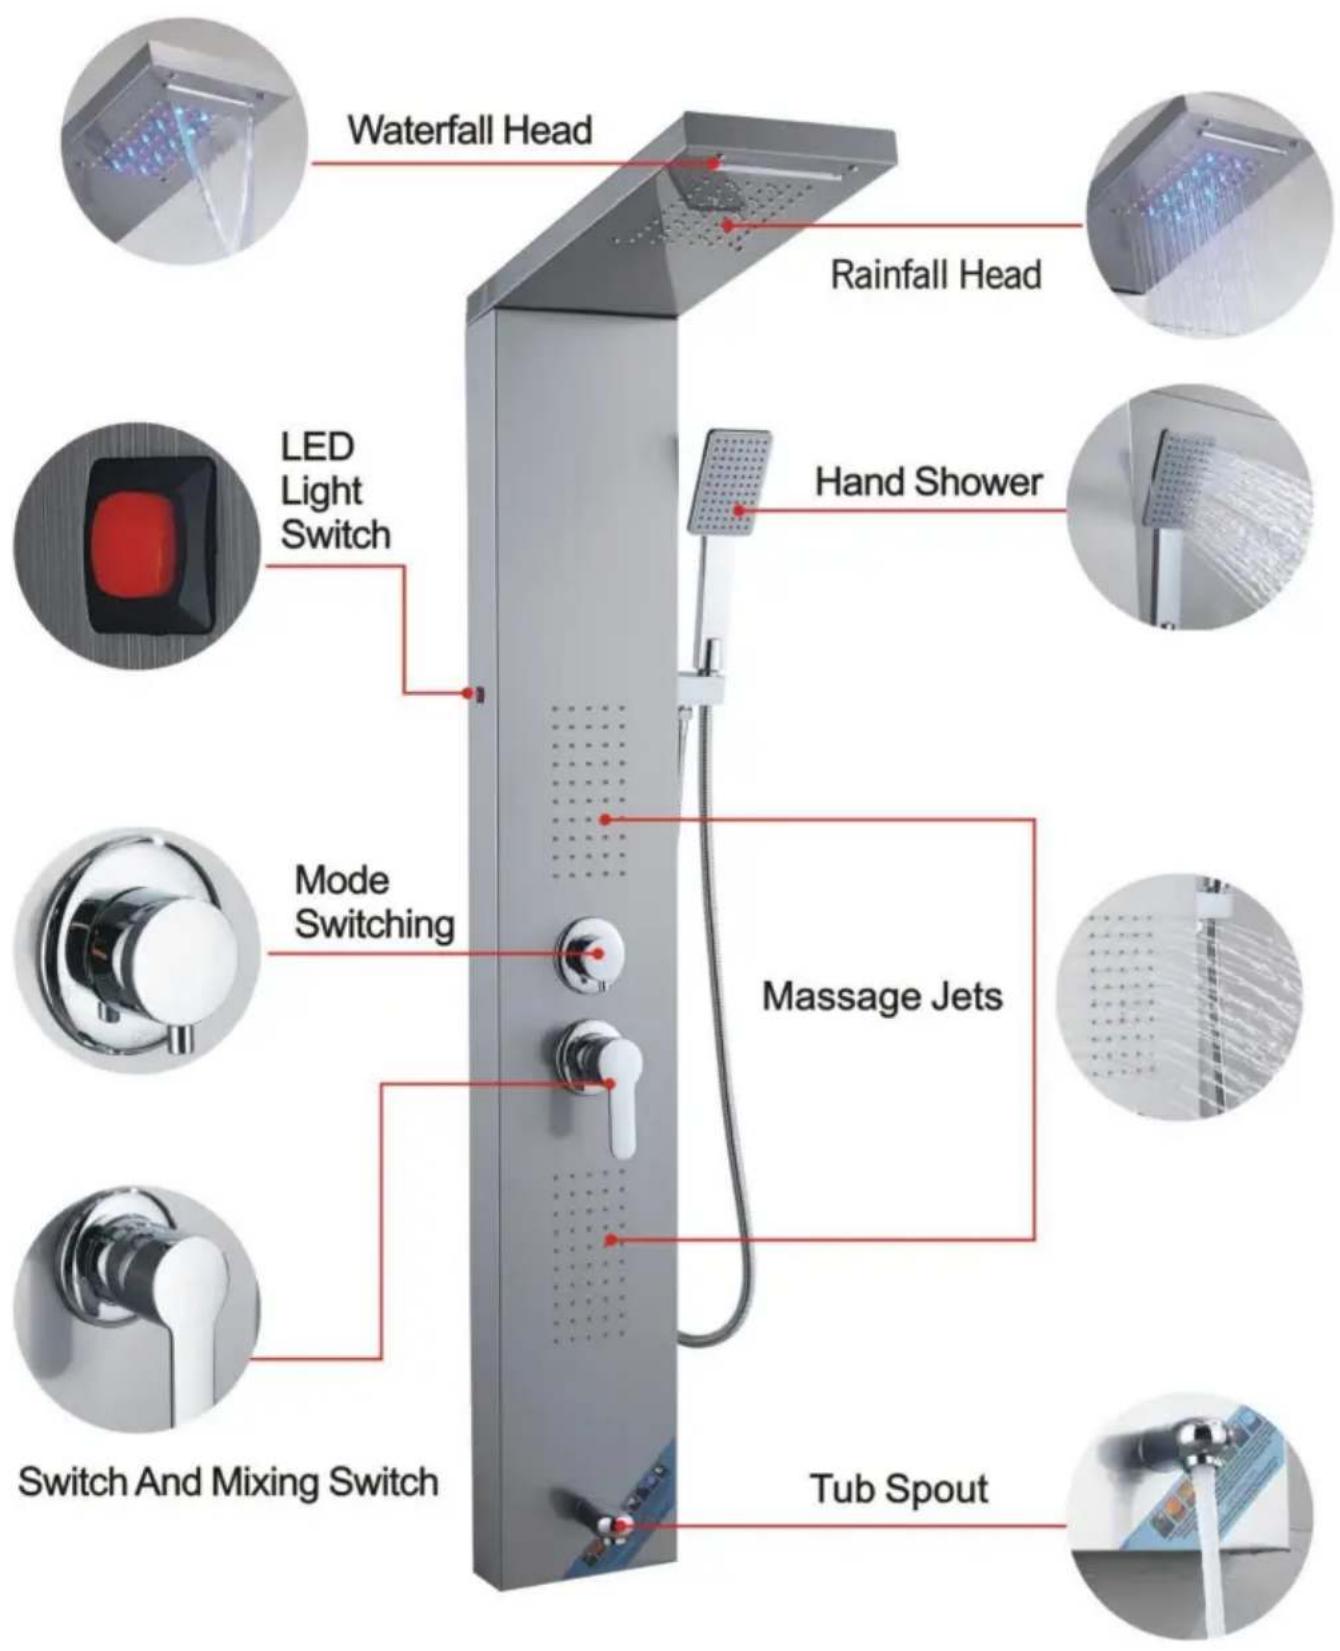
FUNCTION INTRODUCTION
8039FL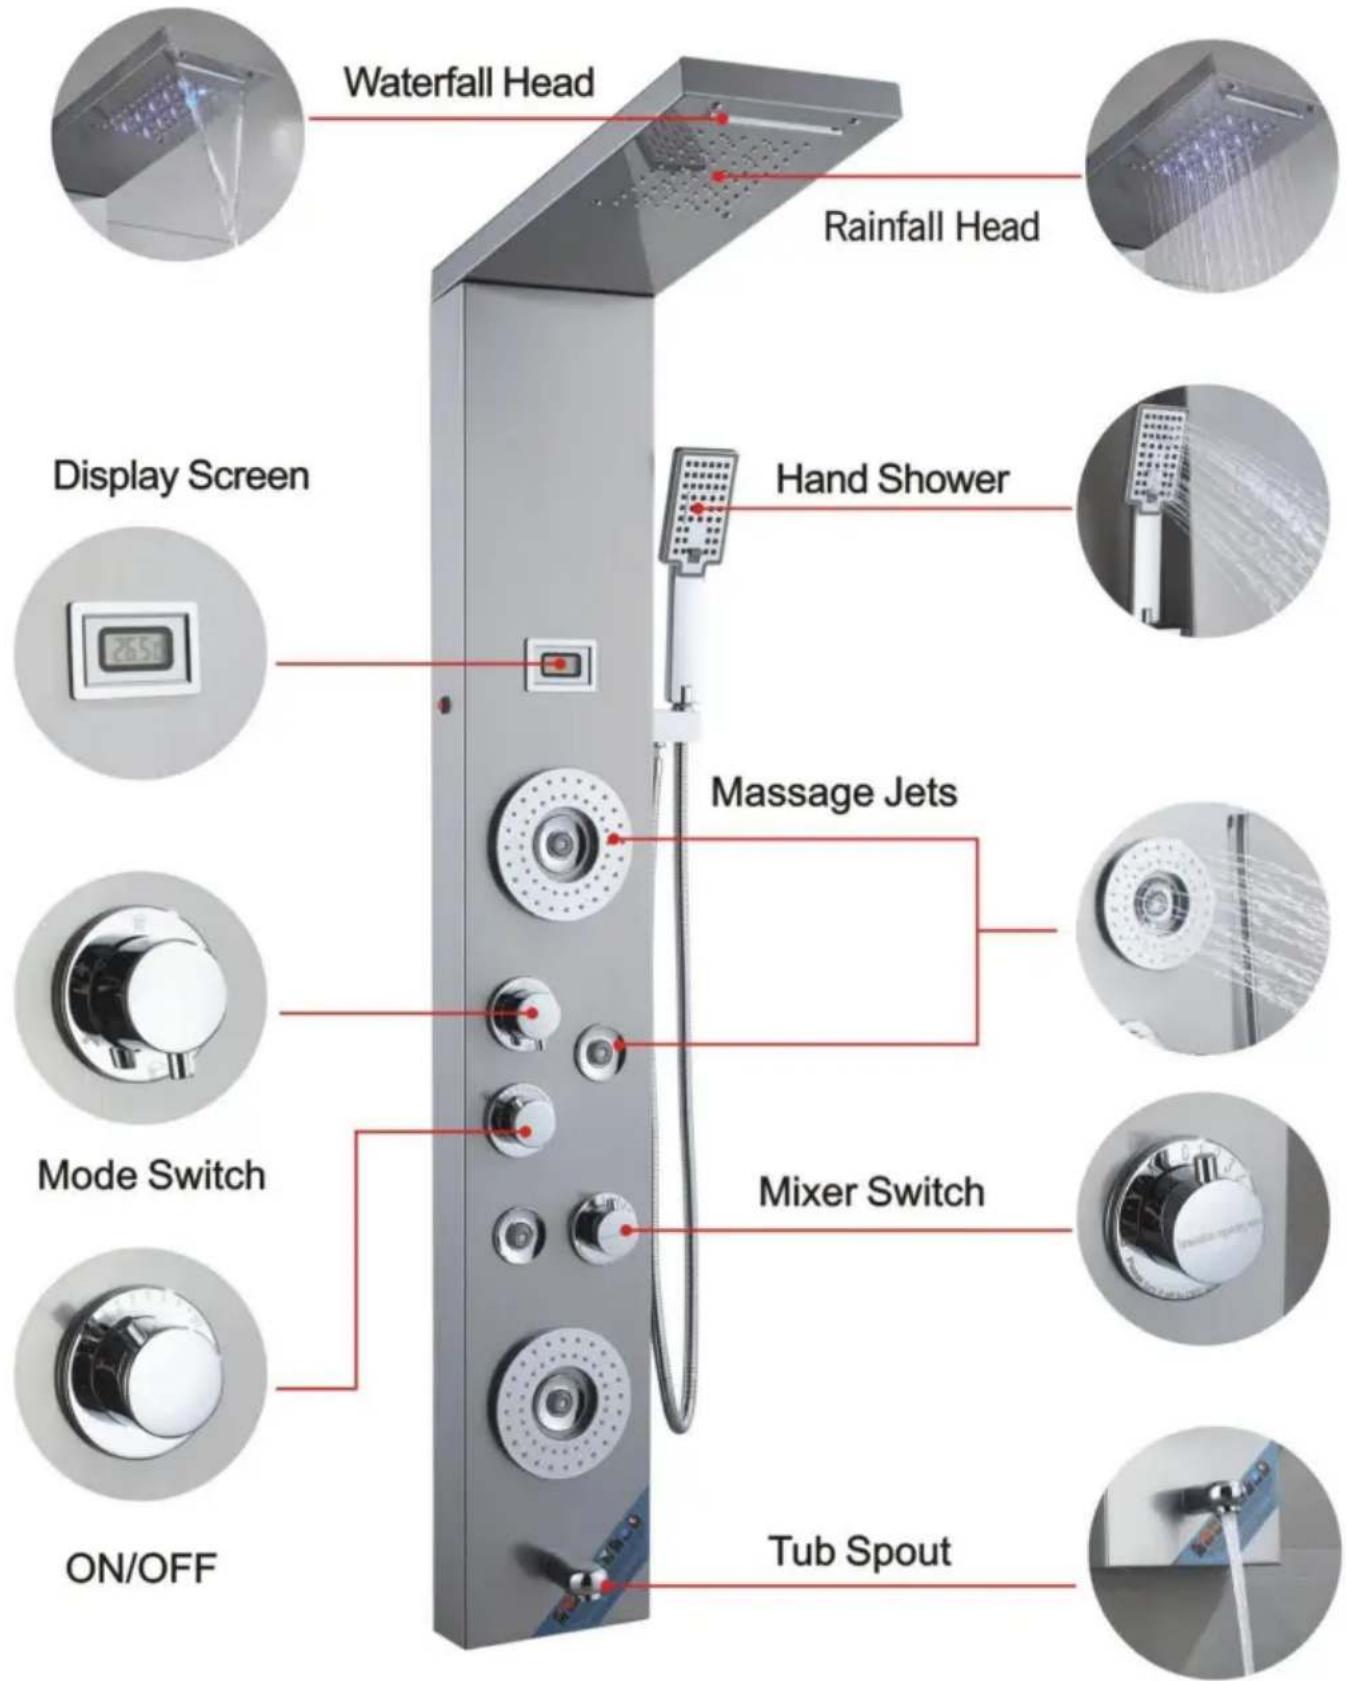
FUNCTION INTRODUCTION
7009FL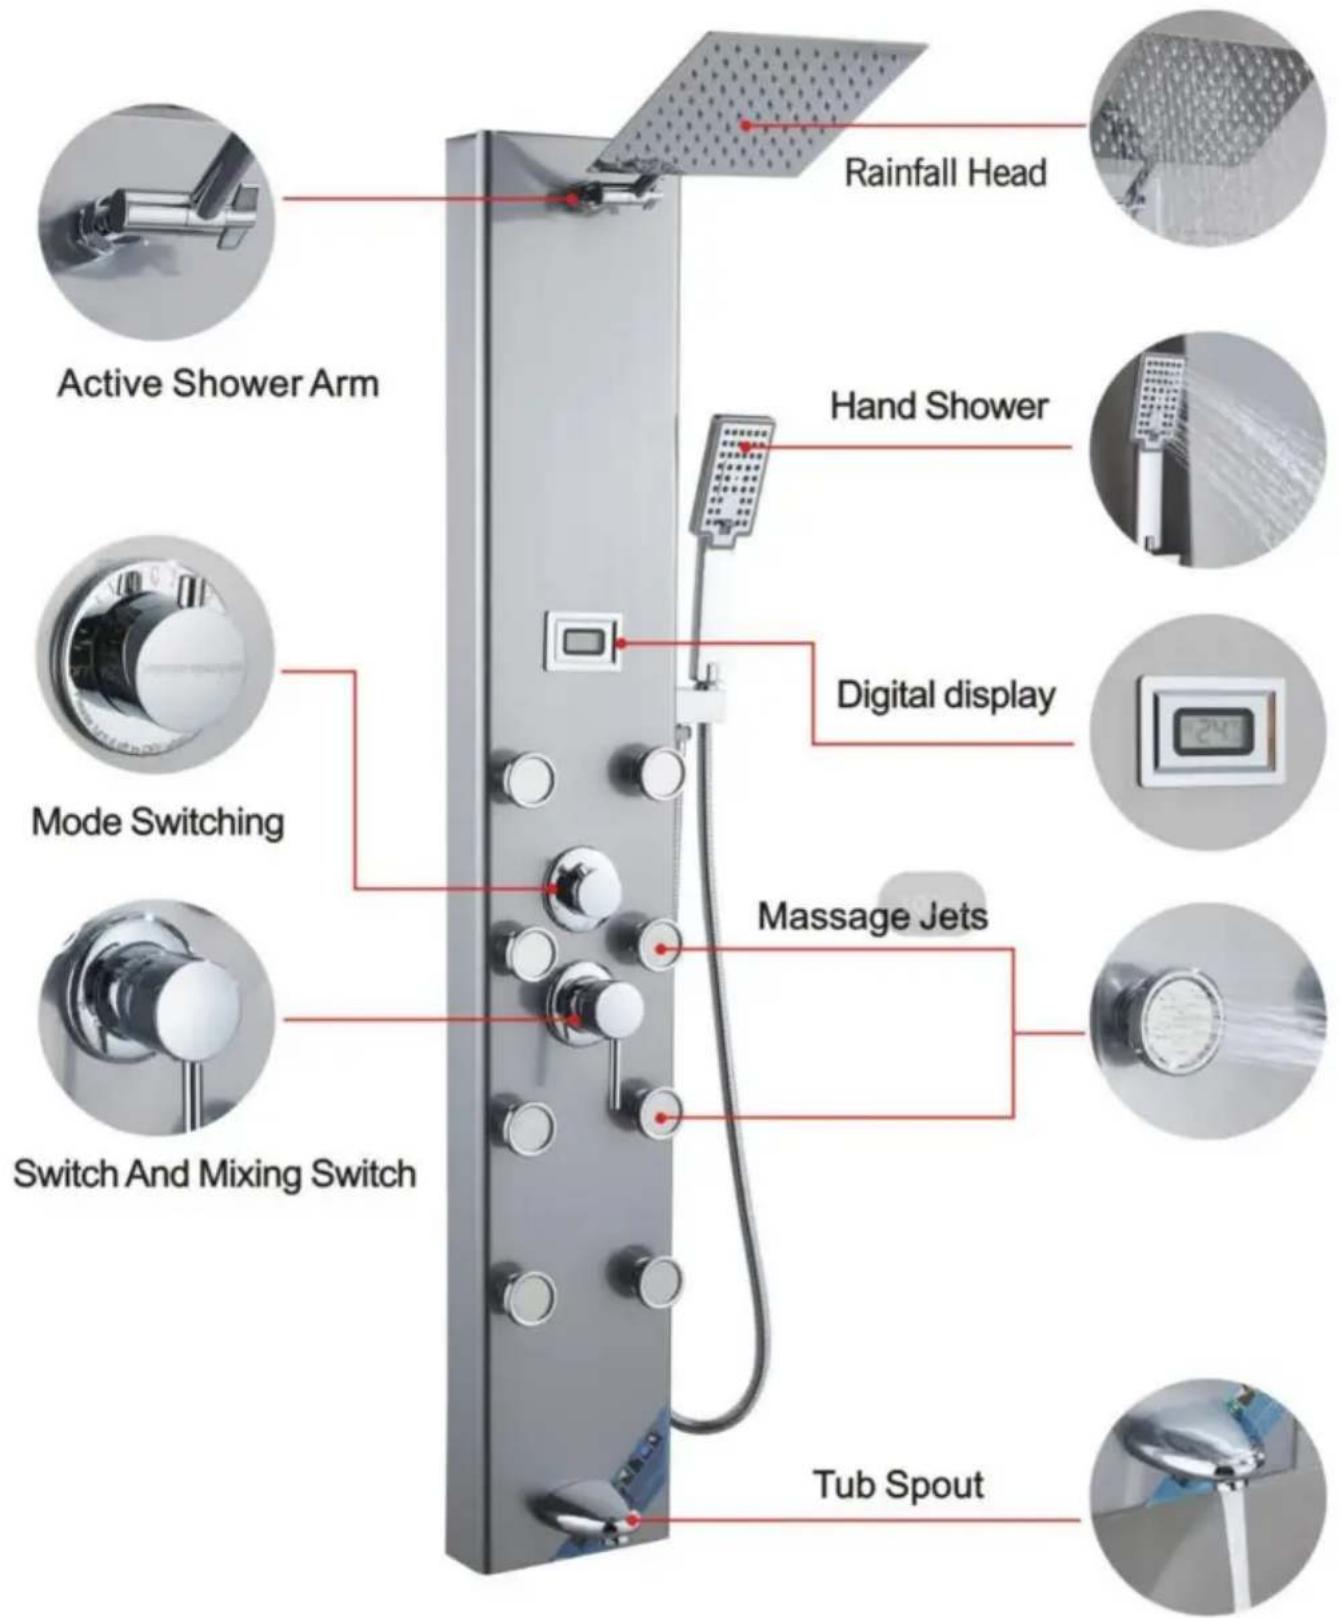
FUNCTION INTRODUCTION
8124FL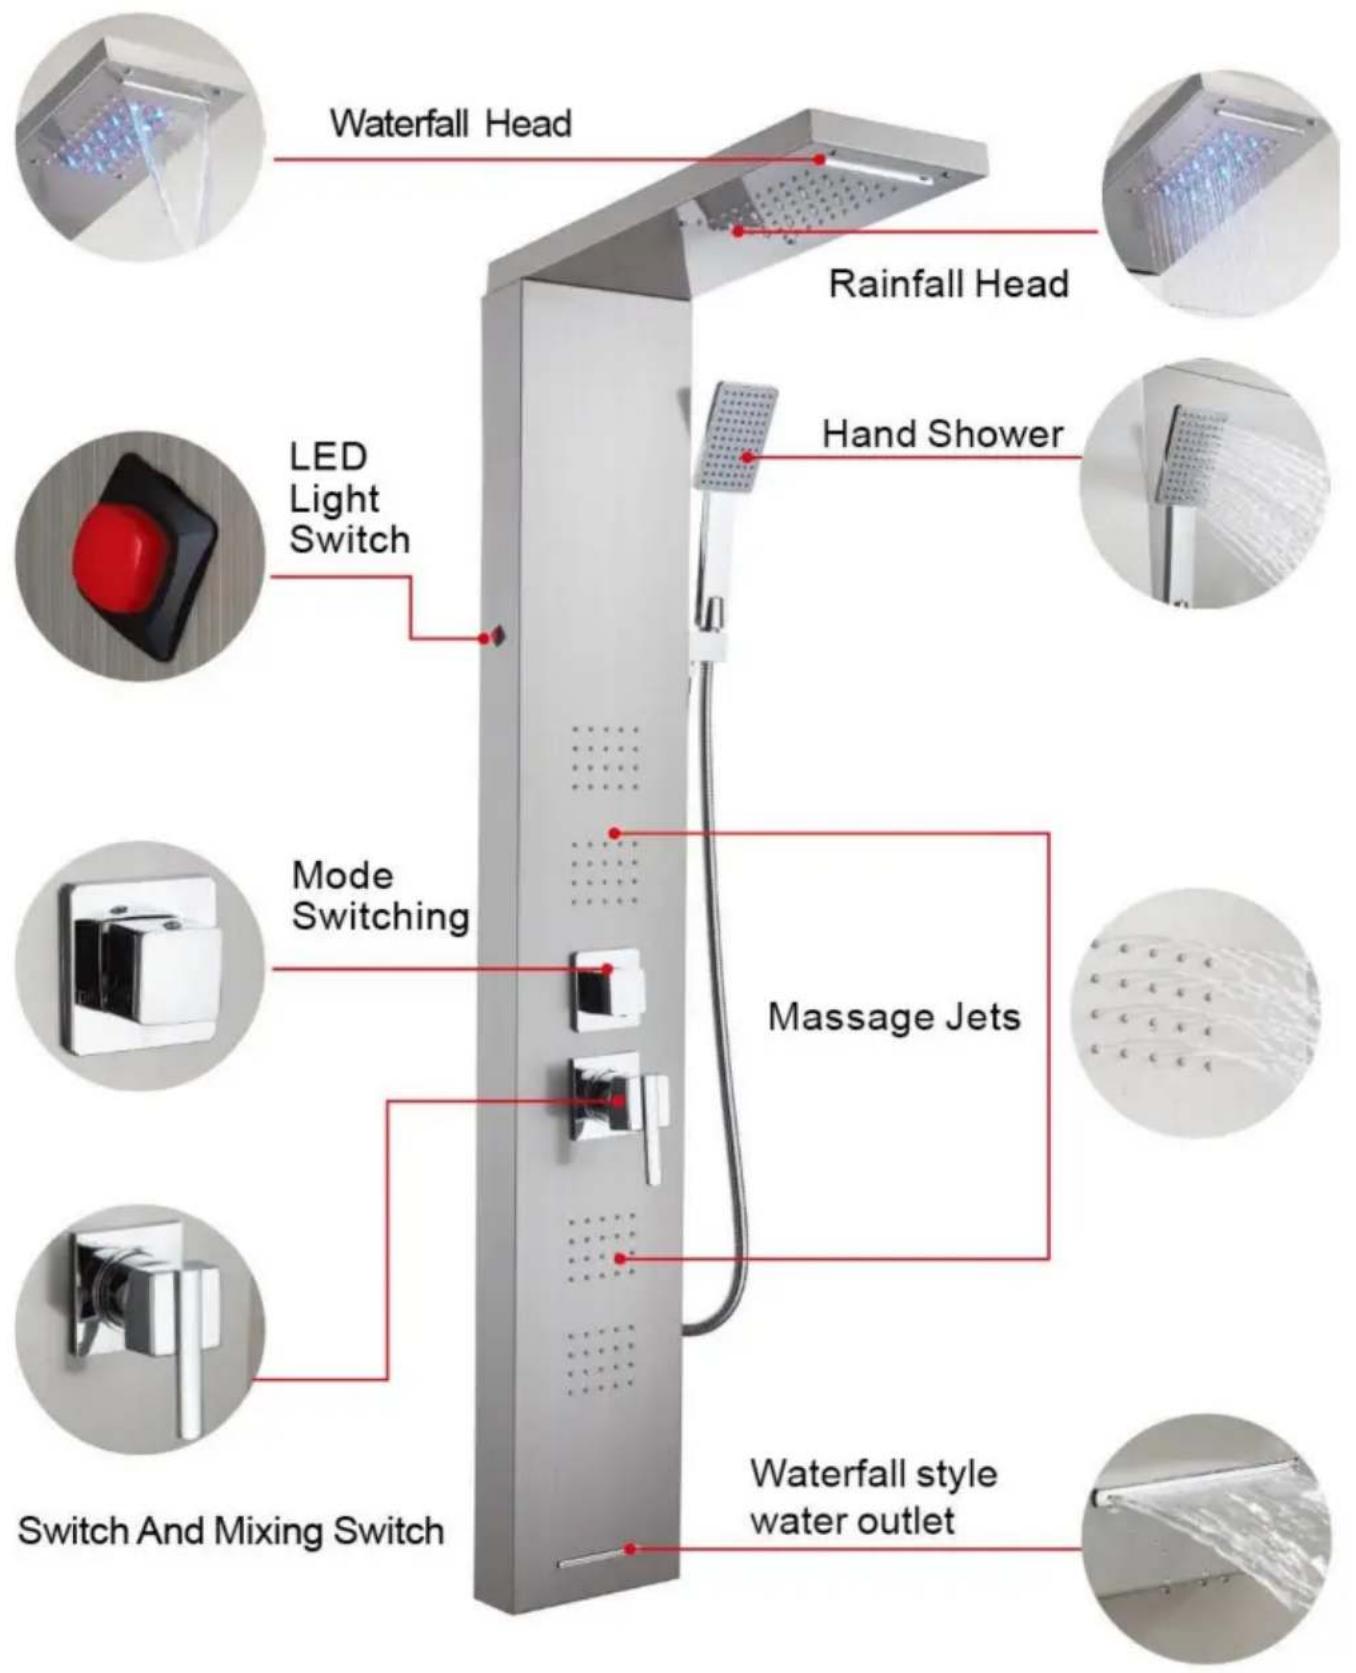
FUNCTION INTRODUCTION
7016FL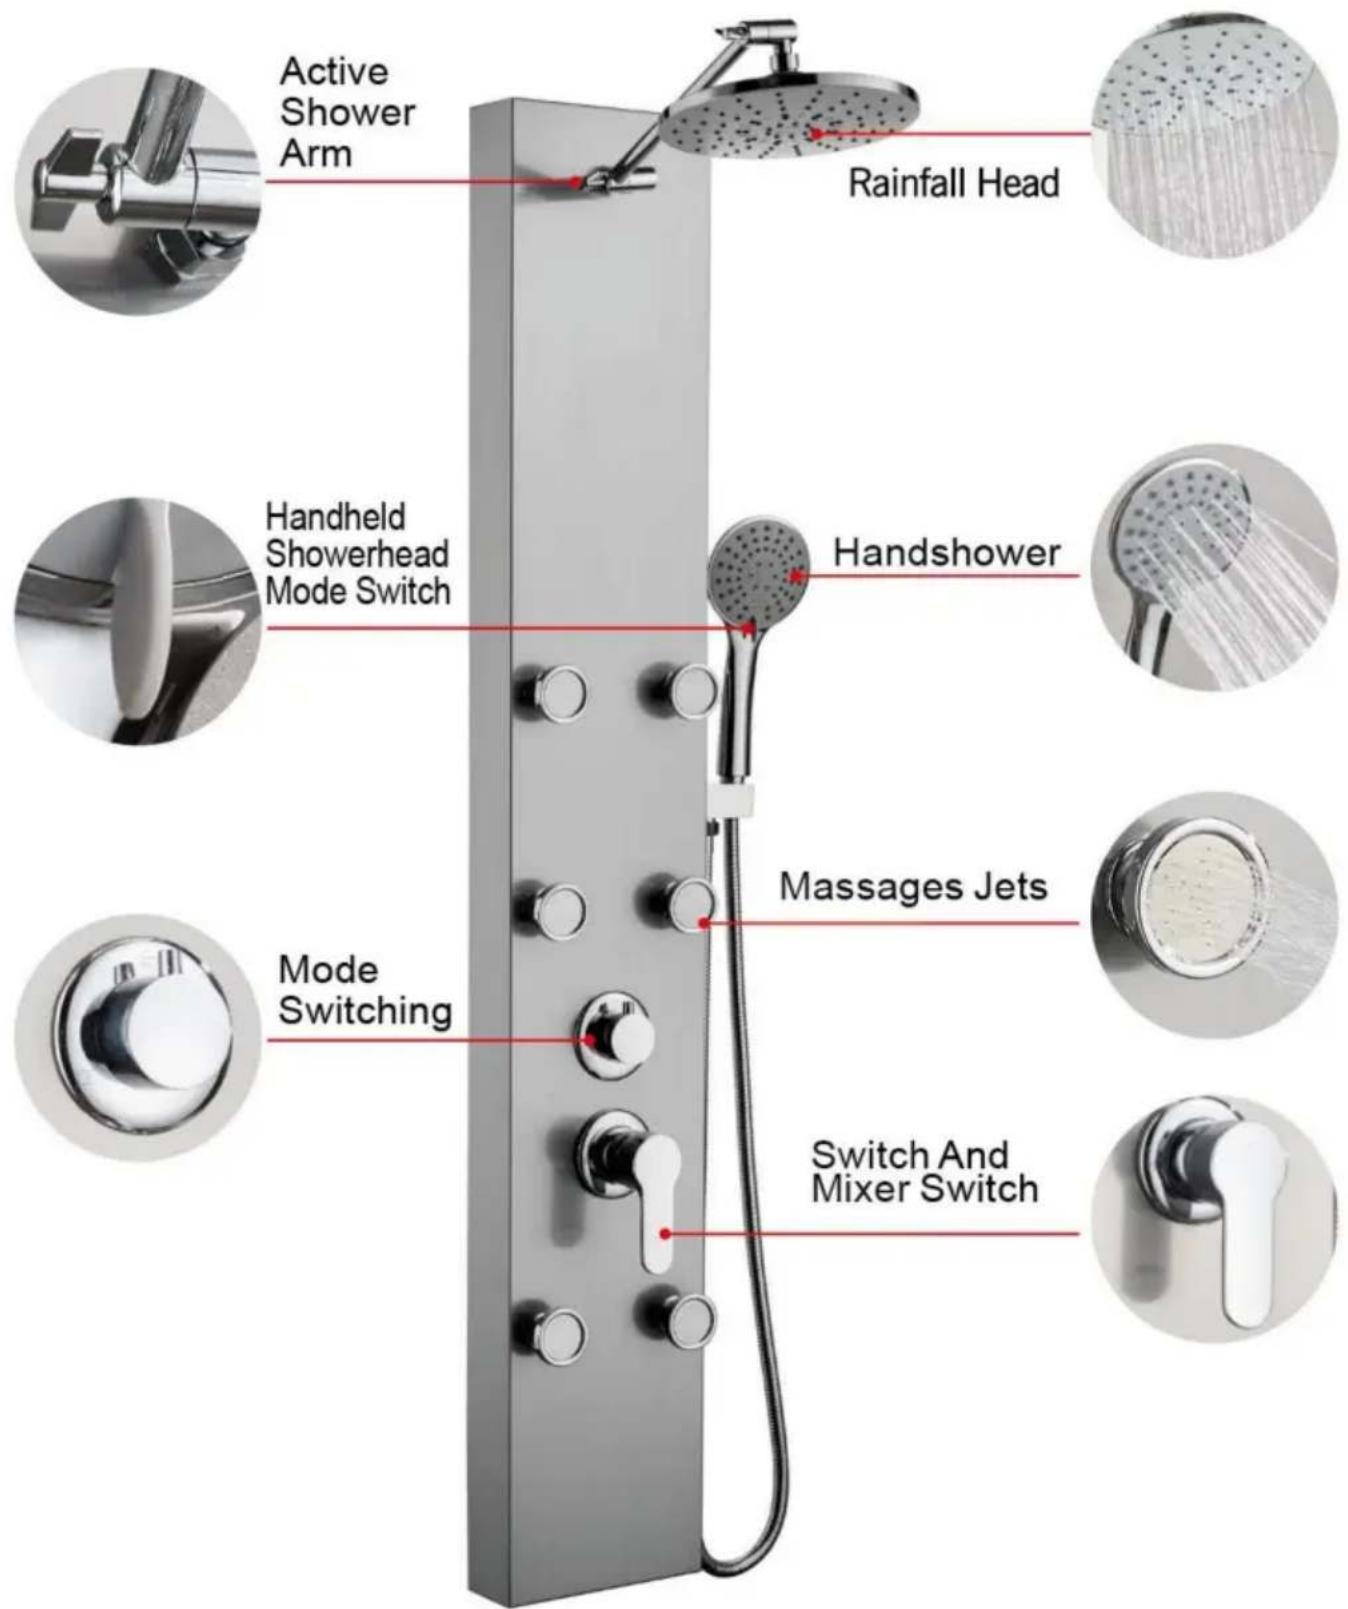
FUNCTION INTRODUCTION
7002FL
FUNCTION INTRODUCTION
7015FY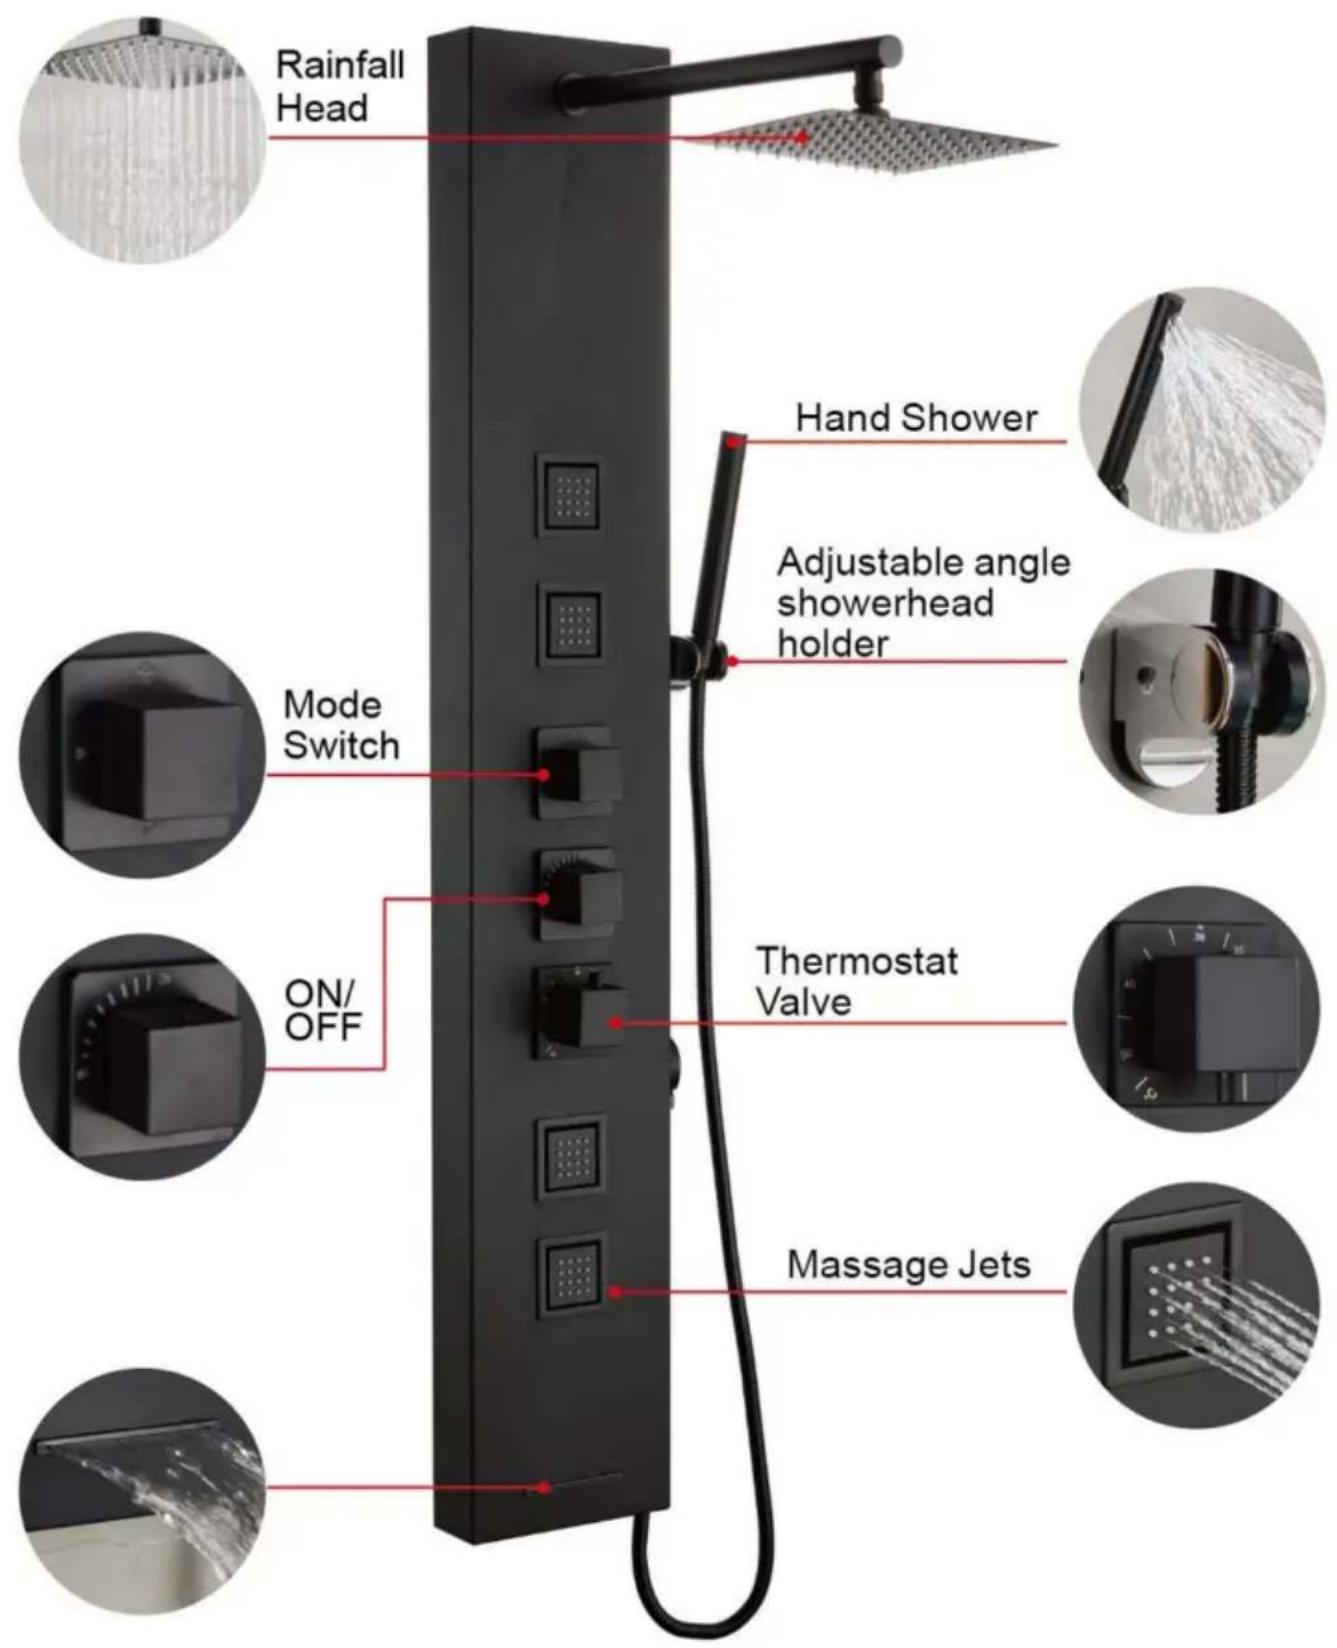
8039FL
8124FL
7009FL
7016FL
7002FL
7015FY

Affordable. Reliable. Home Improvement.
SHOWER PANEL TOWER
MODEL:
6002FL 8039FL 7009FL 6012FL 8124FL 7016FL 7002FL 7015FY
electronics www.vevor.com/support
VEVOR
SHOWER PANEL TOWER
Affordable. Reliable. Home Improvement.
6002FL 6012FL Italian: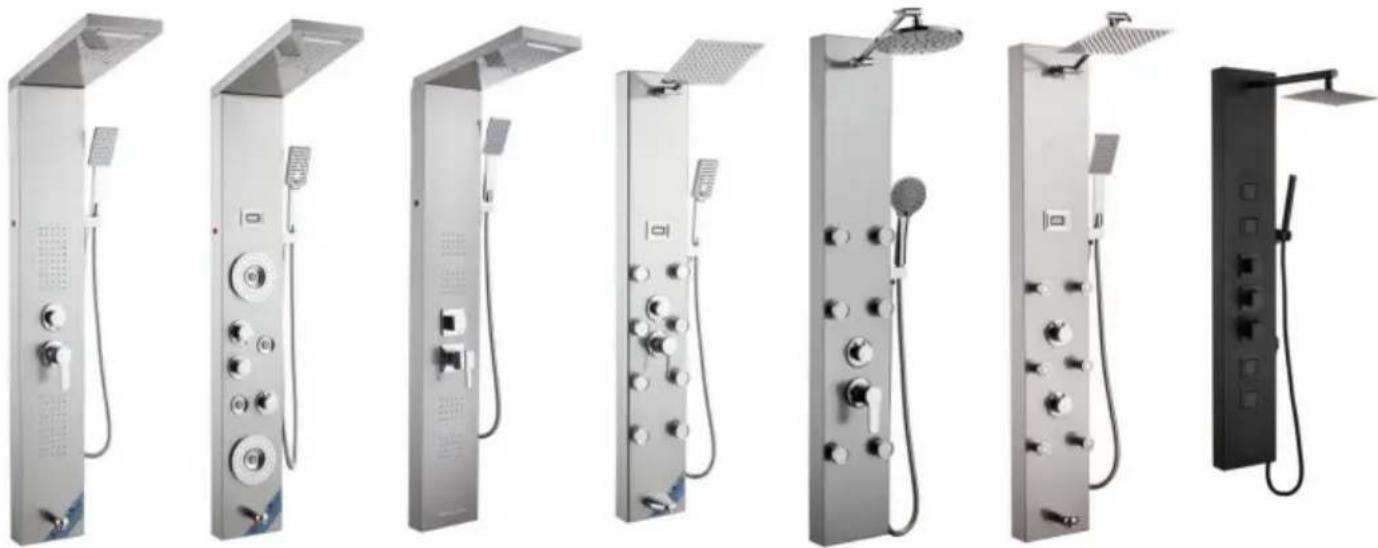
7009FL
8039FL
7016FL
8124FL
7002FL

7015FY




Affordable. Reliable. Home Improvement.
6002FL 6012FL 8039FL 8124FL 7009FL 7016FL 7002FL 7015FY
7009FL
8039FL

7016FL 7002FL
8124FL


Fiscal year 7015



SHOWER PANEL TOWER
MODEL:
6002FL, 8039FL, 7009FL, 6012FL, 8124FL, 7016FL, 7002FL, 7015FY
SHOWER PANEL TOWER
6002FL 6012FL
8039FL 8124FL 7009FL 7016FL 7002FL 7015FY
Insert 2 AA batteries into the battery compartment.
INTRODUCTION TO FUNCTIONS
6002FL / 6012FL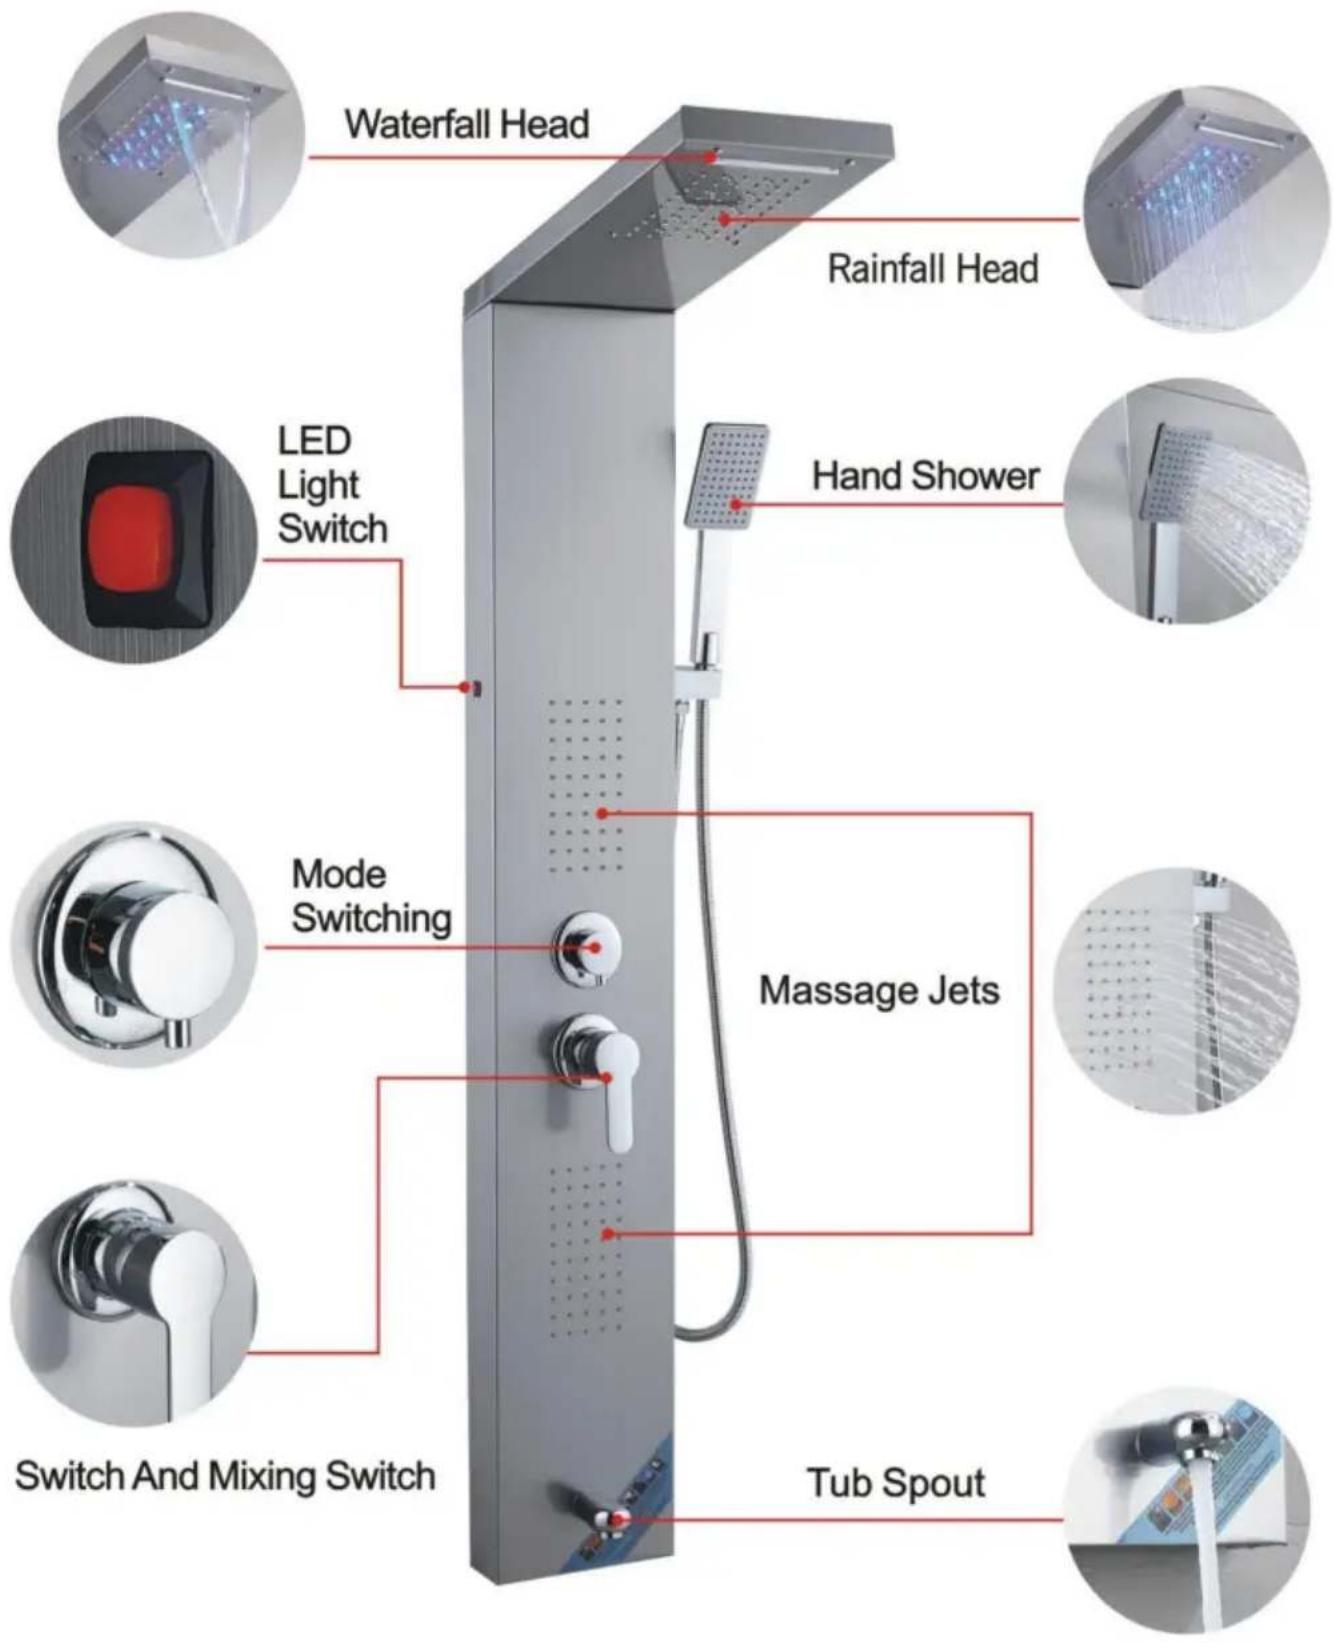
INTRODUCTION TO FUNCTIONS
8039FL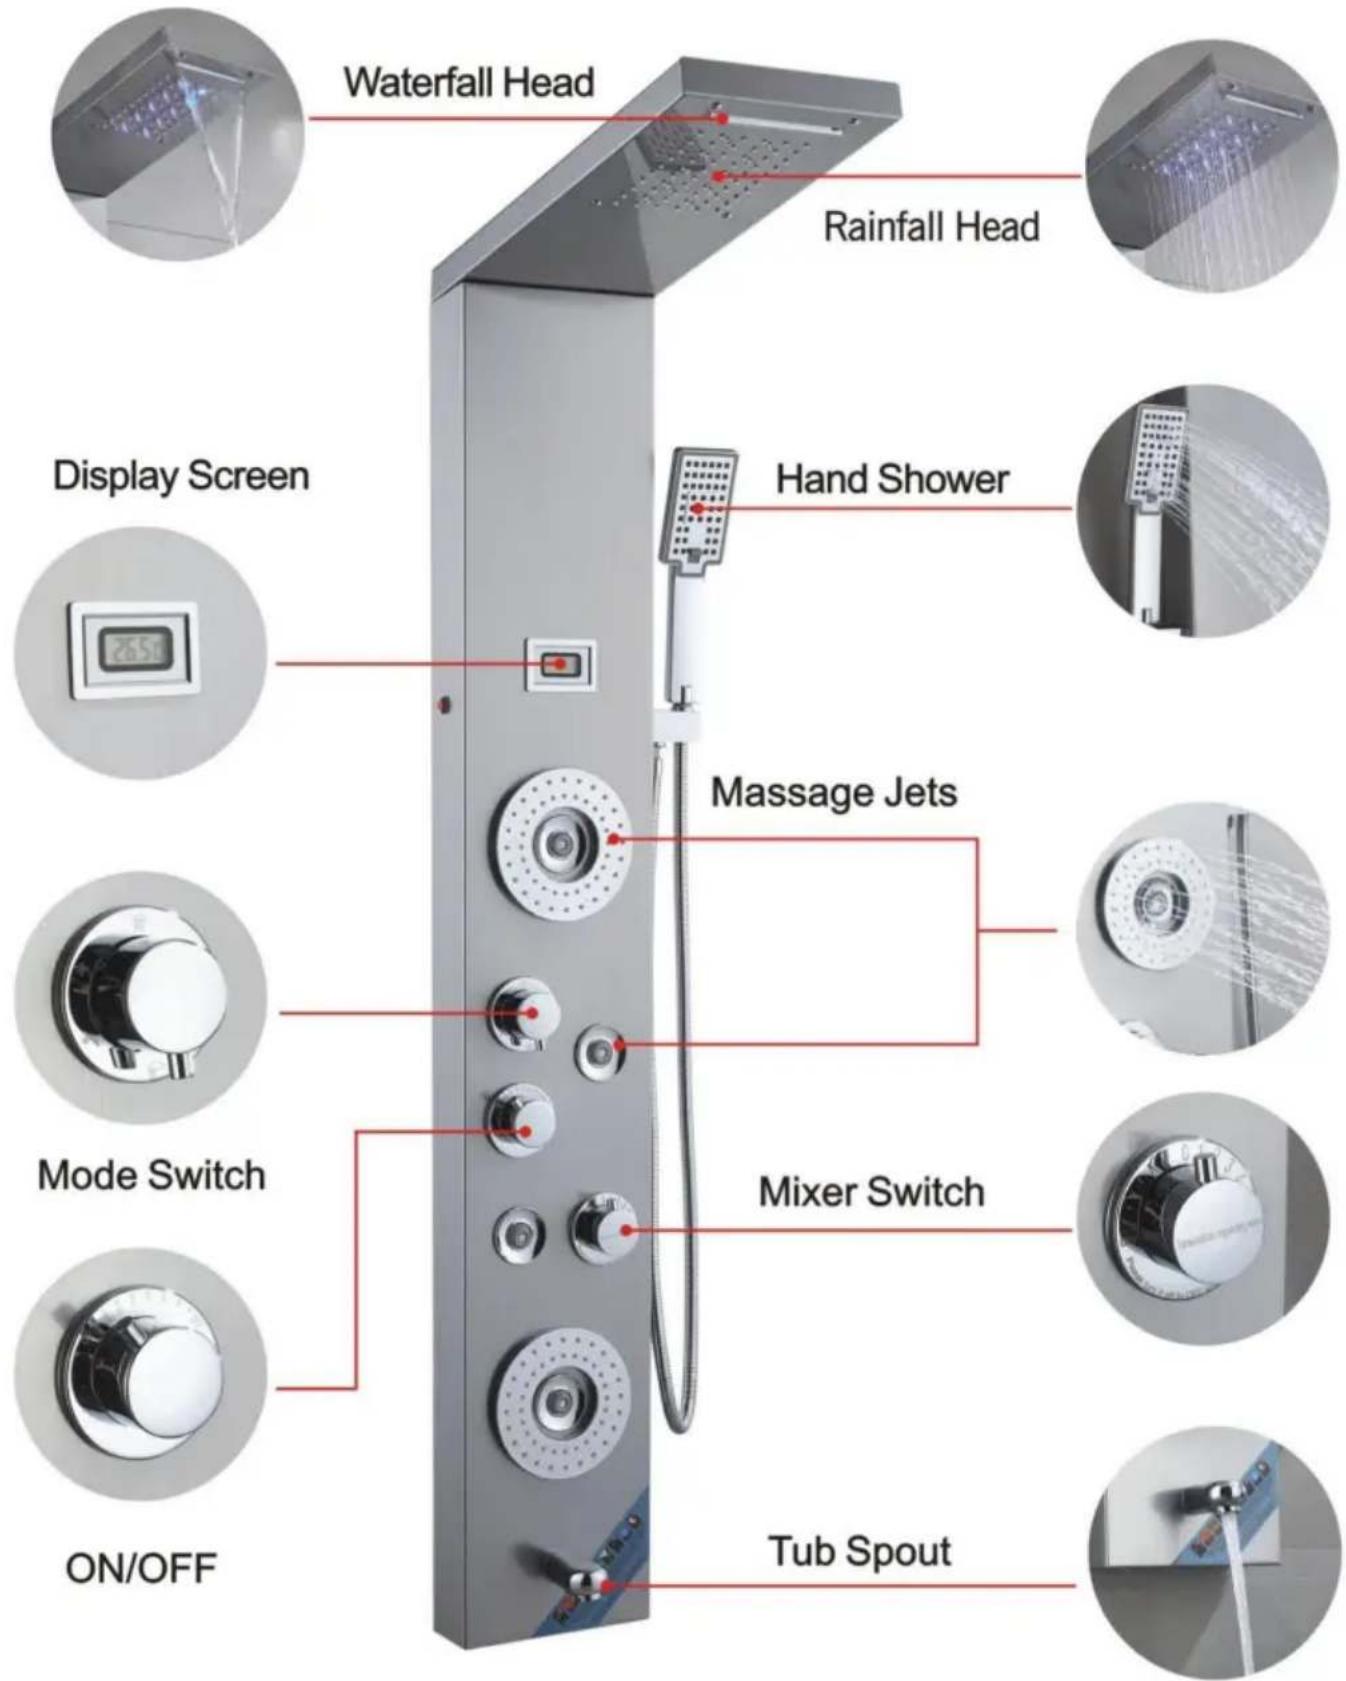
INTRODUCTION TO FUNCTIONS
7009FL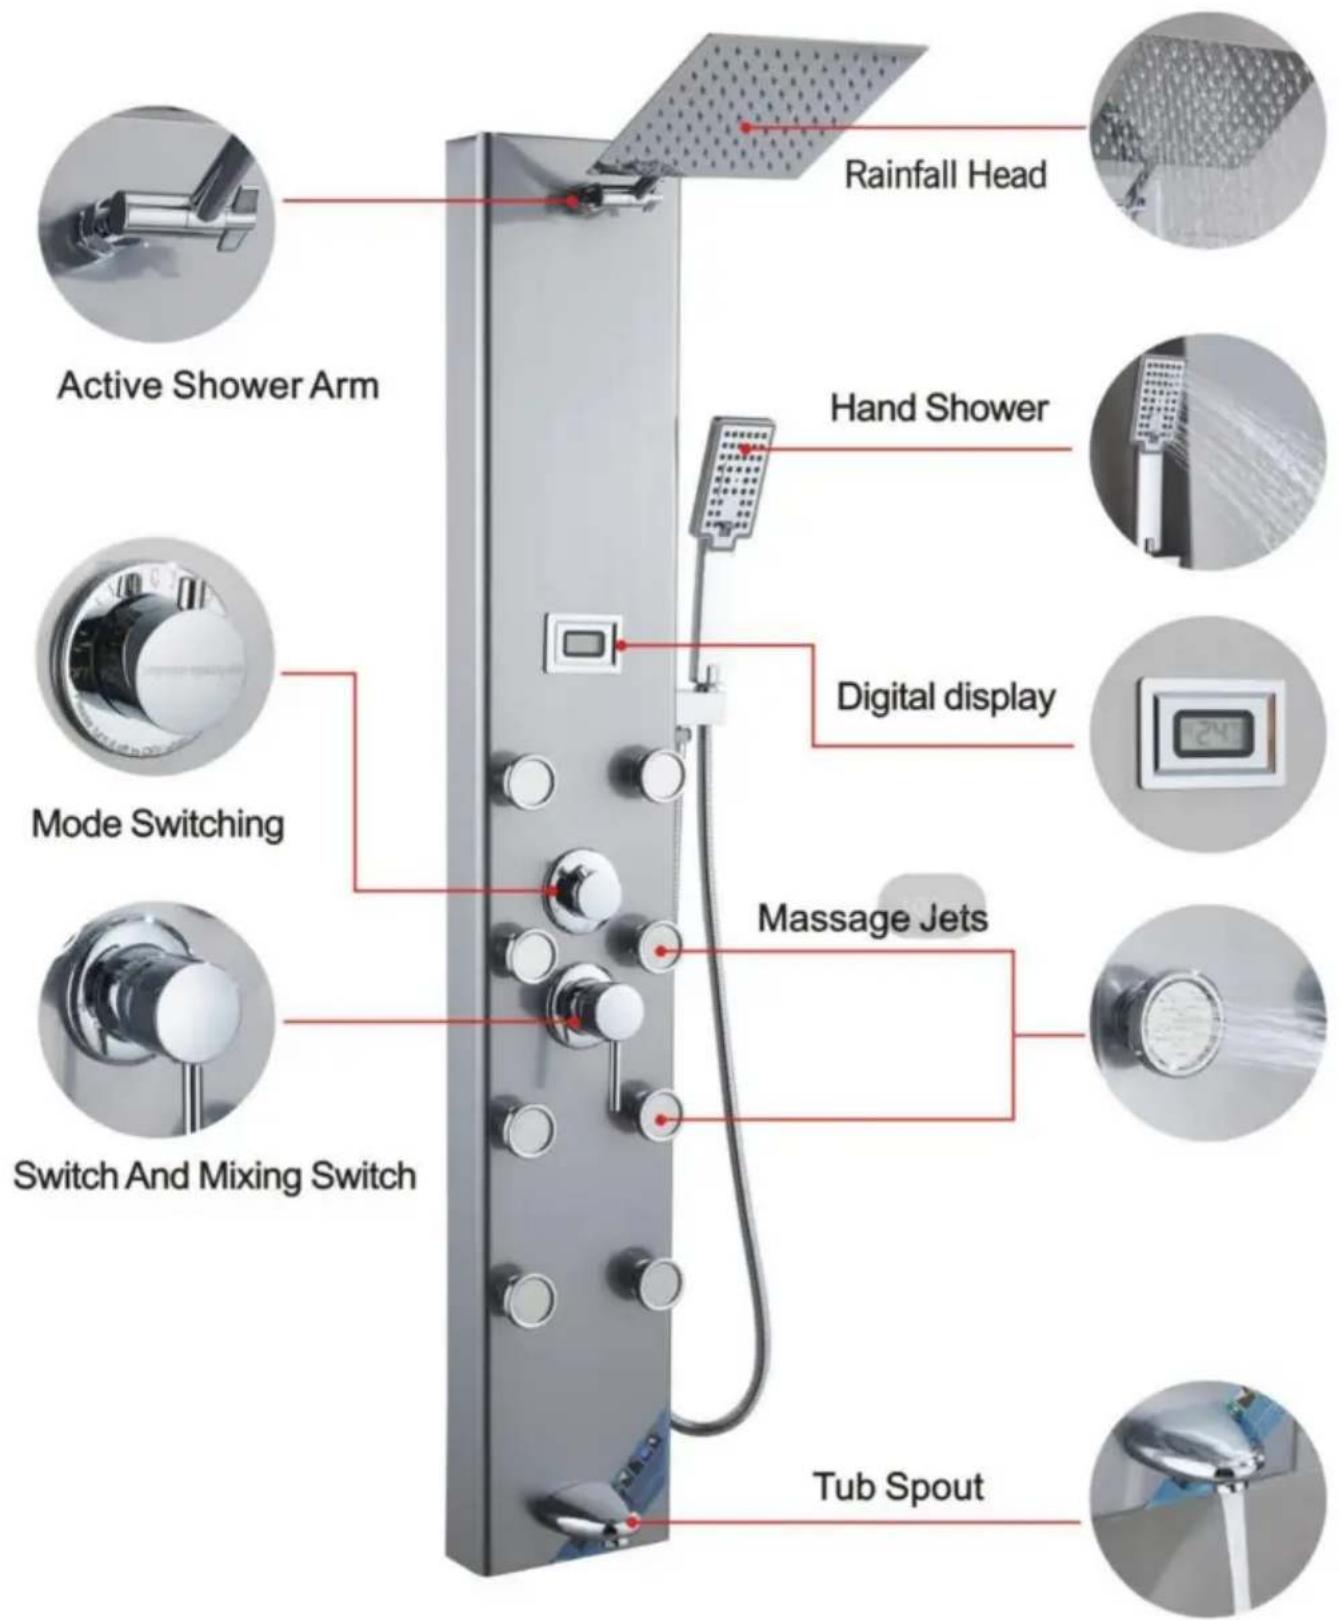
INTRODUCTION TO FUNCTIONS
8124FL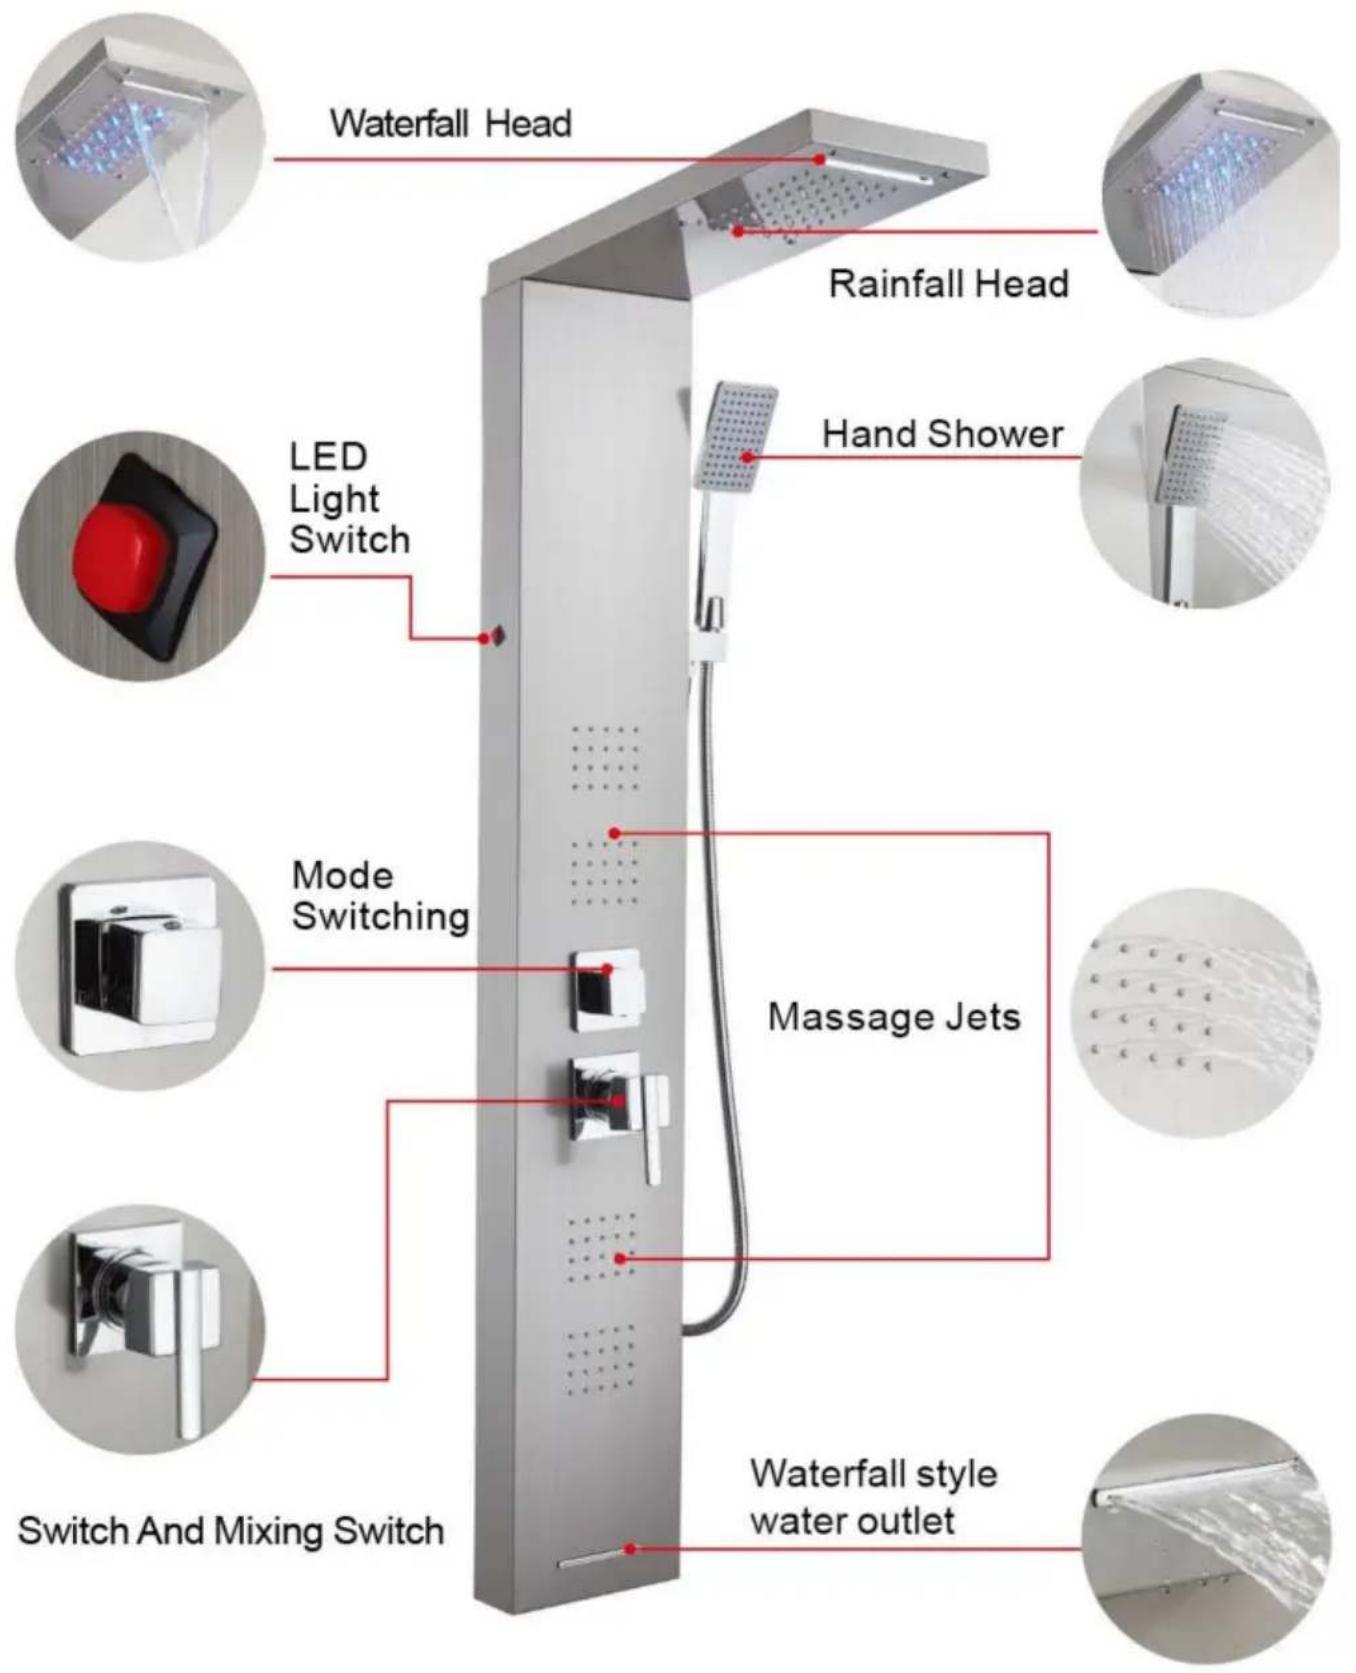
INTRODUCTION TO FUNCTIONS
7016FL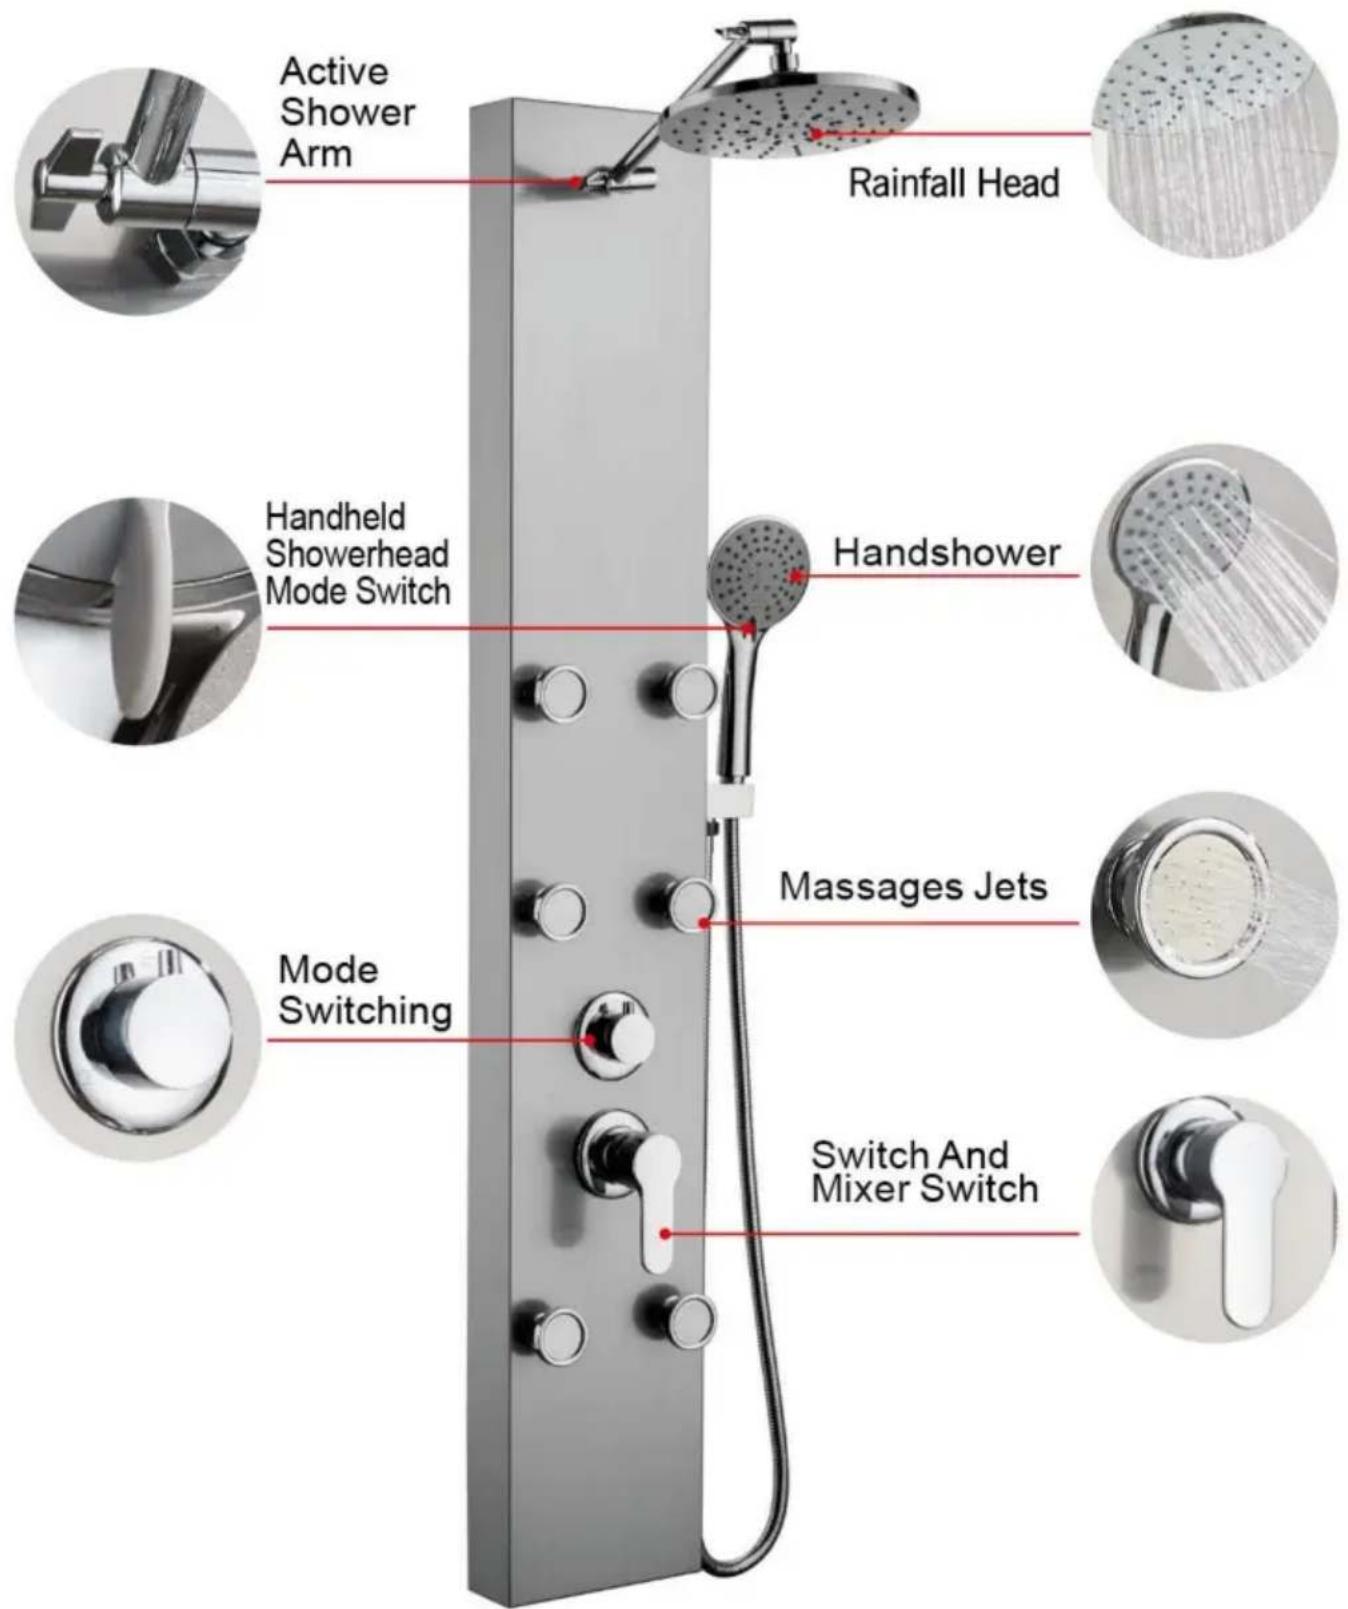
INTRODUCTION TO FUNCTIONS
7002FL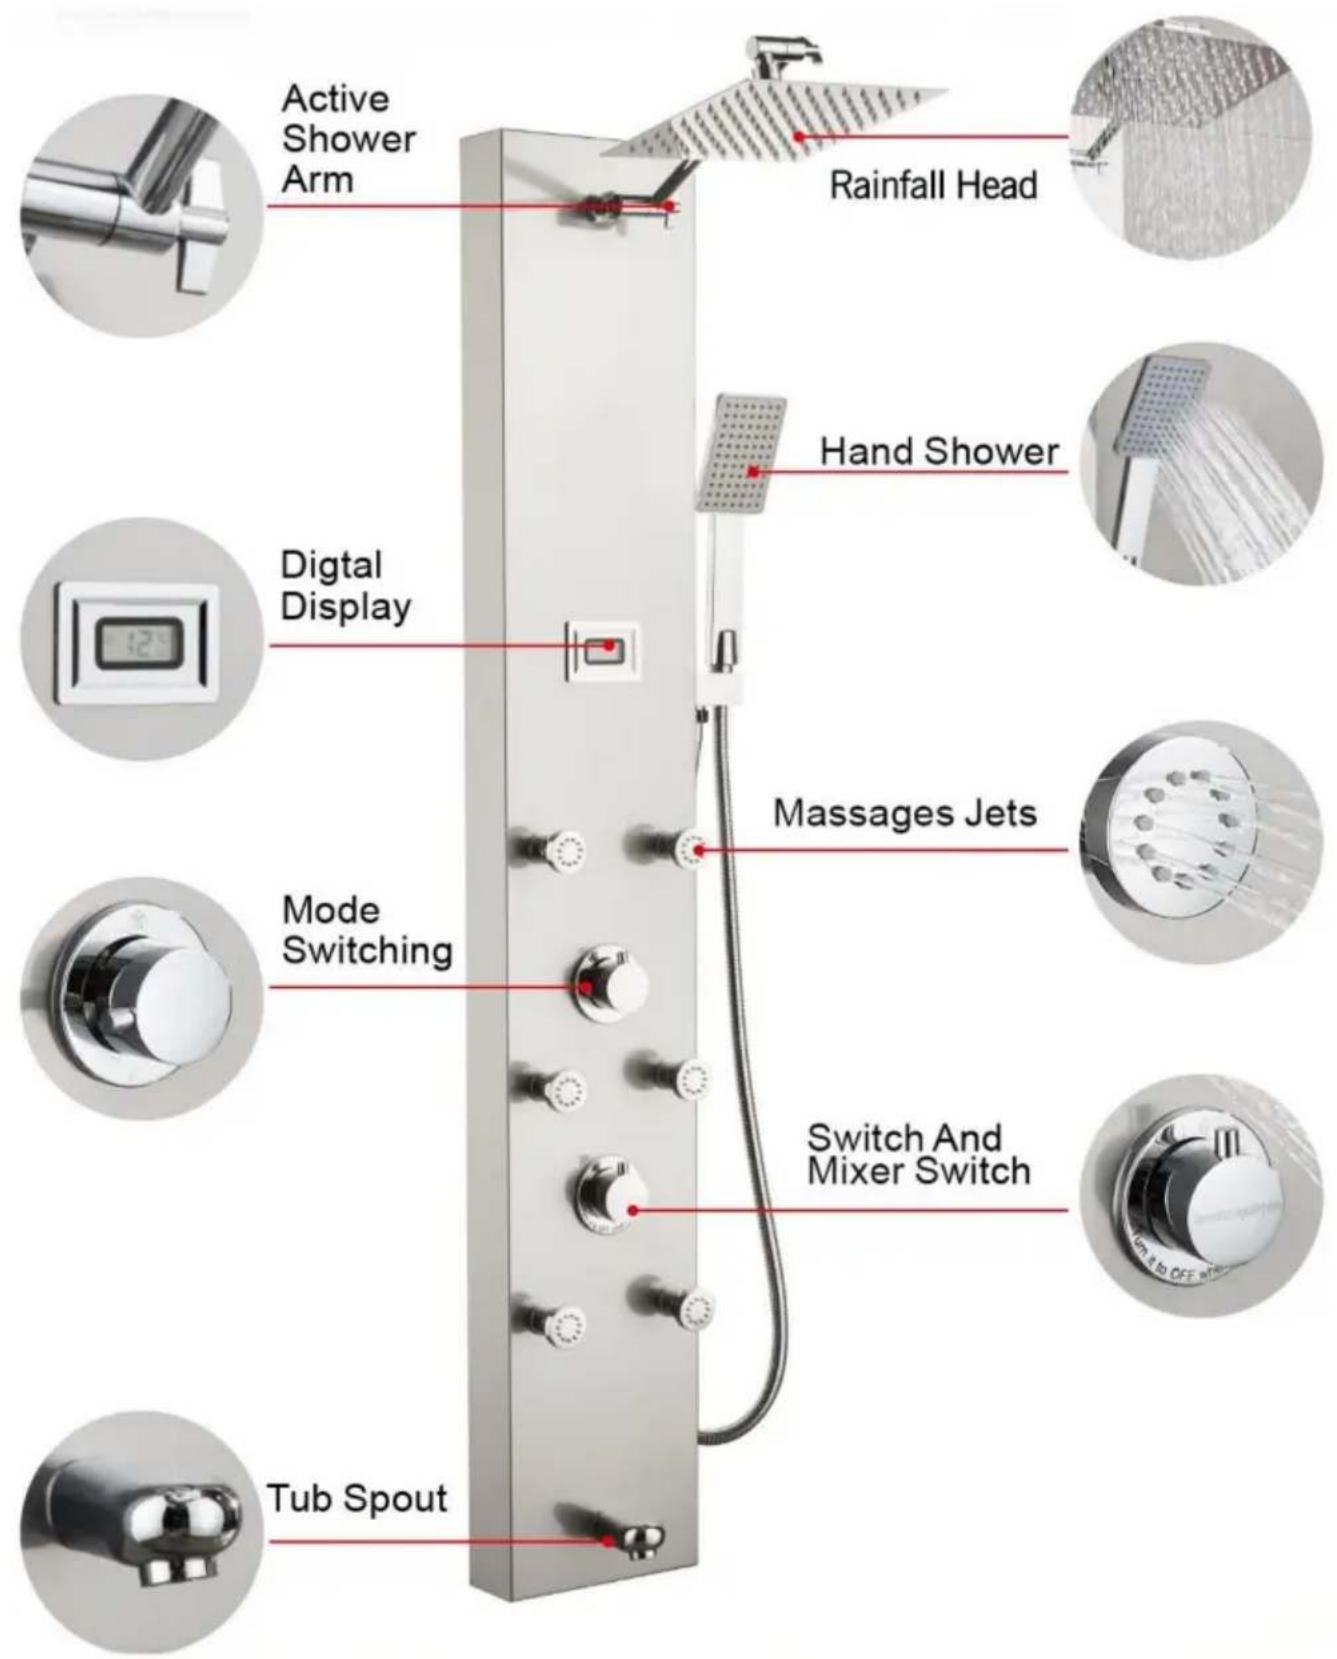
INTRODUCTION TO FUNCTIONS
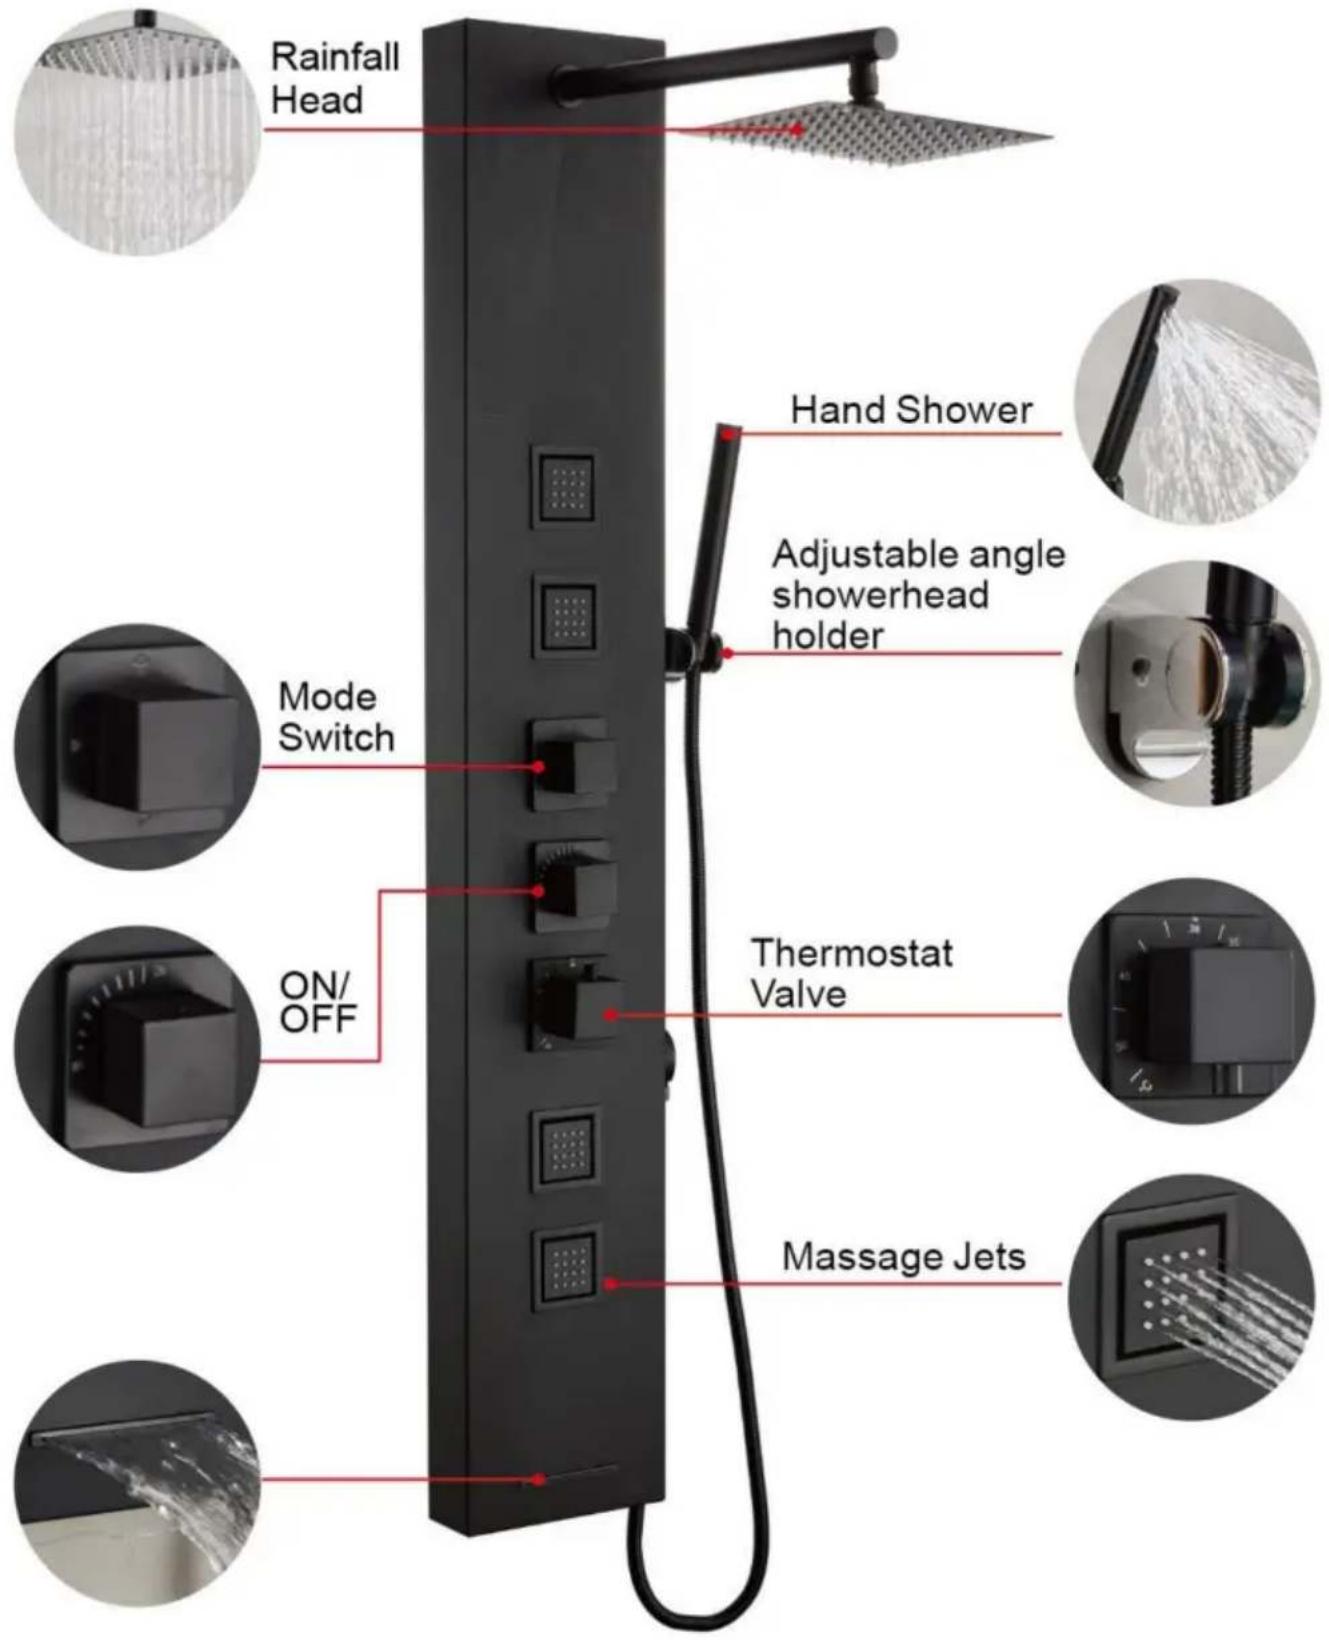
7015 tax year
8039FL
8124FL
7009FL
7016FL
7002FL
7015 tax year

Affordable. Reliable. Home Improvement.
SHOWER PANEL DOOR
MODEL:
6002FL, 8039FL, 7009FL, 6012FL, 8124FL, 7016FL, 7002FL, 7015FY
www.vevor.com/support
VEVOR
SHOWER PANEL DOOR
Affordable. Reliable. Home Improvement.
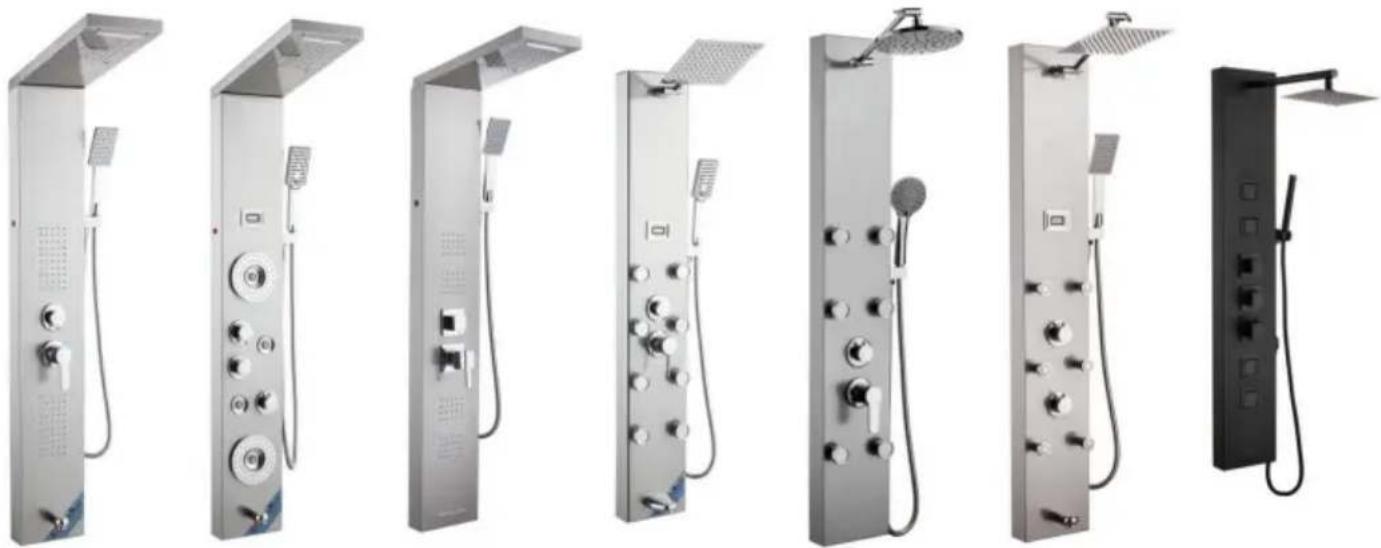
6002FL 6012FL
8039FL 8124FL 7009FL 7016FL 7002FL 7015FY
Installation av
FUNCTION INTRODUCTION
6002FL / 6012FL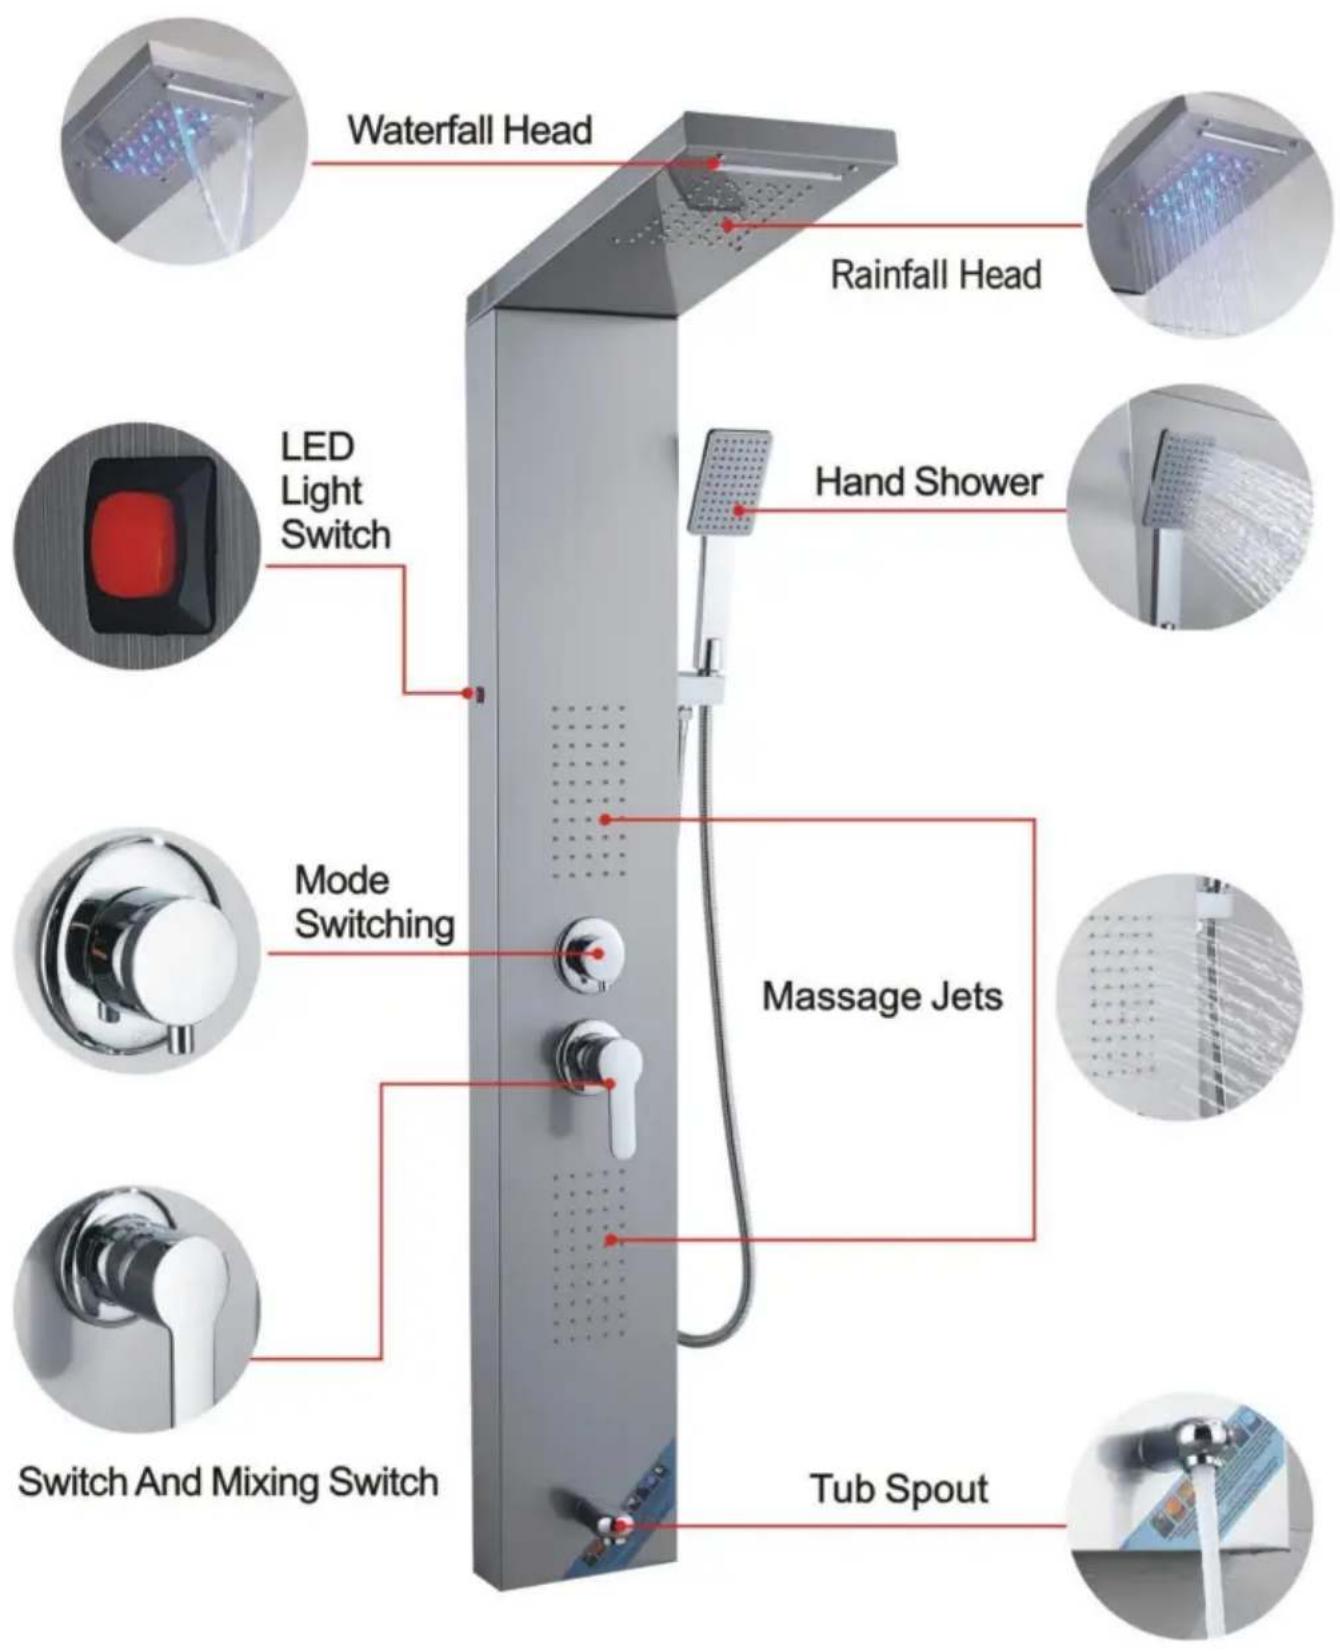
FUNCTION INTRODUCTION
8039FL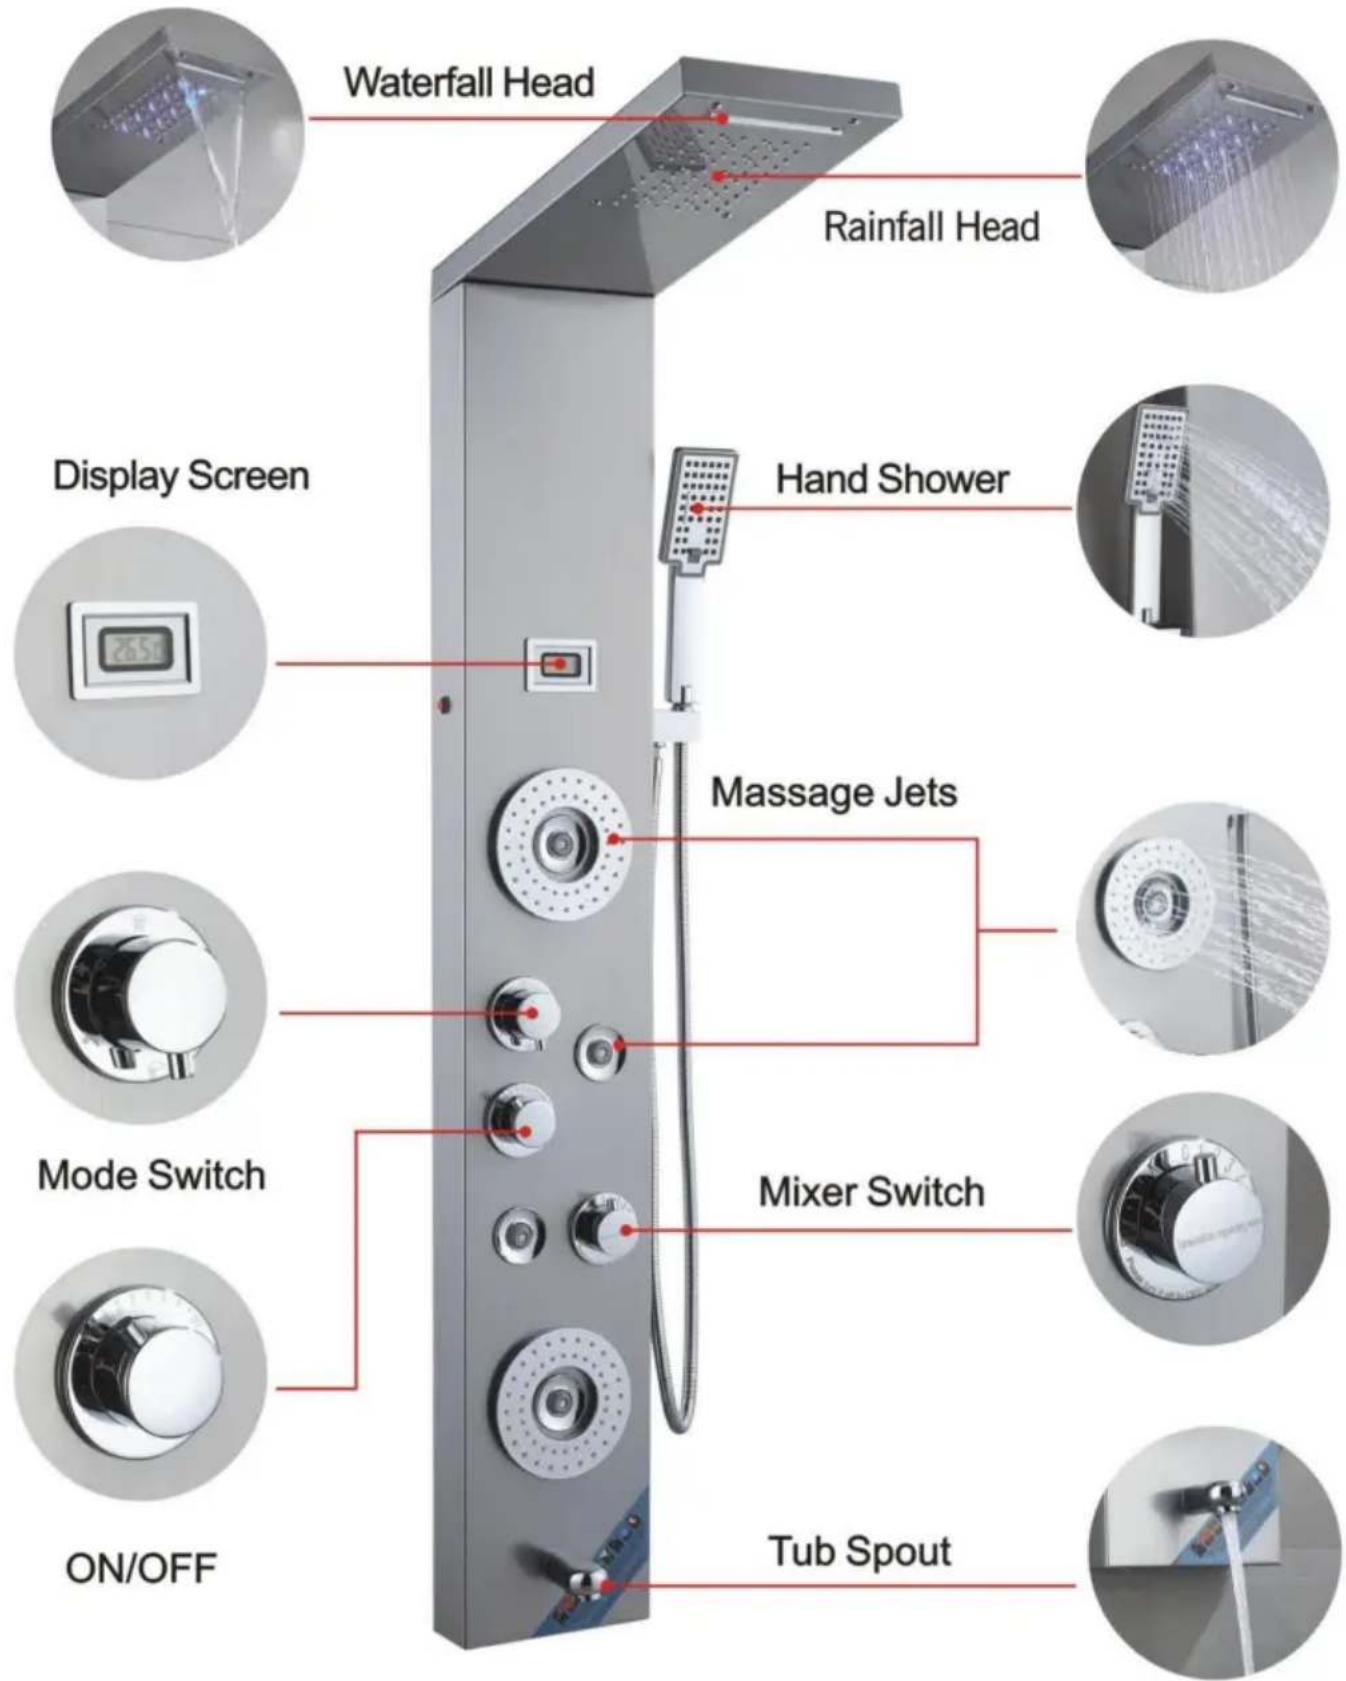
FUNCTION INTRODUCTION
7009FL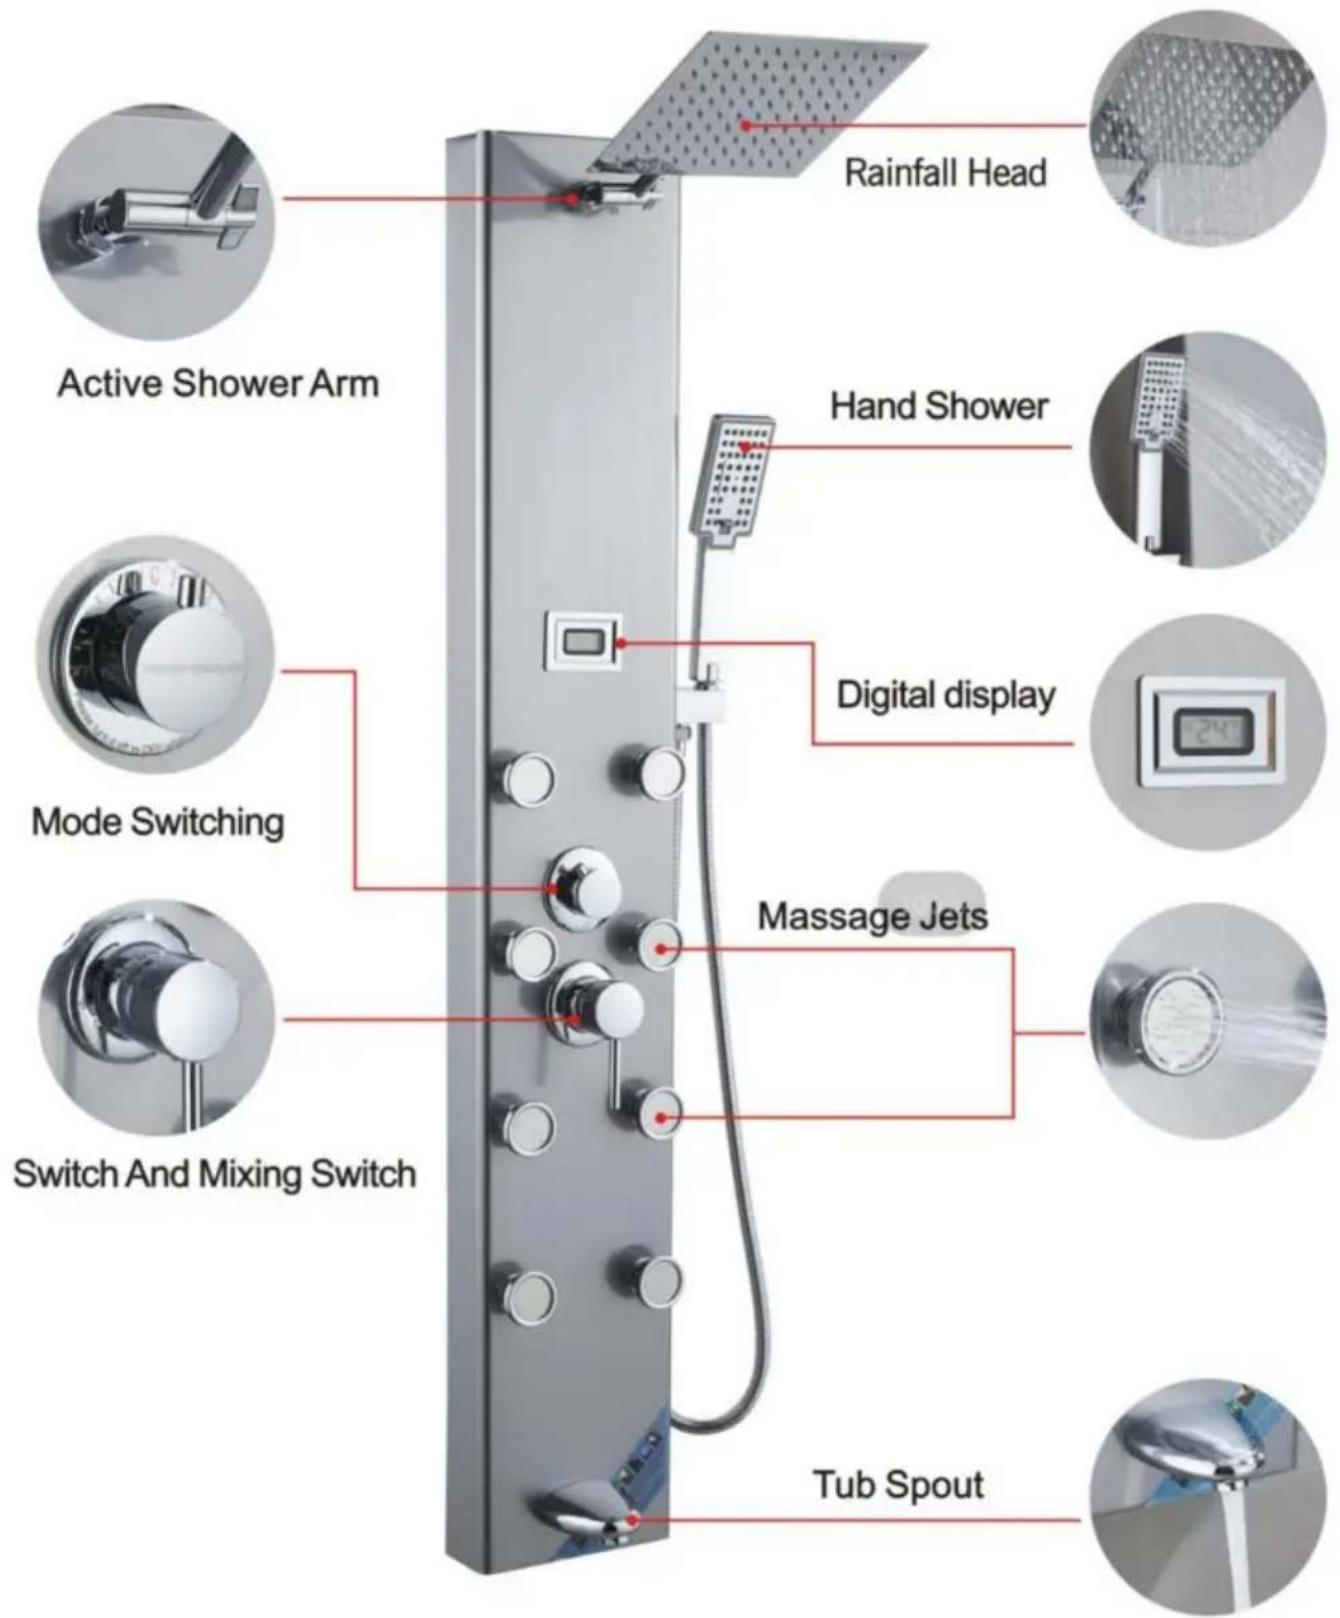
FUNCTION INTRODUCTION
8124FL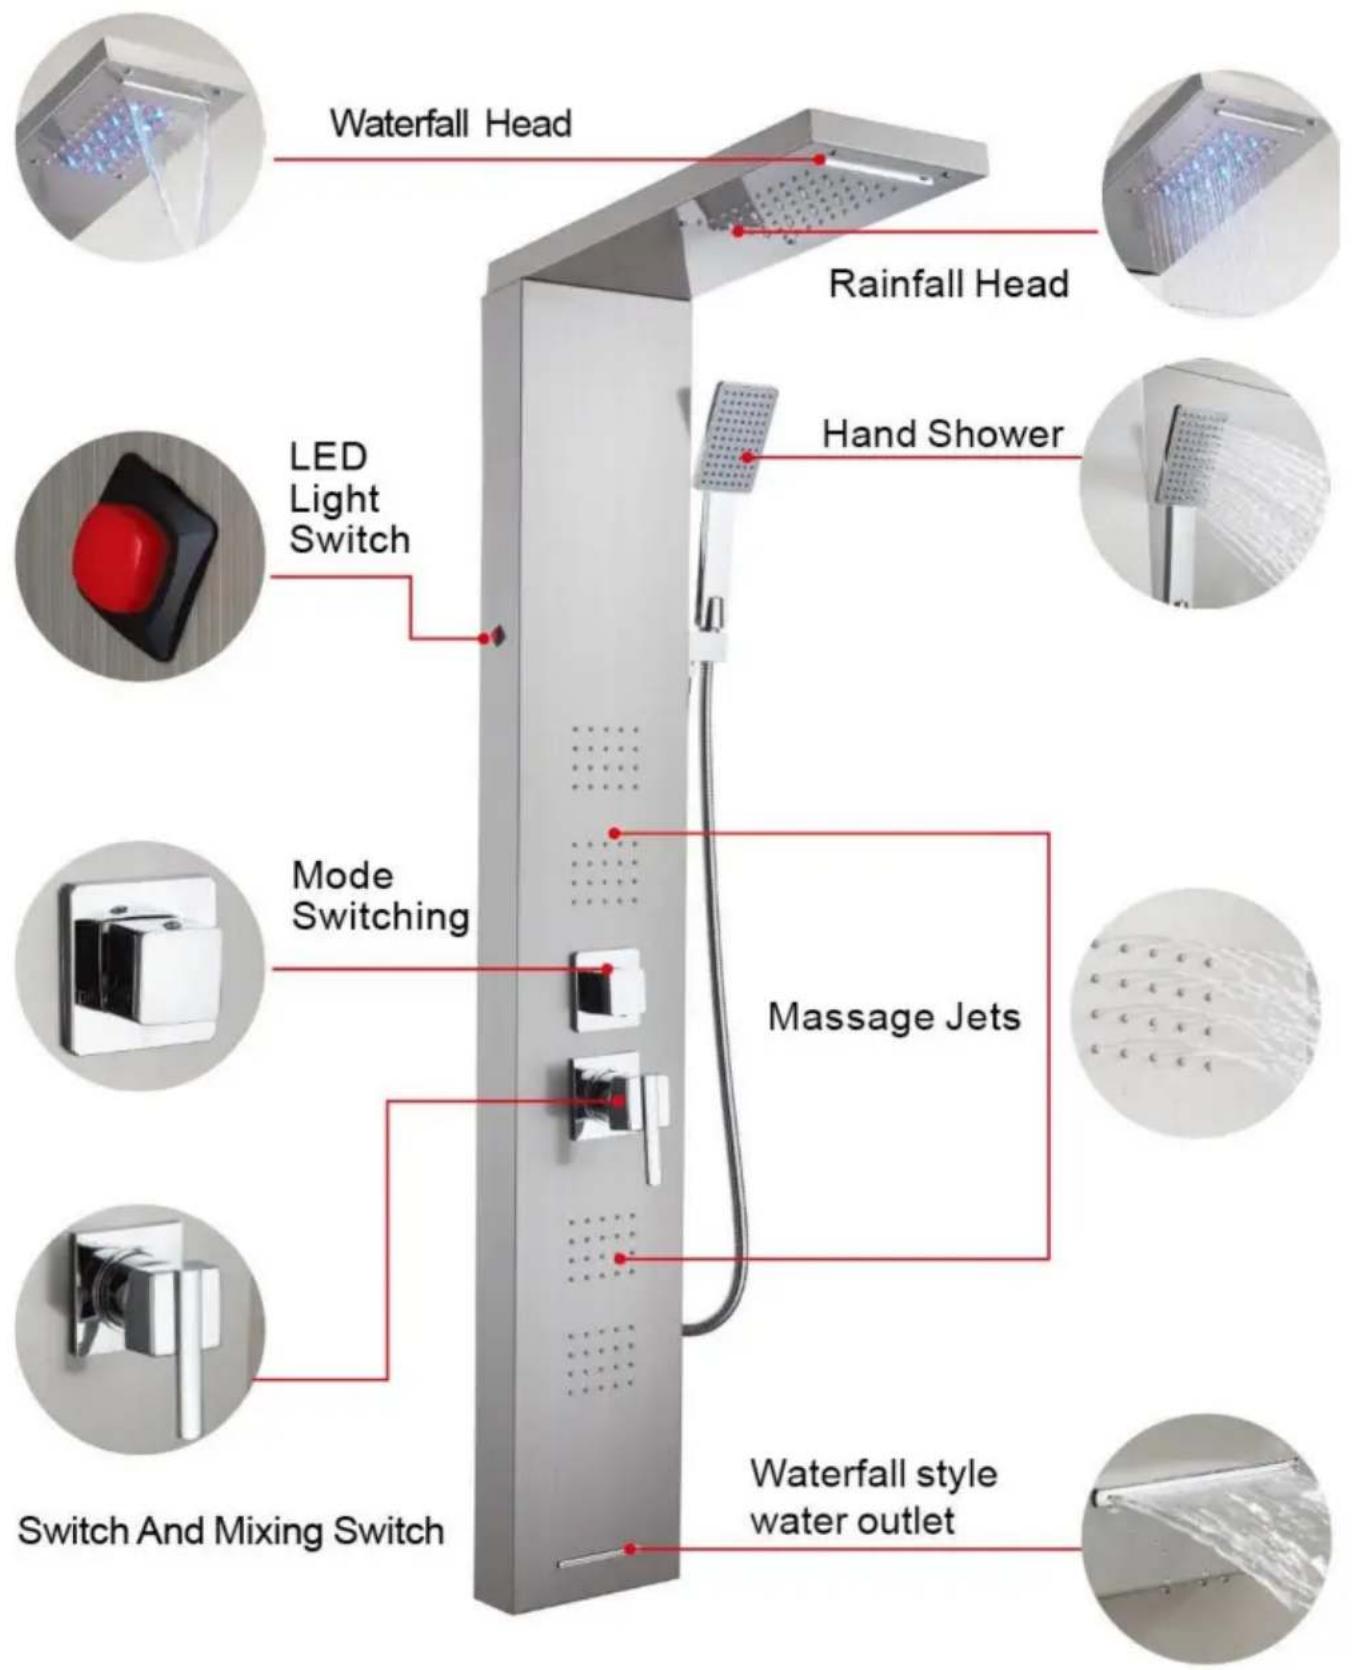
FUNCTION INTRODUCTION
7016FL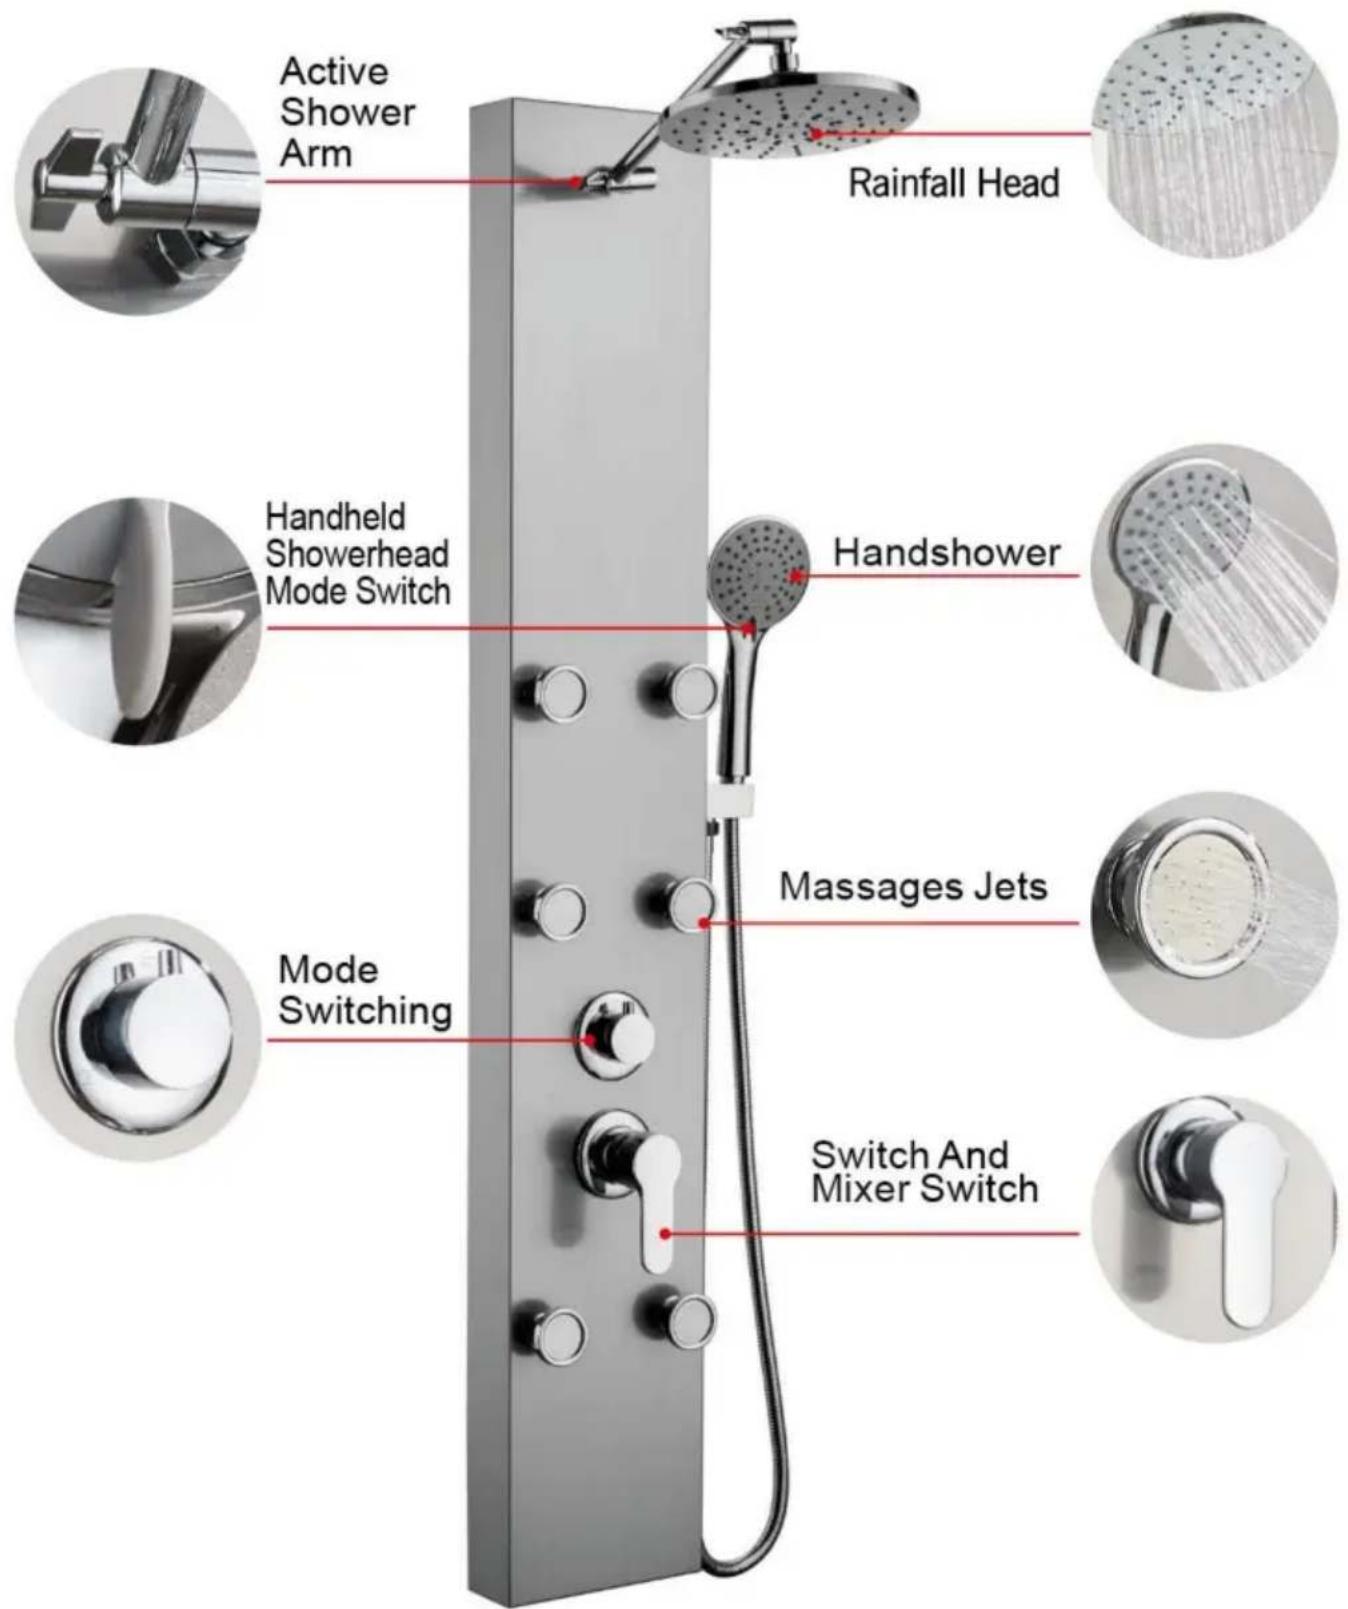
FUNCTION INTRODUCTION
7002FL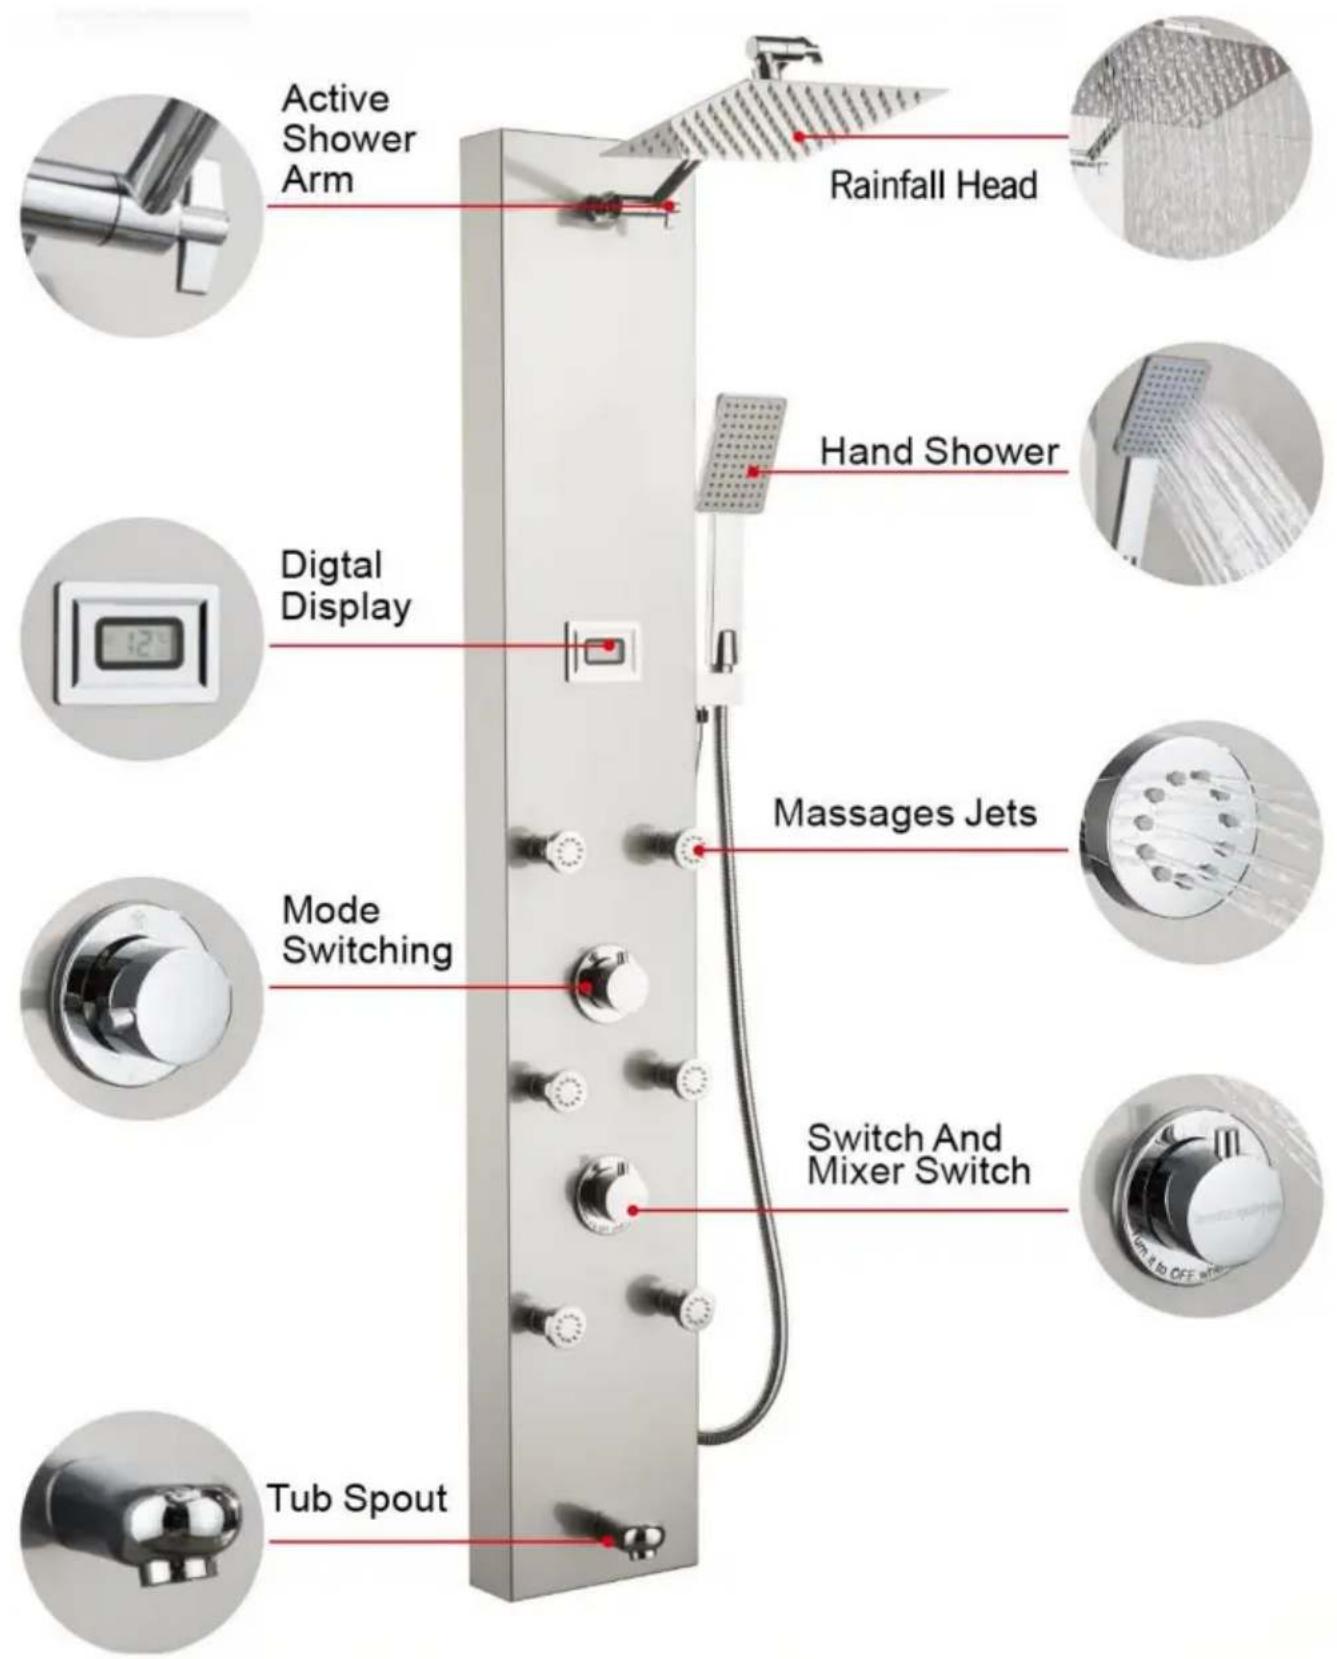
FUNCTION INTRODUCTION
7015FY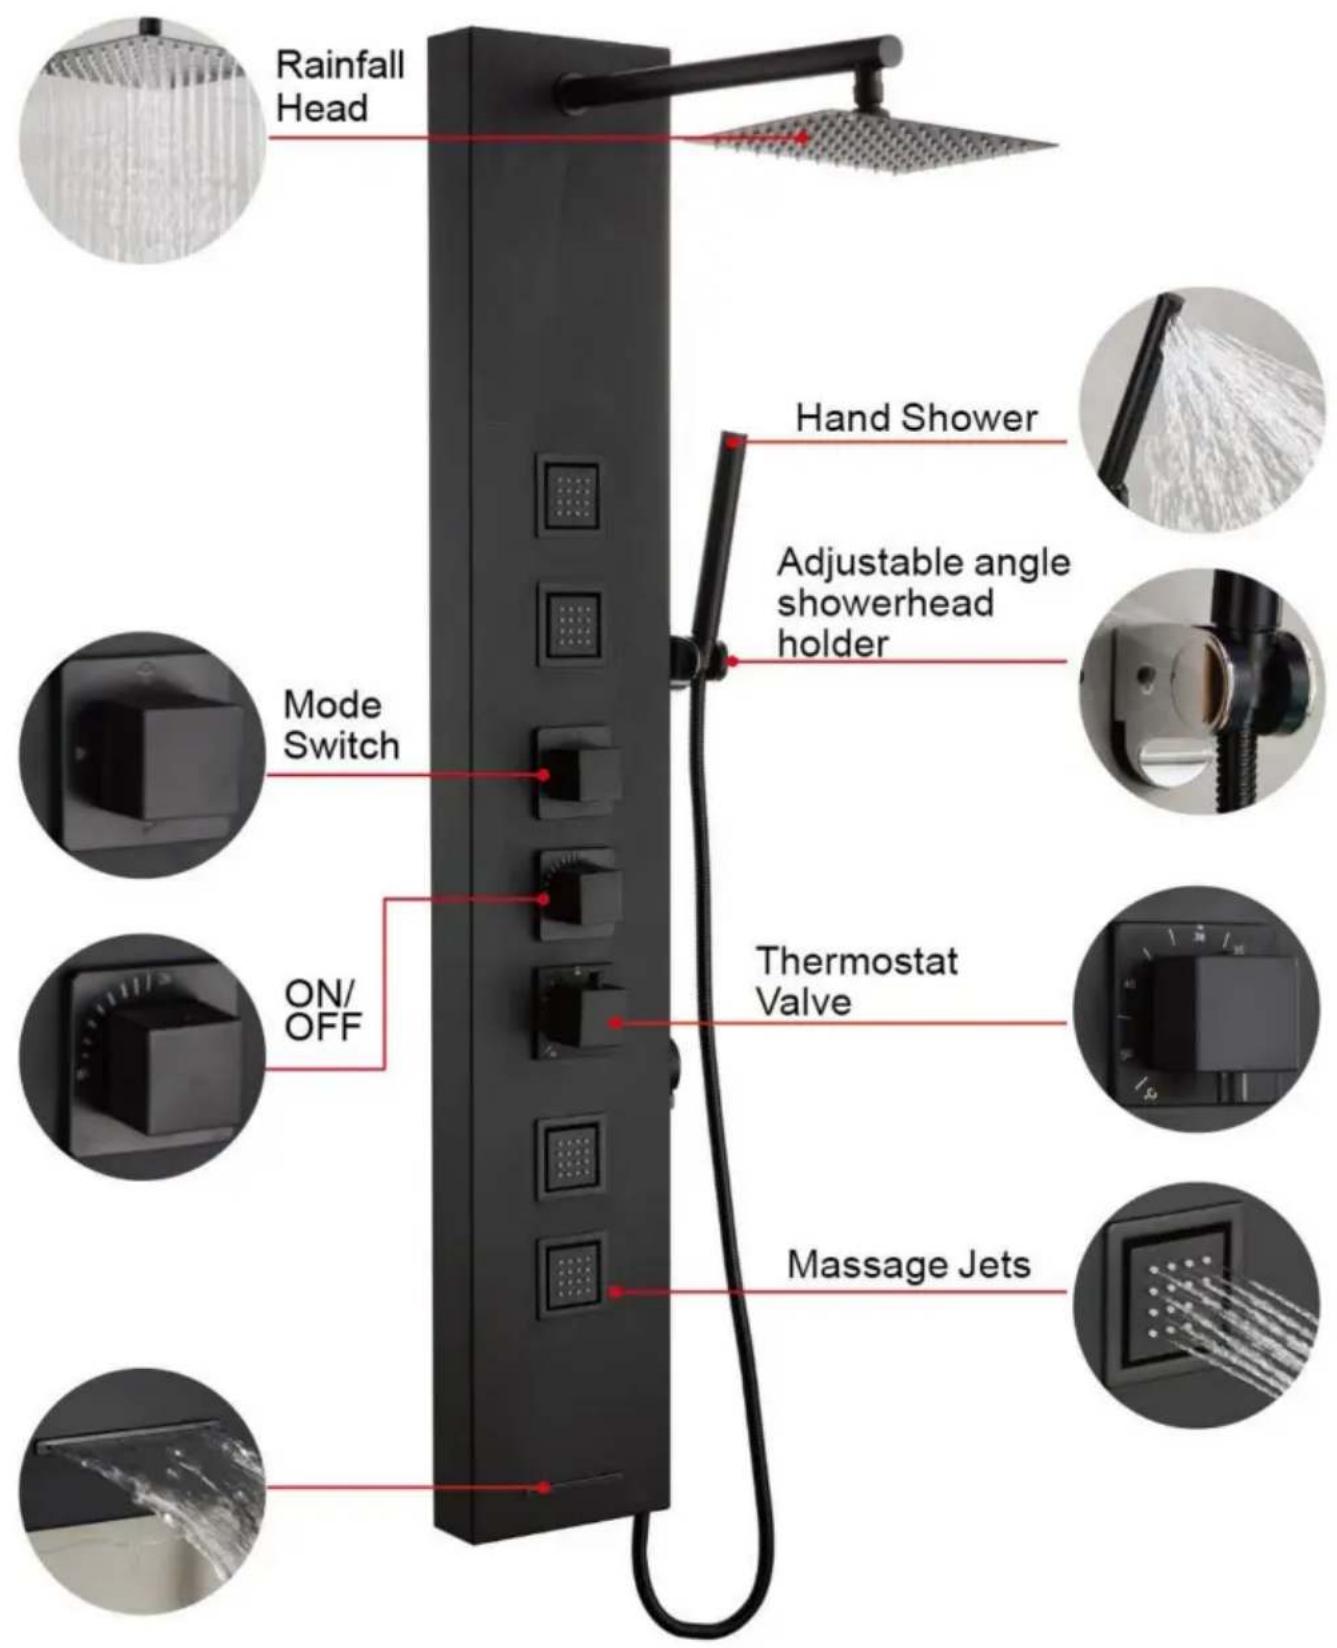
8039FL
8124FL
7009FL
7016FL
7002FL
7015FY

Affordable. Reliable. Home Improvement.
SHOWER PANEL TOWER
MODEL:
6002FL, 8039FL, 7009FL, 6012FL, 8124FL, 7016FL, 7002FL, 7015FY
www.vevor.com/support
VEVOR
SHOWER PANEL TOWER
Affordable. Reliable. Home Improvement.
6002FL 6012FL 8039FL 8124FL 7009FL 7016FL 7002FL 7015FY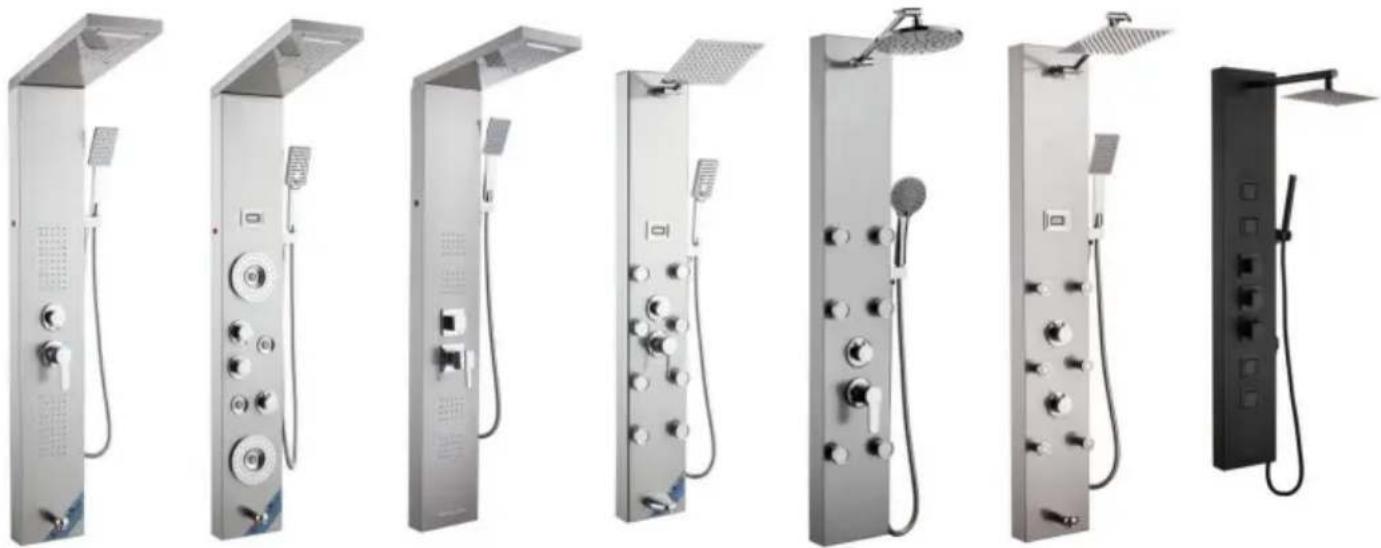
Place 2 AA batteries in the battery compartment.
Connect the hand-held shower hose and the hand shower head.
FUNCTION INTRODUCTION
6002FL / 6012FL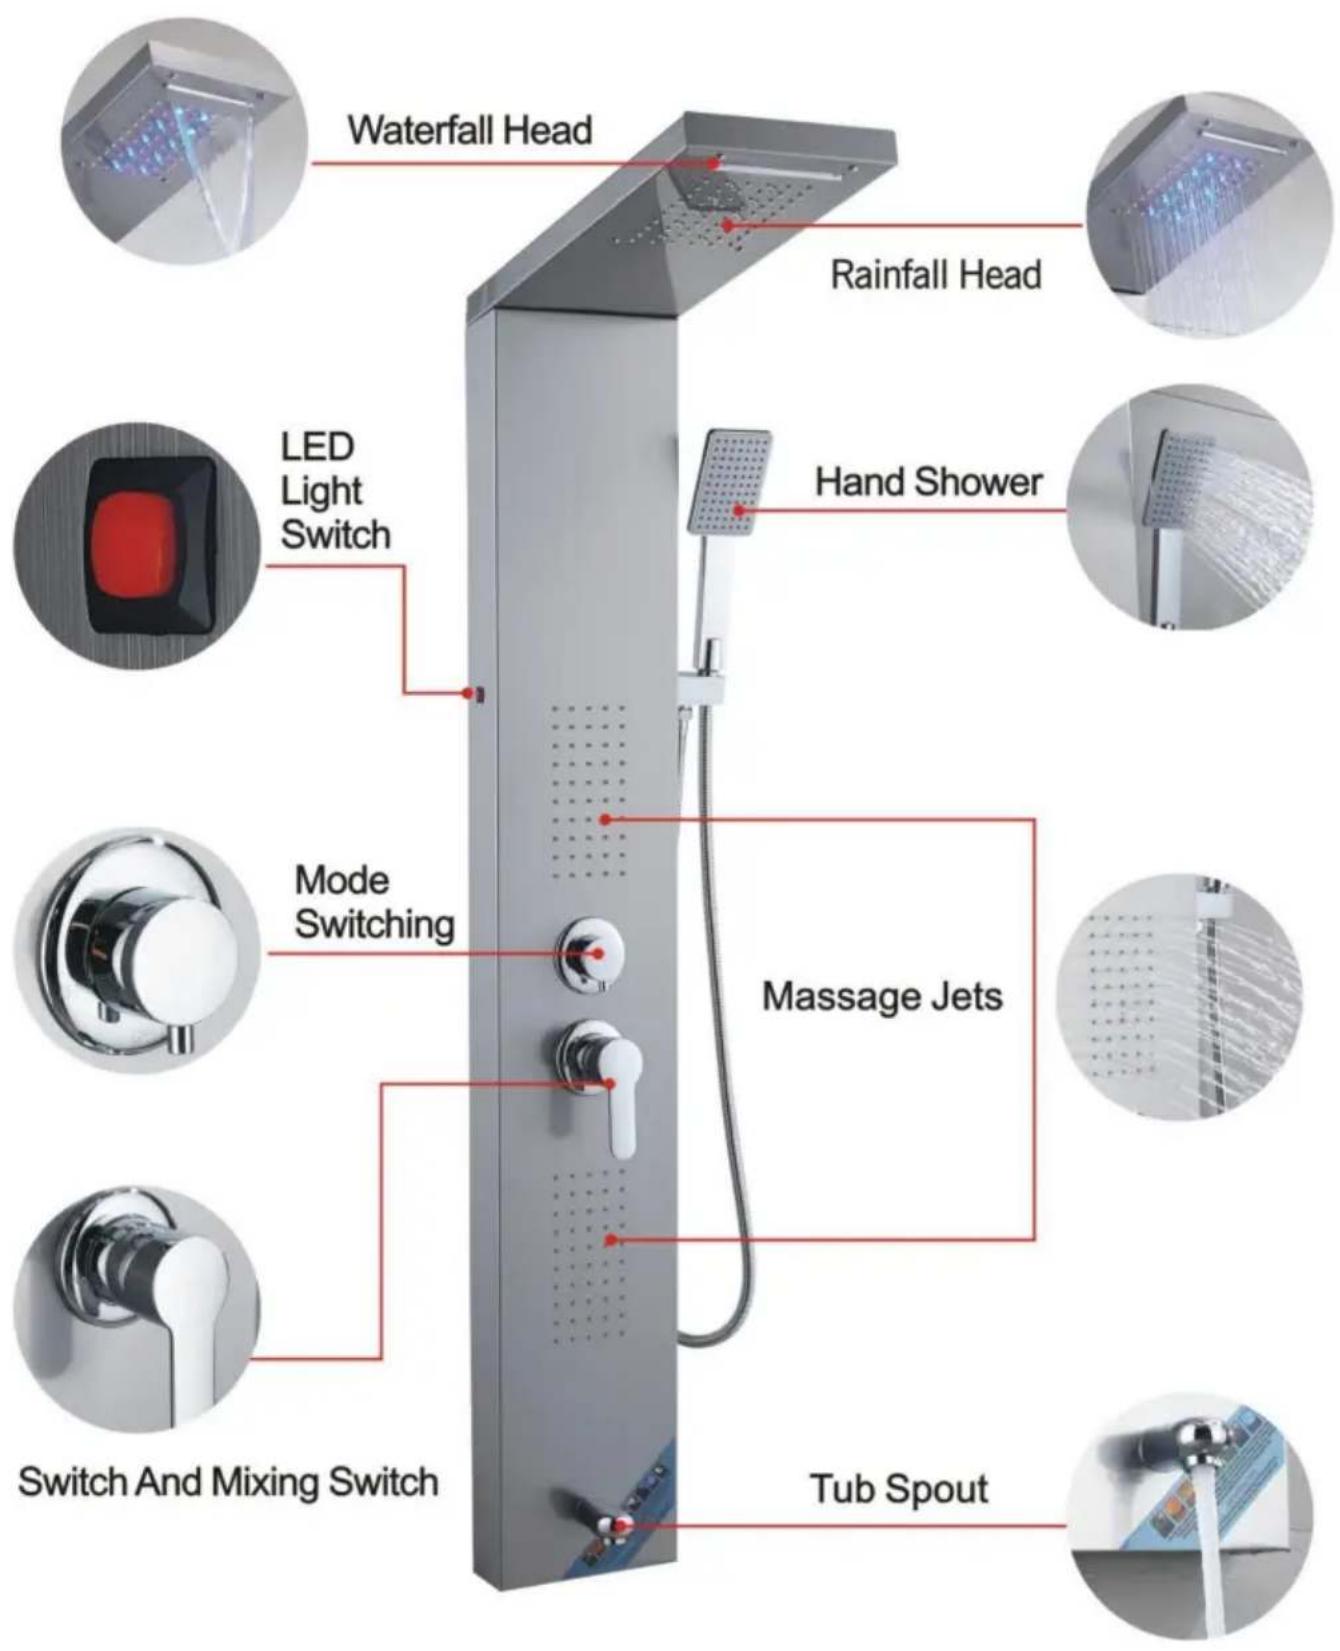
FUNCTION INTRODUCTION
8039FL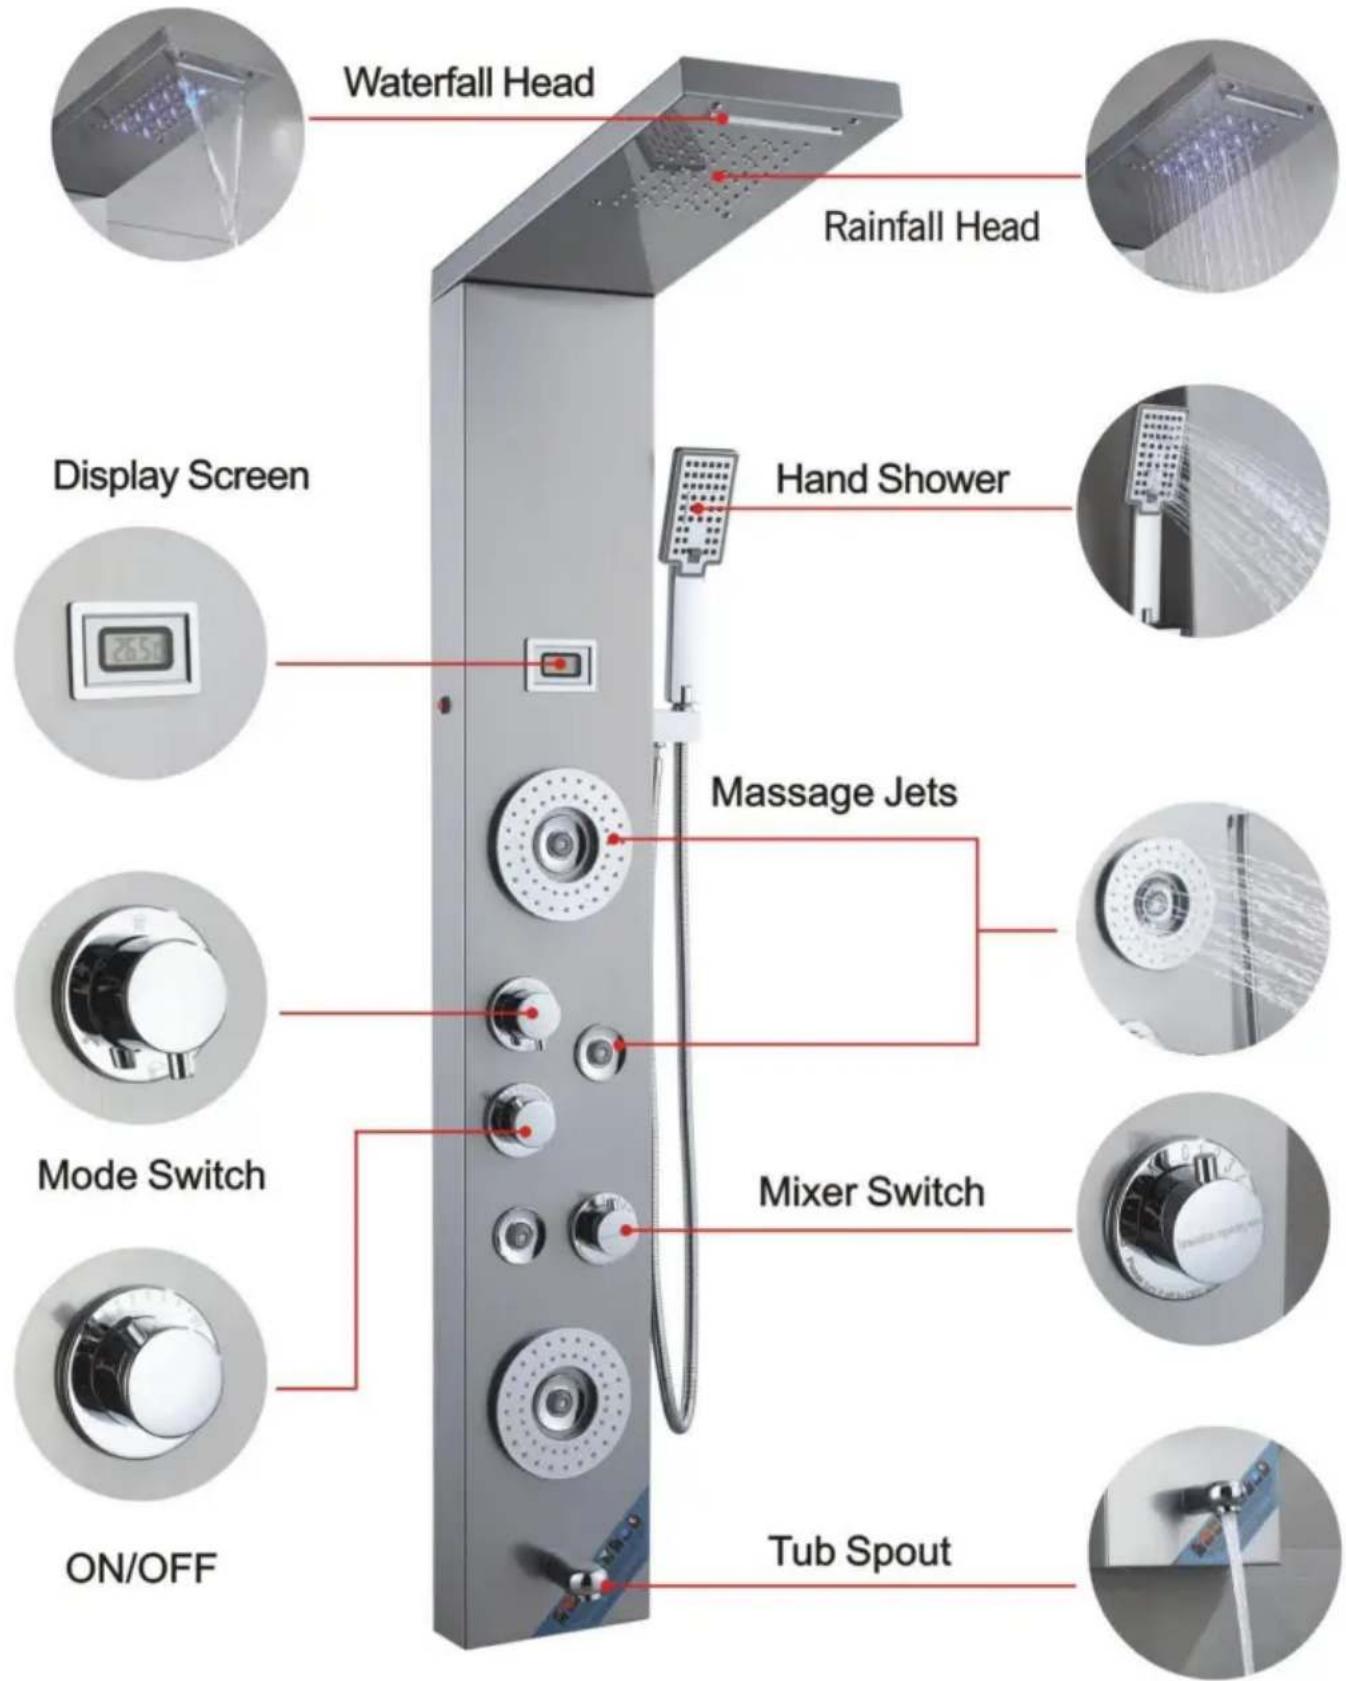
FUNCTION INTRODUCTION
7009FL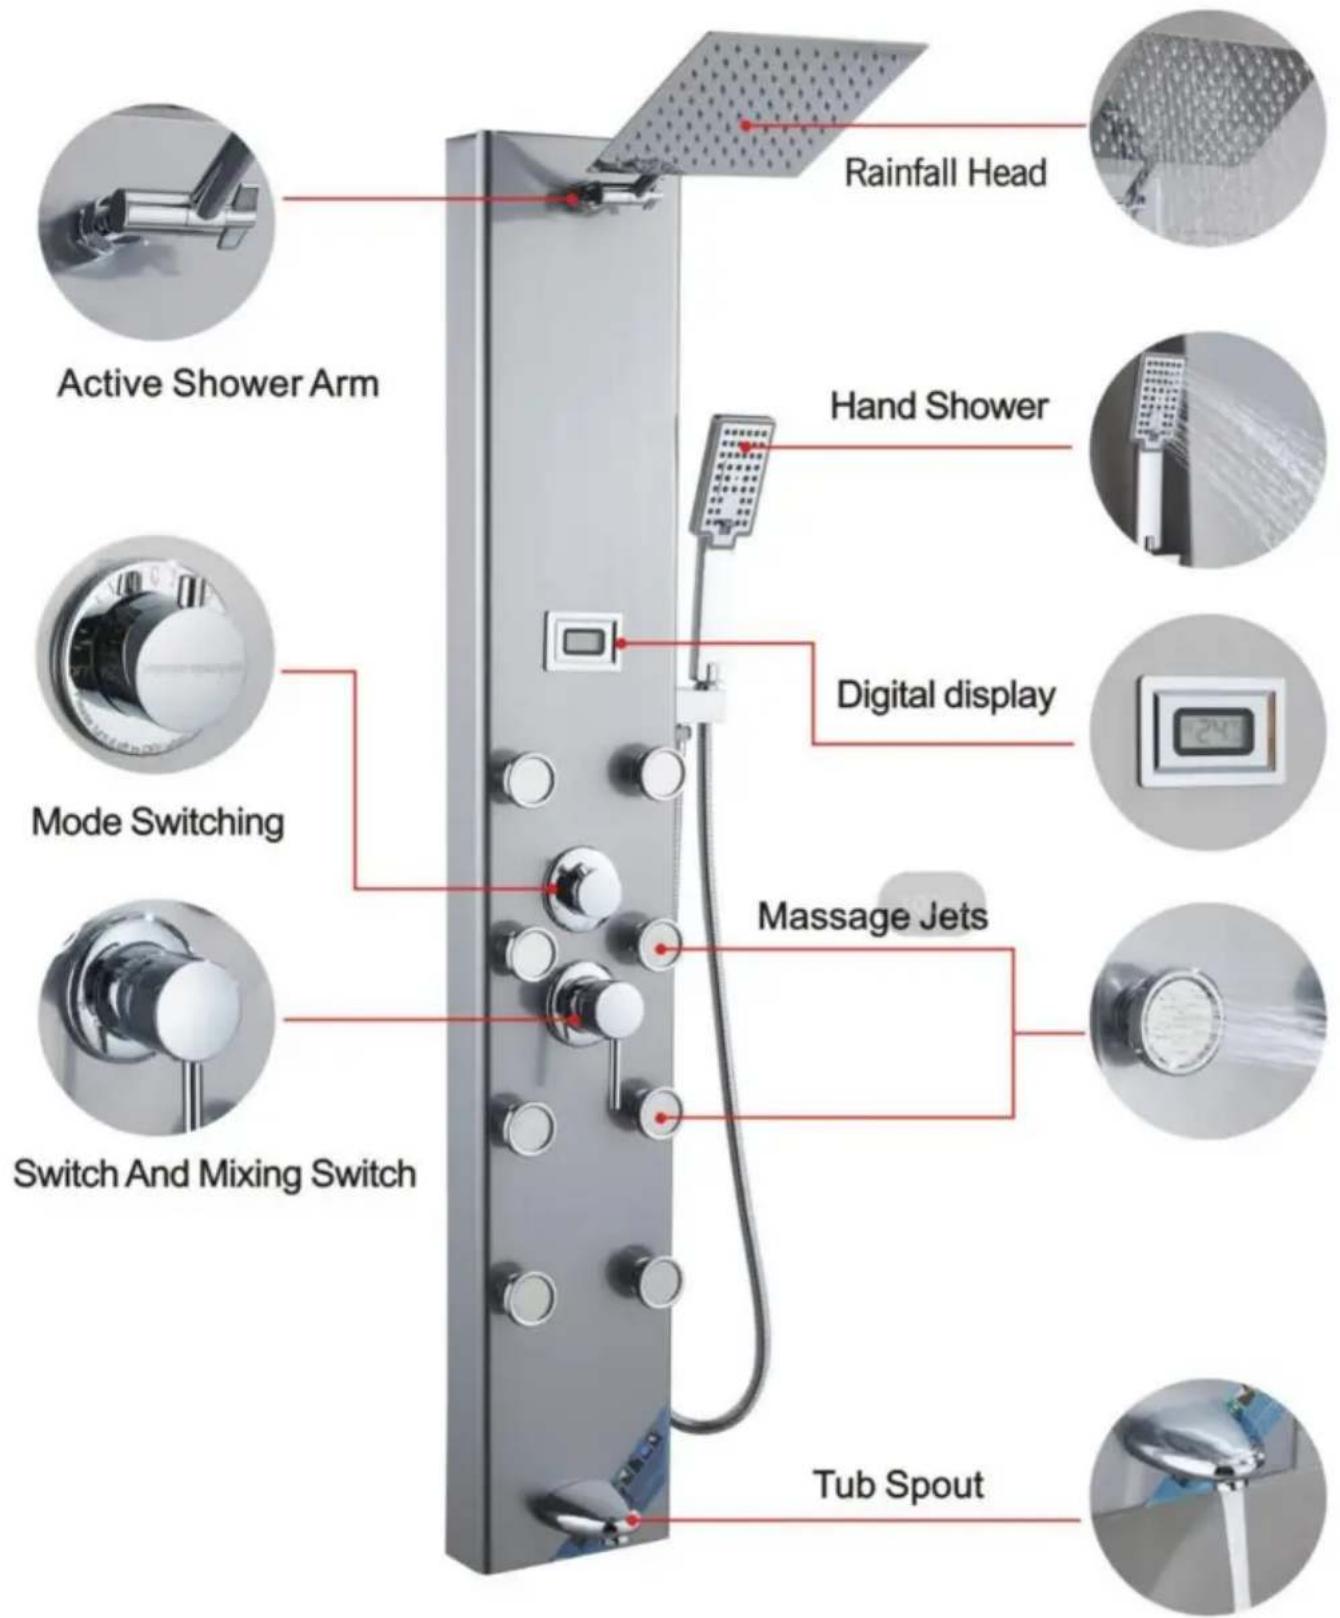
FUNCTION INTRODUCTION
8124FL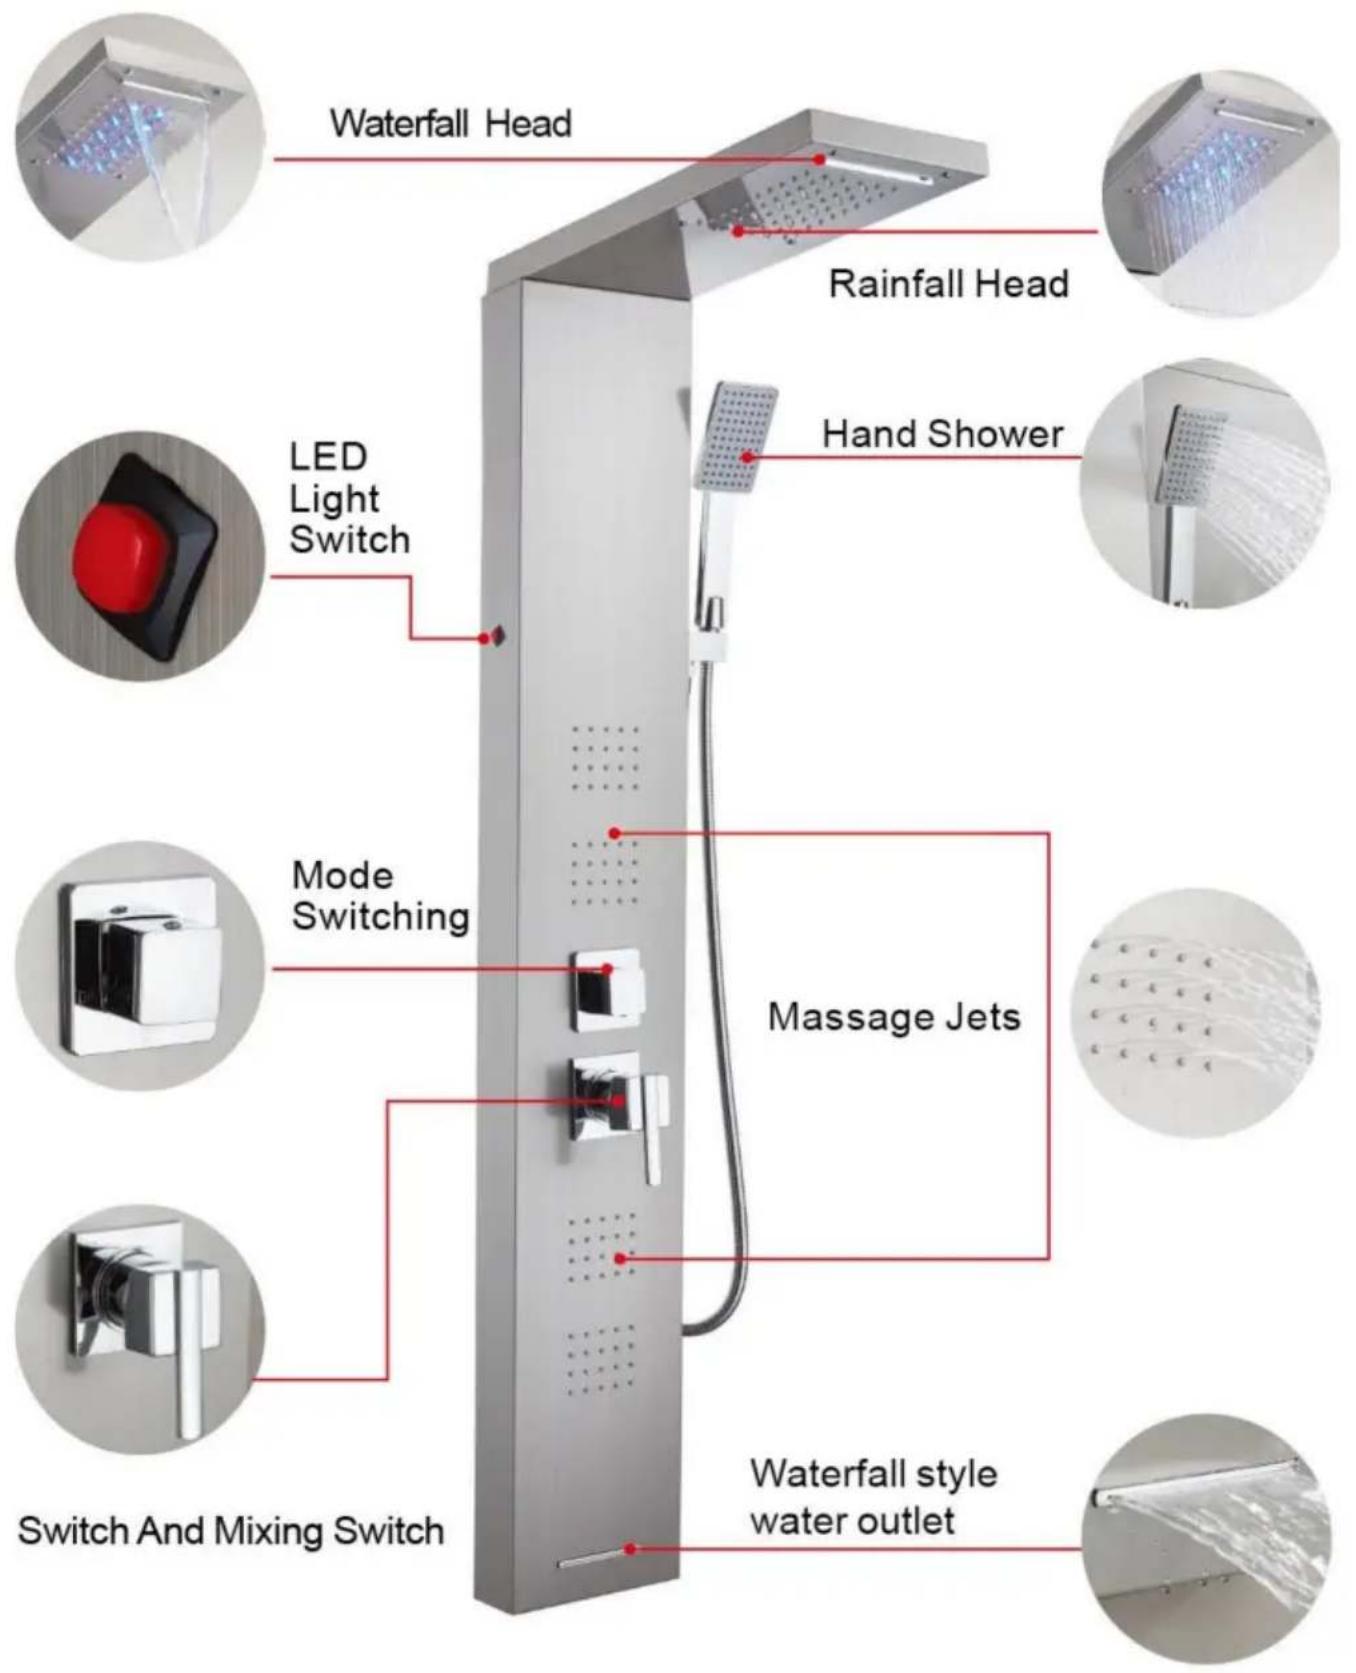
FUNCTION INTRODUCTION
7016FL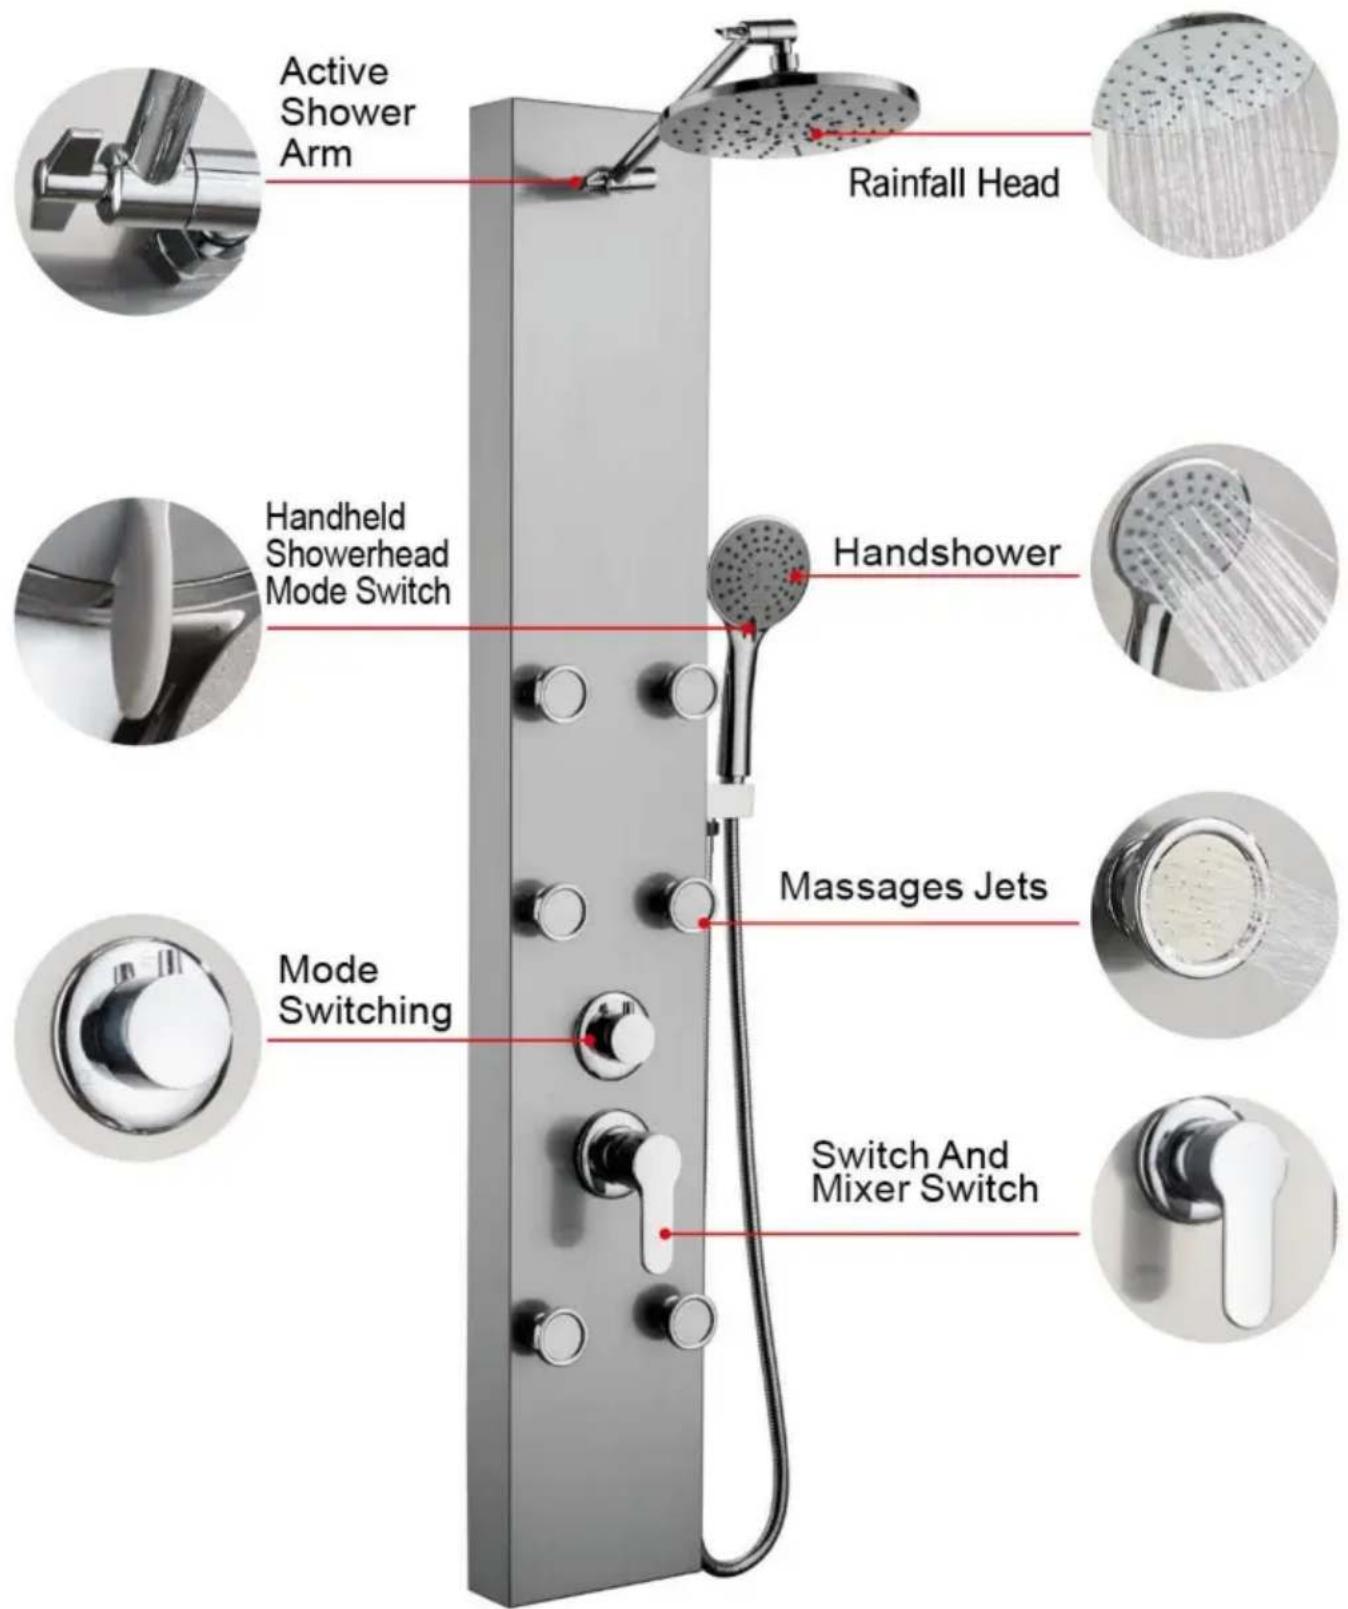
FUNCTION INTRODUCTION
7002FL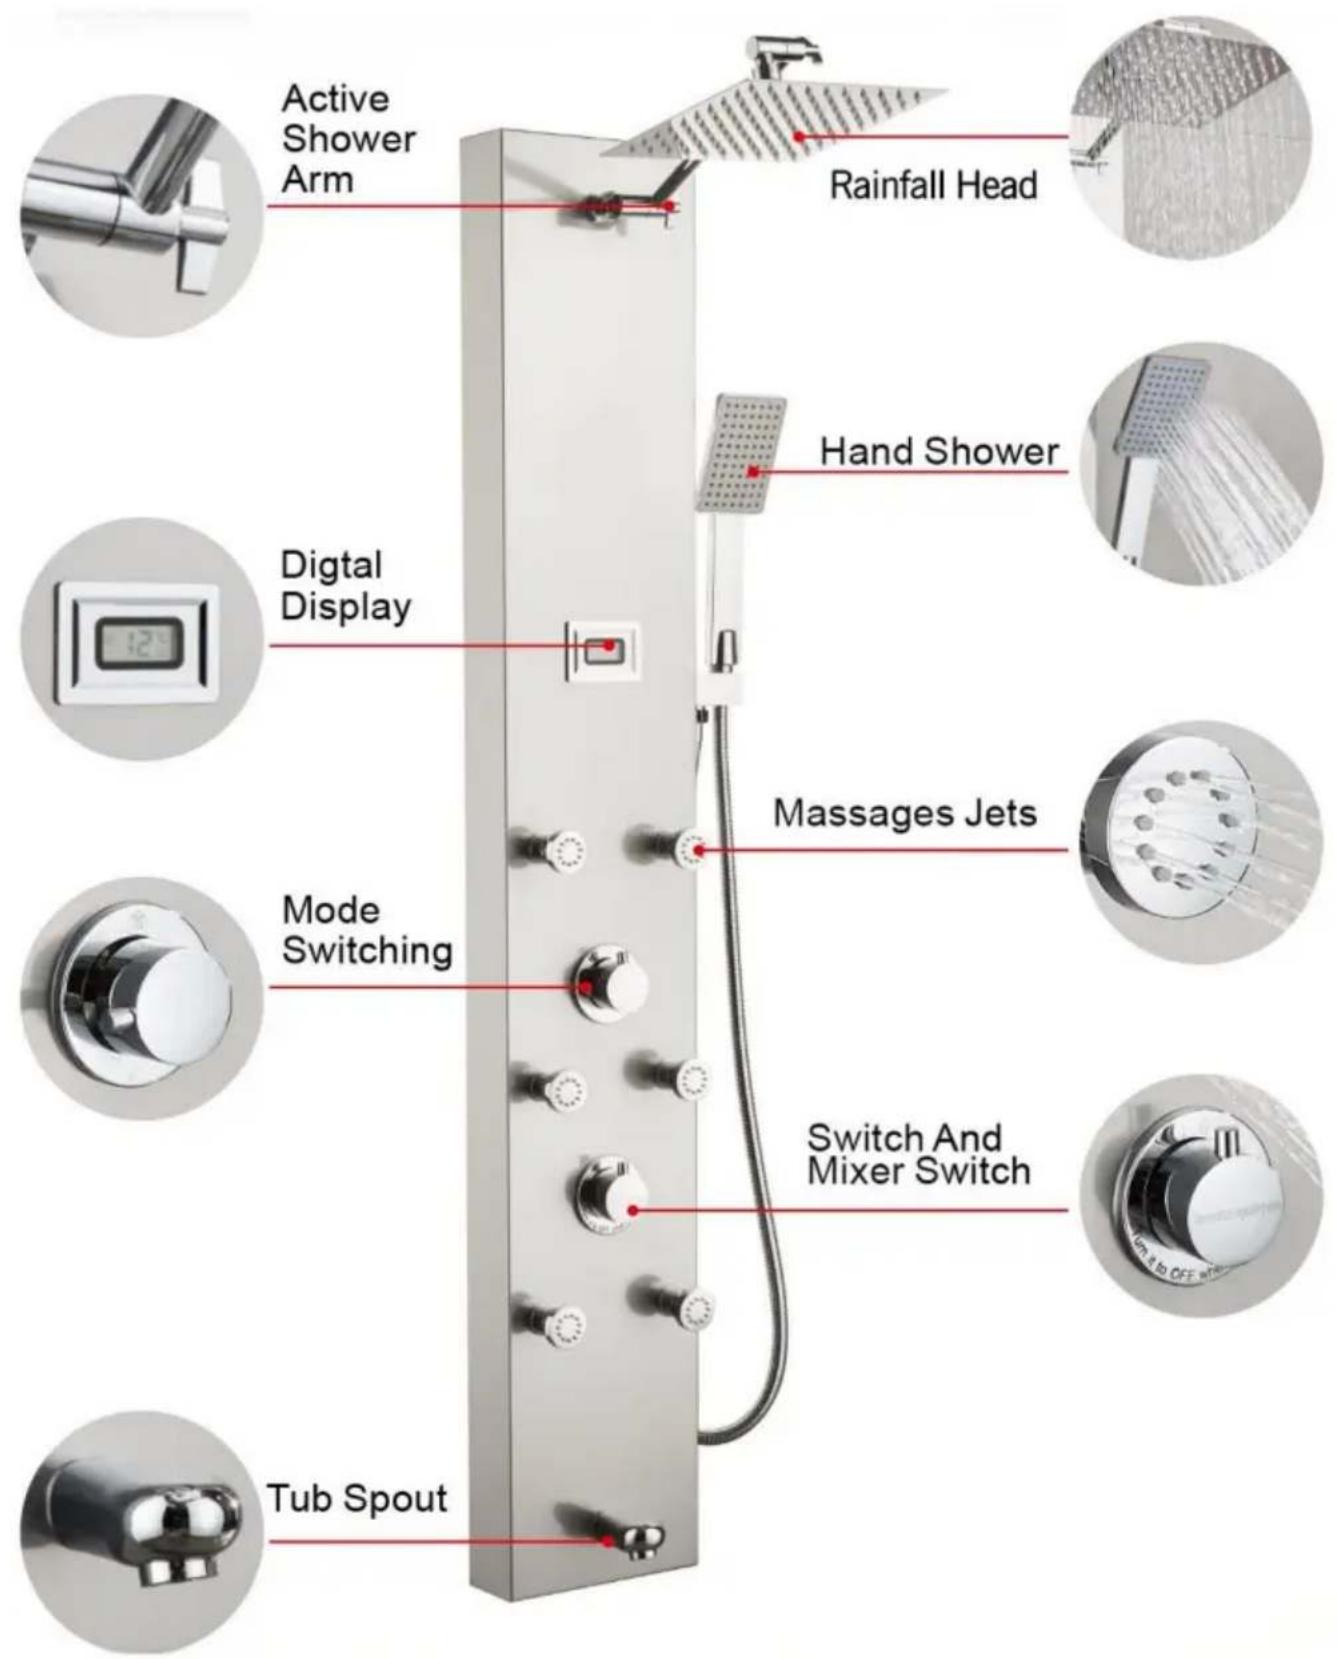
FUNCTION INTRODUCTION
7015FJ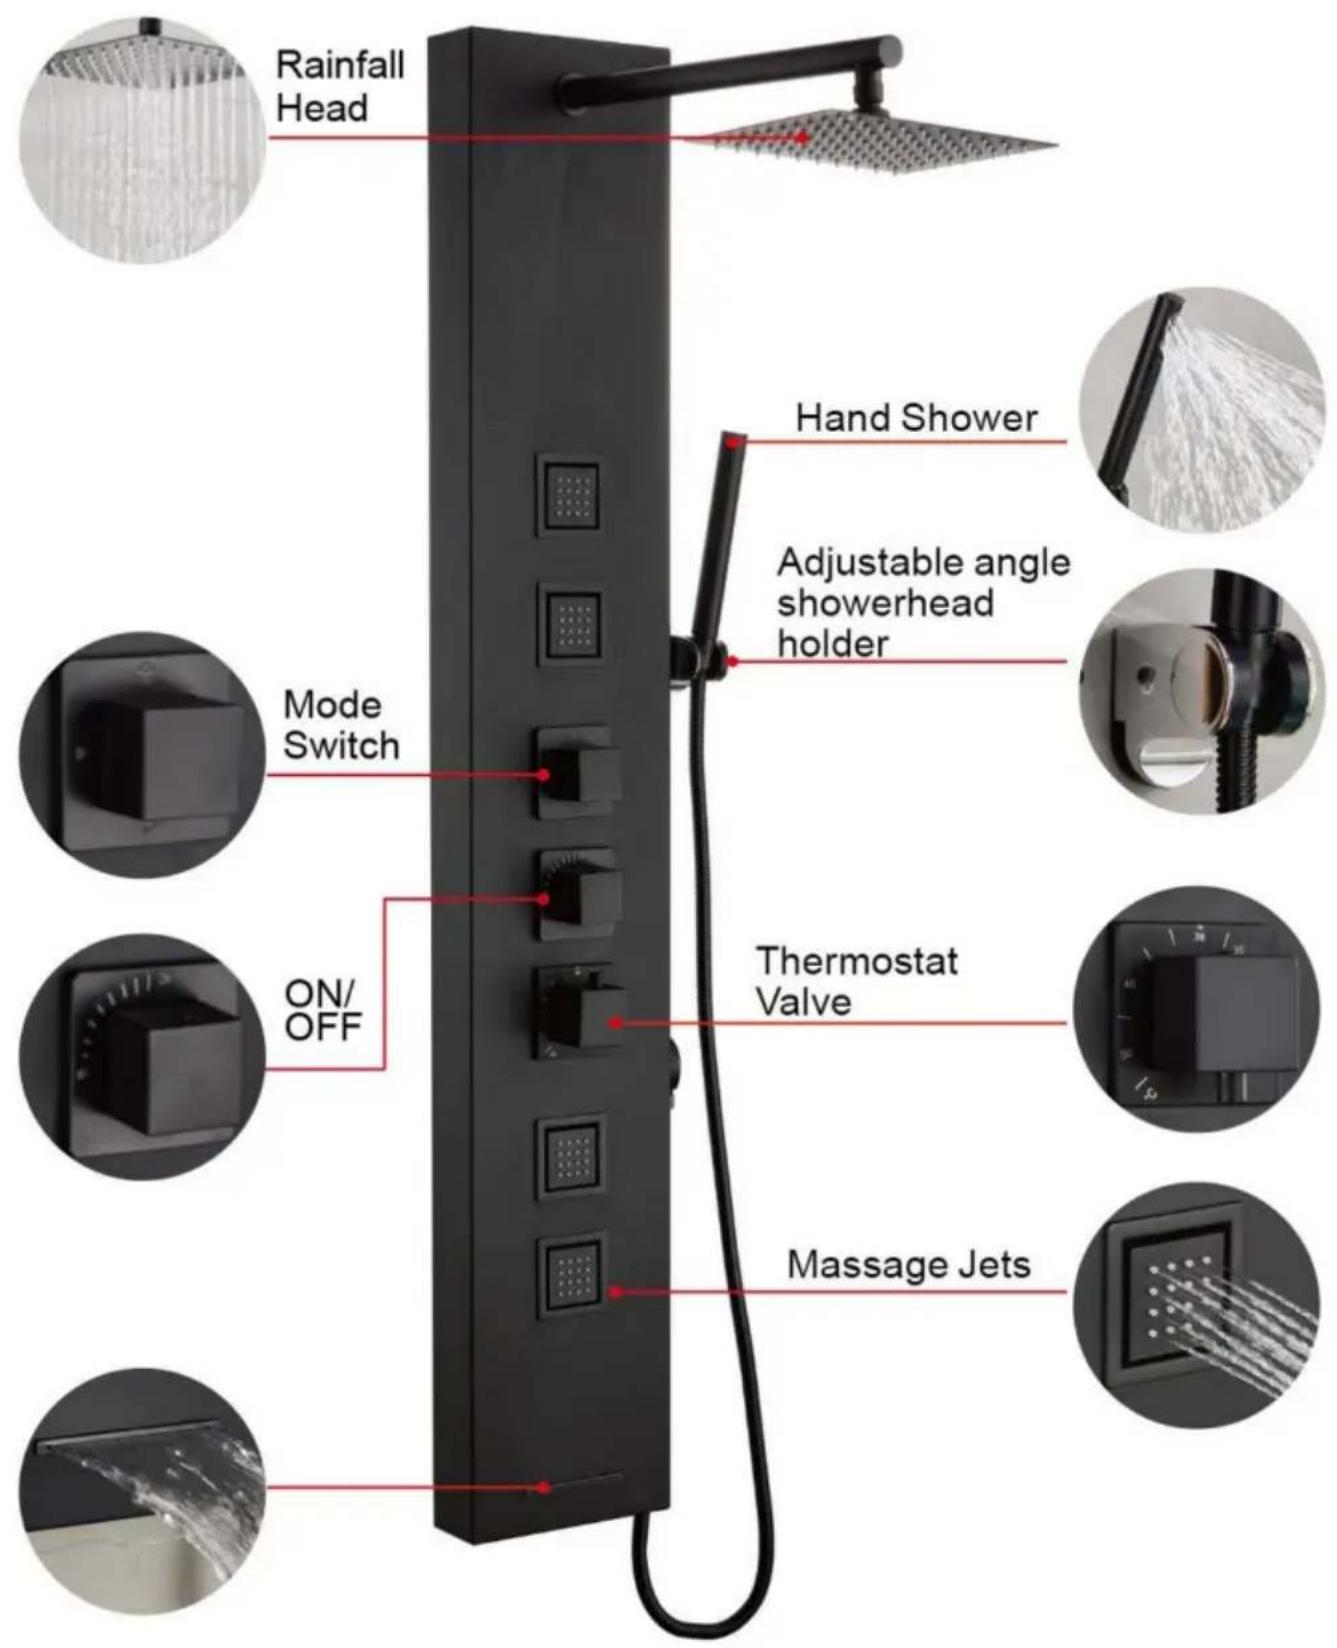
8124FL8039FL

7009FL
7016FL
7002FL
7015FJ

Technical support and e-warranty certificate www.vevor.com/support
- SHOWER PANEL TOWER
- VEVOR
- INSTRUCTIONS
- WARNING TIPS
- SAVE THESE INSTRUCTIONS
- PARTS LIST
- ASSEMBLY INSTRUCTIONS
- MODEL 6012FL/6002FL/8039FL/8124FL
- MODEL 7015FY
- INSTALLATION STEPS (GENERAL)
- INSTALLATION NOTES
- STAINLESS STEEL SHOWER SYSTEM MAINTENANCE METHODS
- SHOWER PANEL SERIES INSTALLATION DIAGRAM
- FUNCTION INTRODUCTION
- AFFORDABLE. RELIABLE. HOME IMPROVEMENT
- INTRODUCTION TO FUNCTIONS
- SHOWER PANEL SERIES - INSTALLATION DIAGRAM
- SHOWER PANEL DOOR
Brand : Vevor
Model : 8124FL
Category : Shower column