
8015FL - Shower column Vevor - Free user manual and instructions
Find the device manual for free 8015FL Vevor in PDF.
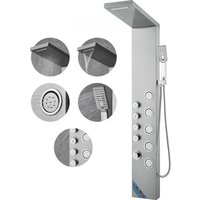


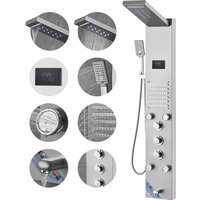
| Product Type | Shower Column |
| Brand | Vevor |
| Model | 8015FL |
| Power Supply | No electrical power required |
| Fixed Shower Functions | 4 spray modes |
| Hand Shower Functions | 3 settings |
| Bathtub Spout | No |
| Temperature Display | No |
| LED Light | No |
| Mounting Type | Wall-mounted |
| Connection | G1/2" |
| Material | Stainless steel, brass, PVC, ABS |
| Finish | Brushed nickel anti-fingerprint |
| Package Contents | Main panel, 3-function hand shower, 1.5m hose, hand shower holder, angled adapters, screws, seals |
| Maintenance | Clean with water or mild detergent, wipe with a soft cloth |
| Safety | Wear gloves during installation; tighten all seals to prevent leaks |
| Warranty | Electronic warranty certificate at www.vevor.com/support |
| Approval | Complies with FCC Part 15 |
Frequently Asked Questions - 8015FL Vevor
User questions about 8015FL Vevor
0 question about this device. Answer the ones you know or ask your own.
Ask a new question about this device
Download the instructions for your Shower column in PDF format for free! Find your manual 8015FL - Vevor and take your electronic device back in hand. On this page are published all the documents necessary for the use of your device. 8015FL by Vevor.
USER MANUAL 8015FL Vevor
Technical Support and E-Warranty Certificate www.vevor.com/support
SHOWER PANEL TOWER
MODEL: 8015FL/6002FL/8039FL/8009FL/8004FL/7009FL
We continue to be committed to providing you with tools at competitive prices. "Save Half", "Half Price", or any other similar expressions used by us only represent an estimate of savings you might benefit from buying certain tools with us compared to top brands and does not necessarily mean to cover all categories of tools offered. We kindly remind you to verify carefully when placing an order with us that you are actually saving half in comparison with the top major brands.
VEVOR®
TOUGH TOOLS, HALF PRICE
SHOWER PANEL TOWER

NEED HELP? CONTACT US!
Have product questions? Need technical support? Please feel free to contact us:
Technical Support and E-Warranty Certificate www.vevor.com/support
This is the original instruction. Please read all manual instructions carefully before operating. VEVOR reserves the right to interpret the user manual. The appearance of the product shall be subject to the product you received. Please forgive us that we won't inform you of any technology or software updates on our product.
PRODUCT INTRODUCTION
 | Warning-To reduce the risk of injury, user must read in manual carefully. |
 | CORRECT DISPOSALThis product is subject to the provision of European Di 2012/19/EC. The symbol showing a wheelie bin crossed through indicates that the product requires separate refu collection in the European Union. This applies to the p and all accessories marked with this symbol. Products r as such may not be discarded with normal domestic w must be taken to a collection point for recycling electric electronic devices. |
Warning Tips:

- During the installation process, it is best to wear gloves to prevent sharp corners on the panel from scratching the palm of your hand.
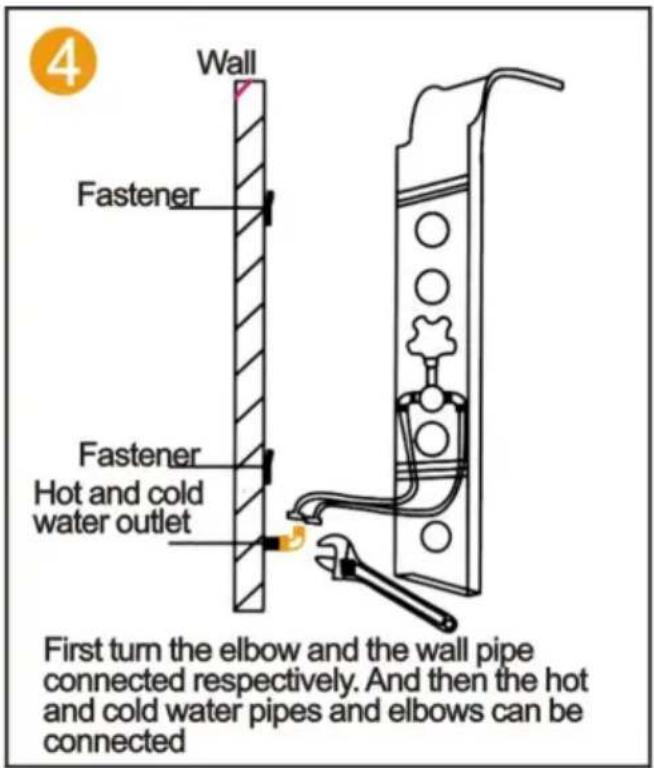
- When installing the shower, ensure that all joints are tightened to avoid water leakage.
- Ensure that the red and blue water inlet pipes inside the panel are in a folded state to avoid affecting water pressure.
- When the shower is not in use, please close the switch valve of the shower.
SAVE THESE INSTRUCTIONS
FCC Information
CAUTION: Changes or modifications not expressly approved by the party responsible for compliance could void the user's authority to operate the equipment!
This device complies with Part 15 of the FCC Rules. Operation is subject to the following two conditions:
1) This product may cause harmful interference. 2) This product must accept any interference received, including interference that may cause undesired operation.
WARNING: Changes or modifications to this product not expressly approved by the party responsible for compliance could void the user's authority to operate the product.
Note: This product has been tested and found to comply with the limits for a Class B digital device pursuant to Part 15 of the FCC Rules. These limits are designed to provide reasonable protection against harmful interference in a residential installation.
This product generates, uses and can radiate radio frequency energy, and if installed and used in accordance with the instructions, may cause harmful interference to radio communications. However, there is no guarantee that interference will not occur in a particular installation. If this product does cause harmful interference to radio or television reception, which can be determined by turning the product off and on, the user is encouraged to try to correct the interference by one or more of the following measures.
- Reorient or relocate the receiving antenna.
- Increase the distance between the product and the receiver.
- Connect the product to an outlet on a circuit different from that to which the receiver is connected.
- Consult the dealer or an experienced radio/TV technician for assistance.
INSTALLATION INSTRUCTIONS
| Model | 8015FL | 6002FL | 8039FL | 8009FL | 8004FL | 7009FL |
| Mounting Type | Wall Mount | Wall Mount | Wall Mount | Wall Mount | Wall Mount | Wall Mount |
| Connection Thread | G1/2" | G1/2" | G1/2" | G1/2" | G1/2" | G1/2" |
| Functions | Four Modes | Five Modes | Six Modes | Six Modes | Six Modes | Five Modes |
| Tub Spout | × | √ | √ | √ | √ | √ |
| Temperature Display | × | × | √ | √ | √ | √ |
| LED Lamp | × | √ | √ | √ | √ | × |
| Power | × | Dry Cell (DC3V) | Dry Cell (DC3V) | Hydro Power (AC6V) | Hydro Power (AC6V) | Dry Cell (DC3V) |
| Hand Shower | 3-Setting | 1-Setting | 3-Setting | 3-Setting | 3-Setting | 3-Setting |
| Finish | Fingerprint-free Brushed Nickel shower system | |||||
| Material | Stainless Steel, Brass, PVC, ABS | |||||
PARTS LIST
| MODEL | 8015FL8039FL8009FL | 6002FL | 8004FL | 7009FL | |
| M6 nut | 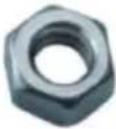 | 4pcs | 4pcs | 0pcs | 0pcs |
| M6 * 10 screw | 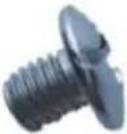 | 4pcs | 4pcs | 0pcs | 0pcs |
| Hose Clamp | 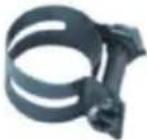 | 2pcs | 2pcs | 2pcs | 0pcs |
| M4 * 10 screw | 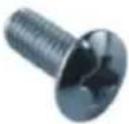 | 0pcs | 0pcs | 2pcs | 0pcs |
| Brass shower arm | 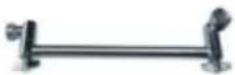 | 0pcs | 0pcs | 0pcs | 1pcs |
| Single function handheld shower | 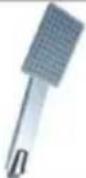 | 0pcs | 1pcs | 0pcs | 0pcs |
| Panel cotton bag |  | 1pcs | 1pcs | 1pcs | 1pcs |
| Top spray cotton bag |  | 1pcs | 1pcs | 1pcs | 0pcs |
| Three function handheld shower | 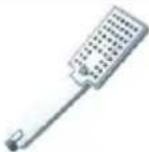 | 1pcs | 0pcs | 1pcs | 1pcs |
| 1.5 meter hand spray hose | 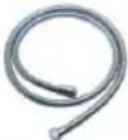 | 1pcs | 1pcs | 1pcs | 1pcs |
| Hand spray seat | 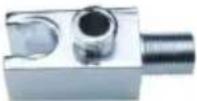 | 1pcs | 1pcs | 1pcs | 1pcs |
| 1/2 right angle adapter | 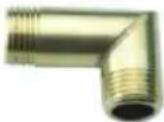 | 2pcs | 2pcs | 2pcs | 2pcs |
| 4-point rubber | 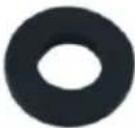 | 2pcs | 2pcs | 2pcs | 2pcs |
| Self tapping screw | 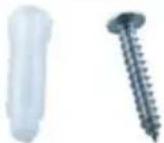 | 4pcs | 4pcs | 4pcs | 4pcs |
| Fastener | 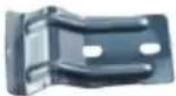 | 2pcs | 2pcs | 2pcs | 2pcs |
| Grommet | 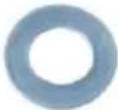 | 1pcs | 1pcs | 1pcs | 1pcs |
| Hexagon nut | 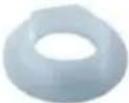 | 1pcs | 1pcs | 1pcs | 1pcs |
ASSEMBLY INSTRUCTIONS
MODEL 8015FL/6002FL/8039FL/8009FL
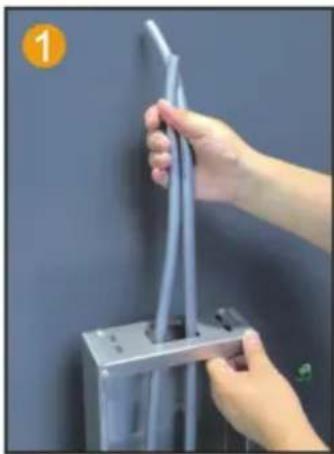
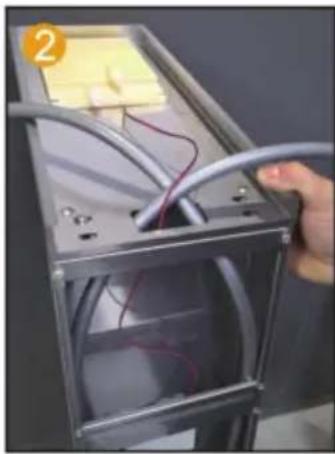
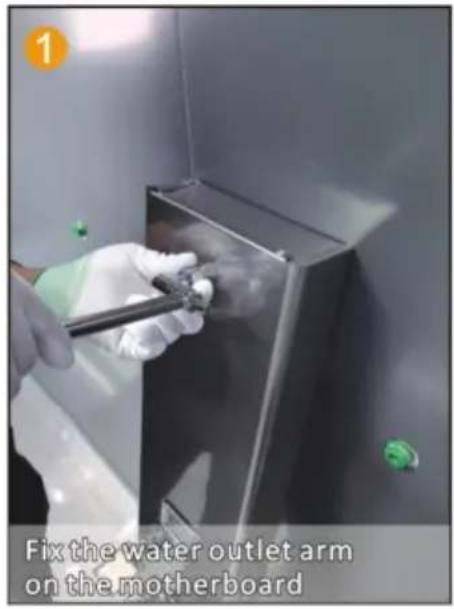
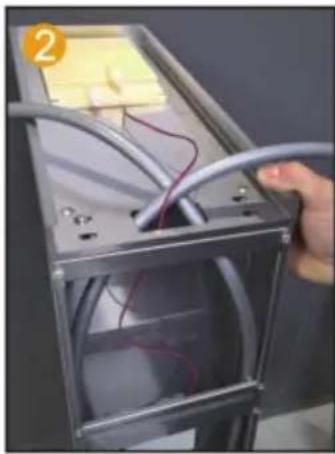
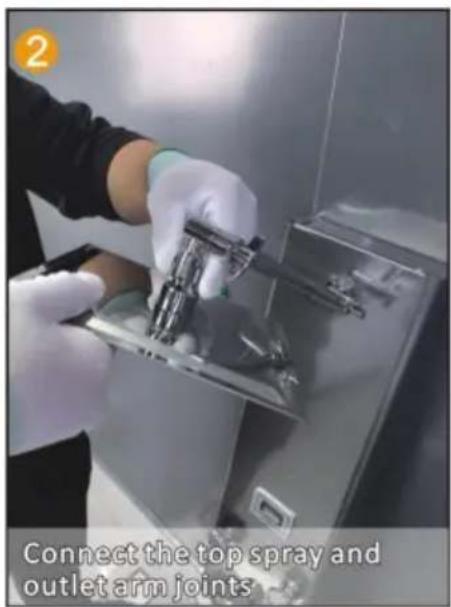
Insert the PVC pipe from the top opening to pierce out.

Route the LED light wire along the hole and insert it into the motherboard.
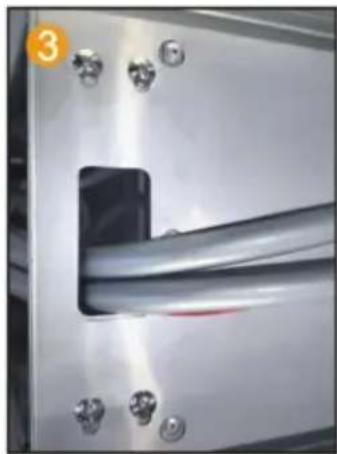
Fix the motherboard and top spray with 4 pairs of M6 screws and nuts.
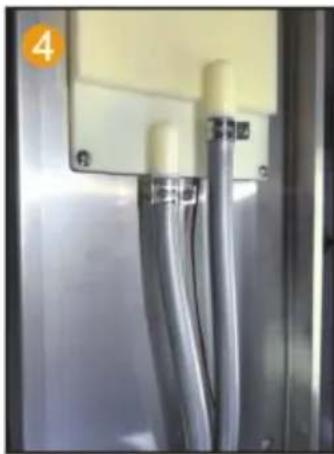
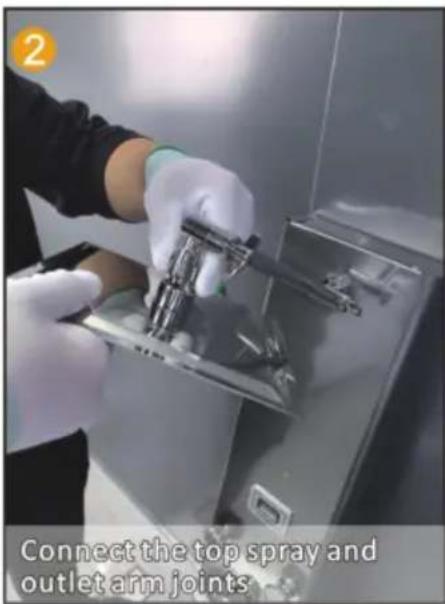
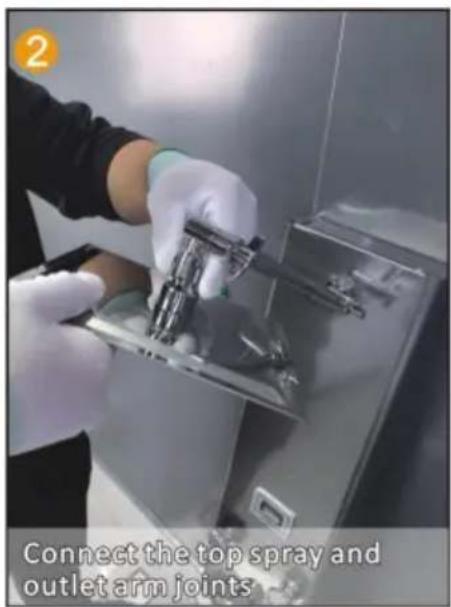
Fix the PVC pipe with a throat clamp on the top spray joint.
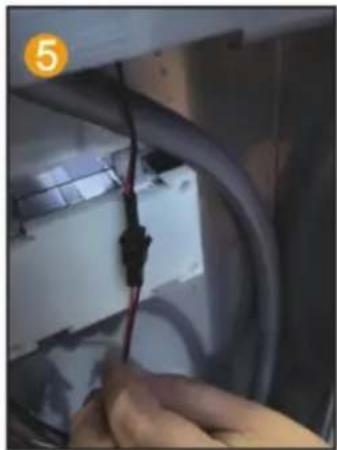
Connect the LED light cable and power supply line.
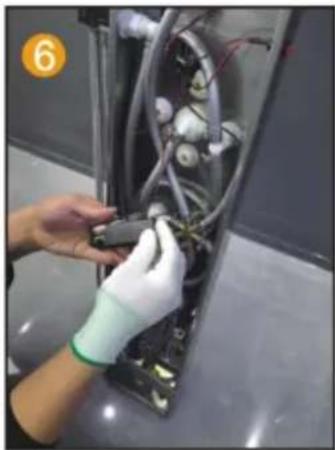
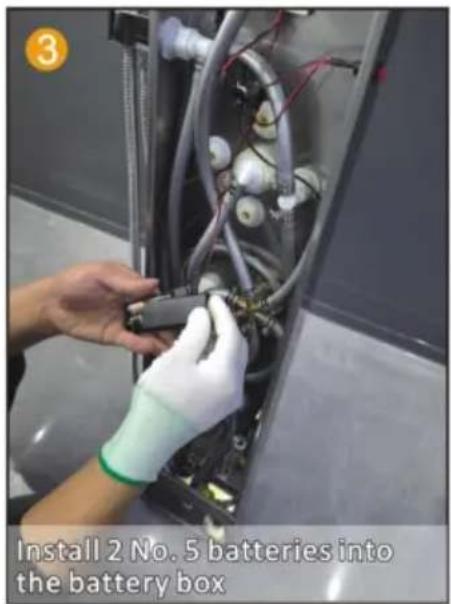
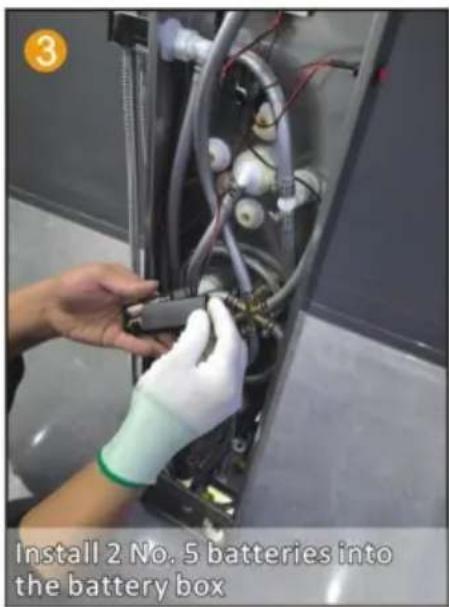
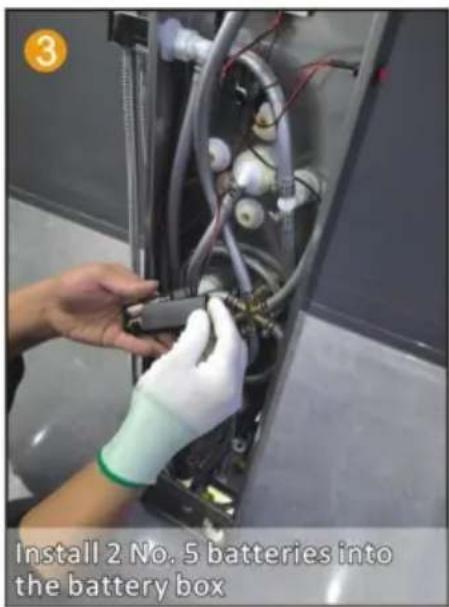
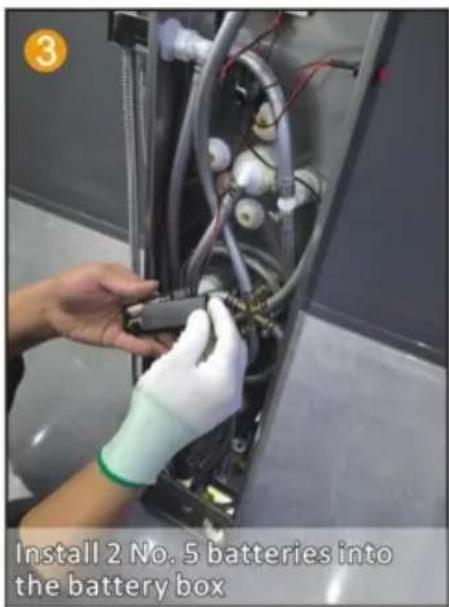
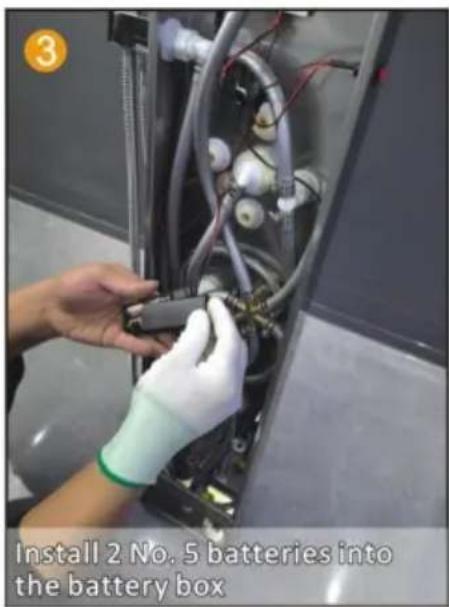
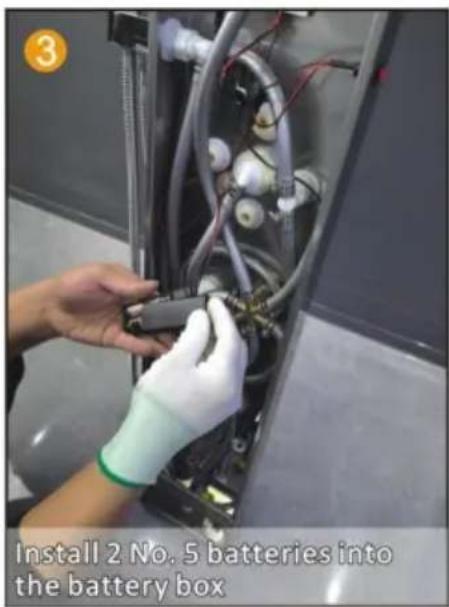
Install 2 No. 5 batteries to charge the pool box.
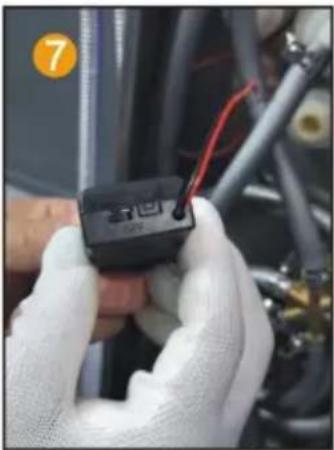
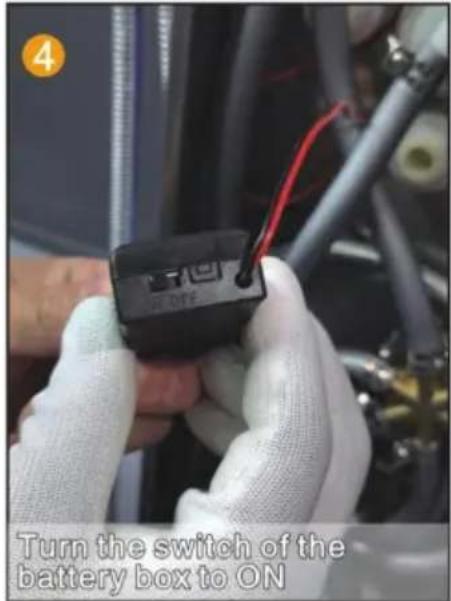
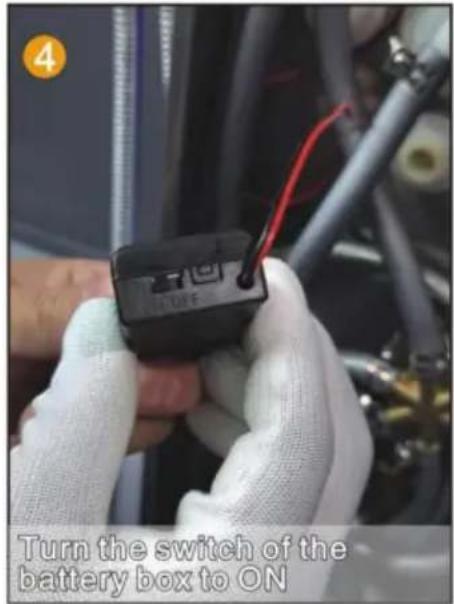
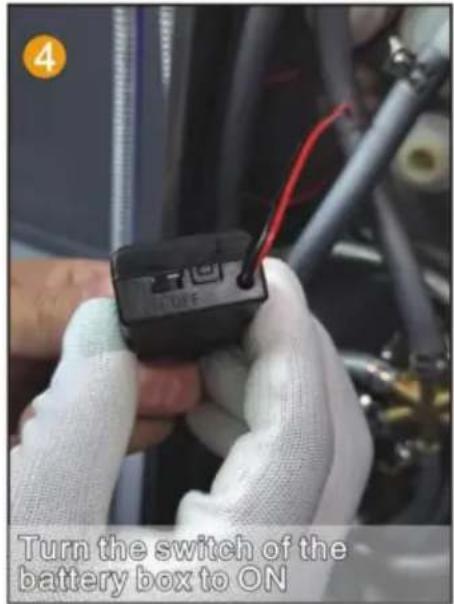
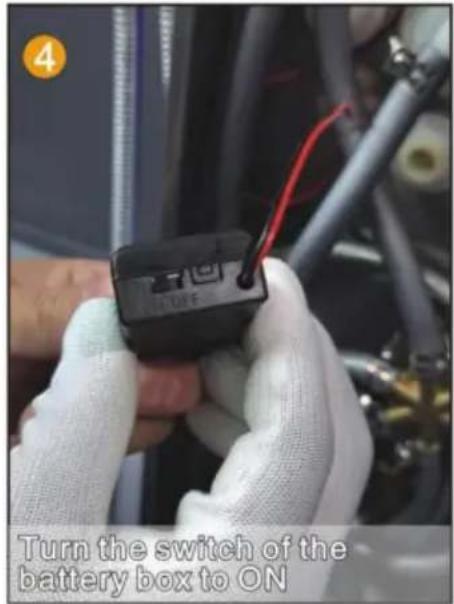
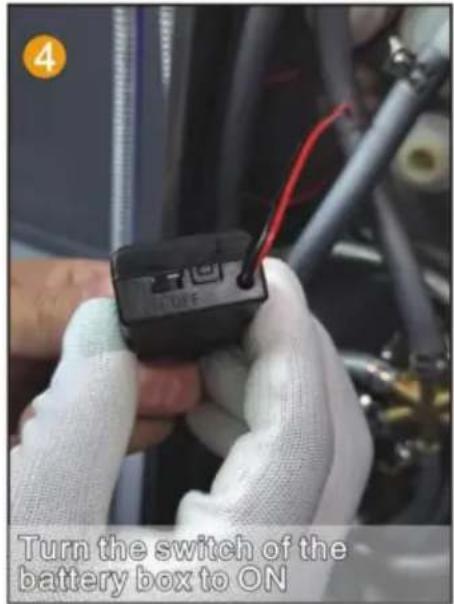
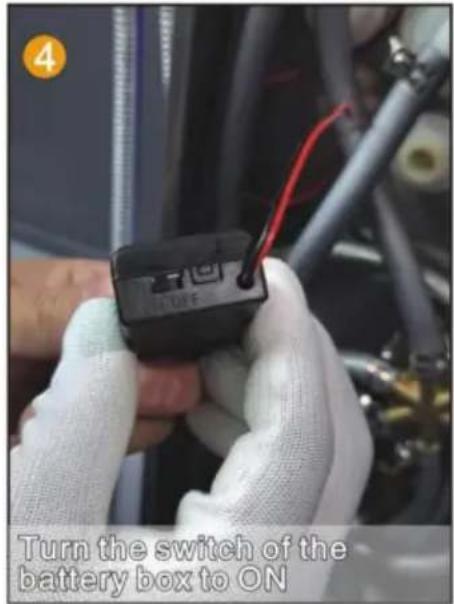
Point the switch of the battery box towards ON.
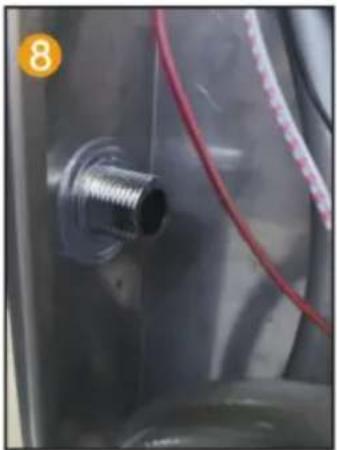
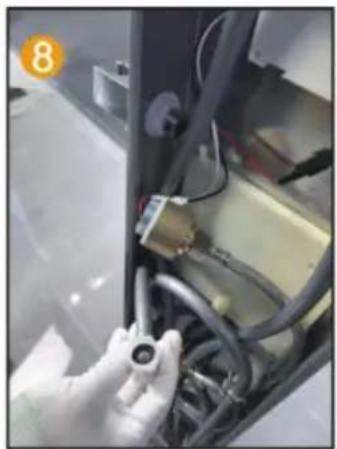
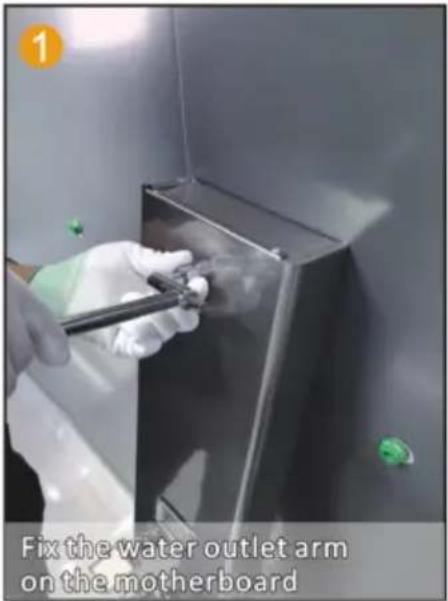
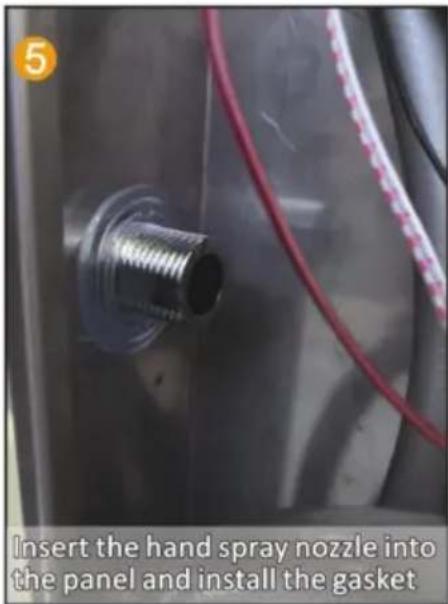
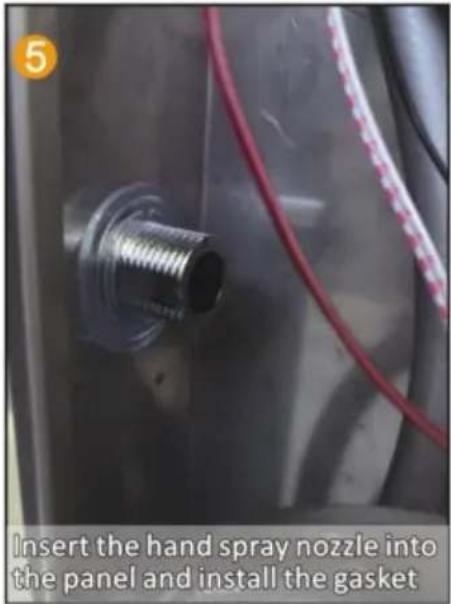
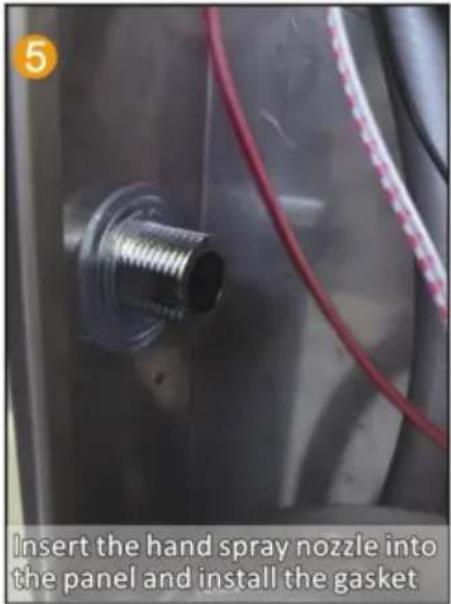
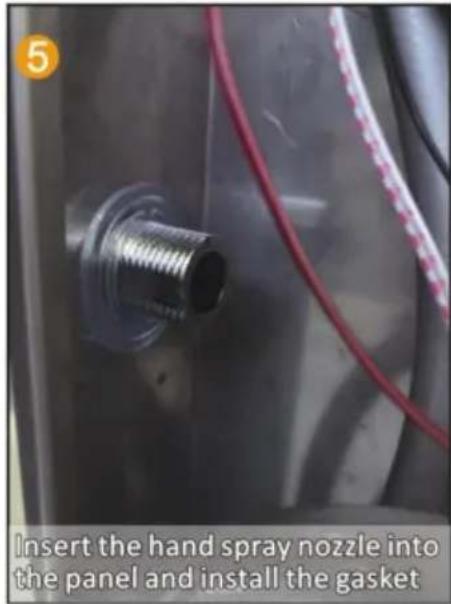
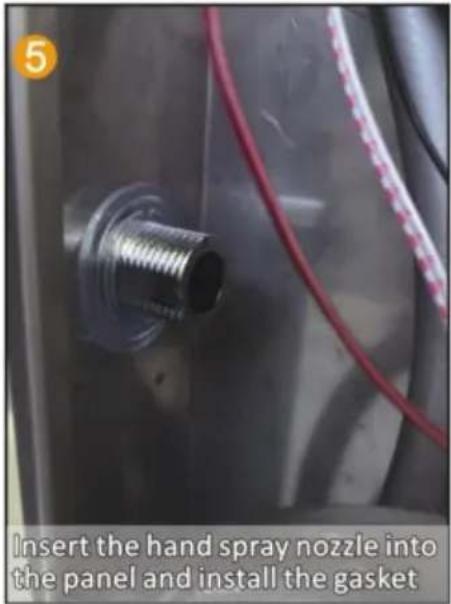
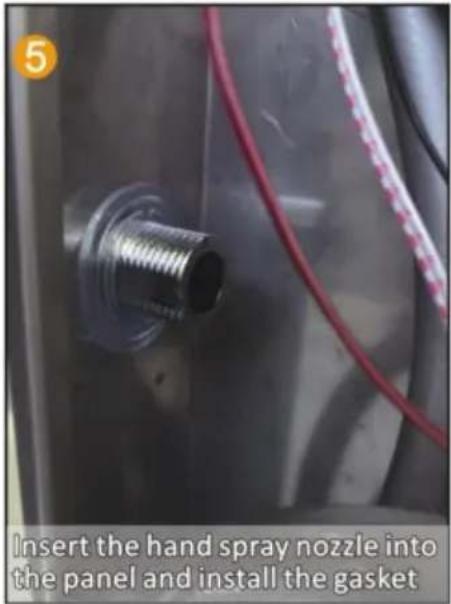
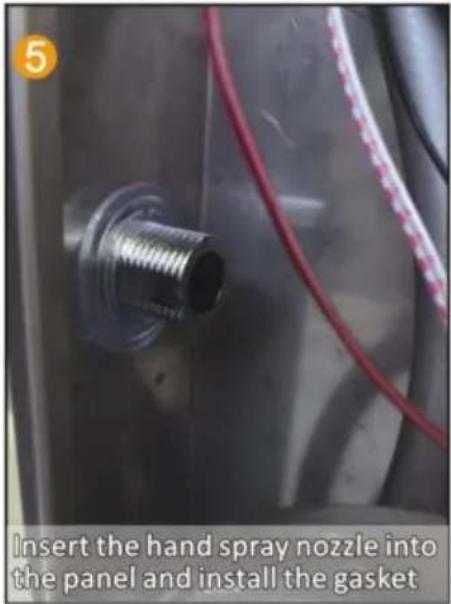
Insert the hand spray nozzle into the panel and install the gasket.
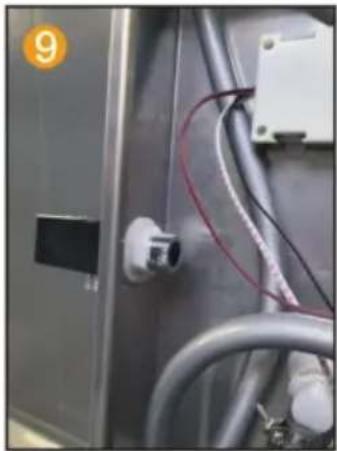
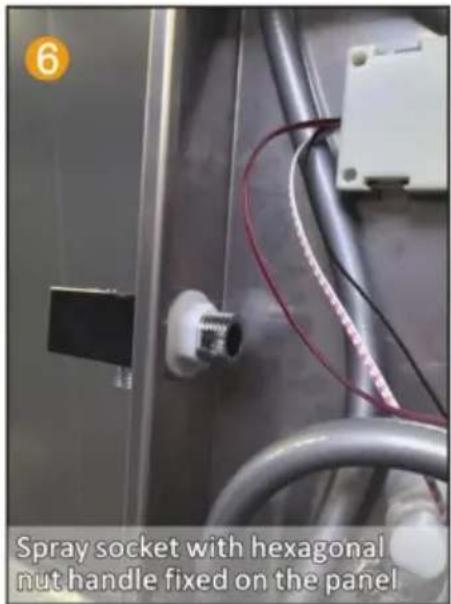
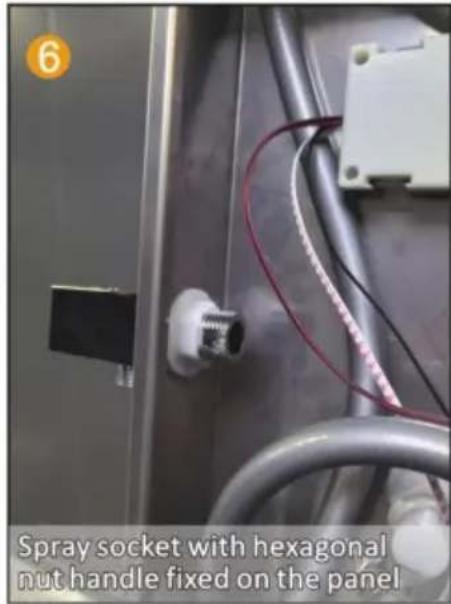
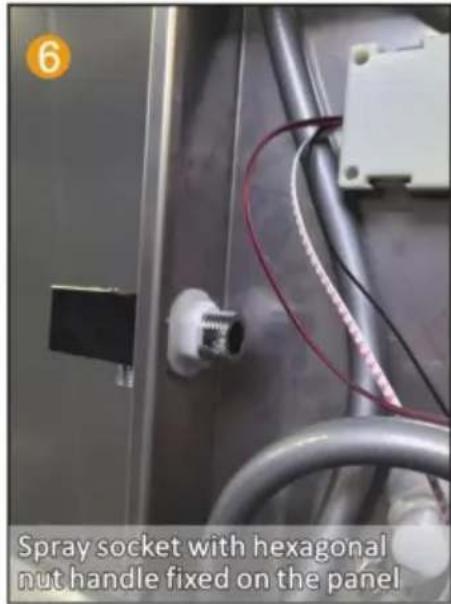
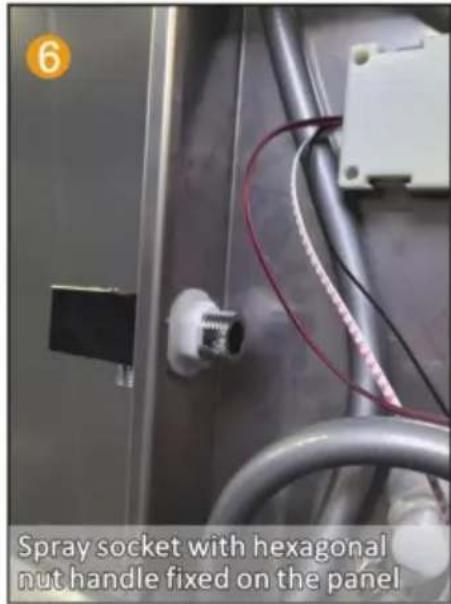
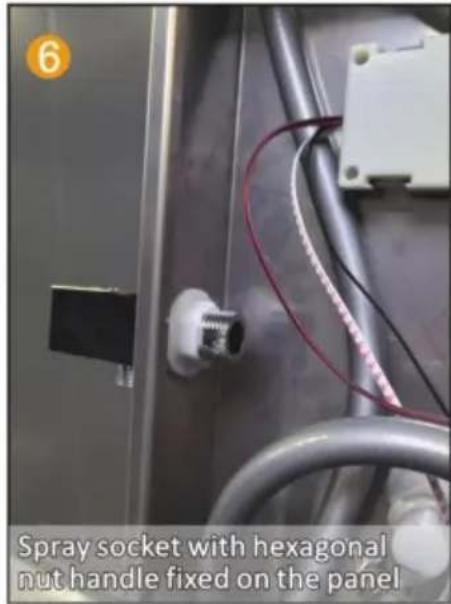
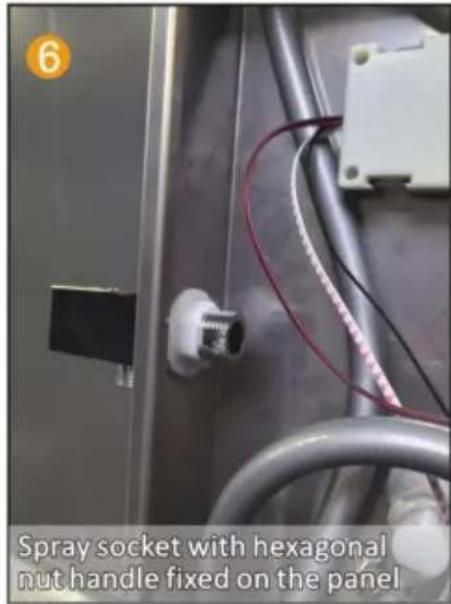
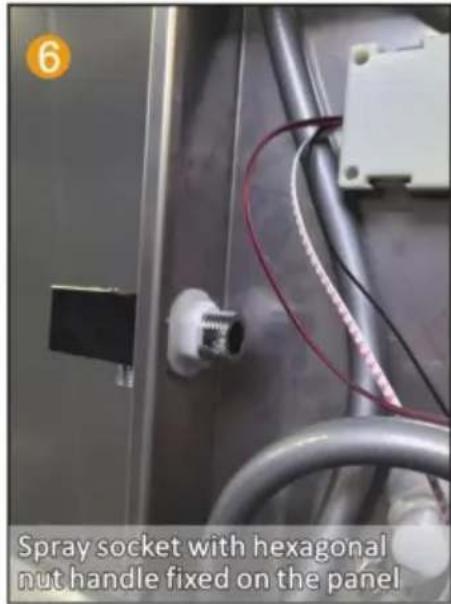
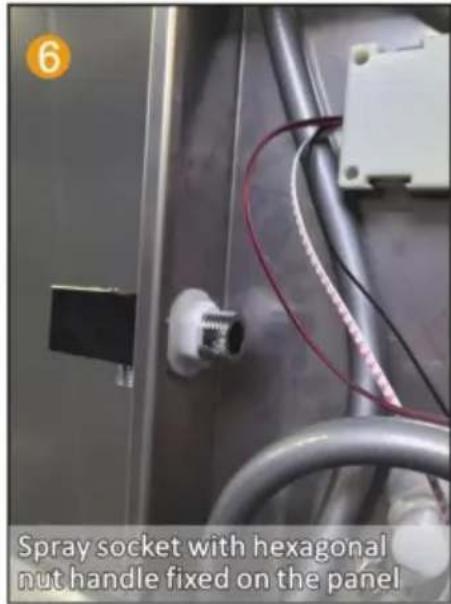
Spray socket with hexagonal nut handle fixed on the panel.
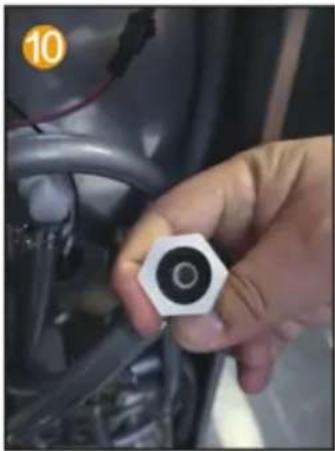
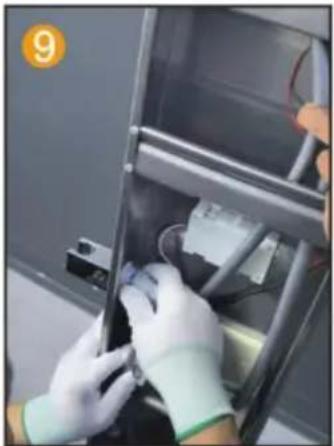
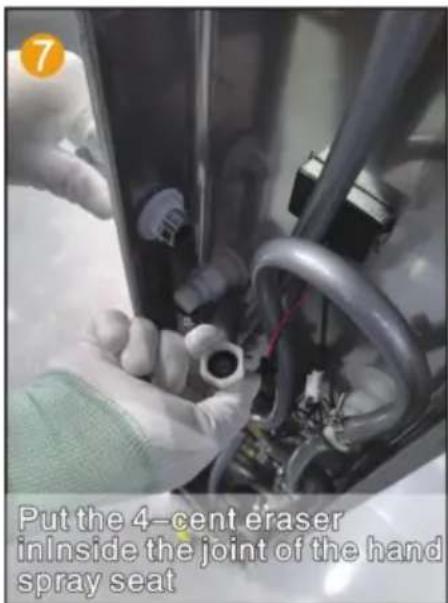
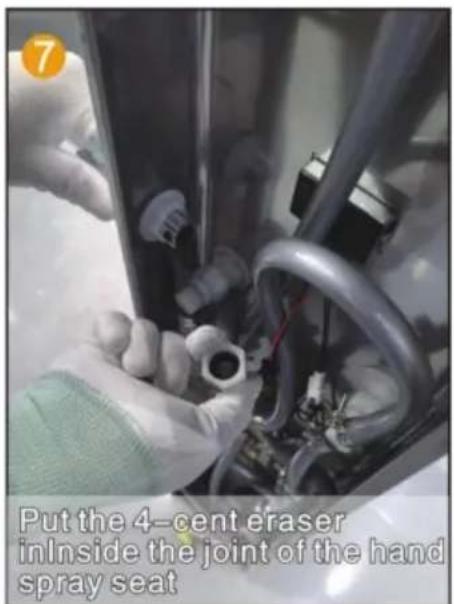
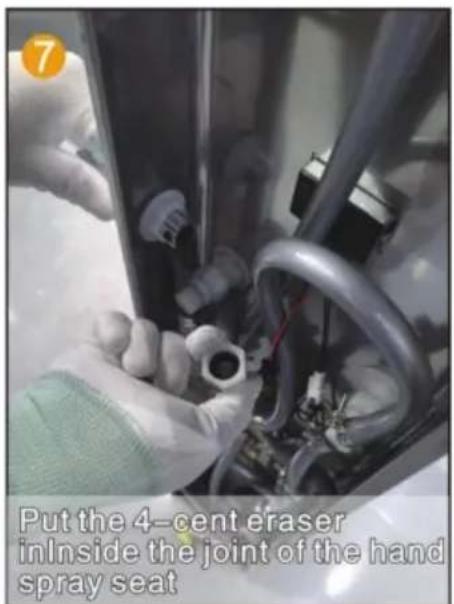
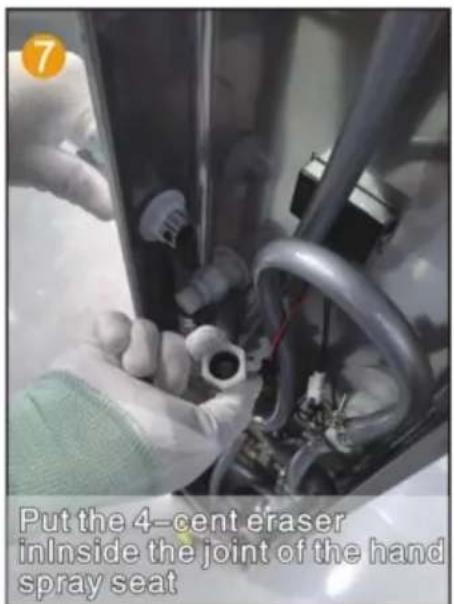
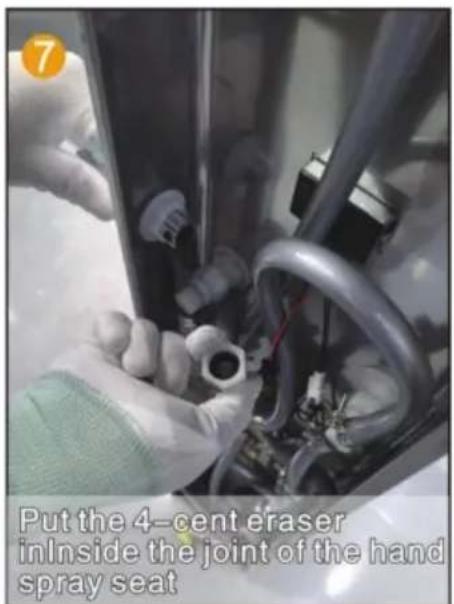
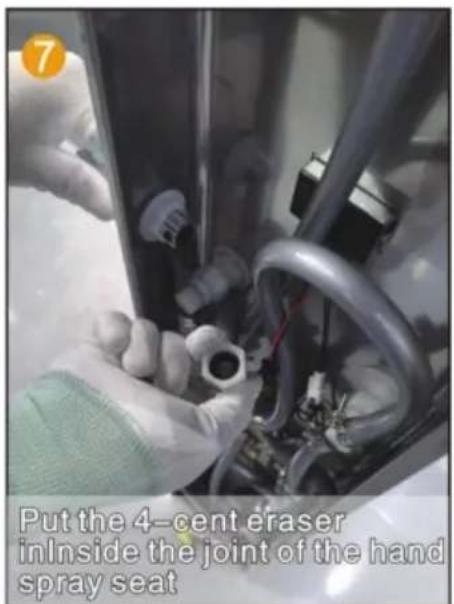
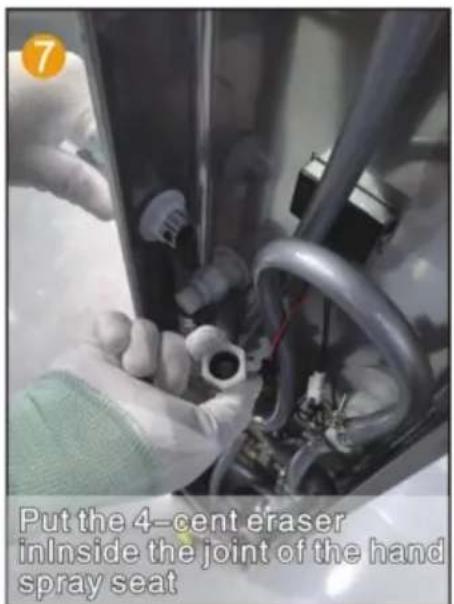
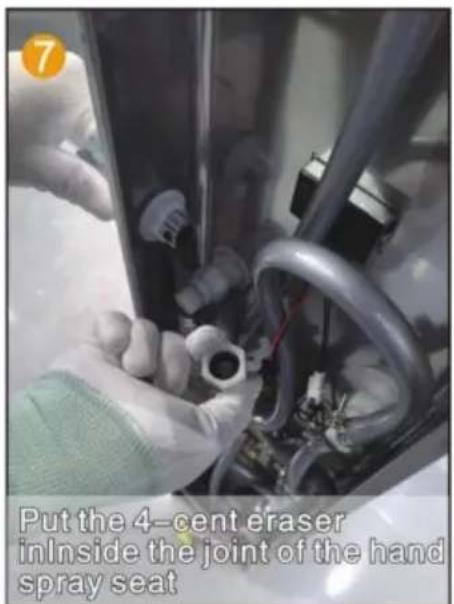
Put the 4-point rubber into the hand spray inside the joint of the seat.
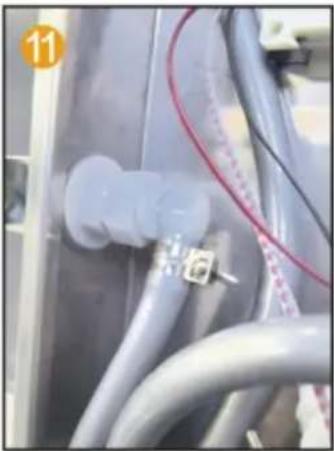
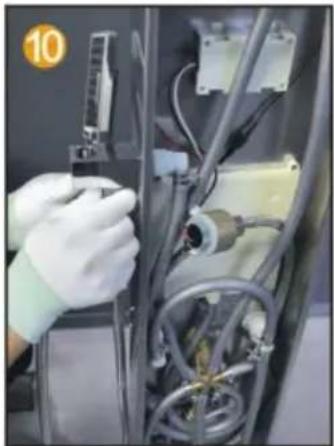
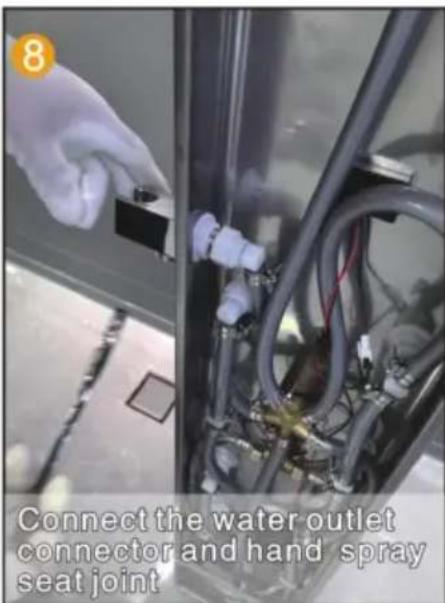
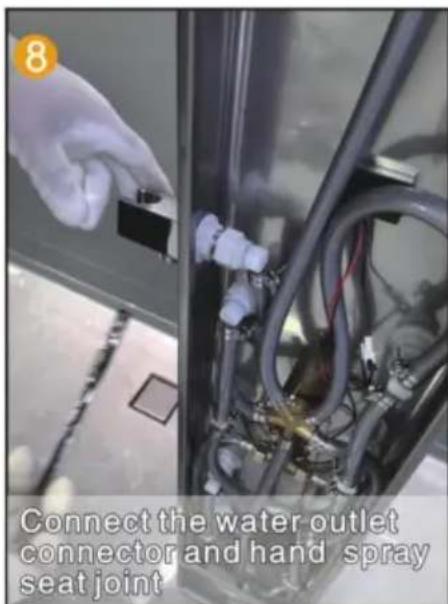
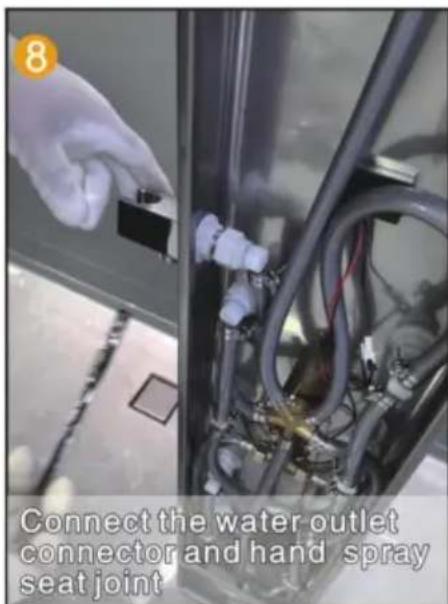
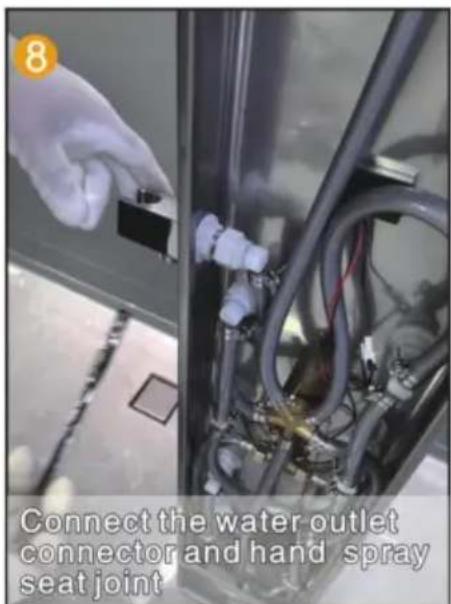
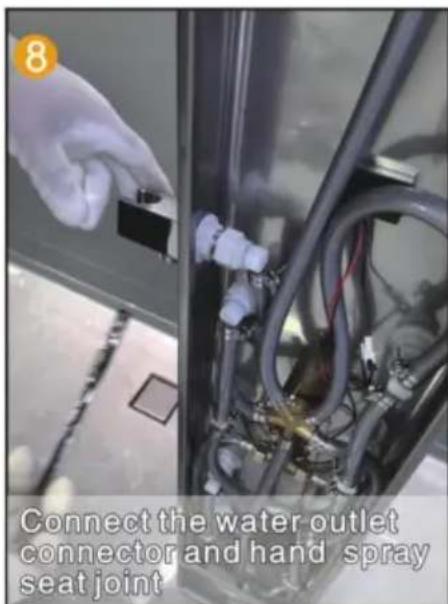
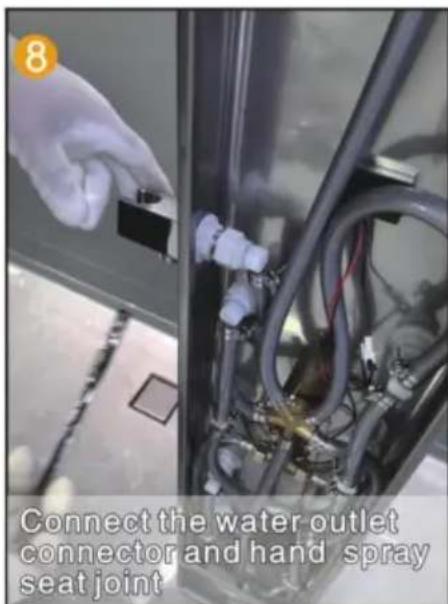
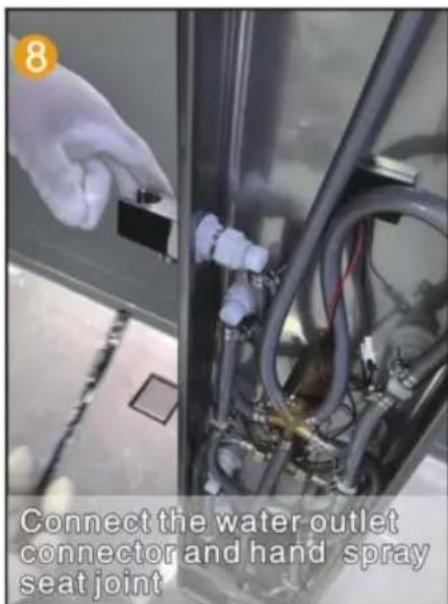
Connect the water outlet connector and hand spray seat joint.
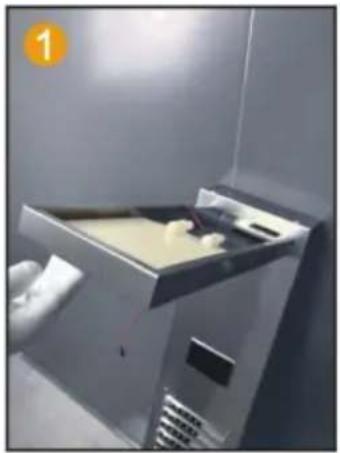
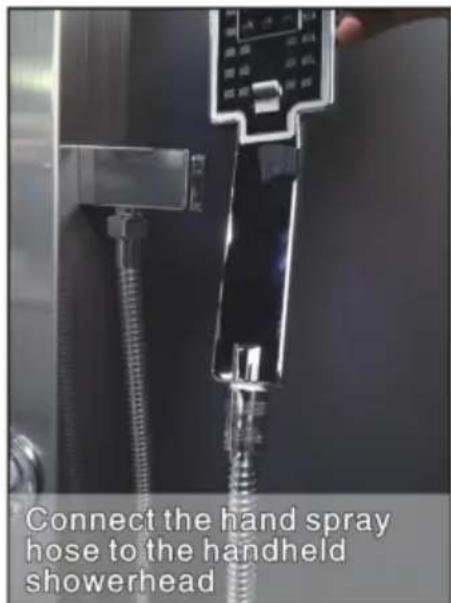
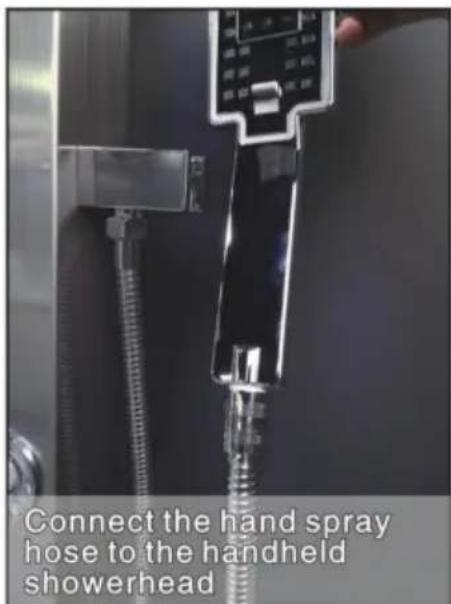
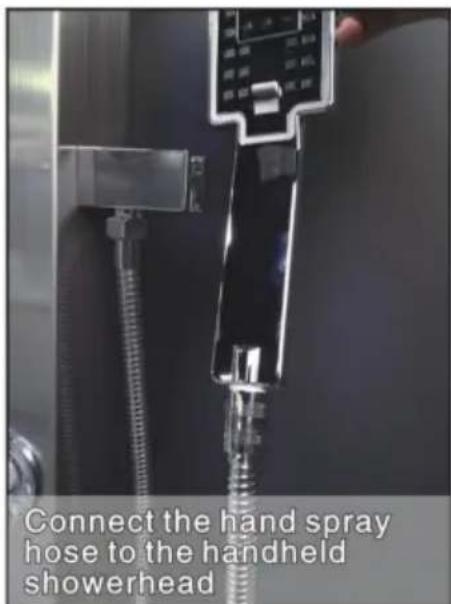
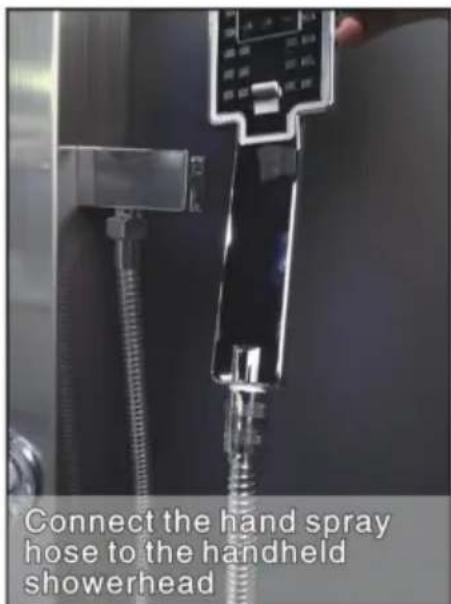
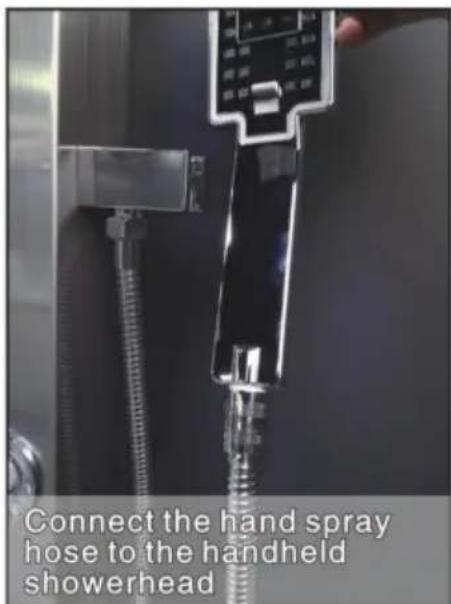
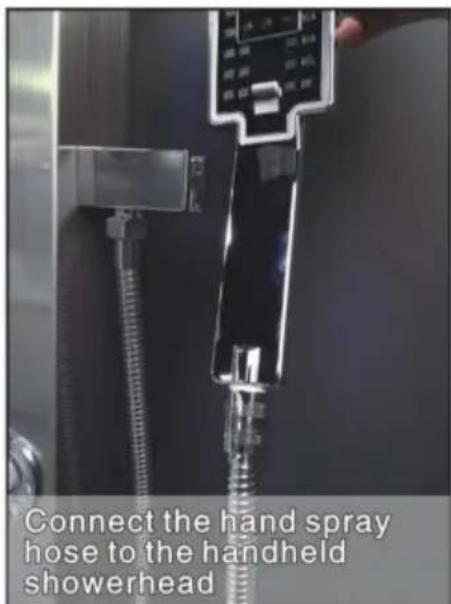
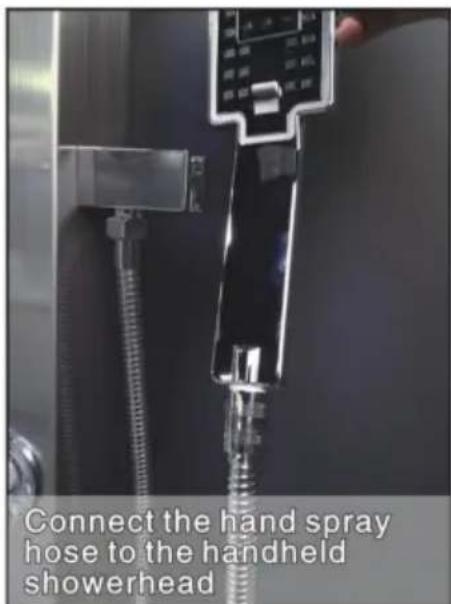
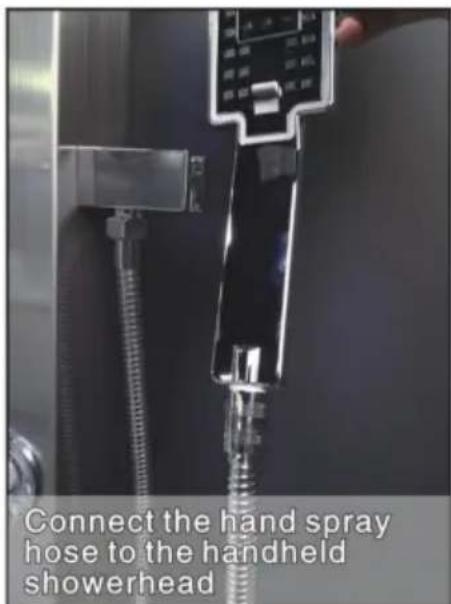
Connect the hand spray hose to the handheld shower head.
MODEL 8004FL
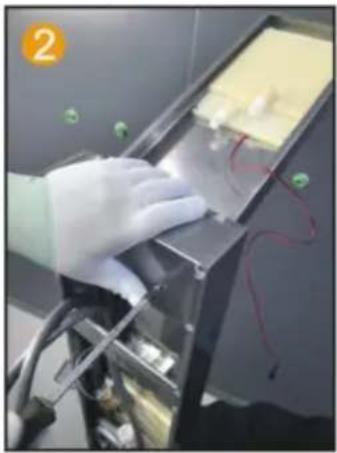
Insert the top spray into the motherboard inside the hole.
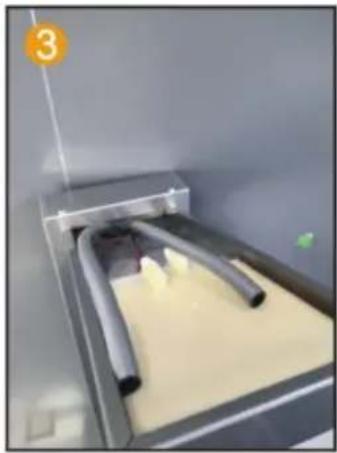
Use 2 M4 screws to secure the main fixed plate and top spray.
Connect PVC pipes and LED light wires, thread them through the hole.
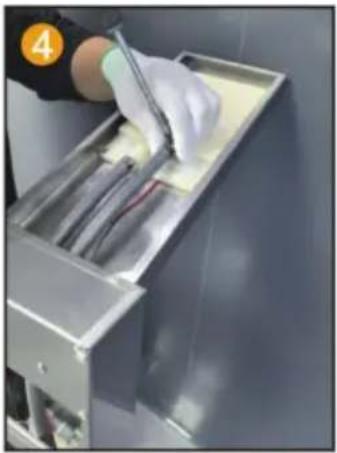
Fix the PVC pipe with a throat clamp on the top spray joint.
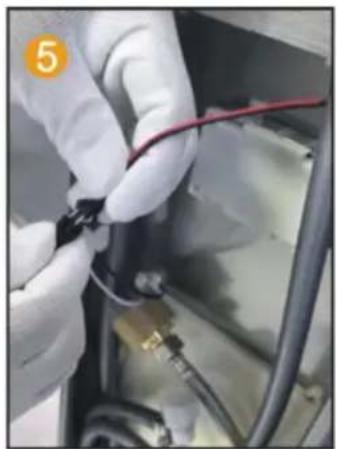
Connect the LED light cable and power supply line.
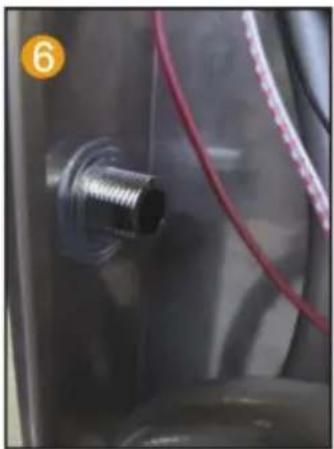
Insert the hand spray nozzle into the panel and install the gasket.
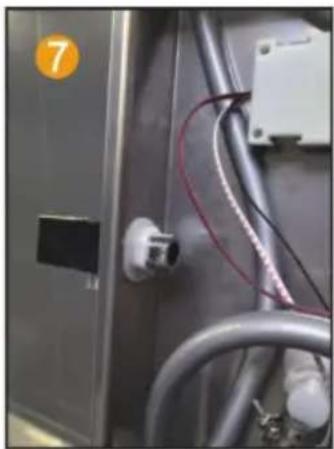
Spray socket with hexagonal nut handle fixed on the panel.
Spray socket with hexagonal nut handle: fix the 4-point rubber on the panel and spray it by hand inside the joint of the seat.
Connect the water outlet connector and hand spray seat joint.
Connect the hand spray hose to the handheld shower head.
MODEL 7009FL
INSTALLATION STEPS (GENERAL)
Installation Notes
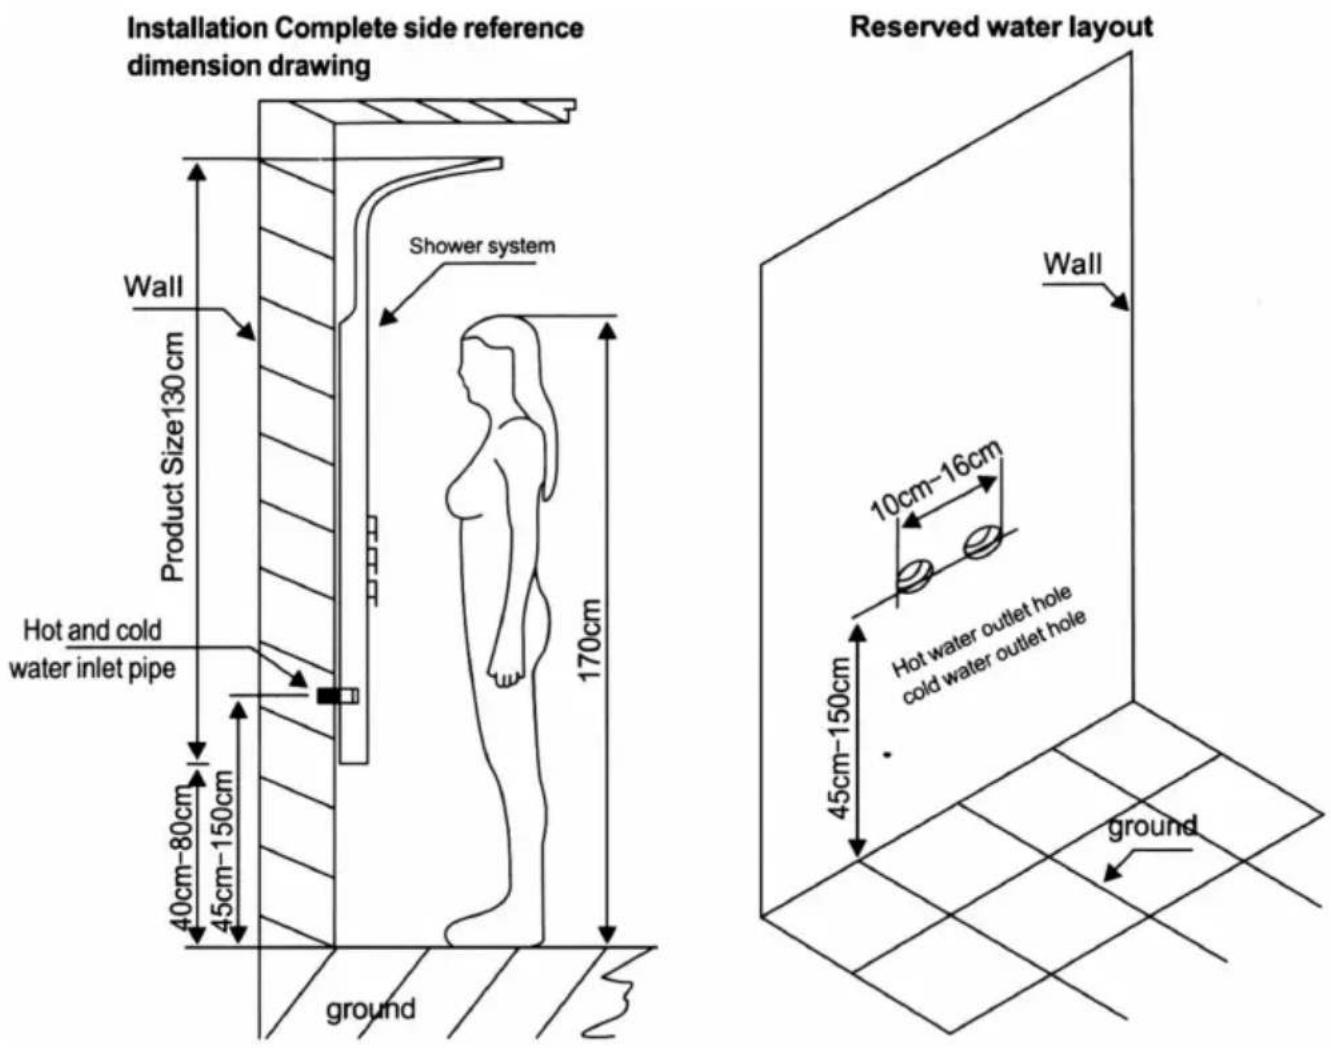
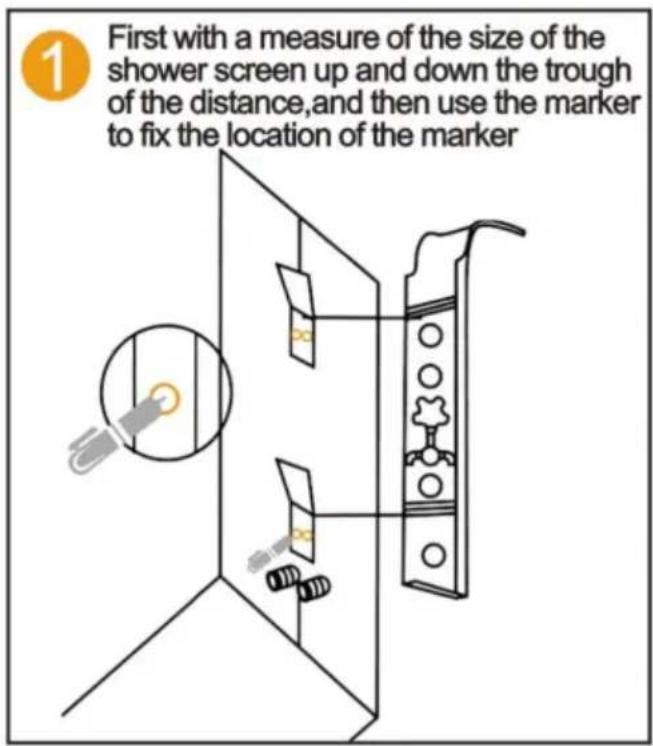
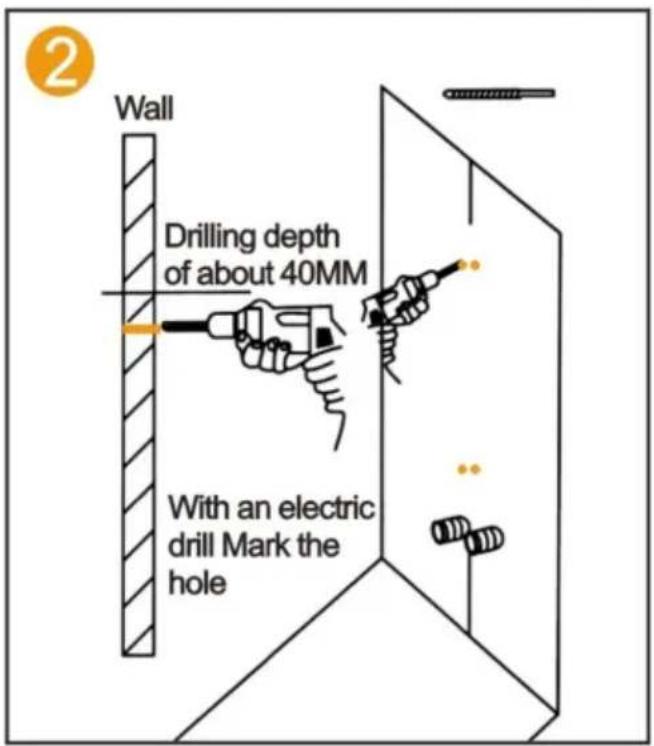
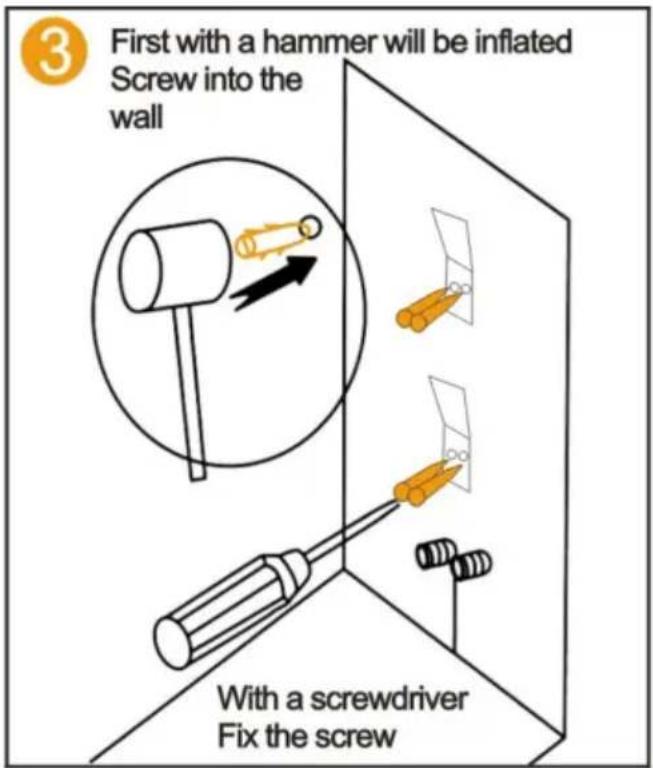
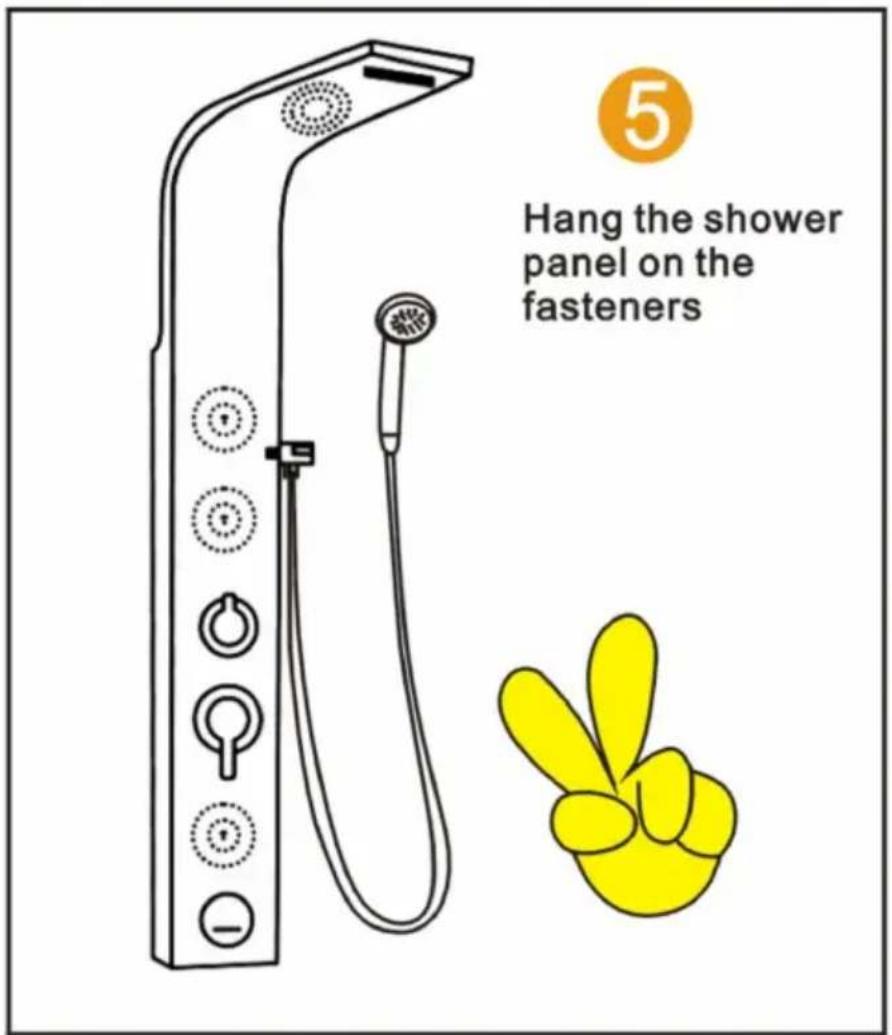
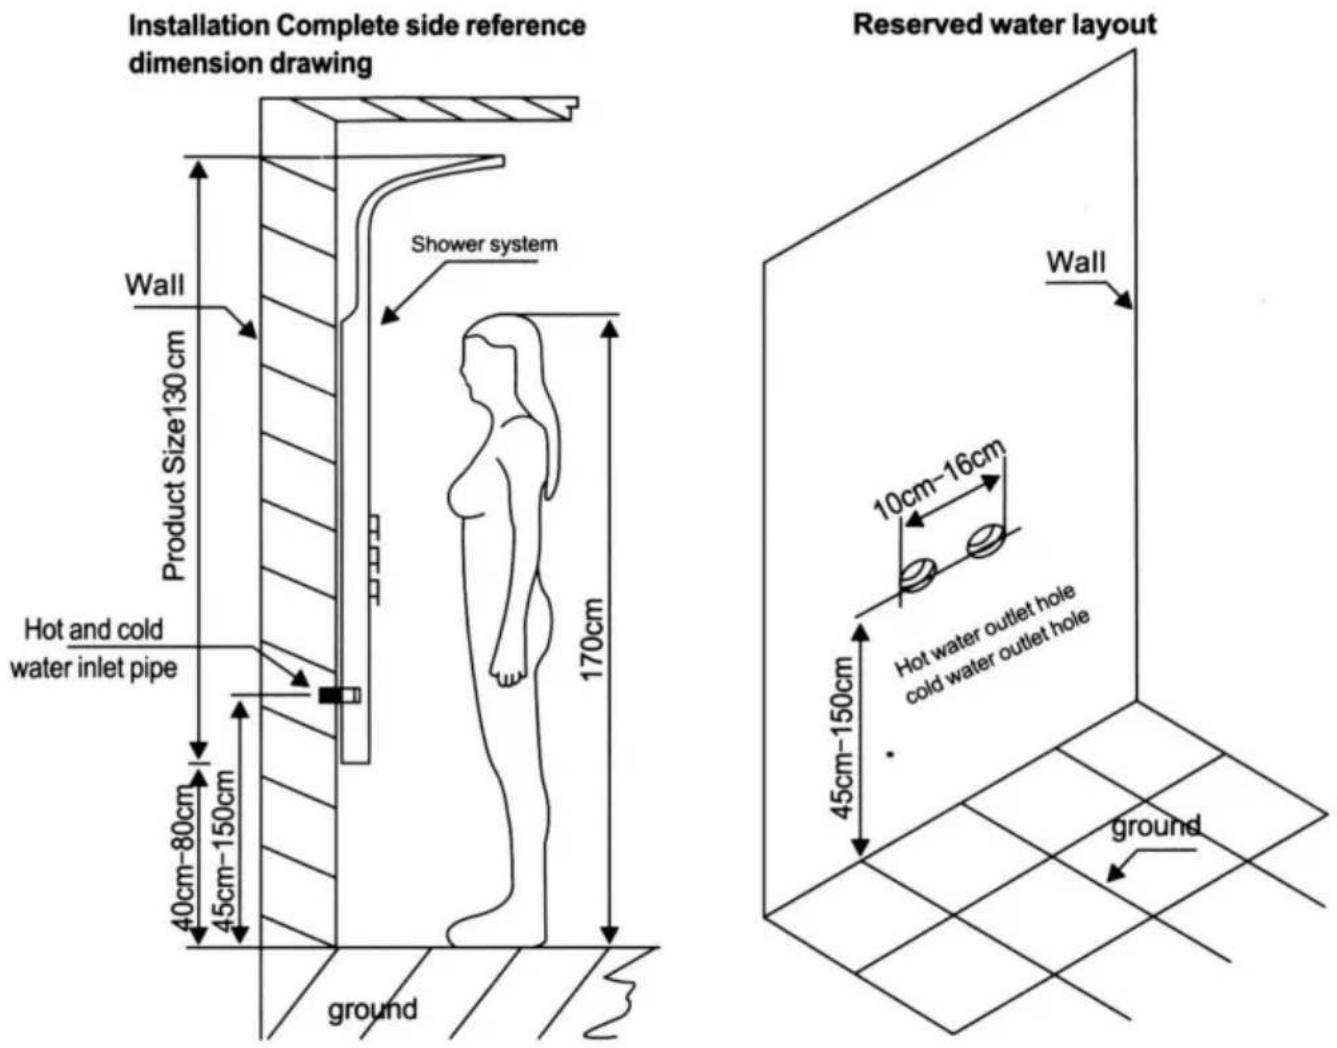
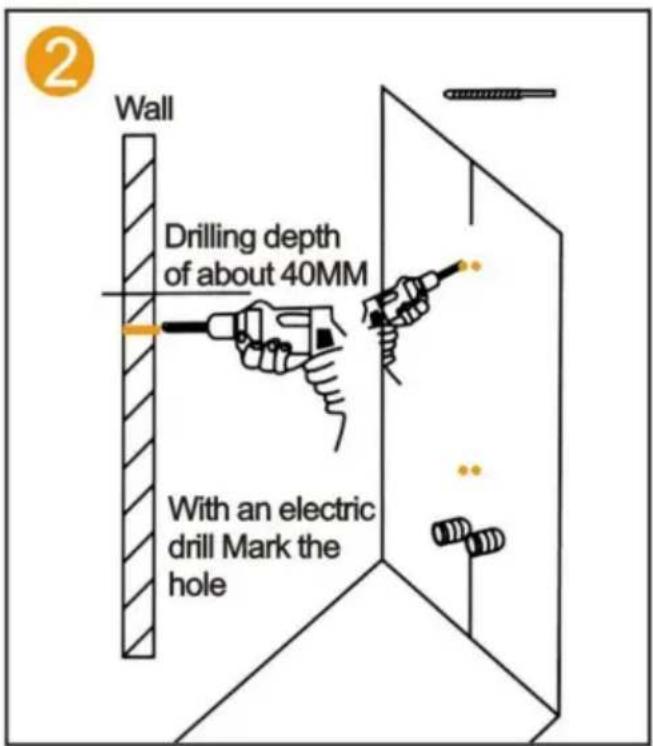
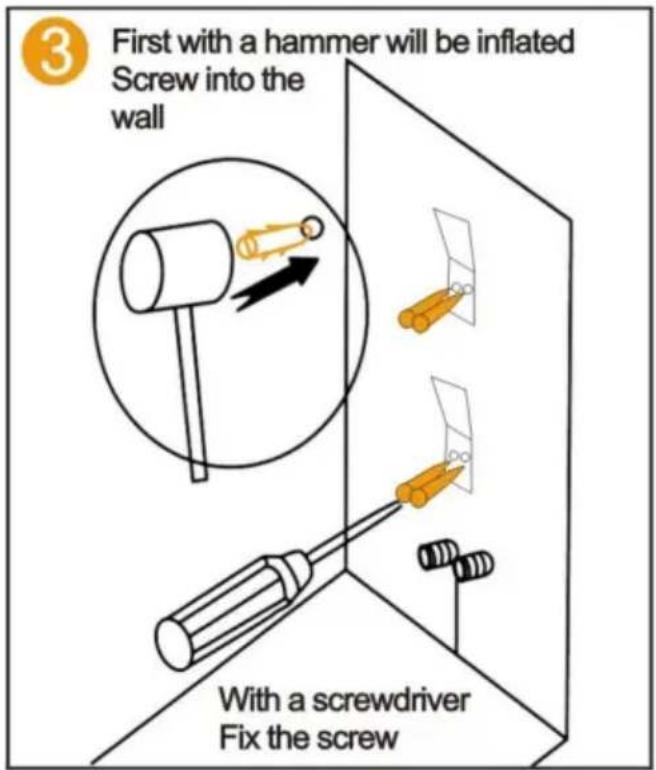
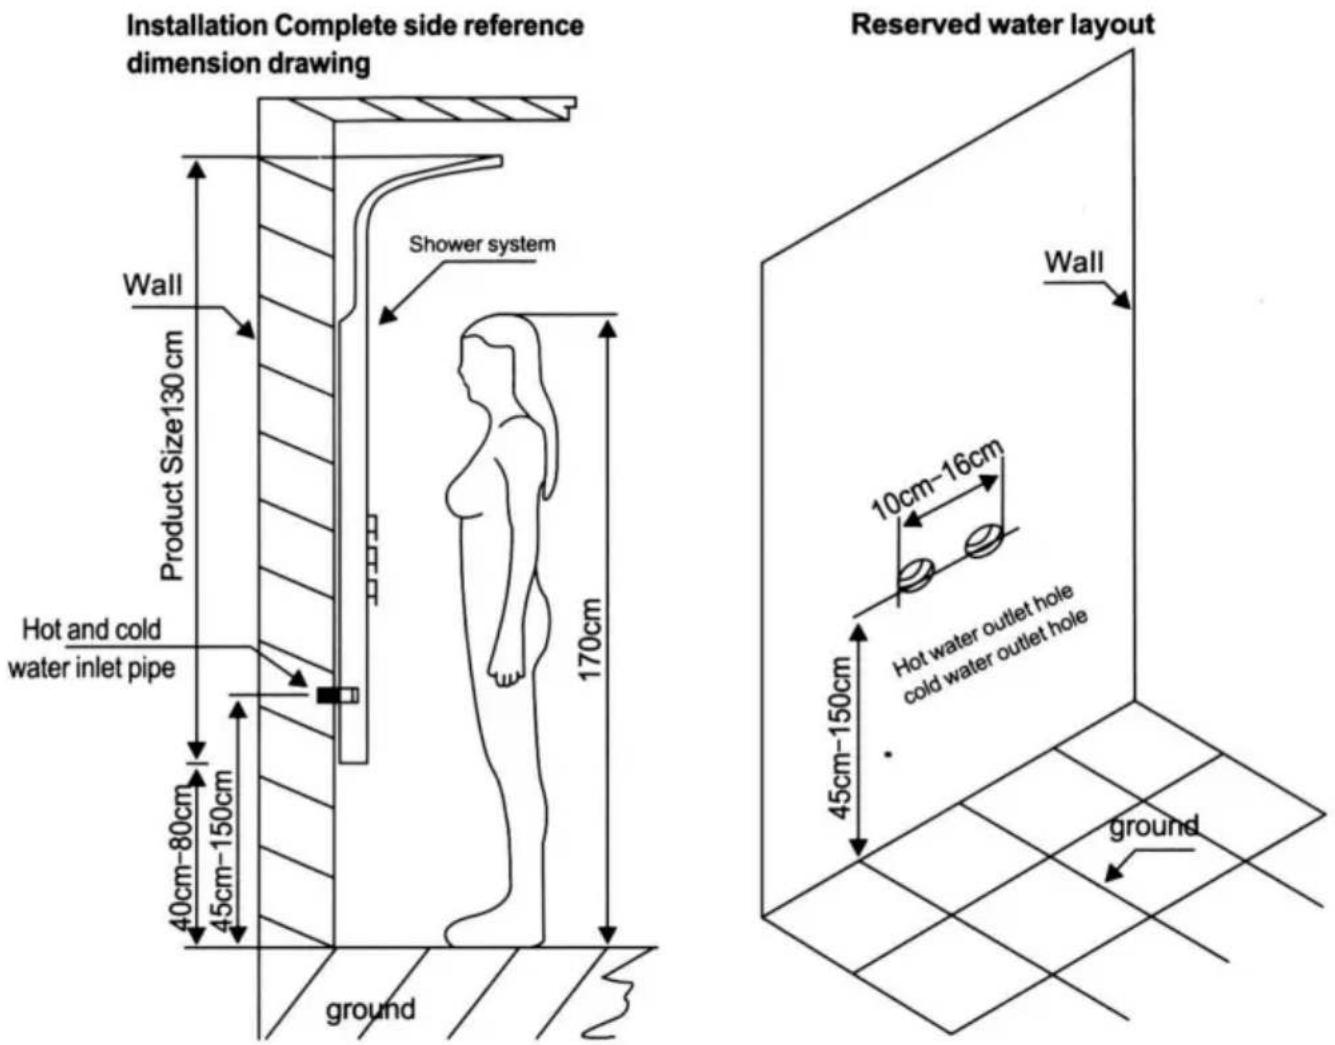
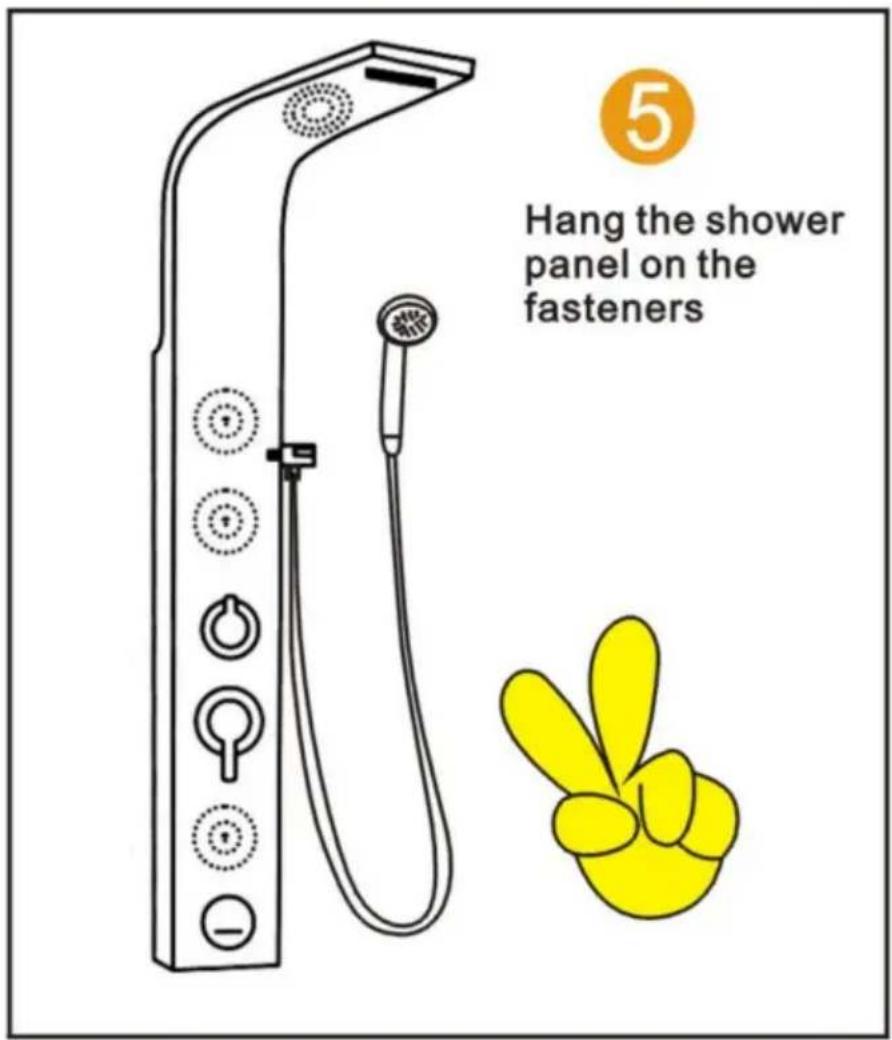
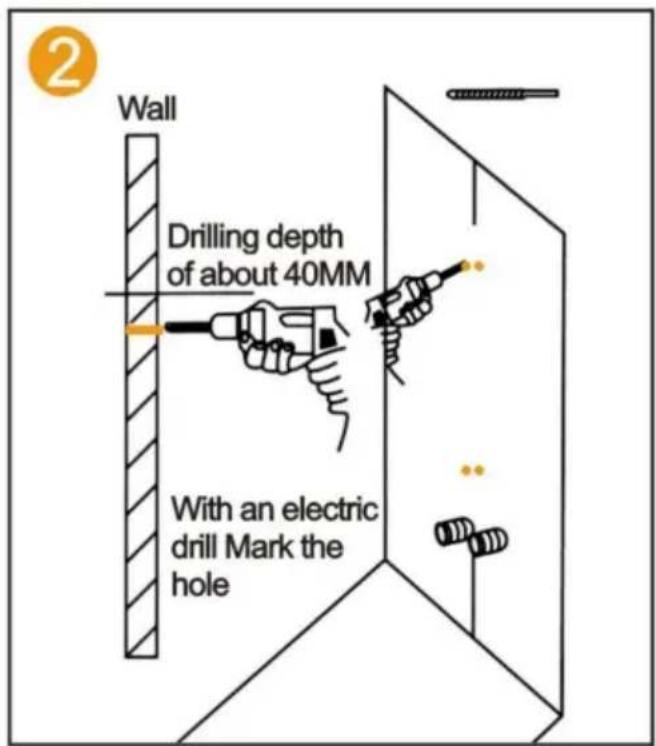
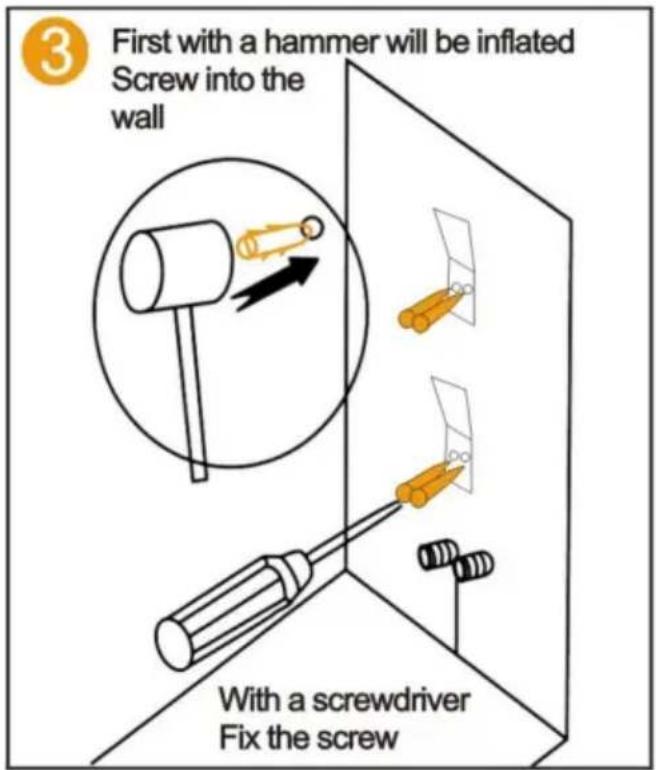
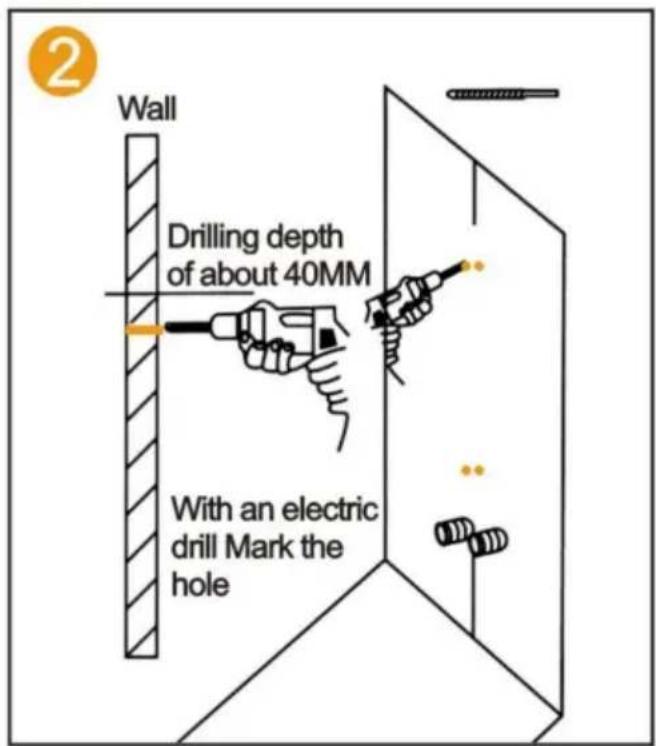
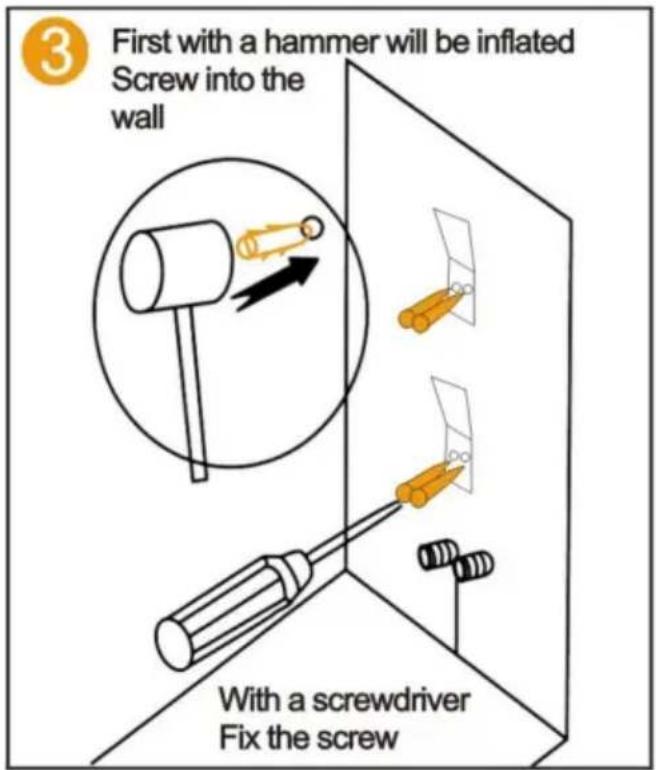
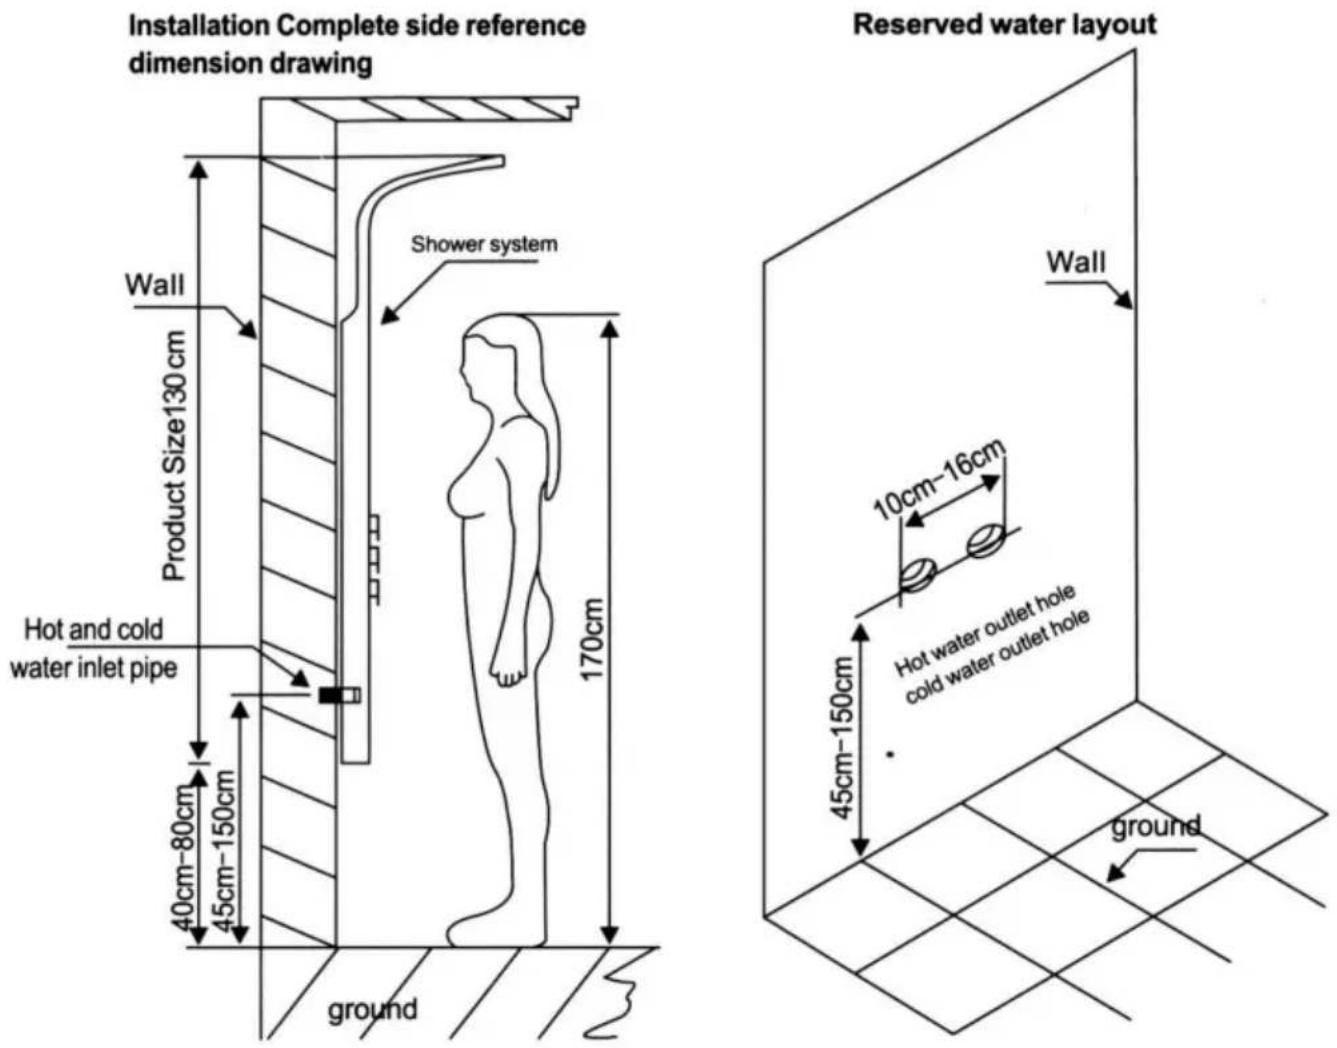
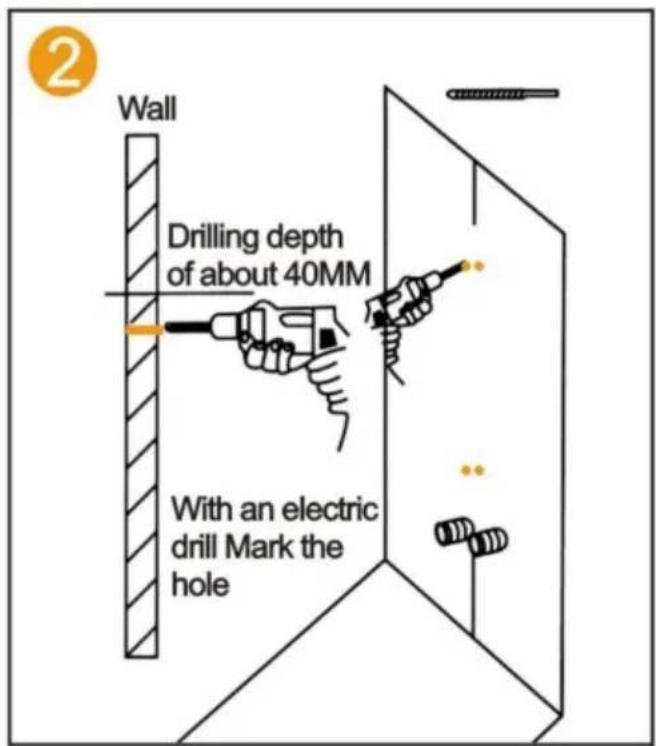
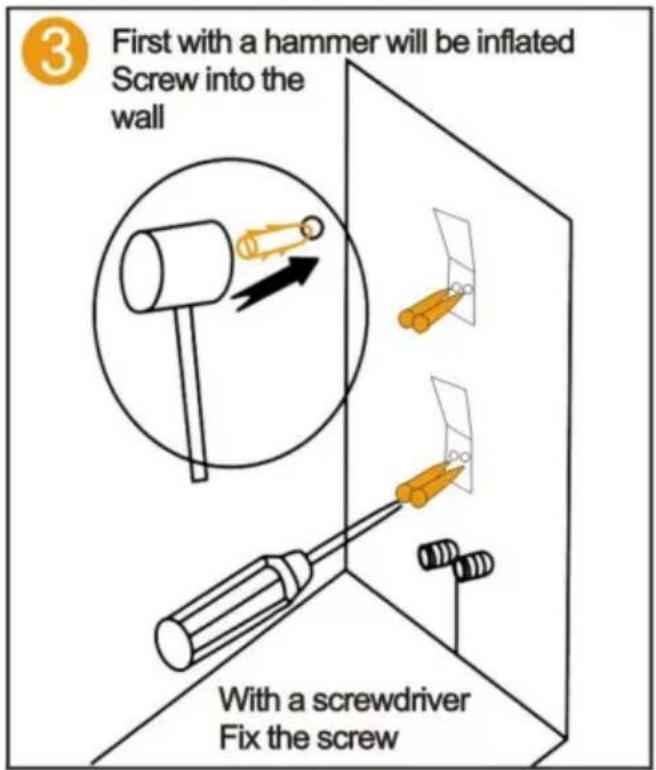
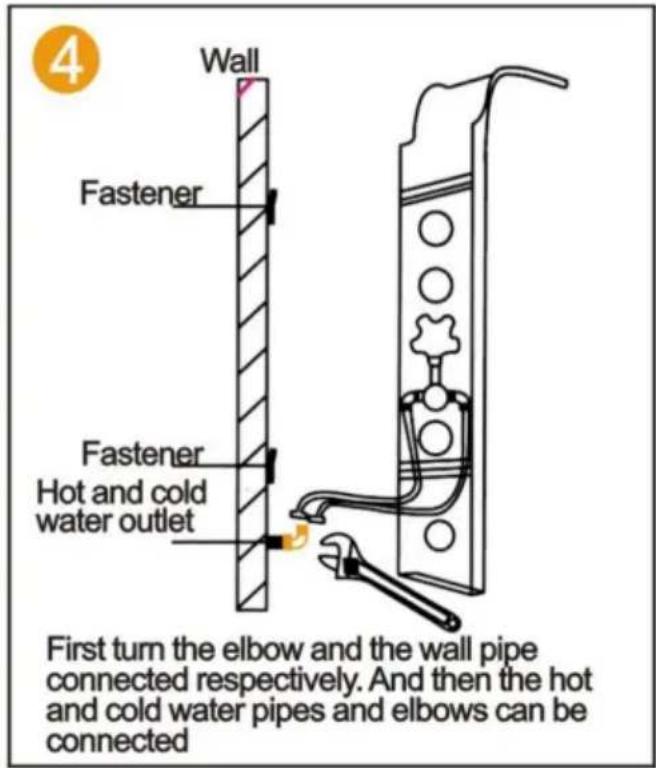
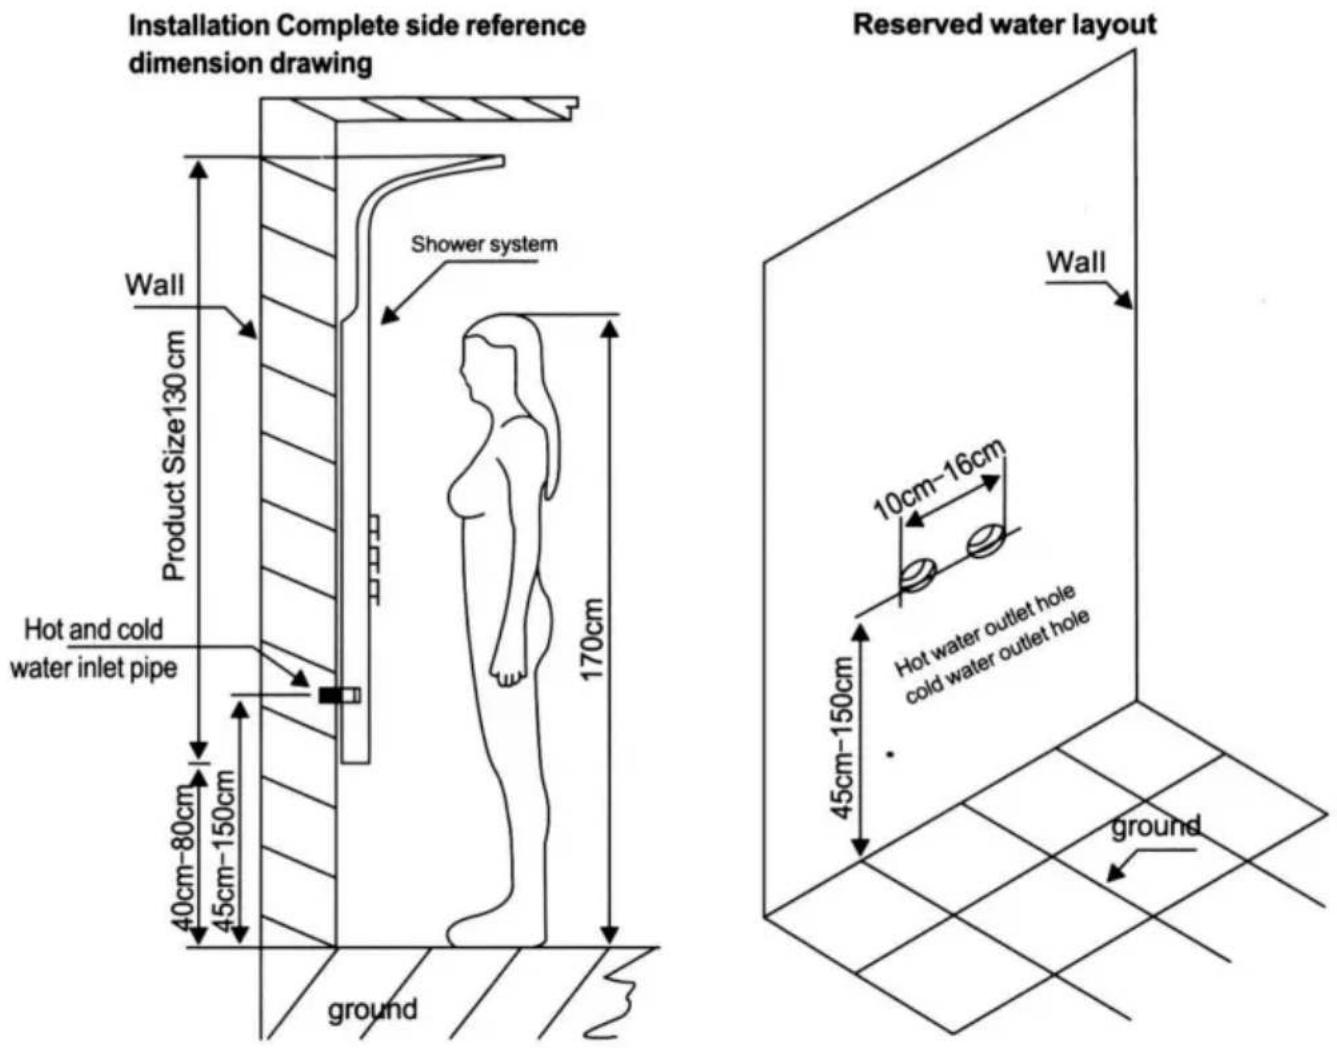
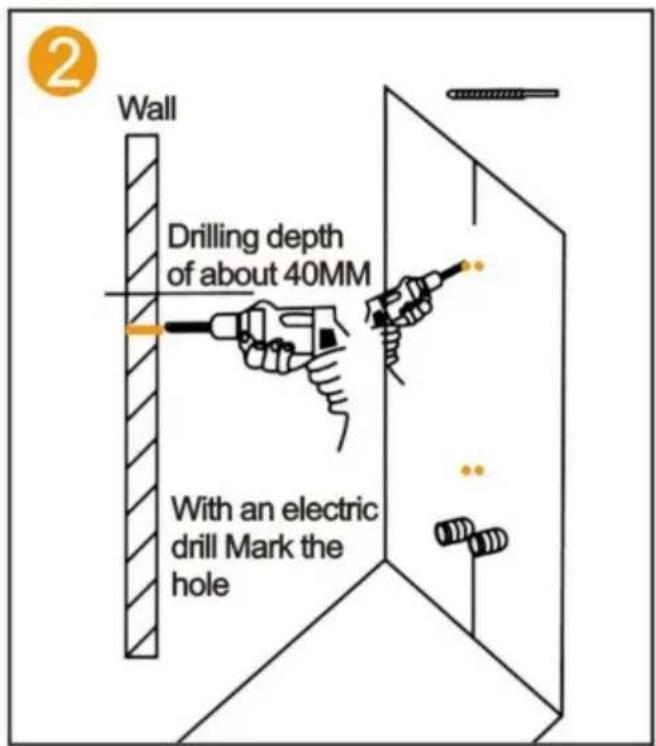
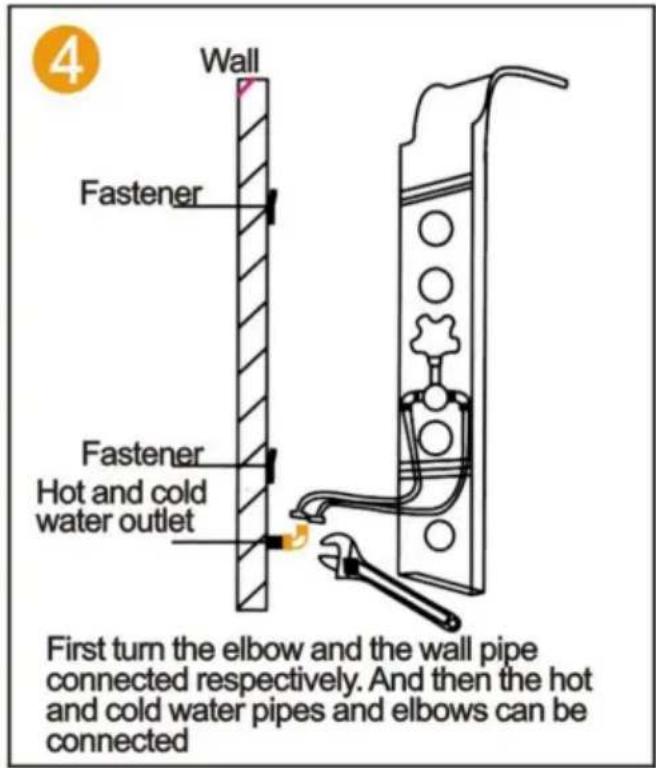
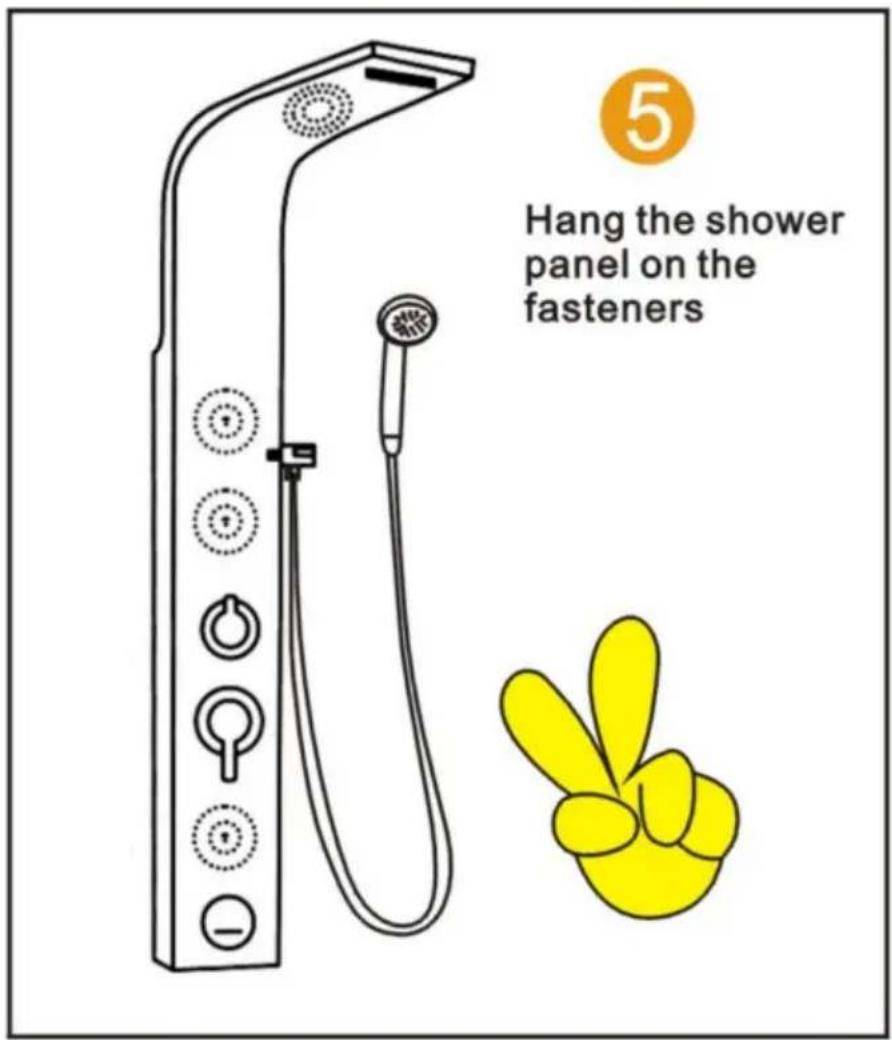
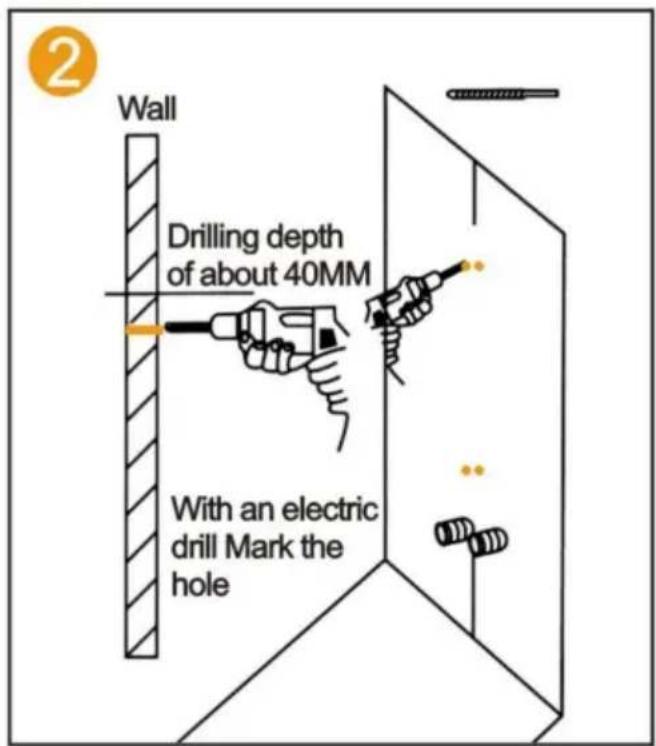
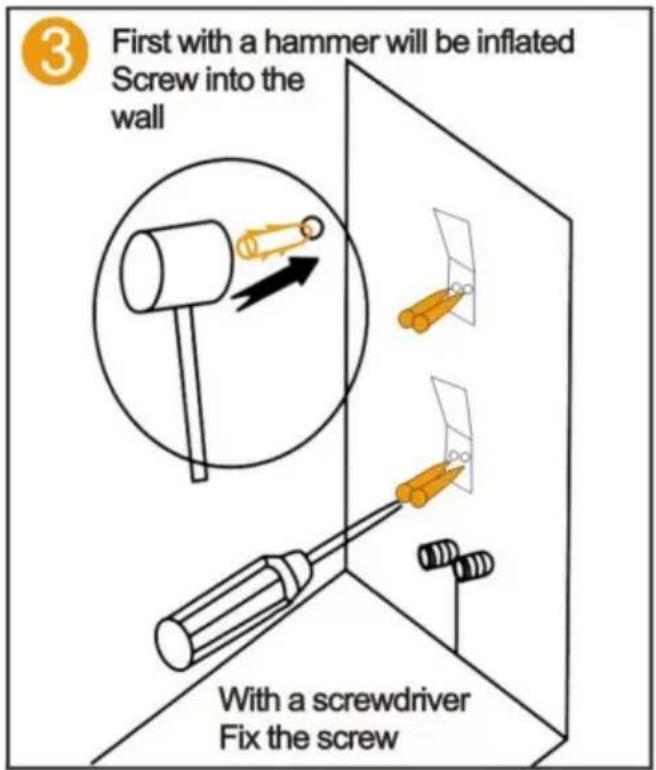
- According to the height of the family and the budget, determine the shower system installation height. Measure the distance on the back of the bar, mark the wall, and in the corresponding position fix the hanging iron (up and down one).
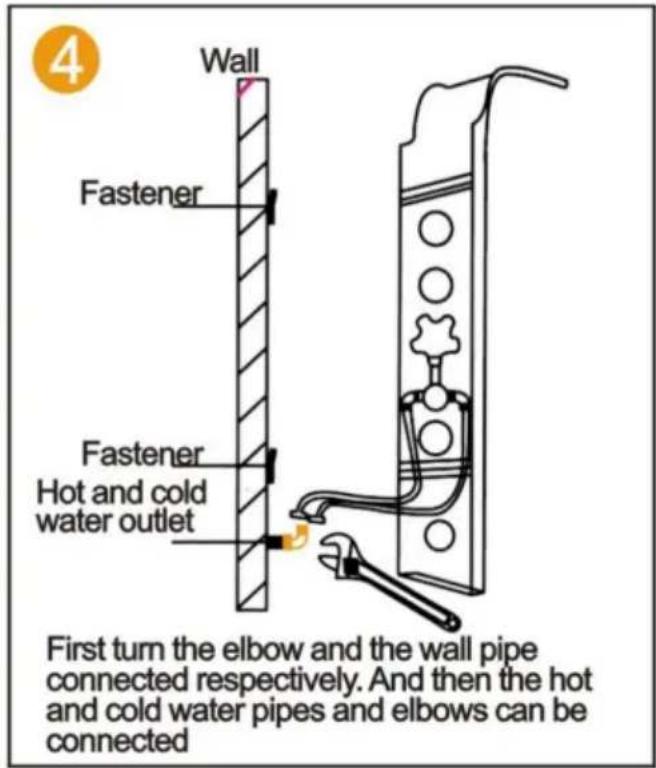
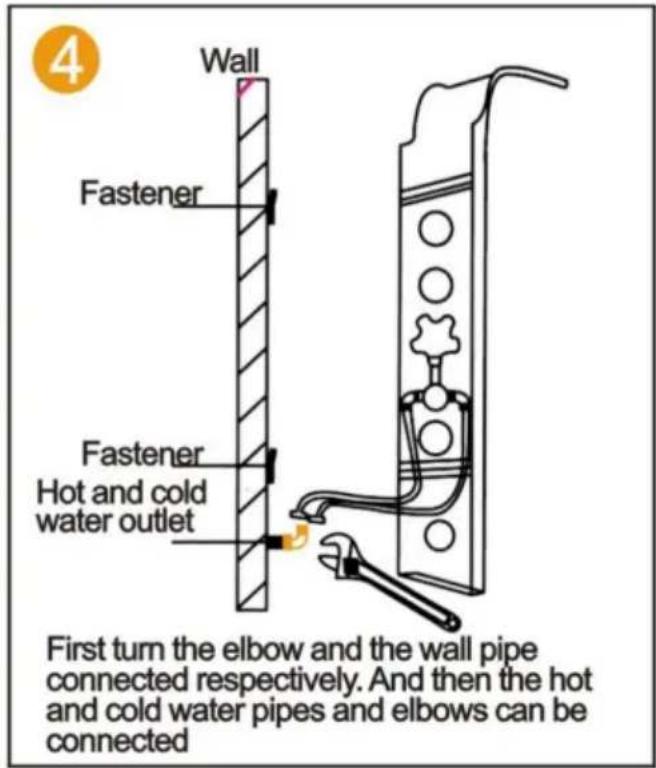
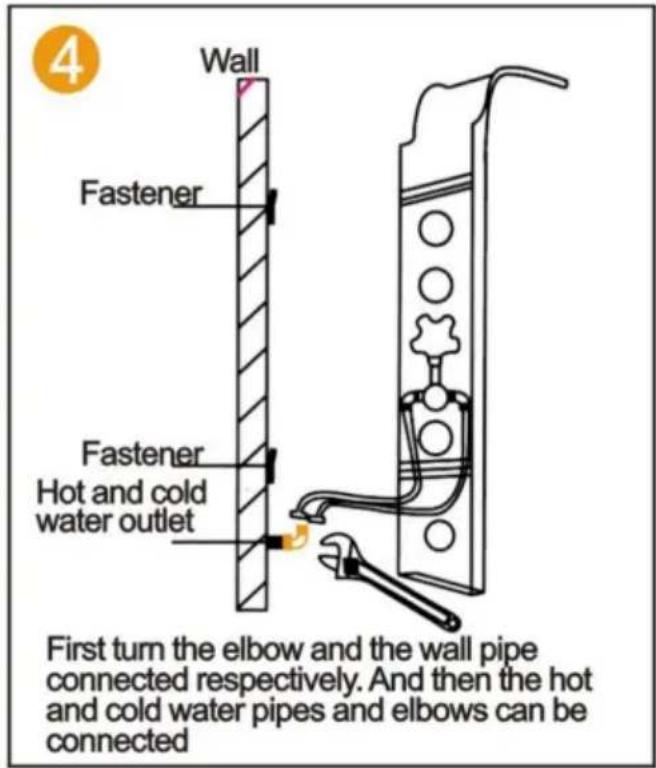
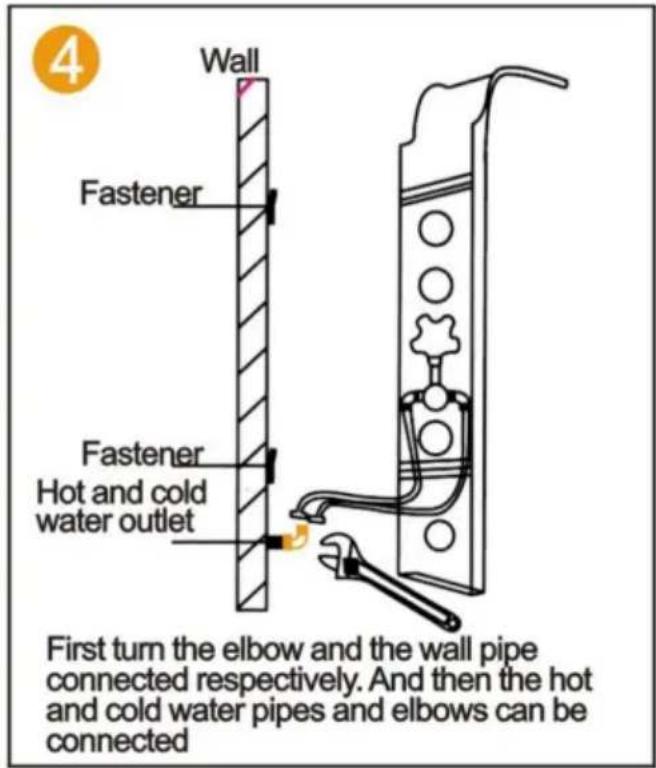
- Connect the hot and cold water hoses (be sure to clean the filter and any debris from the wall scale to prevent blockage and ensure proper water flow).
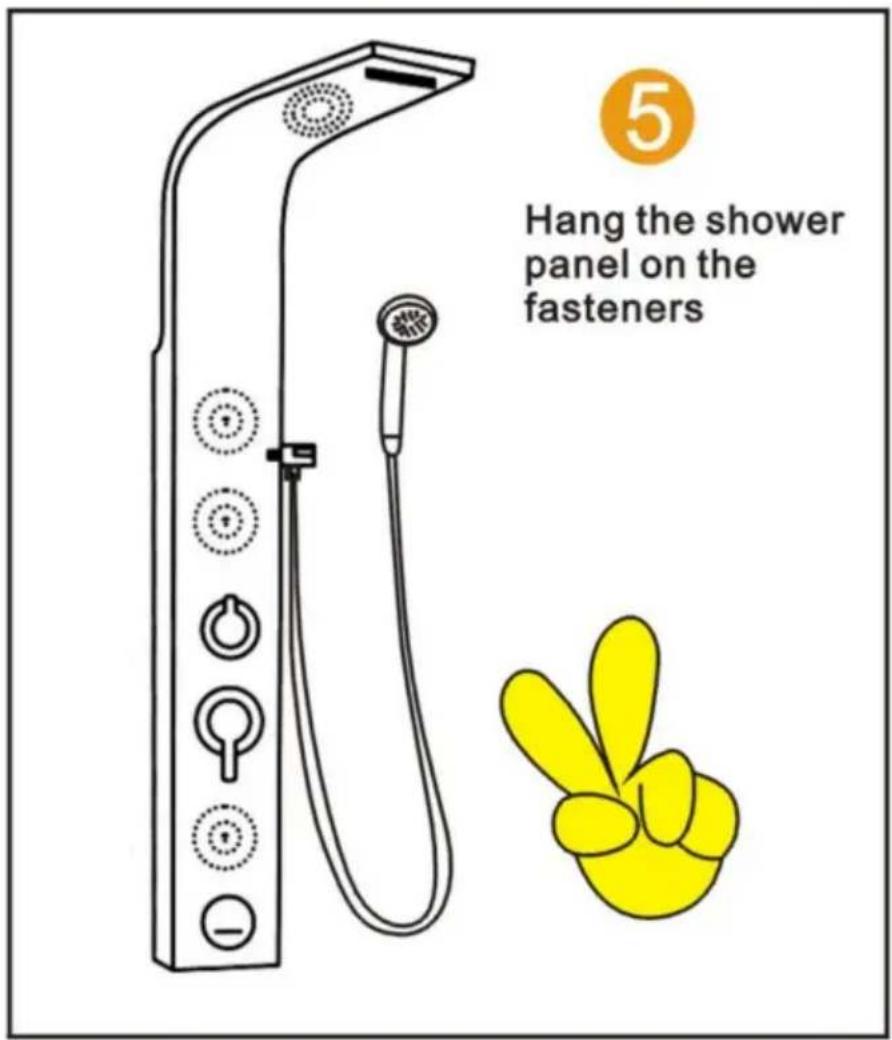
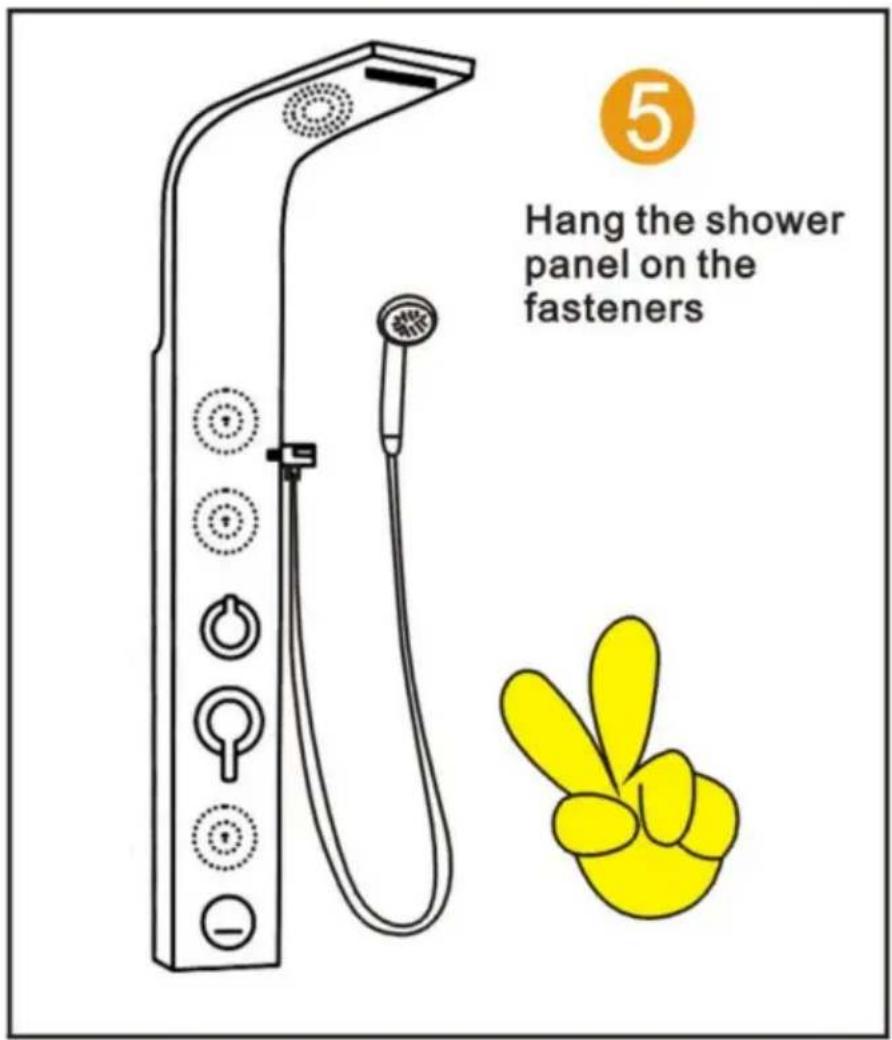
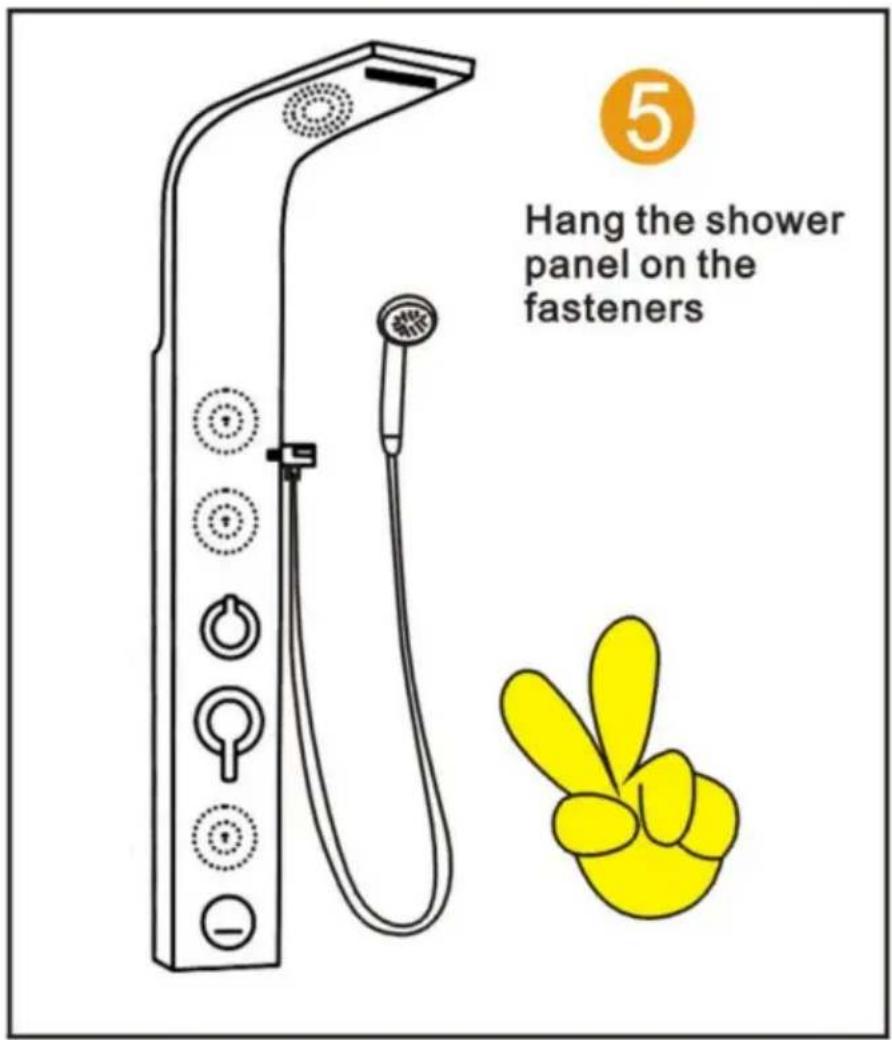
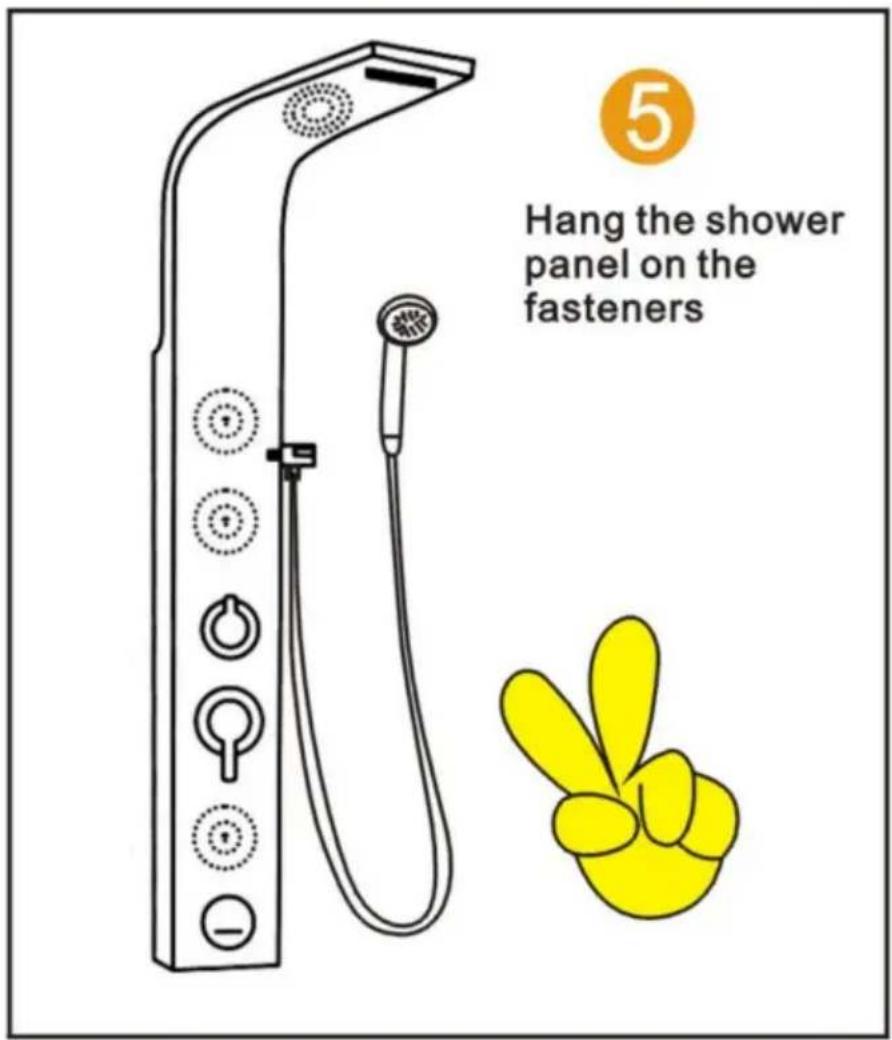
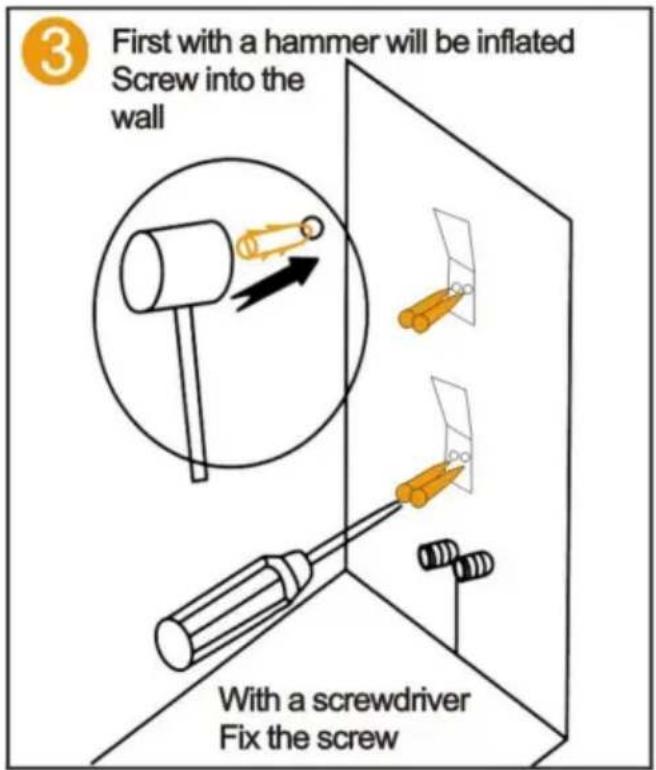
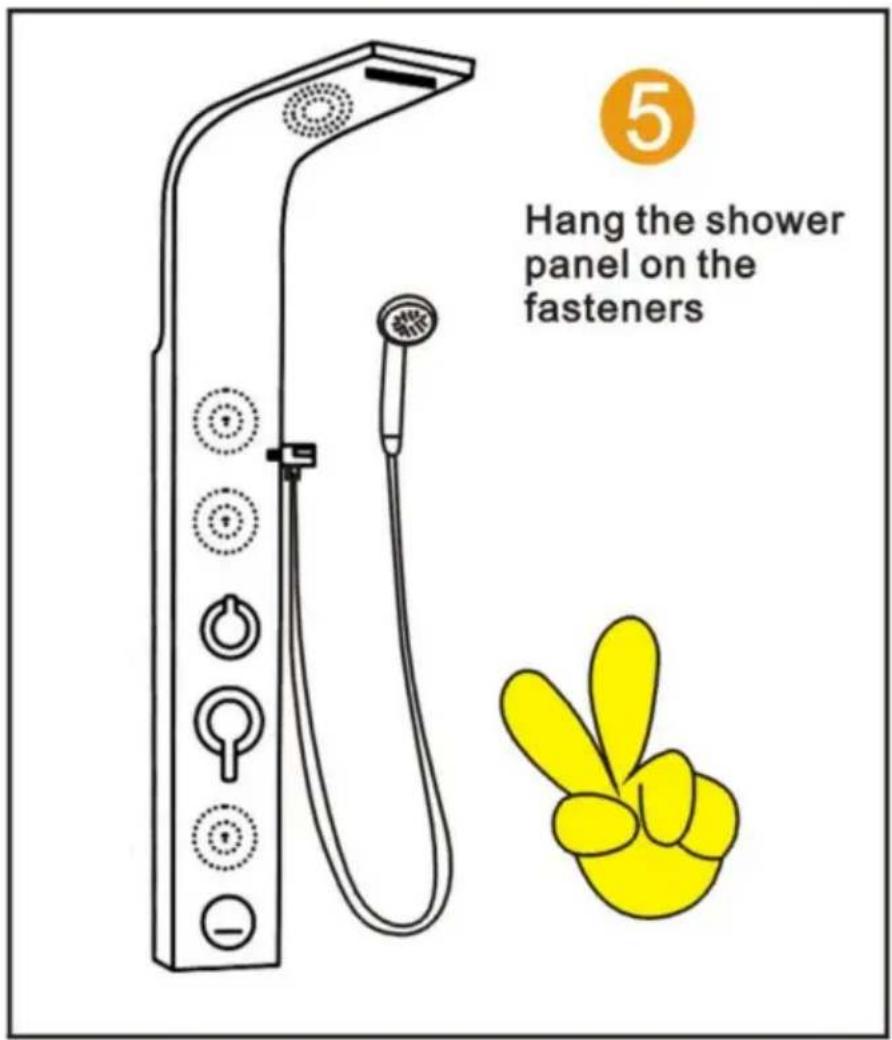
- Hang the shower system on the wall, clamping the upper and lower brackets into the two mounting plates (Note: after mounting the shower system on the wall, it should be stable and not shake; no additional glass adhesive or tools are needed for fixing).
Stainless steel shower system maintenance methods:
- Regularly clean the product to keep its appearance bright and clean;
- Clean the surface with water or a mild detergent and wipe it with a soft cloth.
- Note that cleaning the hidden parts of the product promptly can ensure its longevity.
SHOWER PANEL SERIES INSTALLATION DIAGRAM
8015FL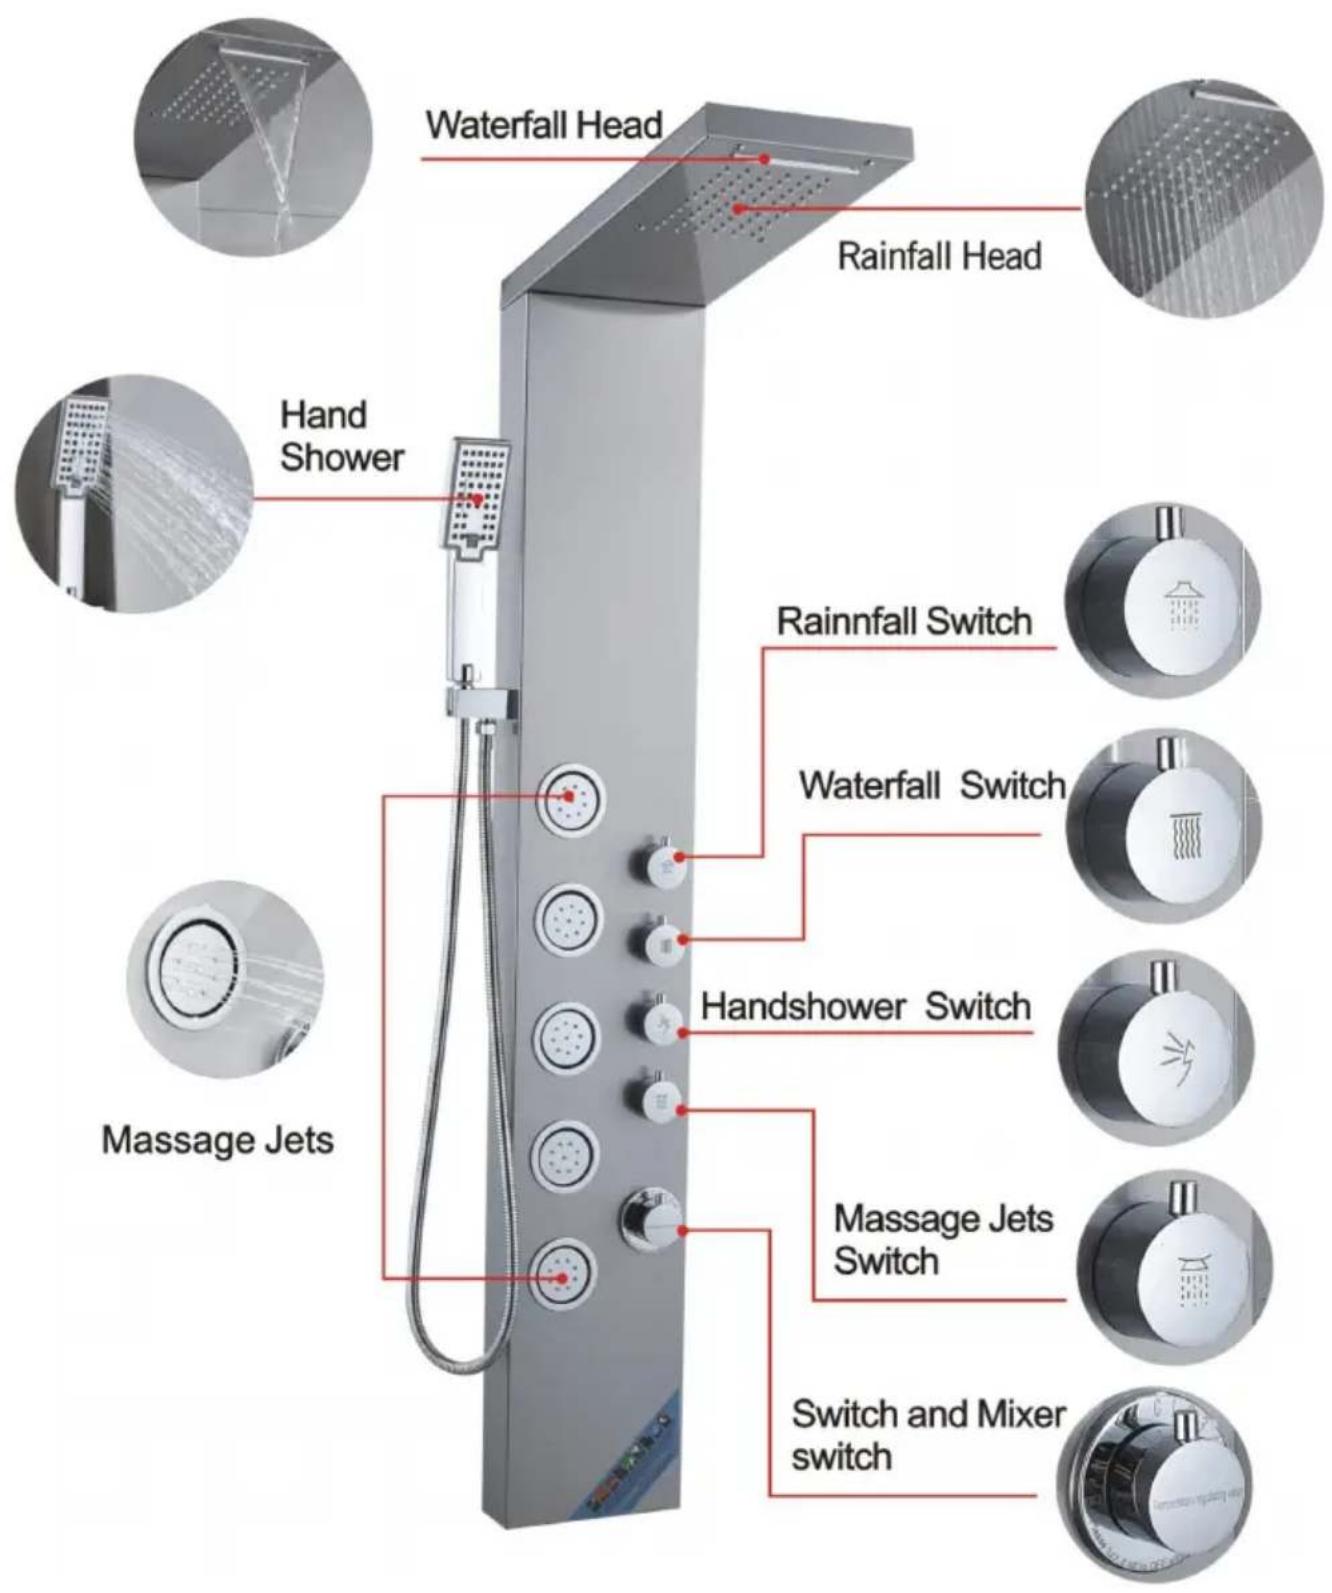
6002FL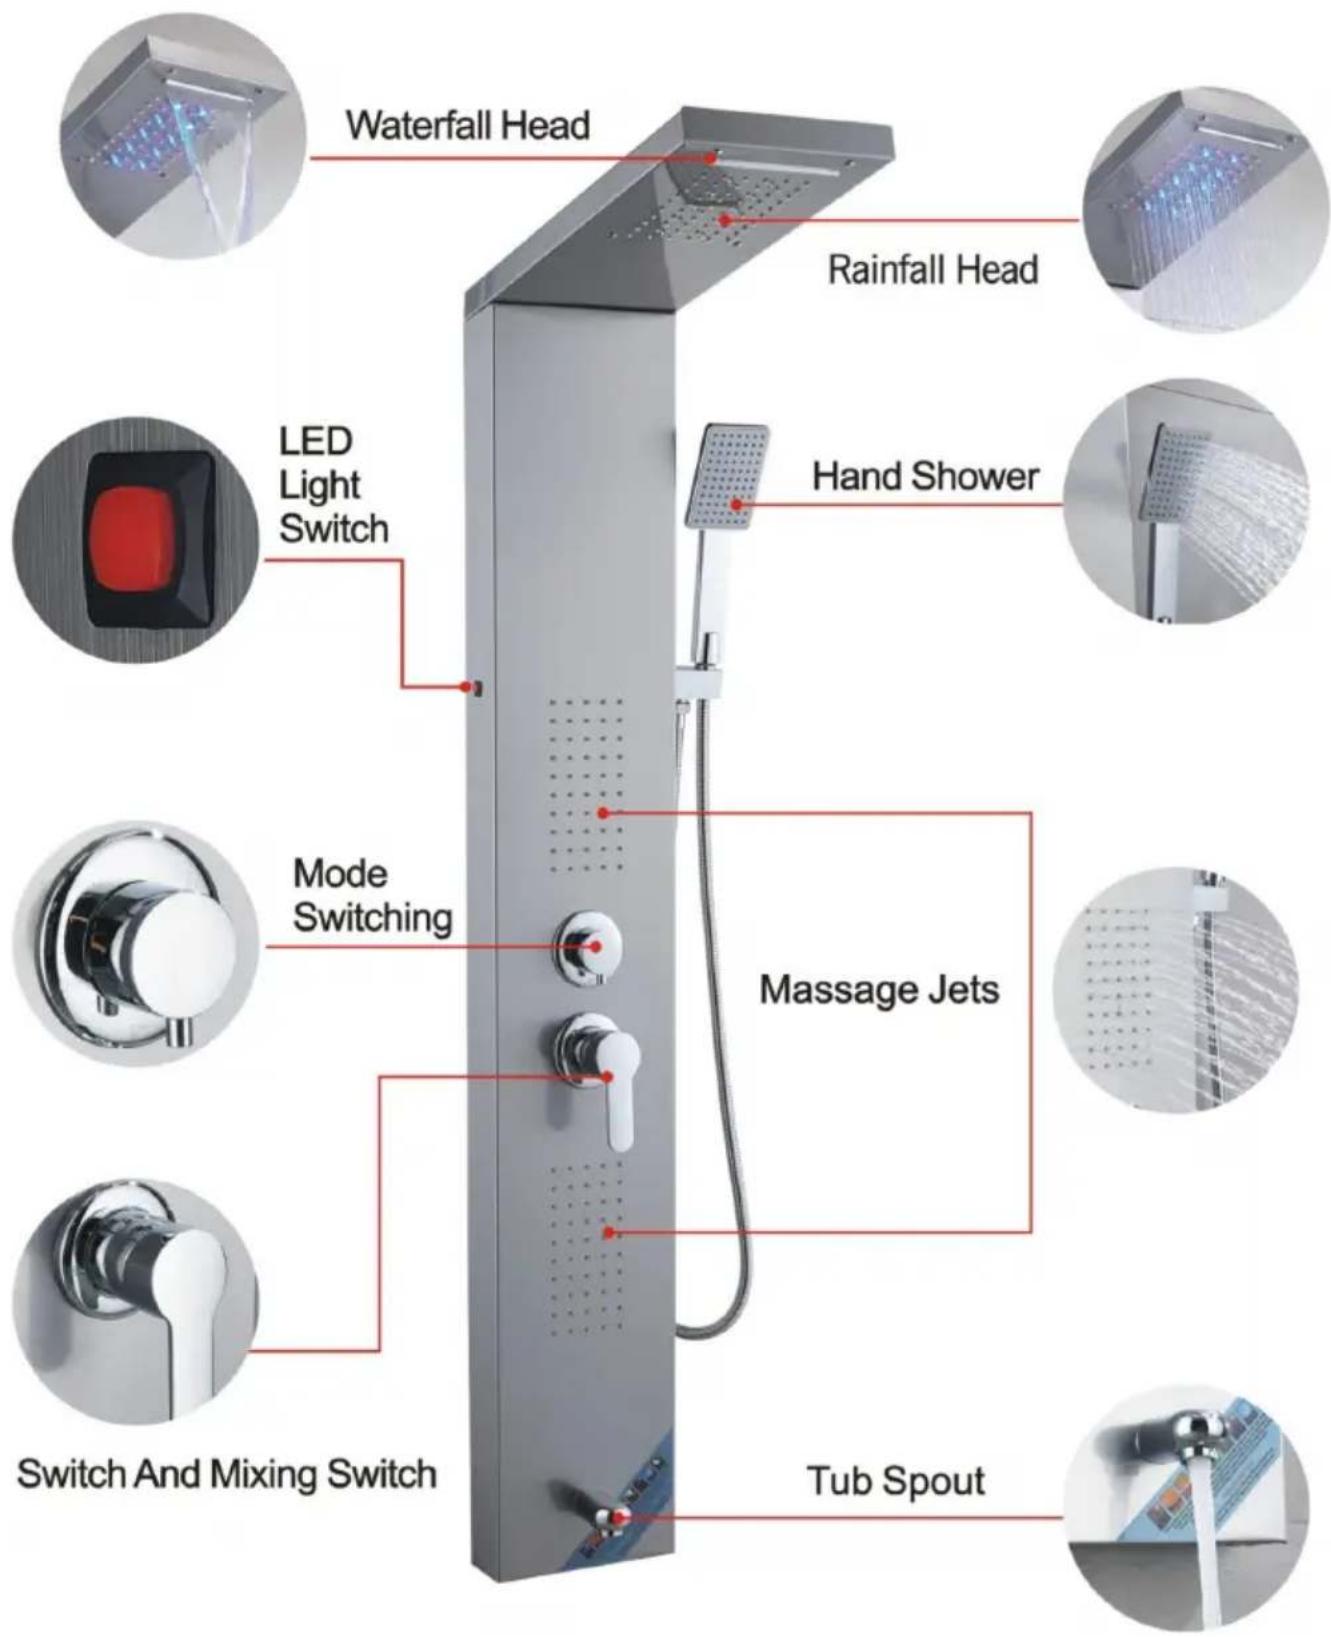
8039FL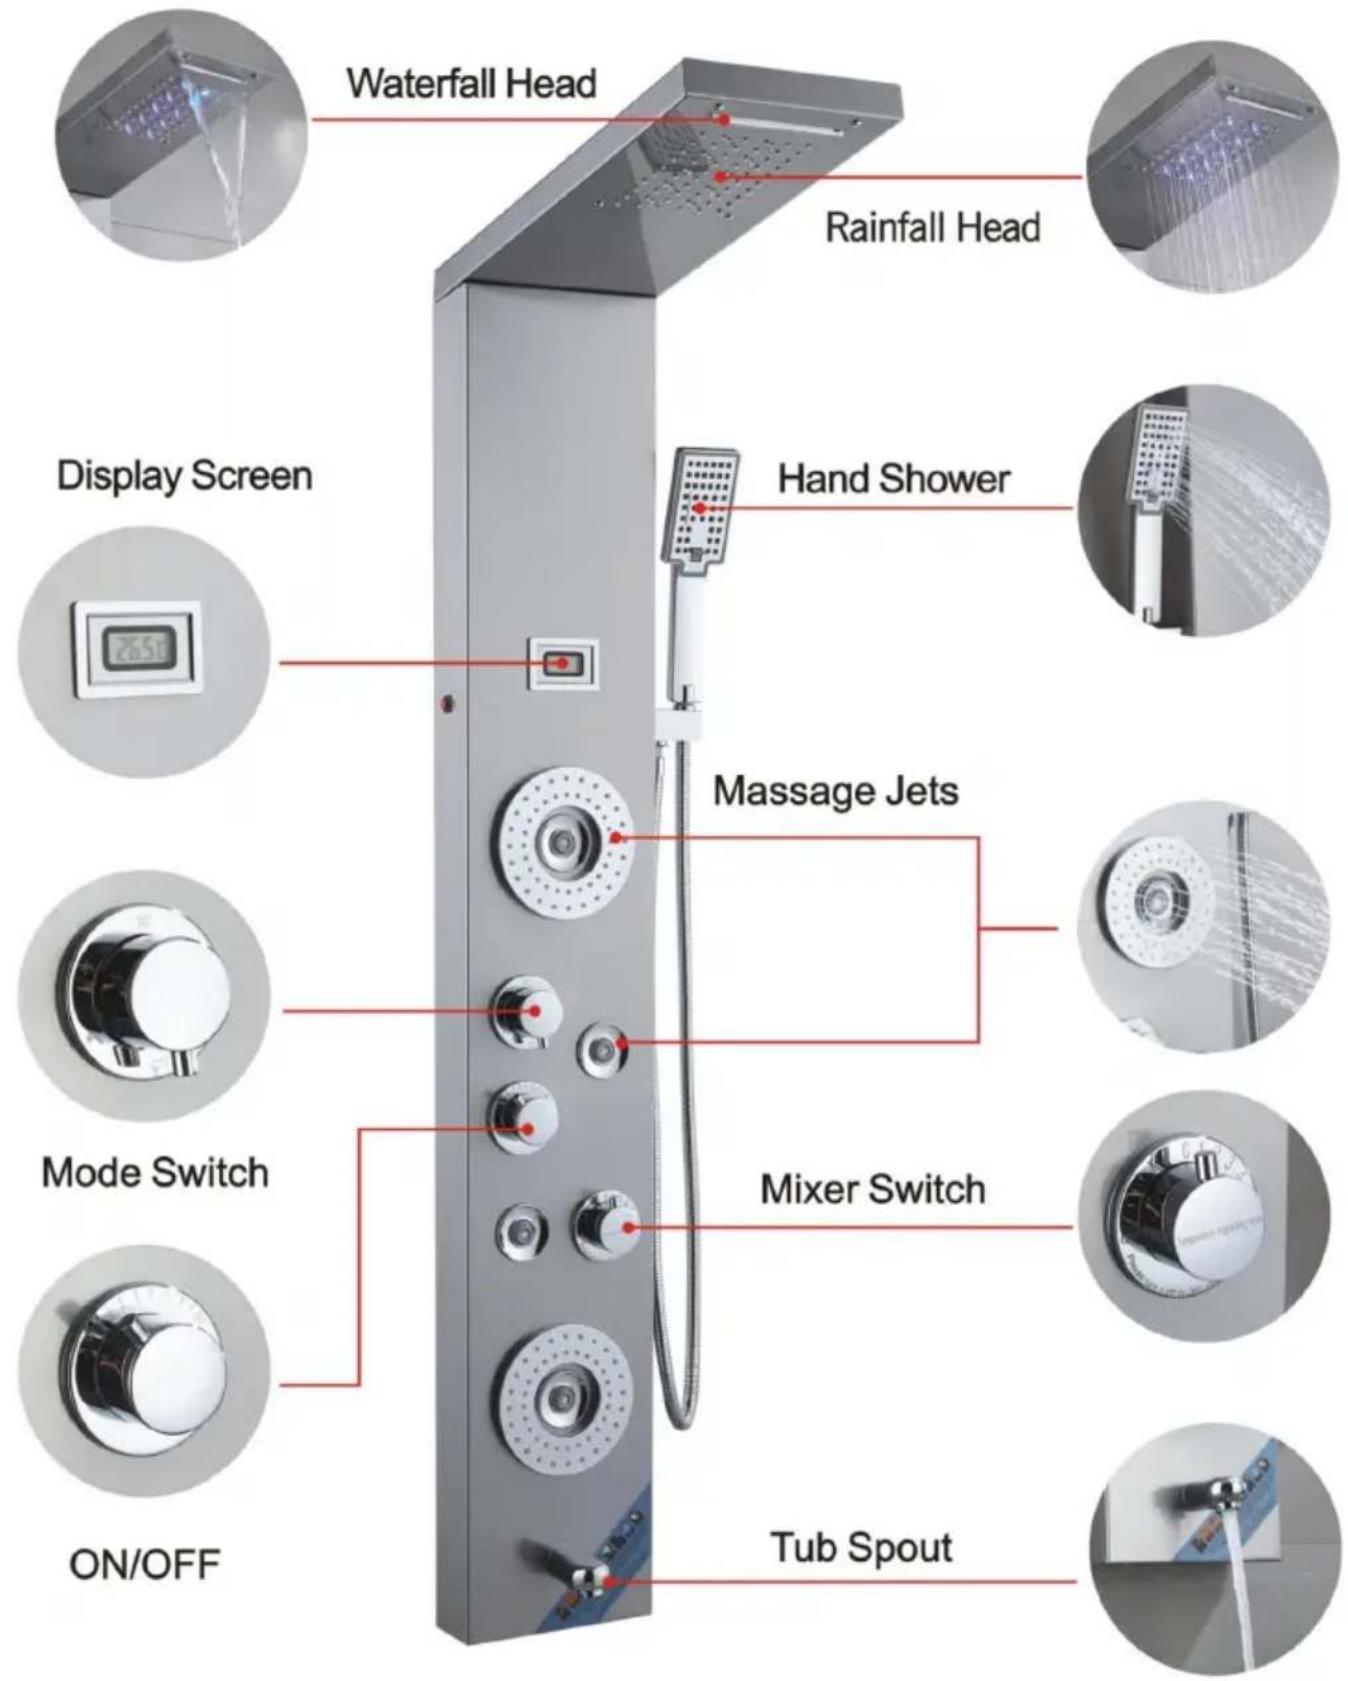
8009FL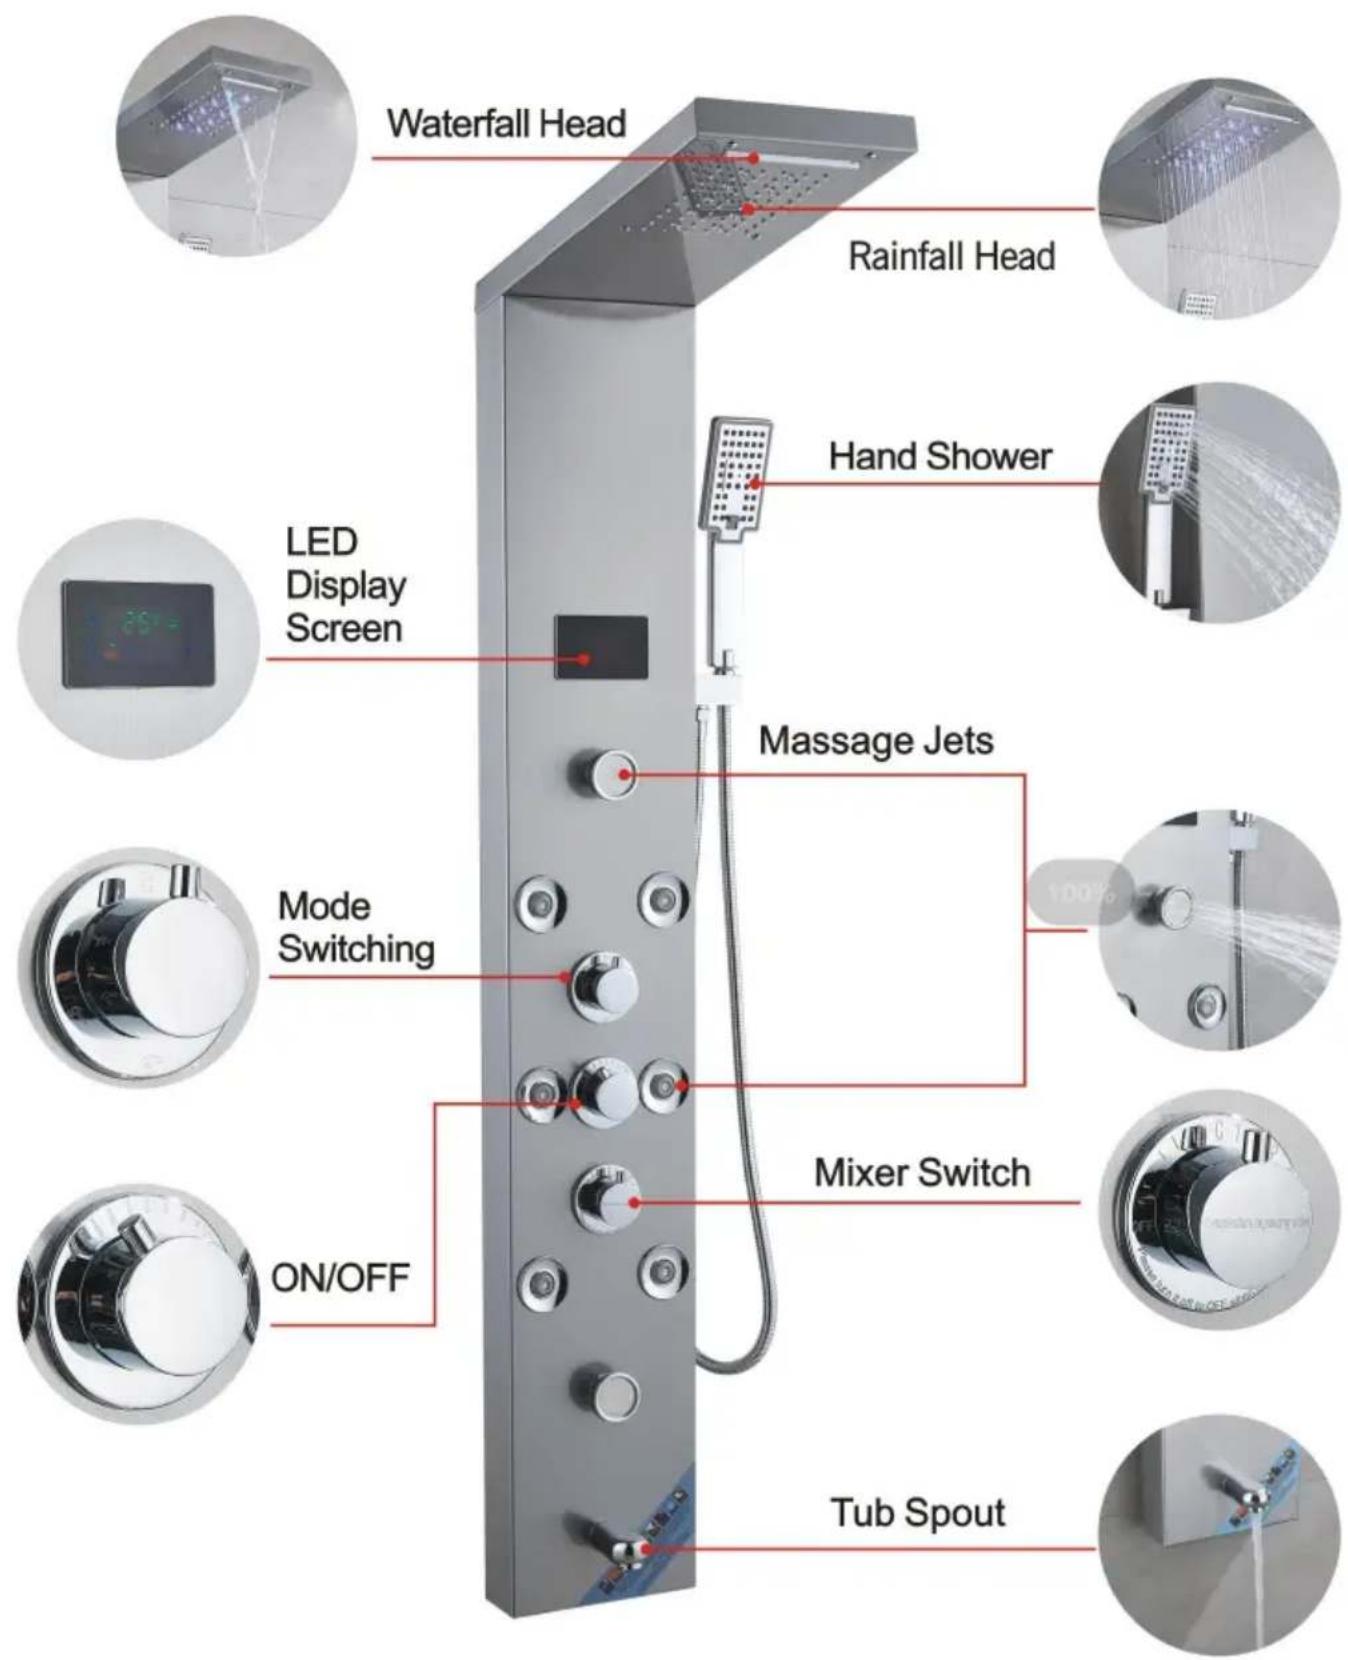
8004FL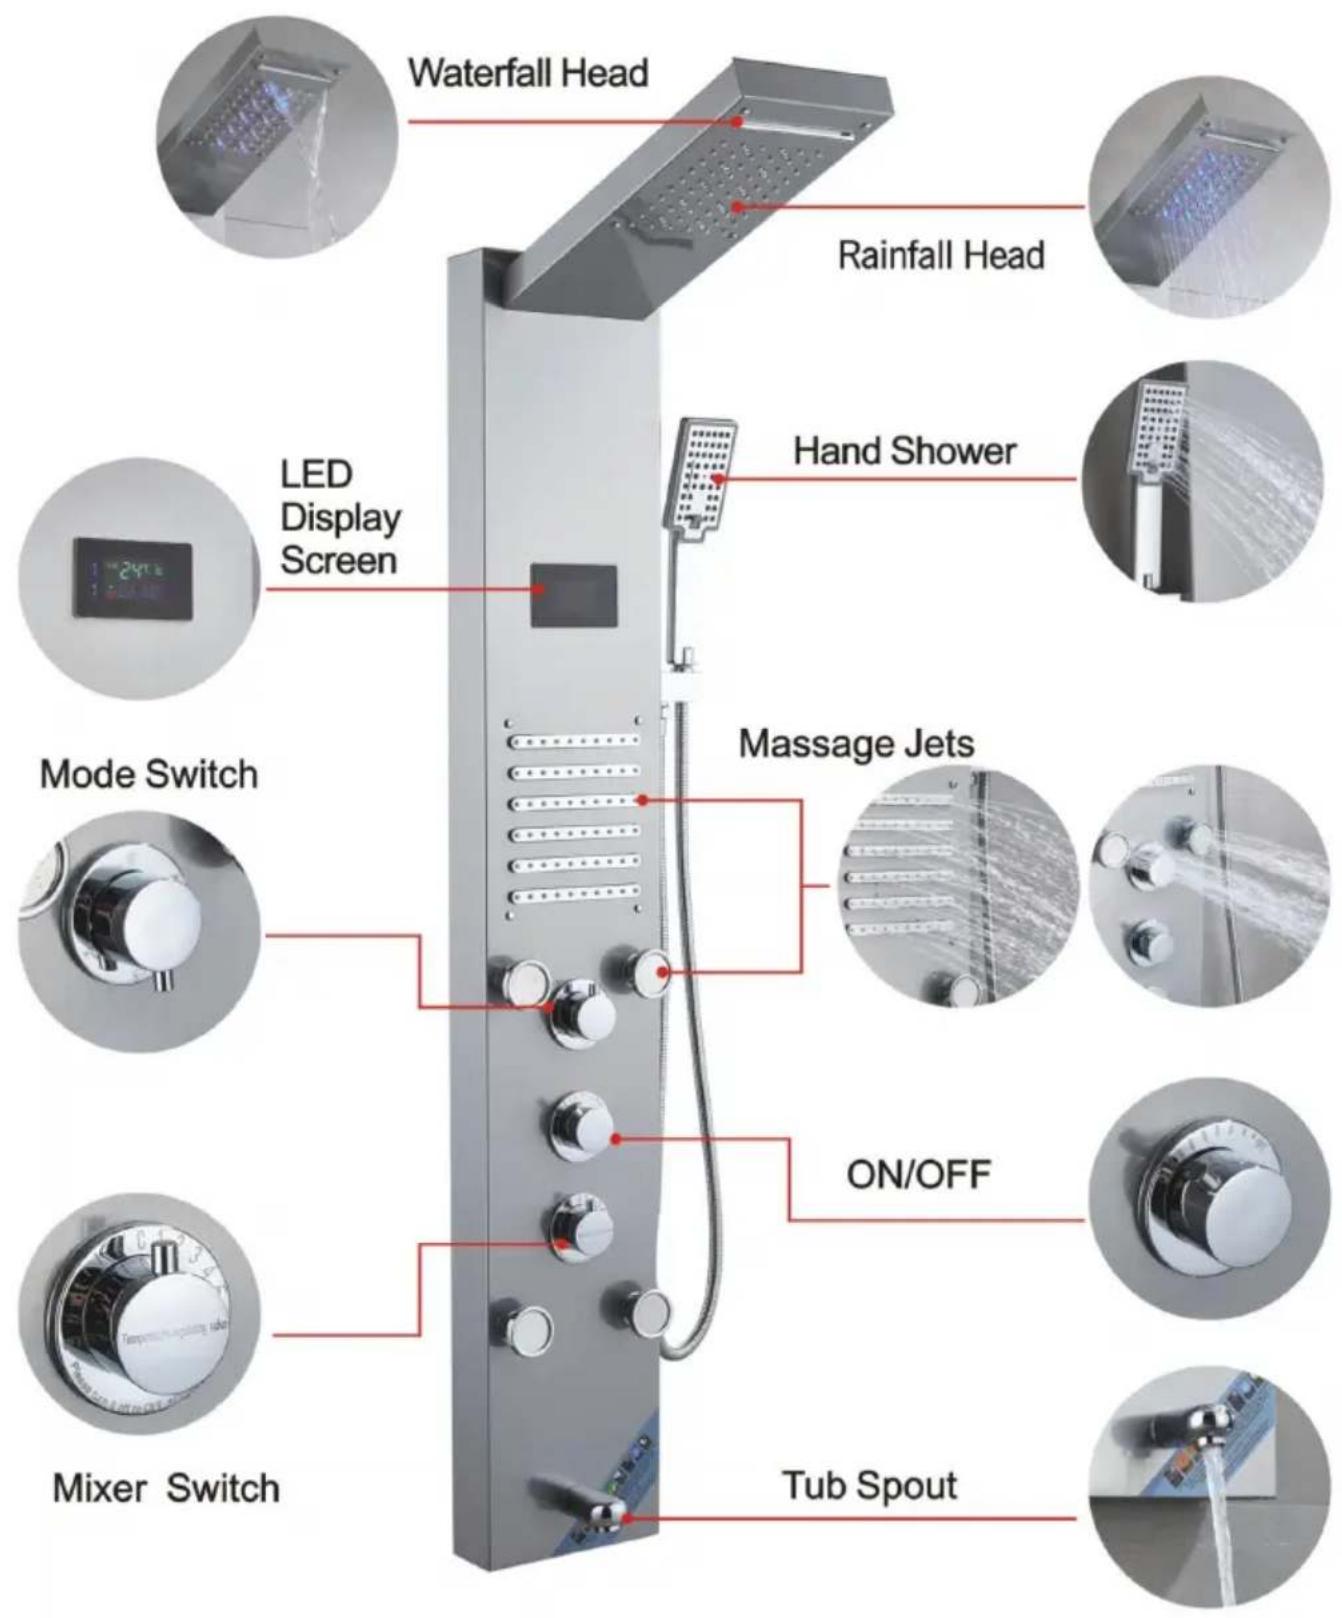
7009FL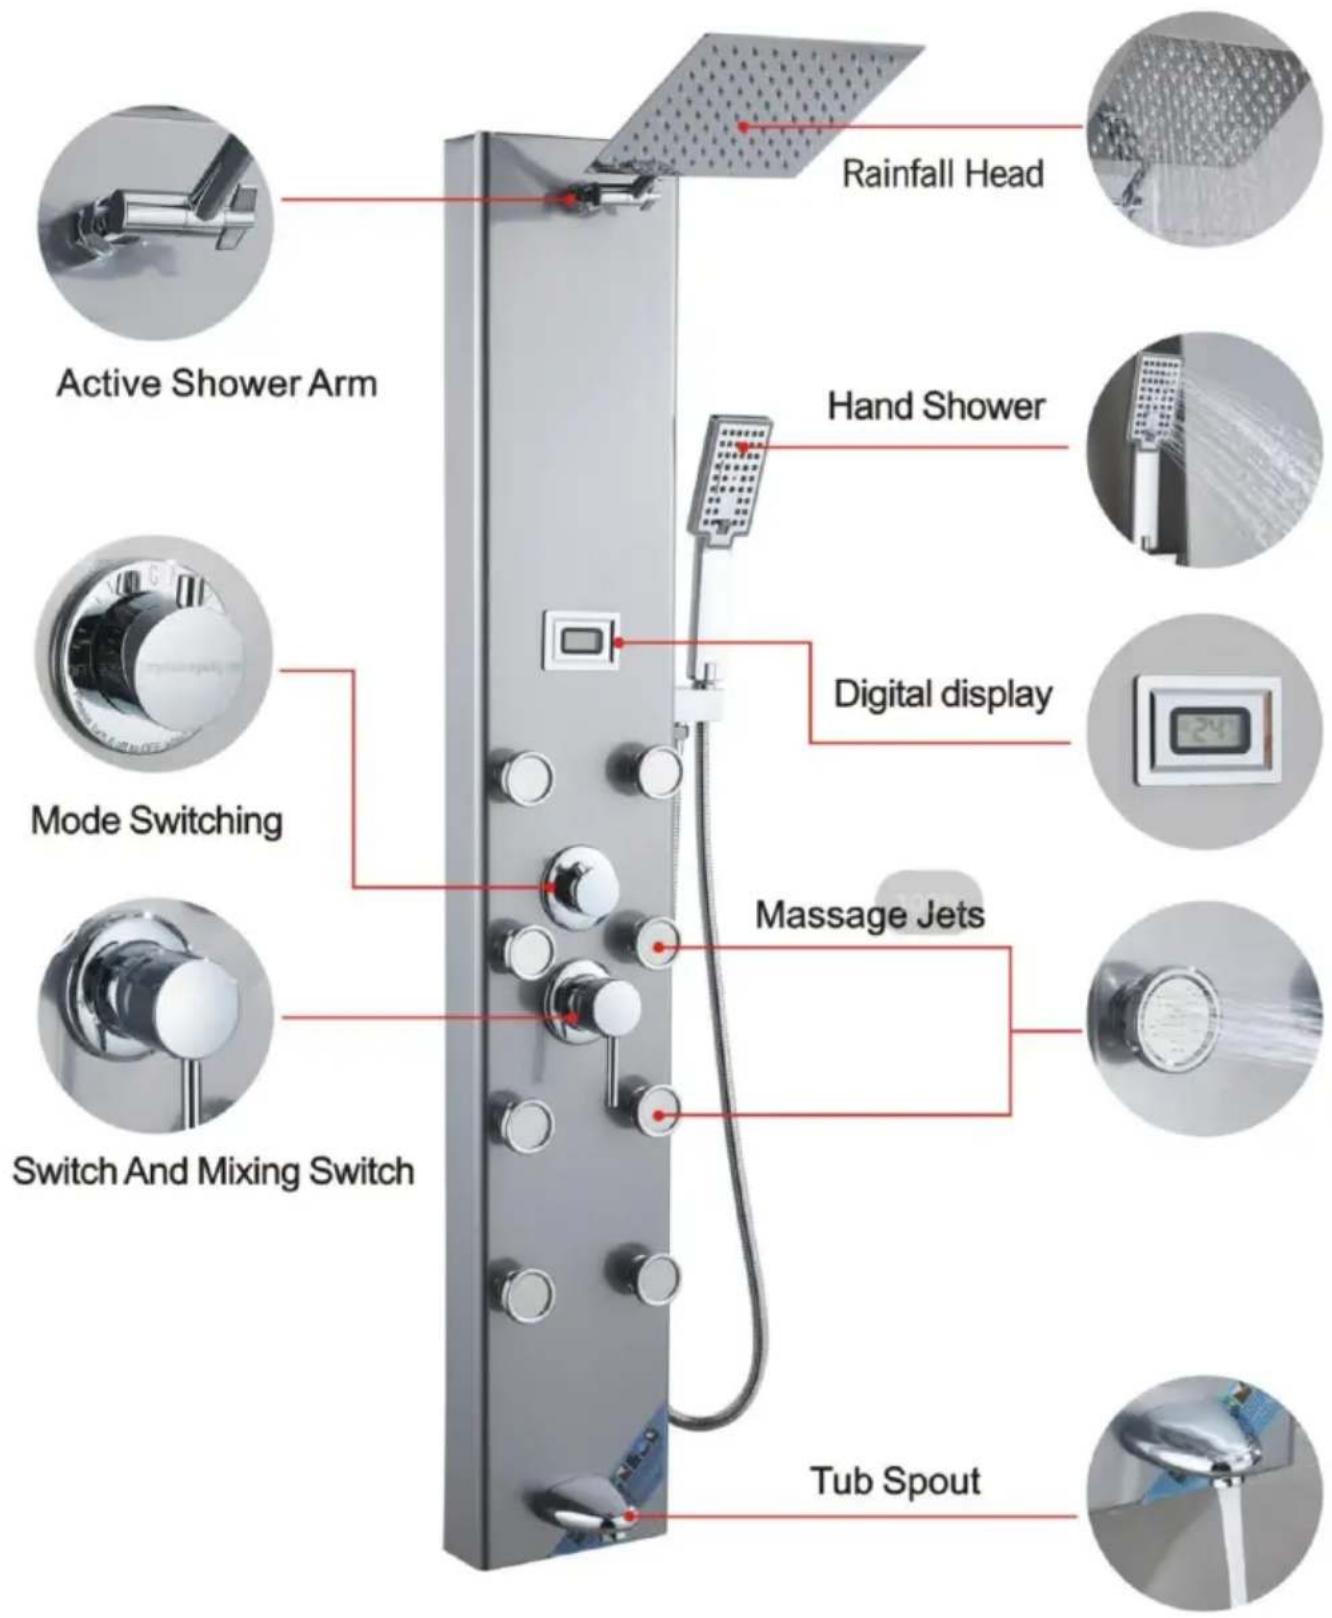
Made In China
VEVOR®
TOUGH TOOLS, HALF PRICE
Technical Support and E-Warranty Certificate
www.vevor.com/support
VEVOR®
TOUGH TOOLS, HALF PRICE
Insert the PVC pipe from the top opening to pierce out.
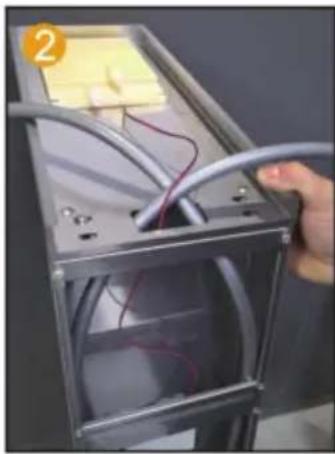
Route the LED light wire along the hole and insert it into the motherboard.
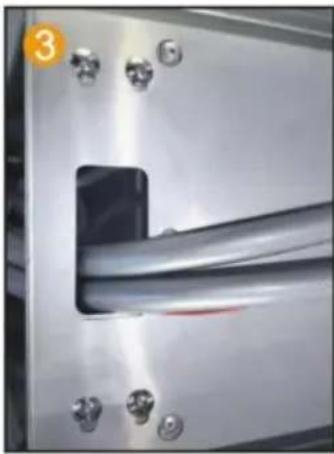
Fix the motherboard and top spray with 4 pairs of M6 screws and nuts.
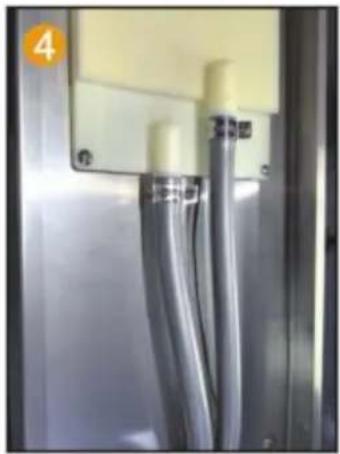
Fix the PVC pipe with a throat clamp on the top spray joint.

Connect the LED light cable and power supply line.
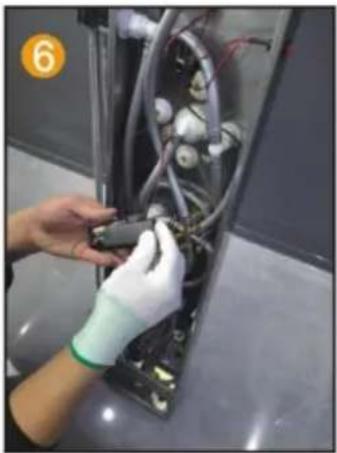
Install 2 No. 5 batteries to charge the pool box.
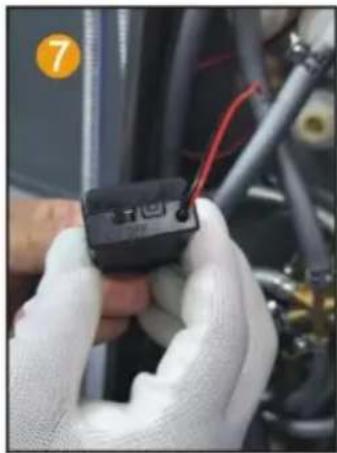
Point the switch of the battery box towards ON.
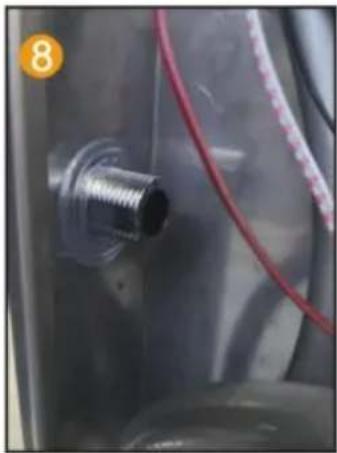
Insert the hand spray nozzle into the panel and install the gasket.
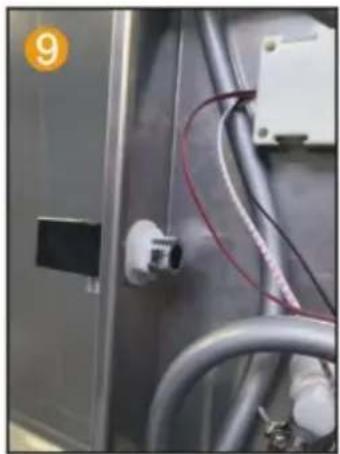
Spray socket with hexagonal nut handle fixed on the panel.
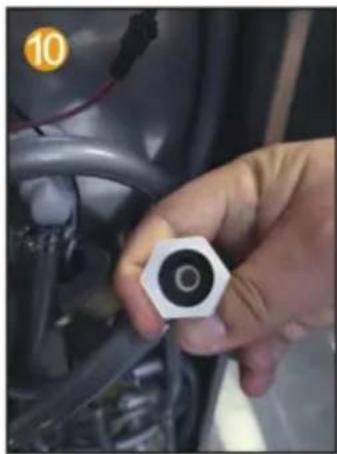
Put the 4-point rubber into the hand spray inside the joint of the seat.
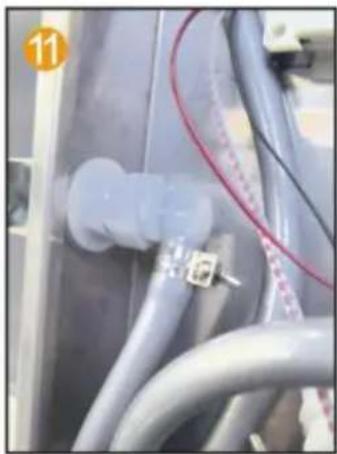
Connect the water outlet connector and hand spray seat joint.
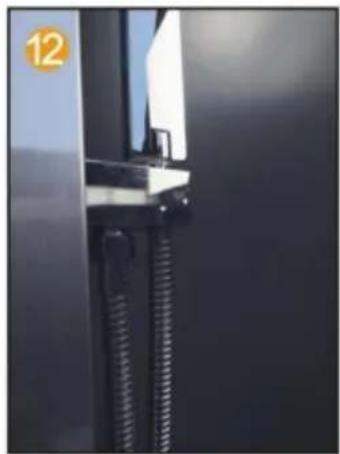
Connect the hand spray hose to the handheld shower head.
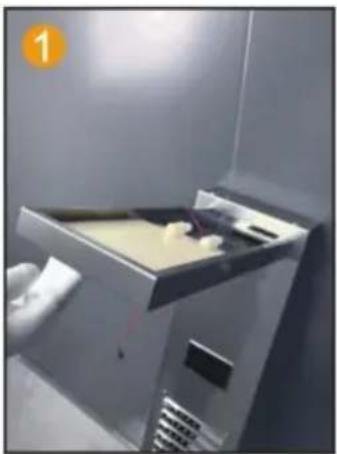
Insert the top spray into the motherboard inside the hole.
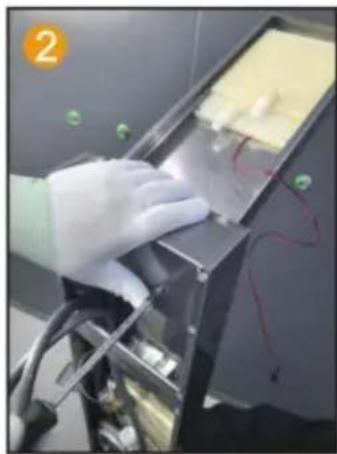
Use 2 M4 screws to secure the main fixed plate and top spray.
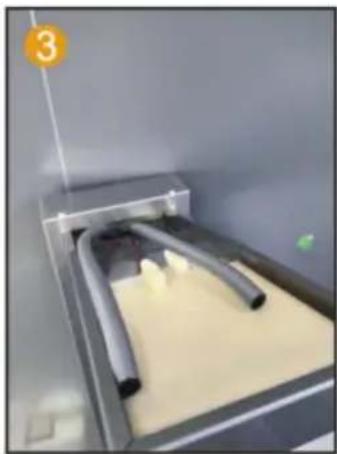
Connect PVC pipes and LED light wires, thread through the hole.
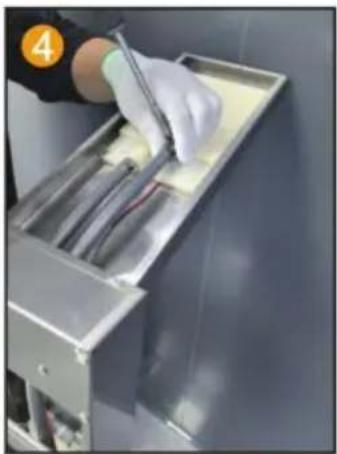
Fix the PVC pipe with a throat clamp on the top spray joint.
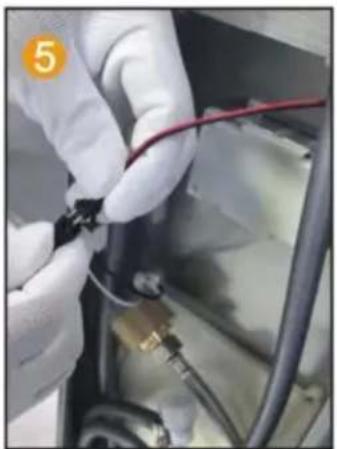
Connect the LED light cable and power supply line.
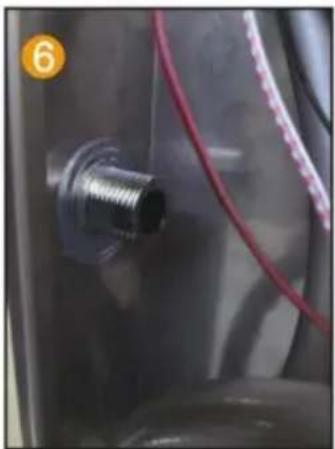
Insert the hand spray nozzle into the panel and install the gasket.
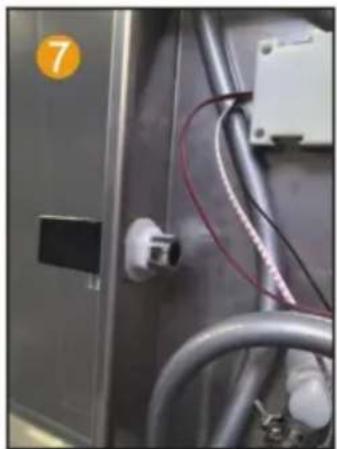
Spray socket with hexagonal nut handle fixed on the panel.
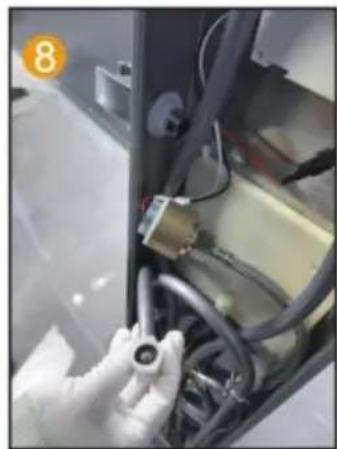
Spray socket with hexagonal nut handle, fix the 4-point rubber on the panel and spray it by hand inside the joint of the seat.
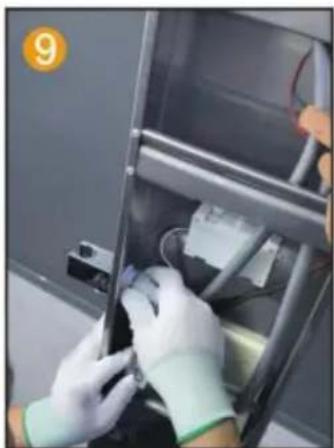
Connect the water outlet connector and hand spray seat joint.
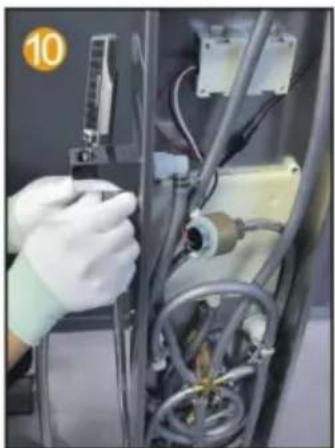
Connect the hand spray hose to the handheld shower head.
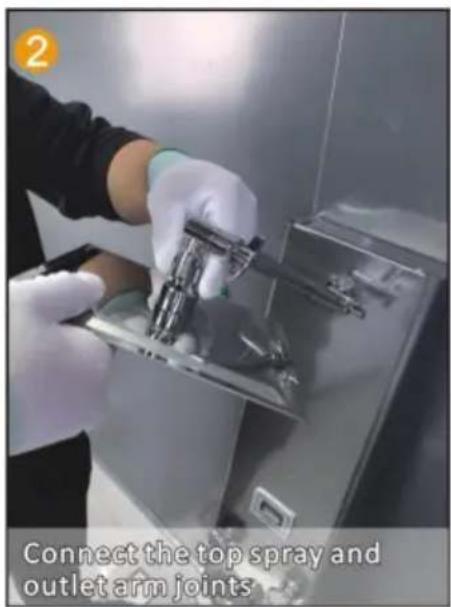
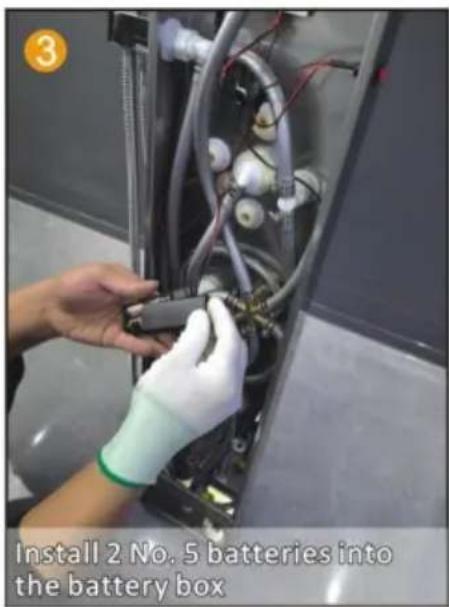
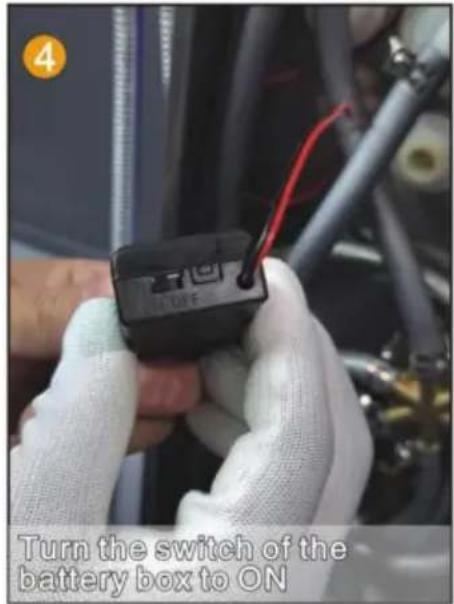
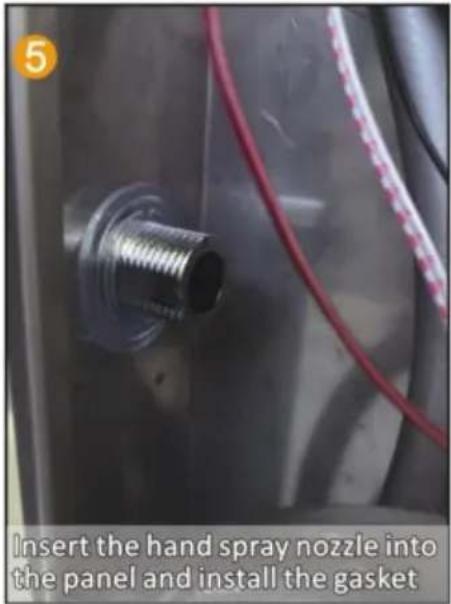

Installation steps (general).
INTRODUCTION OF FUNCTIONS
8015FL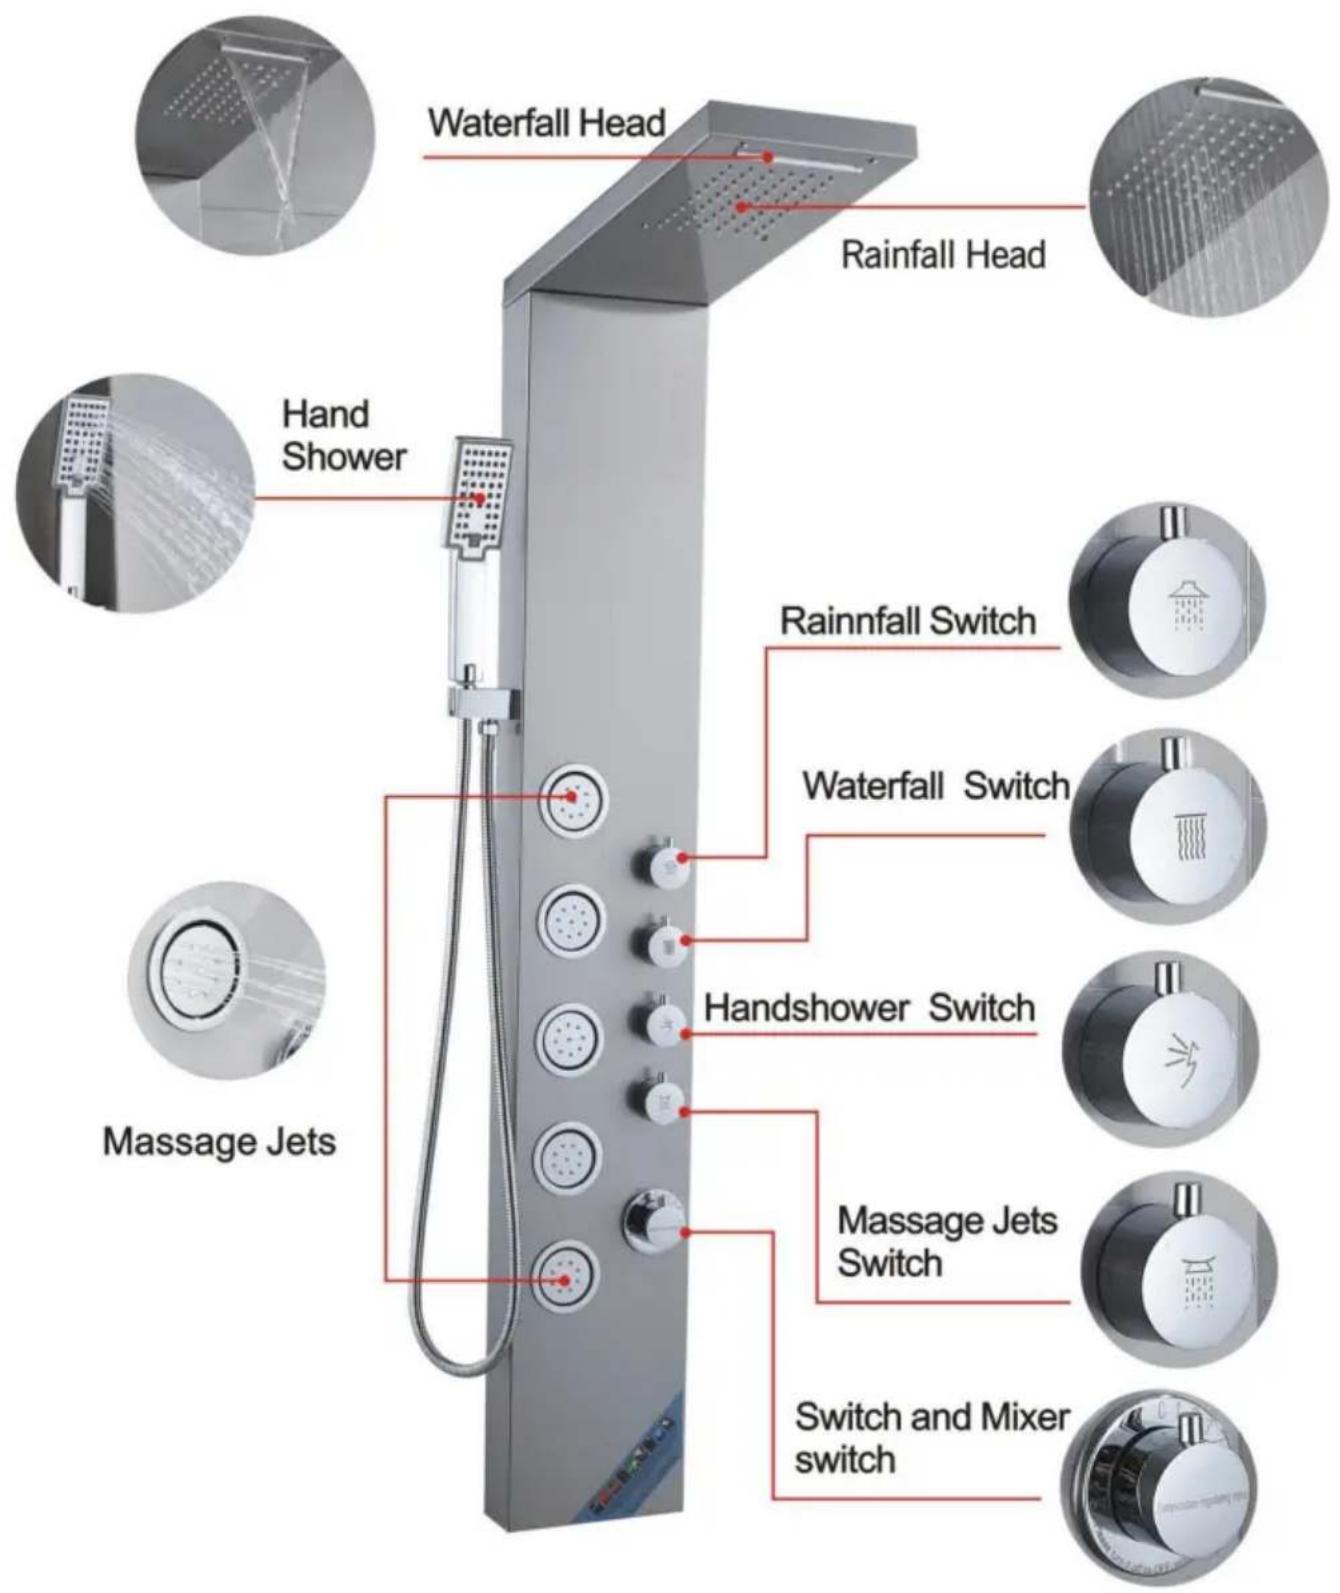
INTRODUCTION OF FUNCTIONS
6002FL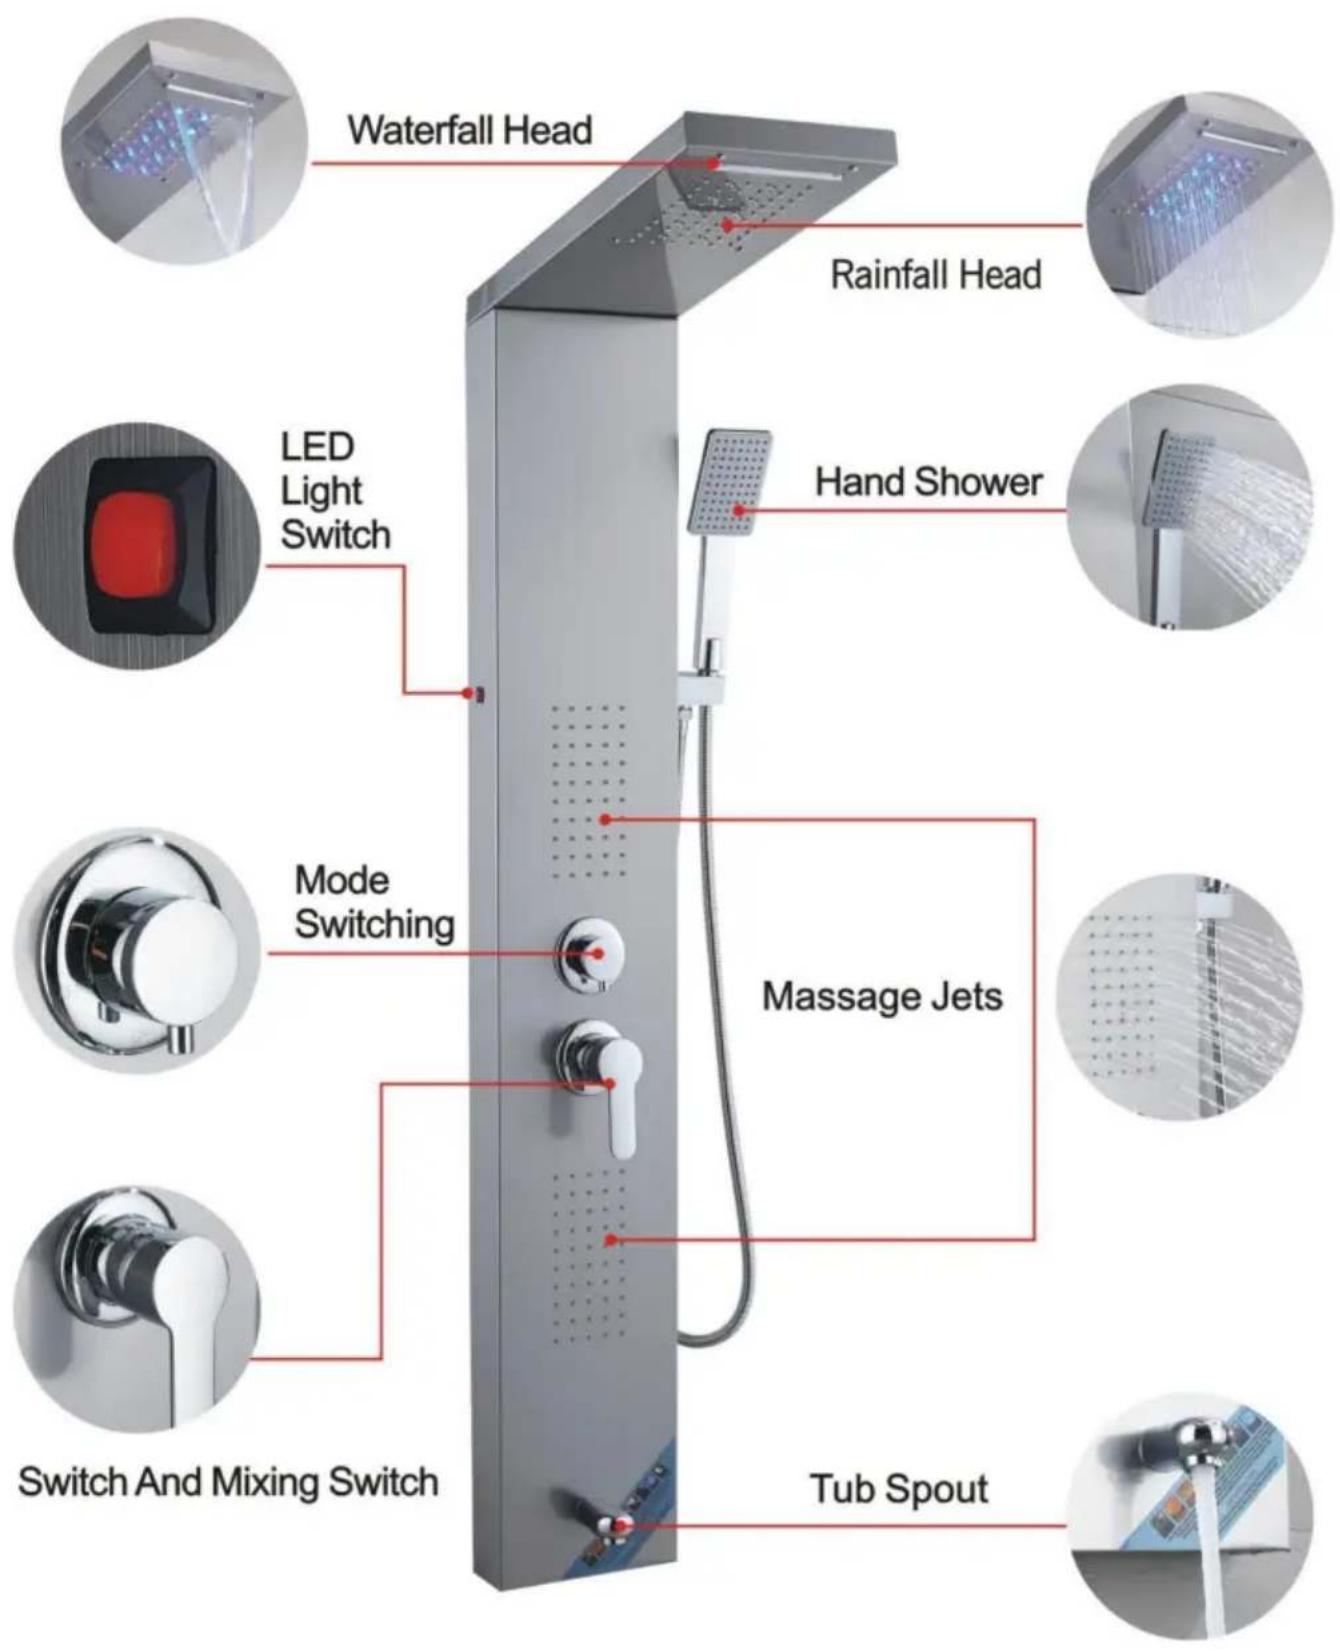
INTRODUCTION OF FUNCTIONS
8039FL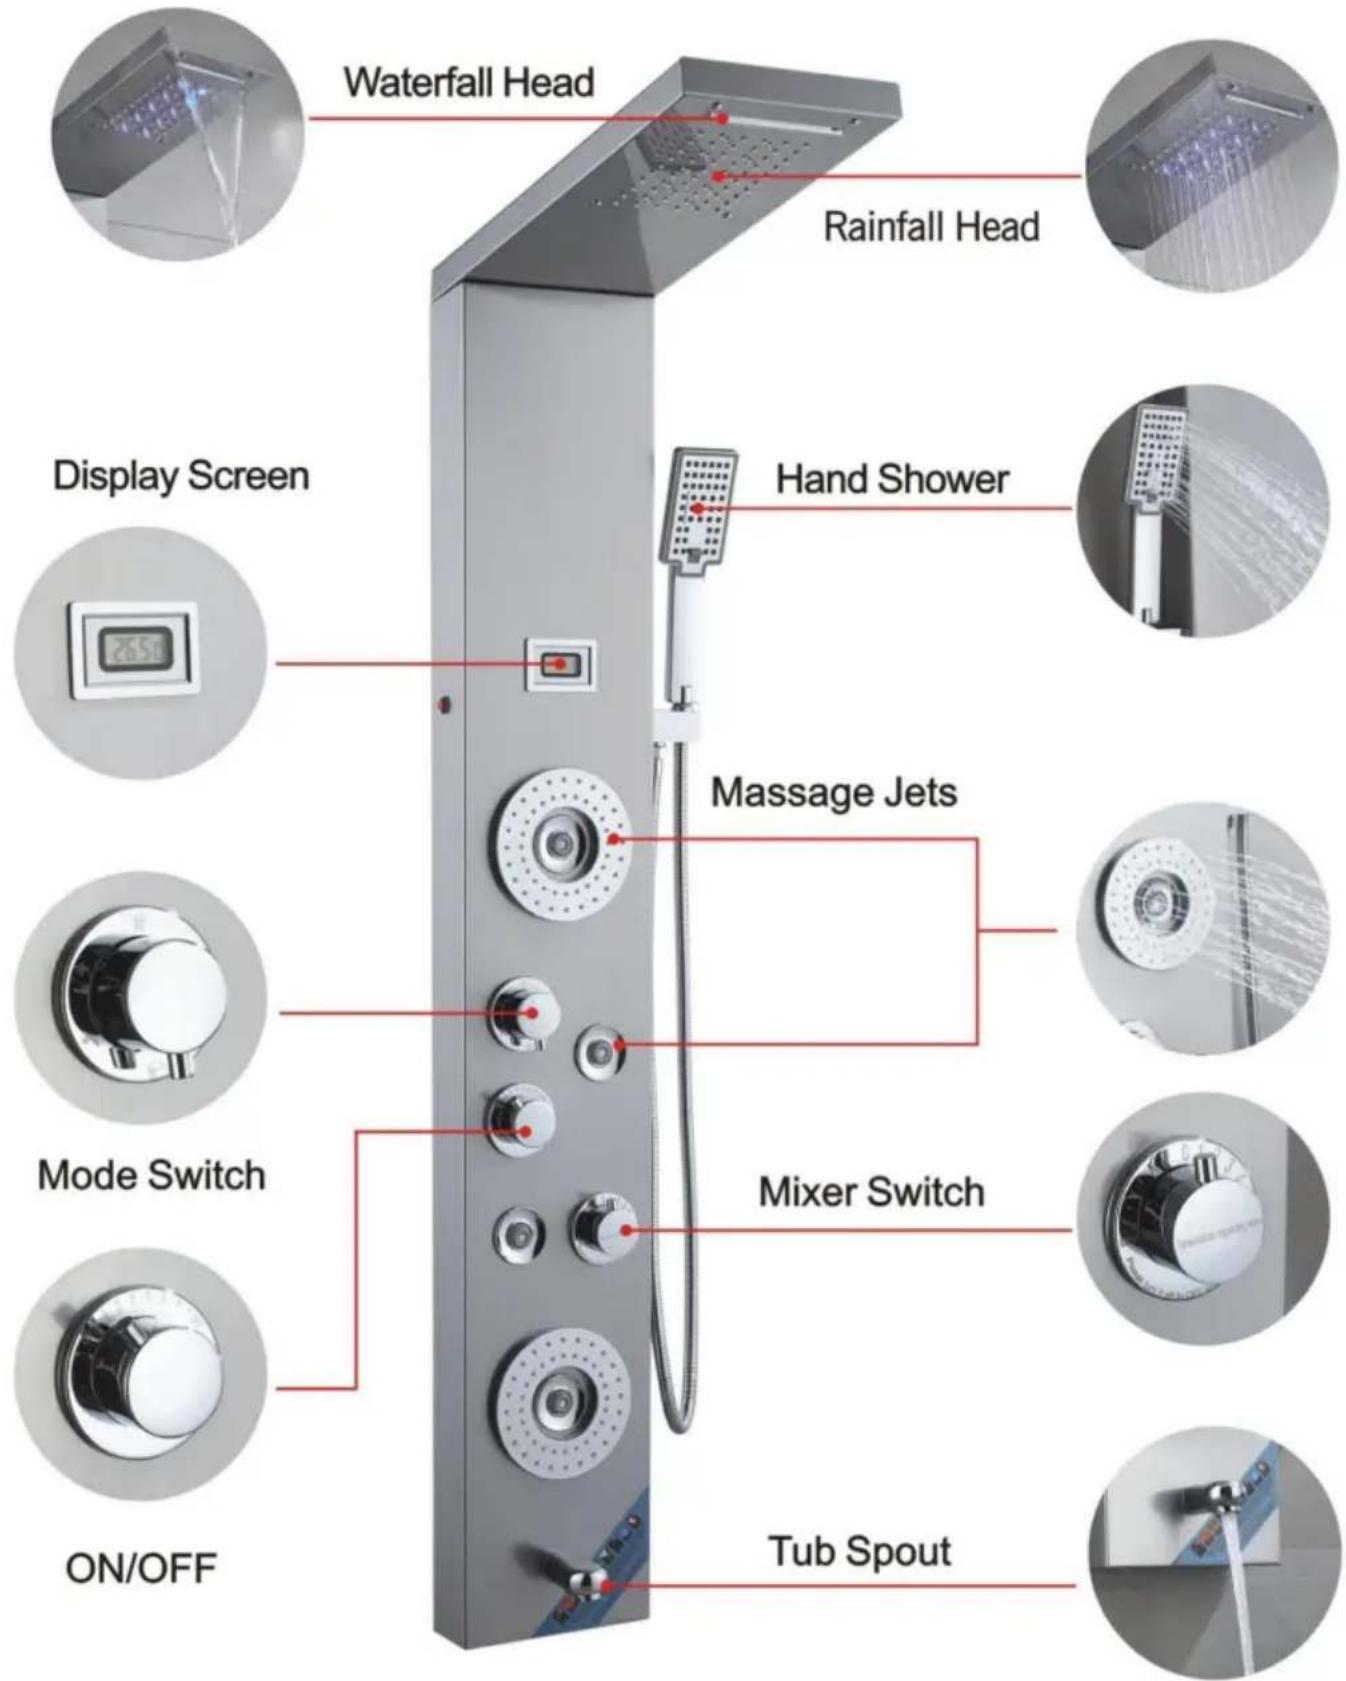
INTRODUCTION OF FUNCTIONS
8009FL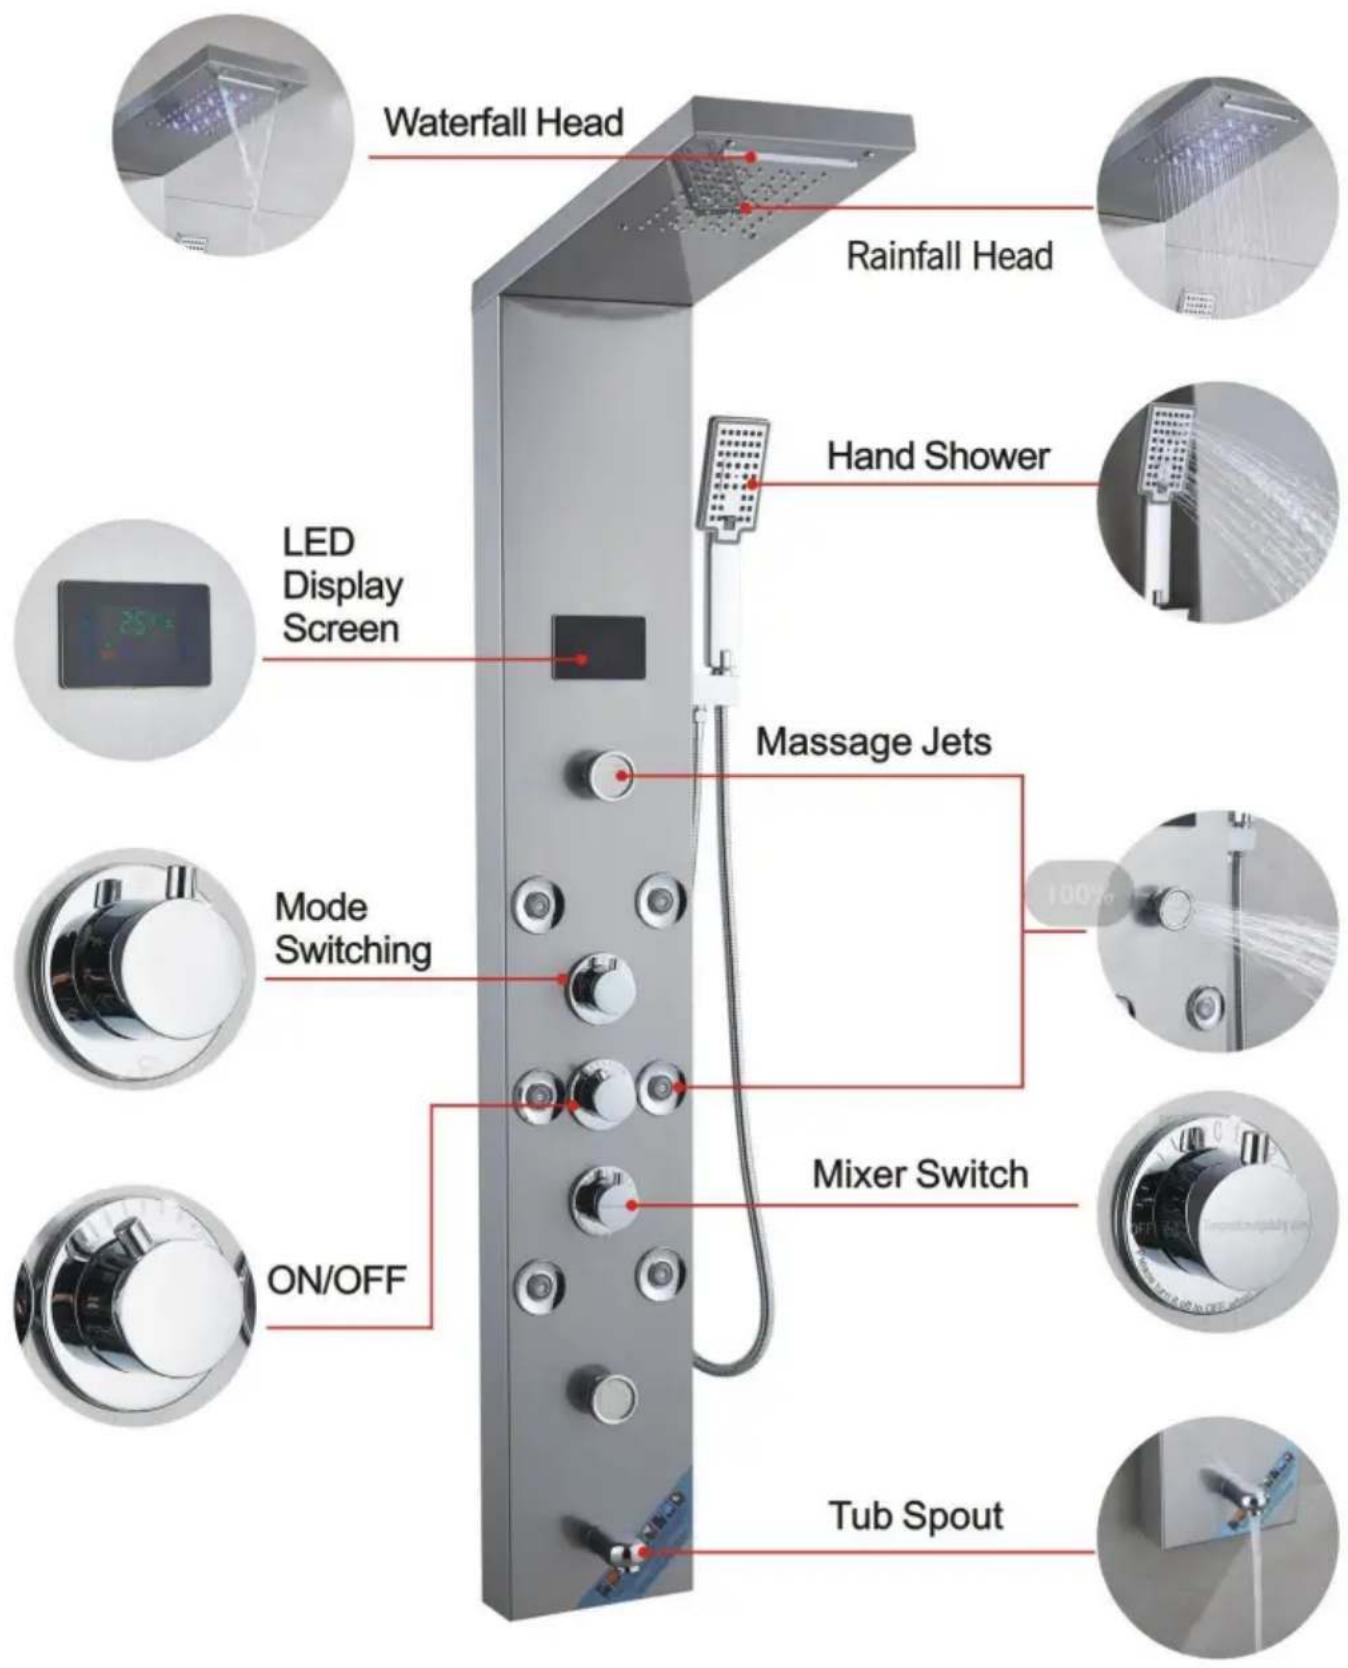
INTRODUCTION OF FUNCTIONS
8004FL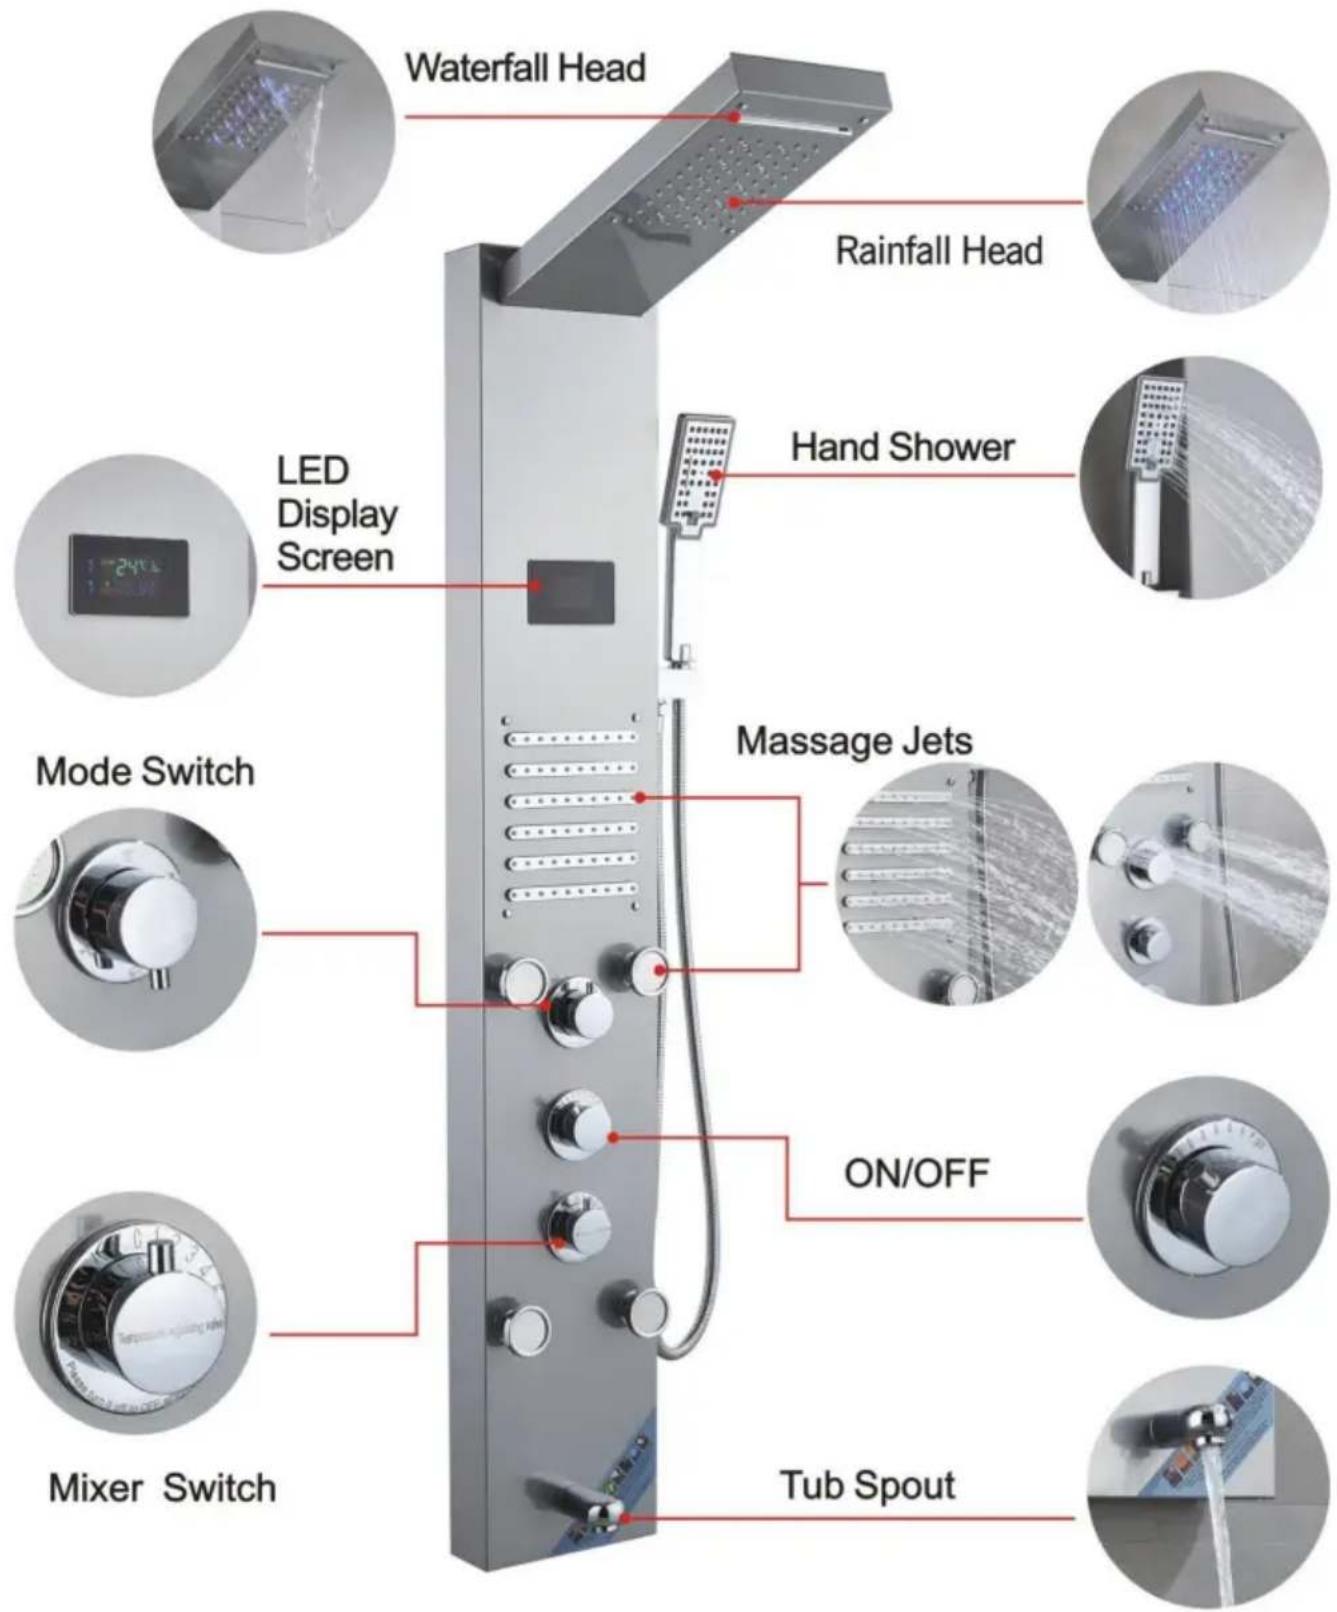
INTRODUCTION OF FUNCTIONS
7009FL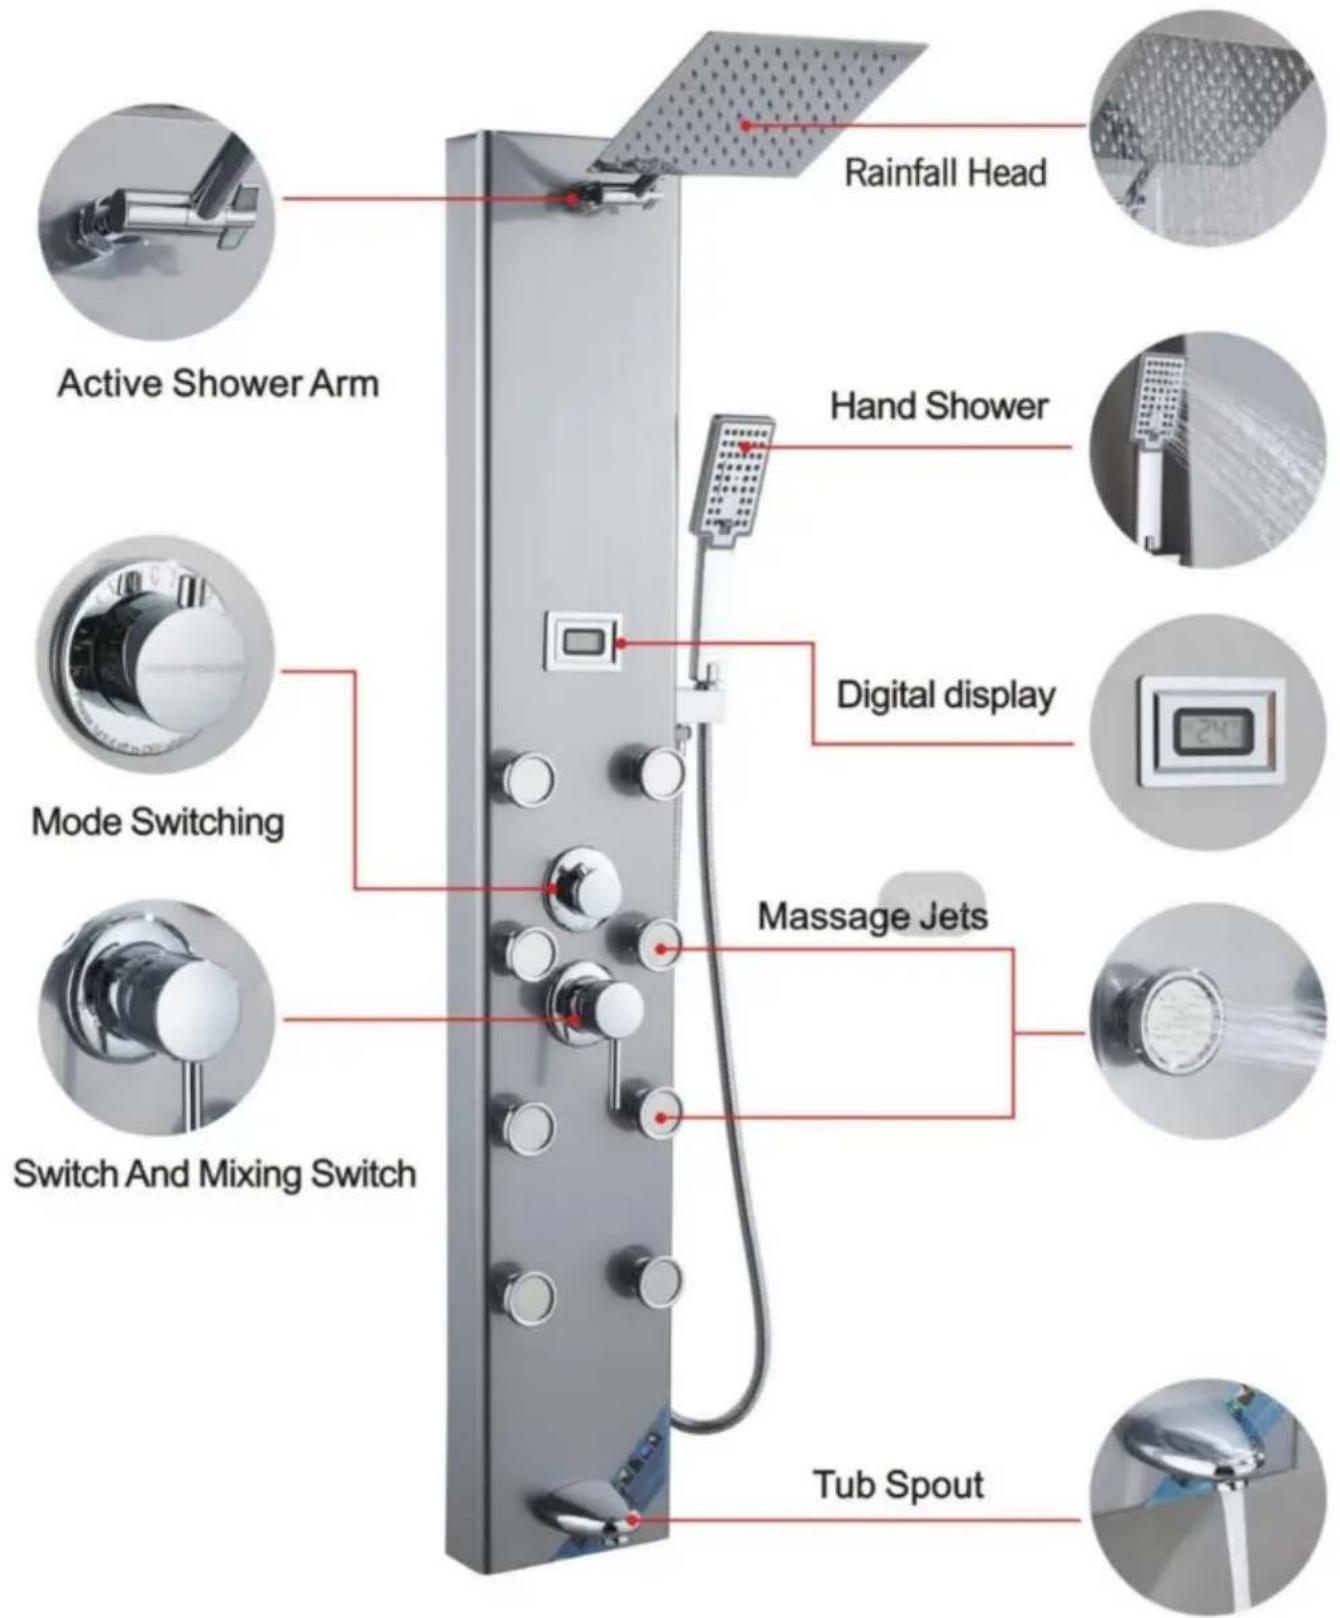
Made in China
VEVOR®
TOUGH TOOLS, HALF PRICE
MODEL: 8015FL/6002FL/8039FL/8009FL/8004FL/7009FL
Insert the PVC pipe from the top opening to pierce out.
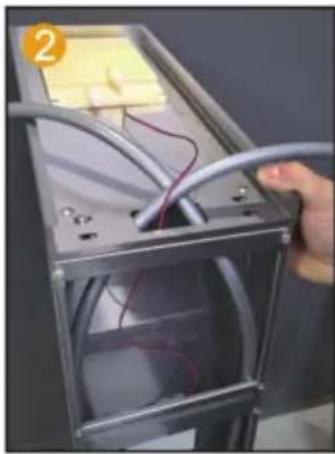
Route the LED light wire along the hole and insert into the motherboard.
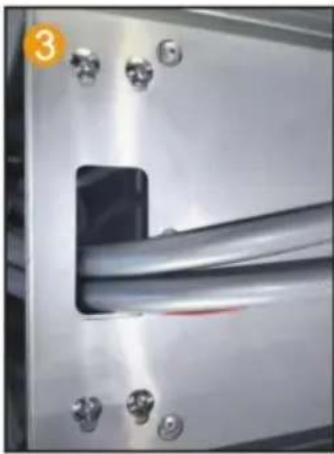
Fix the motherboard and top spray with 4 pairs of M6 screws and nuts.
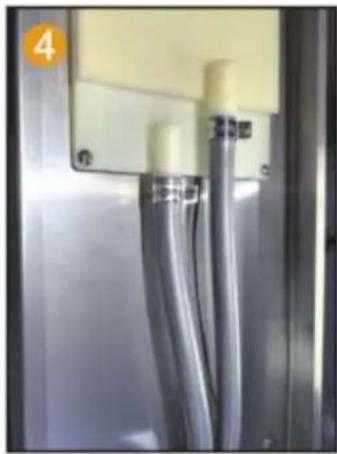
Fix the PVC pipe with a throat clamp on the top spray joint.
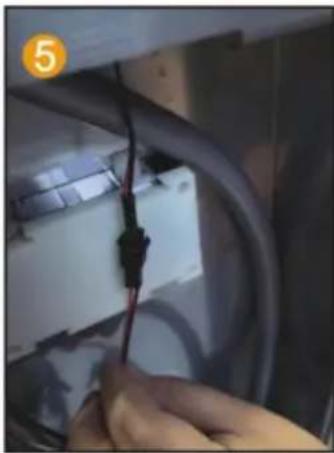
Connect the LED light cable and power supply line.
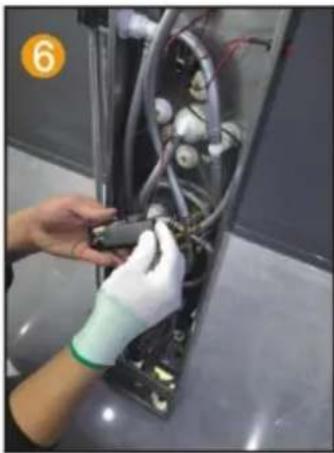
Install 2 No. 5 batteries to charge the pool box.
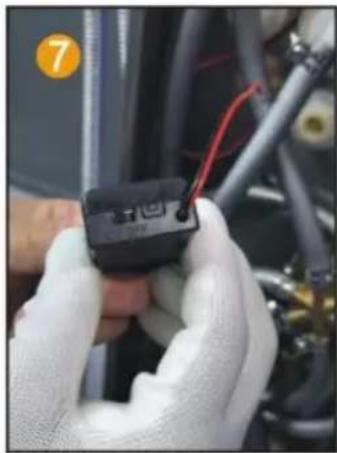
Point the switch of the battery box towards ON.
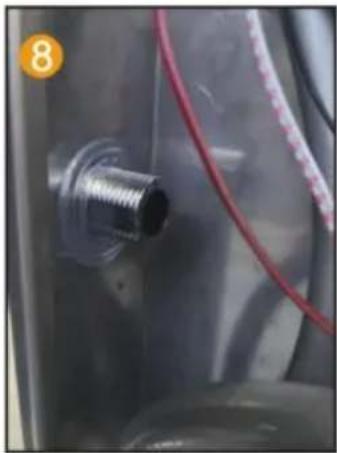
Insert the hand spray nozzle into the panel and install the gasket.
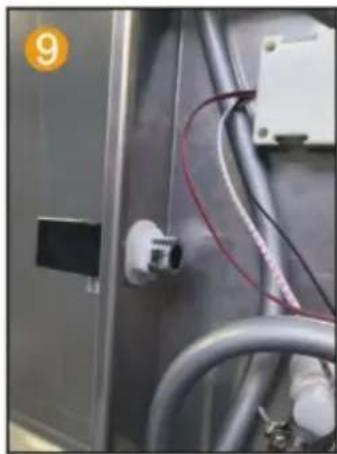
Spray socket with hexagonal nut handle fixed on the panel.
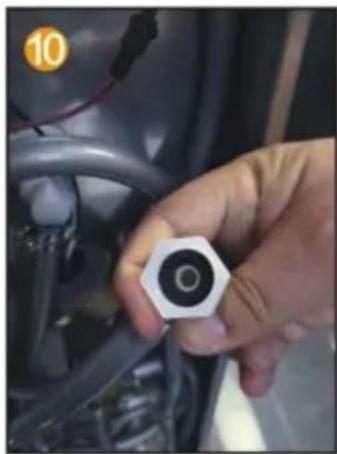
Put the 4-point rubber into the hand spray inside the joint of the seat.
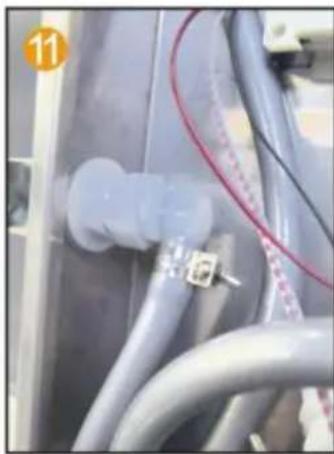
Connect the water outlet connector and hand spray seat joint.
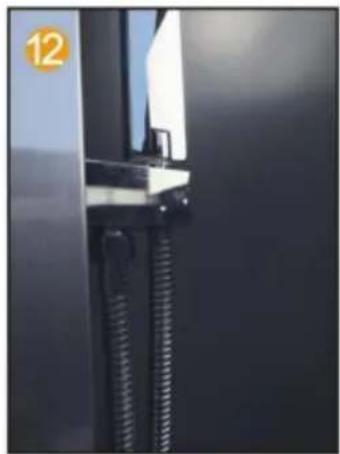
Connect the hand spray hose to the handheld shower head.
MODEL 8004FL
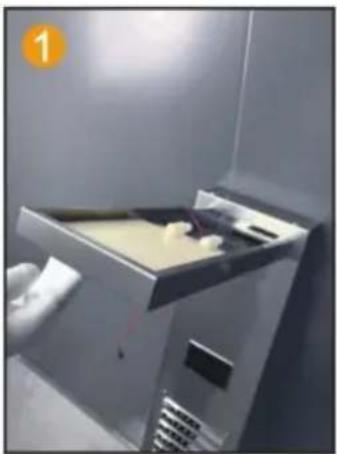
Insert the top spray into the motherboard inside the hole.
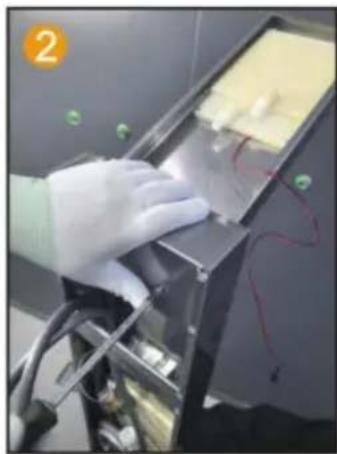
Use 2 M4 screws to secure the main fixed plate and top spray.

Connect PVC pipes and LED light wires, threading them through the hole.
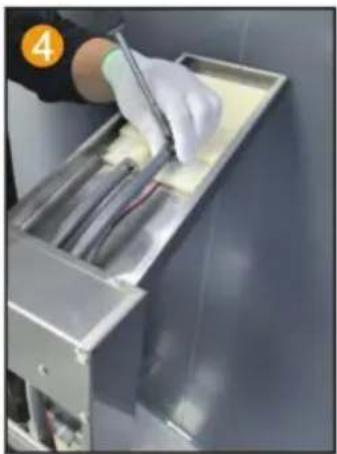
Fix the PVC pipe with a throat clamp on the top spray joint.
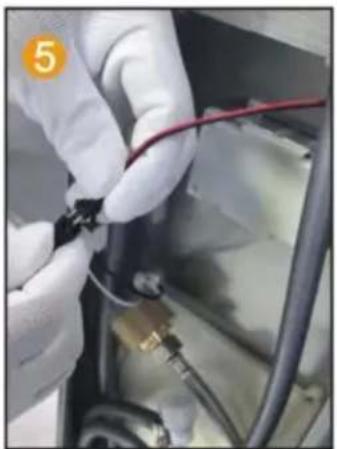
Connect the LED light cable and power supply line.
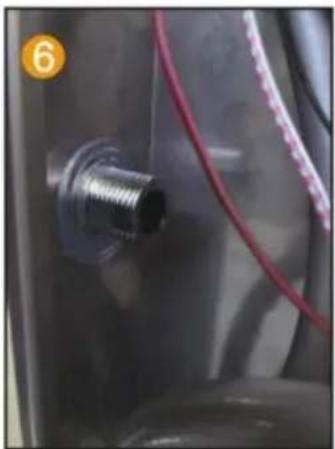
Insert the hand spray nozzle into the panel and install the gasket.
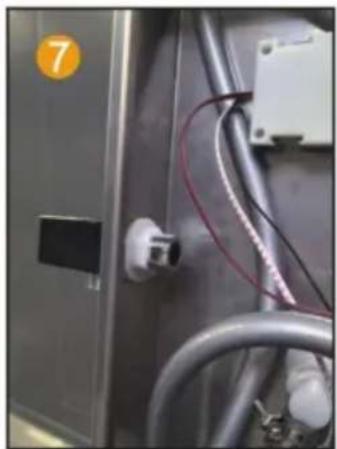
Spray socket with hexagonal nut handle, fixed on the panel.
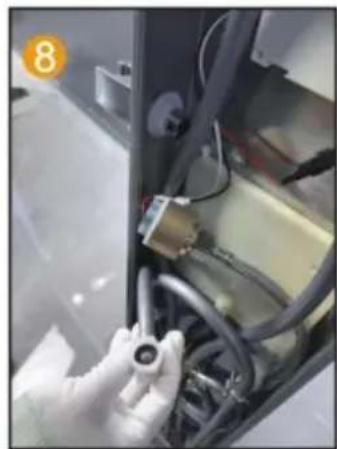
Spray socket with hexagonal nut handle, fix the 4-point rubber on the panel and spray it by hand inside the joint of the seat.
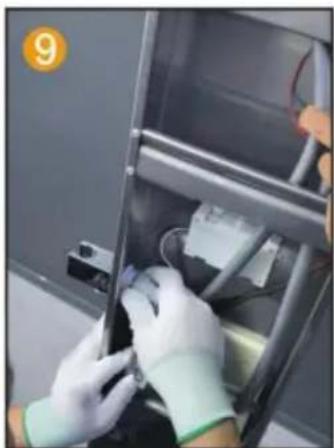
Connect the water outlet connector and hand spray seat joint.
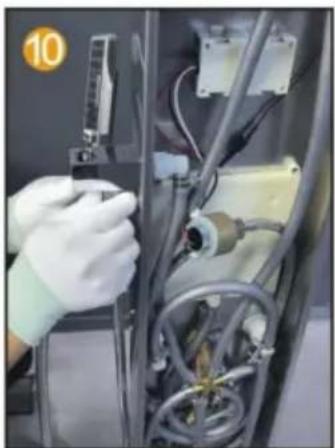
Connect the hand spray hose to the handheld shower head.
MODELL 7009FL
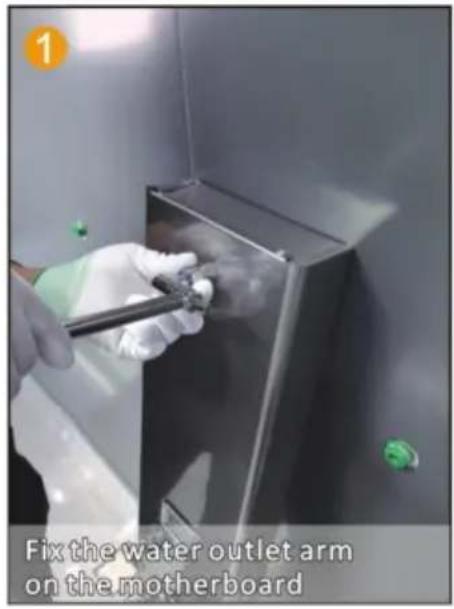
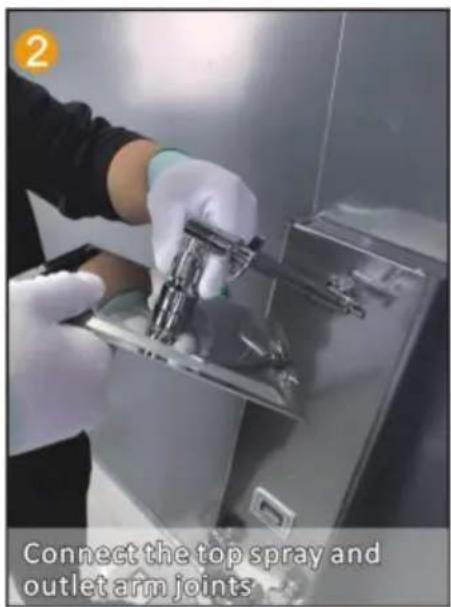
INSTALLATION STEPS (GENERAL)
Installation instructions
INSTALLATION DIAGRAM OF THE SHOWER PANEL SERIES
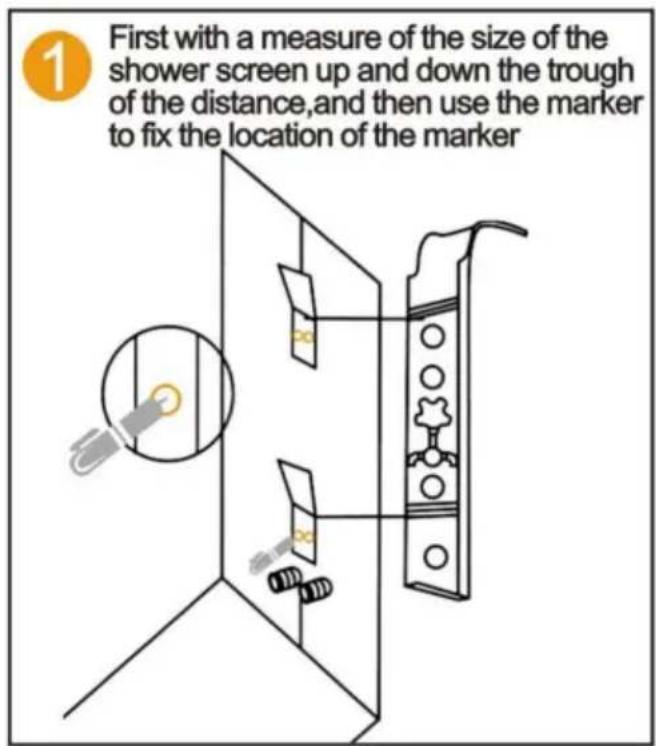
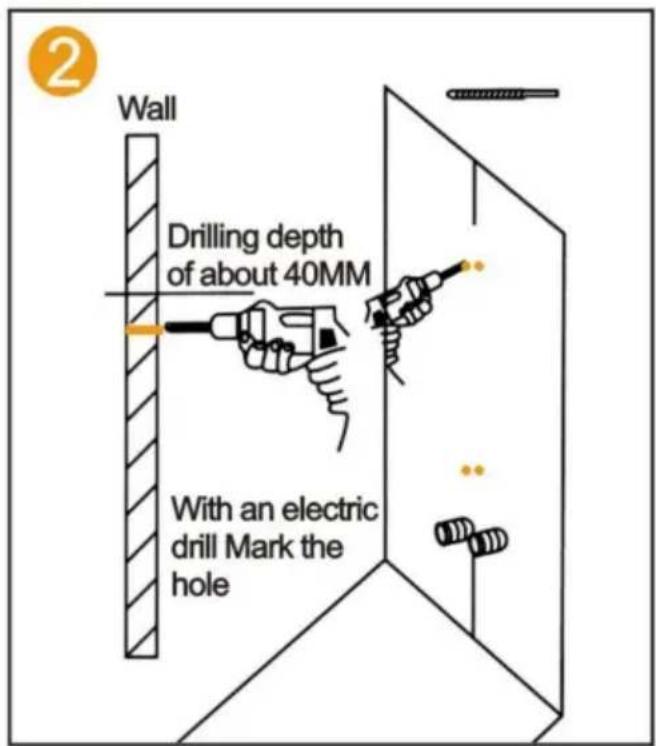
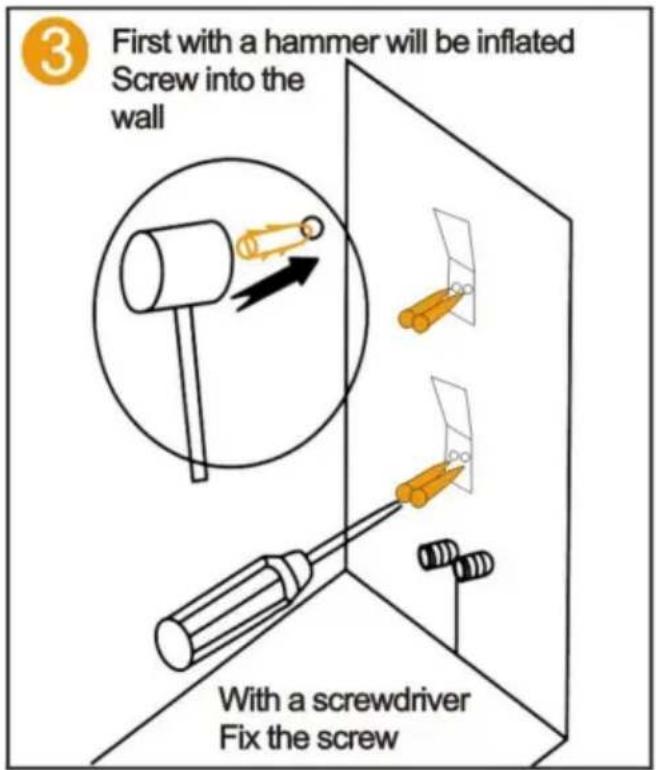
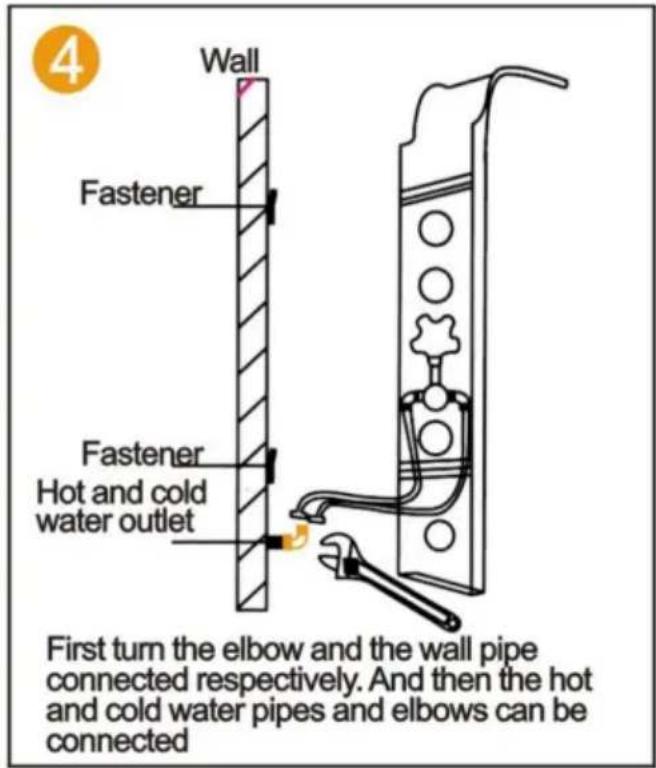
FUNCTION INTRODUCTION
8015FL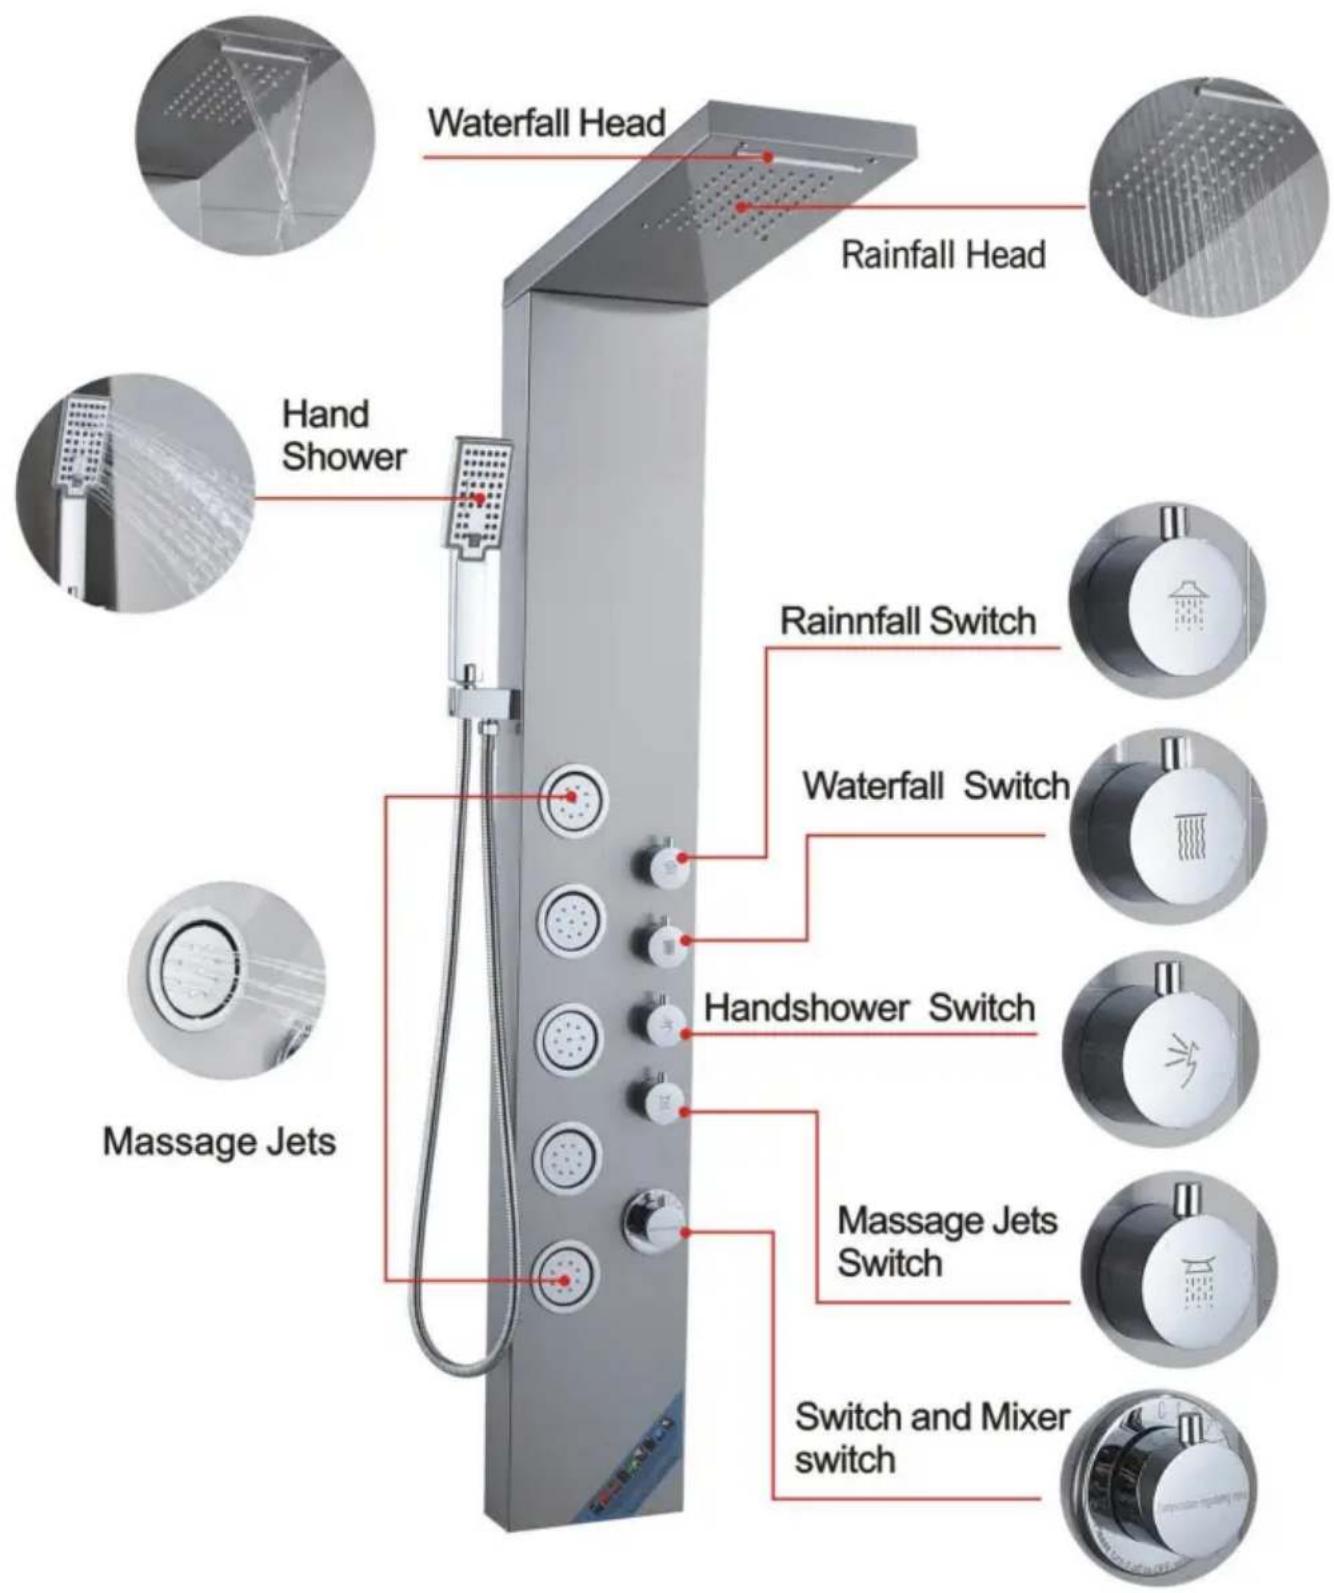
FUNCTION INTRODUCTION
6002FL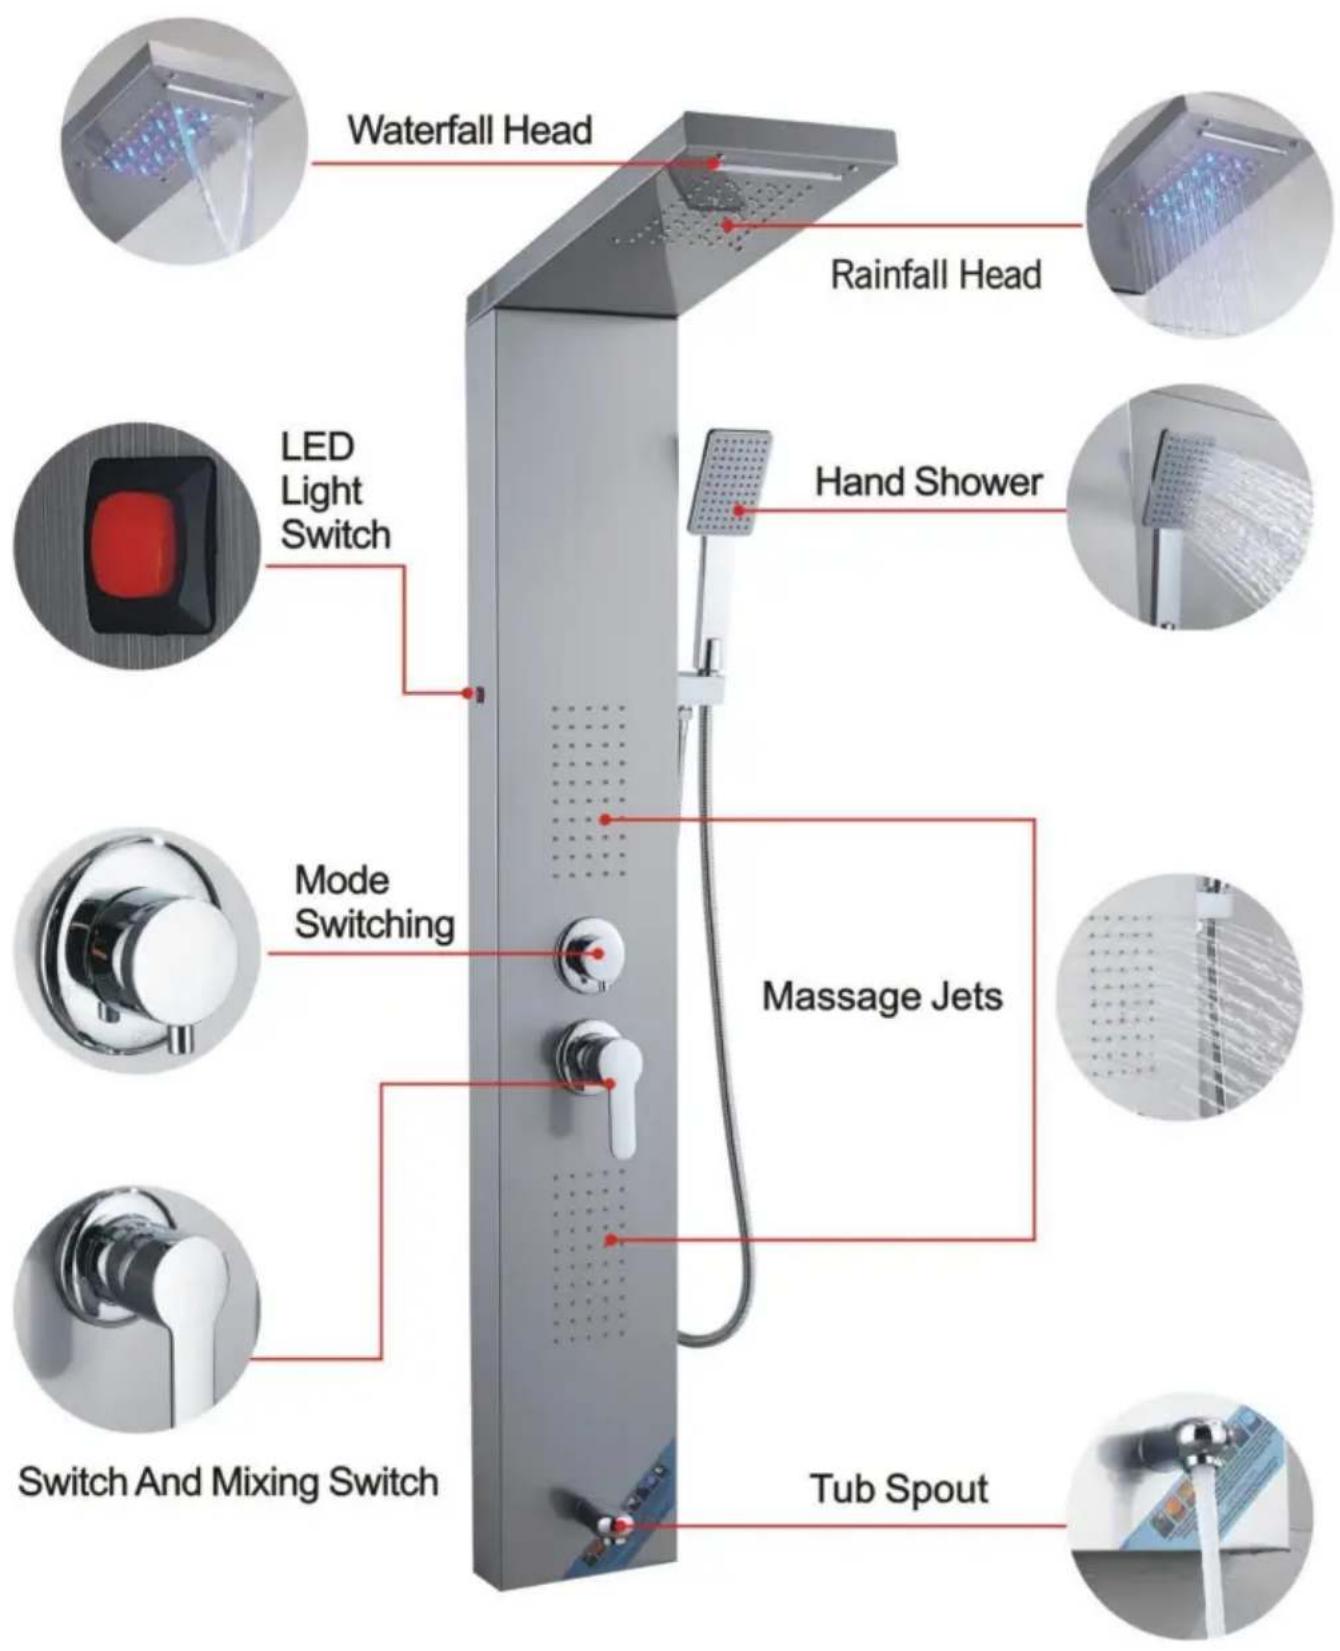
FUNCTION INTRODUCTION
8039FL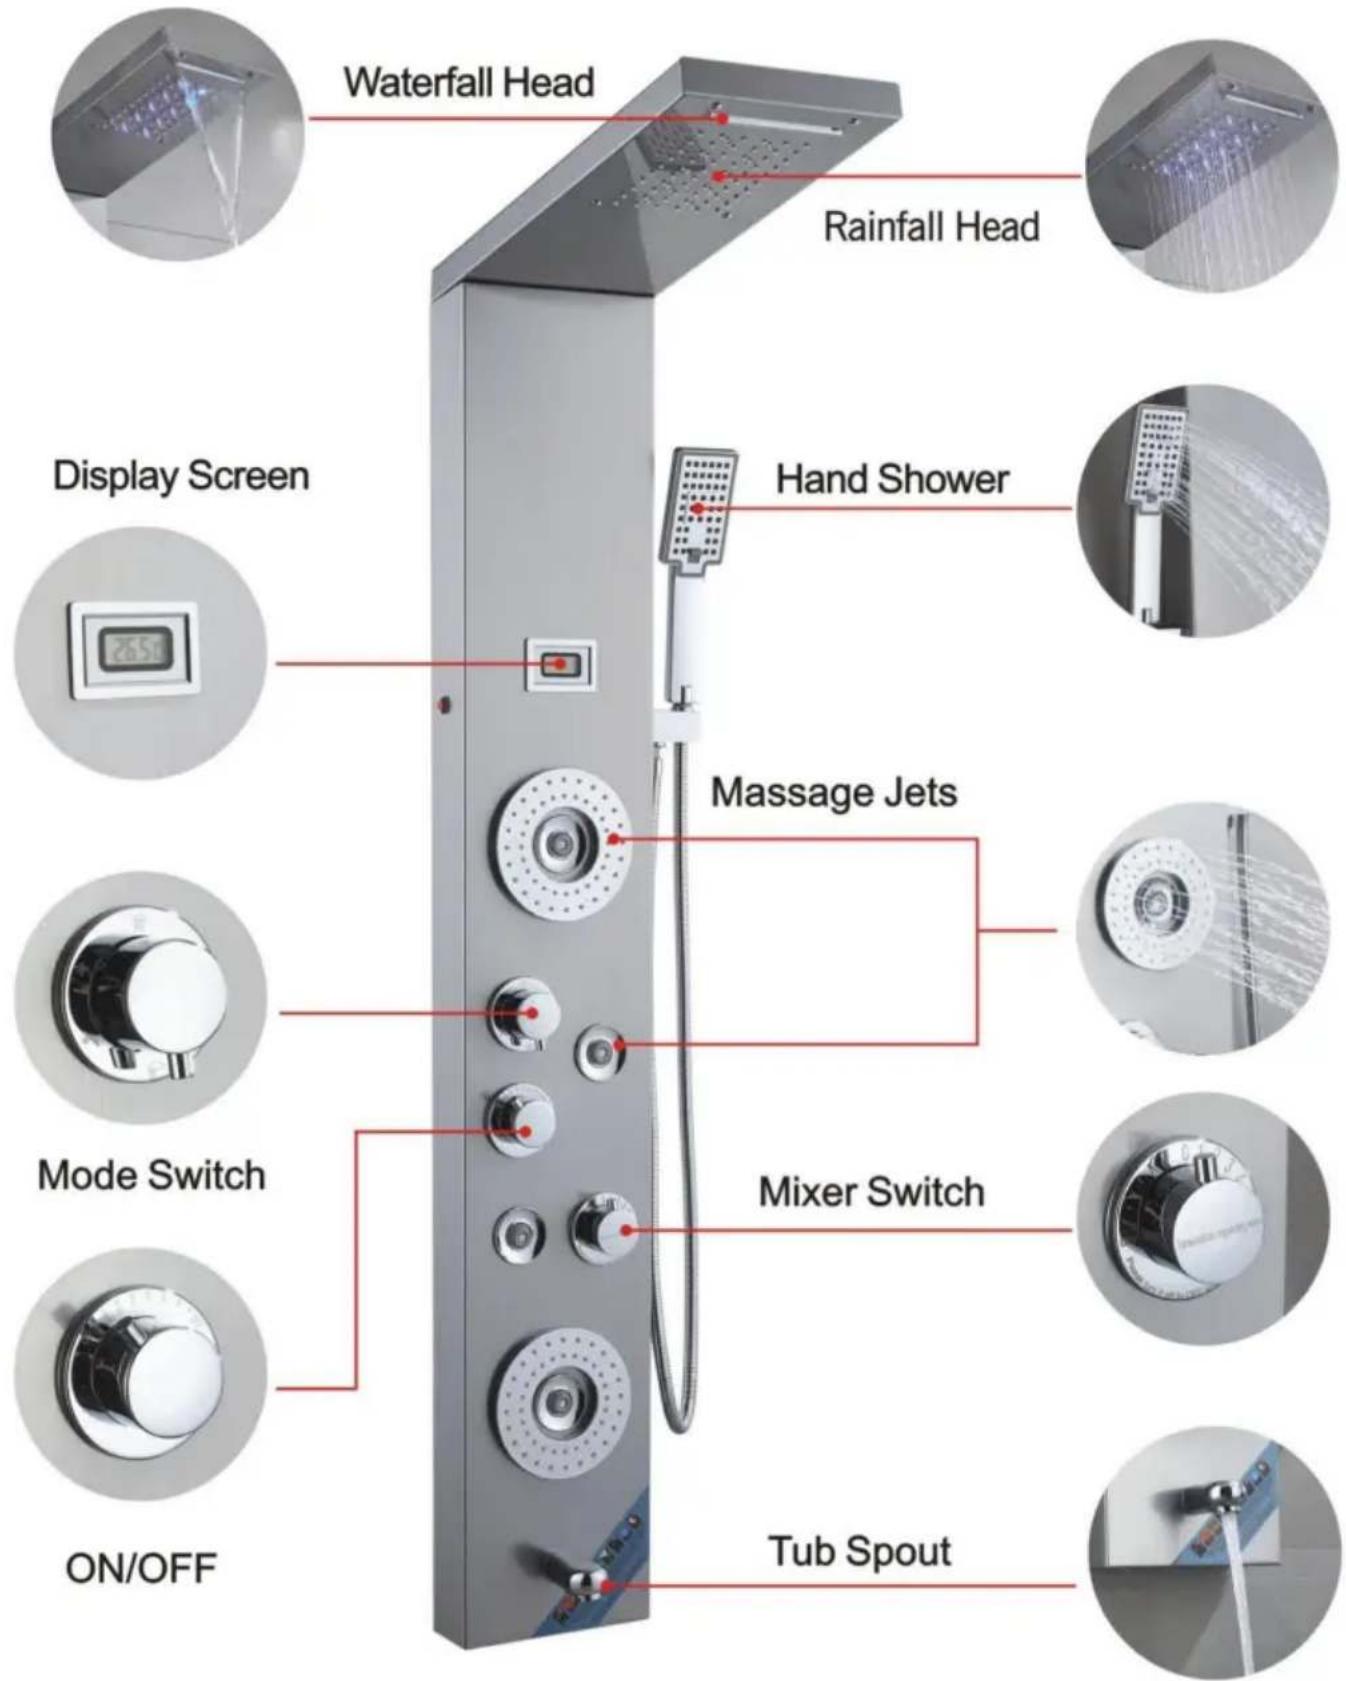
FUNCTION INTRODUCTION
8009FL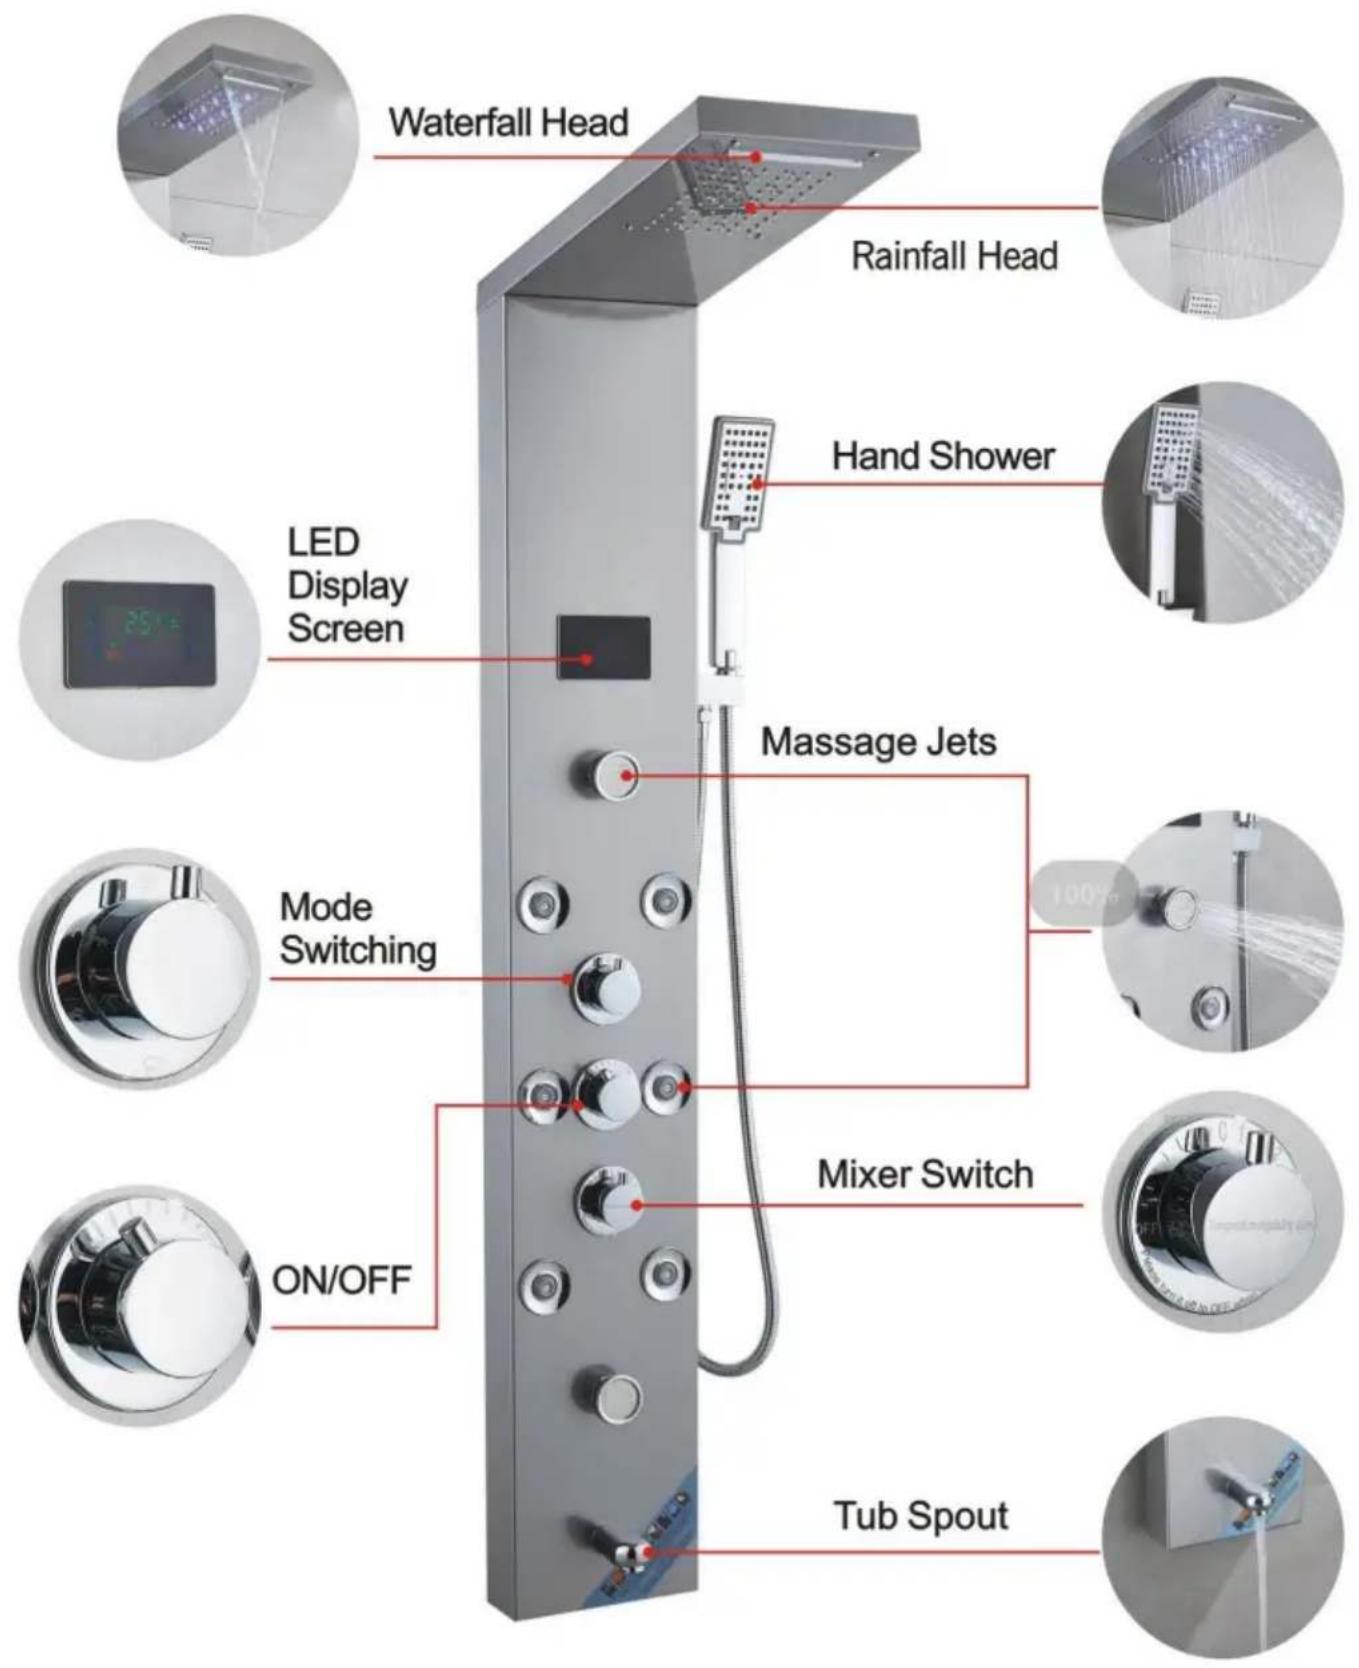
FUNCTION INTRODUCTION
8004FL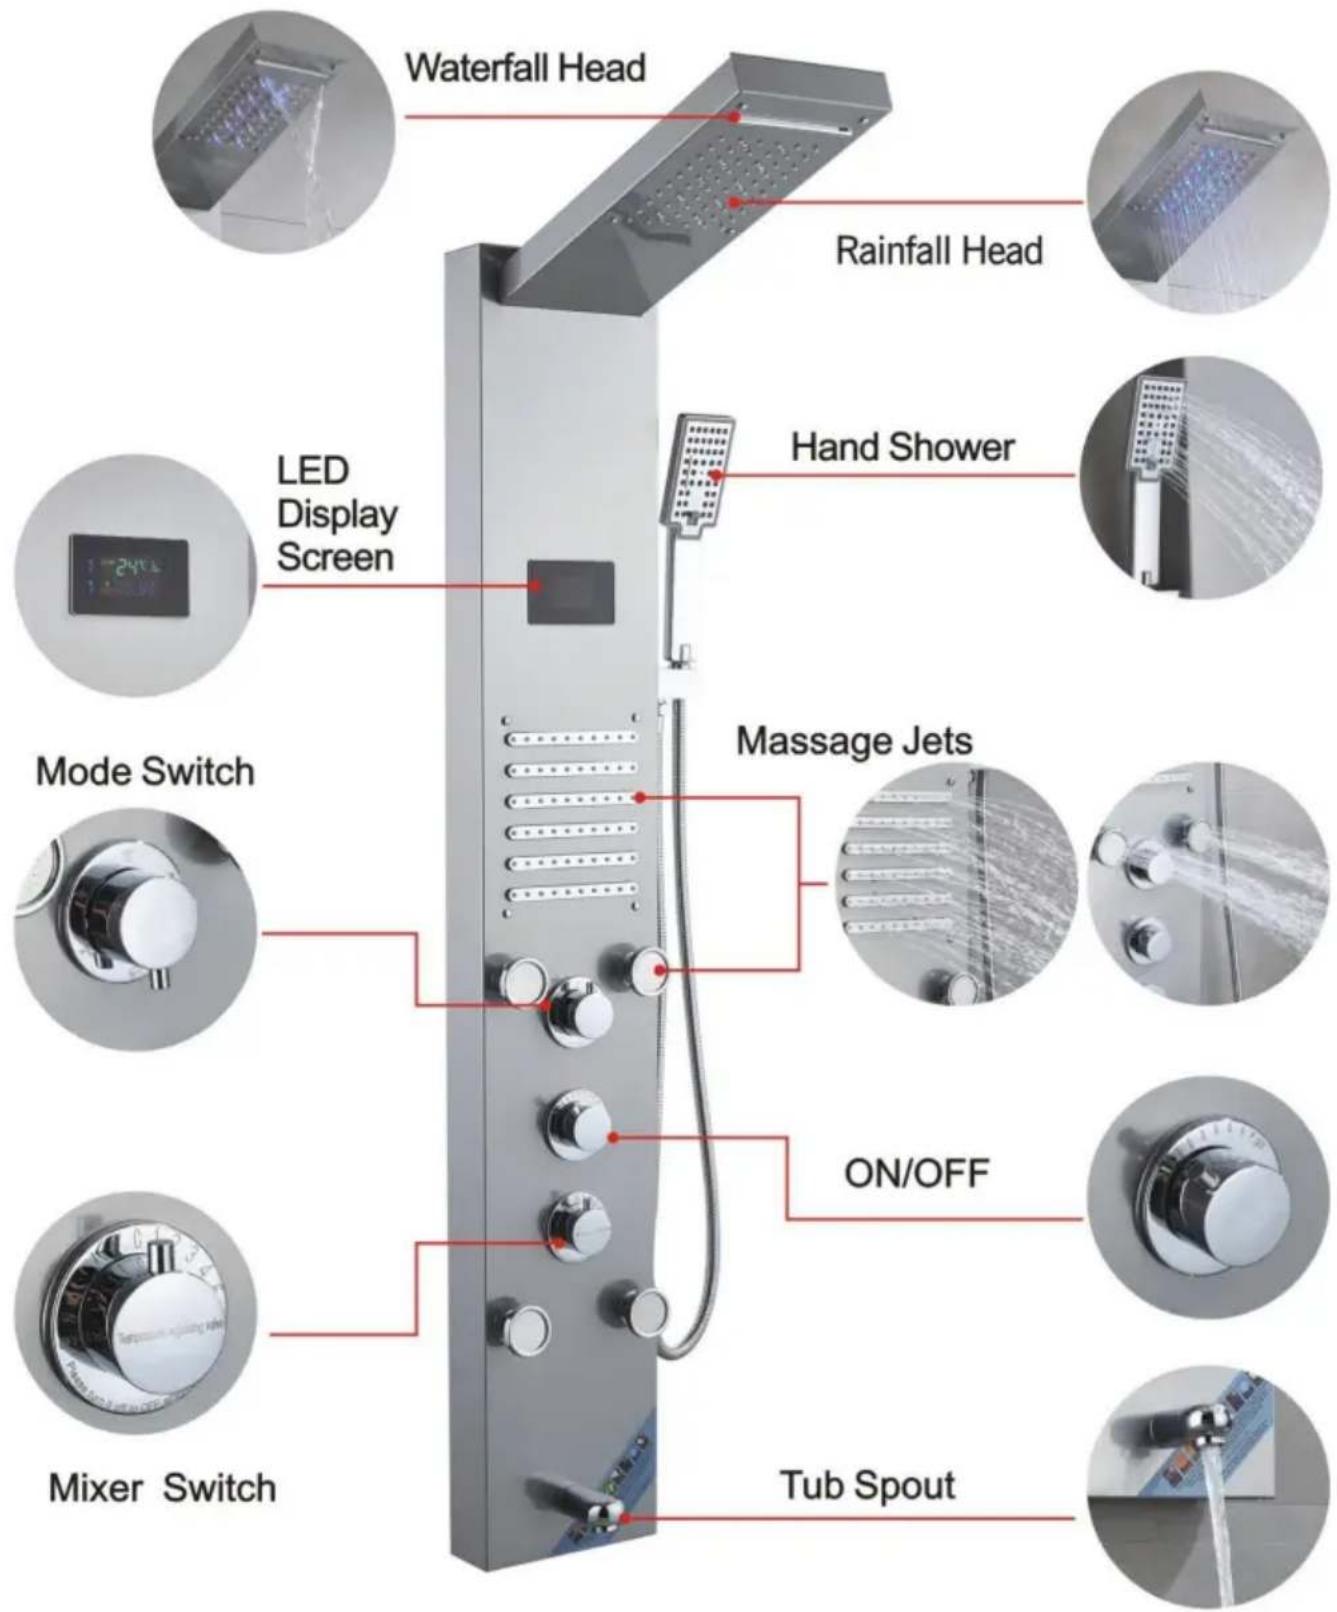
FUNCTION INTRODUCTION
7009FL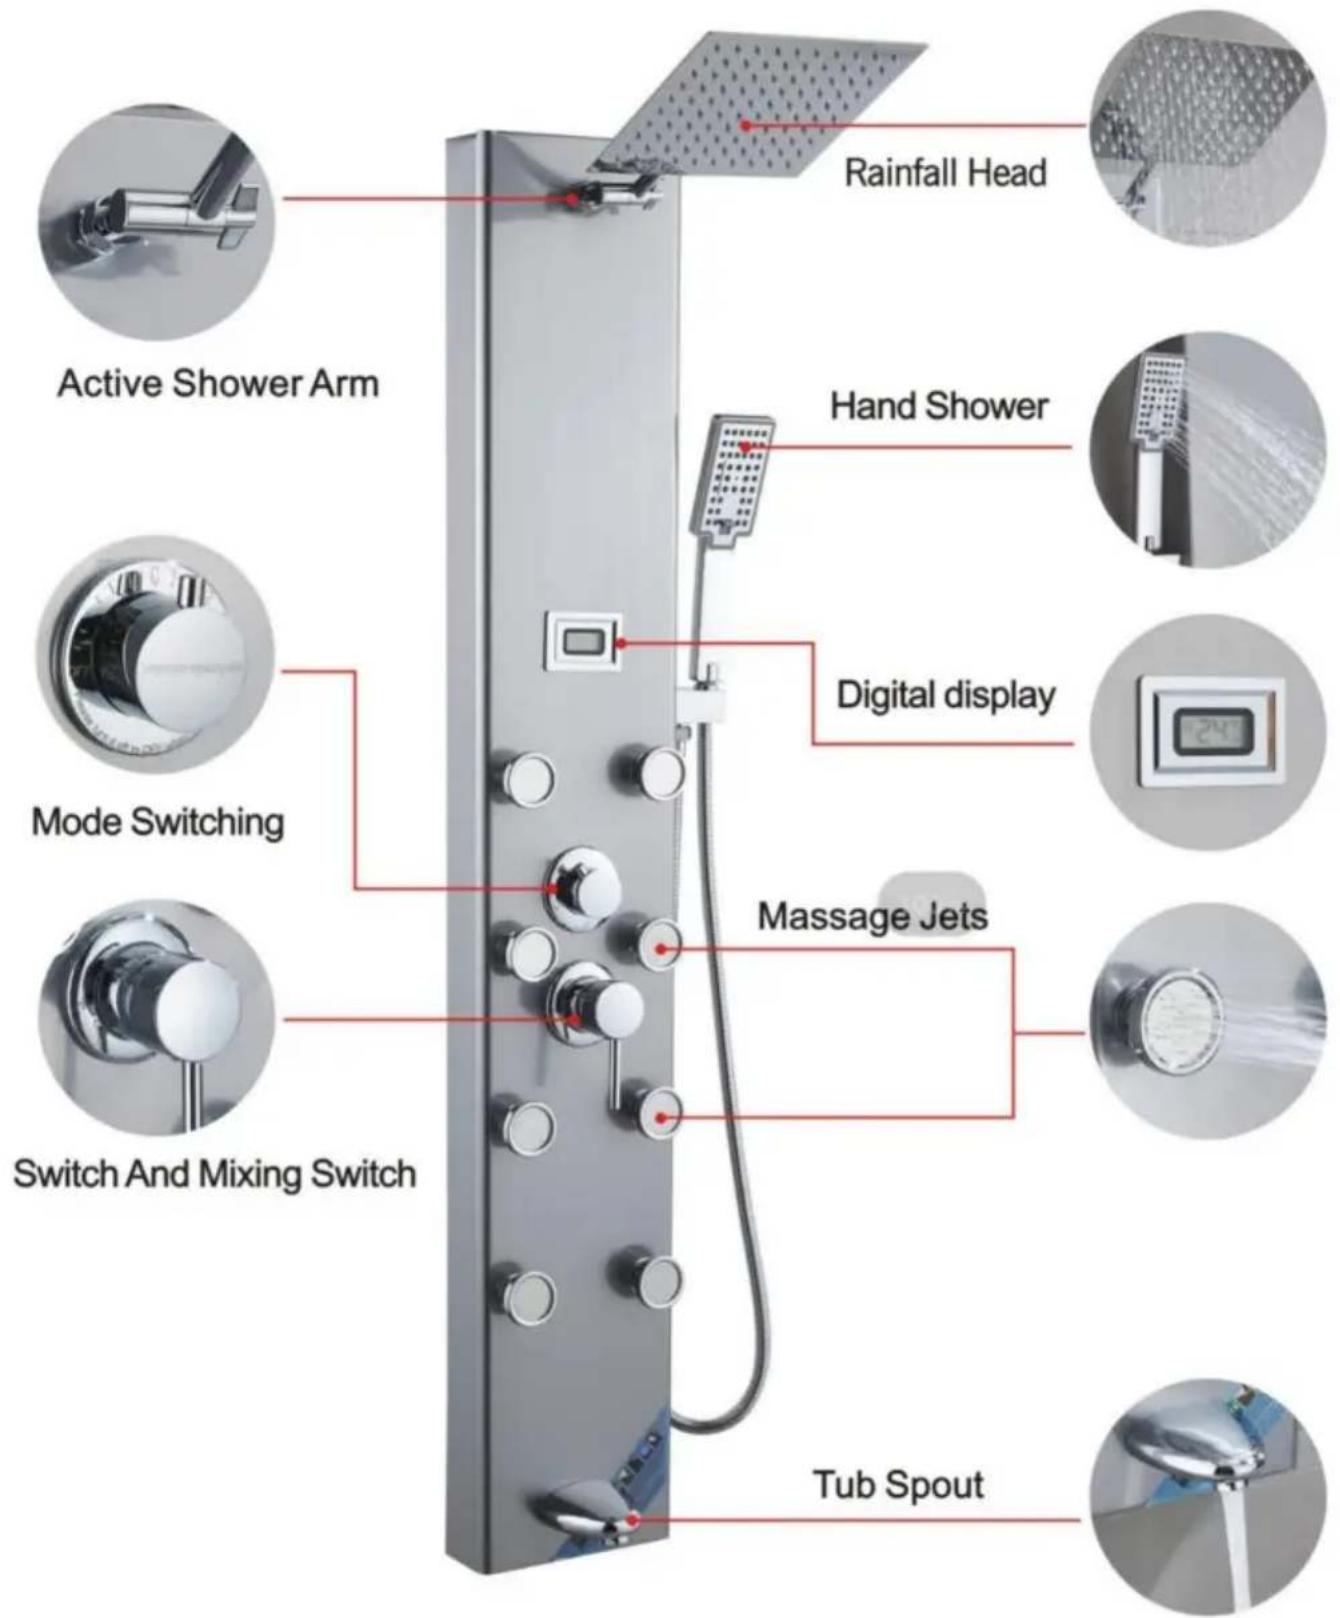
www.vevor.com/support
VEVOR®
TOUGH TOOLS, HALF PRICE
Insert the PVC pipe from the top opening to pierce out.
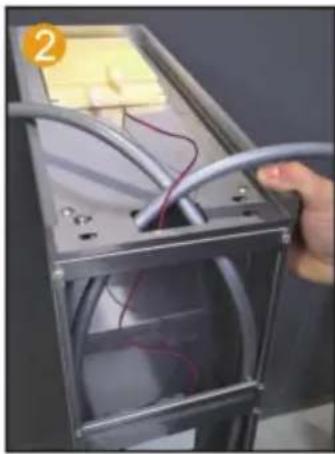
Route the LED light wire along the hole and insert into the motherboard.

Fix the motherboard and top spray with 4 pairs of M6 screws and nuts.
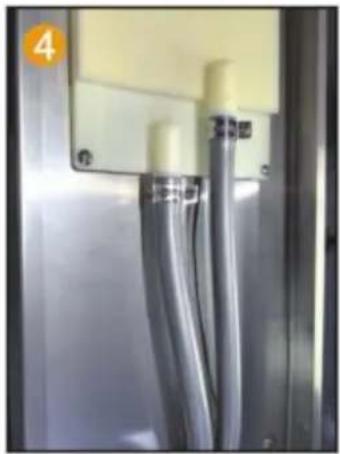
Fix the PVC pipe with a throat clamp on the top spray joint.
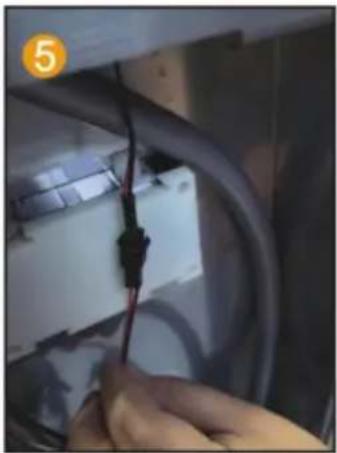
Connect the LED light cable and power supply line.
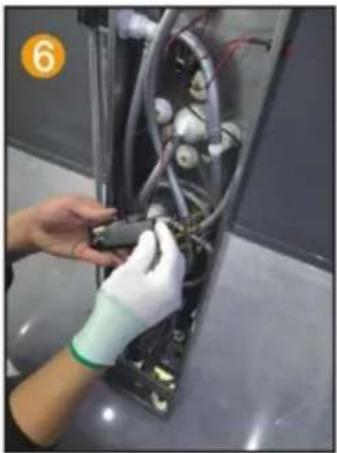
Install 2 No. 5 batteries to charge the pool box.
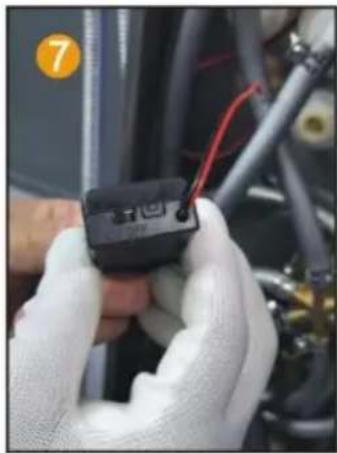
Point the switch of the battery box towards ON.
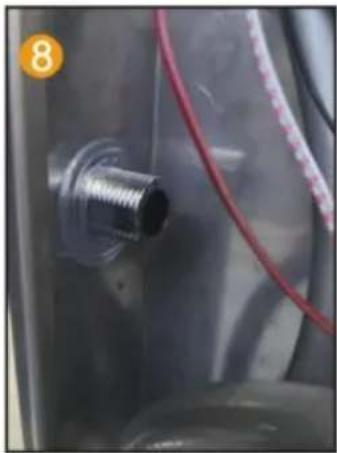
Insert the hand spray nozzle into the panel and install the gasket.
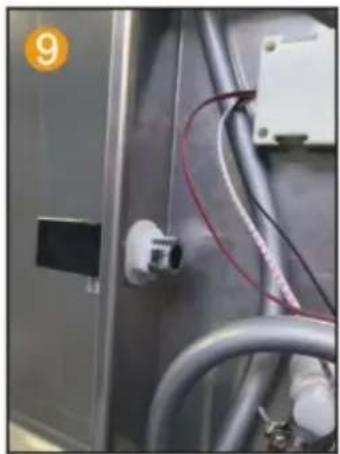
Spray socket with hexagonal nut handle fixed on the panel.
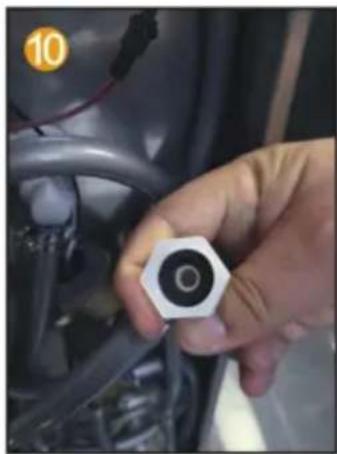
Put the 4-point rubber into the hand spray inside the joint of the seat.
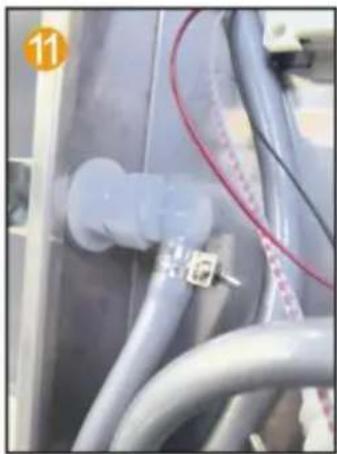
Connect the water outlet connector and hand spray seat joint.
Insert the top spray into the motherboard inside the hole.
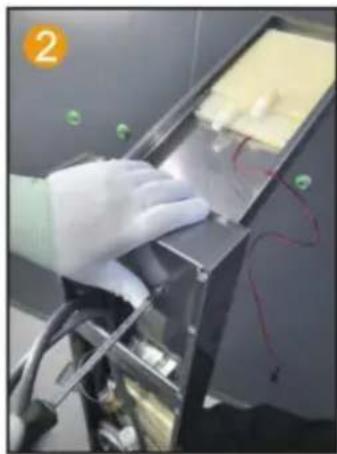
Use 2 M4 screws to secure the main fixed plate and top spray.
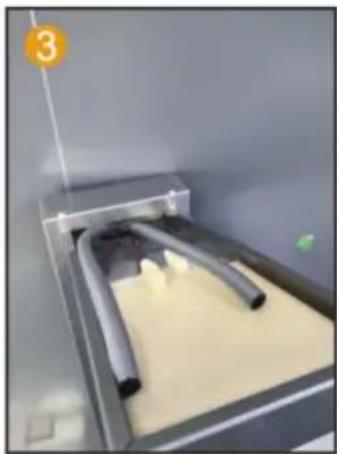
Connect PVC pipes and LED light wires, thread through the hole.
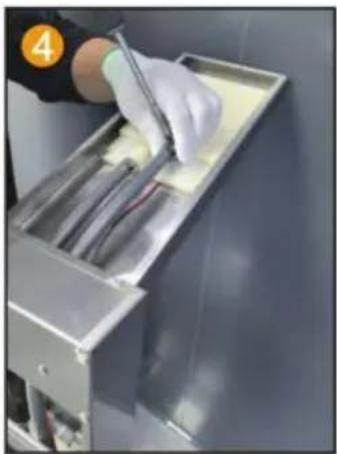
Fix the PVC pipe with a throat clamp on the top spray joint.
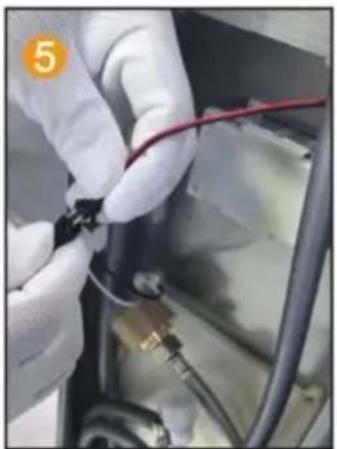
Connect the LED light cable and power supply line.
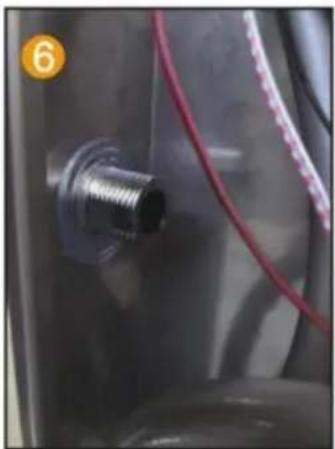
Insert the hand spray nozzle into the panel and install the gasket.
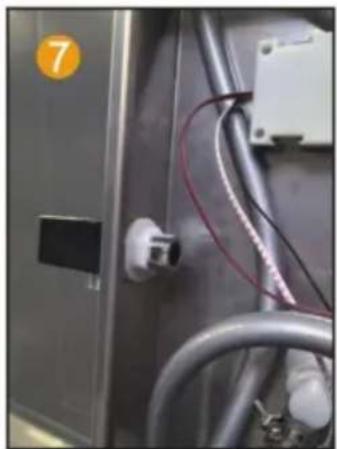
Spray socket with hexagonal nut handle, fixed on the panel.
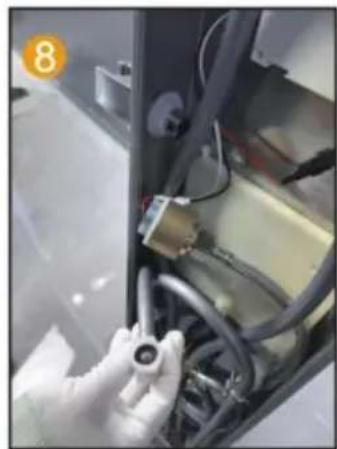
Spray socket with hexagonal nut handle. Fix the 4-point rubber on the panel and spray it by hand inside the joint of the seat.
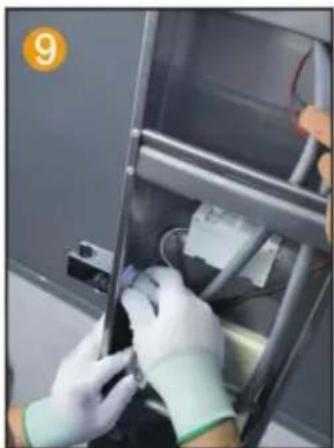
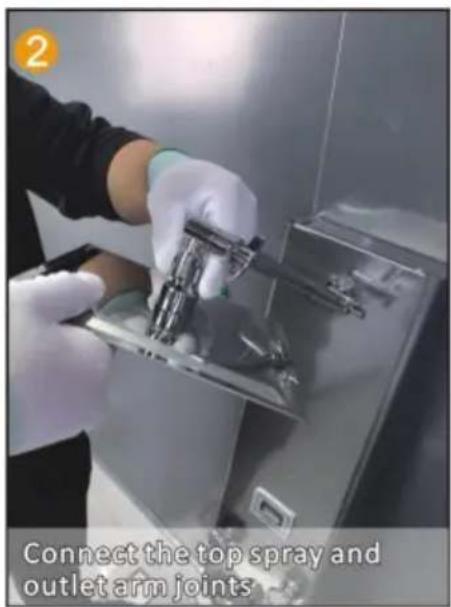
Connect the water outlet connector and hand spray seat joint.
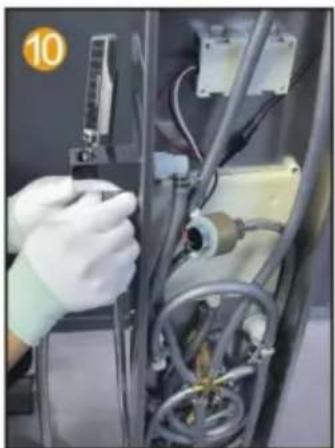
Connect the hand spray hose to the handheld shower head.
MODELLO 7009FL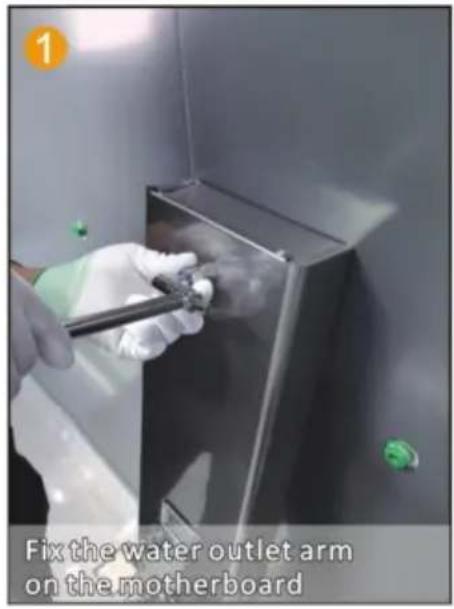
Made in China
VEVOR®
TOUGH TOOLS, HALF PRICE
elettronica www.vevor.com/support
VEVOR®
TOUGH TOOLS, HALF PRICE
Insert the PVC pipe from the top opening to pierce out.
Route the LED light wire along the hole and insert into the motherboard.
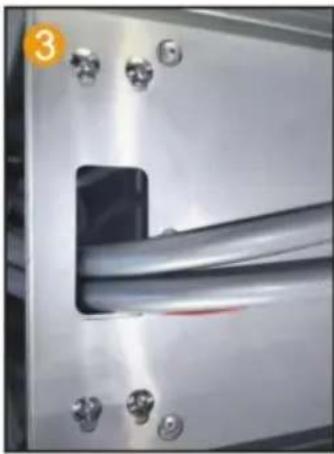
Fix the motherboard and top spray with 4 pairs of M6 screws and nuts.
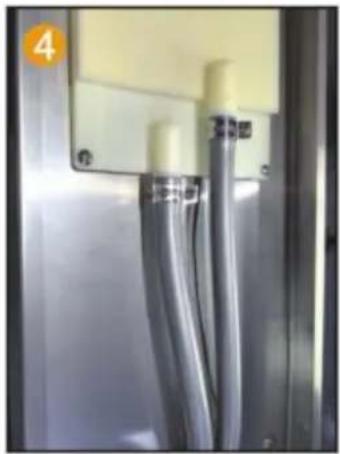
Fix the PVC pipe with a throat clamp on the top spray joint.
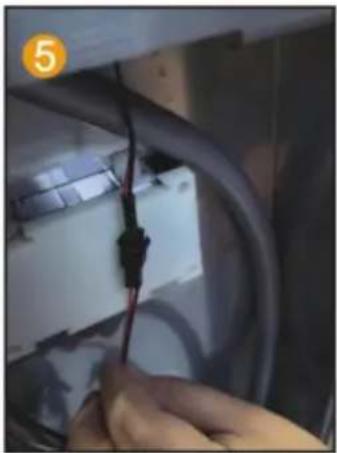
Connect the LED light cable and power supply line.
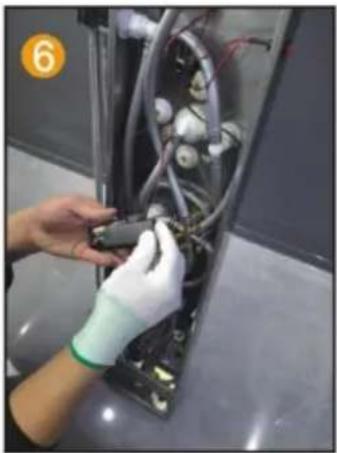
Install 2 No. 5 batteries to charge the pool box.
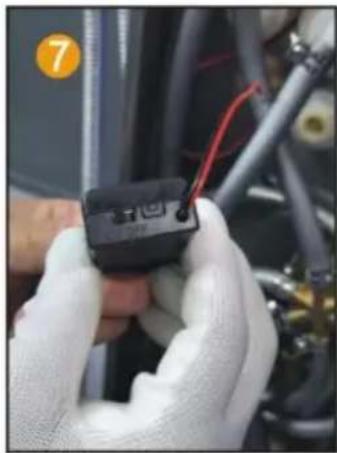
Point the switch of the battery box towards ON.
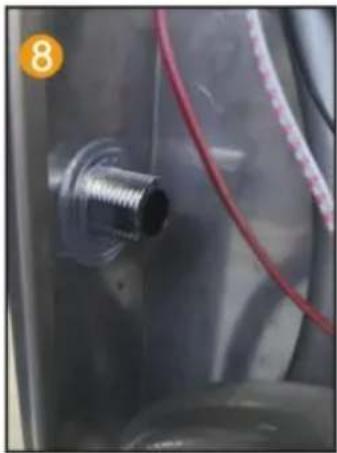
Insert the hand spray nozzle into the panel and install the gasket.
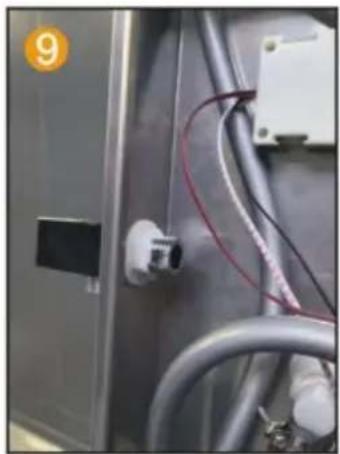
Spray socket with hexagonal nut handle fixed on the panel.
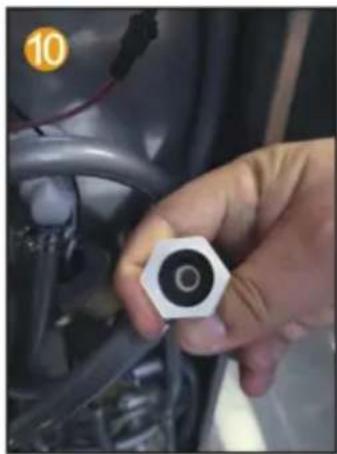
Put the 4-point rubber into the hand spray inside the joint of the seat.
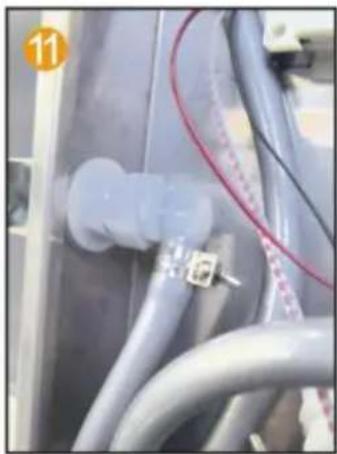
Connect the water outlet connector and hand spray seat joint.

Insert the top spray into the motherboard inside the hole.
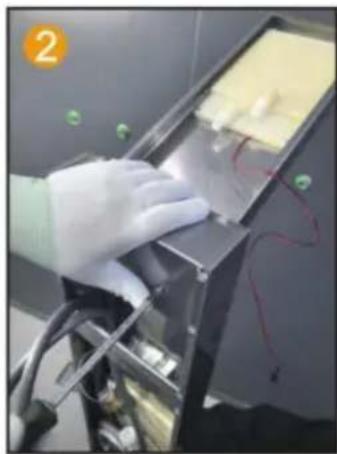
Use 2 M4 screws to secure the main fixed plate and top spray.
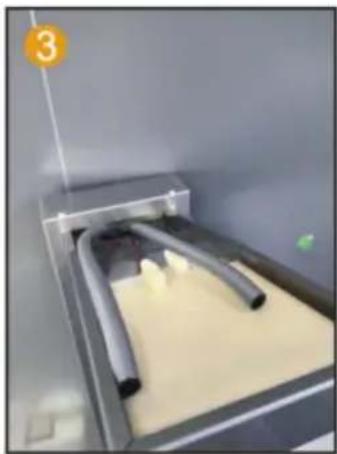
Connect PVC pipes and LED light wires thread through the hole.
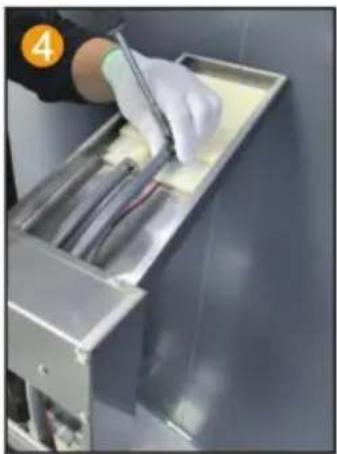
Fix the PVC pipe with a throat clamp on the top spray joint.
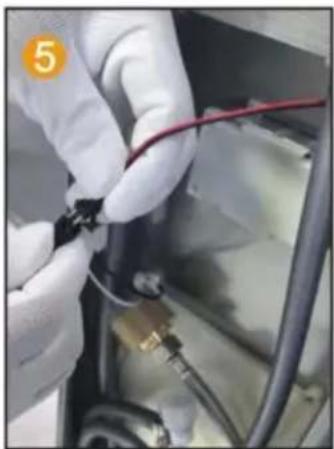
Connect the LED light cable and power supply line.
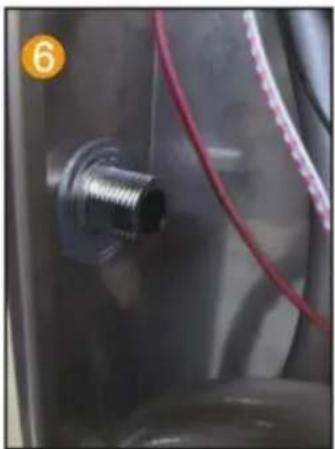
Insert the hand spray nozzle into the panel and install the gasket.
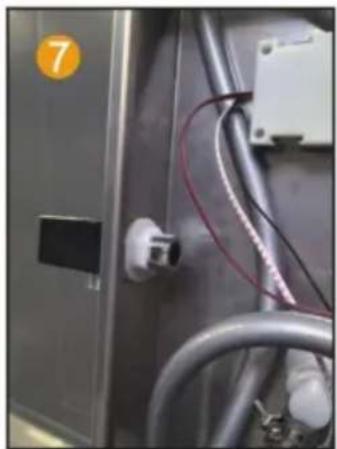
Spray socket with hexagonal nut handle fixed on the panel.
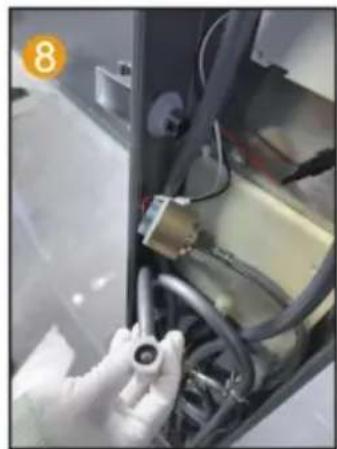
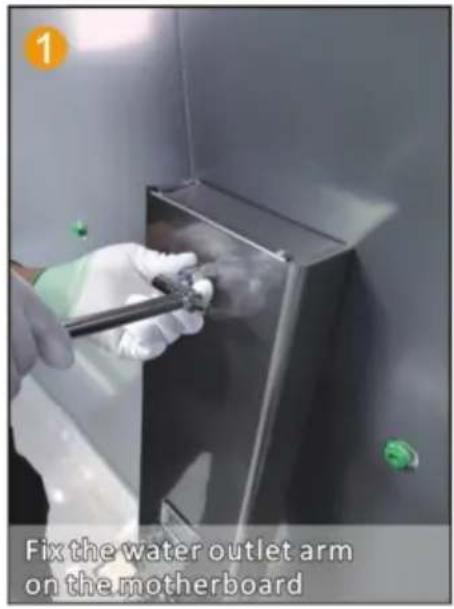
Spray socket with hexagonal nut handle fix the 4-point rubber on the panel and spray it by hand inside the joint of the seat.
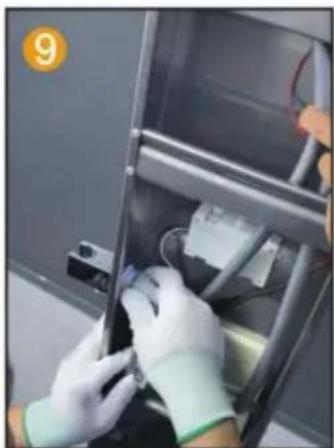
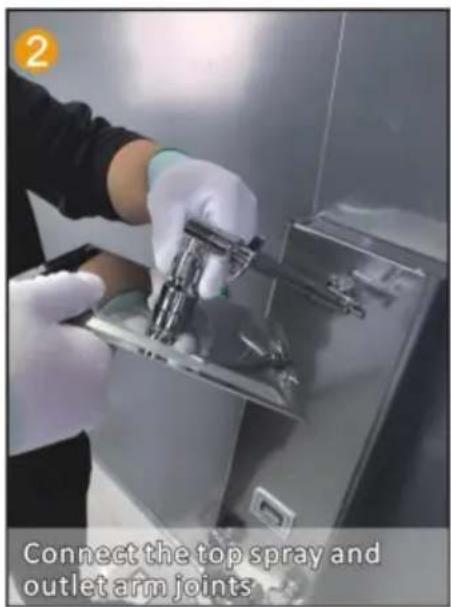
Connect the water outlet connector and hand spray seat joint.
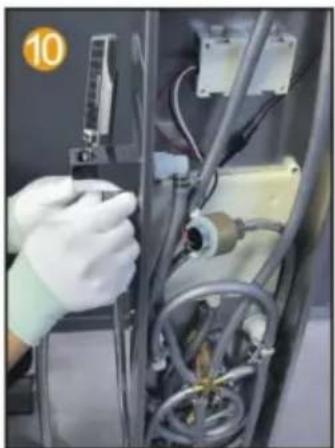
Connect the hand spray hose to the handheld shower head.
MODEL 7009FL
Made in China
VEVOR®
TOUGH TOOLS, HALF PRICE
Insert the PVC pipe from the top opening to pierce out.
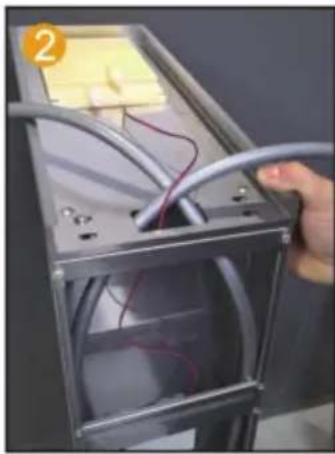
Route the LED light wire along the hole and insert it into the motherboard.
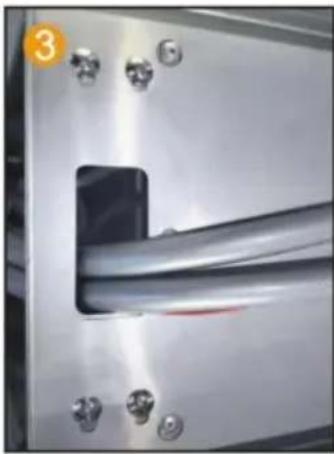
Fix the motherboard and top spray with 4 pairs of M6 screws and nuts.
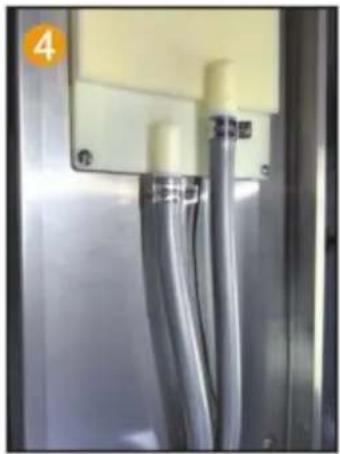
Fix the PVC pipe with a throat clamp on the top spray joint.
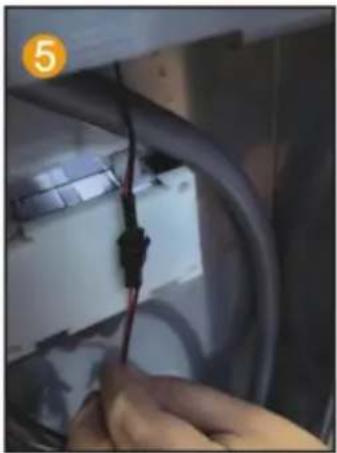
Connect the LED light cable and power supply line.
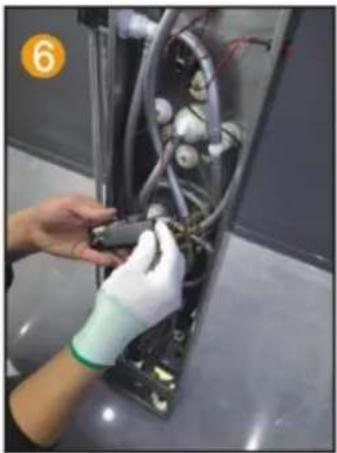
Install 2 No. 5 batteries to charge the pool box.
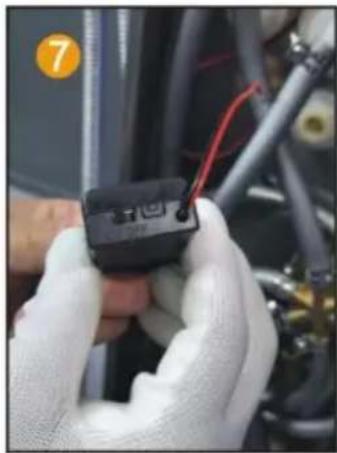
Point the switch of the battery box towards ON.
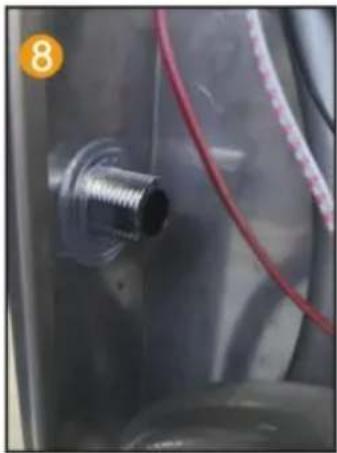
Insert the hand spray nozzle into the panel and install the gasket.
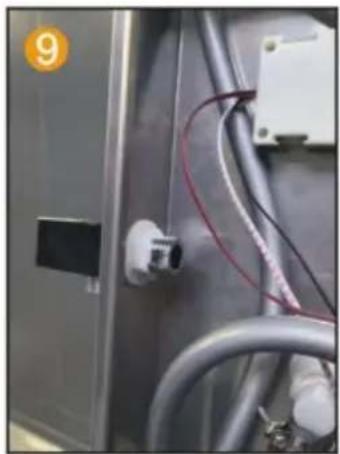
Spray socket with hexagonal nut handle fixed on the panel.
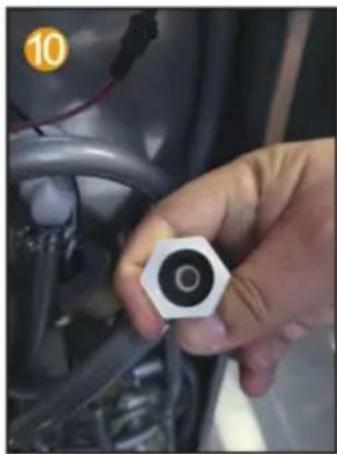
Insert the 4-point rubber into the hand spray joint inside the seat.
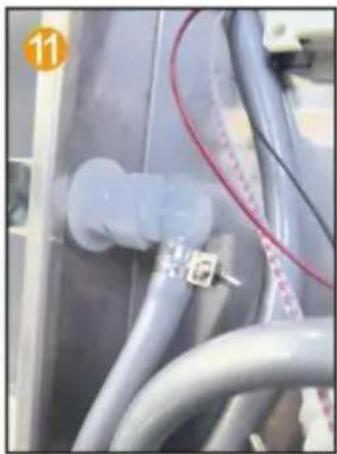
Connect the water outlet connector and hand spray to the seat joint.
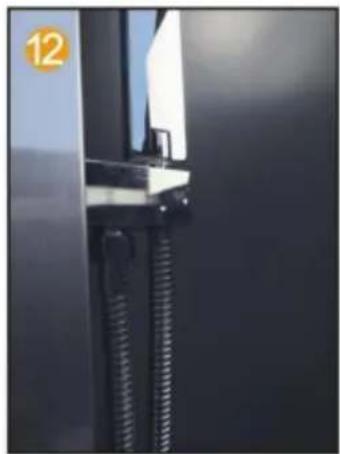
Connect the hand spray hose to the handheld shower head.
MODEL 8004FL
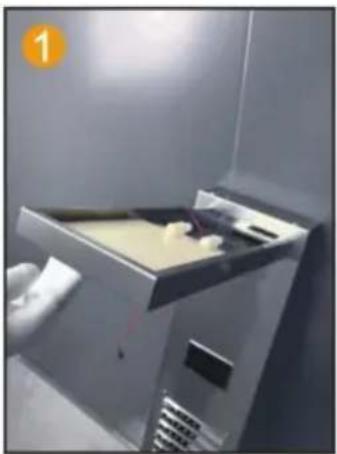
Insert the top spray into the hole in the motherboard.
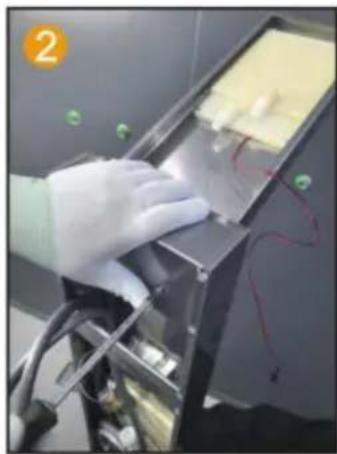
Use 2 M4 screws to secure the main fixed plate and top spray.
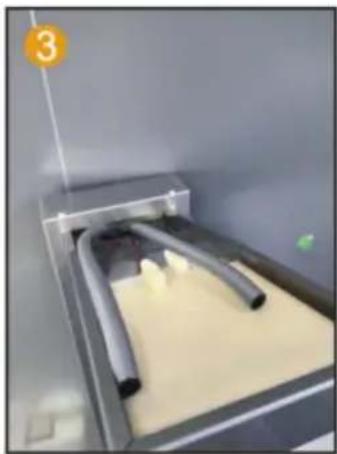
Connect PVC pipes and LED light wires, threading them through the hole.
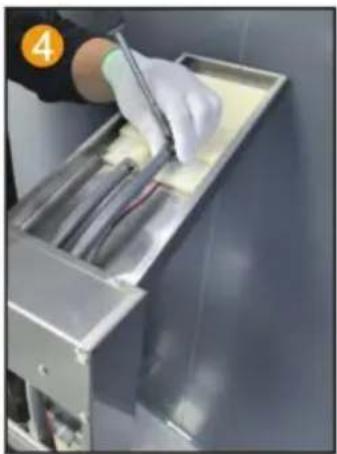
Fix the PVC pipe with a throat clamp on the top spray joint.
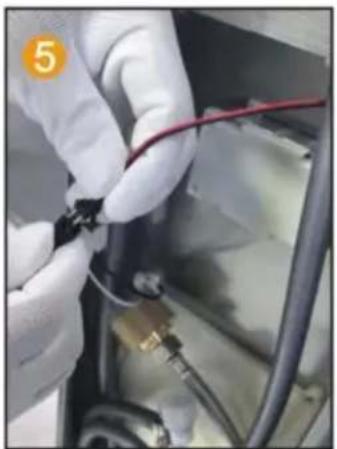
Connect the LED light cable and power supply line.
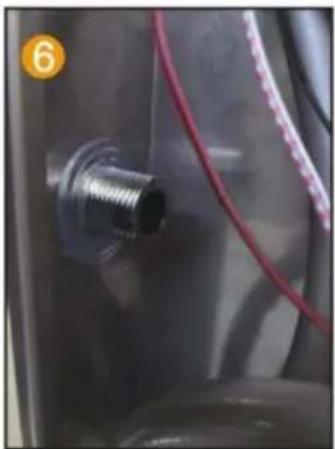
Insert the hand spray nozzle into the panel and install the gasket.
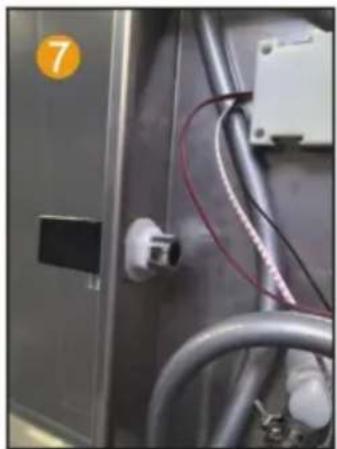
Fix the spray socket with hexagonal nut handle onto the panel.
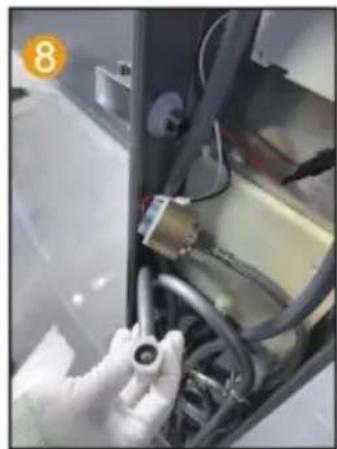
Fix the 4-point rubber on the panel and insert the hand spray into the seat joint.
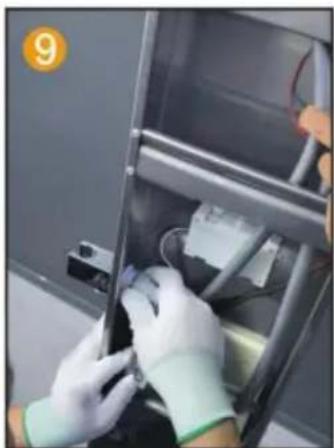
Connect the water outlet connector and hand spray to the seat joint.
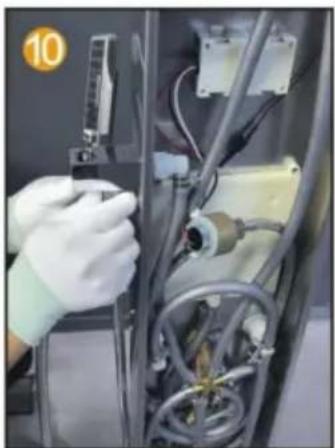
Connect the hand spray hose to the handheld shower head.
MODEL 7009FL
INSTALLATION STEPS (GENERAL)
FUNCTION INTRODUCTION
8015FL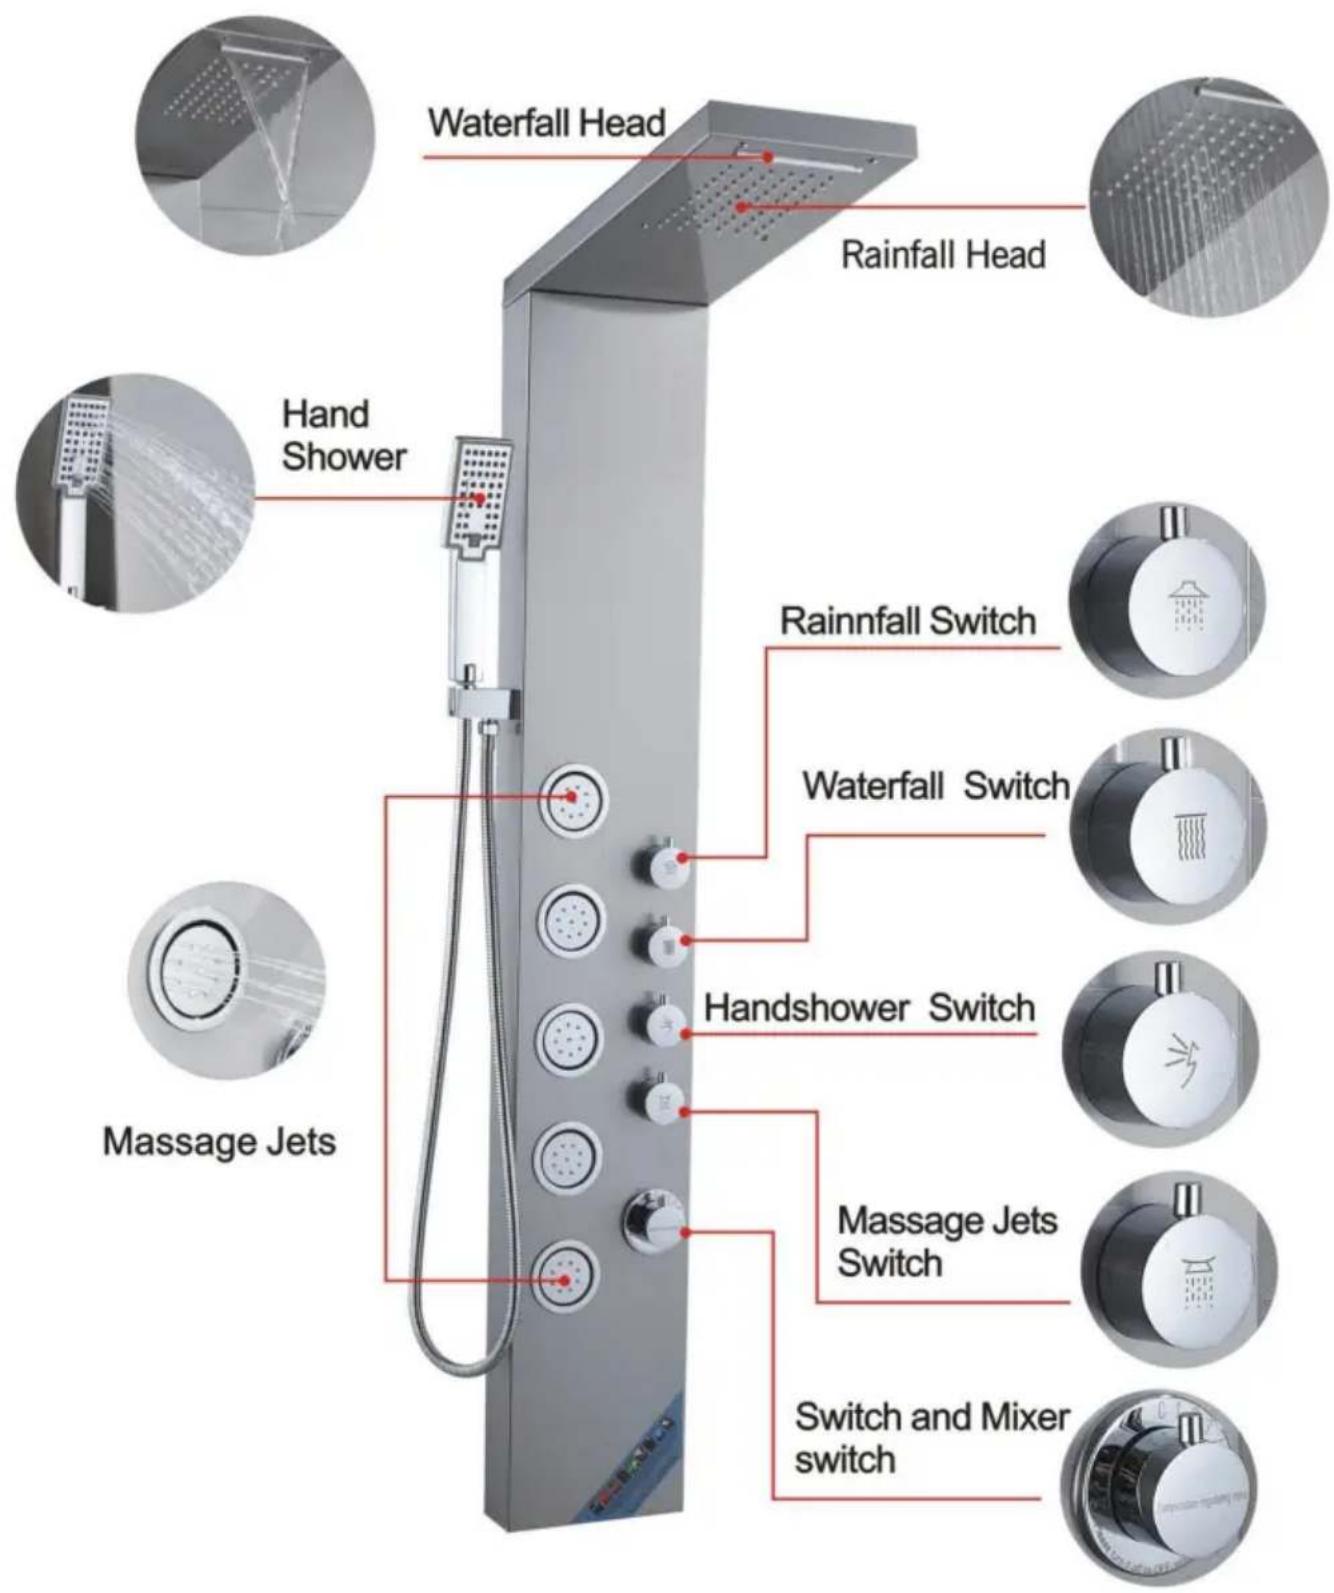
FUNCTION INTRODUCTION
6002FL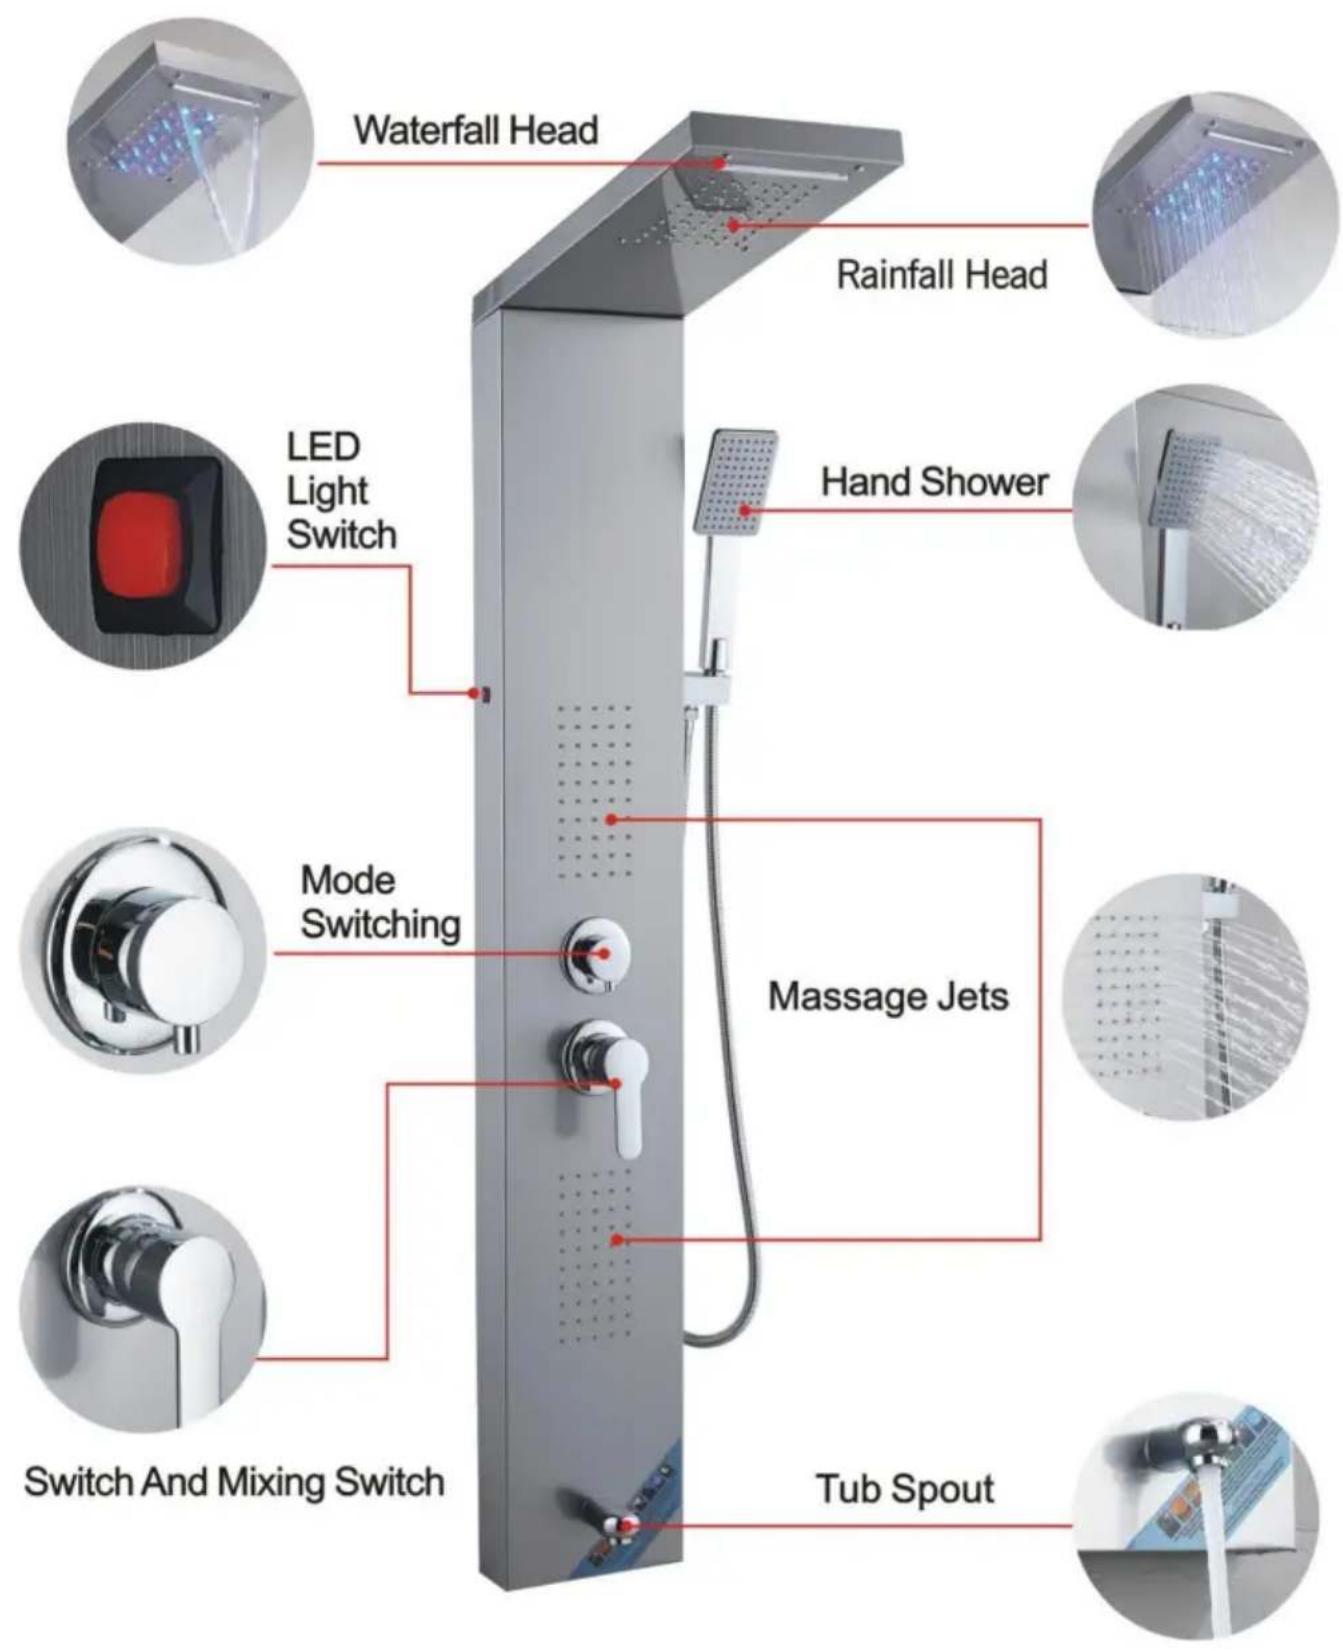
FUNCTION INTRODUCTION
8039FL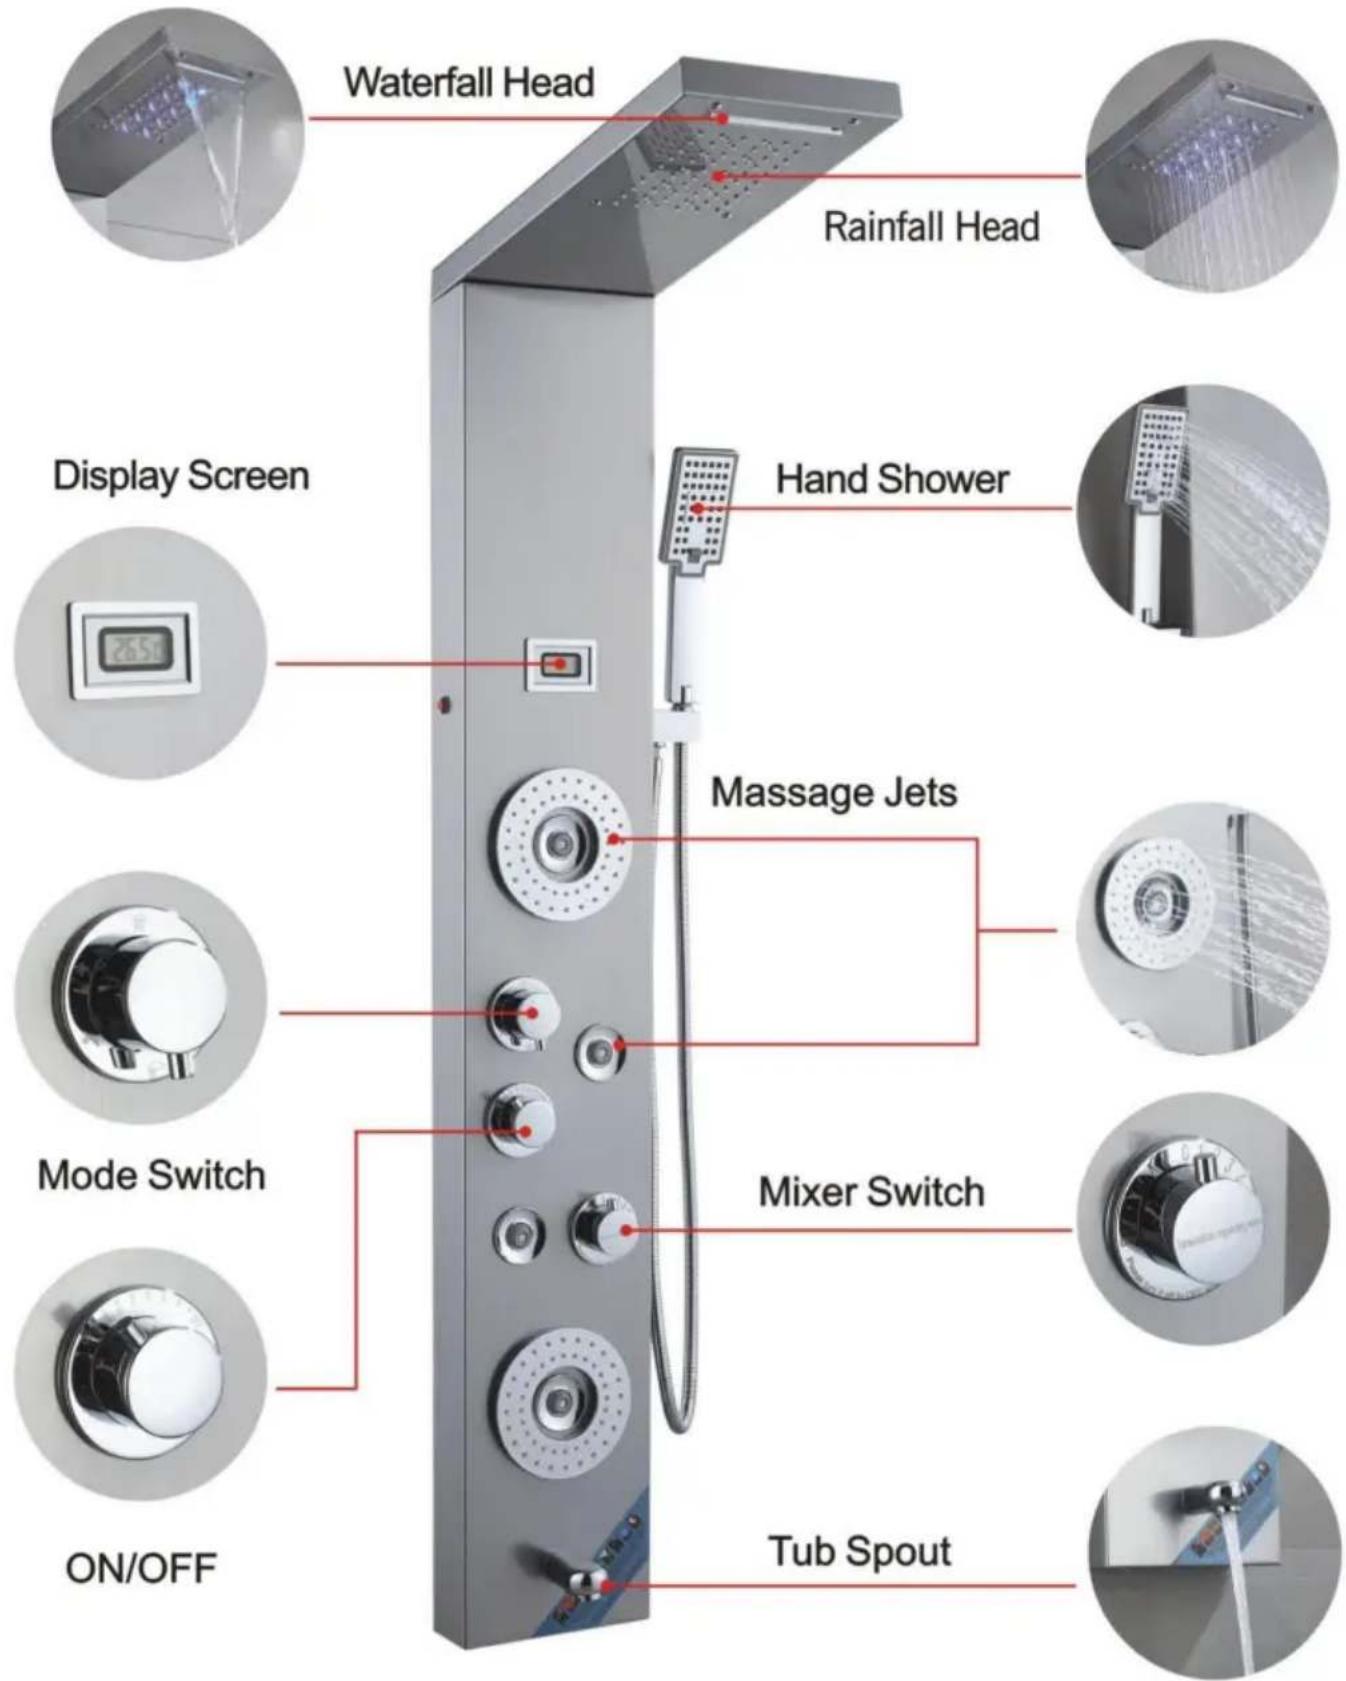
FUNCTION INTRODUCTION
8009FL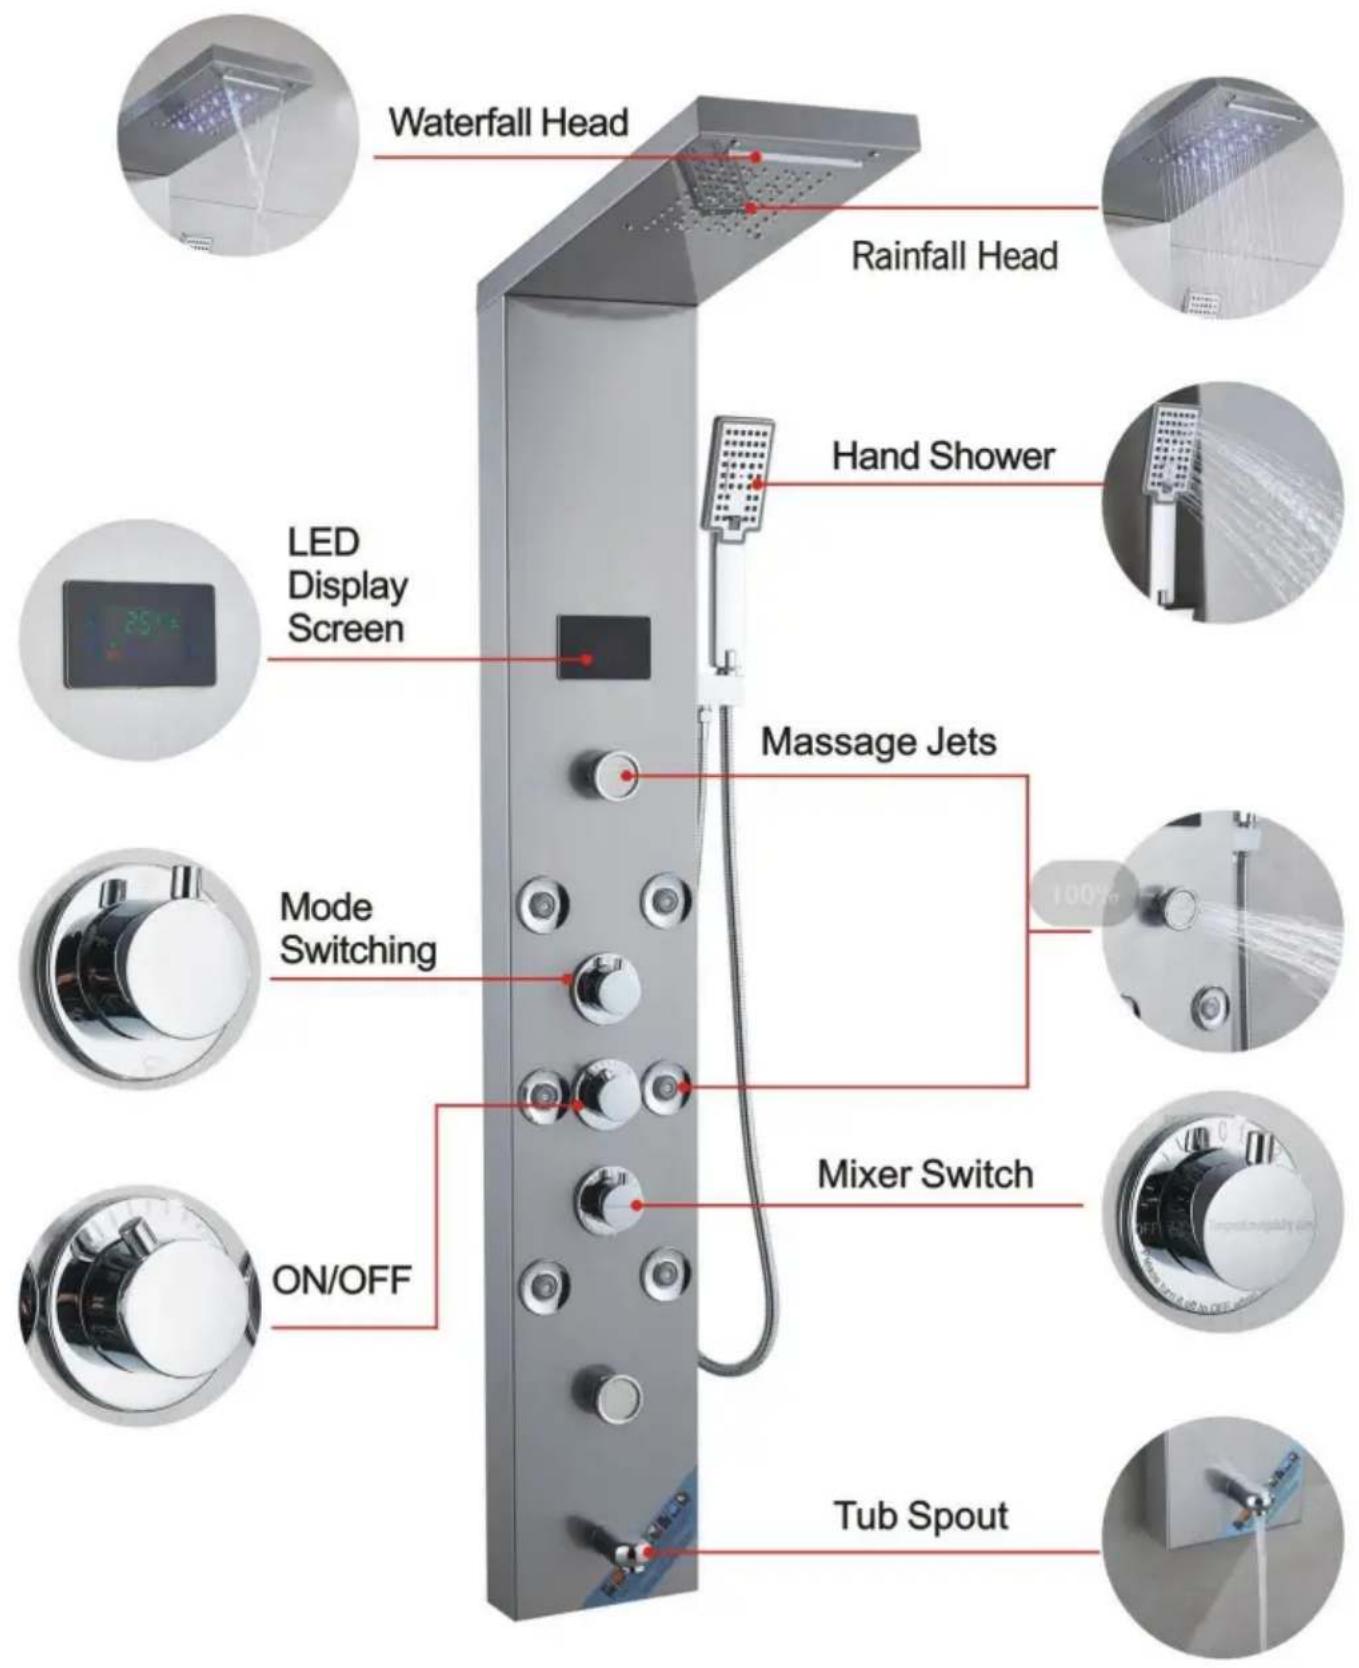
FUNCTION INTRODUCTION
8004FL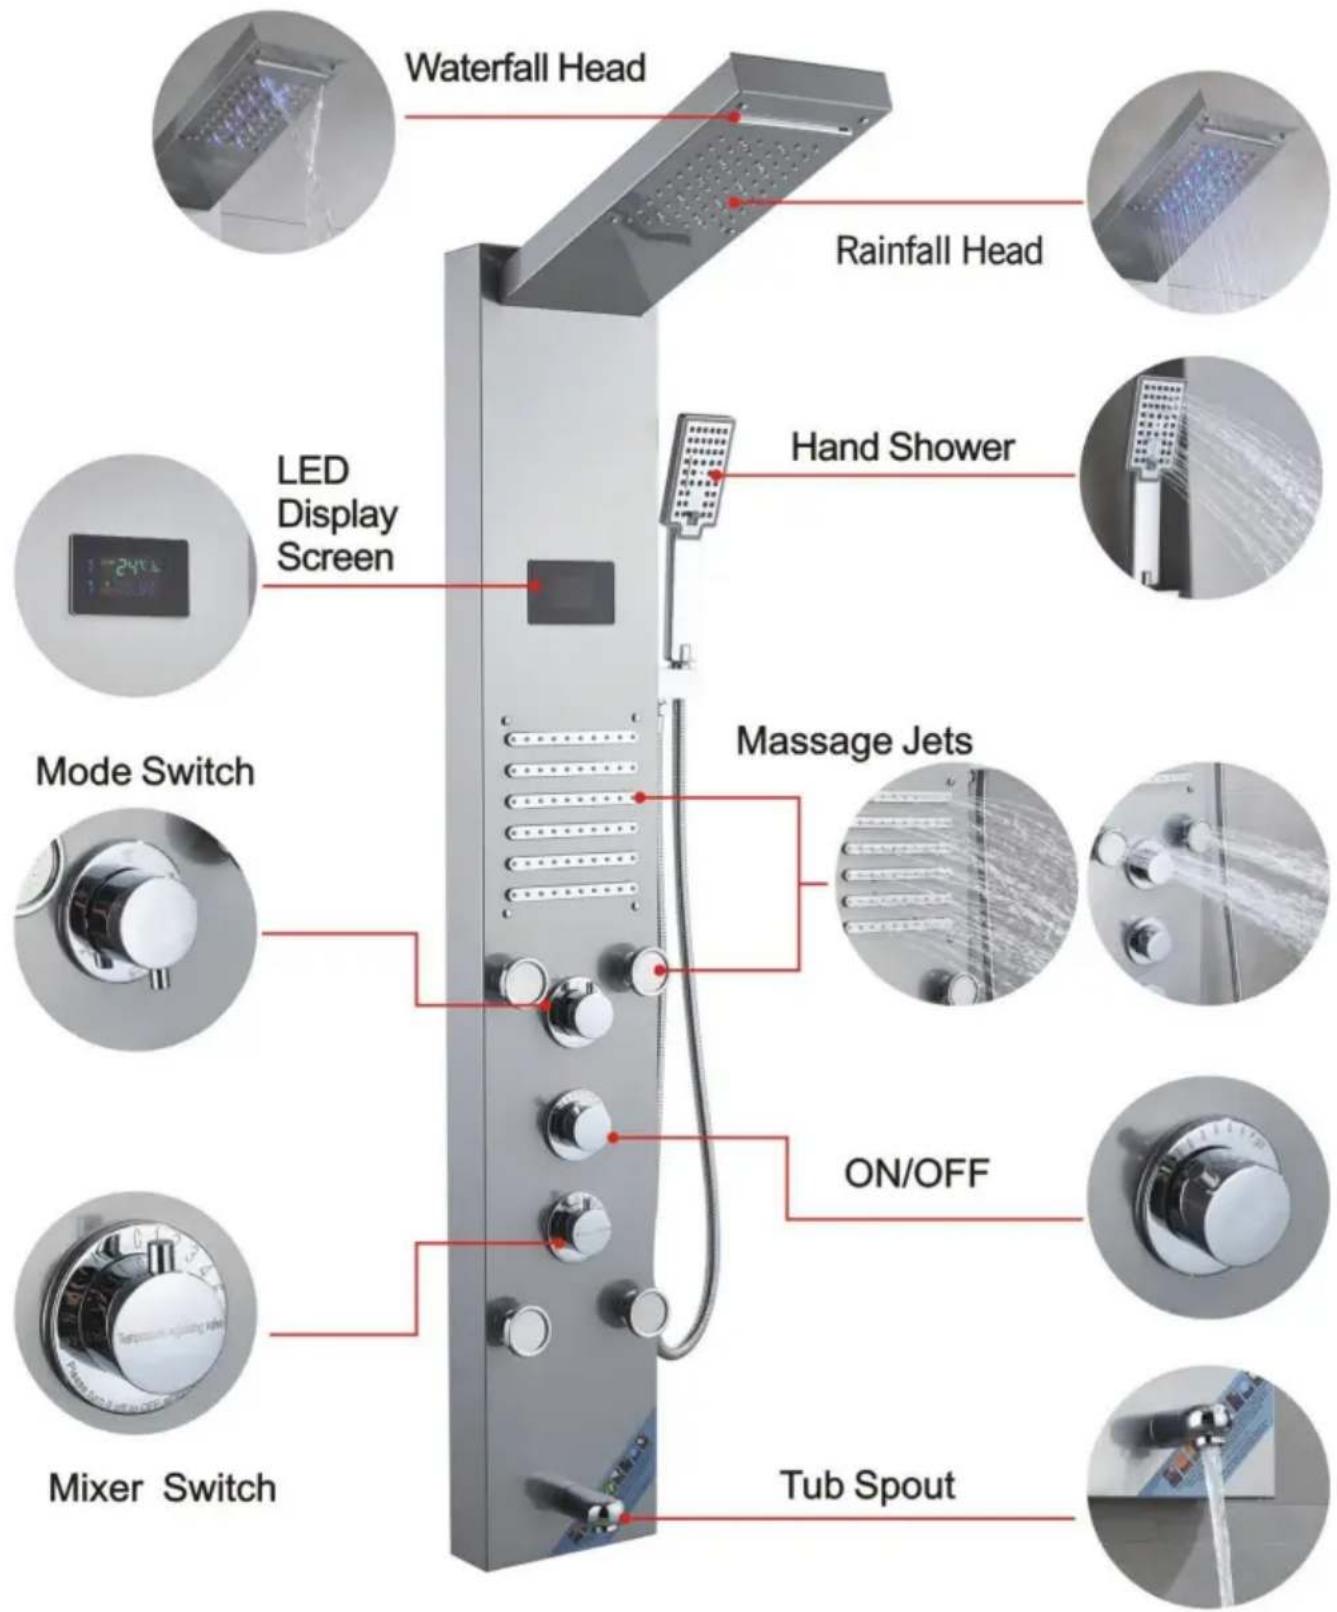
FUNCTION INTRODUCTION
7009FL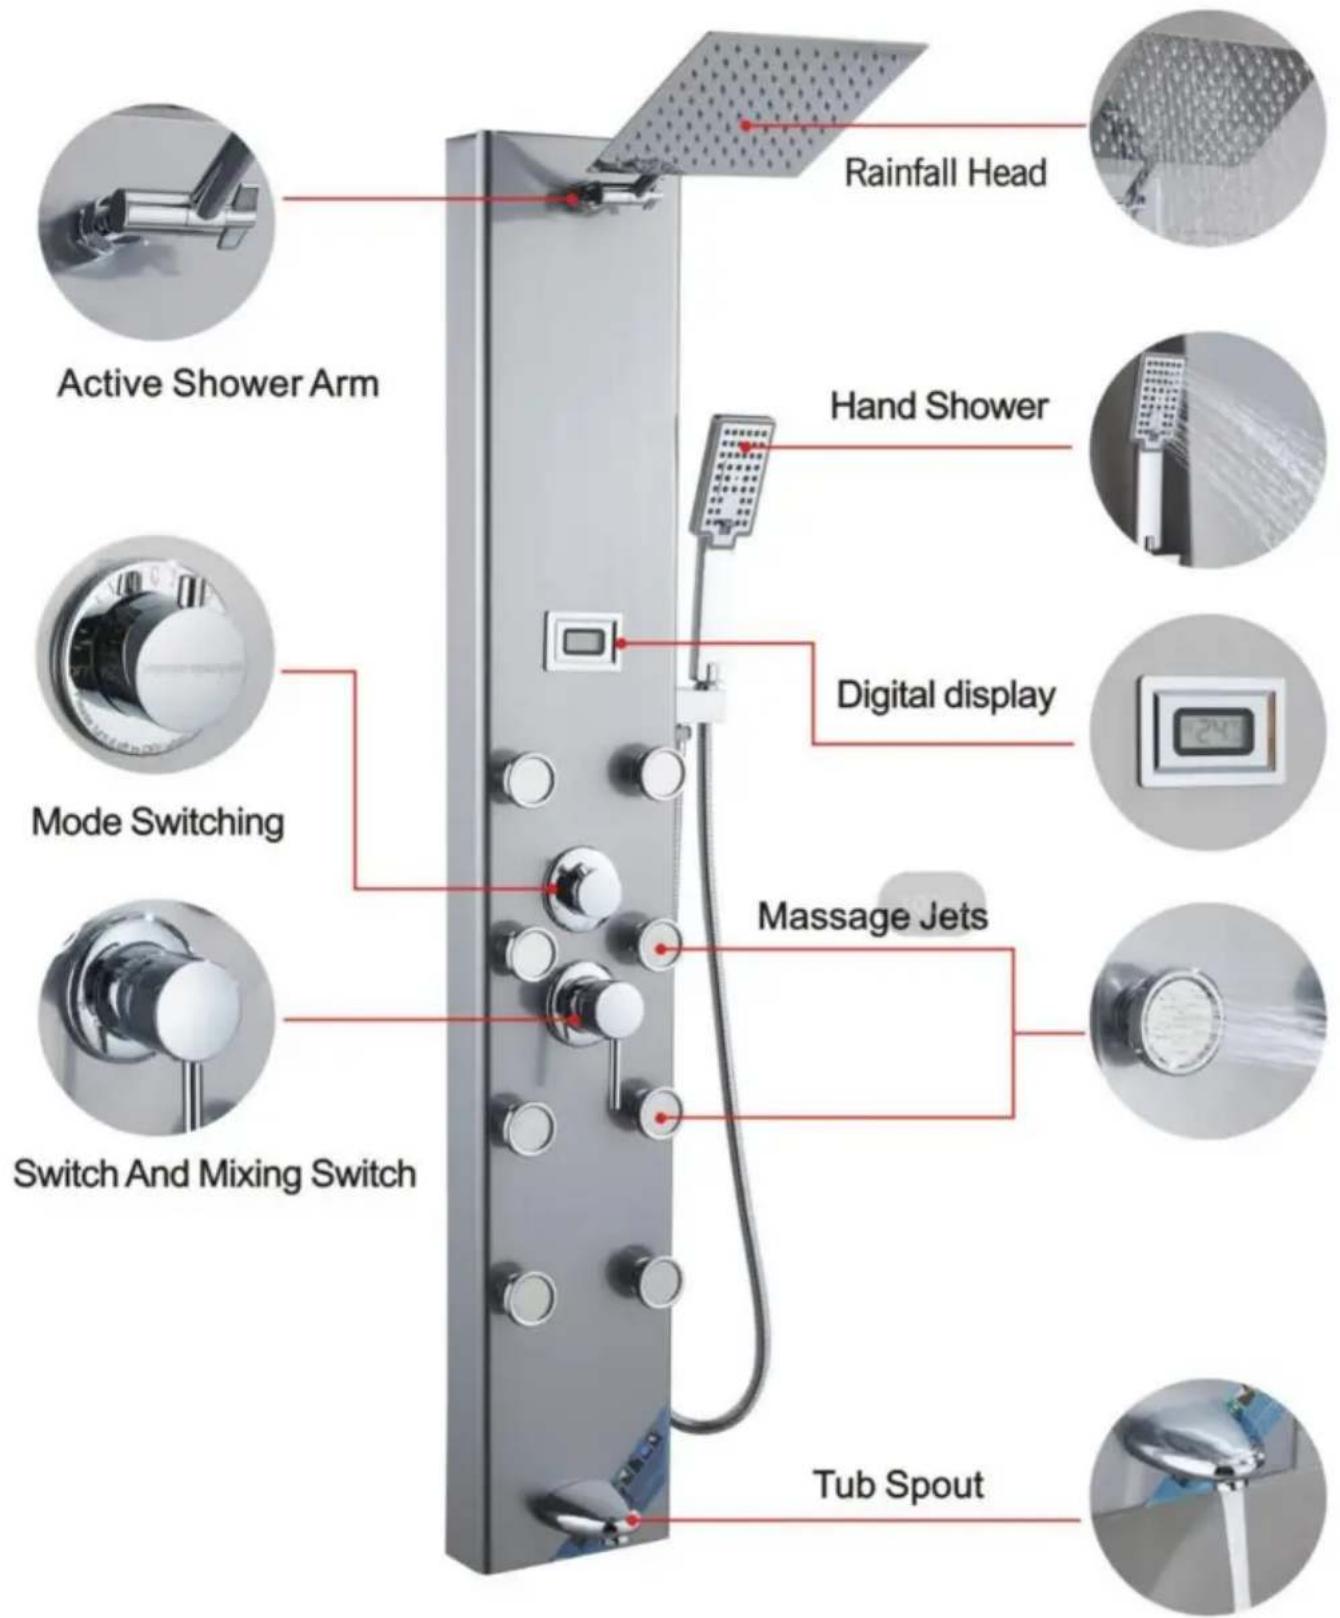
www.vevor.com/support
VEVOR®
TOUGH TOOLS, HALF PRICE
Technical support and e-warranty certificate www.vevor.com/support
SHOWER PANEL TOWER
MODEL:8015FL/6002FL/8039FL/8009FL/8004FL/7009FL
NEED HELP? CONTACT US!
INSTALLATION INSTRUCTIONS
| Model | 8015FL 6002FL 8039FL 8009FL 8004FL 7009FL | |||||
| Montage Type | MuurMonteren | MuurMonteren | MuurMonteren | MuurMonteren | MuurMonteren | MuurMonteren |
| Verbinding Draad | G1/2" | G1/2" | G1/2" | G1/2" | G1/2" | G1/2" |
| Functies | VierModi | VijfModi | ZesModi | ZesModi | ZesModi | VijfModi |
| Baduitloop | × | ÿ | ÿ | ÿ | ÿ | ÿ |
| Temperatuur e Weergave | × | × | ÿ | ÿ | ÿ | ÿ |
| LED lamp | × | ÿ | ÿ | ÿ | ÿ | × |
| Stroom | × | Droge cel (DC3V) | Droge cel (DC3V) | Hydro Stroom (AC6V) | Hydro Stroom (AC6V) | Droge cel (DC3V) |
| Hand Douche | 3-instellingen | 1-instellingen | 3-instellingen | 3-instellingen | 3-instellingen | 3-instellingen |
| Finish | Vingerafdrukvrij douchesysteem van geborsteld nikkel | |||||
| Materiaal | Roestvrij staal, messing, PVC, ABS | |||||
PARTS LIST
| MODEL | 8015FL8039FL8009FL | 6002FL | 8004FL | 7009FL | |
| M6 nut | 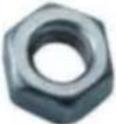 | 4pcs | 4pcs | 0pcs | 0pcs |
| M6 * 10 screw | 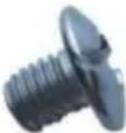 | 4pcs | 4pcs | 0pcs | 0pcs |
| Hose Clamp | 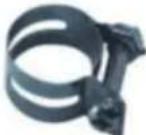 | 2pcs | 2pcs | 2pcs | 0pcs |
| M4 * 10 screw | 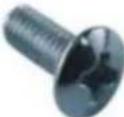 | 0pcs | 0pcs | 2pcs | 0pcs |
| Brass shower arm |  | 0pcs | 0pcs | 0pcs | 1pcs |
| Single function handheld shower |  | 0pcs | 1pcs | 0pcs | 0pcs |
| Panel cotton bag |  | 1pcs | 1pcs | 1pcs | 1pcs |
| Top spray cotton bag |  | 1pcs | 1pcs | 1pcs | 0pcs |
| Three function handheld shower | 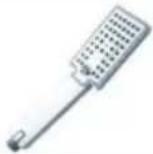 | 1pcs | 0pcs | 1pcs | 1pcs |
| 1.5 meter hand spray hose | 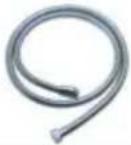 | 1pcs | 1pcs | 1pcs | 1pcs |
| Hand spray seat | 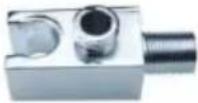 | 1pcs | 1pcs | 1pcs | 1pcs |
| 1/2 right angle adapter | 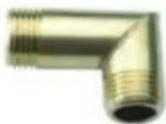 | 2pcs | 2pcs | 2pcs | 2pcs |
| 4-point rubber |  | 2pcs | 2pcs | 2pcs | 2pcs |
| Self tapping screw | 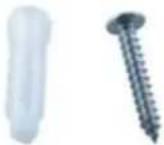 | 4pcs | 4pcs | 4pcs | 4pcs |
| Fastener | 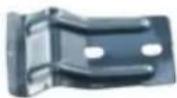 | 2pcs | 2pcs | 2pcs | 2pcs |
| Grommet |  | 1pcs | 1pcs | 1pcs | 1pcs |
| Hexagon nut | 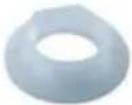 | 1pcs | 1pcs | 1pcs | 1pcs |
ASSEMBLY INSTRUCTIONS
MODEL8015FL/6002FL/8039FL/8009FL
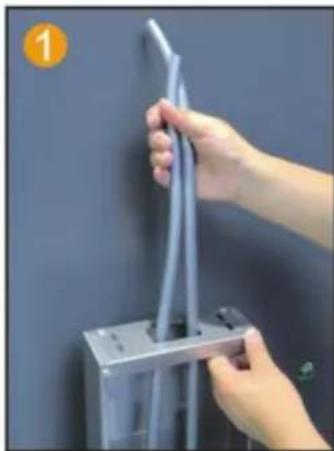
Insert the PVC pipe from the top opening to pierce out
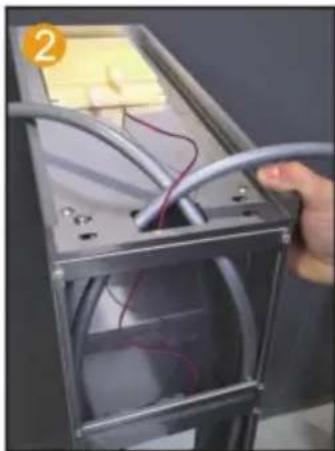
Route the LED light wire along the hole, insert into the motherboard
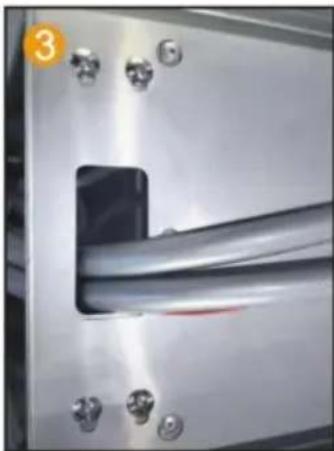
Fix the motherboard and top spray with 4 pairs of M6 screws and nuts
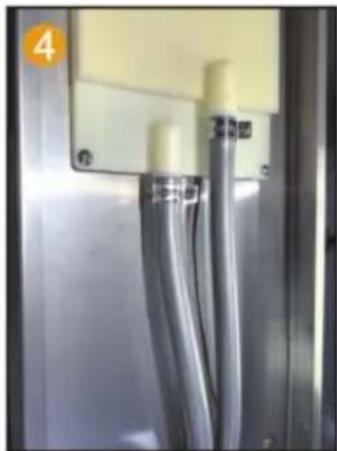
Fix the PVC pipe with a throat clamp on the top spray joint
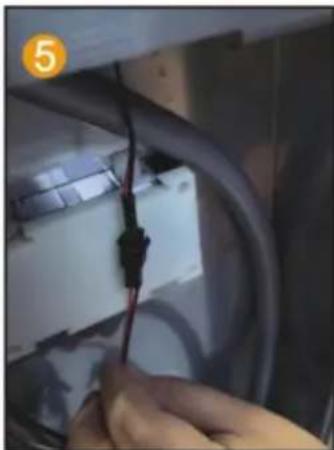
Connect the LED light cable and power supply line
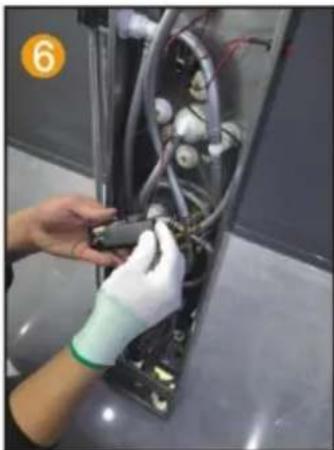
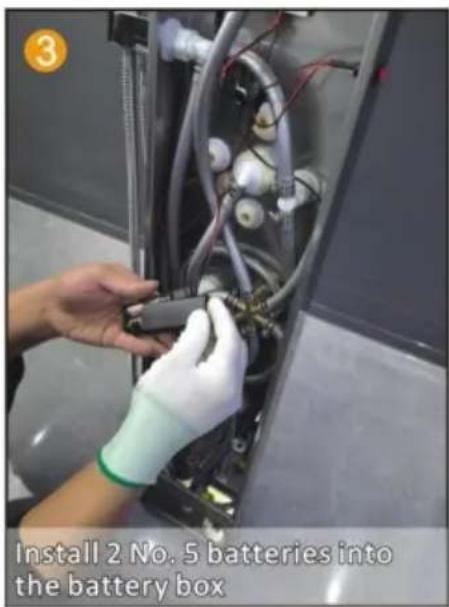
Install 2 No. 5 batteries to charge pool box
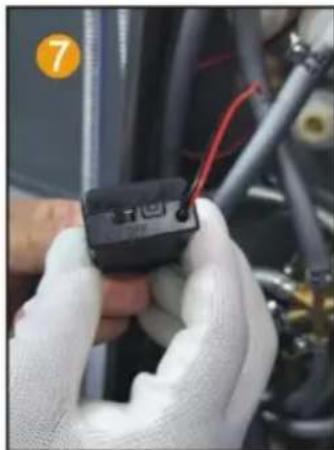
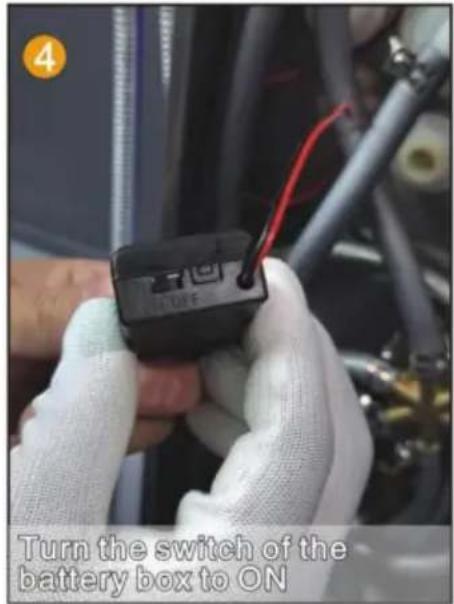
Point the switch of the battery box towards ON.
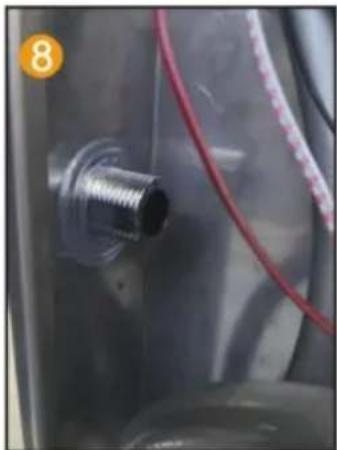
Insert the hand spray nozzle into the panel and install the gasket.
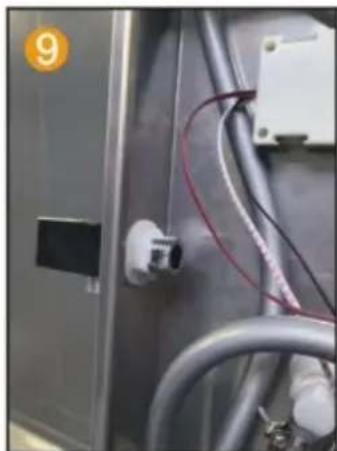
Spray socket with hexagonal nut handle fixed on the panel.
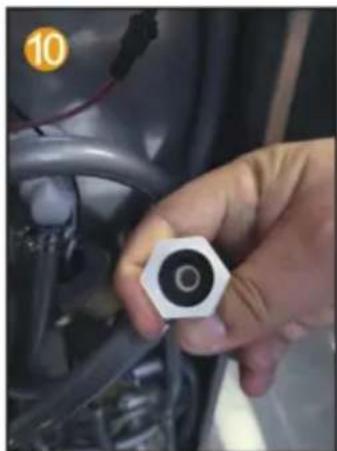
Put the 4-point rubber into the hand spray inside the joint of the seat.
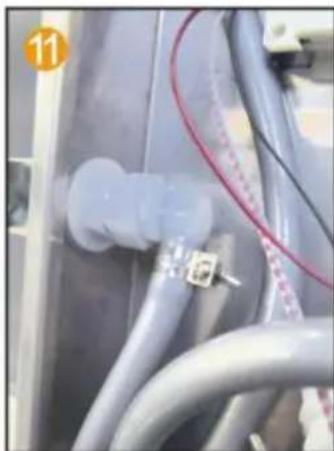
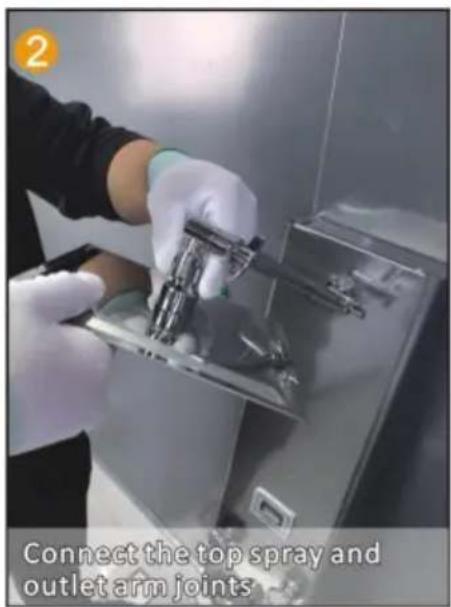
Connect the water outlet connector and hand spray seat joint.
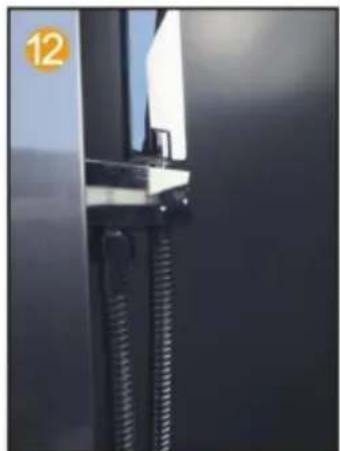
Connect the hand spray hose to the handheld shower head.
MODEL 8004FL
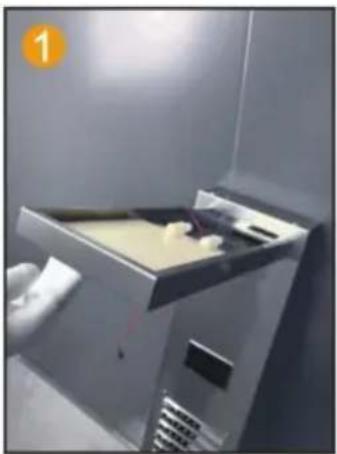
Insert the top spray into the motherboard inside the hole.
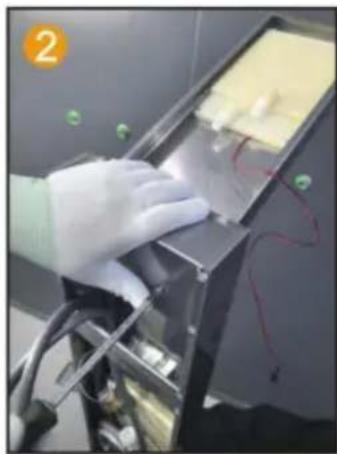
Use 2 M4 screws to secure the main fixed plate and top spray.
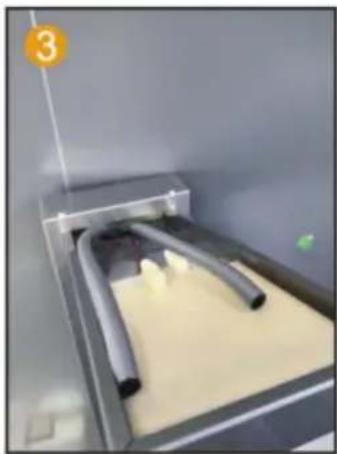
Connect PVC pipes and LED light wires thread through the hole.
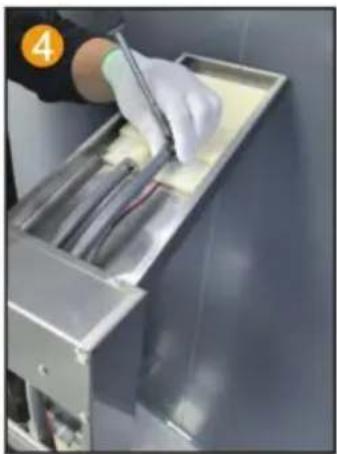
Fix the PVC pipe with a throat clamp on the top spray joint.
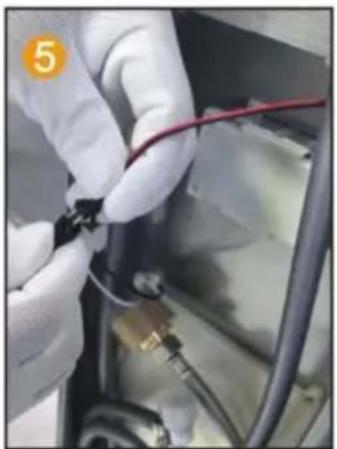
Connect the LED light cable and power supply line.
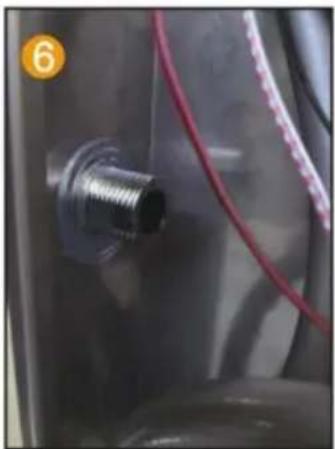
Insert the hand spray nozzle into the panel and install the gasket.
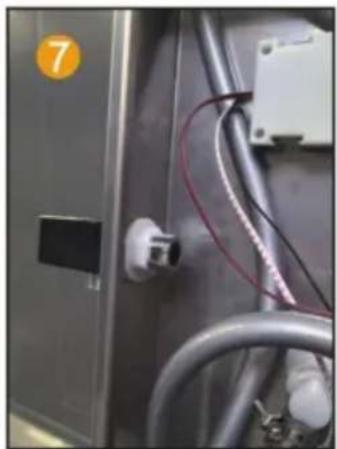
Spray socket with hexagonal nut handle fixed on the panel.
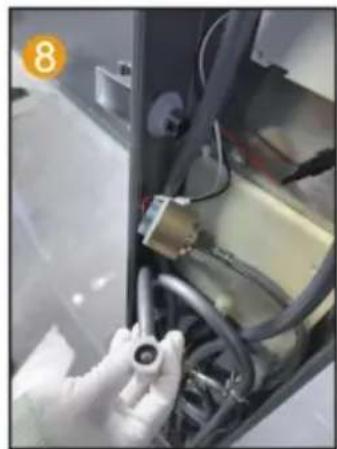
Spray socket with hexagonal nut handle fix the 4-point rubber on the panel and spray it by hand inside the joint of the seat.
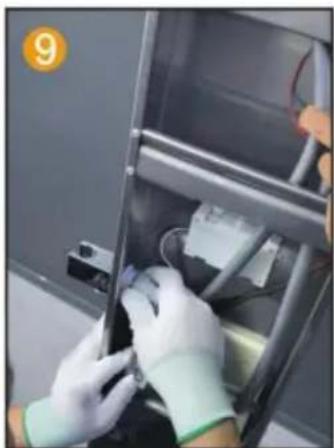
Connect the water outlet connector and hand spray seat joint
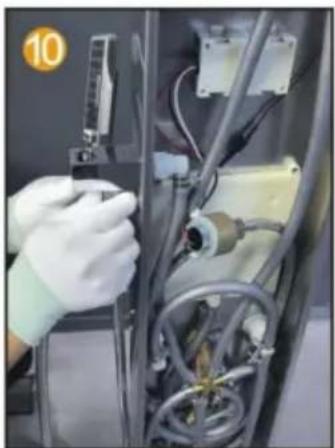
Connect the hand spray hose to the handheld shower head
MODEL 7009FL

INSTALLATION STEPS (GENERAL)
user manual
FUNCTION INTRODUCTION
8015FL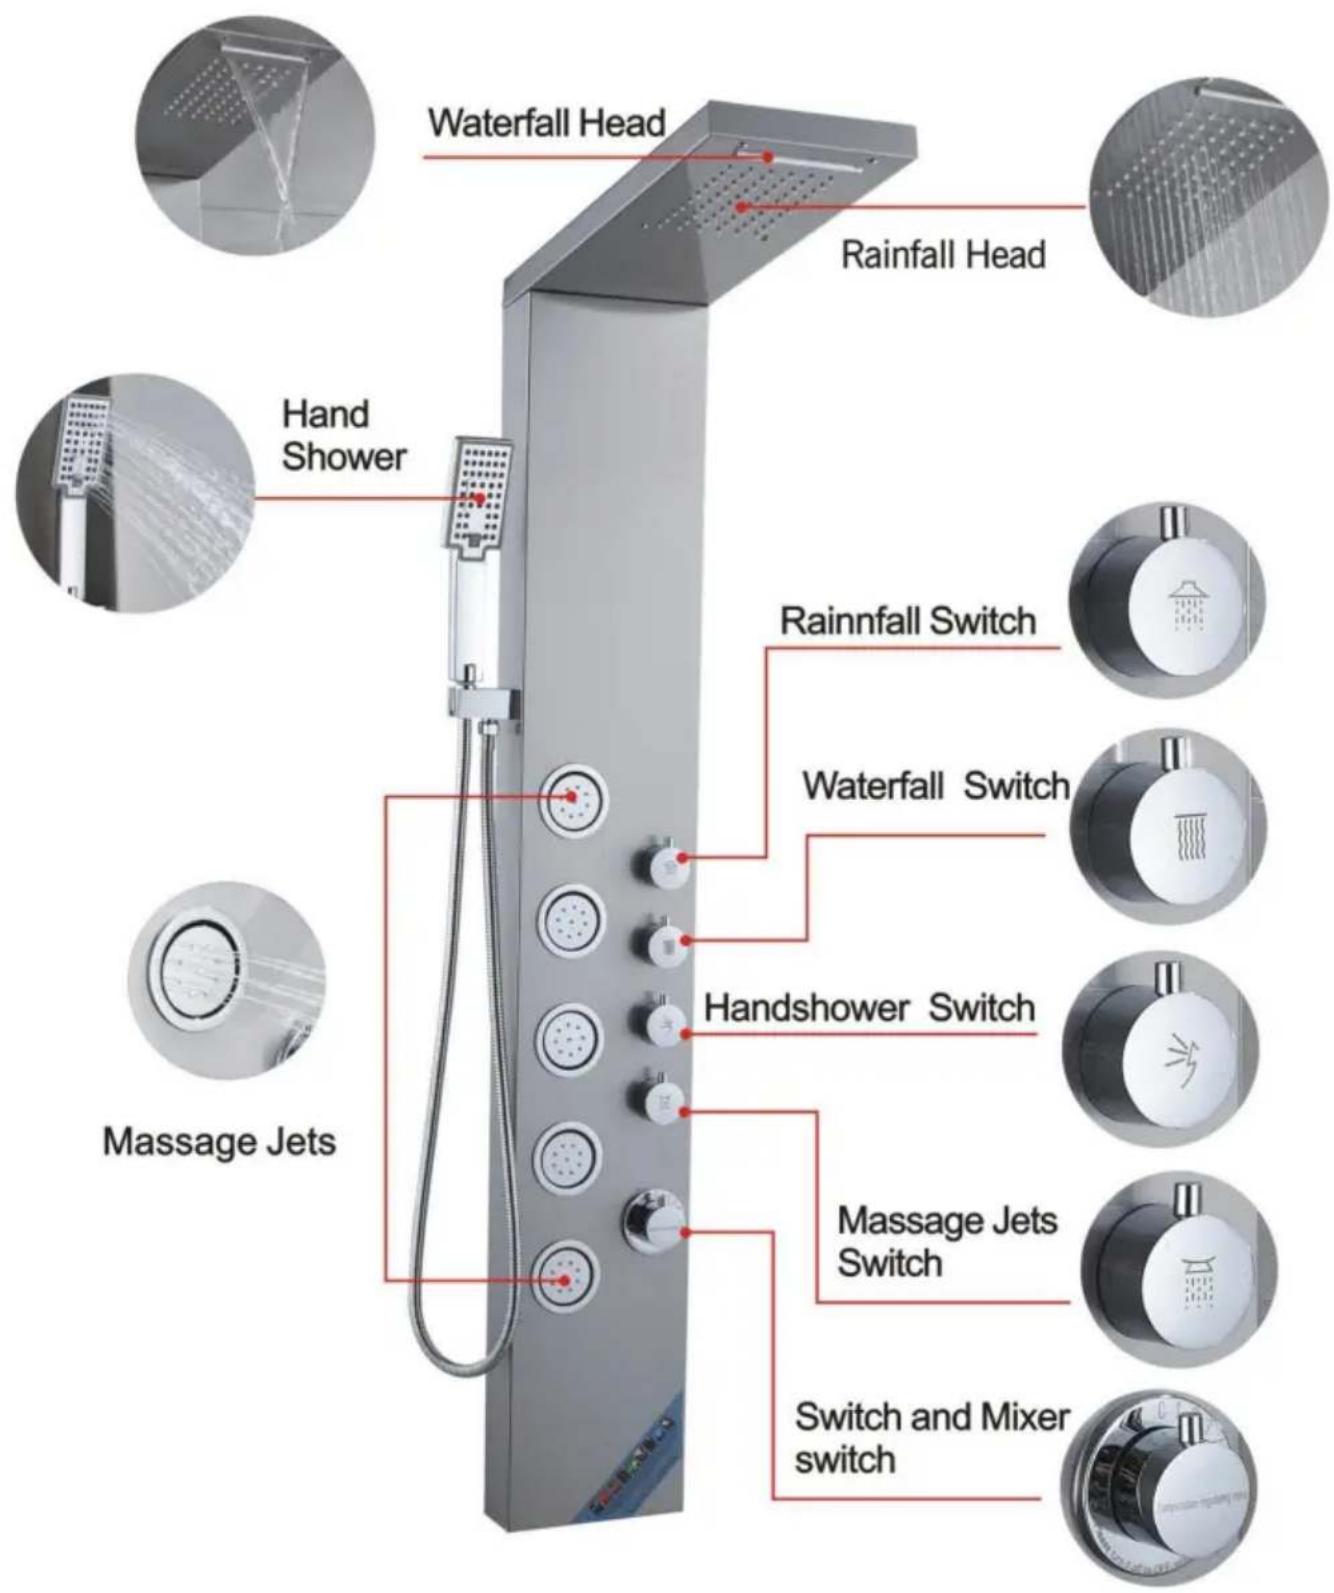
FUNCTION INTRODUCTION
6002FL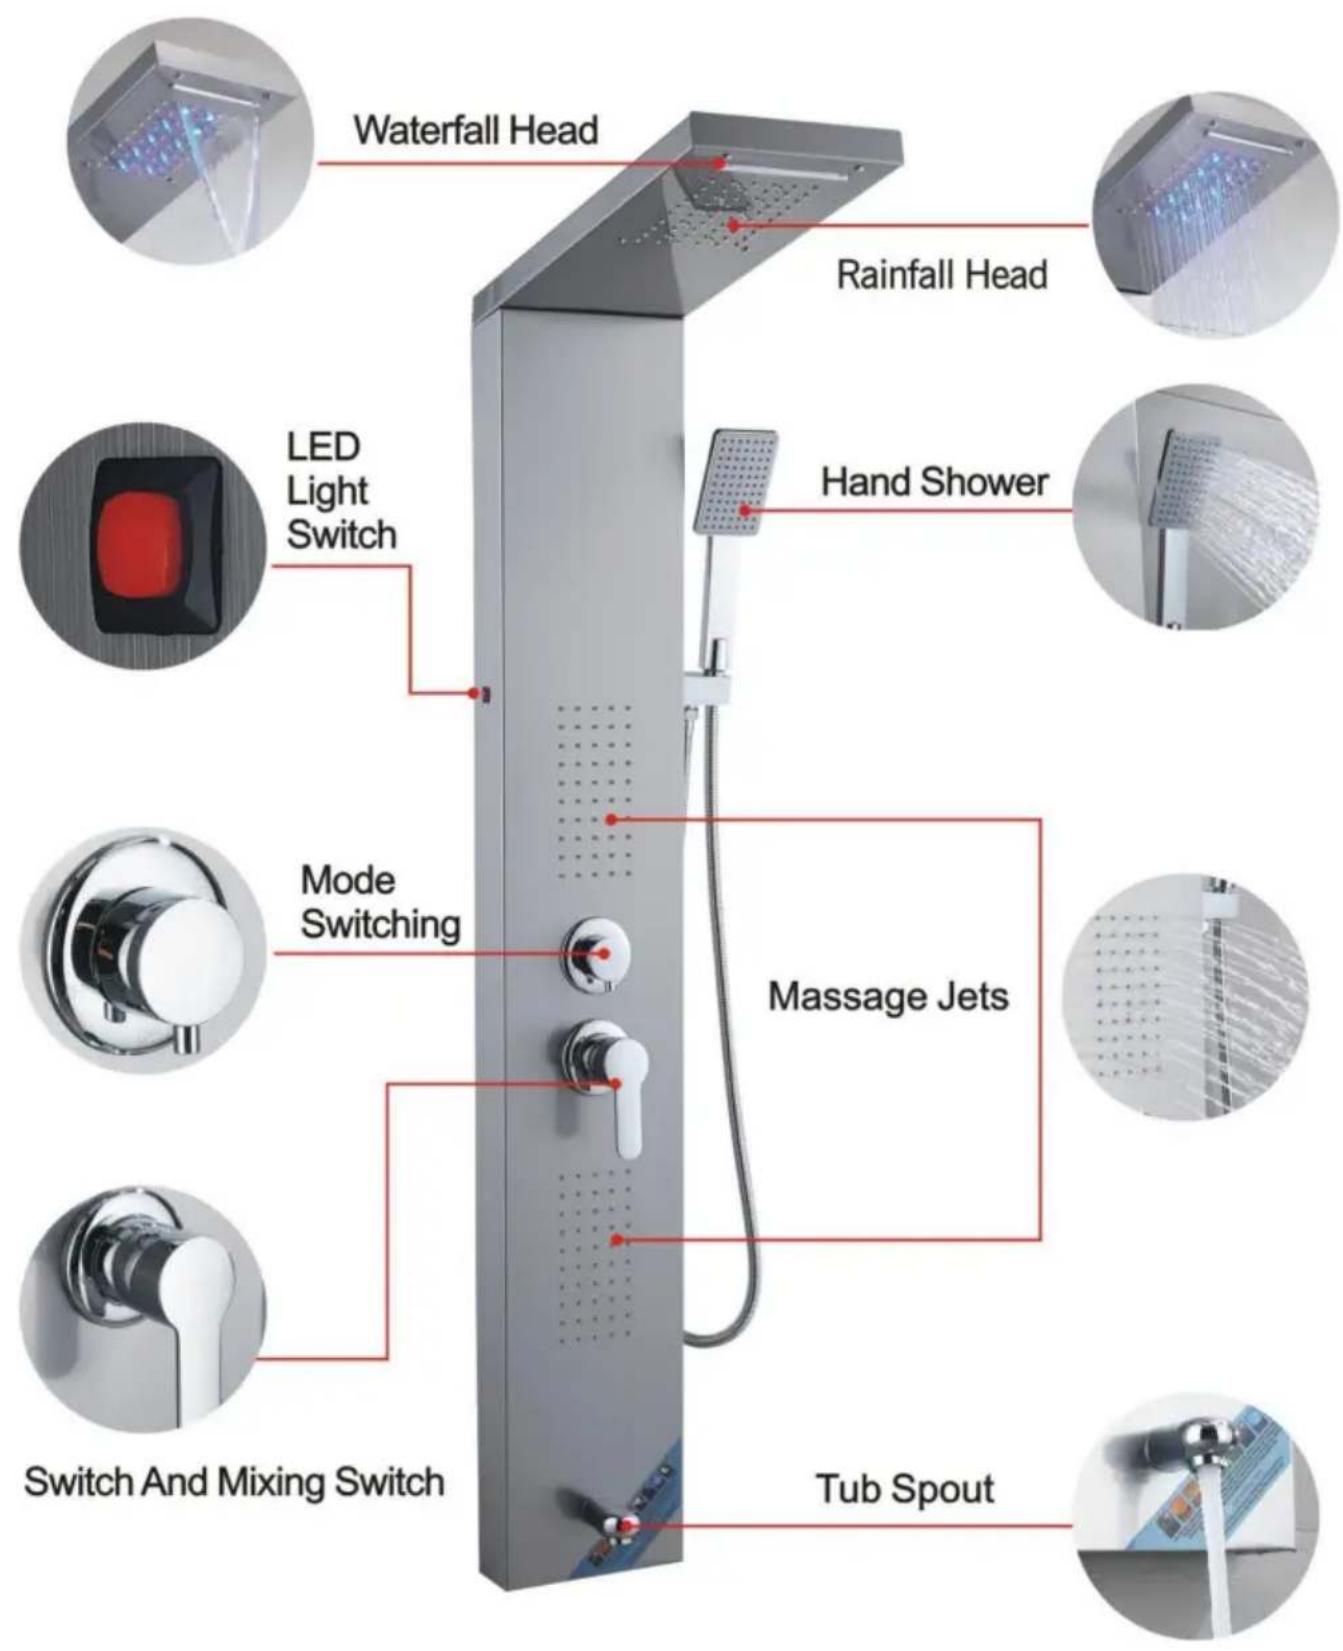
FUNCTION INTRODUCTION
8039FL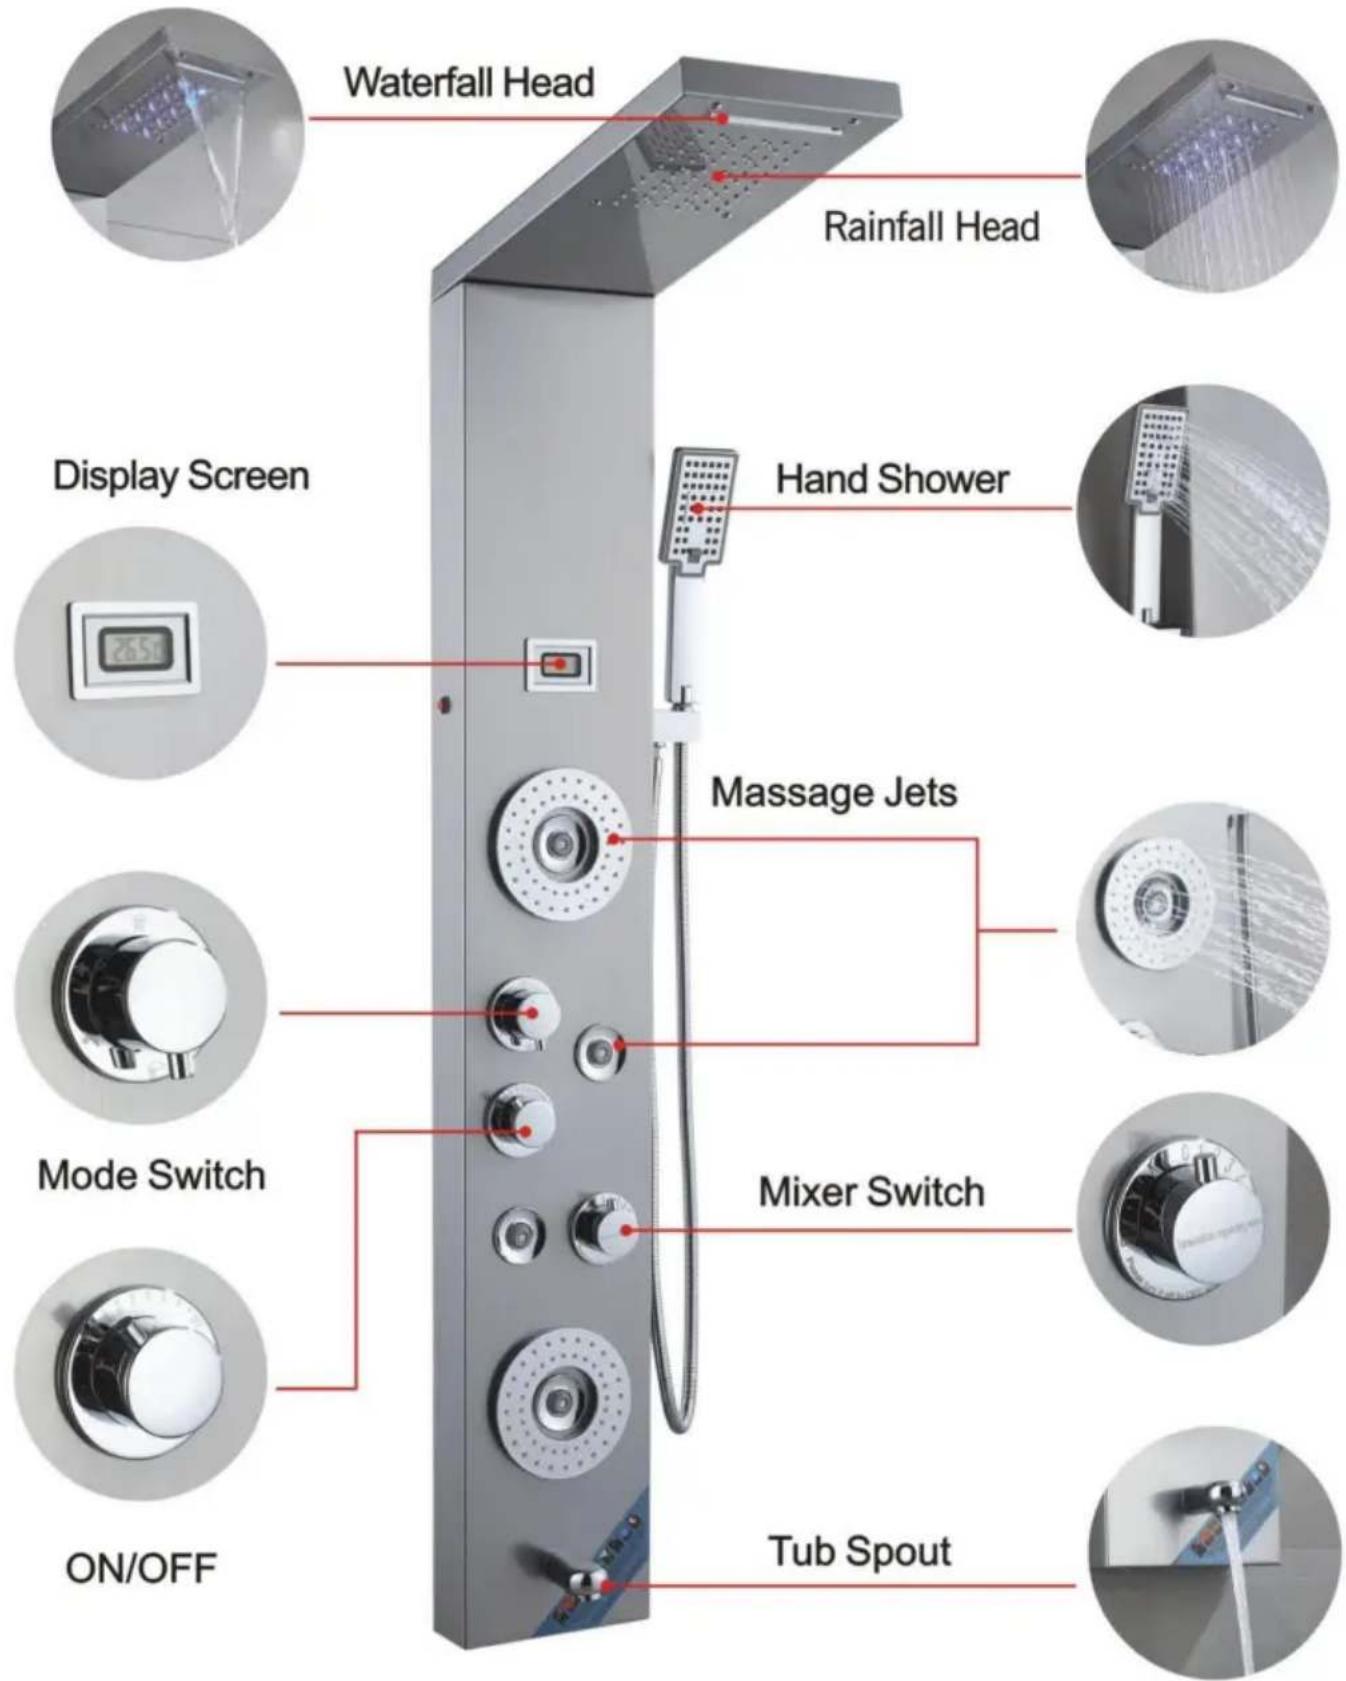
FUNCTION INTRODUCTION
8009FL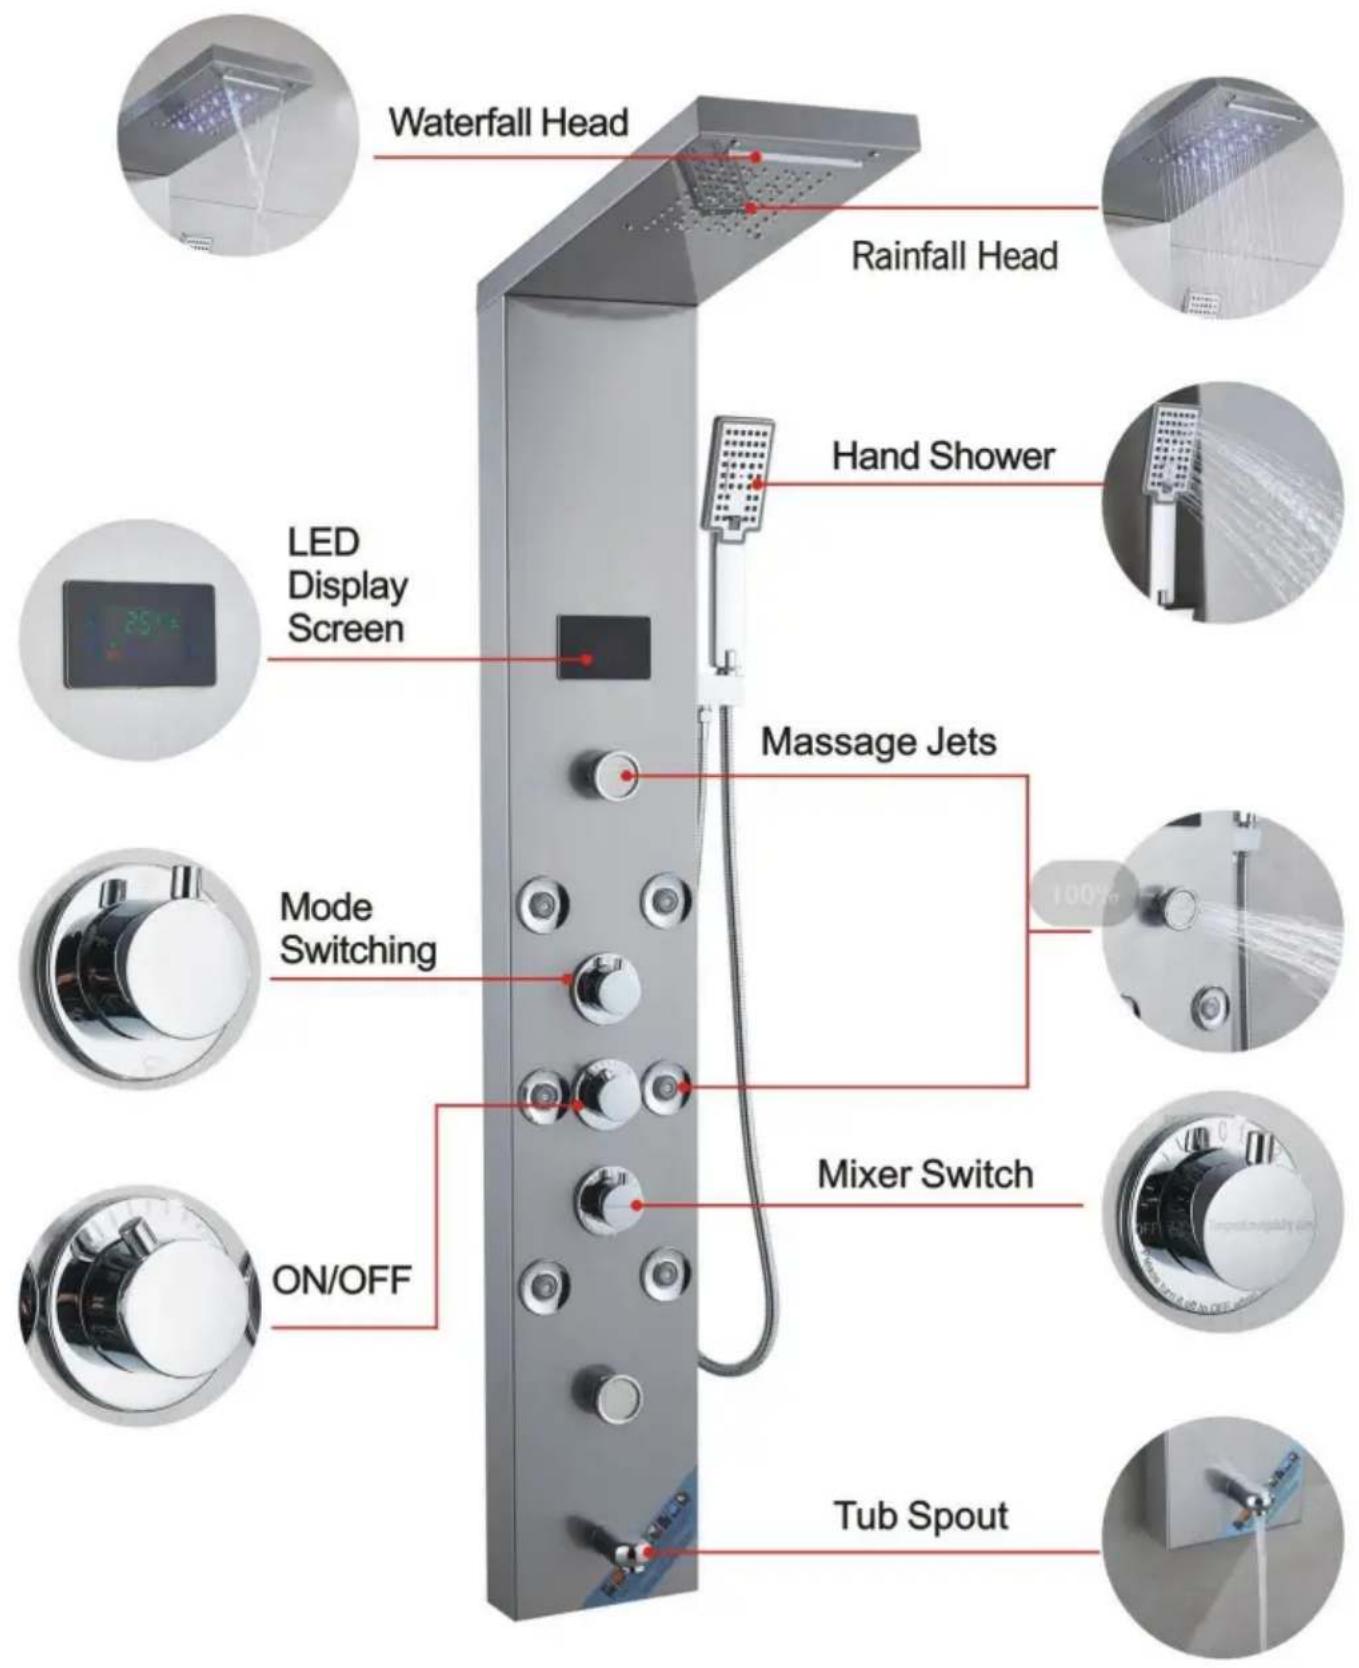
FUNCTION INTRODUCTION
8004FL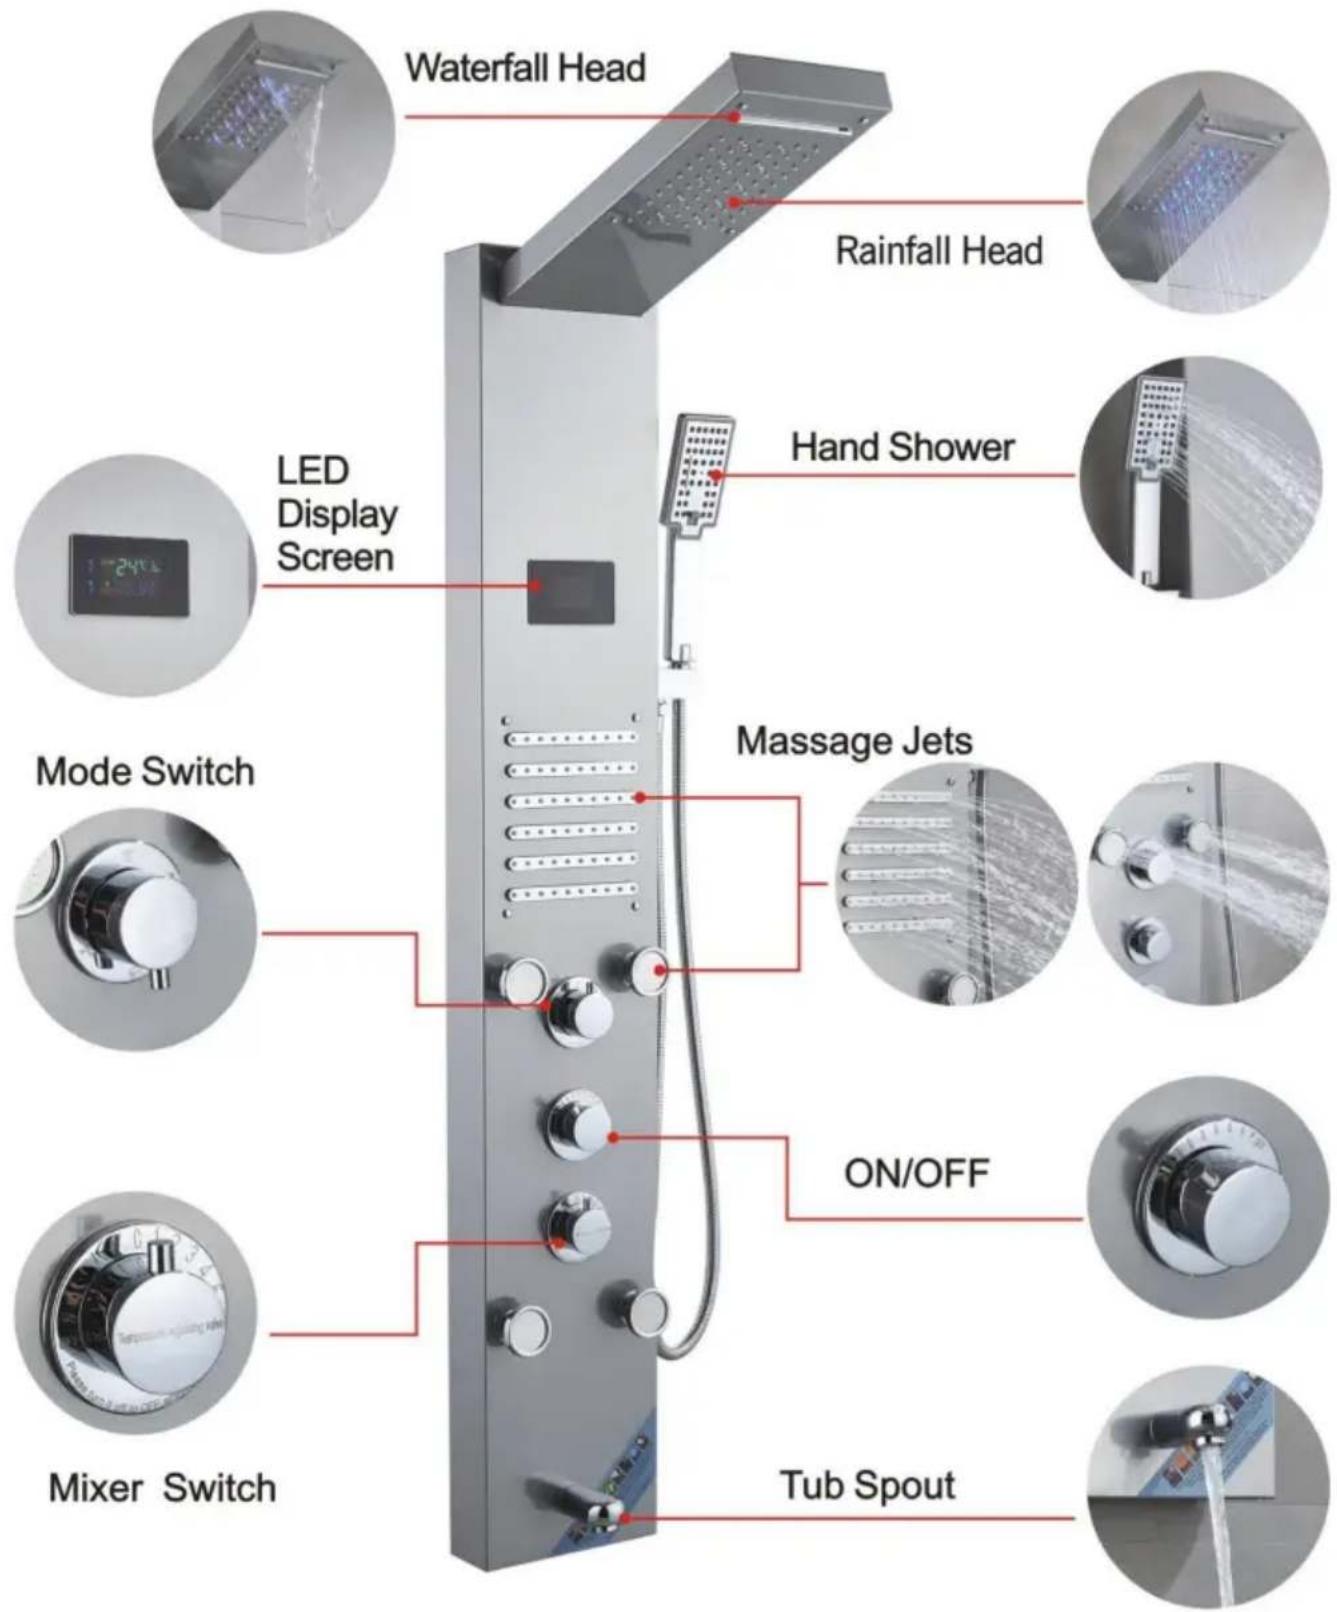
FUNCTION INTRODUCTION
7009FL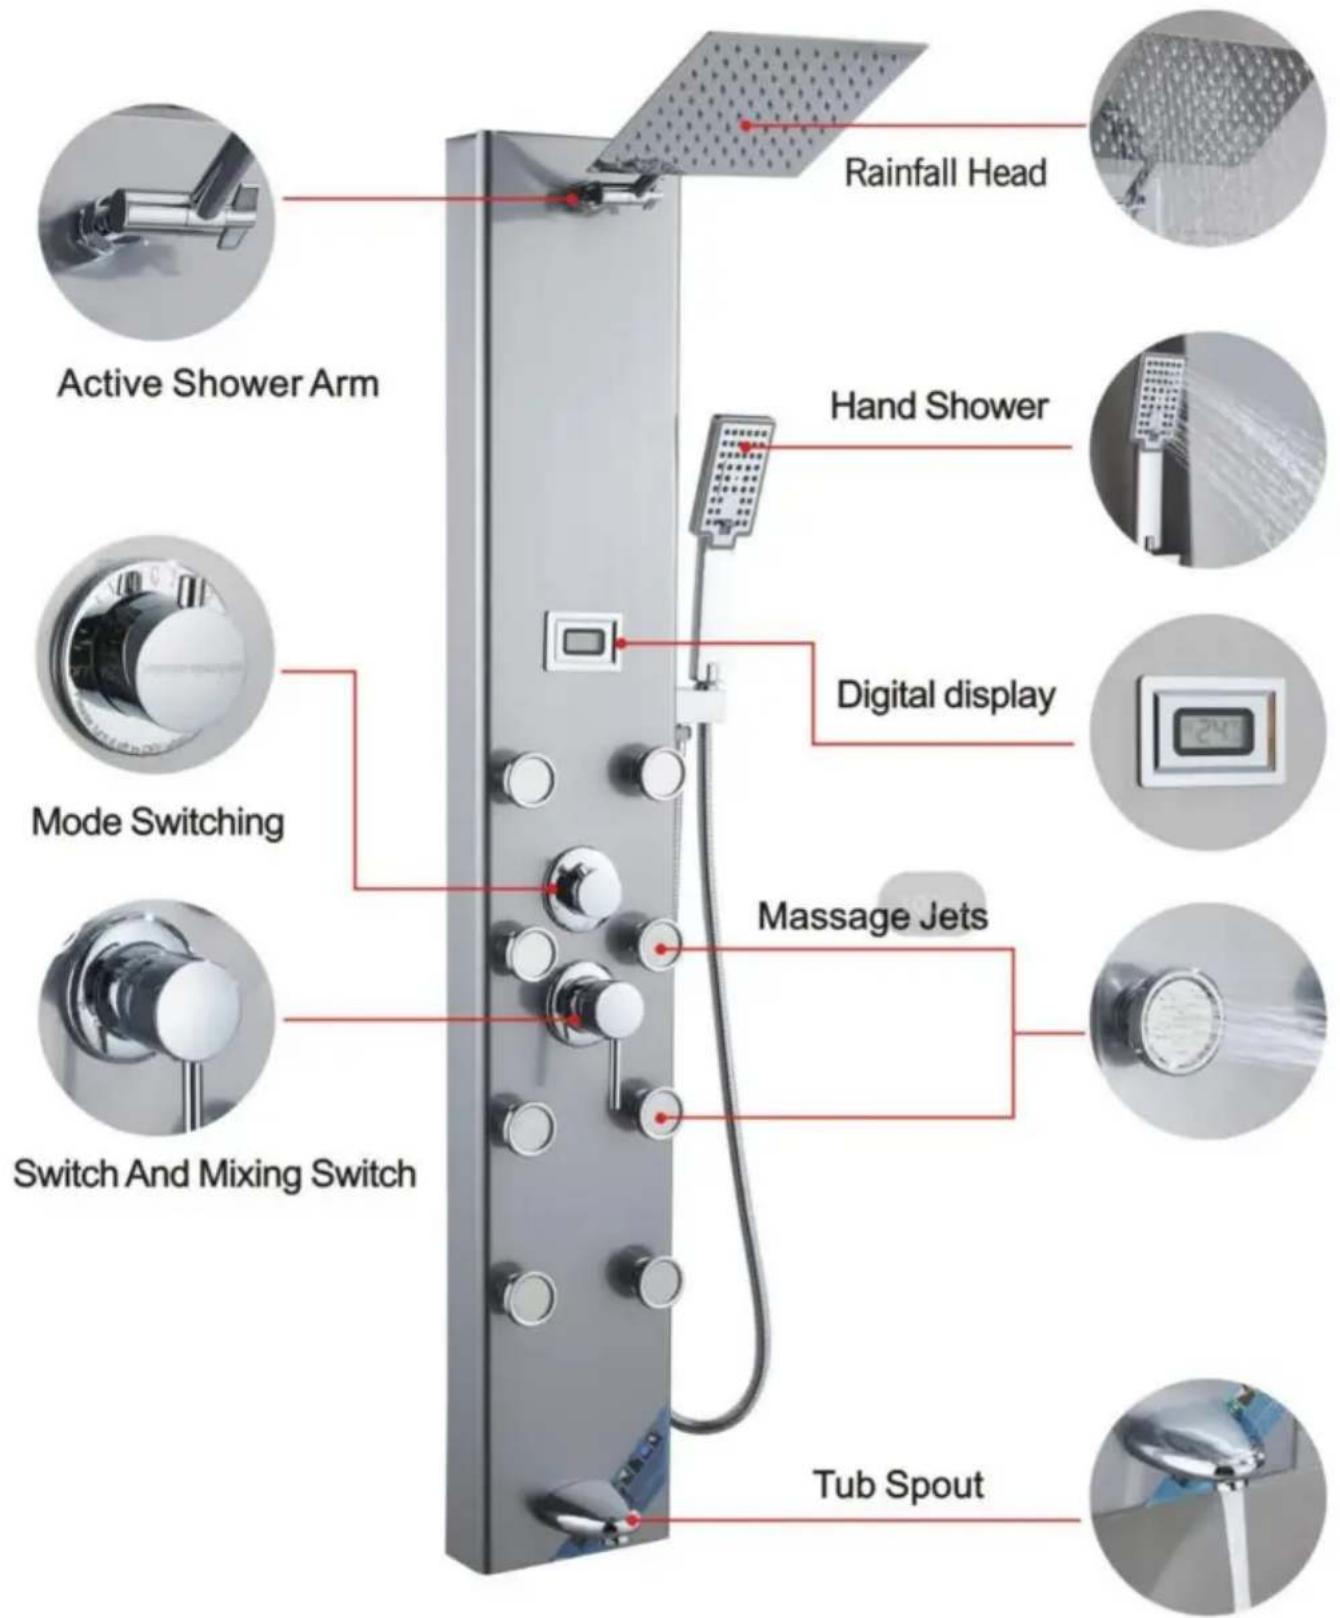
Made in China
VEVOR®
TOUGH TOOLS, HALF PRICE
warranty certificate www.vevor.com/support
VEVOR®
TOUGH TOOLS, HALF PRICE
MODEL:8015FL/6002FL/8039FL/8009FL/8004FL/7009FL
PRODUCT INTRODUCTION
Insert the PVC pipe from the top opening to pierce out
Route the LED light wire along the hole and insert into the motherboard
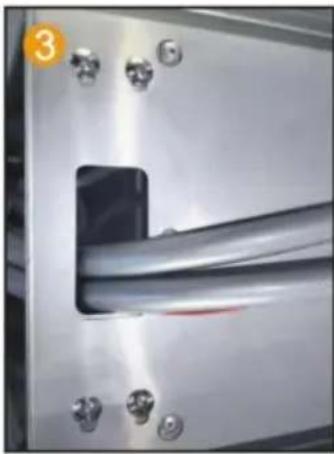
Fix the motherboard and top spray with 4 pairs of M6 screws and nuts
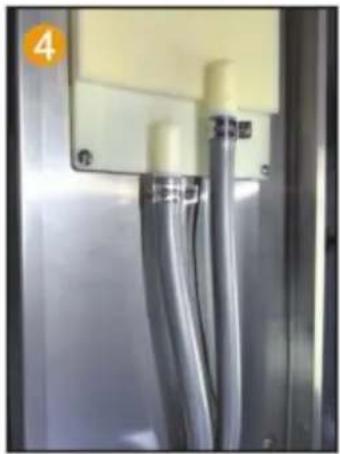
Fix the PVC pipe with a throat clamp on the top spray joint
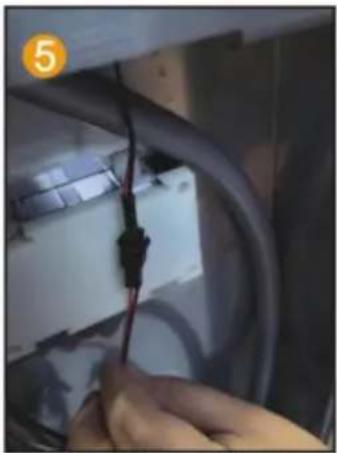
Connect the LED light cable and power supply line

Install 2 No. 5 batteries to charge the pool box.
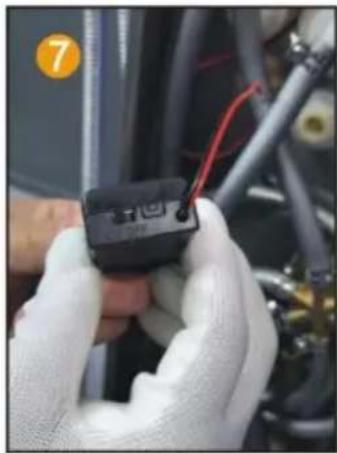
Point the switch of the battery box towards ON.
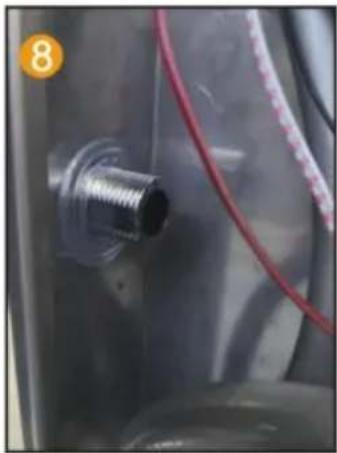
Insert the hand spray nozzle into the panel and install the gasket.
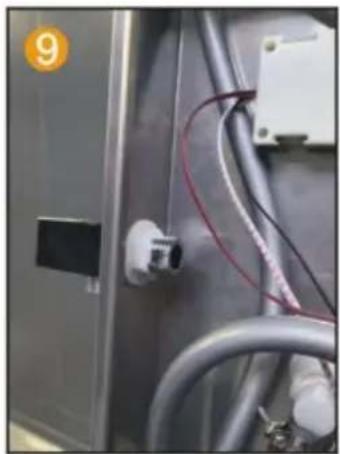
Spray socket with hexagonal nut handle fixed on the panel.
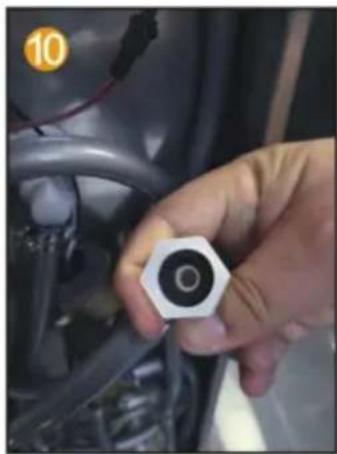
Put the 4-point rubber into the hand spray inside the joint of the seat.
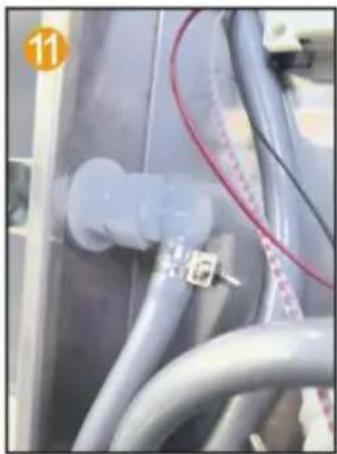
Connect the water outlet connector and hand spray seat joint.
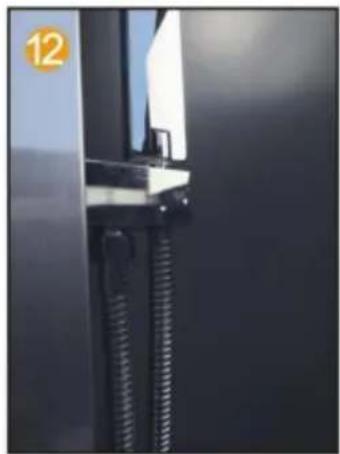
Connect the hand spray hose to the handheld shower head.
MODELL 8004FL
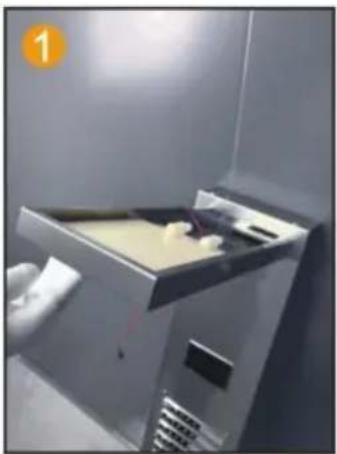
Insert the top spray into the motherboard inside the hole.
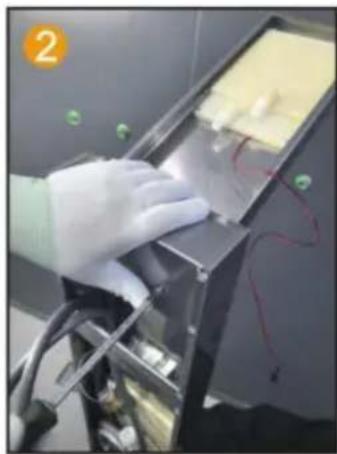
Use 2 M4 screws to secure the main fixed plate and top spray.
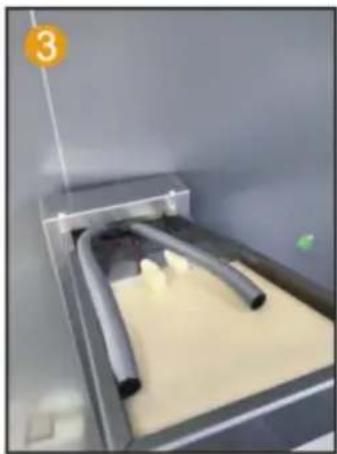
Connect PVC pipes and LED light wires thread through the hole.
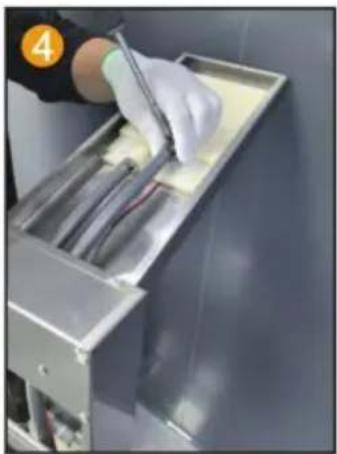
Fix the PVC pipe with a throat clamp on the top spray joint.
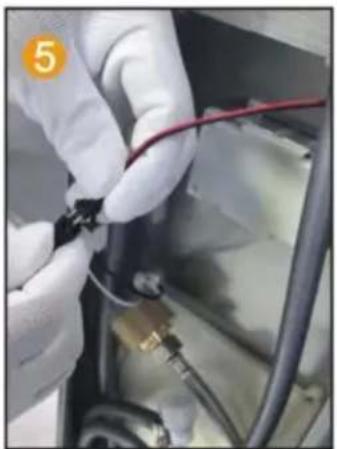
Connect the LED light cable and power supply line.
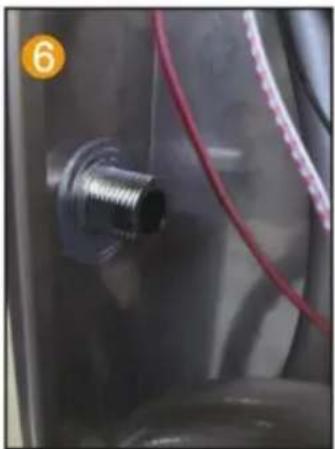
Insert the hand spray nozzle into the panel and install the gasket.
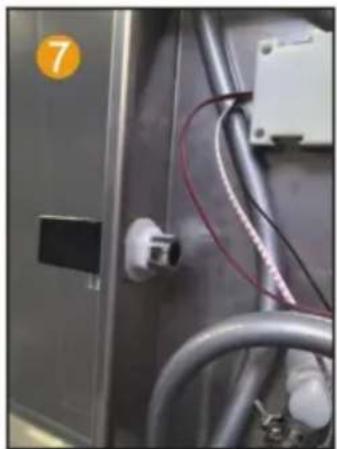
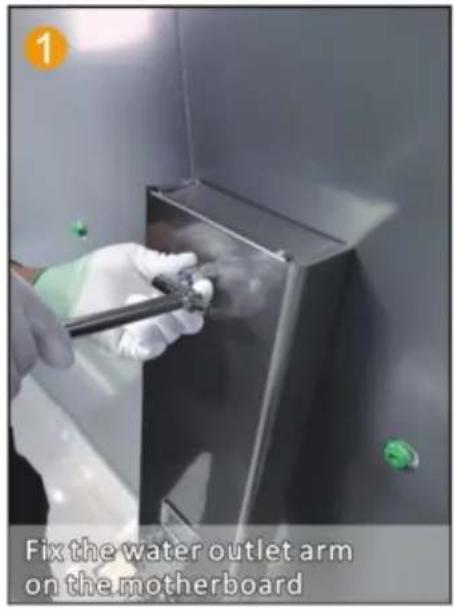
Spray socket with hexagonal nut handle fixed on the panel.

Spray socket with hexagonal nut handle. Fix the 4-point rubber on the panel and spray it by hand. Inside the joint of the seat.
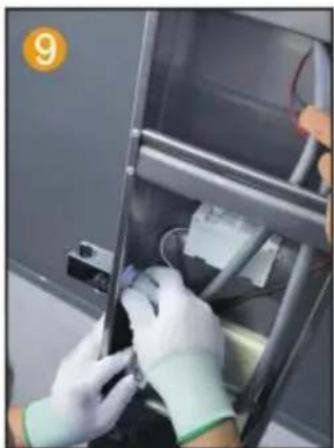
Connect the water outlet connector and hand spray. Seat joint.
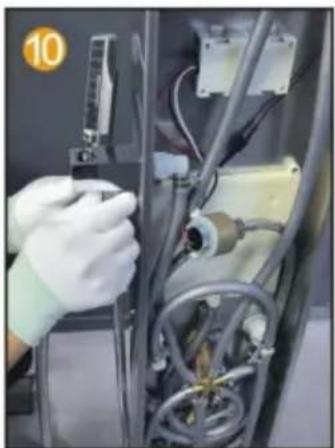
Connect the hand spray hose to the handheld shower head.
MODEL 7009FL
INSTALLATION STEPS (GENERAL)

FUNCTION INTRODUCTION
8015FL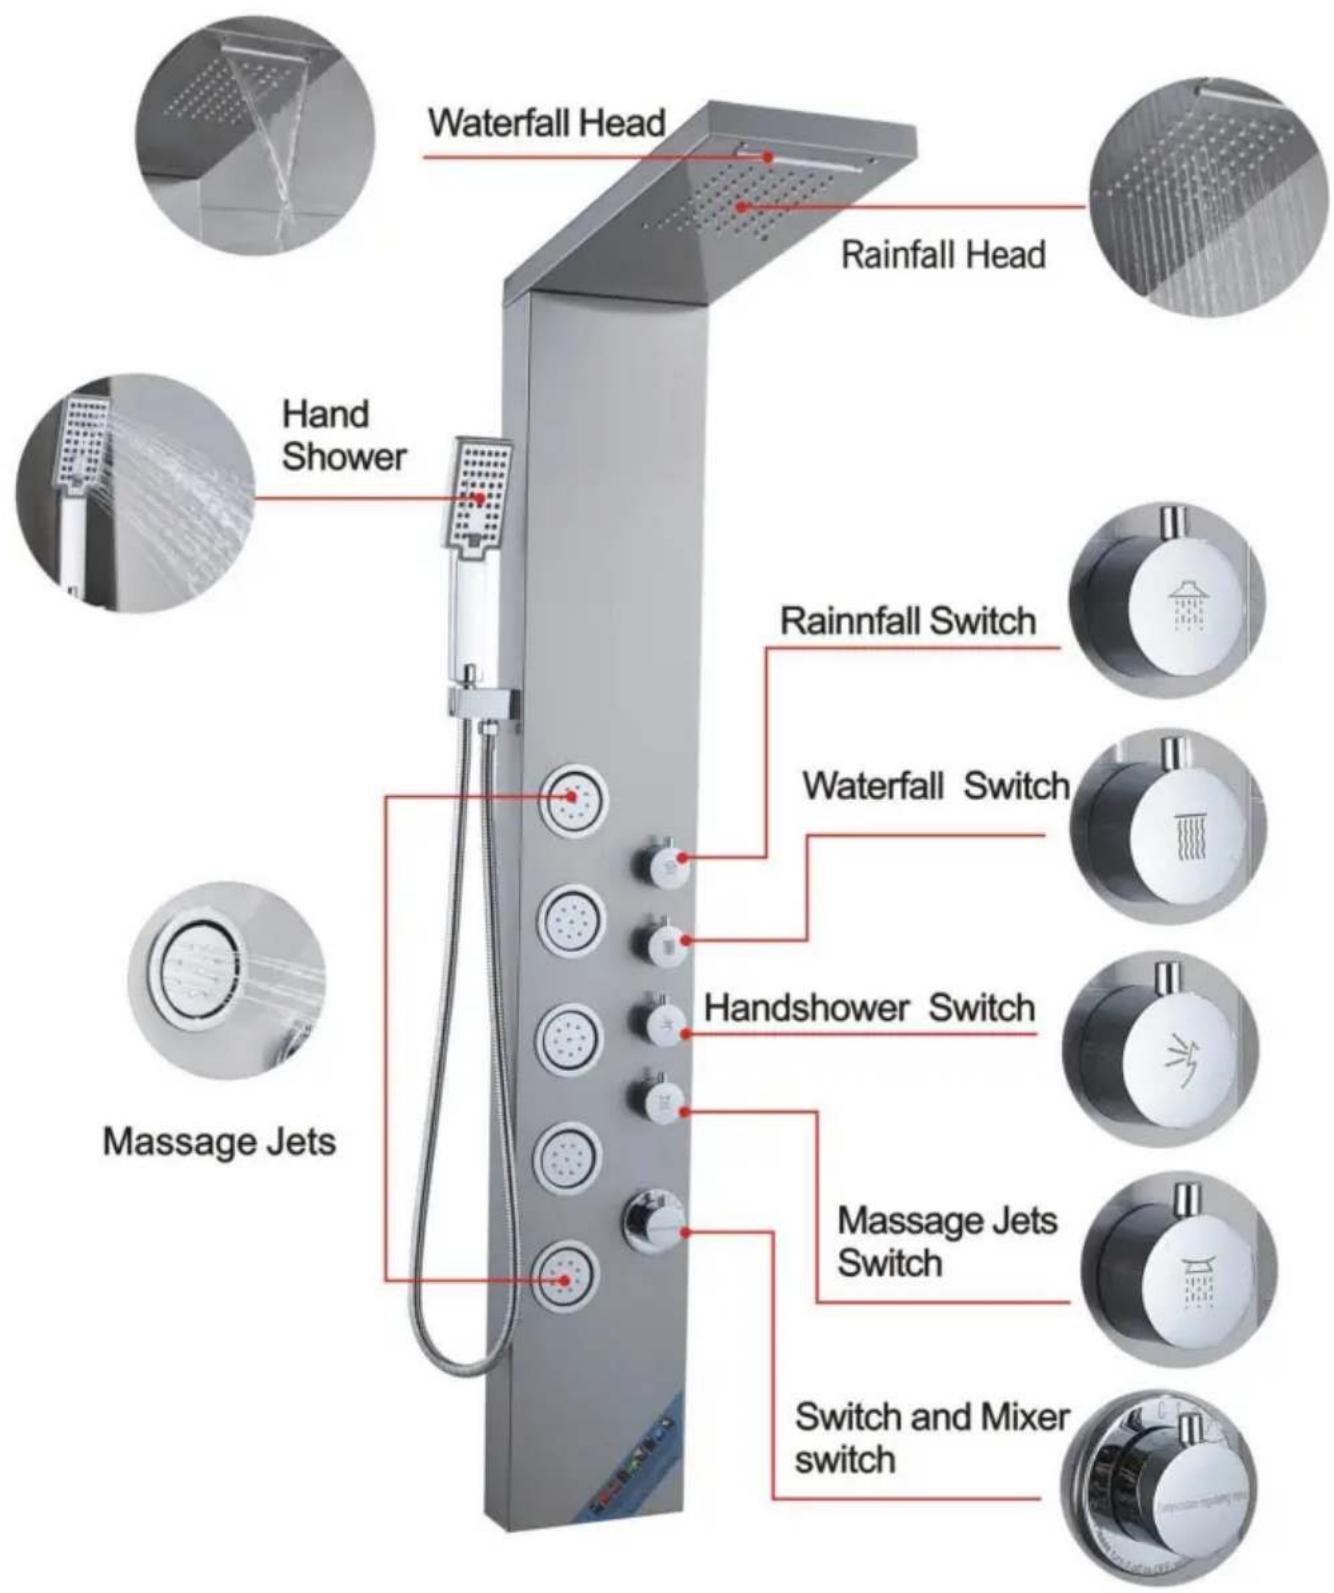
FUNCTION INTRODUCTION
6002FL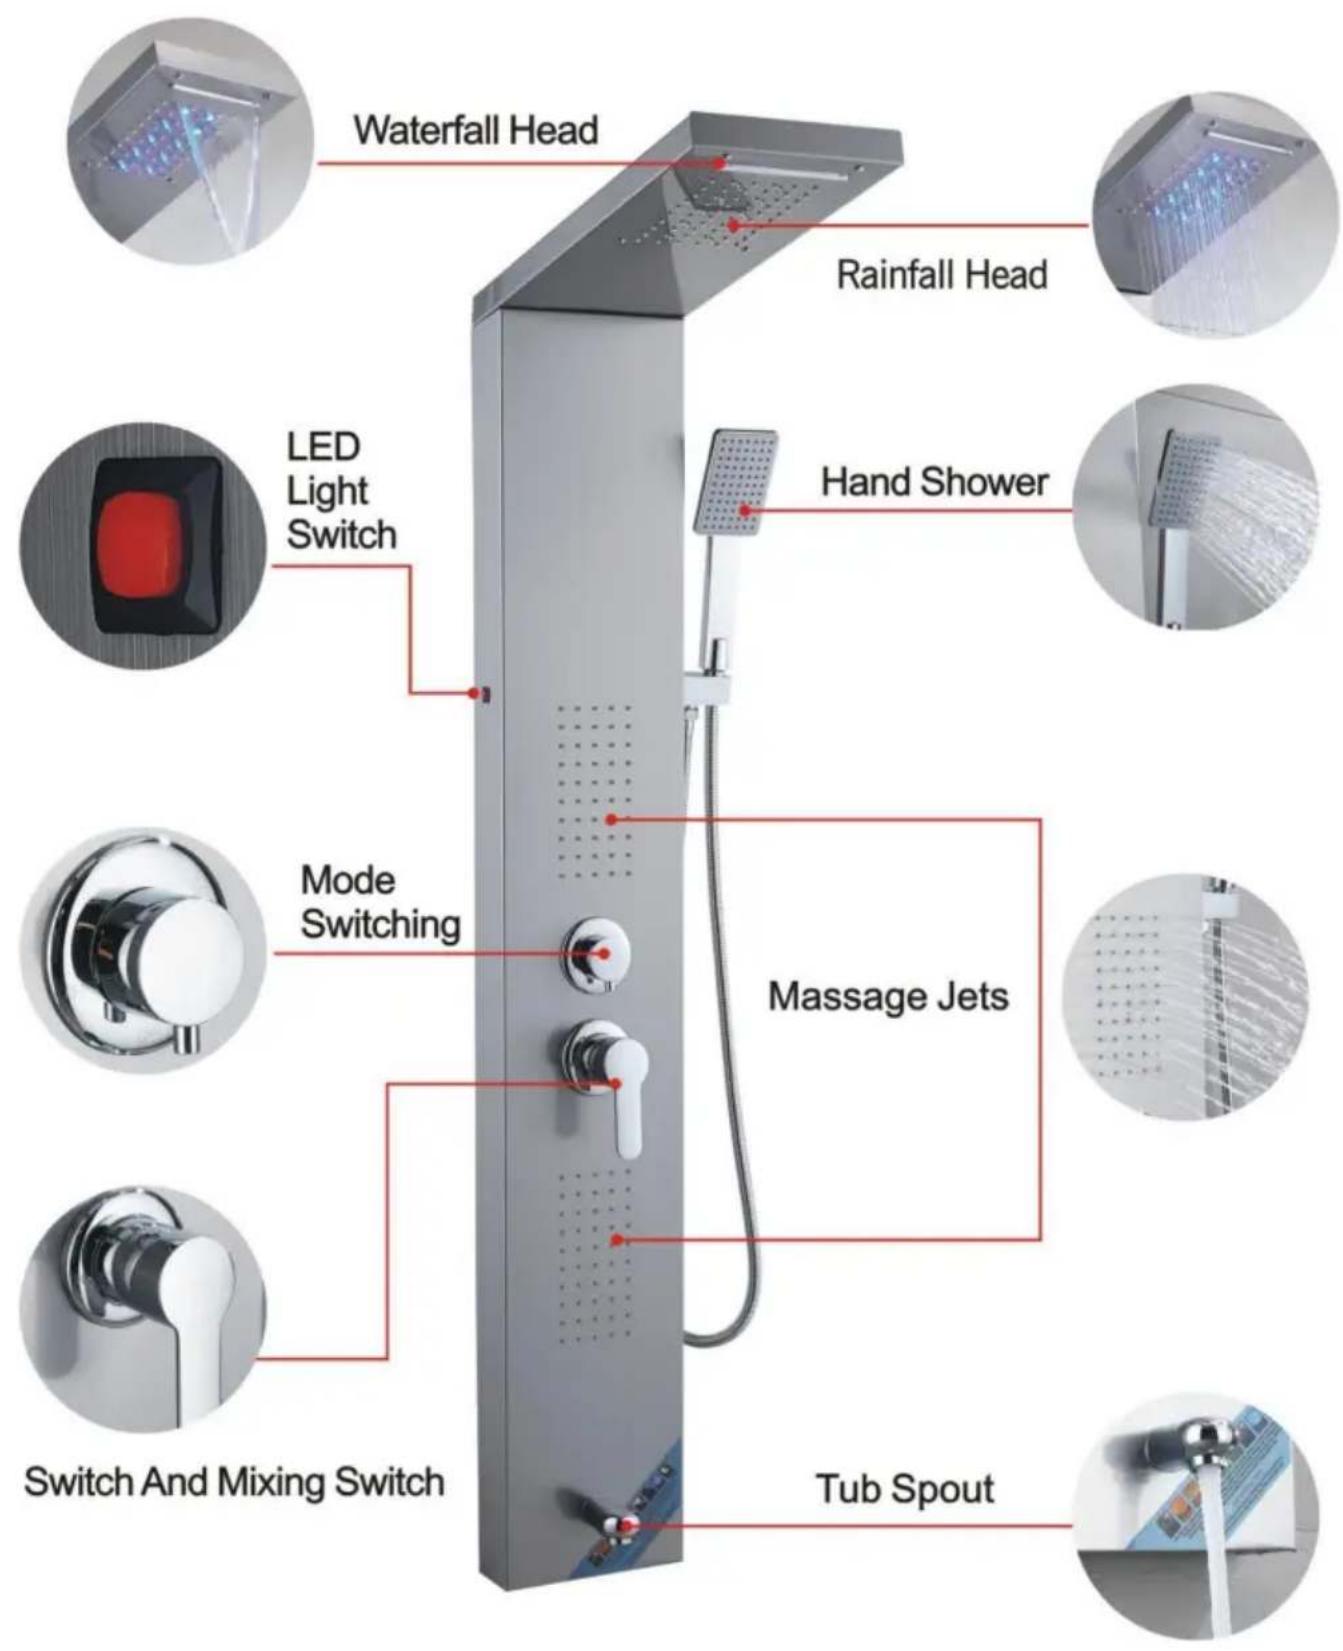
FUNCTION INTRODUCTION
8039FL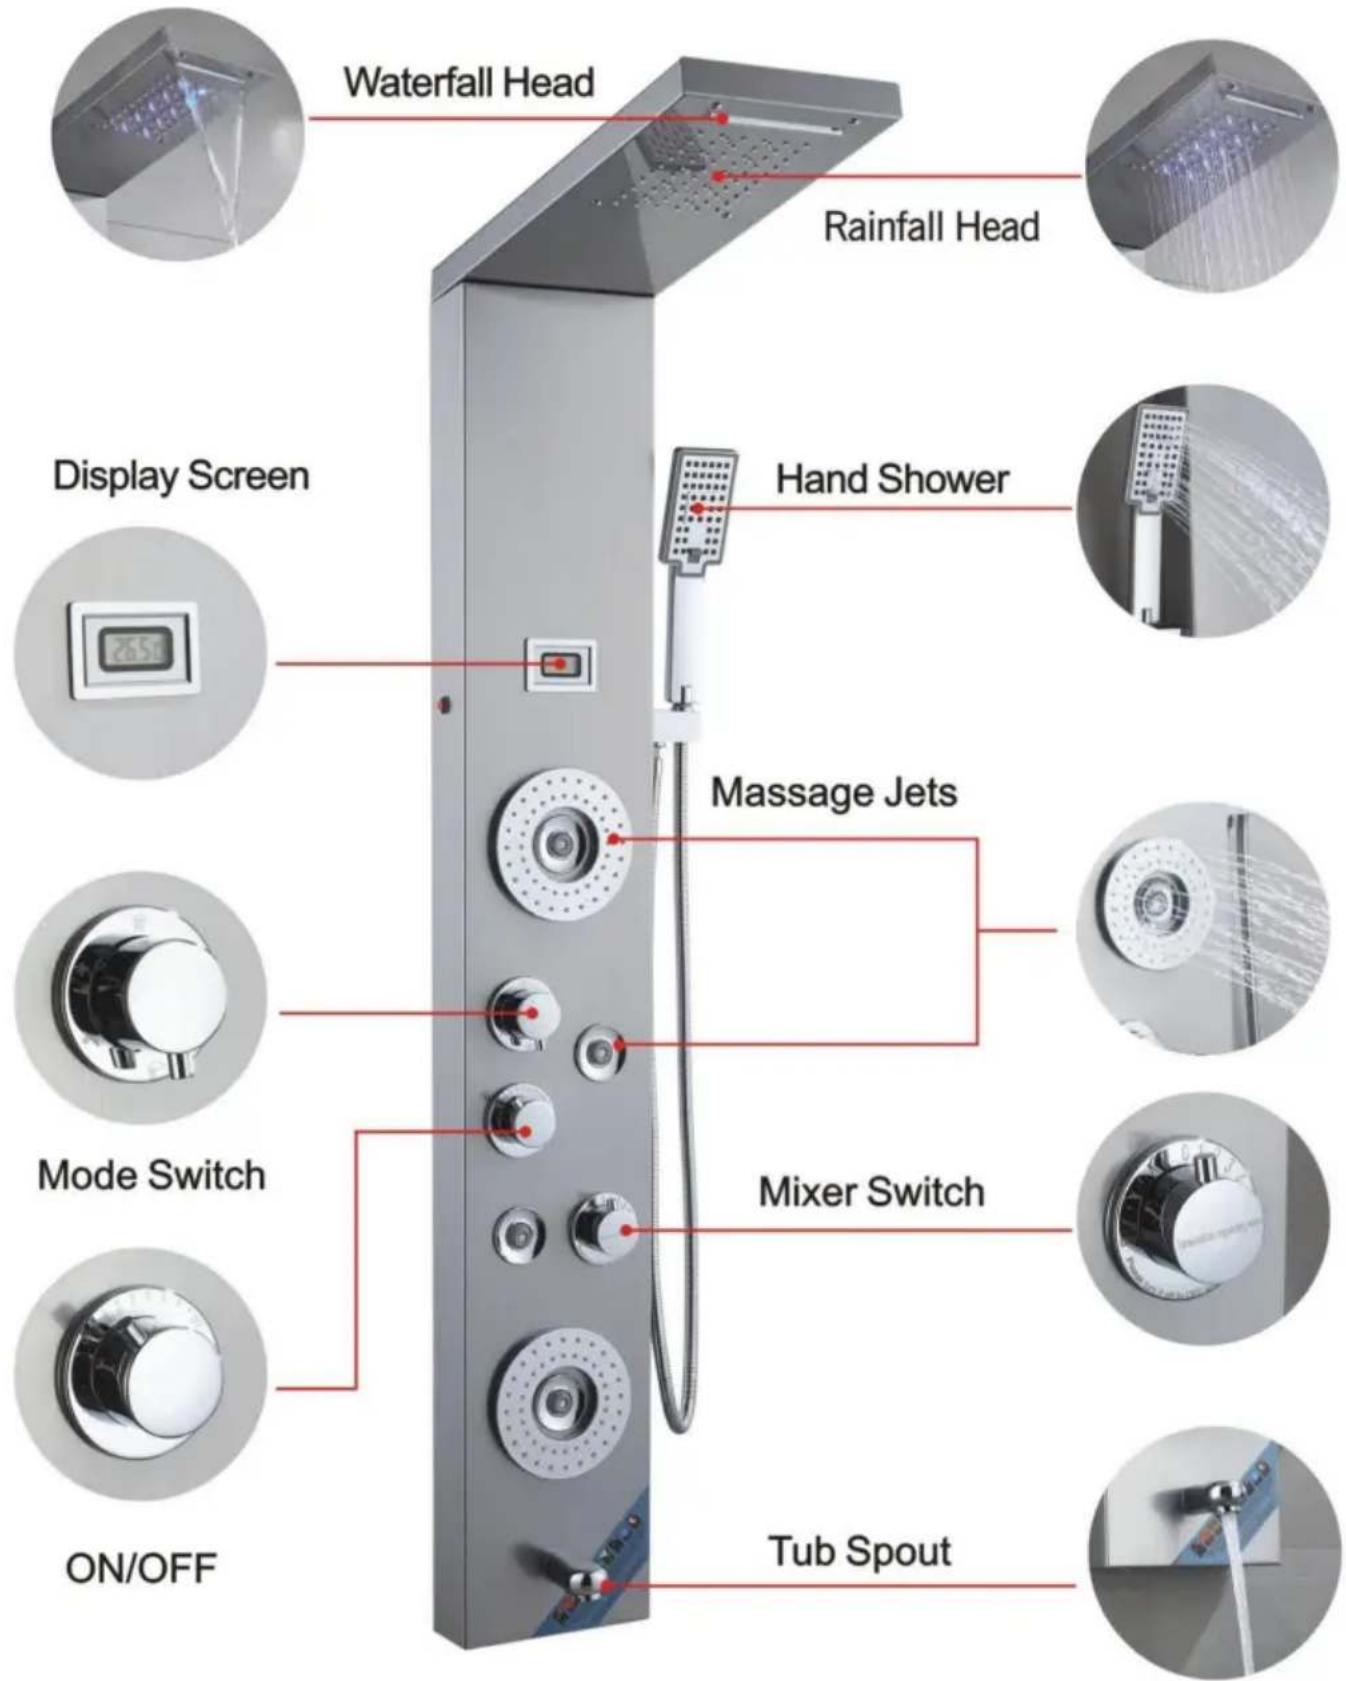
FUNCTION INTRODUCTION
8009FL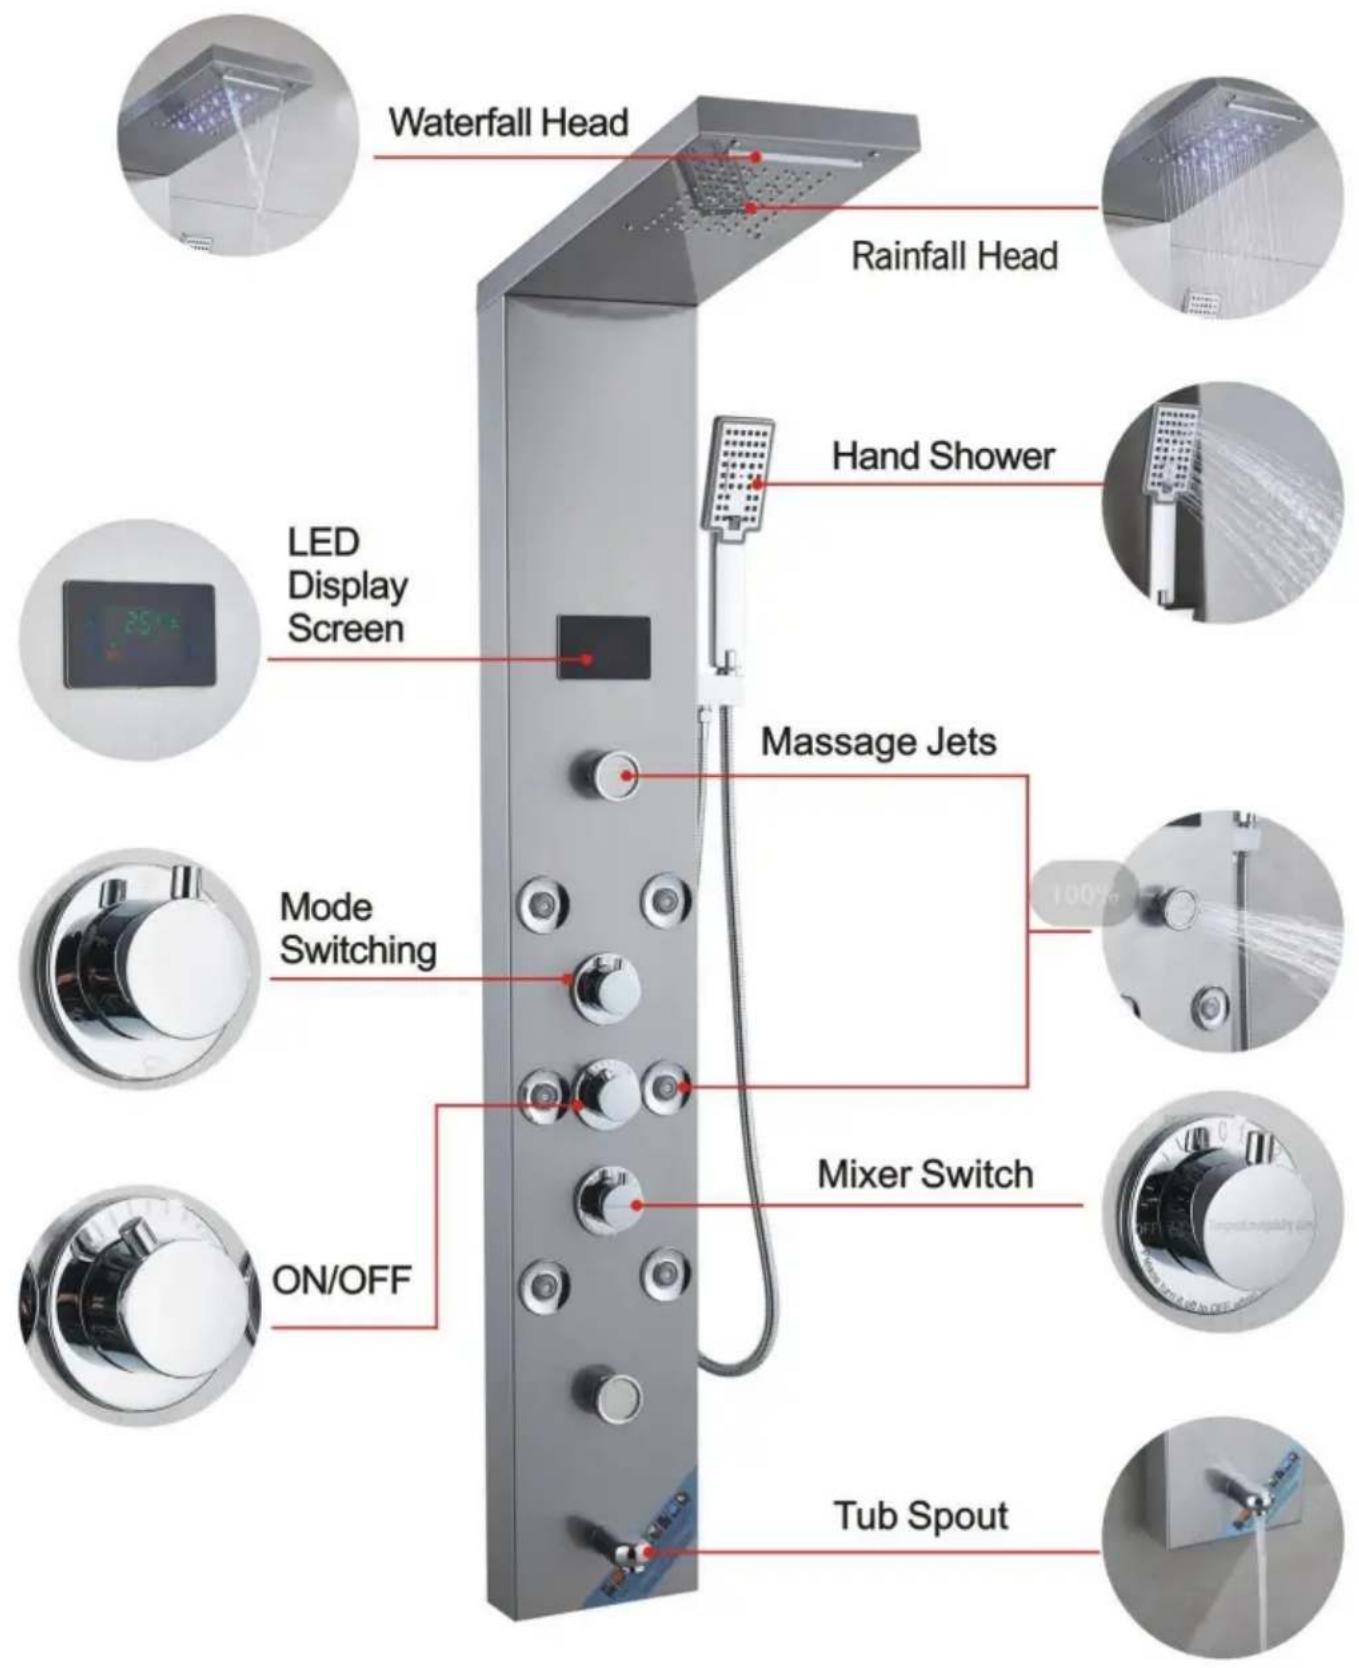
FUNCTION INTRODUCTION
8004FL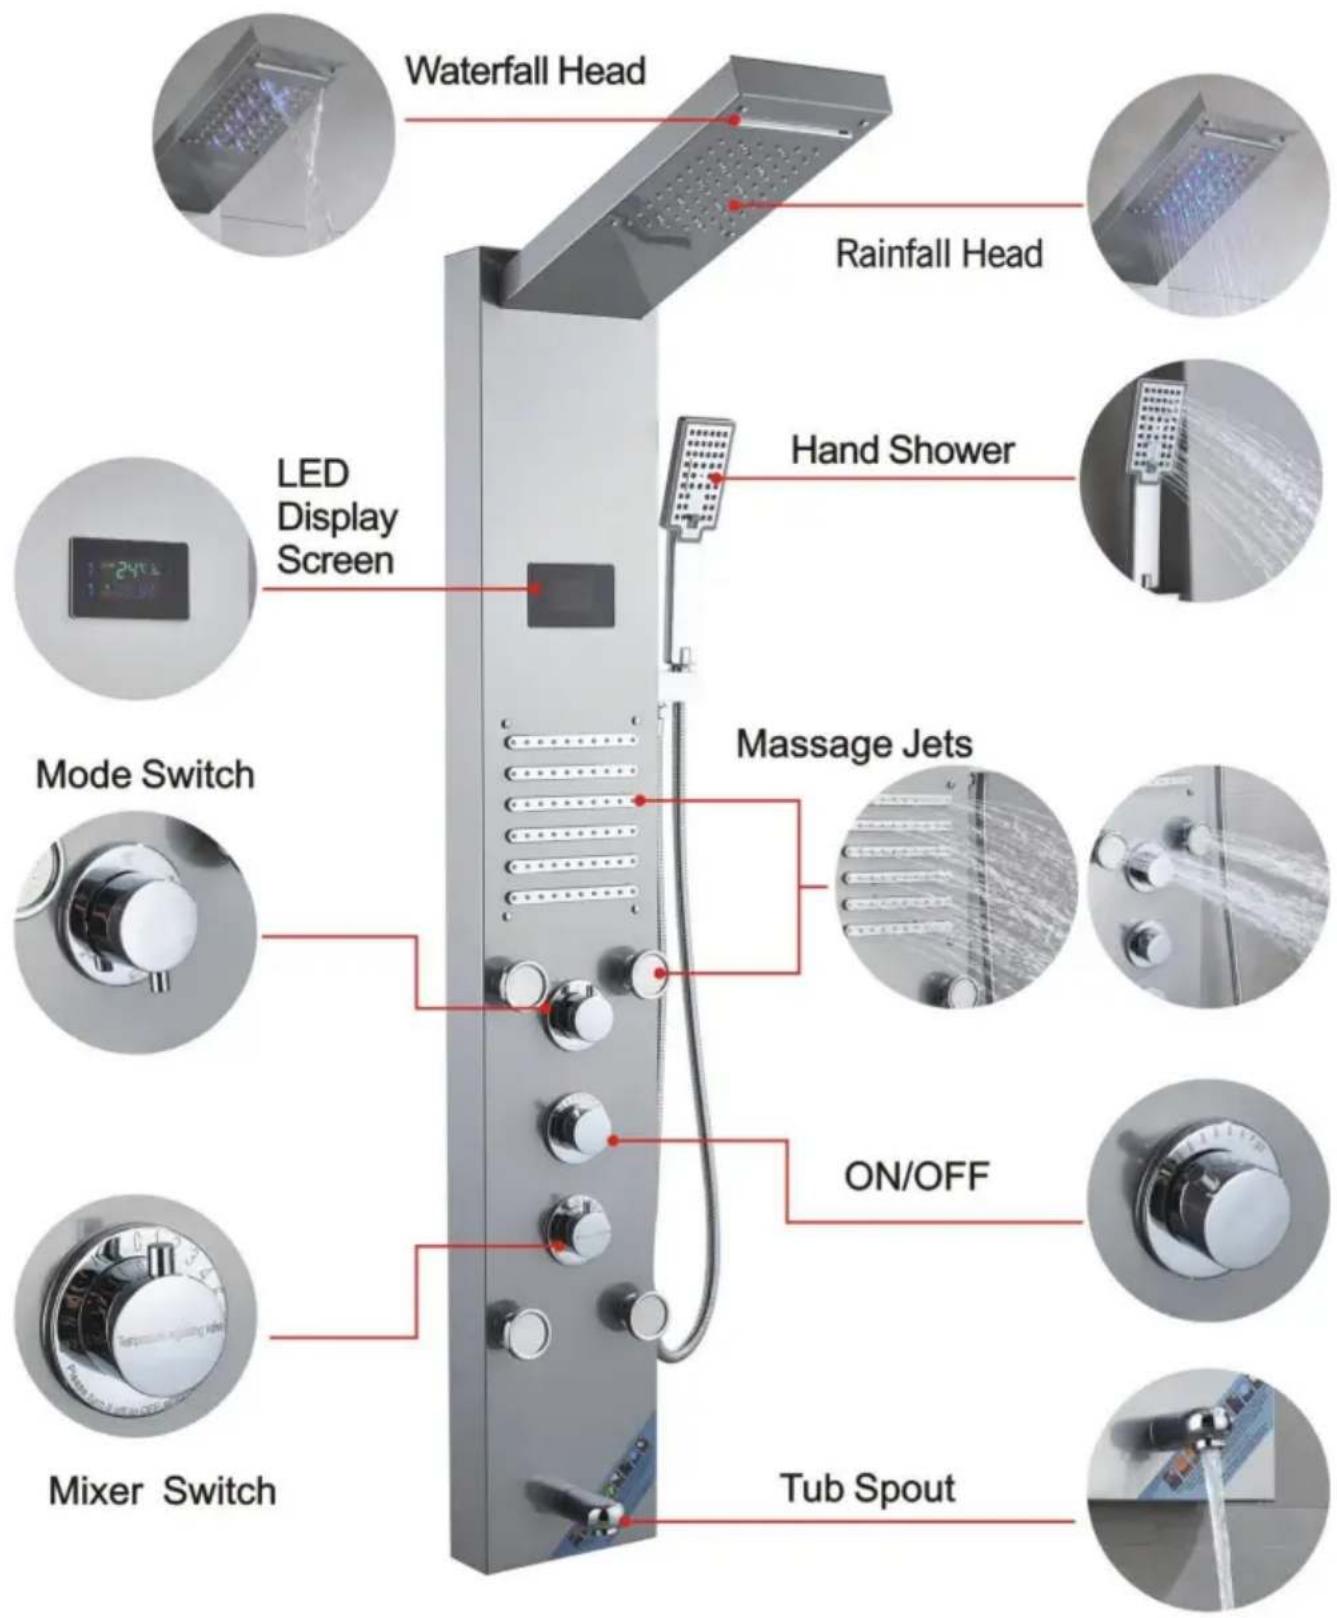
FUNCTION INTRODUCTION
7009FL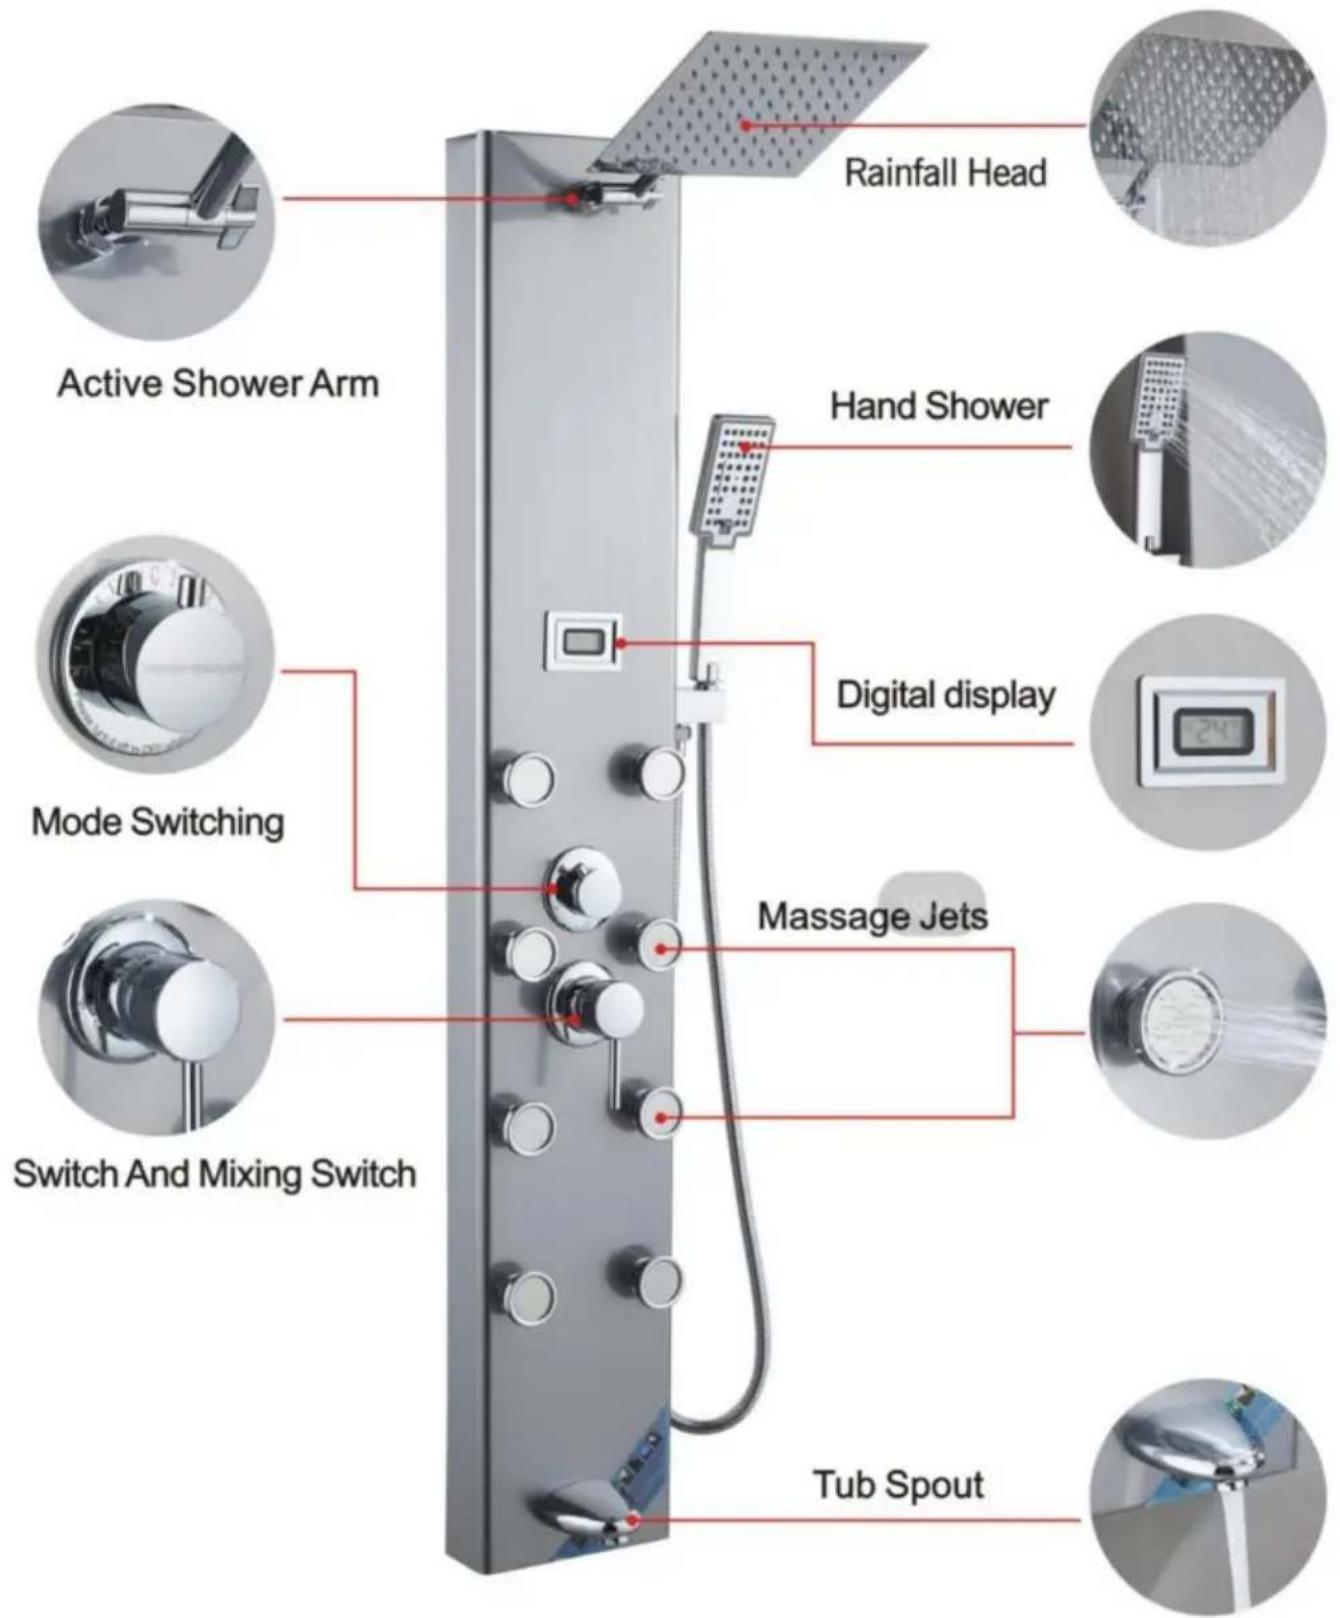
Made in China
VEVOR®
TOUGH TOOLS, HALF PRICE
www.vevor.com/support

- SHOWER PANEL TOWER
- VEVOR®
- NEED HELP? CONTACT US
- PRODUCT INTRODUCTION
- WARNING TIPS
- SAVE THESE INSTRUCTIONS
- FCC INFORMATION
- PARTS LIST
- ASSEMBLY INSTRUCTIONS
- MODEL 8015FL/6002FL/8039FL/8009FL
- MODEL 8004FL
- MODEL 7009FL
- INSTALLATION STEPS (GENERAL)
- INSTALLATION NOTES
- STAINLESS STEEL SHOWER SYSTEM MAINTENANCE METHODS
- SHOWER PANEL SERIES INSTALLATION DIAGRAM
- TOUGH TOOLS, HALF PRICE
- INTRODUCTION OF FUNCTIONS
- MODELL 7009FL
- INSTALLATION INSTRUCTIONS
- INSTALLATION DIAGRAM OF THE SHOWER PANEL SERIES
- FUNCTION INTRODUCTION
- USER MANUAL
- MODELL 8004FL
Brand : Vevor
Model : 8015FL
Category : Shower column