
XFL-QX-YW07 - Medical transfer chair Vevor - Free user manual and instructions
Find the device manual for free XFL-QX-YW07 Vevor in PDF.
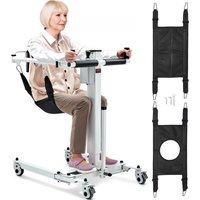


| Product Type | Electric Medical Transfer Chair |
| Brand | Vevor |
| Model | XFL-QX-YW07 |
| Dimensions (L x W x H) | 960 x 600 x 945 mm |
| Maximum Weight Capacity | 150 kg (330 lb) |
| Lifting Stroke | 350 mm |
| Waterproof Rating | IPX44 |
| Color | White and black |
| Power Supply | Power adapter (low voltage), built-in lithium battery |
| Battery Life / Charging | Red light during charging, green when fully charged; automatic charging |
| Intended Use | Transfer of individuals with reduced mobility over short distances (bed, chair, toilet, bathroom) |
| Included Components | Backrest, frame, legs (x2), seat pouch, pouch with holes, adapter, fasteners |
| Assembly | Mounting of legs, connecting rods, backrest and seat cushion included |
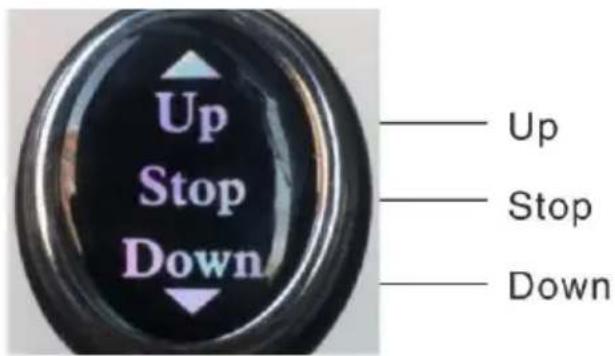
| Controls | Lifting button (up/down) with automatic stop at end of stroke |
| Battery Indicator | Present on the battery case |
| Materials | Metal frame, fabric cushion, plastic coating |
| Safety | Automatic stop at end of stroke, overload protection (150 kg max), use prohibited for children |
| Maintenance and Cleaning | Wipe with a soft cloth and alcohol; non-corrosive disinfection; do not immerse |
| Lubrication | Apply lubricating oil to the rods in case of jerking |
| Warranty | Technical support and electronic warranty via www.vevor.com/support |
| Disposal | Compliant with WEEE directive (2012/19/EU); battery recycling mandatory |
Frequently Asked Questions - XFL-QX-YW07 Vevor
User questions about XFL-QX-YW07 Vevor
0 question about this device. Answer the ones you know or ask your own.
Ask a new question about this device
Download the instructions for your Medical transfer chair in PDF format for free! Find your manual XFL-QX-YW07 - Vevor and take your electronic device back in hand. On this page are published all the documents necessary for the use of your device. XFL-QX-YW07 by Vevor.
USER MANUAL XFL-QX-YW07 Vevor
Technical Support and E-Warranty Certificate www.vevor.com/support
Patient Transfer Chair
MODEL: XFL-QX-YW07
We continue to be committed to providing you with tools at competitive prices. "Save Half", "Half Price", or any other similar expressions used by us only represent the savings you might benefit from buying certain tools with us compared to top brands, and does not necessarily mean to cover all categories of tools offered. We kindly remind you to verify carefully when placing an order with us whether you are actually saving half in comparison with the top major brands.
MODEL: XFL-QX-YW07
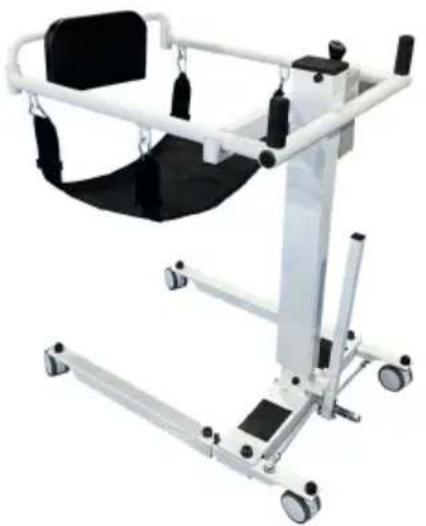
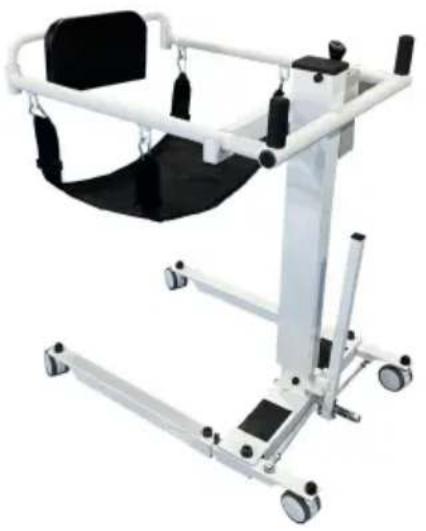
Note: The product picture is for reference; the actual details shall prevail.
NEED HELP? CONTACT US!
Have product questions? Need technical support? Please feel free to contact us:
Technical Support and E-Warranty Certificate www.vevor.com/support
This is the original instruction. Please read all manual instructions carefully before operating. VEVOR reserves the right to interpret the user manual. The appearance of the product shall be subject to the product you received. Please forgive us that we won't inform you of any technology or software updates on our product.
Thank you very much for choosing this Patient Transfer Chair. Please read all of the instructions before using it. The information will help you achieve the best possible results.
Operation Safety
Please put this manual in a place easy to check and keep it properly. This instruction manual clearly indicates how to use the equipment safely and correctly, so as to prevent any harm or property loss caused to you and others.
Warning
- Must use matched adapter with this product when charging. 2. This chair is not recommended for use for showering; if you have to, you must turn off the power and put the waterproof cover on the charging port.
- The light on the adapter will be red while charging. It will stop charging automatically when the battery is fully charged, and the light will turn green. 4. Maintenance of this machine must be carried out by professionals.
Prohibition
- Do not open the battery box while it is charging.
- Do not use the product during the charging process.
- Do not use it if the weight exceeds 330 lbs (150 kg).
- Do not place it where children can reach it to avoid injury. 5. It is strictly forbidden to operate the machine when there are objects blocking it, otherwise the machine will be damaged.
*Our company will not be responsible for any loss or damage caused by operation neglecting warnings and attention. Please pay attention.
Product introduction
Intended use
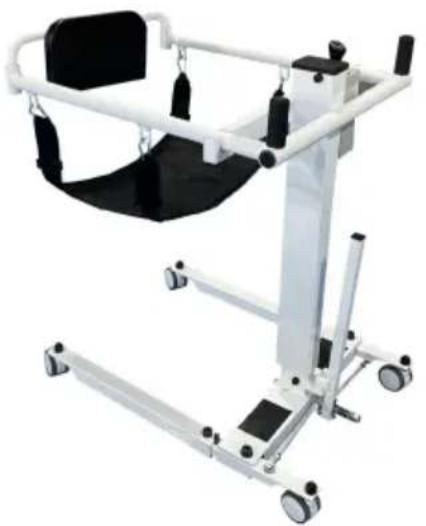
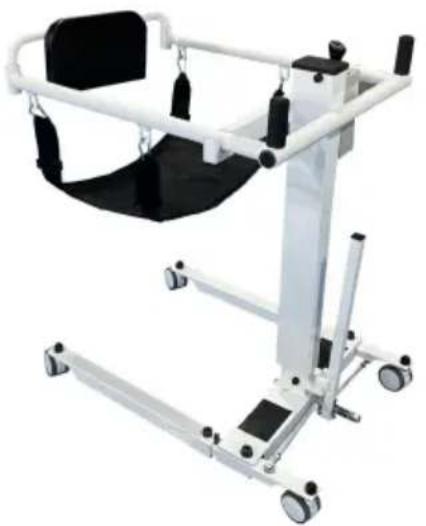
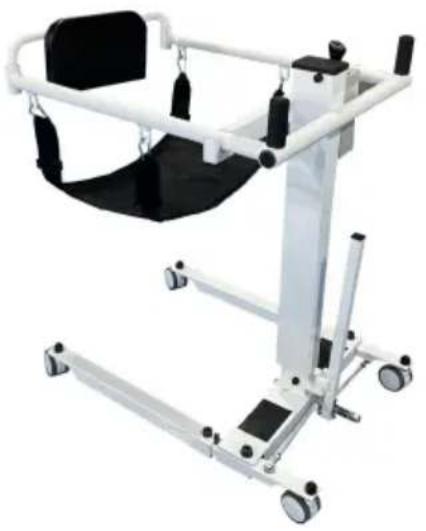
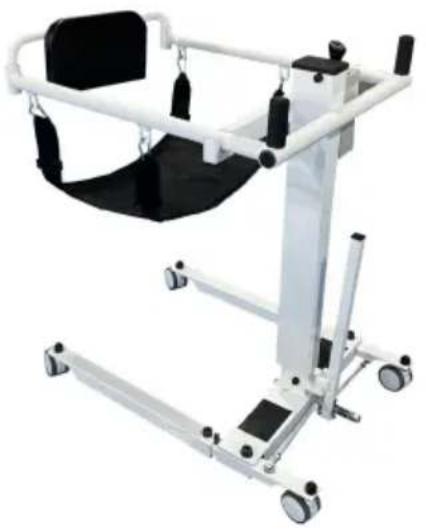
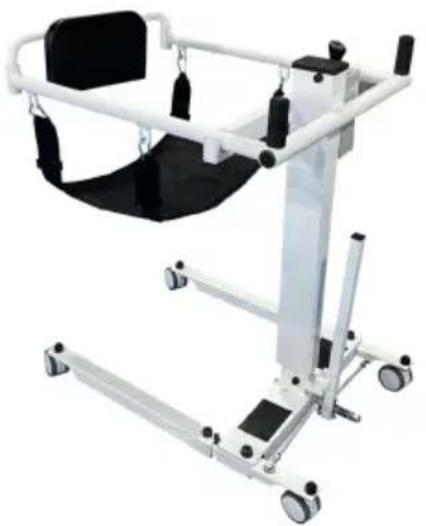
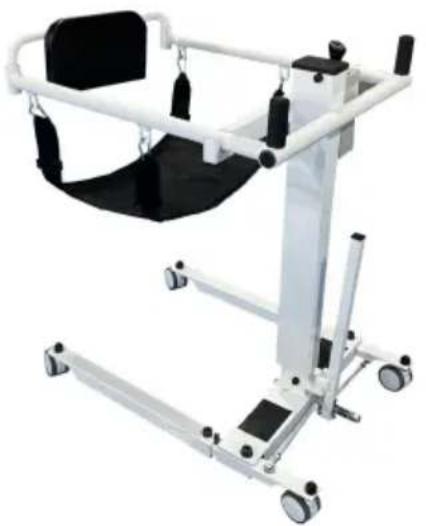
The electric lift transfer chair is a nursing device that helps disabled people move without barriers. It is designed for short-distance transferring and rehabilitation nursing. Caregivers can transfer patients easily by controlling the lift button, which greatly improves nursing efficiency. It helps caregivers transfer immobile patients to the car, living room, toilet, and bathroom. In summary, it can greatly reduce the nursing intensity for caregivers and lower the risk of secondary injury during the transfer process.
Circuit principle block diagram![graph TD A["Battery 24 V"] --> B{Rocker type Bidirectional self reset switch} B -->|Rocker up| C["Electric push rod up"] B -->|Rocker pull down| D["Electric push rod down"]](/content/2026/04/736930/images/cdd04a7b999c795d3cc6292d17fd07baaf8abc094cc808b51adae60aa3a87ed4.jpg)
Environmental requirements
◆Use environment:
Ambient temperature range: +10°C \~ +40°C. Relative humidity
range: 30%\~75%. Atmospheric pressure range: 700hPa\~1060hPa. No corrosive or combustible materials, dry and low-dust indoor environment.
◆Storage environment:
Ambient temperature: 0°C to +50°C; relative humidity: ≤93%; atmospheric pressure: 500 hPa to 1060 hPa. No corrosive gas, well-ventilated room.
◆During transportation and storage, handle with care, and do not throw or drop objects.
Do not store the equipment in a place where liquid may splash.
Do not store the equipment under the risk of combustible gas.
Product parameters
| Model | XFL-QX-YW07 |  |
| Colour | White + black | |
| Lift Range | 350mm | |
| Waterproof Class | IPX44 | |
| Maximum Load | ≤150 KG (330 lbs) | |
| Product Size | 960 x 600x 945 |
Part list
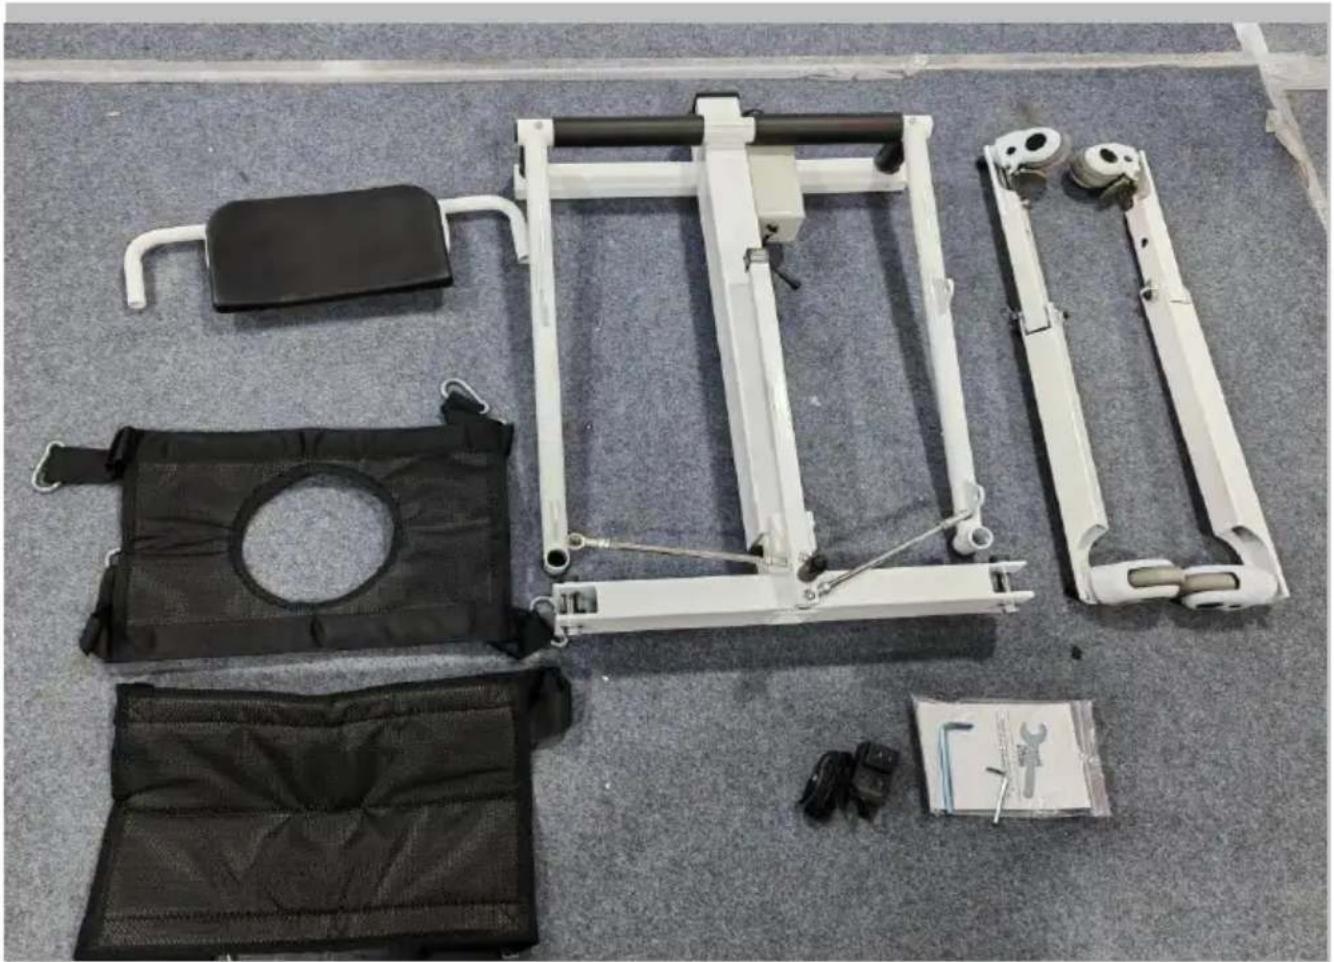
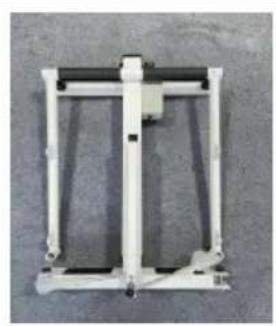
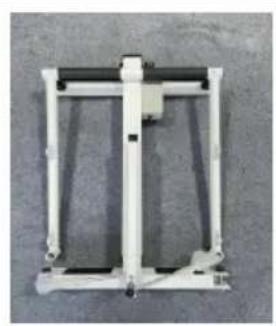
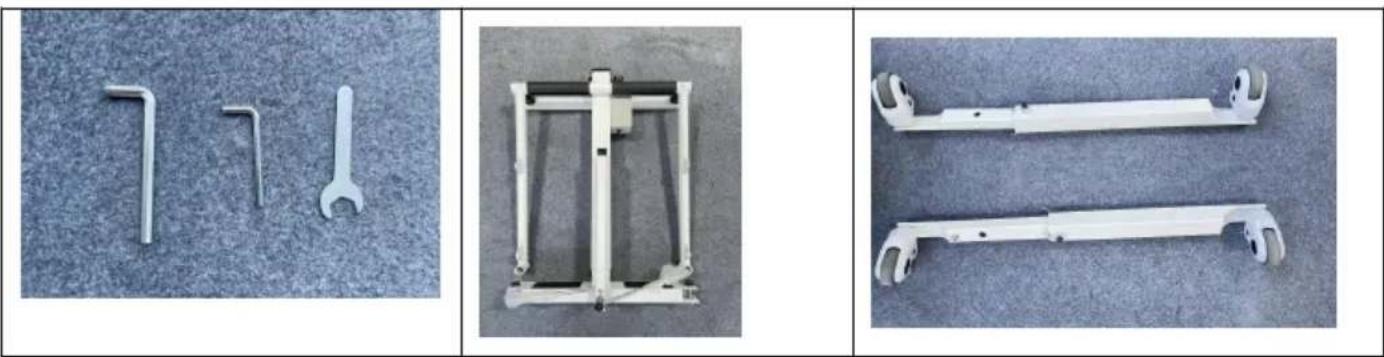
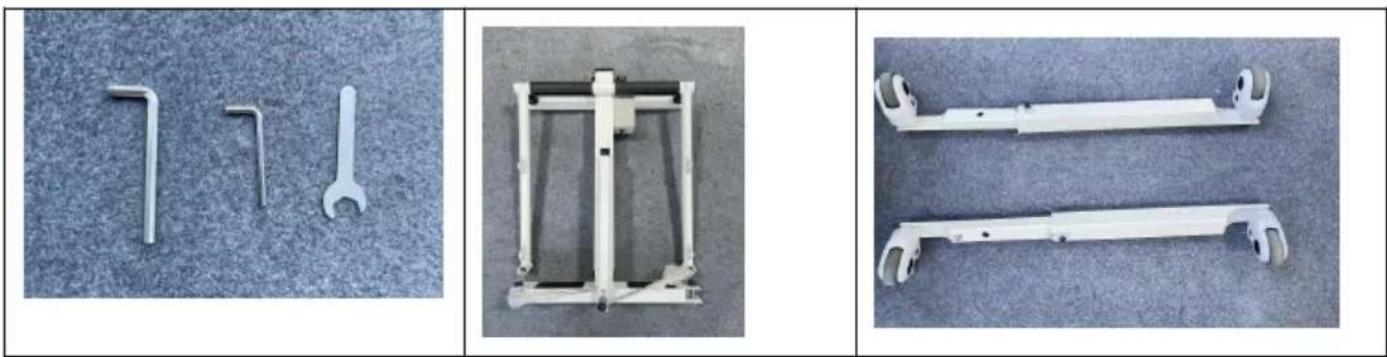
| 1.Backrest x1 | 2.Frame component x1 |
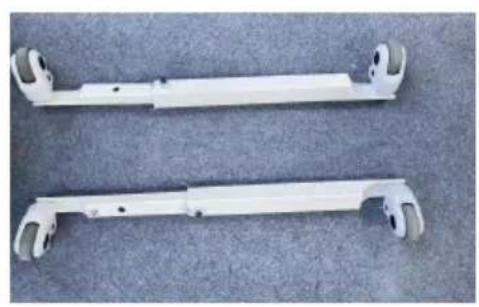
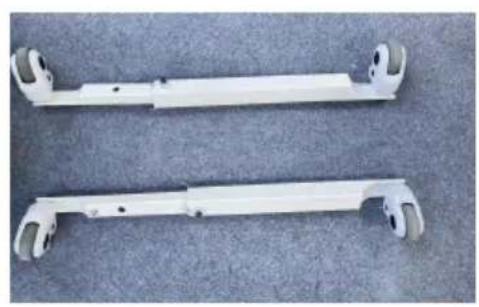
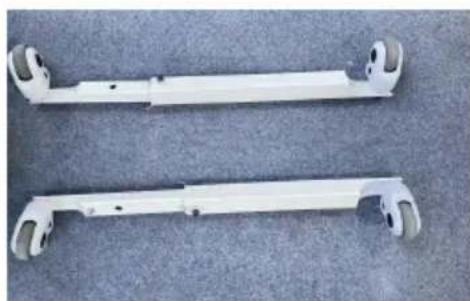
| 3.Standing leg x2 | 4.seat pocket x1 |
| 5.seat pocket (with holes) x1 | 6.Power adapter x1 |
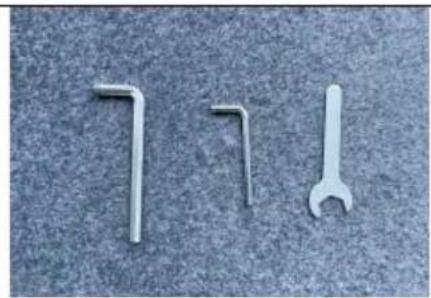
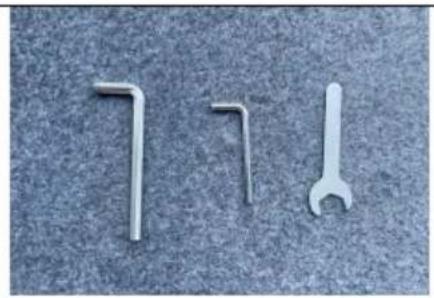
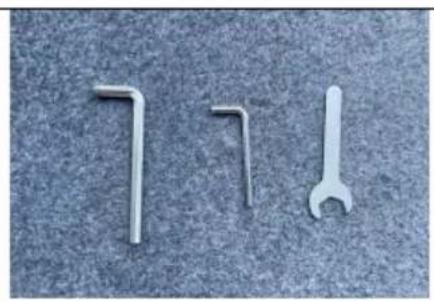
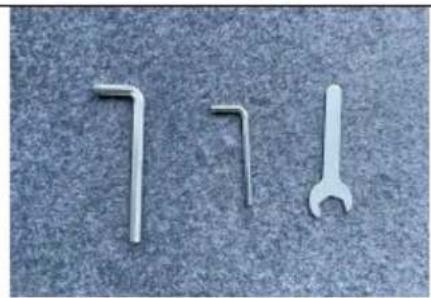
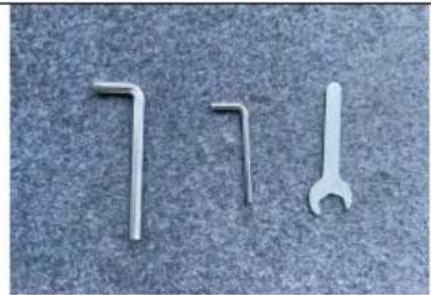
| 7.Mounting fittings x 1set |
Installation instructions
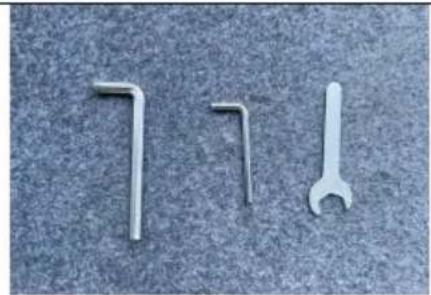
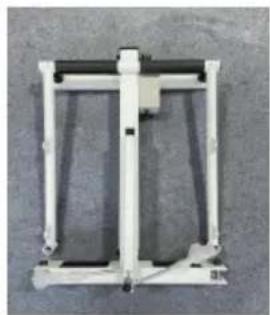
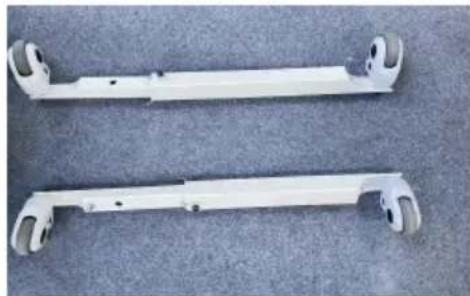
Step 1:
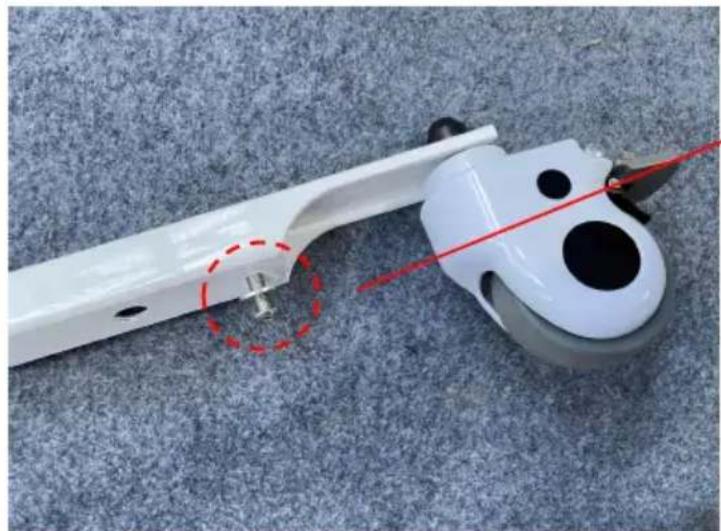
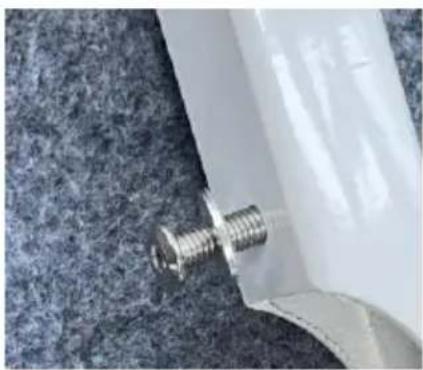
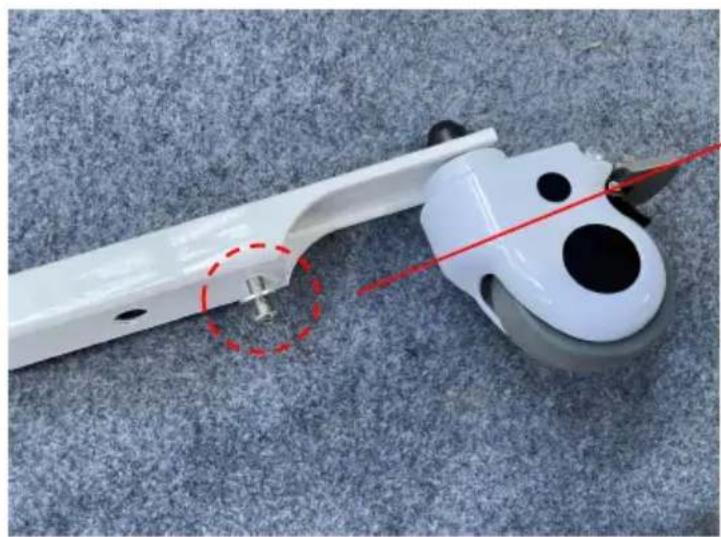
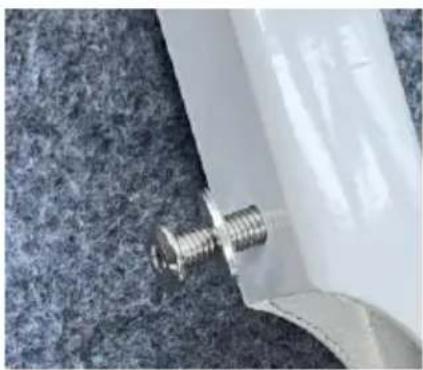
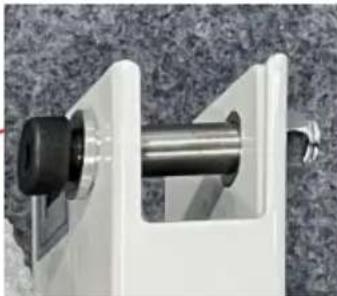
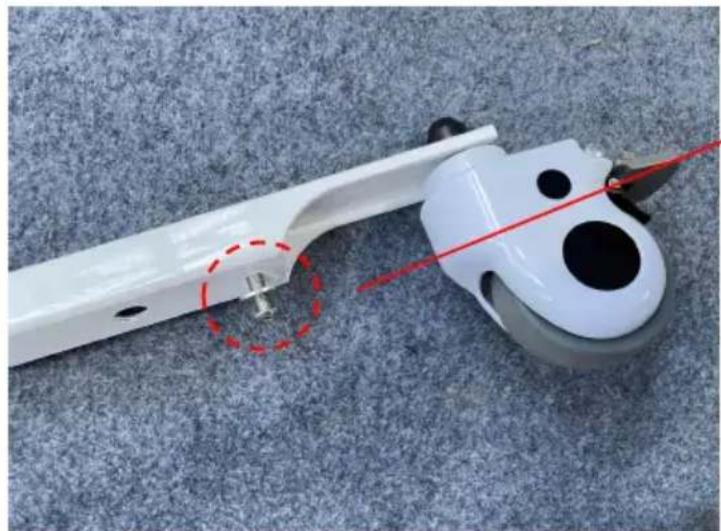
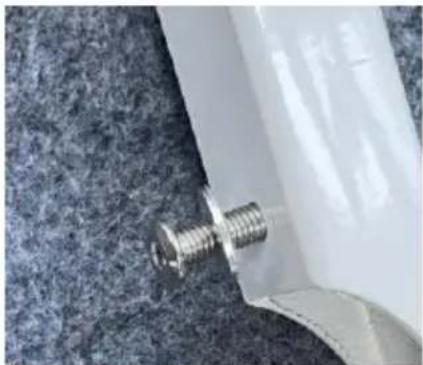
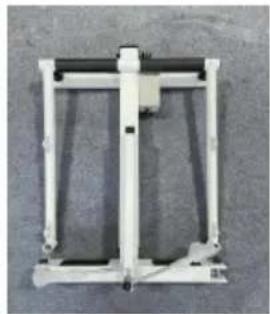
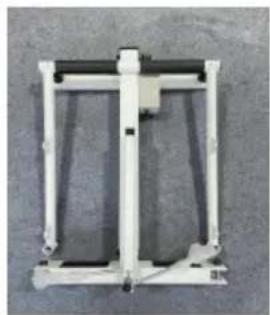
1.1 Remove the pre-installed screws on both sides of the frame, and the pre-installed screws on the left and right legs first.
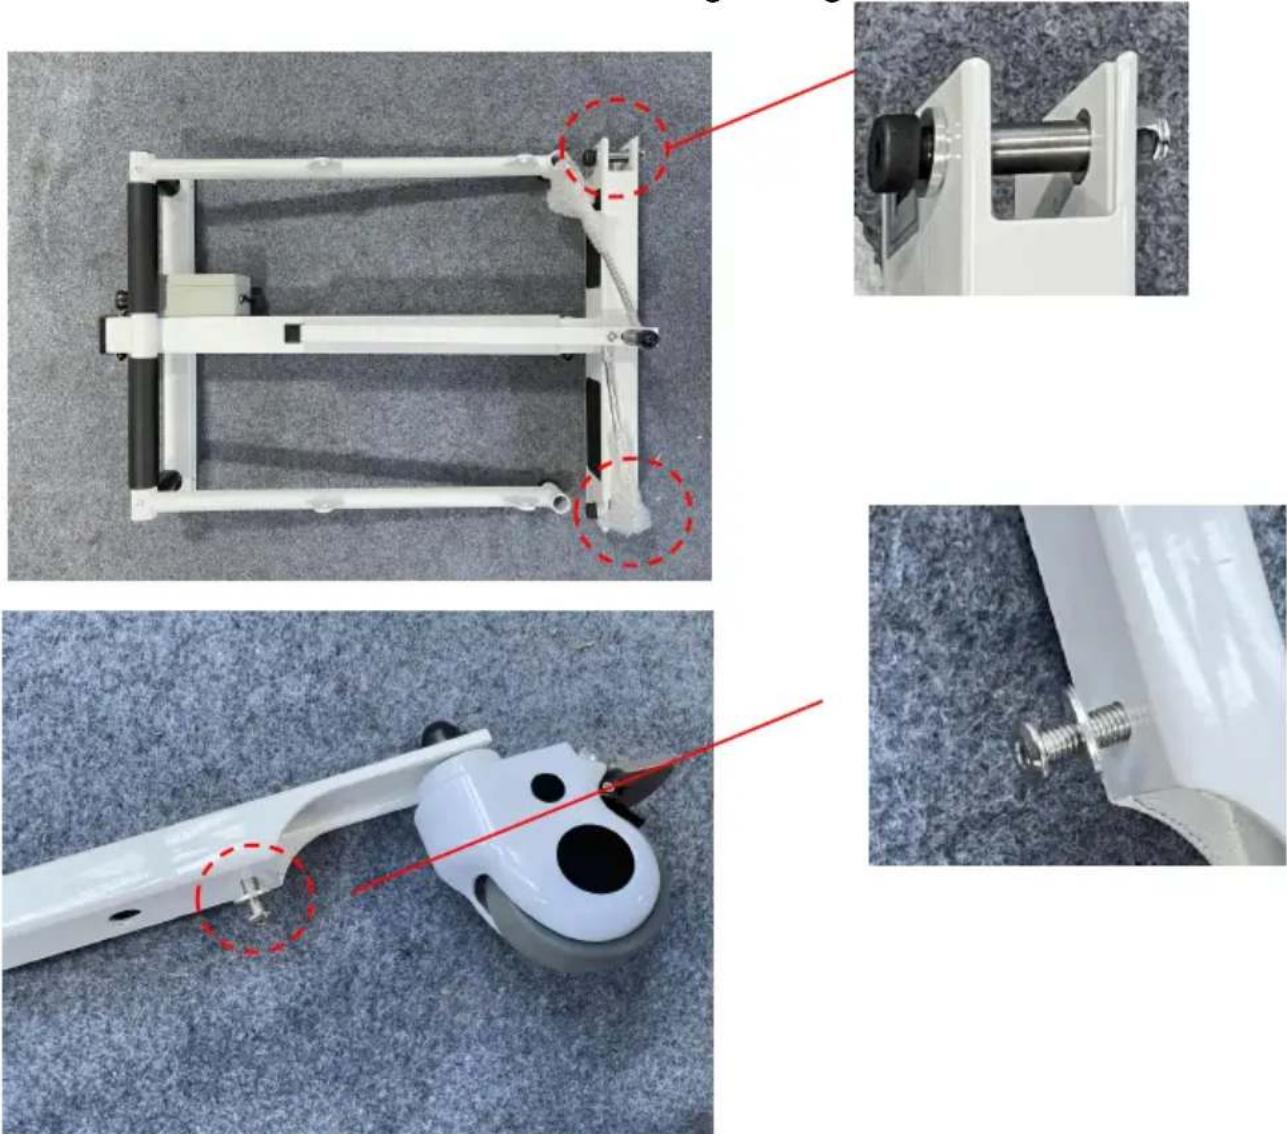
1.2 Next, install the two legs on the frame (pay attention to distinguish left and right order), then connect the two connecting rods on the frame base, assembly as shown in the figure.
(Note the left and right order)
1.3 Turn the frame handrail position up to a fixed position, install the cushion, fasten the climbing buckle, and finally install the backrest. Finish.
![graph TD A["Start: Body Mount"] --> B["Step 1: Rotation of Exercise Machine"] B --> C["Step 2: Insert Robot"] C --> D["Step 3: Insert Robot"] D --> E["Step 4: Insert Robot"] E --> F["End: Close-up of Robot"] subgraph Step 1 G["Left Body Mount"] H["Right Body Mount"] end subgraph Step 2 I["Left Body…](/content/2026/04/736930/images/bae8b5ae020a453cbb3397f3613877abfffbca0ebc2bf70df8e1bd6028f5543f.jpg)
1.3 Turn the frame handrail up to a fixed position, install the cushion, fasten the climbing buckle, and finally install the backrest. Finish.
![graph TD A["Start: Leg Mount"] --> B["Step 1: Rotation of leg"] B --> C["Step 2: Hand press on leg"] C --> D["Step 3: Shift arm to leg"] D --> E["Step 4: Close-up of leg"] E --> F["Step 5: Shift arm to leg with seat"] F --> G["End: Seat with chair"] style A fill:#f9f,stroke:#333 style G fill:#bbf,st…](/content/2026/04/736930/images/6fbbadac784dcf8a91ebf4c2849b58c5ab272ef8b2c56403f8a3b62851413dee.jpg)
Instructions
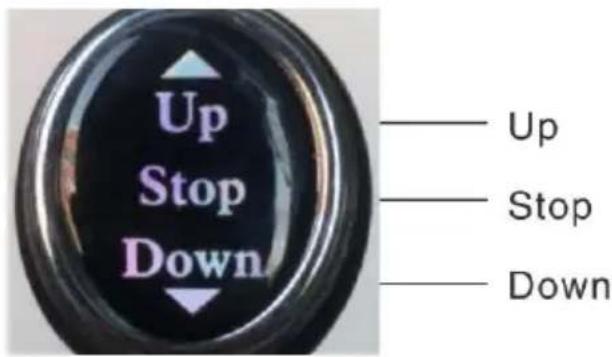
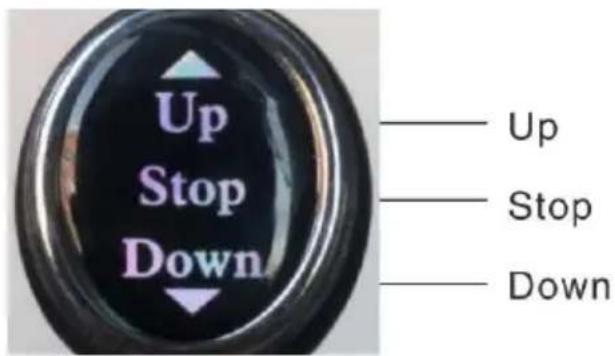
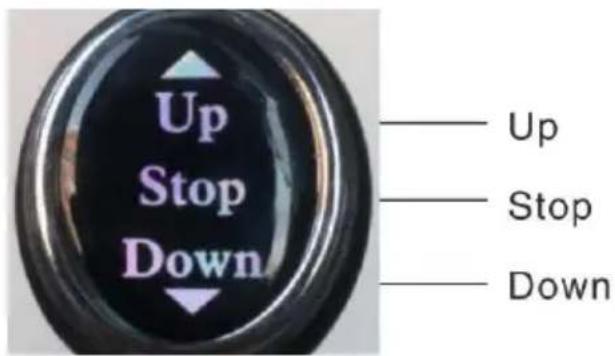
Product Controller Diagram
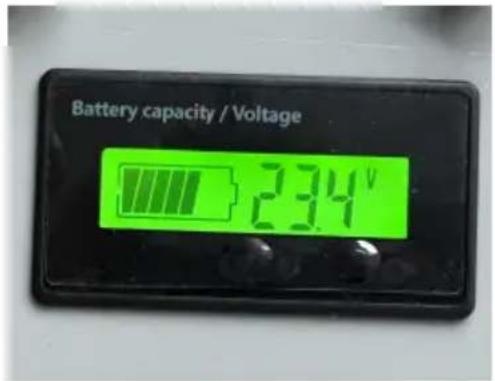
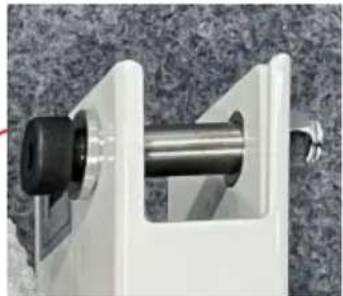
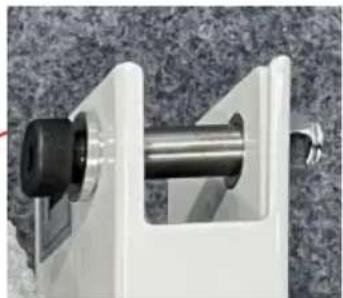
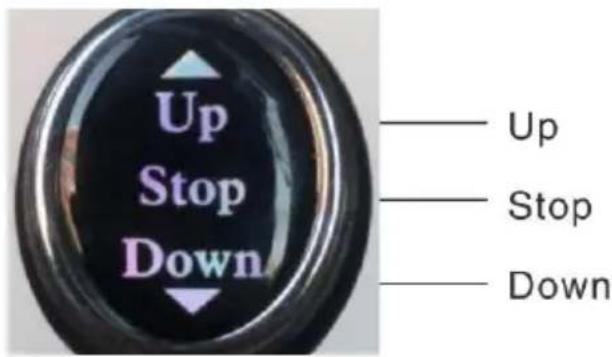
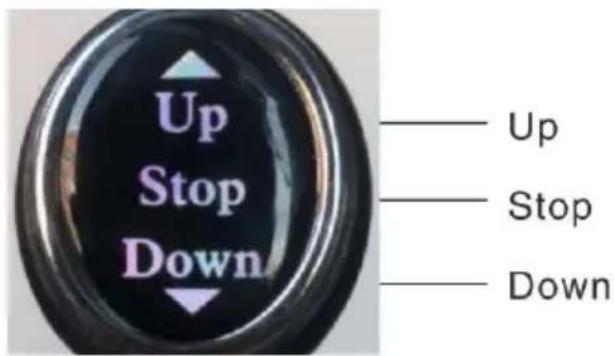
After charging, it can be used normally. It can be adjusted up and down to the proper height. Before use, it must be confirmed that the spindle of the frame is inserted to ensure safety. According to the height of the product, press the up button to the appropriate height, release it. If the key is not released, the product automatically stops at its highest point. The power supply designed for this product is low voltage power supply, please rest assured.
Note: There is a power display on the battery box. Please check the display on the monitor regularly and charge it in time.
Troubleshooting
In the event of a failure, please contact our after-sales personnel or visit our official website for contact information. With the trust of our test staff, we will solve the problem. If we can't solve this problem, we will visit the manufacturer free of charge. If the warranty period ends or
the problem is caused by personnel, our company will not give you a free warranty. Materials and shipping are required.
Maintenance
Warning: Do not disassemble and repair the machine without the permission of the manufacturer.
Cleaning and disinfection
It is recommended to wipe the seat ring with a soft cotton cloth before use, and disinfect it after cleaning. The conveyor shell and accessories should be scrubbed with medical alcohol or other non-corrosive disinfectants.
Warning:
When cleaning and disinfecting, do not charge or use the machine.
It is forbidden to wash or disinfect the transfer machine and accessories with liquid.
It is forbidden to use corrosive detergent to clean the shifter and accessories.
It is forbidden to use corrosive disinfectant to disinfect the moving machine and accessories.
Only after the detergent and disinfectant are dried, can the shifter and accessories be used.
When the machine is not used for a long time, please take it out and charge it regularly to avoid battery failure.
Safe use and maintenance
- Do not always plug in the power supply during the process. At least once a week, the battery should be used to work, and until the battery is exhausted, it is necessary to ensure that the battery is recharged when battery is exhausted. Although the lithium battery has no memory effect, this can prolong the life span of the battery. 2. Please destroy the battery according to the relevant local regulations when the machine is scrapped. 3. After using the machine, it is not necessary to clean and maintain
every time. It can be used normally after charging when the battery is powered. If it is found that there will be jitter when the machine is falling, touch the electric lubricating oil on both long shafts.
- After using the product for a period of time, check whether the set of each part are loose. If there is any looseness, it should be tightened in time.
- The internal power supply of this product is DC low voltage power. If there is water on the surface of the body, it can be dried with a cloth, but do not bubble in water directly.
CORRECT DISPOSAL
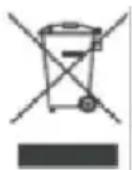
This product is subject to the provision of European Directive 2012/19/EU. The symbol showing a wheelie bin crossed through indicates that the product requires separate refuse collection in the European Union. This applies to the product and all
accessories marked with this symbol. Products marked as such may not be discarded with normal domestic waste, but must be taken to a collection point for recycling electrical and electronic devices.
BATTERY DISPOSAL

To minimize hazards to health and the environment at the end of this product's life, laws dealing with Waste Electrical and
Electronic Equipment (WEEE) and The Waste Battery Directive
require you to dispose of this product at a suitable collection facility where it will be sent in order to remove the batteries and for appropriate recycling. Please contact your local authorities for more details on recycling and safe disposal of these in your area.
XIANG FALI TECHNOLOGY (XIAMEN) CO., LTD.
Address: Floor 5th, No. 63, Pingcheng North Road, Haicang District
Xiamen Fujian, CN 361026
Imported to AUS: SIHAO PTY LTD. 1 ROKEVA STREETEASTWOOD
NSW 2122 Australia
Imported to USA: Sanven Technology Ltd. Suite 250, 9166 Anaheim
Place, Rancho Cucamonga, CA 91730
| UK | REP |
YH CONSULTING LIMITED.
C/O YH Consulting Limited Office 147,
Centurion House,
London Road, Staines-upon-Thames, Surrey
TW18 4AX
| EC | REP |
E-CrossStu GmbH
Mainzer Landstr.69, 60329 Frankfurt a
Main.
VEVOR®
TOUGH TOOLS, HALF PRICE
Technical Support and E-Warranty Certificate
www.vevor.com/support
VEVOR®
TOUGH TOOLS, HALF PRICE
We continue to be committed to providing you with tools at competitive prices. "Save Half", "Half Price" or any other similar expressions used by us only represent the savings you might benefit from buying certain tools with us compared to top brands and does not necessarily mean to cover all categories of tools offered. We kindly remind you to verify carefully when placing an order with us that you are actually saving half in comparison with the top major brands.
MODEL: XFL-QX-YW07
NEED HELP? CONTACT US!
Have product questions? Need technical support? Please feel free to contact us:
Technical Support and E-Warranty Certificate www.vevor.com/support
This is the original instruction. Please read all manual instructions carefully before operating. VEVOR reserves a clear interpretation of the user manual. The appearance of the product shall be subject to the product you received. Please forgive us that we won't inform you of any technology or software updates on our product.
Circuit principle block diagram
![graph TD A["Battery 24 V"] --> B{Rocker type\nBidirectional self reset switch} B -->|Rocker up| C["Electric push rod up"] B -->|Rocker pull down| D["Electric push rod down"]](/content/2026/04/736930/images/c0067f0a285f982f222effeb5479a668d59f061e386238efe040f99a5fdf32de.jpg)
Environmental requirements
◆Usage environment:
Installation instructions
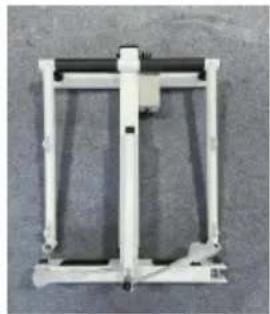
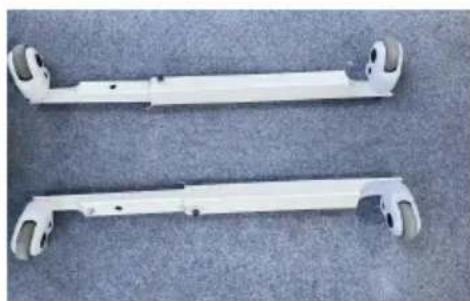
Step 1:
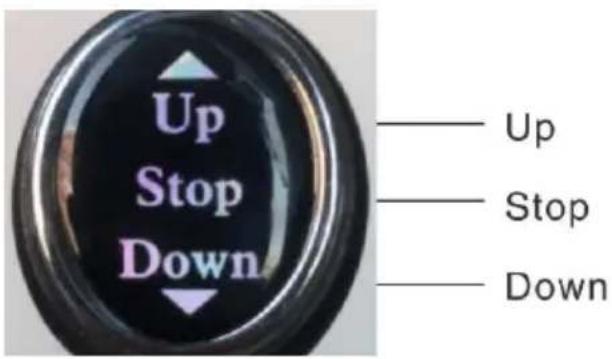
Product Controller Diagram
Troubleshooting
Cleaning and disinfection
Safe use and maintenance
C/O YH Consulting Limited Office 147,
Centurion House,
London Road, Staines-upon-Thames, Surrey
TW18 4AX
| EC | REP |
E-CrossStu GmbH
Mainzer Landstr.69, 60329 Frankfurt a
Main.
VEVOR®
TOUGH TOOLS, HALF PRICE
www.vevor.com/support
VEVOR®
TOUGH TOOLS, HALF PRICE
We continue to be committed to provide you tools with competitive price. "Save Half", "Half Price" or any other similar expressions used by us only represent estimate of savings you might benefit from buying certain tools with us compared top brands and does not necessarily mean to cover all categories of tools offered are kindly reminded to verify carefully when you are placing an order with us actually saving half in comparison with the top major brands.
MODEL: XFL-QX-YW07
NEED HELP? CONTACT US!
Have product questions? Need technical support? Please feel free to contact us:
Technical Support and E-Warranty Certificate www.vevor.com/support
This is the original instruction, please read all manual instruction carefully before operating. VEVOR reserves a clear interpretation user manual. The appearance of the product shall be subject to product you received. Please forgive us that we won't inform you there are any technology or software updates on our product.
Circuit principle block diagram
![graph TD A["Battery 24 V"] --> B{Rocker type\nBidirectional self reset switch} B -->|Rocker up| C["Electric push rod up"] B -->|Rocker pull down| D["Electric push rod down"]](/content/2026/04/736930/images/02d96ab4d23bdb607f1566677ca3a762dee6a2f115771f06a877d854c15b2bd8.jpg)
Environmental requirements
◆ Operating environment:
Installation instructions
Step 1:
Instructions
Product Controller Diagram
Troubleshooting
Cleaning and disinfection
Safe use and maintenance
C/O YH Consulting Limited Office 147,
Centurion House,
London Road, Staines-upon-Thames, Surrey
TW18 4AX
| EC | REP |
E-CrossStu GmbH
Mainzer Landstr.69, 60329 Frankfurt a
Main.
VEVOR®
TOUGH TOOLS, HALF PRICE
www.vevor.com/support
VEVOR®
TOUGH TOOLS, HALF PRICE
We continue to be committed to providing you with tools at competitive prices. "Save Half", "Half Price", or any other similar expressions used by us only represent an estimate of savings you might benefit from buying certain tools with us compared to top brands, and does not necessarily mean to cover all categories of tools offered. We kindly remind you to verify carefully when placing an order with us to ensure that you are actually saving half in comparison with the top major brands.
MODEL: XFL-QX-YW07
NEED HELP? CONTACT US!
Have product questions? Need technical support? Please feel free to contact us:
Technical Support and E-Warranty Certificate www.vevor.com/support
This is the original instruction. Please read all manual instructions carefully before operating. VEVOR reserves the right to interpret the user manual. The appearance of the product shall be subject to the product you received. Please forgive us that we won't inform you of any technology or software updates on our product.
Circuit principle block diagram
![graph TD A["Battery 24 V"] --> B{Rocker type\nBidirectional self reset switch} B -->|Rocker up| C["Electric push rod up"] B -->|Rocker pull down| D["Electric push rod down"]](/content/2026/04/736930/images/fa88eb0003f412005162f2d3ee6ed18cefcdfd225530282c216762d55af03de4.jpg)
Environmental requirements
Installation instructions
Step 1:
Instructions
Product Controller Diagram
Troubleshooting
Cleaning and disinfection
Safe use and maintenance
C/O YH Consulting Limited Office 147, Centurion House,
London Road, Staines-upon-Thames, Surrey TW18 4AX
| EC | REP |
E-CrossStu GmbH
Mainzer Landstr.69, 60329 Frankfurt a Main.
VEVOR®
TOUGH TOOLS, HALF PRICE
We continue to be committed to provide you tools with competitive price. "Save Half", "Half Price" or any other similar expressions used by us only represent of savings you might benefit from buying certain tools with us compared to top brands and does not necessarily mean to cover all categories of tools offered. We kindly remind you to verify carefully when you are placing an order with us to see if you are actually saving half in comparison with the top major brands.
MODEL: XFL-QX-YW07
NEED HELP? CONTACT US!
Have product questions? Need technical support? Please feel free to contact us:
Technical Support and E-Warranty Certificate www.vevor.com/support
This is the original instruction. Please read all manual instructions carefully before operating. VEVOR reserves a clear interpretation of the user manual. The appearance of the product shall be subject to the product you received. Please forgive us that we won't inform you of any technology or software updates on our product.
Circuit principle block diagram
![graph TD A["Battery 24 V"] --> B{Rocker type Bidirectional self reset switch} B -->|Rocker up| C["Electric push rod up"] B -->|Rocker pull down| D["Electric push rod down"]](/content/2026/04/736930/images/02d159199a2f4c835519e7da79ee8fc055150c254887ede58b37debd6383e3f9.jpg)
Environmental requirements
◆Operating environment:
| 1.Rugleuning x1 | 2.Framecomponent x1 |
| 3.Staande poot x2 | 4.Zitzak x1 |
| 5.Zitzak (met gaten) x1 | 6. Stroomadapter x1 |
| 7. Montagemateriaal x 1 set |
Installation instructions
Step 1:
Instructions
Product Controller Diagram
Troubleshooting
Cleaning and disinfection
Safe use and maintenance
C/O YH Consulting Limited Office 147,
Centurion House,
London Road, Staines-upon-Thames, Surrey
TW18 4AX
| EC | REP |
E-CrossStu GmbH
Mainzer Landstr.69, 60329 Frankfurt a
Main.
www.vevor.com/support
VEVOR®
TOUGH TOOLS, HALF PRICE
We continue to be committed to providing you tools with competitive prices. "Save Half", "Half Price" or any other similar expressions used by us only represent an estimate of savings you might benefit from buying certain tools with us compared to top brands and does not necessarily mean to cover all categories of tools offered. We kindly remind you to verify carefully when placing an order with us that you are actually saving half in comparison with the top major brands.
MODEL: XFL-QX-YW07
NEED HELP? CONTACT US!
Have product questions? Need technical support? Please feel free to contact us:
Technical Support and E-Warranty Certificate www.vevor.com/support
This is the original instruction. Please read all manual instructions carefully before operating. VEVOR reserves a clear interpretation of the user manual. The appearance of the product shall be subject to the product you received. Please forgive us that we won't inform you of any technology or software updates on our product.
Circuit principle block diagram![graph TD A["Battery 24 V"] --> B{Rocker type Bidirectional self reset switch} B -->|Rocker up| C["Electric push rod up"] B -->|Rocker pull down| D["Electric push rod down"]](/content/2026/04/736930/images/78a0ac182f8409bdcacc1d81d8eecee63077a7a112217b7eaddff1eae901750d.jpg)
Environmental requirements
◆Operating environment:
Installation instructions
Step 1:
Instructions
Product Controller Diagram
Troubleshooting
Cleaning and disinfection
Safe use and maintenance
Address: Floor 5th, No. 63, Pingcheng North Road, Haicang District
Xiamen Fujian, CN 361026
Imported to AUS: SIHAO PTY LTD. 1 ROKEVA STREET EASTWOOD
NSW 2122 Australia
Imported to USA: Sanven Technology Ltd. Suite 250, 9166 Anaheim
Place, Rancho Cucamonga, CA 91730
| UK | REP |
YH CONSULTING LIMITED.
C/O YH Consulting Limited Office 147,
Centurion House,
London Road, Staines-upon-Thames, Surrey
TW18 4AX
| EC | REP |
E-CrossStu GmbH
Mainzer Landstr. 69, 60329 Frankfurt am Main
Main.
VEVOR®
TOUGH TOOLS, HALF PRICE
www.vevor.com/support
VEVOR®
TOUGH TOOLS, HALF PRICE
We continue to be committed to provide you tools with competitive price. "Save Half", "Half Price" or any other similar expressions used by us only represent savings you might benefit from buying certain tools with us compared to top brands and does not necessarily mean to cover all categories of tools offered. We kindly remind you to verify carefully when placing an order with us that you are actually saving half in comparison with the top major brands.
MODEL: XFL-QX-YW07
NEED HELP? CONTACT US!
Have product questions? Need technical support? Please feel free to contact us:
Technical Support and E-Warranty Certificate www.vevor.com/support
This is the original instruction. Please read all manual instructions carefully before operating. VEVOR reserves the right to interpret the user manual. The appearance of the product shall be subject to the product you received. Please forgive us that we won't inform you of any technology or software updates on our product.
Circuit principle block diagram
![graph TD A["Battery 24 V"] --> B{Rocker type\nBidirectional self reset switch} B -->|Rocker up| C["Electric push rod up"] B -->|Rocker pull down| D["Electric push rod down"]](/content/2026/04/736930/images/74dfcfb767a064fcdb5d42ee1e21eb76c4bedc73d3659df5ad9d8206fe933282.jpg)
Environmental requirements
Operating environment:
Installation instructions

Step 1:
Instructions
Product Controller Diagram
Troubleshooting
Cleaning and disinfection
Safe use and maintenance
C/O YH Consulting Limited Office 147,
Centurion House,
London Road, Staines-upon-Thames, Surrey
TW18 4AX
| EC | REP |
E-CrossStu GmbH
Mainzer Landstr.69, 60329 Frankfurt a
Main.
VEVOR®
TOUGH TOOLS, HALF PRICE
www.vevor.com/support
VEVOR®
TOUGH TOOLS, HALF PRICE
We continue to be committed to providing you with tools at competitive prices. "Save Half", "Half Price", or any other similar expressions used by us only represent the savings you might benefit from buying certain tools with us compared to top brands, and does not necessarily mean to cover all categories of tools offered. We kindly remind you to verify carefully when placing an order with us to ensure you are actually saving half in comparison with the top major brands.
MODEL: XFL-QX-YW07
NEED HELP? CONTACT US!
Have product questions? Need technical support? Please feel free to contact us:
Technical Support and E-Warranty Certificate www.vevor.com/support
This is the original instruction. Please read all manual instructions carefully before operating. VEVOR reserves the right to interpret the user manual. The appearance of the product shall be subject to the product you received. Please forgive us that we won't inform you of any technology or software updates on our product.
Circuit principle block diagram
![graph TD A["Battery 24 V"] --> B{Rocker type\nBidirectional self reset switch} B -->|Rocker up| C["Electric push rod up"] B -->|Rocker pull down| D["Electric push rod down"]](/content/2026/04/736930/images/a77fb3d9a65329c05de6f4f09e8199cb0025d70ace8431b5517b099f45d11a0b.jpg)
Environmental requirements
Installation instructions
Phase 1:
Troubleshooting
Cleaning and disinfection
Safe use and maintenance
C/O YH Consulting Limited Office 147,
Centurion House,
London Road, Staines-upon-Thames, Surrey
TW18 4AX
| EC | REP |
E-CrossStu GmbH
Mainzer Landstr.69, 60329 Frankfurt a
Main.
VEVOR®
TOUGH TOOLS, HALF PRICE


- PATIENT TRANSFER CHAIR
- MODEL: XFL-QX-YW
- NEED HELP? CONTACT US
- OPERATION SAFETY
- WARNING
- PROHIBITION
- PRODUCT INTRODUCTION
- INTENDED USE
- ENVIRONMENTAL REQUIREMENTS
- PART LIST
- INSTALLATION INSTRUCTIONS
- STEP
- INSTRUCTIONS
- TROUBLESHOOTING
- MAINTENANCE
- CLEANING AND DISINFECTION
- SAFE USE AND MAINTENANCE
- CORRECT DISPOSAL
- BATTERY DISPOSAL
- VEVOR®
- TOUGH TOOLS, HALF PRICE
- CIRCUIT PRINCIPLE BLOCK DIAGRAM
- PHASE
Brand : Vevor
Model : XFL-QX-YW07
Category : Medical transfer chair