
S3020 - Machine Tool Vevor - Free user manual and instructions
Find the device manual for free S3020 Vevor in PDF.
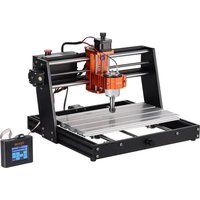


| Product Type | CNC Engraving Machine |
| Brand | Vevor |
| Model | S3020 |
| Approximate Dimensions (L x W x H) | 500 x 400 x 300 mm |
| Approximate Weight | 15 kg |
| Power Supply | 24 V DC, 5 A |
| Spindle Motor | 775, with ER11 collet (0-5 mm capacity) |
| Approximate Working Area (X x Y x Z) | 300 x 200 x 40 mm |
| Control Software | Candle (GRBL), Windows compatible |
| Offline Controller | Built-in, touch screen, Wi-Fi (access point or client 2.4 GHz) |
| Limit Switches | 3 axes (X, Y, Z) |
| Emergency Stop | Emergency stop button on control box |
| Main Functions | Engraving, milling, drilling on non-metal materials (wood, plastic, etc.) |
| Safety Unlock | $X command to unlock after alarm |
| Origin Setting | Zeroing X/Y and Z axes via software or controller |
| Supported File Formats | G-code (NC, NCC, TAP, TXT, Gcode, GCO, NL, CUT, CNC) |
| Maintenance | Clean with soft brush, keep dry |
| Spare Parts Available | Spindle motor, collets, screws, nuts, press plates, cables |
| Repairability | Technical support via www.vevor.com/support, manual with troubleshooting guide |
| General Information | Machine tool for indoor use, requires safety glasses |
Frequently Asked Questions - S3020 Vevor
User questions about S3020 Vevor
0 question about this device. Answer the ones you know or ask your own.
Ask a new question about this device
Download the instructions for your Machine Tool in PDF format for free! Find your manual S3020 - Vevor and take your electronic device back in hand. On this page are published all the documents necessary for the use of your device. S3020 by Vevor.
USER MANUAL S3020 Vevor
Technical Support and E-Warranty Certificate
www.vevor.com/support
CNC ENGRAVING MACHINE USER MANUAL
MODEL: S3020
We continue to be committed to provide you tools with competitive price. "Save Half", "Half Price" or any other similar expressions used by us only represent estimate of savings you might benefit from buying certain tools with us compared to top brands and does not necessarily mean to cover all categories of tools offered. We kindly remind you to verify carefully when you are placing an order with us if actually saving half in comparison with the top major brands.
MODEL: S3020

Scan for videos and guides
NEED HELP? CONTACT US!
Have product questions? Need technical support? Please feel free to contact us:
Technical Support and E-Warranty Certificate www.vevor.com/support
This is the original instruction. Please read all manual instructions carefully before operating. VEVOR reserves a clear interpretation of the user manual. The appearance of the product shall be subject to the product you received. Please forgive us that we won't inform you of any technology or software updates on our product.
 | Warning-To reduce the risk of injury, user must read instructions man carefully. |
 | Warning- Be sure to wear eye protectors when using this product. |
 | Indoor Use Only |
 | Do not touch any rotating parts when the machine is running |
 | Always wear protective glasses when use the machine |
 | Prohibited from use in flammable objects or gases |
 | Do not touch the socket with wet hand to reduce risk of electrocuti |
 | Please cut off the power immediately in case of emergency |
 | This product is subject to the provision of European Directive 2012/19 The symbol showing a wheelie bin crossed through indicates that the requires separate refuse collection in the European Union. This applies product and all accessories marked with this symbol. Products marked such may not be discarded with normal domestic waste, but must be a collection point for recycling electrical and electronic devices |
Important Safety Instructions
Warning: To reduce the risk of burns, electrocutions, or injury to persons!

Warning
◆ Please wear protective glasses when using the machine. In case your eyes hurt. Before replacing the tool, please disconnect the power supply of the machine to avoid accidents. ◆ Unplug the socket when not in use, before replacing parts and maintaining the machine. ◆ Unplug when assembling and disassembling the unit. ◆ Close supervision is necessary when any appliance is used near children. ◆ To avoid jamming, do not force the unit to operate with excessive pressure. ◆ Do not immerse wires or machines in water, as this can cause electric shock. This appliance is not intended for use by persons (including children) with reduced physical, sensory, or mental capabilities or lack of experience and knowledge unless they have been given supervision or instruction concerning the use of the appliance by a person responsible for their safety. ◆ Children should be supervised to ensure that they do not play with the appliance. If the supply cord or plug is damaged, it must be replaced by the main service agent or similarly qualified persons in order to avoid a hazard. (I operate this appliance. Return it to the store of service or repair by a serviceman.
SAVE THESE INSTRUCTIONS
- Parts List
| S3020 Parts List | |||||
| Part No Part Name Explanation Quantity Picture Remark | |||||
| 01 Component for X-axis —— 1Set |  | ||||
| 02 Component for Y-axis —— 1Set |  | ||||
| 03 | Spindle clamp | Φ52, Aluminum | 1Set |  | |
| 04 | Spindle motor | 775 | 1Set | [HXX8] | |
| C16-ER11-35L 5mm |  | ||||
| Fixing ring Φ52 | [IWYDD] | ||||
| 05 Inner hexagon screw M5*35 2 | [22T6] | ||||
| 06 Inner hexagon screw M5*14 8 | [S057] | ||||
| 07 Inner hexagon screw M5*12 4 | [DAZY] | ||||
| 08 Inner hexagon screw M4*6 4 |  | ||||
| 09 Trapezoidal nut M5-20 8 Already assembled | [22ZW] | ||||
| 10 Control box | —— 1Set |  | |||
| 11 | Offline controller and data cable | Touch screen with SD card | 1Set |  | |
| 12 | X/Z Stepper motor wire | 4P,length 360mm | 2 |  | |
| 13 | Y Stepper motor wire | 4P,length 480mm | 1 |  | |
| 14 | Spindle motor wire | 2P,length 480mm | 1 |  | |
| 15 | X-Limit wire | 3P,length 470mm | 1 |  | |
| 16 | Z-Limit wire | 3P,length 400mm | 1 |  | |
| 17 Y-Limit wire 3P,length 300mm 1 | —— | ||||
| 18 | USB cable | —— | 1 | —— | |
| 19 | Power supply | 24V,5A | 1 | [Z7BD] | |
| 20 | Milling cutter | —— 1Set | [Drawd] | ||
| 21 | Pressing plate | 50*20*3 | 4 | [XOCC] | Pressing plate assembly drawing |
| 22 | Screw | M6*40 4 | [3DBK] | ||
| 23 | Screw | M6*45 4 | [Drawd] | ||
| 24 | Butterfly nut | M6 | 4 | [THK] | 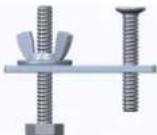 |
| 25 | Washer | M6*2mm | 4 | [Drawd] | |
| 26 | Inner Hexagon Wrench | 2/2.5/3/4mm | 1Set | [56XX] | |
| 27 | Nut Wrench | 14/17mm | 1Set |  | |
| 28 | Probe | —— | 1 | [63BD] | |
| 29 | Soft brush | —— | 1 | [WZBD] | |
| 30 | Winding pipe | —— | 1 | [444E] | |
| 31 | U Disk | —— | 1 |  | |
| 32 | Instruction manual | —— | 1 | —— | |
2. Machine Assembly
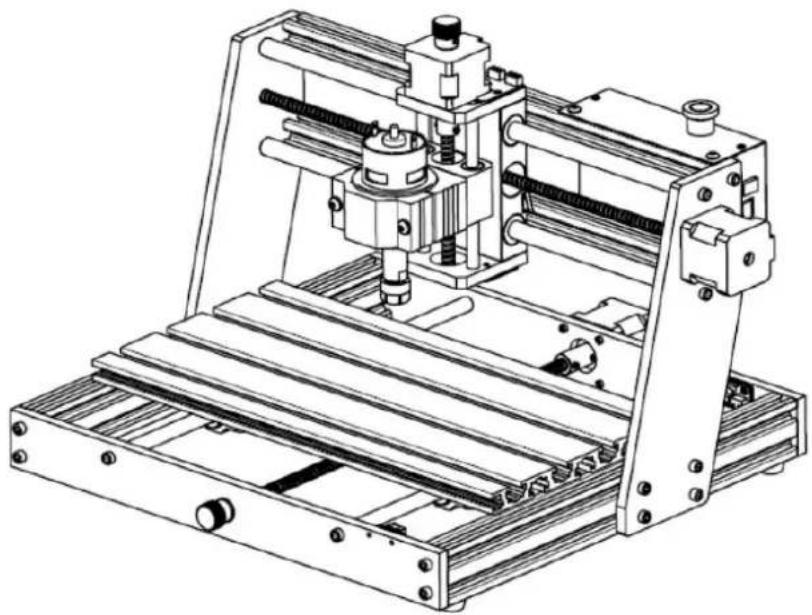
① X-axis and Y-axis component assembly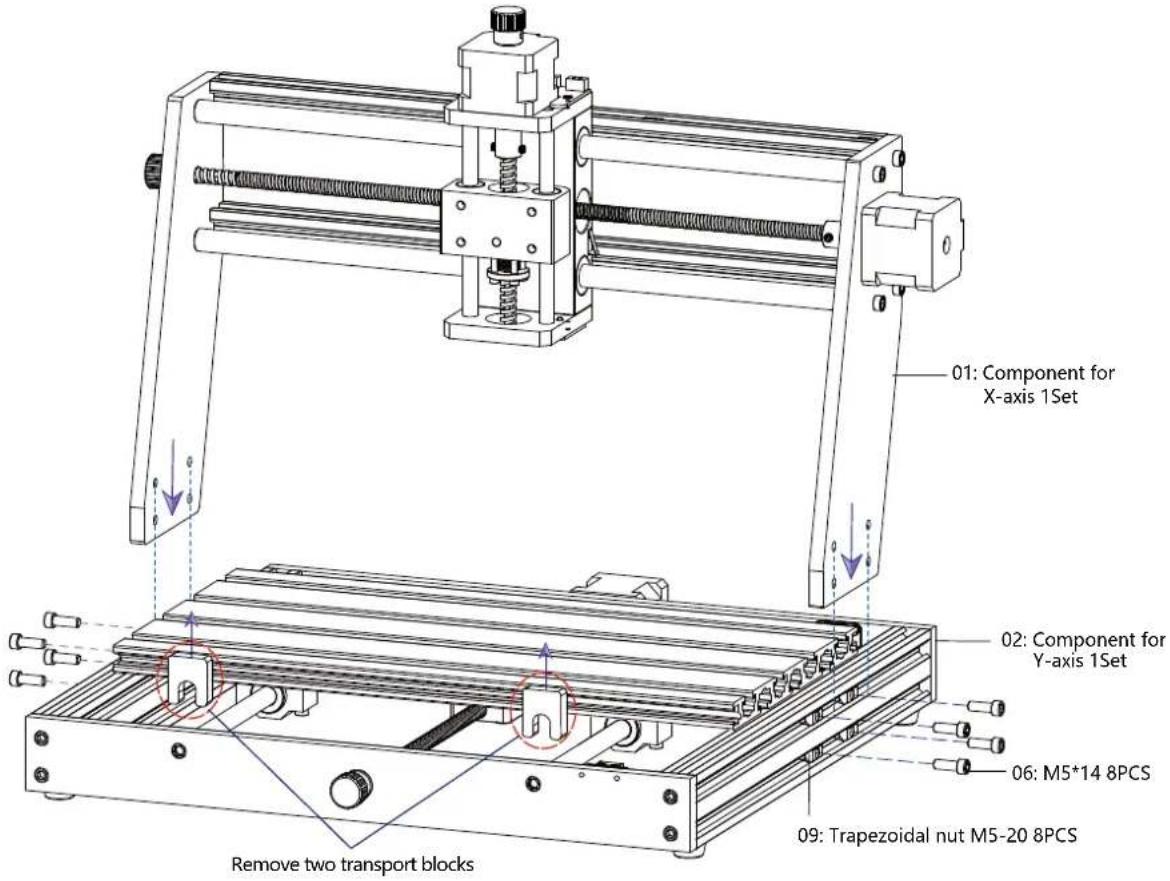
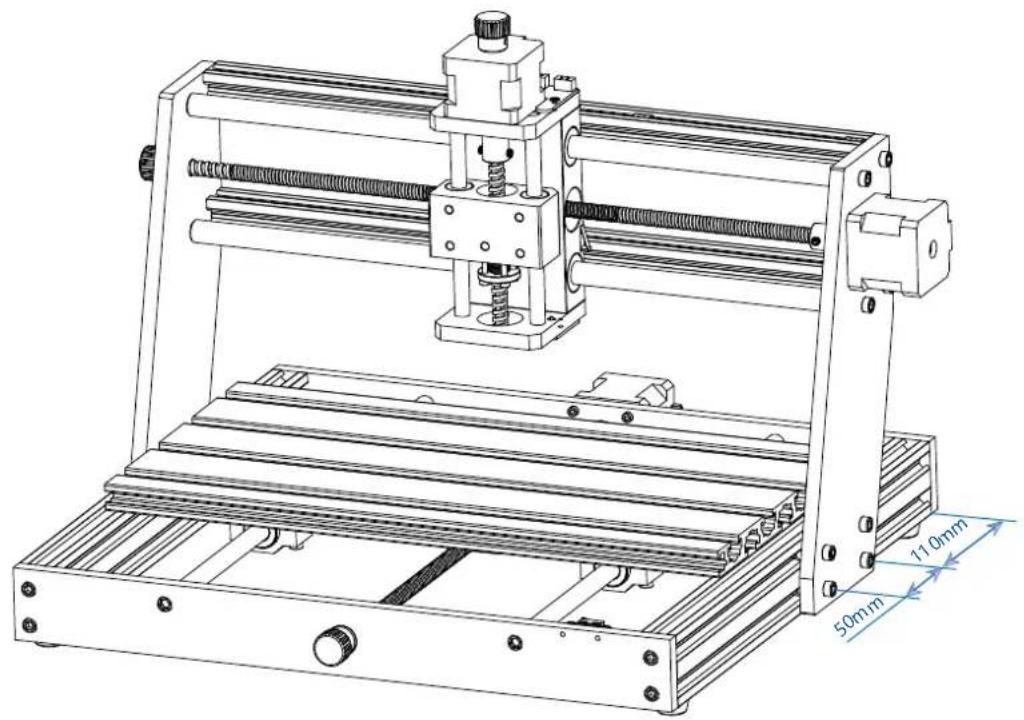
② Spindle fixture and motor assembly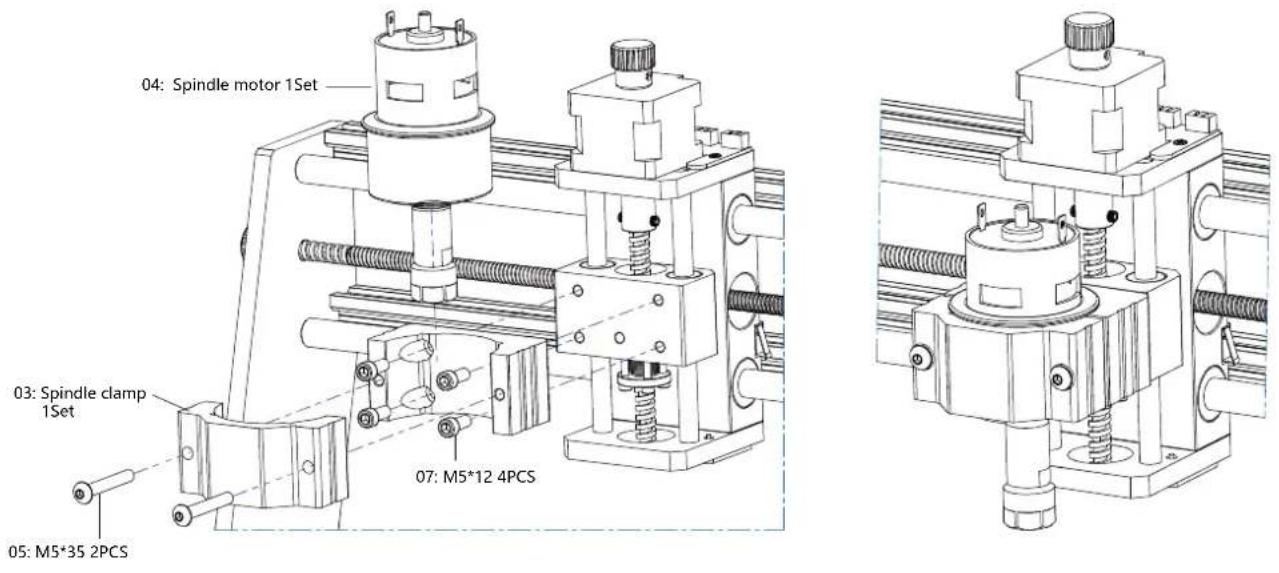
③ Control box assembly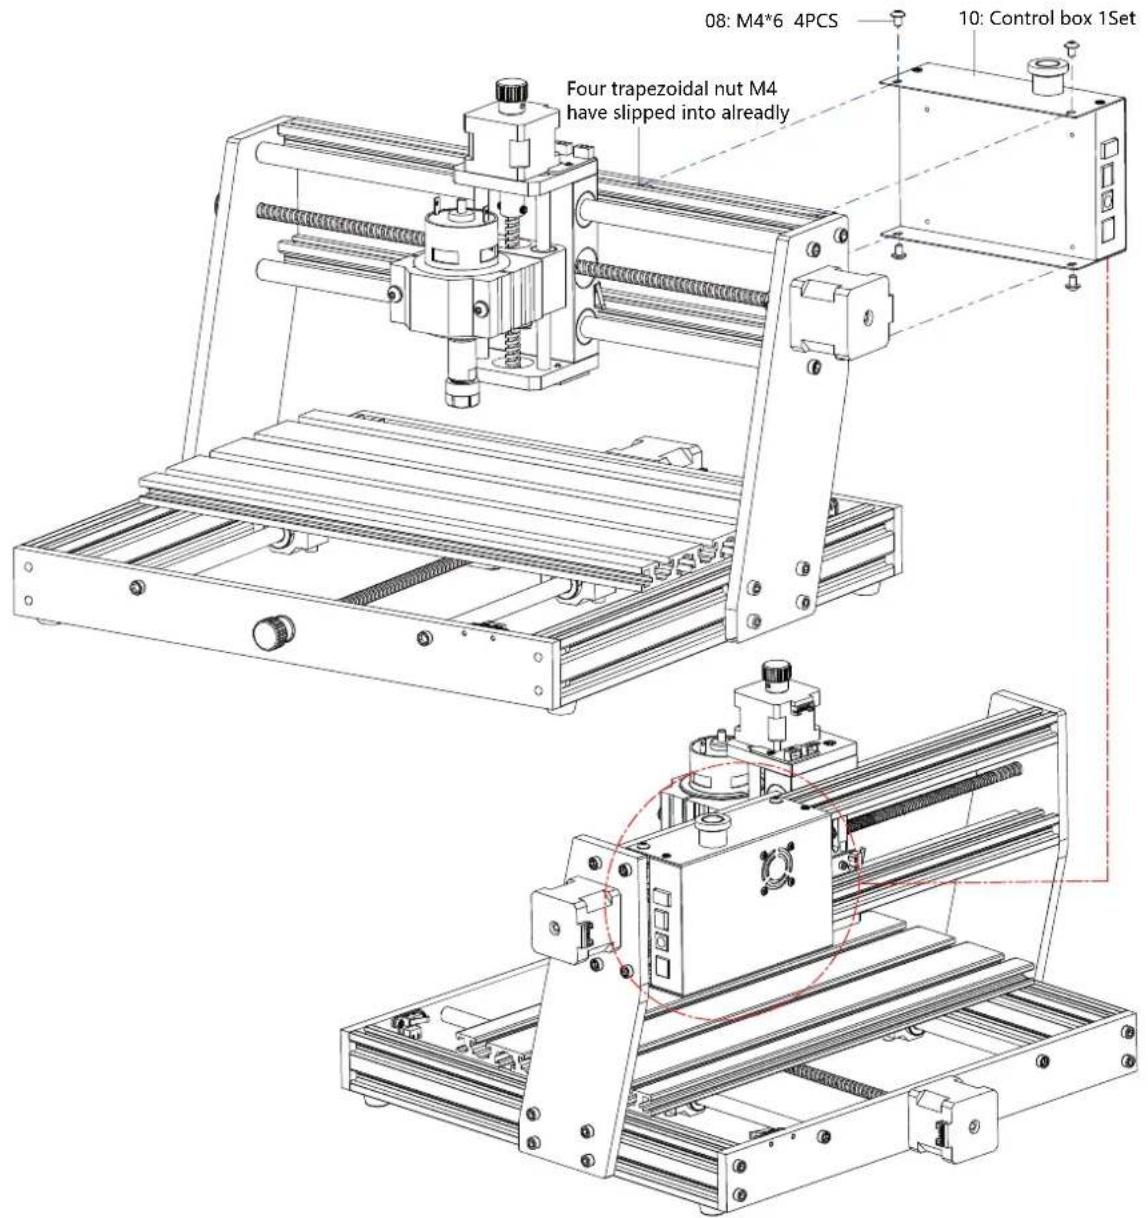
- Instructions for ports on the control-box
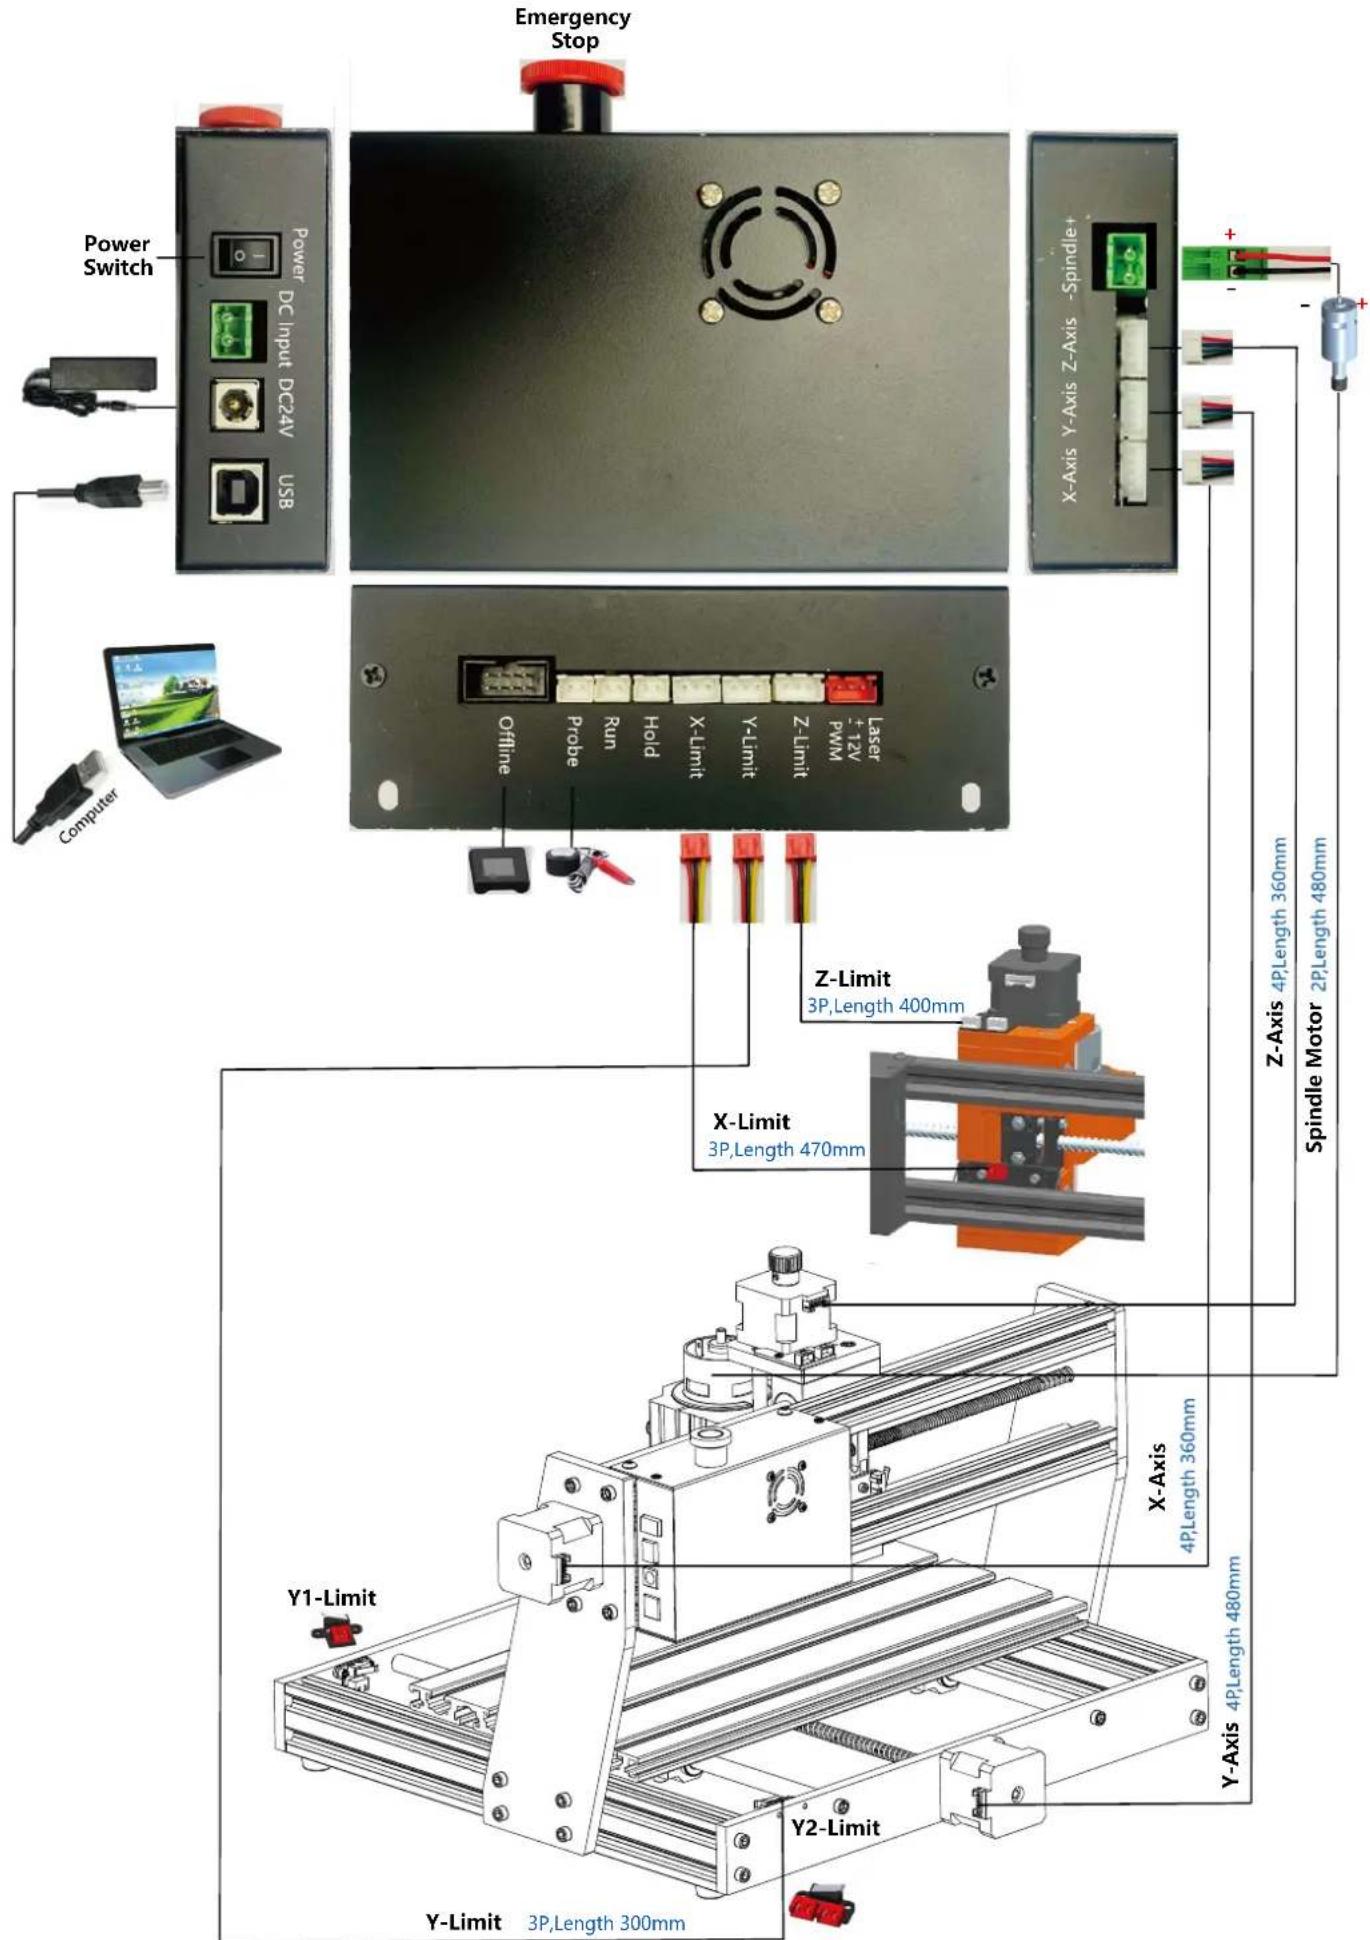
4. Candle Software
Candle is a GUI application for GRBL-based CNC-machines with G-Code visualizer. Candle is an open-source software suitable for CNC machine tool processing. It supports G code file processing and visual display.
Supported functions:
(1) Controlling GRBL-based CNC-machine via console commands, buttons on form, numpad. (2) Monitoring CNC-machine state. (3) Load, edit, save and send G-code files to CNC-machine. (4) Visualizing G-code files.
4.1 States
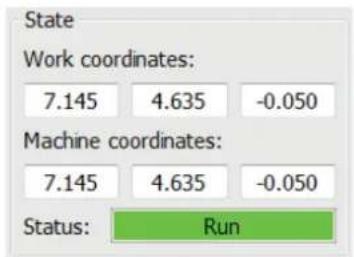
Work coordinates:
Represents current X, Y & Z local coordinates of the CNC.
Machine coordinates:
Represents current X, Y & Z absolute machine coordinates.
One of the following CNC statuses:
- Idle - waiting for a G-code command; Running - running a G-code command; Home - homing cycle is executing
- Check - G-code command check mode is turned on
- Hold - paused by a "!" command, need to be restarted by a "~" command
- Alarm - CNC doesn't know where it is and blocks all G-code commands
4.2 Control

Home button
Starts the homing cycle procedure with "$H" command

Z-probe
Starts the zero Z-axis search procedure using the command specified in the settings ("Z-probe commands" box). Example command: G91G21; G38.2Z-30F100; G0Z1; G38.2Z-1F10
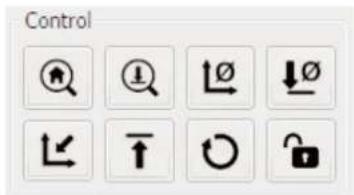

Zero X/Y
Zeroes the "X" and "Y" coordinates in the local coordinate system. Also retains a local system offset ("G92") for later use.

Restore X/Y/Z
Restores local system coordinates with "G92" command.

Safe Z
Moves tool by "Z"-axis to safe position. Position coordinate can be specified in the "Safe Z" setting. Position must be specified in machine coordinates.

Reset
Resets CNC with "CTRL+X" command

Unlock
Unlocks CNC with "$X" command.
4.3 Software using steps
(1). Install the driver
For the first time use, please connect the device to the computer via USB cable, and click the CH341SER.exe file in the driver folder to install the driver. Under normal circumstances, the Win10 system will automatically identify and install the driver. For Win7 and Win8 systems, please install it manually.
(2) Set the port and connection
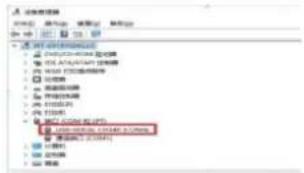
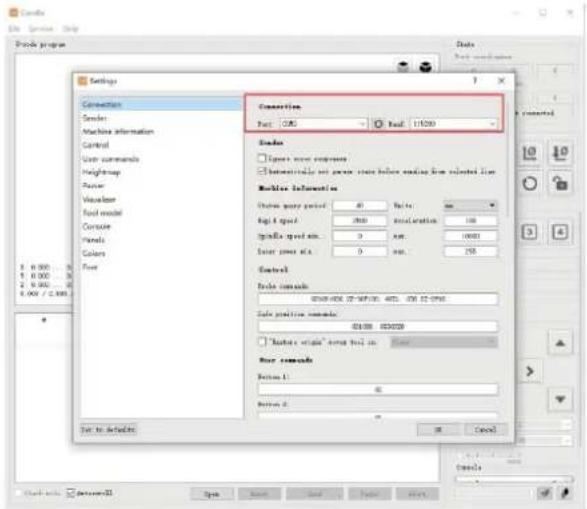
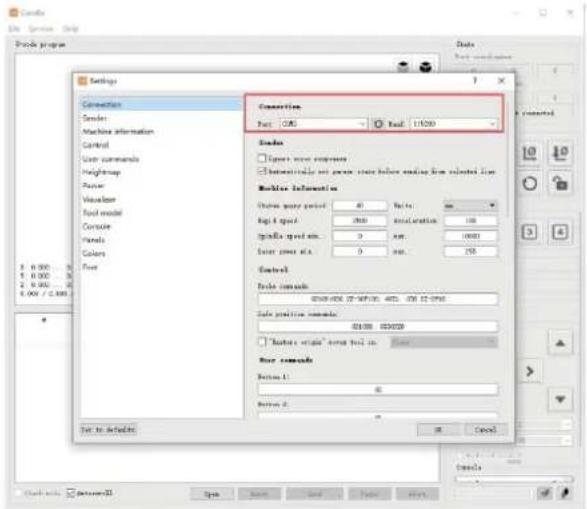
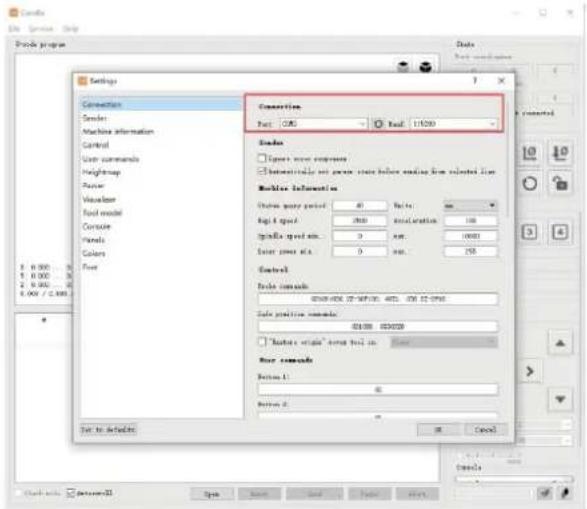
After installing the driver, open the device manager of the computer and click on the port option to see the content inside the red box on the screen shown in the figure below (the port information is in brackets).
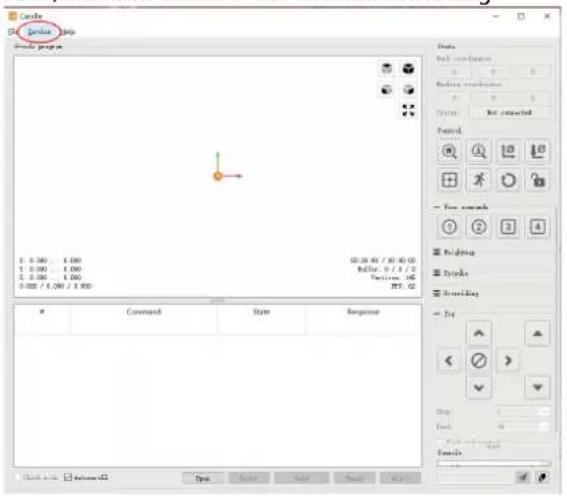
Remember the port information queried above, switch to the Candle software interface and click the "Settings" option in the upper left corner. Selecting the setting will pop up the setting window. Under "Connection", select the port name you queried, select the baud rate 115200, and then click the "ok" to finish the setting.

(3). Complete connection
After setting the port and baud rate, click Finish. The status bar at the top right of the Candle interface will show Idle, and at the same time, the console at the bottom right will display the information shown below, indicating that the connection has been successfully established.
(4). Processing documents
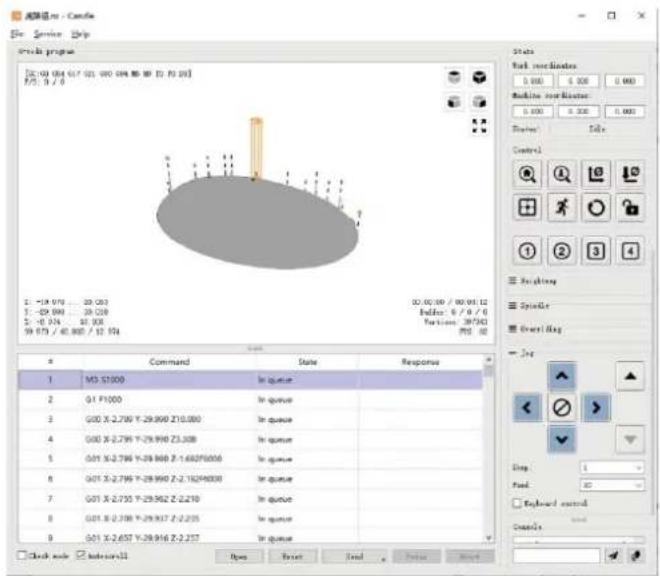
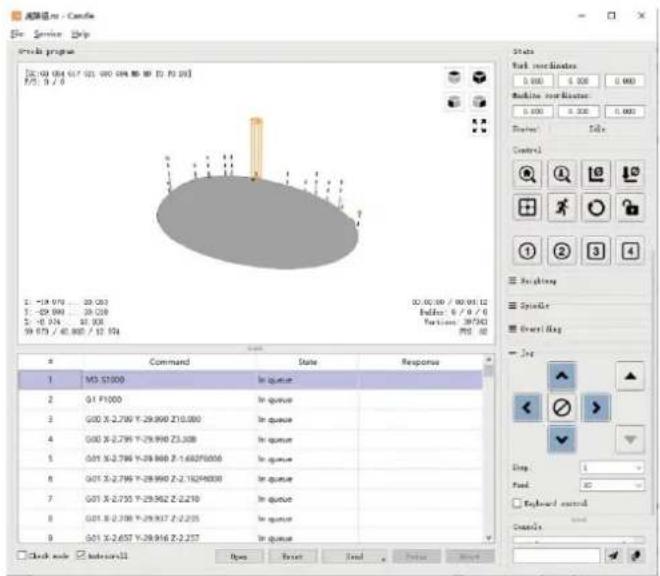
Click "File" option at the top of the interface, then click "New" to create G-Code. On the command bar at the bottom of the interface, click "Open" to select a G-code file that has been made to import the file. After importing, the middle of the interface will display a visual graph composed of tool paths (the position of the pen-shaped graph in the graph is the current tool position). In the visualization window, hold down the left mouse button to move to rotate the graph, and hold down the right button to move the graph. Scrolling the middle wheel can zoom in and out of the graphics. At the same time, the content of the G-Code will be displayed in the lower command bar. During processing, the machine will run one by one according to the G-Code commands.
![Candle File Service Help Options program [0:40.054 0:17:02] 000.054 80 30 30 20] F5: 0 / 0 Status Work coordinates: 0.000 0.000 0.000 Machine coordinates: 0.000 0.000 0.000 Status: ID# Control No viewing Update Reversing Top Drag: Load: 10 Keyboard mode Candle Command State Response Check node Butto…](/content/2026/04/736311/images/03de86075bb4460a72b1241e61b59c8ad9d6b619340d59f2fe1b7301c1e4e00a.jpg)
![Candle File Service Help Command [0.00] 0.04 (0.17) [0.00] 0.04, 0.06, 0.09 TO 0.10] F/S: 0 / 0 State Work coordinates: 0.000 0.000 0.000 Machine coordinates: 0.000 0.000 0.000 Status: Add Control Heighting Spindle Drawing Jap Step: 1 Feed: 10 Backward control Cancel Check mode: Internal Type: Selec…](/content/2026/04/736311/images/eba984286cbf5c55dbb72f0da714c903f24b34b8d3b438ac52ba43ca80a22b51.jpg)
![Score device File Service Help Prove program [0:00:04 01:03 00:04 (00:05)] F/0.0 / 0 -19.970 28.000 -29.990 38.010 -2.974 18.000 39.973 / 60.008 / 12.974 Command State Response M3 E1000 In queue G1 F1000 In queue G00 K-2.799 Y-29.990 Z10.000 In queue G00 K-2.799 Y-29.990 Z3.308 In queue G01 K-2.799…](/content/2026/04/736311/images/f08332ea253a901140adb7b94c5e5f7429a0d46a079595819d639e3254bd03ae.jpg)
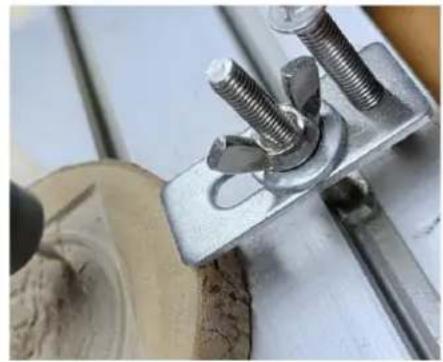
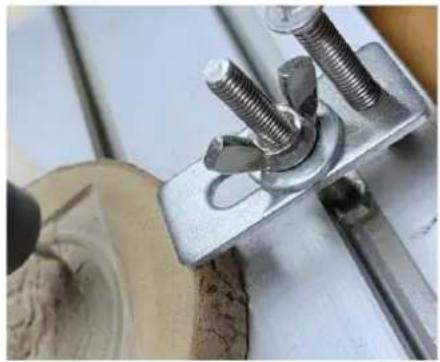
(5). Fixture, tool installation and setting the working coordinate origin
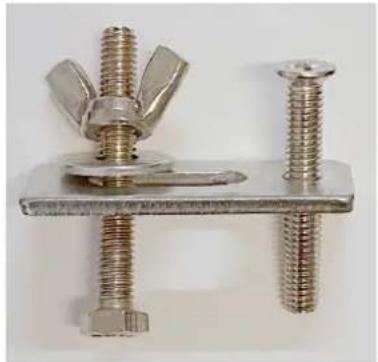
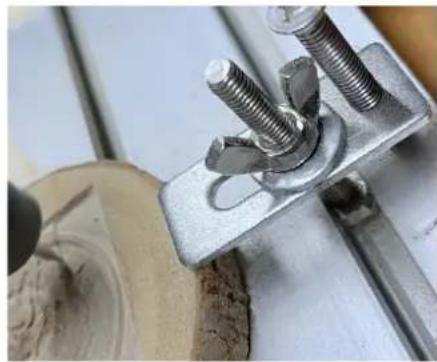
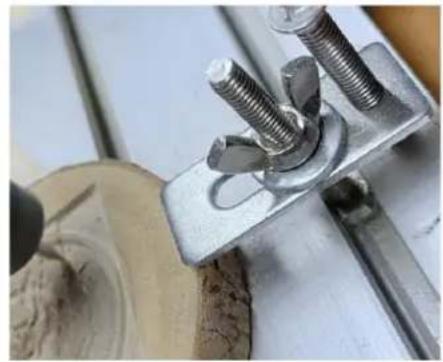
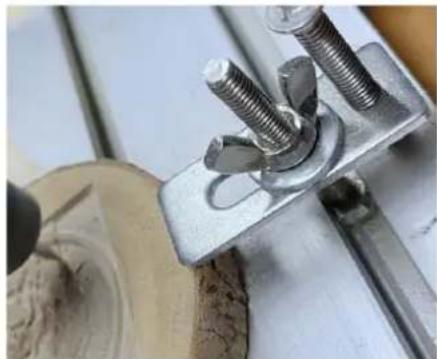
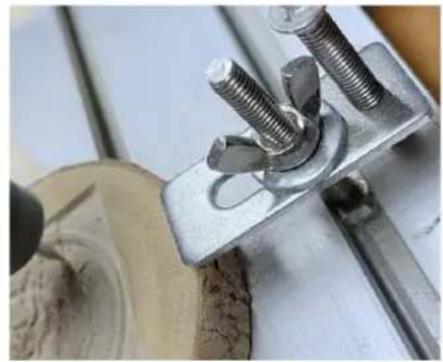
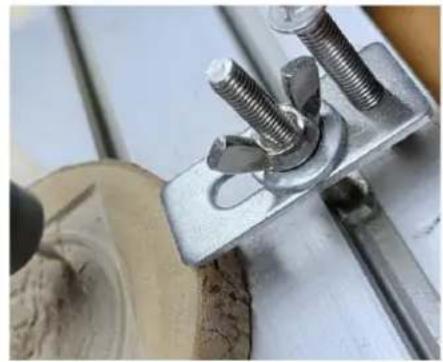
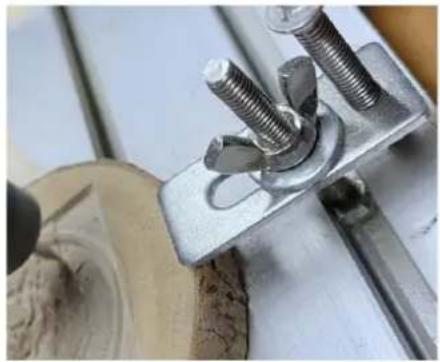
The fixture in the product kit is not assembled. There are four sets in total. The appearance and usage of the assembled fixture are shown in the right figures.
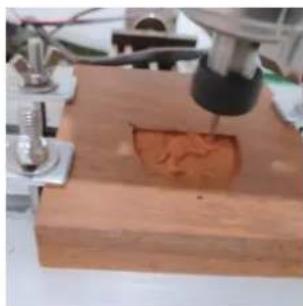
Before running the G-code program, you need to find the position of the engraving figure relative to the overall engraving plate. There is a three-axis coordinate system in the visual graphics. The origin of the three-axis coordinate system is the tool setting point of the actual processing graphic.
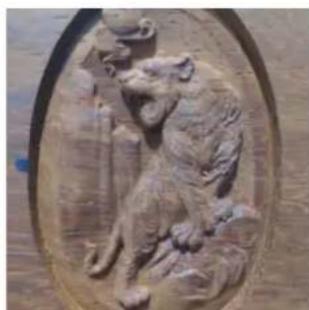
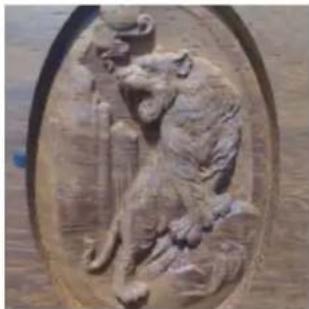
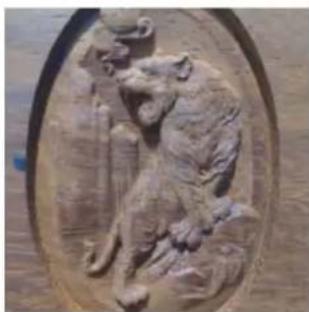
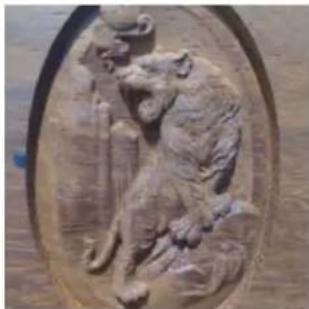
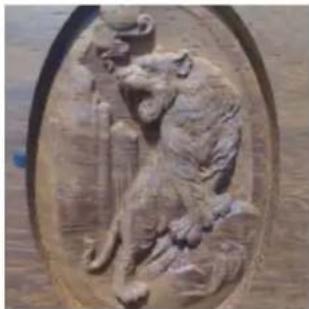
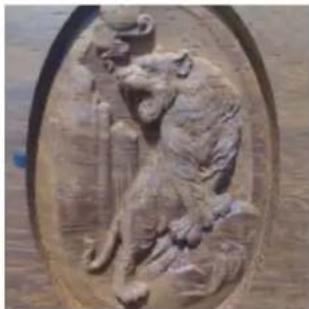
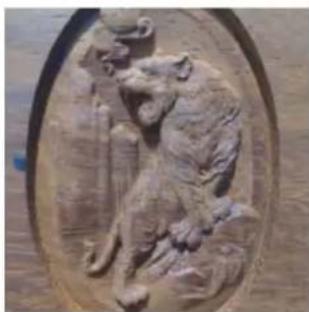
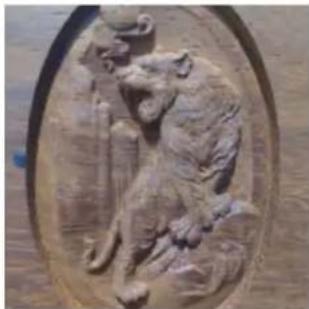
You can move the tool to determine the position of the engraving graphic relative to the overall engraving plate based on the position of this origin. The engraving figure in the figure below is taken as an example.
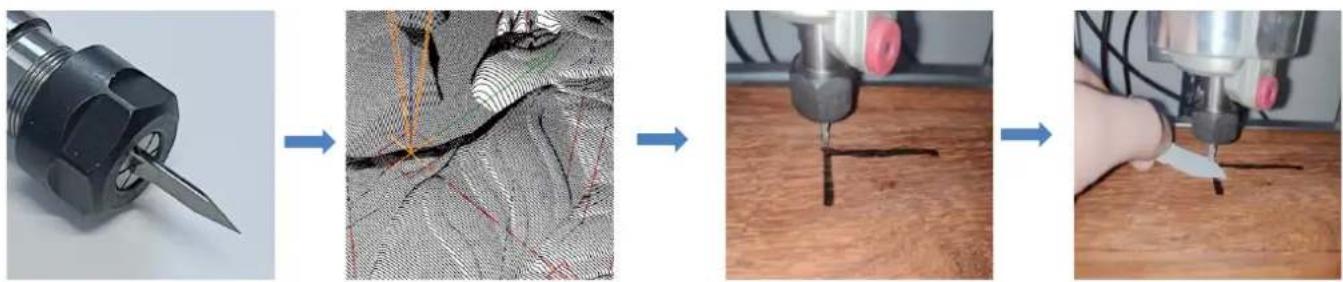
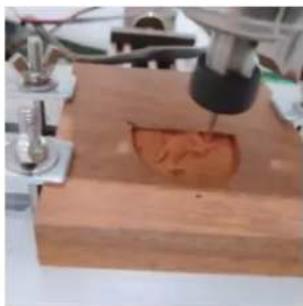
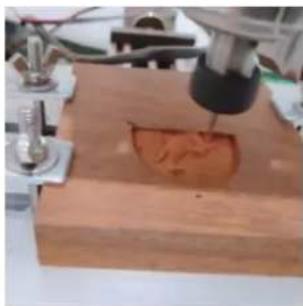
After the selected tool position is started, the X/Y and Z axes are reset to zero (the 10 10 are zeroing X/Y and Z axes buttons). Before returning to zero, make sure that the tool approaches the distance of one sheet of paper for engraving, and then return the X/Y and Z axes to zero (please use a flat-bottom sharp knife when engraving, and use a cylindrical milling cutter when machining planes, slots, and holes). The effect is that the sculpted figure will be carved with the blade tip as the origin.
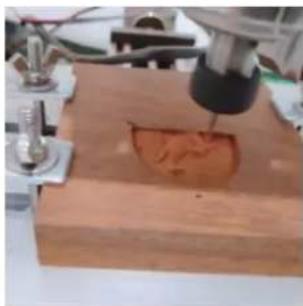
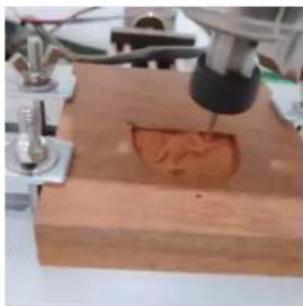
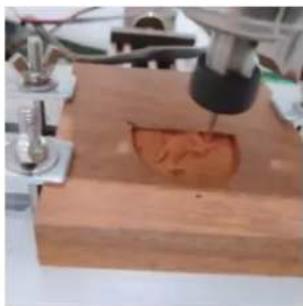
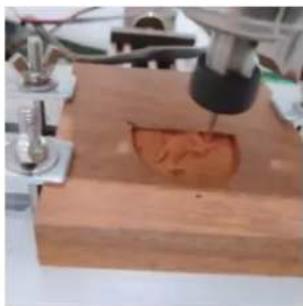
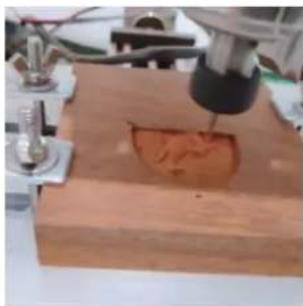
The ER11 collet on the spindle motor should be clamped into the fixed head first, and it must be clamped in place. When installing the cutter, please do not extend the collet too much, as shown in the first figure below.
(6) Start carving
After finding the engraving position, click the send button below and the device will automatically start engraving. The status bar at the top right shows running. The visualization window shows that the tool is moving along the tool path. You can choose the pause and stop buttons below when engraving. (After pausing, click again to continue the previous carving. After termination, click Send to start processing from the beginning).
(7). Finished processing
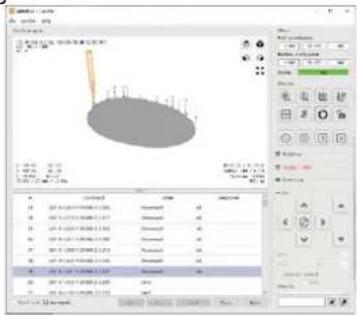
After the processing is completed, the visualization window prompts that the engraving is completed and the time required for carving.
5. Offline controller (Optional)
Note: The offline controller and the computer cannot be connected to the engraving machine at the same time. When using the offline controller, please make sure that the USB cable of the machine and the computer is disconnected.
The offline controller has an external 12V standby power supply interface. When users use other mainboards with no power supply and weak power supply capacity, they can connect an external power supply to supply power to the controller.
5.1 Main page:
Y-: right, Y+: left, Z+: Send \$X to the GRBL motherboard to unlock it.
OK/SPN: Confirm button.
5.2 Control page:
Manually move each axis to the desired position. X+: X axis move right direction, X- opposite. Y+: Y axis move forward direction, Y- opposite. Z+: Z axis move up direction, Z- opposite.
Manually move each axis to the desired position. X+: X axis moves in the right direction, X- moves in the opposite direction. Y+: Y axis moves in the forward direction, Y- moves in the opposite direction. Z+: Z axis moves in the upward direction, Z- moves in the opposite direction.
OK/SPN: Spindle test switch. Press to open the spindle (the corresponding SPN on the screen turns gray), press again to close the spindle (the corresponding SPN on the screen returns to normal). Long press to enter the spindle speed change page. On this page, Y+/Y- adjusts the spindle speed high/low. Long press OK/SPN to exit the spindle speed change page.
Exit/STP: Function 1: Tap each axis button (X, Y, Z) to change the movement distance by 0.1, 1, 5, or 10 increments each time. Function 2: Press and hold for about 2 seconds to exit.
![graph TD A["Main page"] --> B["Control"] A --> C["File"] A --> D["Setting"] B --> E["Move Page"] B --> F["Move"] E --> G["X+ Y+ Z+ SPN"] E --> H["X- Y- Z- XI"] F --> I["0.1min/T 1min/T 2min/T 5min/T 10min/T 15min/T"] C --> J["IPHONE~1.NC"] C --> K["File Select"] K --> L["Ready To Print"] L --> M["Co…](/content/2026/04/736311/images/be4b50104e2e53984172f229cd37bc668c33101855aefa272c38e0870f02445c.jpg)
File list Select the file to be engraved. Support documents include: NC, NCC, TAP, TXT, Gcode, GCO, NL, CUT, CNC.
File list: Select the file to be engraved. Supported file formats include: NC, NCC, TAP, TXT, Gcode, GCO, NL, CUT, CNC.
OK/SPN: Confirm the selection and enter the confirmation engraving page.
5.4 Confirm the engraving page:
5.4 Confirm the engraving page:
Confirm that the engraving file is started without errors.
OK/SPN: Confirmation starts, ready to print becomes the progress display percentage, the file selection page is returned after the engraving is completed.
5.5 Settings page:
X+/ X-: Change Baud rate; Y+/Y-: Change Feed rate by ±100/Click; Z+/Z-: Change Feed rate by ±10/Click; OK/SPN: Change Laser Mode ON/OFF
5.6 Wi-Fi Network and Web
The offline controller has WiFi wireless network function. By default, the WiFi hotspot of VIGO-STK**** is automatically established. You can connect to the hotspot through the WiFi of your computer or mobile phone with password 12345678, and then open
192.168.0.1 or vigostick.local in browser to manage (upload or delete) the files on the SD card of the offline controller, and you can also enter the SSID (Only support 2.4G signal) account and password to help the offline controller access your local WiFi network. After the controller is connected to the local 2.4G WiFi, the current IP address of the controller or the domain name vigostick.local can still be opened to enter the web management interface. You can open About page of the controller to check the IP address.
Network status: There is a dot in the upper left corner of the main page. The RED dot indicates that VIGO-STK**** hotspot is active, and the GREEN dot indicates that the controller has connected to Local WiFi.
The web management interface is as previous page. The web pages functions as follows:
Click the menu "Control", the MOVE Control interface appears, you can click the corresponding button to control the CNC machine movement.
Click the menu "File", shows the carving files currently stored in the SD card of the current offline controller. You can upload new files to the controller. After selecting the corresponding carving file to start the carving, the interface displays the file being carved and the carving progress. You can click the button to pause or stop the carving process.
Click the menu "Settings", enter the carving machine setting interface, where you can set some control parameters, or perform reset, unlock, restore settings, tools setting, turn on/off laser mode and other commands.
6. Restore factory settings
If the mechanical movement of the machine is smooth, but the engraving movement appears stuck, or the stepper motor does not move, please try to restore the factory settings of the main-board.
Method : Run Candle software and send command \$RST=* to the machine, then reboot the machine.
CNC Repair Guide

| Problem Solution | |
| Computer and offline controller cannot control the machine's normal movement or engrave abnormally | Check if the offline controller and the computer USB are both connected to the engraving machine. If so, unplug either the offline controller or the computer USB cable. Both cannot be connected to the engraving machine at the same time. |
| The machine is connected to the computer and powered on, but the engraving software shows a connection failure | Please make sure the computer has the correct driver installed; please check if the USB interface is properly connected; please make sure the COM port is selected correctly (do not select COM1); please make sure the baud rate is selected correctly (choose 115200). |
| The software displays an alarm error, the controller is locked, and clicking reset and unlock does not eliminate it | Check if the limit switches in the XYZ three-axis direction are pressed down or obstructed by foreign objects. Clean them if necessary. Alternatively, unplug the connection wires of the limit switches. If it returns to normal, the corresponding switch has short-circuited and failed. It can be replaced or temporarily abandoned. |
| The engraved content appears as a mirrored reflection of the original image, and the manual control movement direction is incorrect | Just set the Grbl parameters in the software to reverse the direction of the X or Y axis. |
| The engraved content appears rotated by 90 degrees | Check if the connection joints of the controller's XY axis have been swapped. Simply swap the connections back. |
| Problem | Solution |
| The engraved image is distorted and misaligned | Please check if there is any slippage between the lead screw motor axis and the coupling. Tighten the set screws on both ends of the coupling. |
| After modifying the engraving machine firmware parameters, various abnormal machine movements or abnormal engraving sizes occur | Please restore the firmware to factory settings. Run the Candle software, connect to the machine, and in the bottom right command box, enter and send the command $RST=*, then restart the machine. |
E-CrossStu GmbH
Mainzer Landstr.69, 60329 Frankfurt am Main.

YH CONSULTING LIMITED.
C/O YH Consulting Limited office 147, Centurion House.
London Road, Staines-upon-Thames, Surrey, TW18 4AX
VEVOR®
TOUGH TOOLS, HALF PRICE
Technical Support and E-Warranty Certificate
www.vevor.com/support
VEVOR®
TOUGH TOOLS, HALF PRICE


5.3 Page File:
C/O YH Consulting Limited office 147. Centurion House.
London Road, Staines-upon-Thames, Surrey, TW18 4AX
VEVOR®
TOUGH TOOLS, HALF PRICE

![Candle Service Help [00:00] 00:00 [1] 00:00 [2] 00:00 [3] 00:00 [4] 00:00 [5] P=1.0 / 1.0 State Rock coordinate: 0.000 0.000 0.000 Machine coordinate: 0.001 0.001 0.001 Strain: 1 Hz Control 1 2 3 4 Neighbour Spindle Overriding Jog Stop: 1 Fool: 10 Screened control Candle Command State Response Clock…](/content/2026/04/736311/images/02b8bf8ba45fdca1a73d9def7b662faf909a45944c50719b307e9e9def989513.jpg)
![File Edit View Help Create program [0:00] 004 017 021.090.098 00:00:12 / 10:00] F5: 3 / 0 2 -29.979 ... 20.063 1 -29.990 ... 20.028 5 -6.574 ... 81.038 39.573 / 40.860 / 52.574 Command State Response 1 MS-51000 In queue 2 Q1 F1000 In queue 3 G00 X-2.799 Y-29.990 Z10.000 In queue 4 G00 X-2.799 Y-29.9…](/content/2026/04/736311/images/c1e7d0bf31fd532ffe2c0726dfc1789ee36e01298afd71cc36ca77cec944068d.jpg)
5. Offline Controller (optional)
5.3 Data page:
C/O YH Consulting Limited office 147. Centurion House.
London Road, Staines-upon-Thames, Surrey, TW18 4AX
VEVOR®
TOUGH TOOLS, HALF PRICE
electronics www.vevor.com/support
CNC ENGRAVING MACHINE
USER MANUAL
MODEL: S3020

Search videos and guides
(3). Complete connection
5. Controller offline (optional)
5.3 File page:
C/O YH Consulting Limited office 147. Centurion House.
London Road, Staines-upon-Thames, Surrey, TW18 4AX
VEVOR®
TOUGH TOOLS, HALF PRICE

Machine Translated by Google
(6) Start carving
5.3 Page of
C/O YH Consulting Limited office 147. Centurion House.
London Road, Staines-upon-Thames, Surrey, TW18 4AX
VEVOR®
TOUGH TOOLS, HALF PRICE

Machine Translated by Google
2. Machine assembly
5. Offline controller (optional)
5.3 File page:
C/O YH Consulting Limited office 147. Centurion House.
London Road, Staines-upon-Thames, Surrey, TW18 4AX
VEVOR®
TOUGH TOOLS, HALF PRICE
www.vevor.com/support
CNC ENGRAVING MACHINE
USER MANUAL
MODEL: S3020

NEED HELP? CONTACT US!
www.vevor.com/support
ÿ Spindle mounting and motor installation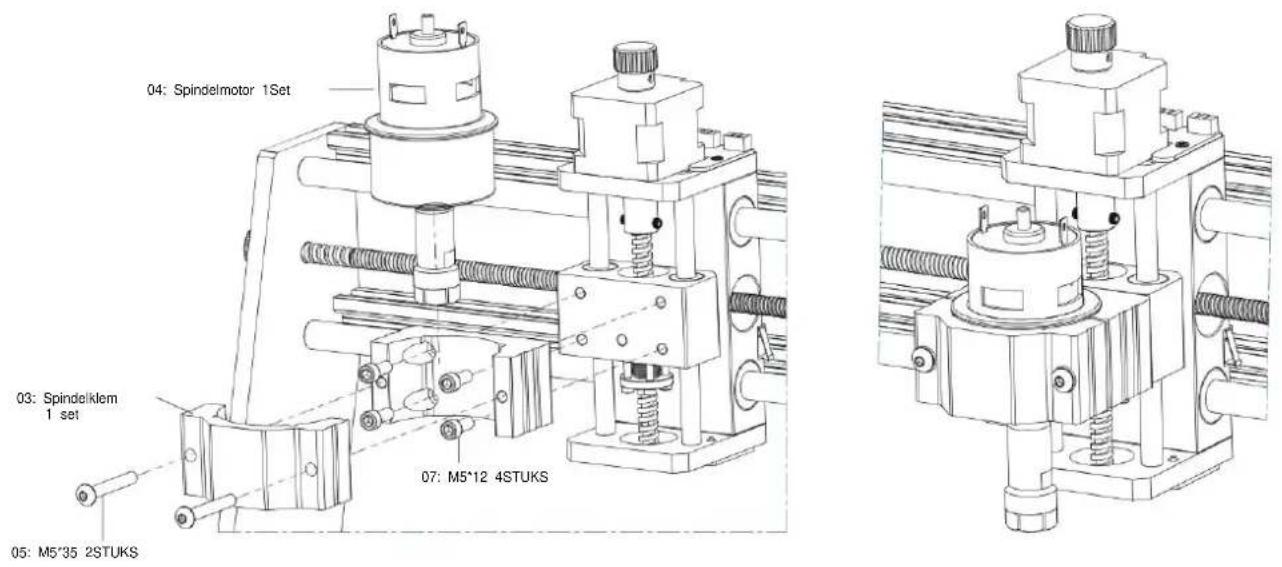
ÿ Installation of the control box![Candy System Help Create program 3.0.001 ... 0.000 5.0.001 ... 0.000 6.0.001 ... 0.000 8.0.001 / 0.000 / 8.000 Command State Process Start New Test Tools Help Status Not confirmed Before condition State Not corrected Control Box comments Building Details Brands Zip Check order [content] Name Name To…](/content/2026/04/736311/images/476c01246d03bbf2e7bfa2cedaad17569fd663a6b6b76908eb66b22aad7e84a2.jpg)
5. Offline controller (optional)
5.3 Inventory page:
C/O YH Consulting Limited office 147. Centurion House.
London Road, Staines-upon-Thames, Surrey, TW18 4AX
VEVOR®
TOUGH TOOLS, HALF PRICE
www.vevor.com/support
VEVOR®
TOUGH TOOLS, HALF PRICE
www.vevor.com/support
CNC ENGRAVING MACHINE
USER MANUAL
MODEL: S3020

(3). Complete connection
![Control Display File Edit View Help Show program [0:00] 004 017 021.090.098 00:00:12 / 10:00] F5: 3 / 0 -29.979 ... 20.003 -29.990 ... 20.028 -6.974 ... 81.008 39.573 / 40.865 / 52.574 Command State Response 1 MS-51000 In queue 2 Q1 F1000 In queue 3 G00 X-2.799 Y-29.990 Z10.000 In queue 4 G00 X-2.79…](/content/2026/04/736311/images/be54a621373392eab3038b99d47465fbe43446cc5b000ef2c71a0ff53058f328.jpg)
(6) Start carving
5. Offline control (optional)
5.3 File: Fillista
Select the file to be engraved. Supported file formats include: NC, NCC, TAP, TXT, Gcode, GCO, NL, CUT, CNC.
C/O YH Consulting Limited office 147. Centurion House.
London Road, Staines-upon-Thames, Surrey, TW18 4AX
VEVOR®
TOUGH TOOLS, HALF PRICE
www.vevor.com/support
- CNC ENGRAVING MACHINE USER MANUAL
- NEED HELP? CONTACT US
- IMPORTANT SAFETY INSTRUCTIONS
- WARNING
- SAVE THESE INSTRUCTIONS
- MACHINE ASSEMBLY
- CANDLE SOFTWARE
- STATES
- CONTROL
- HOME BUTTON
- Z-PROBE
- ZERO X/Y
- RESTORE X/Y/Z
- SAFE Z
- RESET
- UNLOCK
- SOFTWARE USING STEPS
- (1). INSTALL THE DRIVER
- SET THE PORT AND CONNECTION
- (3). COMPLETE CONNECTION
- (4). PROCESSING DOCUMENTS
- (7). FINISHED PROCESSING
- OFFLINE CONTROLLER (OPTIONAL)
- MAIN PAGE
- MANUALLY MOVE EACH AXIS TO THE DESIRED POSITION. X+: X AXIS MOVE RIGHT DIRECTION, X- OPPOSITE. Y+: Y AXIS MOVE FORWARD DIRECTION, Y- OPPOSITE. Z+: Z AXIS MOVE UP DIRECTION, Z- OPPOSITE
- FILE LIST SELECT THE FILE TO BE ENGRAVED. SUPPORT DOCUMENTS INCLUDE: NC, NCC, TAP, TXT, GCODE, GCO, NL, CUT, CNC
- CONFIRM THE ENGRAVING PAGE
- SETTINGS PAGE
- WI-FI NETWORK AND WEB
- RESTORE FACTORY SETTINGS
- CNC REPAIR GUIDE
- VEVOR®
- TOUGH TOOLS, HALF PRICE
- DATA PAGE
- CNC ENGRAVING MACHINE
- USER MANUAL
- CONTROLLER OFFLINE (OPTIONAL)
- FILE PAGE
- MACHINE TRANSLATED BY GOOGLE
- INVENTORY PAGE
- OFFLINE CONTROL (OPTIONAL)
- FILE: FILLISTA
Brand : Vevor
Model : S3020
Category : Machine Tool