HR-270 - Boat Vevor - Free user manual and instructions
Find the device manual for free HR-270 Vevor in PDF.

| Brand | Vevor |
| Model | HR-270 |
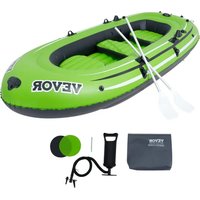
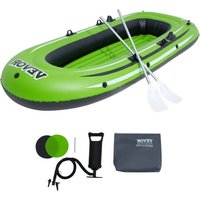
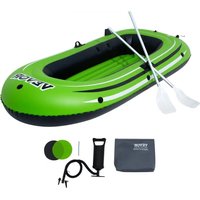
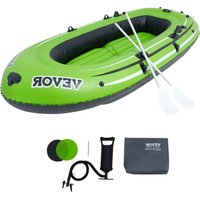
| Product Type | Inflatable boat |
| Approximate Dimensions | 2.7 m length |
| Main Material | PVC |
| Maximum Load Capacity | 454 kg (1000 lb) |
| Number of Passengers Allowed | 4 persons |
| Number of Air Chambers | 3 (front, sides, keel) |
| Maximum Inflation Pressure | 3.5 psi |
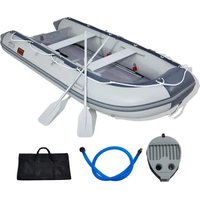
| Included Accessories | Carry bag, aluminum oars (2), foot pump, floorboard (3 boards), aluminum bench, repair kit, Velcro straps, fuel tank gasket |
| Main Functions | Water sports, fishing, cruising |
| Maintenance and Cleaning | Clean with water and soap, avoid solvents except for stubborn stains, dry before storage |
| Safety | Wear a life jacket, distribute load evenly, do not exceed capacity, avoid fire |
| Repairability | Repair kit included for small tears; major repairs by dealer |
| Storage | Deflate, clean, dry, fold in carry bag |
| Origin | Made in China |
| Model Number | HR-270 |
Frequently Asked Questions - HR-270 Vevor
User questions about HR-270 Vevor
0 question about this device. Answer the ones you know or ask your own.
Ask a new question about this device
Download the instructions for your Boat in PDF format for free! Find your manual HR-270 - Vevor and take your electronic device back in hand. On this page are published all the documents necessary for the use of your device. HR-270 by Vevor.
USER MANUAL HR-270 Vevor
Technical Support and E-Warranty Certificate www.vevor.com/support
INFLATABLE BOAT
MODEL: HR-270 / HR-360
We continue to be committed to provide you tools with competitive price. "Save Half", "Half Price" or any other similar expressions used by us only represent of savings you might benefit from buying certain tools with us compared top brands and does not necessarily mean to cover all categories of tools offered are kindly reminded to verify carefully when you are placing an order with us actually saving half in comparison with the top major brands.
VEVOR®
TOUGH TOOLS, HALF PRICE
INFLATABLE
BOAT
MODEL: HR-270 / HR-360
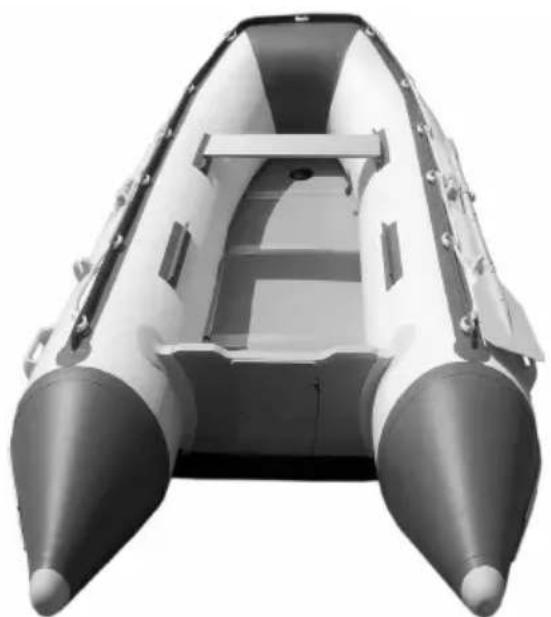
natural_image
Black and white photo of an inflatable rigid-hulled inflatable boat with two side lobes (no text or symbols visible)NEED HELP? CONTACT US!
Have product questions? Need technical support? Please feel from contact us:
Technical Support and E-Warranty Certificate www.vevor.com/support
This is the original instruction, please read all manual instruction carefully before operating. VEVOR reserves a clear interpretation user manual. The appearance of the product shall be subject to product you received. Please forgive us that we won't inform you there are any technology or software updates on our product.
SAFETY WARNINGS
Read the following instructions
Only use this product in the manner described and for its intended purpose. these instructions for use in a safe place. When passing the product on to parties, please hand over all accompanying documents as well. They contain important details on the product as well as its setup, operation, and maintain together with safety requirements. Since water sports are always associated with certain amount of risk, detailed knowledge of the product has the potential to prevent personal injury or even death.
Safety Information
The dinghy is an inspected and safe water sports vessel. We would still to impress upon you the importance of complying with the following rules and regulations:

Risk of Death!
Never let children play with packaging materials unsupervised. There is a risk of suffocation Never let children play with product unsupervised.

Risk of injury!
Beware of offshore wind!
Beware of offshore currents.
- Keep in mind that persons and loads must be evenly distributed in the bc all times, since there would other-wise be a risk of capsizing.
- Please observe the information on the identification plate, the allowable load capacity, and number of passengers as well as the warning notices.
● Always comply with the local regulations governing nautical travel. - Do not transport any sharp or pointy objects The dinghy should be protect against contact with possibly hazardous liquids or acids This could cause
irreparable damage.
- Protect the dinghy against heat and fire! Be careful with smoldering cigarettes!
- Make sure the dinghy doesn't end up on stony ground in order to prevent damage to the hull of the vessel. Should one of the three air chambers become damaged during operation on the water, do not under any circumstances leave the dinghy The two intact air chambers should be buoyant enough to keep the dinghy safely above water.
- Never transport the product on a vehicle when it is inflated.
- Never leave your dinghy on the water unattended. It could be washed away faster than you can swim out to get it.
● Always make sure you have the paddle with you before using the vessel otherwise it would be impossible to adequately maneuver it.
- Do not make any technical modifications to the vessel. Changes of any kind pose a risk to the proper operation of the sporting vessel. Never use the product under the influence of alcohol, drugs, or medications.
- Never overestimate your strength and pace yourself while paddling to make sure that you can easily paddle back the way you came at any given t Stay in protected shore zones up to 984.2 ft(300 m) out and pay attent changing wind and current conditions that might make movement considerably more difficult.

WARNING!
Maintaining your caution and self-awareness is extremely important on the water. Never overestimate your strength and ability to maneuver! Always stay near the shore! Pay attention to the weather conditions, storm warm and any light signals!

AWARNING!
Always pay attention to safety requirements and the applicable legal regulations for lakes and open water and always wear an approved life for your own safety.

AWARNING!
Avoid using sunscreen and skin care products containing alcohol.
Sunscreen and skin care products containing alcohol may cause the cold coating to come off of the inflatable PVC material. This may leave color residue on your body clothing, and other objects that come into contact.

AWARNING!
If a person should fall overboard, they must always climb back in over bow or stern, since climbing in on the side would increase the risk of capsizing.
Avoiding Material Damage!
- All inflatable products are susceptible to cold. For this reason, never unfold and inflate the product at a temperature of less than 59^(15^) .
- If the air pressure increases in direct sunlight, it must be offset by releasing appropriate amount of air
- Make sure that the product - particularly when inflated - does not come in contact with stones gravel, or sharp objects and does not at any point to scrape, because this may cause damage to the surface foil.
- Only plug suitable pump adapters into the safety valve. Otherwise the valves could be damaged.
- Do not over inflate as there is a risk that the welded seams will split. Cl valves fully after inflating.Avoid contact with sharp, hot, pointed, or danger objects.
TECHNICAL INFORMATION
| Model | HR-270 | HR-360 |
| Material | PVC | PVC |
| Load | 1000lbs | 1500lbs |
| Allowable Passengers | 4 | 6 |
ACCESSORY LIST
| NO | PICTURE | NAME | HR-270 | HR-360 |
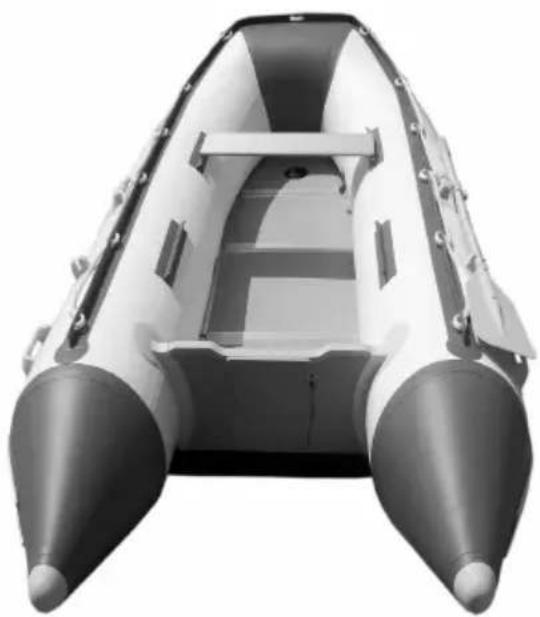
| A | 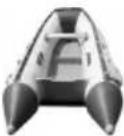 | Inflatable Boat | 1 | 1 |
| B | 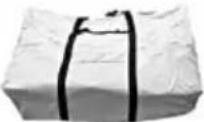 | Carry-bag | 1 | 1 |
| C | 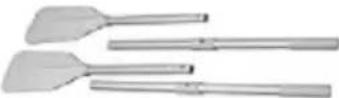 | Aluminum Oars | 2 | 2 |
| D | 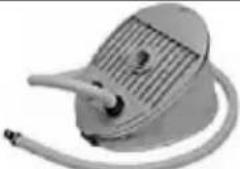 | Foot Pump | 1 | 1 |
| E | 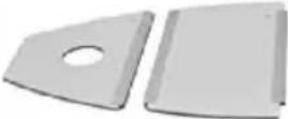 | Piece Wood floor | 3 | 4 |
| F | 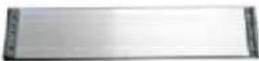 | Aluminum bench Seat | 1 | 2 |
| G | 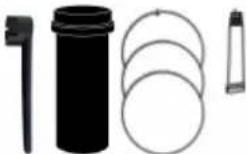 | Repair-Kit | 1 | 1 |
| H | 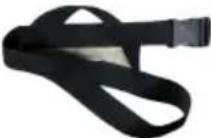 | Velcro Straps | 1 | 1 |
| I |  | Fuel Tank Gasket | 1 | 1 |
Steps on How to Install the Wood Floorboard
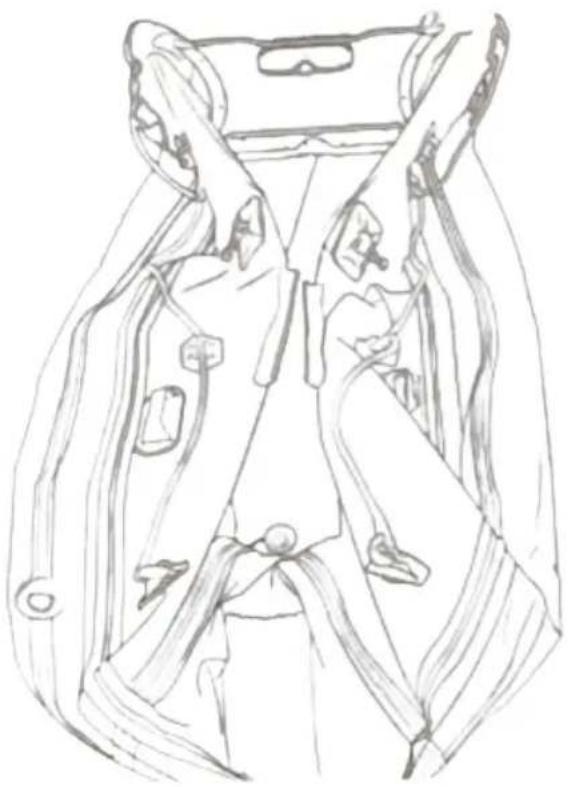
natural_image
Line drawing of a car interior showing seatbelt, dashboard, and seatbelt components (no text or symbols)Step 1: Unfold the deflated boat
Clear a flat space (making sure it is cl and free from sharp objects)and unfold boat.Remove the hull from its box and out of the boat bag. Unroll the hull so out flat.
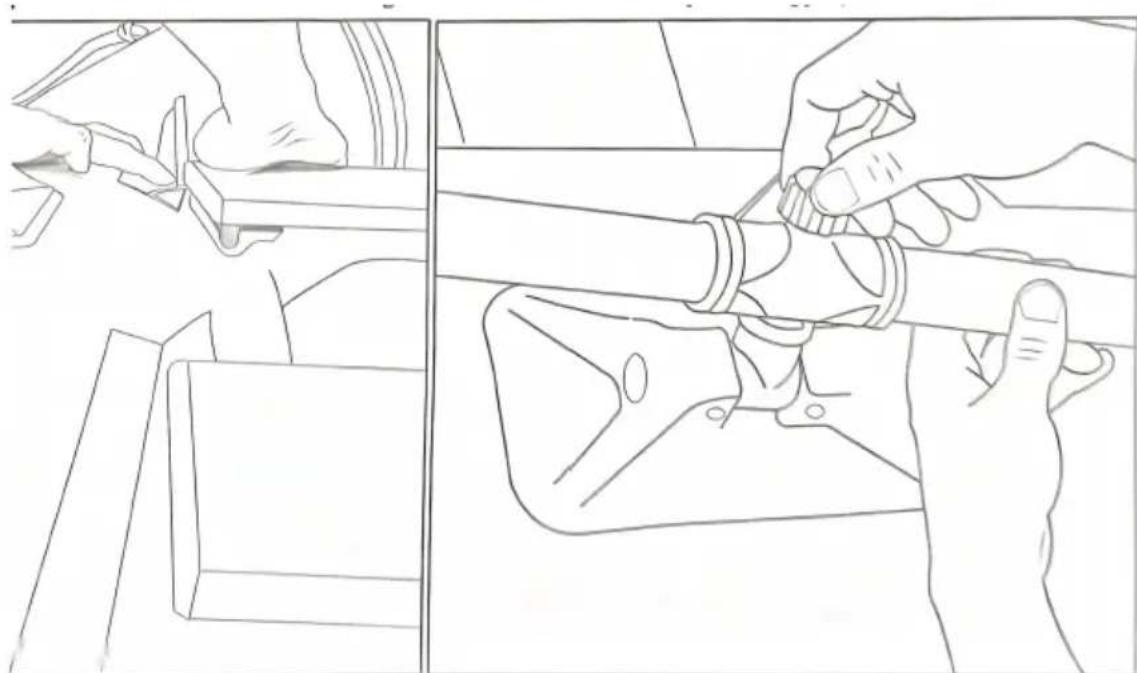
Step 2: Inflate partially
Push and twist the hose nozzle (adapter on the hose) inside the valve until it is screwed in. Inflat hull chambers to approximately 30%-50% full in order to make floorboard insertion easier.
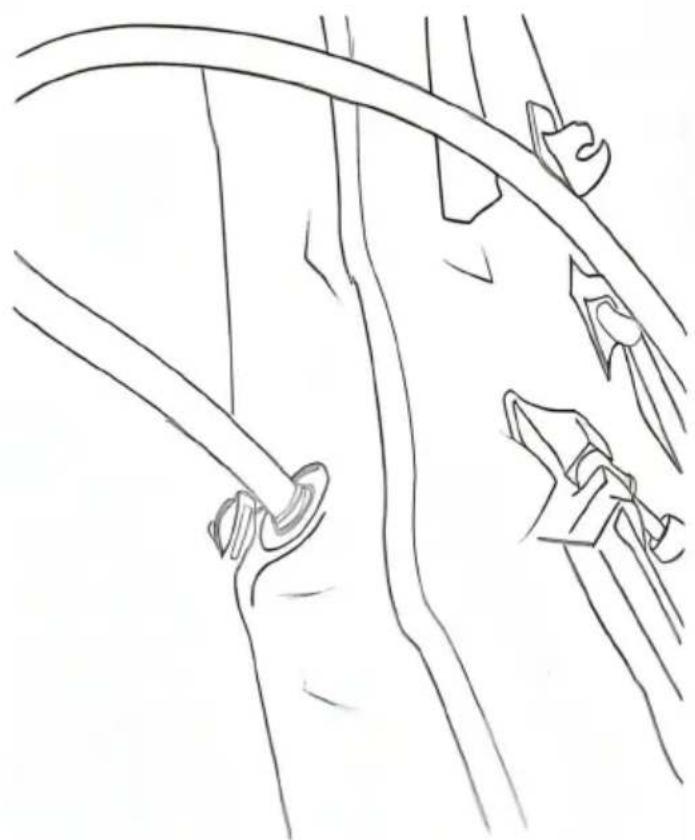
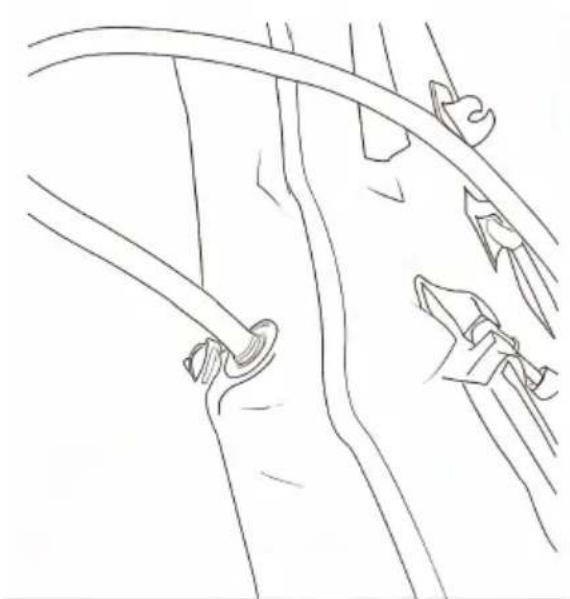
natural_image
Line drawing of a rope and cable structure with no text or symbols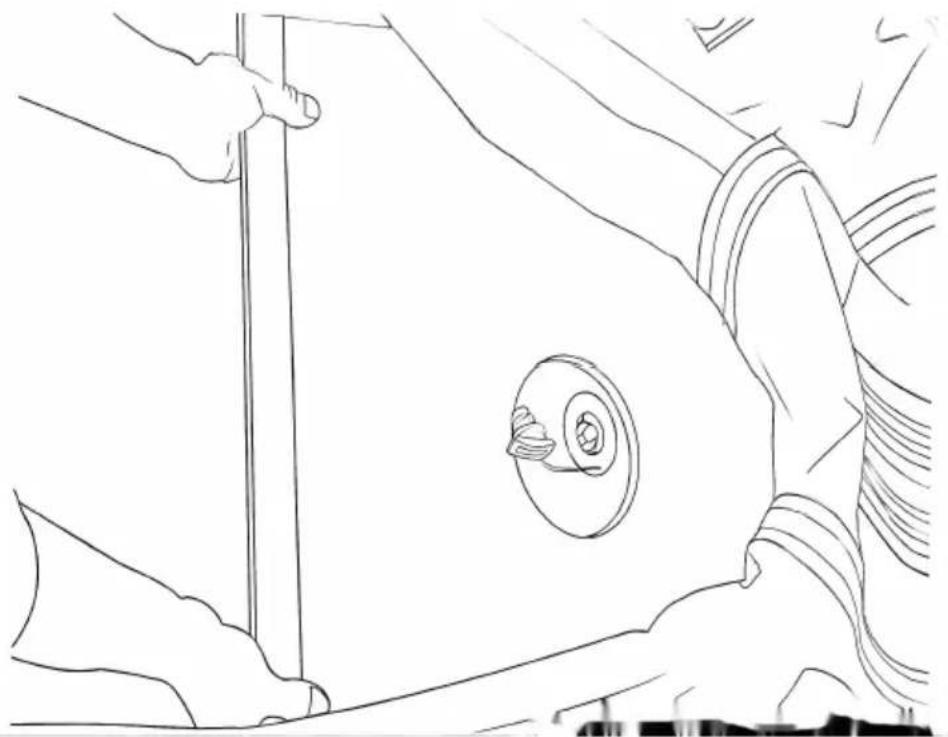
natural_image
Line drawing of a hand holding a vertical object with a circular inset showing a small object, no text or symbols presentStep 3: Install floorboard No.1
Each floorboard is labeled with the number. Floorboard No.1 will be the floorboard.Place floorboard No. 1 at bow part. Make sure you get first floor forward as possible, right in the join between the bottom of the boat on. Make sure that keel valve is located at the center of No.1 boards' h
natural_image
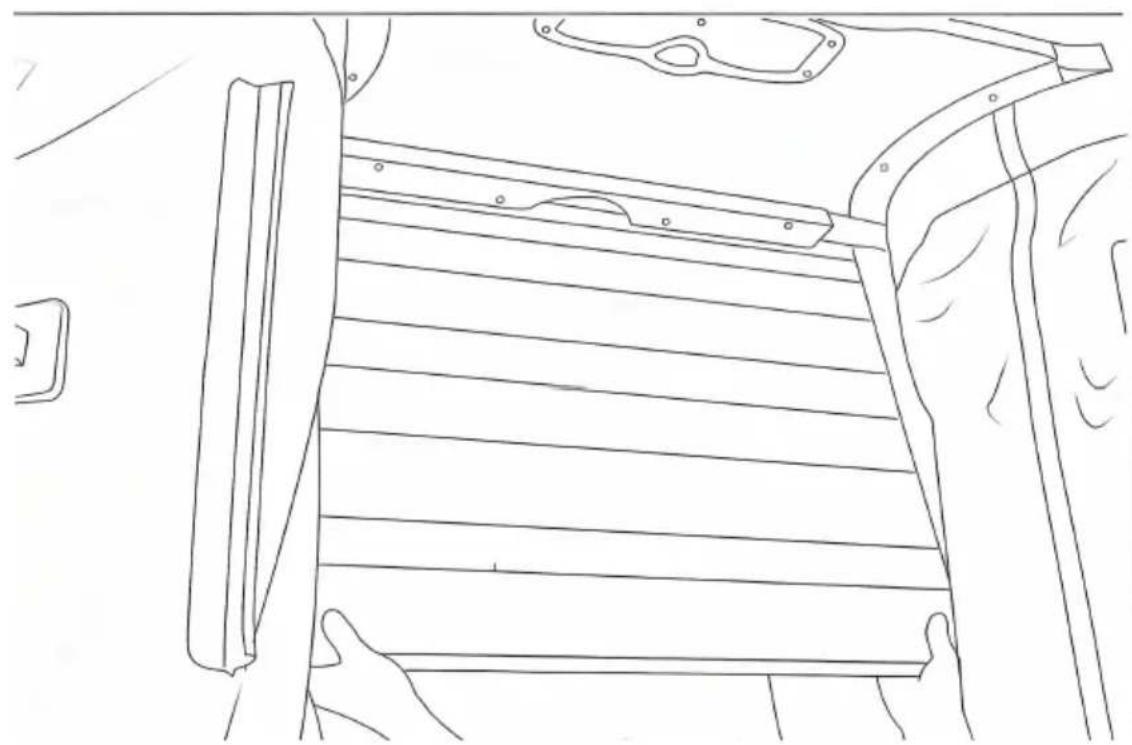
Line drawing of a vehicle's side panel with hand positioning and seatbelt (no text or symbols)Step 4: Install Floorboard No.4
Place floorboard No. 4 next to the transom.
natural_image
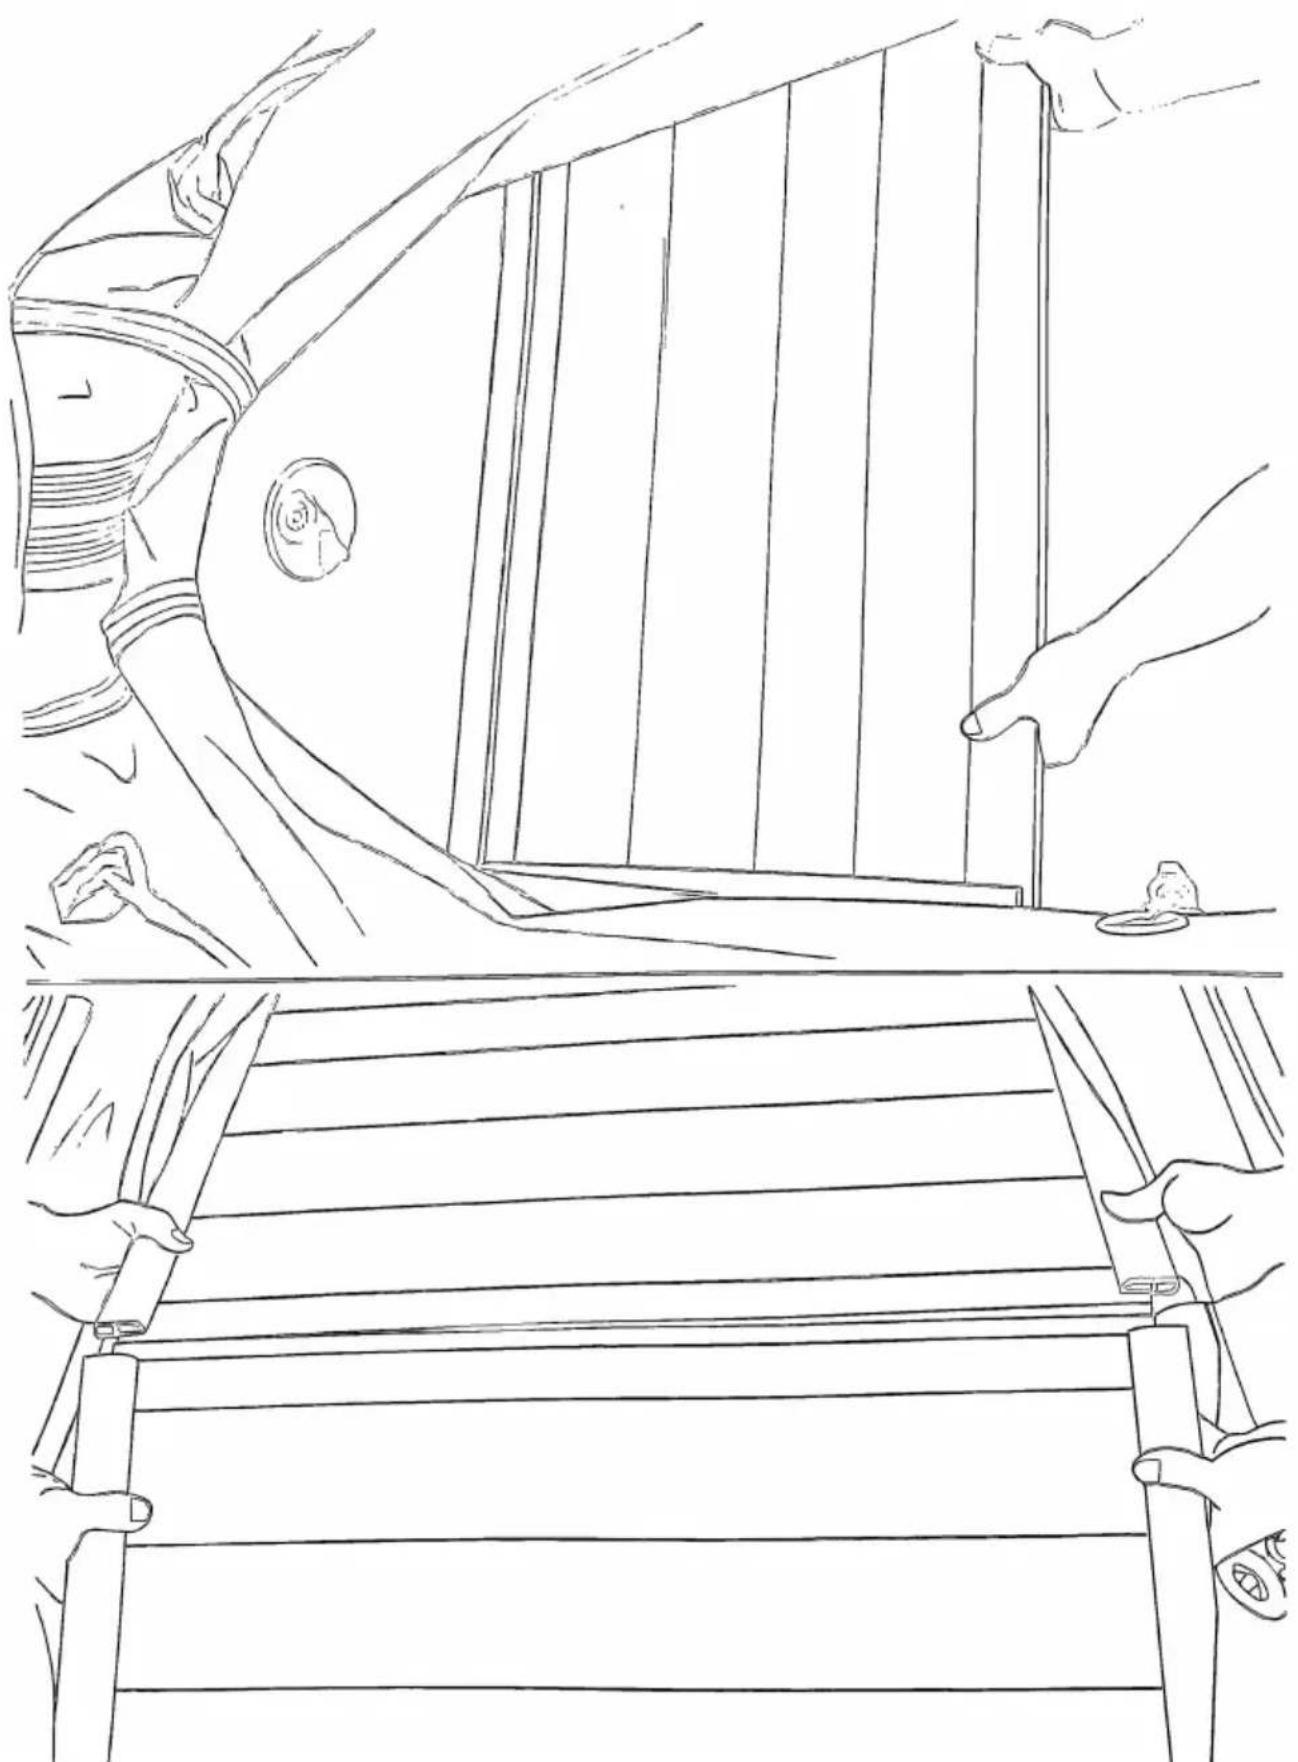
Line drawing of a person installing or adjusting a door panel, with hands adjusting the panel (no text or symbols present)Step 5: Install Floorboard No.2 and No.3
Place floorboard No.2 next to No.1 and floorboard No.3 next to No.4. Floorboard No.2 and No.3 should be placed angular to each other. Push floorboard downwards to join these floorboards in flat position.
natural_image
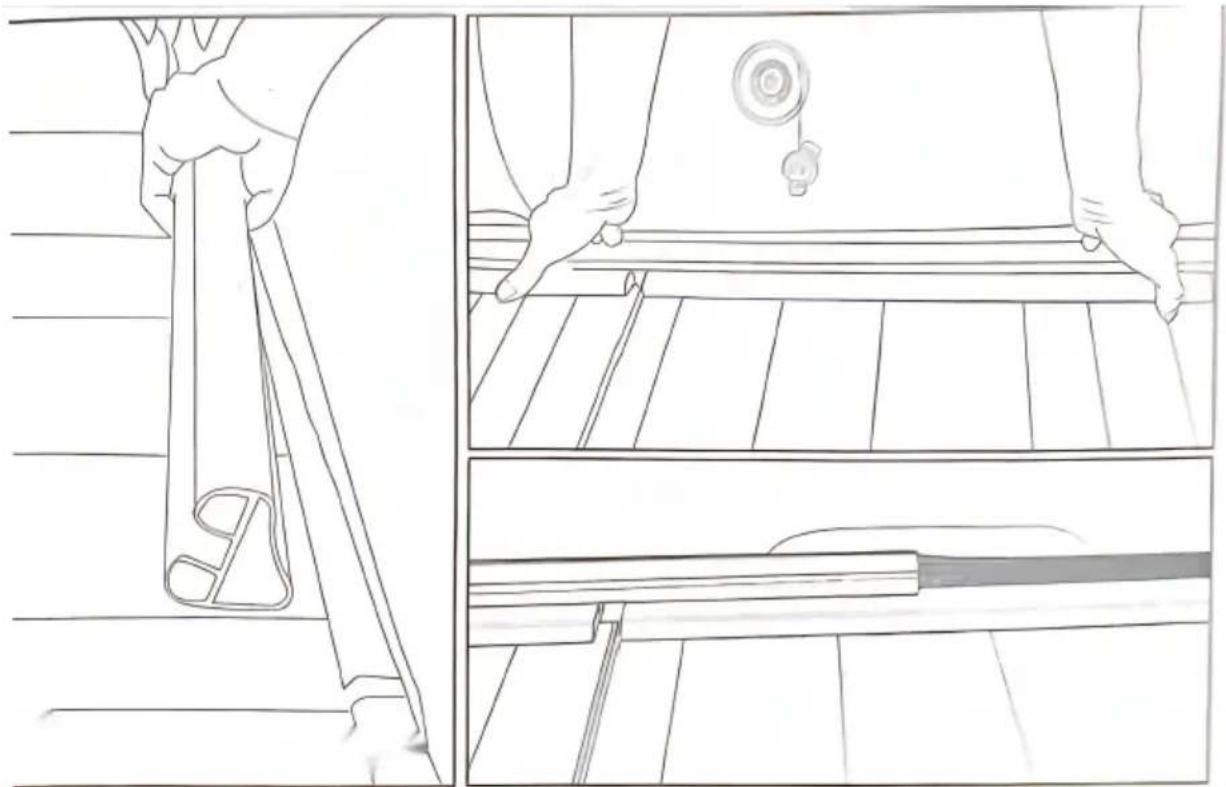
Line drawings of a hand holding a tool, showing three different steps: opening, adjusting the blade, and cutting the blade (no text or symbols present)Step 6: Attach side joiners
Attach side joiners to the floor along the tubes to create a solid flo
(Tips: Stringers are used for stabilizing the floorboards. For convenience of install an oar under the tube to give the floorboard a lit. This makes installing side str Please make sure to leave side tips of stringer on the PVC patch. PVC patches predetermined to endure long term friction caused by the edgy tips of stringer.)
natural_image
Line drawing showing hands operating a mechanical component, no text or symbols presentStep 7: Attach seats and oars
Attach wooden seat properly by placing plastic edges with seat with the s located on the sides of the boat. The oars are placed accordingly as sho
natural_image
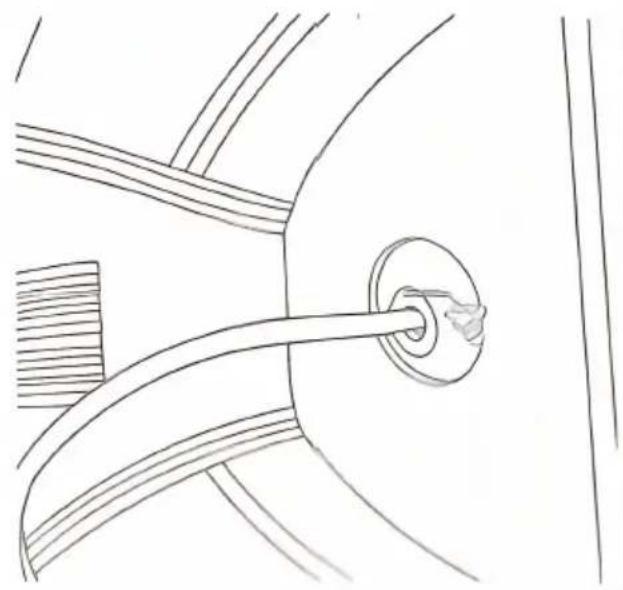
Line drawing of a curved road with two small objects and directional arrows indicating movement or flow (no text or symbols)Step 8: Inflate the boat
Start inflating the front air chamber, follow by the two sides of air chambers. And inflate the keel in the middle. Place cap the valve and twist tightly. Join the oars piece and properly attach them on the oar lock. Then screw cap tightly to faster (Tips: The internal air pressure in chambers go up to a maximum pressure of 3.5psi. With air pressure gauge, you can exactly measure the air pressure as desired. The air pressure gauge is sold separately.)
Keel Inflation: DON'T forget to inflate the keel. A vessel with a flat keel can be unstable to steer on water.
Keel inflating is the last step to finish entire setup of the boat and floorboard. Inspect whether or not keel valve is positioned properly by inflating the keel after positioning the floorboard correctly. Prior to the full inflation of air chambers, inflate and deflate to check keel valve is still in the same place through hole cut. This helps to ensure part of keel is suppressed so as to i healthy inflation.
Next attach accessories on the their designated places.
natural_image
Line drawing of a mechanical component with a central shaft and curved internal structure (no text or symbols)Step 9: (Note: HR-270 only one
Aluminum bench Seat )
The boat is basically ready for me rowing now. If you want to attach accessories, steps are not yet finish
natural_image
Black and white photo of an inflatable rigid-hulled inflatable boat with two conical hulls (no text or symbols visible)Tips of Installation:
Valve mechanism:
Air valve is consisted of 3 different parts. The bottom part stays inside the chamber permanently, connecting to the outer parts on the outside. The uppermost part is the one with air controlling mechanism. It also ties a knot 1 string that holds the cap, avoiding constant misplacing of your cap.
When the pin is pushed down and locked, it permits free access of air in the ways. When releases, it snaps back to stop any air leakage.
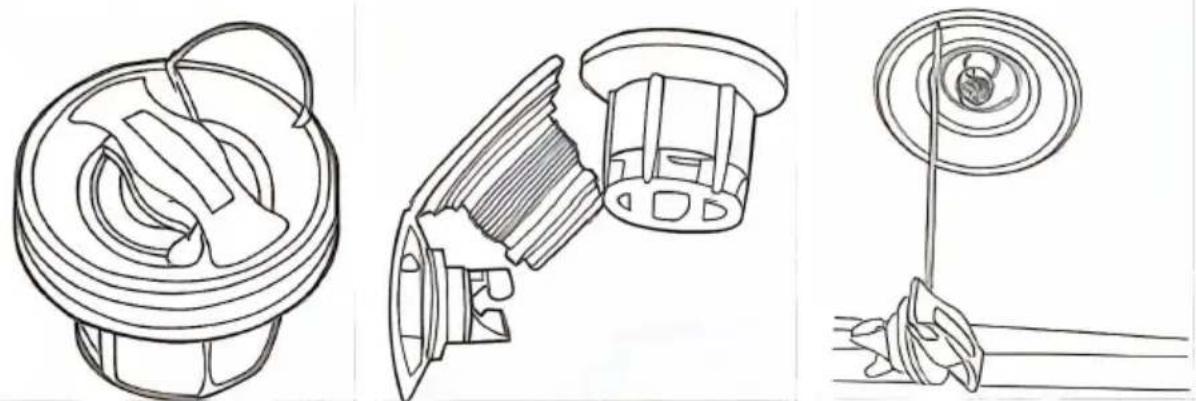
Damage and replacement:
The outer parts can be replaced once found broken or lost. Dispose the broke part properly to recycle and exchange the new set.
Deflating:
Deflate at your need by opening the cap and push-lock the pin down and v air to completely lose.
To fully deflate for compact storage, get it done with foot pump provided.
Foot Pump also can be used reversely for air suction, switch the hose conn on pump and proceed to pedal drawing air until flat.
Inflating the boat in a correct order can also help you identify whether your air chamber partition layer is leaking.
It's a good rule of thumb to always start inflating from the back to bow. Usu best method getting this done is to inflate the rear chambers to the point w not too rigid yet.Then start inflate the bow chamber,You will see the boat ac itself to a perfect hardness, reaching the expected pressure of 3.5psi. The principle is that the elastic membrane in between is elastic when inflating. Th step of bow chamber inflation push back all the membrane back to a norma relaxed position.
In the process or inflating, leaving one side of chamber flat and only inflating one next to, thus it can show you signs of potential air leaking on the segn parts. If the chambers get full when you are only inflating one side, then ce there is a leaking hole on the membrane.
On the side note, inflating evenly on both side of chamber can help avoid unnecessary damages on partition segments which extends the lifespan.
Original Key Features:
① On the stern, transom is double reinforced by a thick rubber skin. Glued and screw to the transom board, connecting to the air chamber offering a firm grab to it, the screws are plastic that penetrates through the transor board with a trace of water adhesive covered on the outside. The transom is the firmest structure comparing to other compartments. As a significant part of the boat.it to be built strong. avoiding loosening or separate during boating.
② On top of transom board, glued a layer o thick rubber skin as w for the protection over the edge, plywood that makes the transom board needs to be completely sealed and covered avoid delamination after being exposed to water. The outside coating also is key protecting transom board.
③ And the two triangle PVC skins covering the side c transom is designed to guard water splash,also does the job at reinforcir transom and air chambers together.
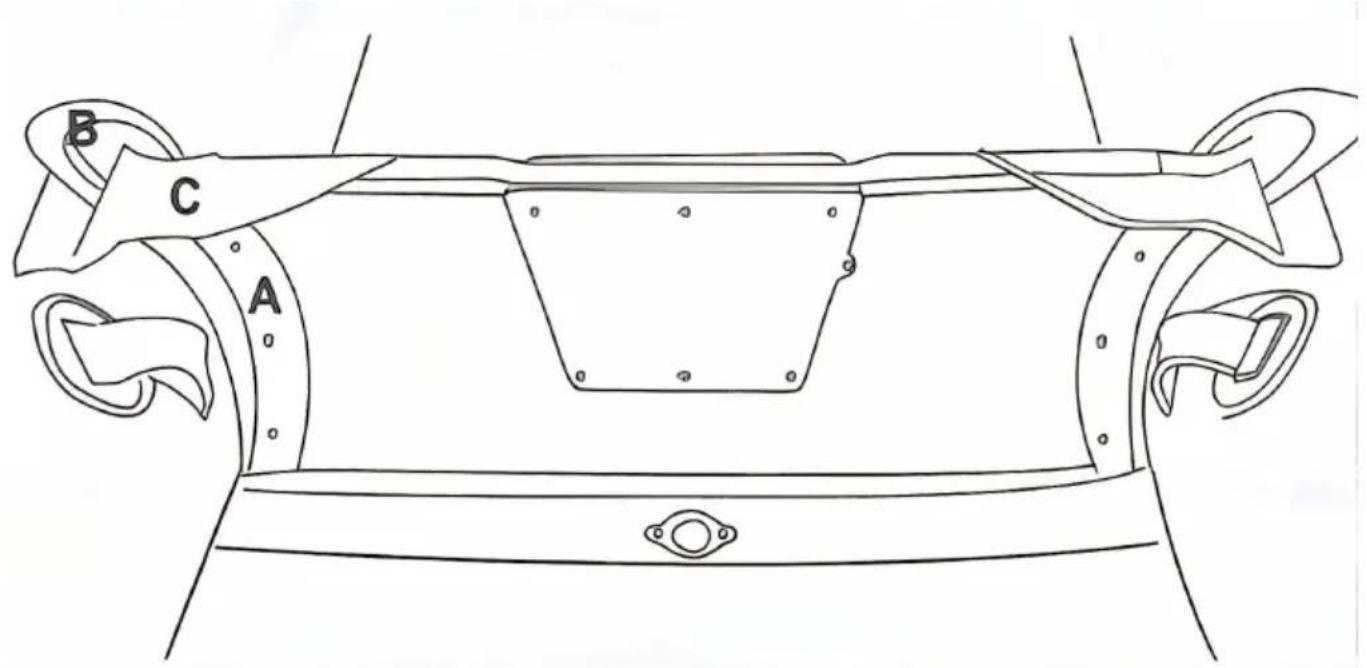
Quadruple Seam: Under the strake line locates the seam line, you can literate see the bulging line from outside. There are 4 layers of PVC glued and tap from inside out.
Strake Lines: Are designed for preventing scratches and crash. The rugged shape features a small curled down edge to help prevent water from flushing upward into your boat.
OPERATION
The unpacking
Before you unfold the boat, take a good look at how the boat is folded to g. Unfold the boat at a flat surface and check if all parts did come with the b (valves, wooden seat or inflatable thwart, foot-pump, oars, side-joiners, repair-and carrying-bag)
Valves
The valves are pre-assembled you can leave them there permanently, because they do not damage the fabric, or the user of the boat. Loosen the front car place pump-hose to fill the boat. Inside the valve is a nipple, press and turn air will come out. The valve will close the same way too.
Using oars
Our inflatables are extremely suitable to row with. Be careful when there is: wind and you are sailing a boat without a keel.
Towing
Our inflatables have three towing-rings. When you are towing the boat, it is that to use all 3 towing-rings, this way the tractive power is divided. It is also not allowed to have ballast in the boat when you are towing. Make sure that you extra towing-ropes when you are towing during bad weather. The length of the towing-ropes must be adjusted to type of boat that you are towing and the circumstances.
Loosing pressure
For an inflatable boat is standard designed that it may not loose more than the air in 24 hours. When this does happen, do the following.
-
check if all valves are screwed tight.
-
Check if all valves are clean.
-
See if you can find any damaging.
-
Check the seams.
-
Put some soap-suds on the boat to discover small leaks.
Due temperature difference the pressure can increase or decrease.
How to repair
If you have found a leak, then clean the fabric around it. Cut out a piece of with round edges, which is about 2.5com bigger than the leak. Clean the area around the leak and the piece of fabric with thinner. Put on both parts two la glue. Let the parts dry until the upper glue layer has dried a bit. Stick both pi together and make sure that there are no air-bubbles between. Let the repair for 24 hours before you start using the boat again.
Important: Repairing is only possible with a dry atmosphere and the air moisture may not be bigger than 60%.
Maintenance
Because the boats fabric is PVC it does not need maintenance. So you do n need to use talcum powder when the boat is folded together. Clean the boat soap and the water. When you find persistent stains like oil and tar, you can remove them with thinner. After you have used thinner, always clean the boat fresh water. It is important to clean the valves also. The transom, wooden so floorboards are made out of plywood and are treated with a waterproof paint. Every damaging of the paint must directly be scoured and painted to avoid damage to the wood. When you do not use the inflated boat, we advise y cover it with a boat-cover against sun and dirt.
Stowing away
When you will not use the boat for a longer time and you stow it away in carrying-bag, it is sensible to clean the boat with fresh water to remove sand dirt and let it dry. Take out the valves and empty the air chambers. Then I the floorboard and joiners. Now fold the tubes to the inner side of the boat boat has the same width as the transom, fold the cones behind the transom you can roll the boat together starting with the transom. You can tie a rope the package to keep it small. Put the boat with all the parts together in the carrying-bag.
Fire risk
All materials of this inflatable boat are flammable.Take open fire away from the boat.
Advises
-
Always take lifesaving-vests with you for all passengers, although it is legal obliged or not,
-
Check the pressure and the condition of the boat before you start sailing.
-
Pay attention to the weather circumstances for your safety and also for its influence on the fuel-consumption.
-
Do not forget important papers like maps or a sailing license.
- Make sure you take spare-papers, repair-kits, first-aid-kit and a pump with you
At last: Make sure you do not ever exceed the maximum recommended number of persons, load capacity and engine power. We wish you have lots of pleasure your aquamarine inflatables.
SMALL TEARS, CUTS AND PUNCTURE
- The repair of a small leak or puncture less than 1/2in (12.7mm) can be n with a round patch, sin(76.2mm) diameter minimum.
- Both patch and surface on boat must be dry and free of dirt or grease.
- Apply 3thin, even coats of glue to surface of boat and patch. Wait s minute between each coat After 3fd coat, wait 10- 15 minutes before placing patch boat. Use hard roller to press patch onto boat skin.
- Wait a minimum of 24 hours before re-inflating and using the boat.
LARGE REPAIRS OF SKIN,SEAMS,BULKHEADS TRANSO
It is recommended that boat be returned to selling dealer for all large repairs is not possible, contact dealer.
INSTALLING NEW CHECK VALVES
Lubricate check valve stem with silicone or soapy water solution to ease installation.
Address : Baoshanqu Shuangchenglu 803long 11hao 1602A-1609shi Shanghai
Imported to AUS: SIHAO PTY LTD, 1 ROKEVA STREETEASTWOOD NSW 2122 Australia
Imported to USA: Sanven Technology Ltd., Suite 250, 9166 Anaheim Place, Rancho Cucamonga, CA 91730
| UK | REP |
Pooledas Group Ltd
Unit 5 Albert Edward House, The Pavilions
Preston, United Kingdom
| EC | REP |
SHUNSHUN GmbH
Römeräcker 9 Z2021, 76351
Technical Support and E-Warranty Certificate www.vevor.com/support
VEVOR®
TOUGH TOOLS, HALF PRICE
natural_image
Black and white photo of an inflatable boat with two side lobes and a horizontal deck (no text or symbols visible)BESOIN D'AIDE? CONTACTEZ-NOUS!
natural_image
Line drawing of a car interior showing seatbelt, dashboard, and seatbelt components (no text or symbols)natural_image
Line drawing of a hand holding a curved object, possibly a tool or device, with no visible text or symbols.
natural_image
Line drawing of a hand holding a vertical rod next to a circular object, with no visible text or symbolsnatural_image
Line drawing of a vehicle's side panel with hand positioning and structural details (no text or symbols)natural_image
Line drawing of a person installing or adjusting a door panel, with hands adjusting the panel (no text or symbols present)natural_image
Line drawings of a person holding a tool, showing three different views: front view, side view, and top view (no text or symbols present)natural_image
Line drawing showing hands operating a mechanical component in two different states (no text or symbols)natural_image
Line drawing of a curved road with directional arrows and footprints (no text or symbols)natural_image
Technical line drawing of a mechanical component with a central shaft and circular housing (no text or symbols)natural_image
Black and white photo of an inflatable rigid-hulled inflatable boat with two side lobes (no text or symbols visible)natural_image
Three technical line drawings of mechanical components, including a fan, gear, and a spiral (no text or symbols)Rancho Cucamonga, CA 91730
Groupe Pooledas Ltd
natural_image
Black and white photo of an inflatable boat with two side fins and a flat hull (no text or symbols visible)BRAUCHEN SIE HILFE? KONTAKTIERE UNS!
natural_image
Line drawing of a car interior showing seatbelt, dashboard, and seatbelt components (no text or symbols)natural_image
Line drawing of a hand holding a vertical rod next to a circular object, with no visible text or symbolsSchritt 3: Diele № 1 verlegen.
natural_image
Line drawing of a vehicle's side panel with hand positioning and structural details (no text or symbols)Schritt 4: Bodenbrett № 4 verlegen.
natural_image
Line drawing of a person installing or adjusting a door panel, with hands adjusting the panel (no text or symbols present)natural_image
Line drawings of a person holding a tool, showing three different views: front view, side view, and close-up (no text or symbols)natural_image
Line drawing showing hands operating a mechanical component with a tool, no text or symbols presentnatural_image
Line drawing of a curved road with directional arrows indicating flow or movement (no text or symbols)natural_image
Diagram of a medical procedure showing a catheter inserted into a tube, with no visible text or labels.natural_image
Black and white photo of an inflatable rigid-hulled inflatable boat with two side lobes (no text or symbols visible)Tipps zur Installation:
natural_image
Technical line drawings of three mechanical components: a fan-like device, a gear mechanism, and a pulley system (no text or symbols present)Rancho Cucamonga, CA 91730
| UK | REP |
Pooledas Group Ltd
natural_image
Black and white photo of an inflatable boat with two side fins and a flat hull (no text or symbols visible)HO BISOGNO DI AIUTO? CONTATTACI!
natural_image
Line drawing of a car interior showing seatbelt, dashboard, and seatbelt (no text or symbols)natural_image
Line drawing of a hand holding a curved object, possibly a tool or device, with no visible text or symbols.
natural_image
Line drawing of a hand holding a vertical rod next to a circular object, with no visible text or symbolsnatural_image
Line drawing of a vehicle's side panel with hand positioning and structural details (no text or symbols)natural_image
Line drawing of a person installing or adjusting a door panel, with hands adjusting the panel (no text or symbols present)natural_image
Line drawings showing a hand holding a tool, a close-up of hands holding a device, and a close-up of a tool handle (no text or symbols)natural_image
Line drawing showing hands operating a mechanical component with a tool, no text or symbols presentnatural_image
Line drawing of a curved road with directional arrows indicating flow or movement (no text or symbols)natural_image
Black and white photo of an inflatable rigid-hulled inflatable boat with two side lobes (no text or symbols visible)natural_image
Three technical line drawings of mechanical components, including a fan, gear, and a pulley (no text or symbols present)Importato in Australia: SIHAO PTY LTD, 1 ROKEVA STREETEASTWOOD NSW 2122Australia
natural_image
Black and white photo of an inflatable rigid-hulled inflatable boat with two side lobes (no text or symbols visible)natural_image
Line drawing of a car interior showing seatbelt, dashboard, and seatbelt (no text or symbols)natural_image
Line drawing of a rope and cable structure with no text or symbols
natural_image
Line drawing of a hand holding a vertical rod next to a circular object, with no visible text or symbolsPaso 3: Instale la tabla del piso No.1
natural_image
Line drawing of a vehicle's side panel with hand positioning and structural details (no text or symbols)Paso 4: Instale la tabla del piso No. 4
natural_image
Line drawing of a person installing or adjusting a door panel, with hands adjusting the panel (no text or symbols present)natural_image
Line drawings showing a hand holding a tool, a close-up of hands holding a device, and a close-up of a tool handle (no text or symbols)natural_image
Line drawing showing hands operating a mechanical component in two different states (no text or symbols)natural_image
Line drawing of a curved road with directional arrows indicating flow or movement (no text or symbols)natural_image
Technical line drawing of a mechanical component with a central shaft and circular housing (no text or symbols)Paso 9: (Nota: HR-270 solo un banco de aluminio)
natural_image
Black and white photo of an inflatable rigid-hulled inflatable boat with two side lobes (no text or symbols visible)natural_image
Three technical line drawings of mechanical components, including a fan, gear, and a pulley (no text or symbols present)Rancho Cucamonga, CA 91730
Grupo Pooledas Ltd
natural_image
Black and white photo of an inflatable boat with two side lobes and a horizontal deck (no text or symbols visible)POTRZEBUJE POMOCY? SKONTAKTUJ SIĘ Z NAMI!
natural_image
Line drawing of a car interior showing seatbelt, dashboard, and seatbelt (no text or symbols)natural_image
Line drawing of a rope being lifted by a hand, showing mechanical components (no text or symbols)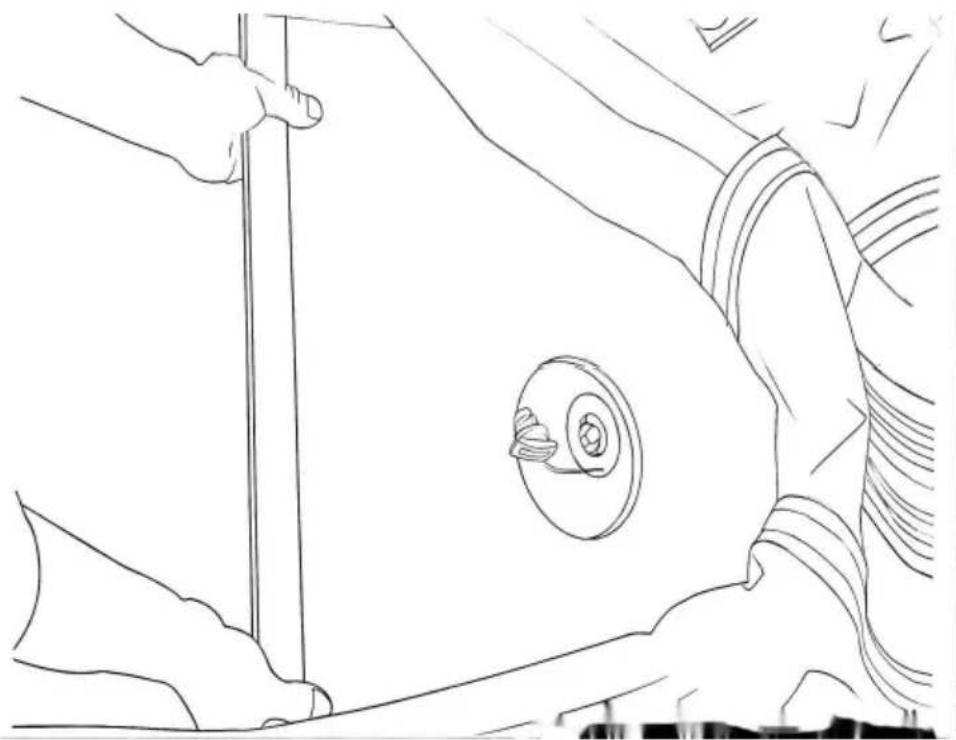
natural_image
Line drawing of a hand holding a vertical rod next to a circular object, with no visible text or symbolsnatural_image
Line drawing of a vehicle's side panel with hand positioning and structural details (no text or symbols)natural_image
Line drawing of a person installing or adjusting a door panel, with hands adjusting the panel (no text or symbols present)natural_image
Line drawings of a person holding a tool, showing three different views: front view, interior view, and side view (no text or symbols)natural_image
Line drawing showing hands operating a mechanical component with a tool, no text or symbols presentnatural_image
Line drawing of a curved road with directional arrows indicating flow or movement (no text or symbols)natural_image
Diagram of a medical procedure showing a catheter inserted into a tube, with no visible text or labels.natural_image
Black and white photo of an inflatable rigid-hulled inflatable boat with two conical hulls (no text or symbols visible)natural_image
Three technical line drawings of mechanical components, including a fan, gear, and a spiral (no text or symbols)Import do AUS: SIHAO PTY LTD, 1 ROKEVA STREETEASTWOOD
www.vevor.com/support
VEVOR®
TOUGH TOOLS, HALF PRICE
Technische ondersteuning en e-garantiecertificaat www.vevor.com/support
OPBLAASBARE BOOT
MODEL: HR-270 / HR-360
natural_image
Black and white photo of an inflatable boat with two side lobes and a horizontal ladder (no text or symbols visible)HULP NODIG? NEEM CONTACT MET ONS OP!
VEILIGHEIDSWAARSCHUWINGEN
INSTALLATIE INSTRUCTIES
natural_image
Line drawing of a car interior showing seatbelt, dashboard, and seatbelt (no text or symbols)natural_image
Line drawing of a hand holding a curved object, possibly a tool or device, with no visible text or symbols.
natural_image
Line drawing of a hand holding a vertical rod next to a circular object, with no visible text or symbolsnatural_image
Line drawing of a vehicle's side panel with hand positioning and structural details (no text or symbols)natural_image
Line drawing of a person installing or adjusting a door panel, with hands adjusting the panel (no text or symbols present)natural_image
Line drawings showing a hand holding a tool, a close-up of hands holding a device, and a close-up of a tool handle (no text or symbols present)natural_image
Line drawing showing hands operating a mechanical component in two different states (no text or symbols)natural_image
Line drawing of a curved road with directional arrows indicating flow or movement (no text or symbols)natural_image
Diagram of a medical or anatomical structure with curved lines and a central circular component (no text or symbols)natural_image
Black and white photo of an inflatable rigid-hulled inflatable boat with two side lobes (no text or symbols visible)natural_image
Three technical line drawings of mechanical components, including a fan, gear, and a pulley (no text or symbols present)natural_image
Black and white photo of an inflatable boat with two side lobes and a horizontal deck (no text or symbols visible)BEHÖVS HJÄLP? KONTAKTA OSS!
natural_image
Line drawing of a car interior showing seatbelt, dashboard, and seatbelt (no text or symbols)Steg 1: Vik ut den tömda båten
natural_image
Line drawing of a hand holding a curved object, possibly a tool or device, with no visible text or symbols.
natural_image
Line drawing of a hand holding a vertical rod next to a circular object, with no visible text or symbolsnatural_image
Line drawing of a vehicle's side panel with hand positioning and safety goggles (no text or symbols)natural_image
Line drawing of a person installing or adjusting a door panel, with hands adjusting the panel (no text or symbols present)natural_image
Line drawings showing a hand holding a tool, a close-up of hands holding a device, and a close-up of a tool handle (no text or symbols present)natural_image
Line drawing showing hands operating a mechanical component with a tool, no text or symbols presentnatural_image
Line drawing of a curved road with directional arrows indicating flow or movement (no text or symbols)natural_image
Black and white photo of an inflatable rigid-hulled inflatable boat with two side lobes (no text or symbols visible)natural_image
Three technical line drawings of mechanical components, including a fan, gear, and a pulley (no text or symbols)STORA REPARATIONER AV HUD, SÖMMAR, TRANSO
Enhet 5 Albert Edward House, The Pavilions