
58016V - Coffee machine Vevor - Free user manual and instructions
Find the device manual for free 58016V Vevor in PDF.
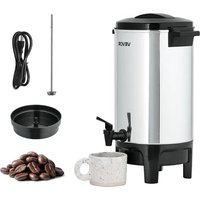


| Product type | Drip coffee maker |
| Brand | Vevor |
| Model | 58016V |
| Power supply | 120 V or 220-240 V AC, 50/60 Hz |
| Maximum capacity | Approximately 12 cups (according to levels on carafe) |
| Main functions | Brewing, keep warm, auto shut-off |
| Coffee type | Ground coffee (medium to coarse grind) |
| Brew time | Approximately 1 minute per cup |
| Operating temperature | 5 °C to 45 °C |
| Carafe material | Metal (not specified) |
| Regular cleaning | After each use: wash the interior, basket, stem and lid with warm soapy water |
| Recommended descaling | Every 2 weeks with a vinegar-water solution (1 quart water + white vinegar) |
| Safety | Auto shut-off, overheat protection (minimum water level required) |
| Included spare parts | Lid, basket, stem, faucet (spout), level gauge |
| Repairability | Power cord replaceable by an authorized workshop |
| Warranty | Not specified (follow instructions to avoid voiding) |
| Manufacturer | Shanghai Muxin Muye Co., Ltd. |
| Importer (Australia) | SIHAO PTY LTD, 1 ROKEVA STREET, ASTWC NSW 2122 |
| Importer (United States) | Sanven Technology Ltd., Suite 250, 9166 Anaheim |
Frequently Asked Questions - 58016V Vevor
User questions about 58016V Vevor
0 question about this device. Answer the ones you know or ask your own.
Ask a new question about this device
Download the instructions for your Coffee machine in PDF format for free! Find your manual 58016V - Vevor and take your electronic device back in hand. On this page are published all the documents necessary for the use of your device. 58016V by Vevor.
USER MANUAL 58016V Vevor
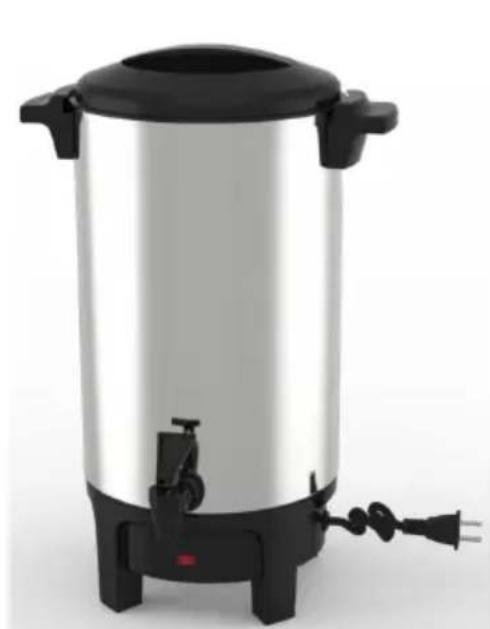
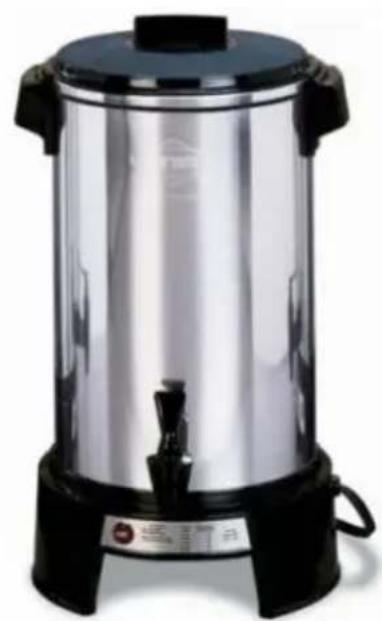
ELECTRIC COFFEE URN
MODEL:18102, 58016V-1, 18103, 58016V
VEVOR
ELECTRIC COFFEE URN
MODEL:18102, 58016V-1, 18103, 58016V
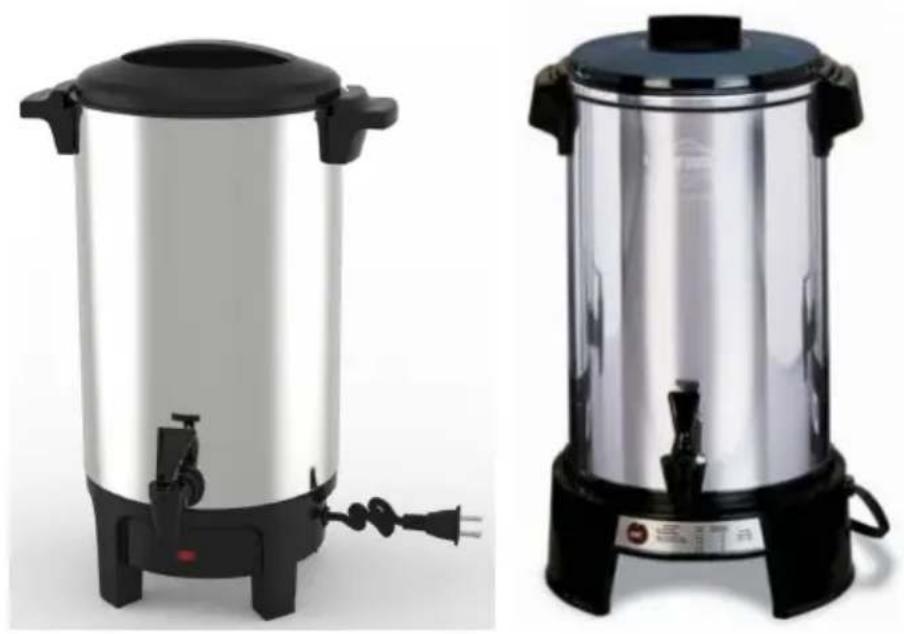
This is the original instruction. Please read all manual instructions carefully before operating. VEVOR reserves a clear interpretation of our user manual. The appearance of the product shall be subject to the product you received. Please forgive us that we won't inform you again if there are any technology or software updates on our product.
 | Warning-To reduce the risk of injury, user must read instructions manual carefully. |
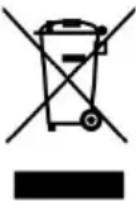 | CORRECT DISPOSALThis product is subject to the provision of European Direc 2012/19/EC. The symbol showing a wheelie bin crossed through indicates that the product requires separate refuse collection in the European Union. This applies to the proo and all accessories marked with this symbol. Products ma as such may not be discarded with normal domestic wast must be taken to a collection point for recycling electrical electronic devices |
 | Keep children away from the machine for fear of danger. |
 | Surface are liable to get hot during use. |
TO PREVENT PERSONAL INJURY OR PROPERTY DAMAGE, READ AND FOLLOW THE INSTRUCTIONS AND WARNINGS IN THIS CARE AND USE INSTRUCTION MANUAL.

IMPORTANT SAFEGUARDS

Use electricity safely and wisely. Observe safety precautions when using your
coffeemaker including the following:
- Read all instructions before using.
- Be sure coffeemaker contains water or brewed coffee before plugging in.
Do not leave coffeemaker plugged in when it is not being used.
- Plug coffeemaker into 120 or 220-240 volt AC electric outlet ONLY. Ensure that plug is wired correctly as follows. • Coffeemaker should always be unplugged and allowed to cool before cleaning.
- Do not let cord touch hot surfaces or hang over the edge of a counter, table or surface area.
- Make sure cover, basket and stem are properly attached before coffeemaker is plugged in (see instructions). No part of the coffeemaker should be removed during the brewing cycle as scalding could occur.
- Your coffeemaker, its cord and plug should not be used outdoors, immersed in liquids, placed near a hot electric or gas burner or placed in a heated oven.
- Do not touch coffeemaker when it is hot. Use handles or knob. • Supervise closely when coffeemaker is used by or near children.
- Use your coffeemaker only for the uses described in this booklet. Do not use attachments with your coffeemaker unless recommended by VEVOR.
- Do not use your coffeemaker if it or its cord are damaged or not working properly.
- This appliance is not suitable for installation in an area where a water jet could be used. • Children being supervised not to play with the appliance. • Children shall not play with the appliance.
- This appliance is only to be installed in locations where it can be overseen by trained personnel.
- This appliance can be used by children aged from 8 years and above and persons with reduced physical, sensory or mental capabilities or lack of experience and knowledge if they have been given supervision or instruction concerning use of the appliance in a safe way and understand the hazards involved.
- This appliance is not to be used by persons (including children) with reduced physical, sensory or mental capabilities, or lack of experience and knowledge, unless they have been given supervision or instruction. • Cleaning and user maintenance shall not be made by children without supervision.
SAVE THESE INSTRUCTIONS
WARNING: THIS APPLIANCE MUST BE GROUNDED
NOTICE
If the supply cord of this appliance is damaged, it must be replaced by a repair shop appointed by the manufacturer because special purpose tools and a special cord are required.
Promptly dispose of any plug that has been cut from the power supply cord.
WARNING: A shock hazard could result if the cut-off plug is inserted in a socket outlet elsewhere in the house.
COFFEE MEASURING GUIDE
Note: Use this chart only as a guide. Adjust the amount of water and coffee as needed to suit your taste.
| WATER LEVEL | AMOUNT OF GROUND COFFEE |
| 40 cups | 21/2 cups |
| 30 cups | 13/4 cups |
| 20 cups | 11/2 cups |
| 10 cups | 3/4 cup |
*1 cup = 150 mL serving
Allow approximately 1 minute per cup brewing time. Voltage changes or variations in water temperature will affect brewing time. NEVER MAKE LESS THAN THE MINIMUM CAPACITY OR MORE THAN THE MAXIMUM CAPACITY OF YOUR COFFEEMAKER.
INSTRUCTIONS FOR MAKING COFFEE
- Before using the first time, clean coffeemaker thoroughly. Refer to Regular Cleaning Instructions on page 4.
CAUTION: TO PREVENT PERSONAL INJURY OR ELECTRIC SHOCK, DO NOT IMMERSE COFFEEMAKER, ITS PLUG OR CORD IN WATER OR OTHER LIQUID.
- Always use coffeemaker on a dry, level surface. Be sure hands are dry.
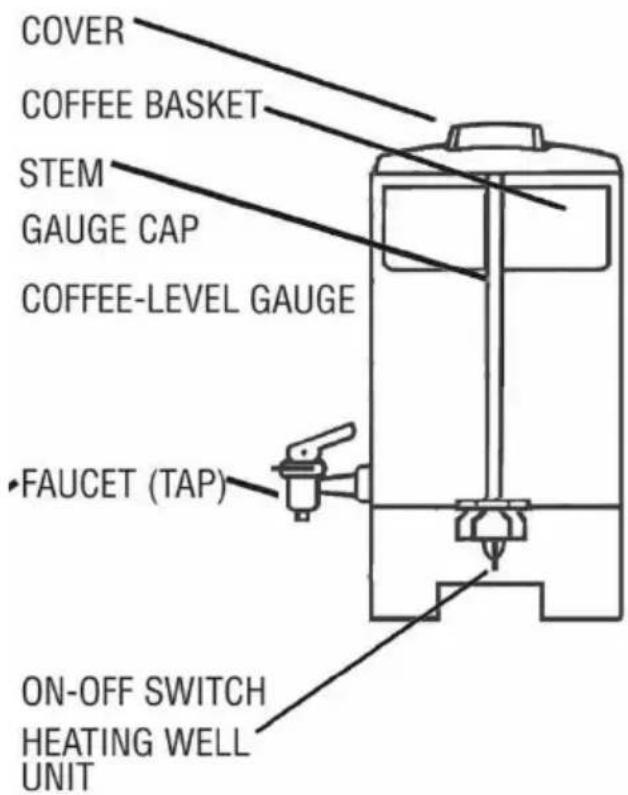
- With basket and stem removed, fill coffeemaker with COLD water. Marks on inside of coffeemaker show water levels.
- Press stem into heating well unit in bottom of coffeemaker; put basket on stem. Put electric perk ground coffee in basket; do not let any fall into stem. Follow proper chart for amount to use. Spread evenly in basket. (Use standard measuring cups as used to measure flour, sugar, etc. to measure coffee.) Amount of coffee can be adjusted to suit taste preference.
SPECIAL NOTE ON GRINDING BEANS: If grinding your own coffee beans, grind to medium coarseness for best results. DO NOT grind too fine (powder-like) as this can cause basket to flood.
- Place cover on coffeemaker, twisting to secure in place inside handles. Note the arrows on the cover for correct turning. To reduce coffee spills, especially if coffeemaker is tipped over, make sure cover has been turned clockwise until it is completely secured into the handle slots. Care should be used when moving the coffeemaker as the secured cover only temporarily reduces coffee spills if coffeemaker is tipped over.
- Plug cord into a 120 volt AC grounded electric outlet ONLY.
CAUTION: TO PREVENT PERSONAL INJURY OR PROPERTY DAMAGE, DO NOT ALLOW LONG CORD TO DRAPE OR HANG OVER THE EDGE OF A COUNTERTOP OR TABLETOP WHERE IT CAN BE PULLED ON BY CHILDREN OR TRIPPED OVER. YOUR COFFEEMAKER HAS A LONG CORD FOR EASY ACCESS TO ELECTRIC OUTLET. DO NOT ALLOW CHILDREN TO BE NEAR OR USE THE COFFEEMAKER WITHOUT CLOSE ADULT SUPERVISION.
- The coffeemaker will stop perking automatically. (Each cup requires no longer than 1 minute brewing.) Coffee is ready when light in base glows. Coffee will remain at serving temperature as long as coffeemaker is plugged in. Before serving, twist and remove cover. (Some condensation may form on the inside of the coffeemaker handles which is normal.) Using a hot pad, remove coffee basket and stem. If basket and stem are not removed, bitter oils from the extracted grounds will drip into coffee. Replace cover making sure it is completely secured in the handle slots.
- For cup-on-saucer filling, press faucet handle down. Release handle when filled. For a continuous flow when filling a coffee server, lift handle straight up until it holds the open position. Lower handle when server is filled.
- When about three cups of coffee remain in coffeemaker or when coffee can no, unplug cord from wall outlet
- To reheat cold coffee, simply plug in coffeemaker and push in. Be sure basket and stem are removed. There must be at least 10 cups of coffee in coffeemaker to reheat. Operate between ambient temperatures 5°C - 45°C (40°F - 110°F).
CAUTION: LIQUID MUST COVER INSIDE BOTTOM OF UNIT AT ALL TIMES. FALLING BELOW THIS LEVEL (APPROX. 2 INCHES) COULD CAUSE OVERHEATING AND DAMAGE TO INTERNAL COMPONENTS. THIS WILL VOID THE WARRANTY.
INSTRUCTIONS FOR CLEANING COFFEEMAKER
Regular Cleaning – After each use
- Unplug coffeemaker. Do not let water contact electrical parts in base.
- Clean inside of coffeemaker by filling with hot water to about one-third its capacity. Add detergent and wash with a sponge or cloth. Twist pad inside unit well to clean. Unit well must be kept clean for coffeemaker to work properly. Rinse thoroughly with clear hot water and dry.
- Clean faucet (tap) by letting clear hot water run through it, while moving handle up and down. (Keep faucet (tap) in closed position when not in use.)
- Clean basket, stem and cover in hot soapy water. Rinse thoroughly. Do not clean cover in a dishwasher; surface may permanently discolor.
- Clean outside of coffeemaker with a damp cloth, then polish with a dry cloth. Sterling silver polish may be used. Do not use scouring pads or powders.
SPECIAL CLEANING - EVERY TWO WEEKS
If coffeemaker is used daily, a special cleaning every 2 weeks (in addition to regular cleaning) is necessary to thoroughly clean the heating well unit. If the heating well unit is not kept clean, the performance of the coffeemaker will be affected.
- Fill coffeemaker with 1 quart each of cold water and white distilled vinegar. Put empty basket and stem in coffeemaker, secure cover on and plug in. Let coffeemaker run through perking cycle. Let stand 20 minutes. or unplug. Drain coffeemaker and cool. (The vinegar and water solution may be saved for future cleaning. Label container of solution indicating its contents and use. Add an additional 1 to 2 cups (16.3 cl to 32.6 cl) of vinegar to the solution when reusing for thorough cleaning.)
- Add a small amount of hot soapy water to coffeemaker and scour interior and heating well unit following regular cleaning instructions. Drain. Wash basket and stem.
- Clean coffee-level gauge. Unscrew the gauge cap and remove the tube. Clean tube in hot soapy water. Rinse thoroughly. Replace. The brush may also be used to clean the stem.
- Unscrew faucet handle. Move a brush up and down through faucet, then insert brush through opening inside coffeemaker to clean faucet connection. Wash faucet handle in hot soapy water and rinse. Replace faucet handle.
- Rinse inside of coffeemaker and parts thoroughly with clean hot water, then dry.
- Do not use a baking soda solution; it may discolor and pit the surface.
INSTRUCTIONS FOR HEATING WATER FOR INSTANT BEVERAGES Plain
water may be heated in your coffeemaker for use with instant beverages. Simply fill the clean coffeemaker with cold water to the desired cup level and place stem and clean, empty basket into position as for making coffee. Secure cover in place and Plug cord into grounded electric outlet. Heat water until perking stops and light in base glows.
Twist cover, remove basket and stem with a hot pad and replace cover, making sure it is secured in place. Unplug coffeemaker when less than 3 cups (49 cl) of water remain.
Inside of coffeemaker may darken after heating water which is normal and does not affect coffeemaker or water heated.
When coffeemaker is used to heat water only, it must be cleaned well after each use in addition to special weekly cleaning using vinegar to remove mineral deposits. If these deposits are not removed, pitting of the metal can occur and result in damage to coffeemaker. See Special Cleaning Instructions on page 4.
Manufacturer: Shanghaimuxinmuyeyouxiangongsi
Address: Shuangchenglu 803nong11hao1602A-1609shi, baoshanqu, shanghai 200000 CN.
Imported to AUS: SIHAO PTY LTD. 1 ROKEVA STREETEASTWOOD NSW 2122 Australia
Imported to USA: Sanven Technology Ltd. Suite 250, 9166 Anaheim Place, Rancho Cucamonga, CA 91730
| UK | REP |
YH CONSULTING LIMITED. C/O YH Consulting Limited Office 147, Centurion House, London Road, Staines-upon-Thames, Surrey, TW18 4AX
| EC | REP |
Affordable. Reliable. Home Improvement.
Affordable. Reliable. Home Improvement.
ELECTRIC COFFEE URN
MODEL: 18102, 58016V-1, 18103, 58016V
supervision instructions
| EAU NIVEAU | MONTANT DE SOL CAFÉ |
| 40 tasses | 21/2 tasses |
| 30 tasses | 13/4 tasses |
| 20 tasses | 11/2 tasses |
| 10 tasses | 3/4 tasse |
* 1 cup = 150 mL serving
INJURY OR PROPERTY DAMAGE, DO NOT
ALLOW LONG CORD TO DRAPE OR HANG
OVER THE EDGE OF COUNTER OR ON TOP
TABLET WHERE IS IT - IT CAN BE PULLED ON BY
CHILDREN OR TORN ON. YOUR COFFEE MACHINE
HAS A LONG CORD FOR EASY ACCESS TO
ELECTRICAL OUTLET. DO NOT
Place, Rancho Cucamonga, CA 91730
| UK | REP |
YH CONSULTING LIMITED. C/O YH Consulting
Limited Office 147, Centurion House, London
Road, Staines-upon-Thames, Surrey, TW18 4AX
| EC | REP |
E-CrossStu GmbH
Mainzer Landstr.69,
60329 Frankfurt am Main.

VEVOR
Affordable. Reliable. Home Improvement.
Affordable. Reliable. Home Improvement.
ELECTRIC COFFEE URN
MODEL: 18102, 58016V-1, 18103, 58016V
MINIMUM CAPACITY OR MORE THAN THE MAXIMUM CAPACITY
INSTRUCTIONS
FOR MAKING COFFEE
COFFEE
YH CONSULTING LIMITED. C/O YH Consulting Limited Office 147, Centurion House, London Road, Staines-upon-Thames, Surrey, TW18 4AX
| EC | REP |
Affordable. Reliable. Home Improvement.
ELECTRIC COFFEE MAKER
MODEL: 18102, 58016V-1, 18103, 58016V
VEVOR
Affordable. Reliable. Home Improvement.
ELECTRIC COFFEE URN
MODEL: 18102, 58016V-1, 18103, 58016V
YH CONSULTING LIMITED. C/O YH Consulting Limited Office 147, Centurion House, London Road, Staines-upon-Thames, Surrey, TW18 4AX
| EC | REP |
Affordable. Reliable. Home Improvement.
ELECTRIC COFFEE URN
MODEL: 18102, 58016V-1, 18103, 58016V
VEVOR
Affordable. Reliable. Home Improvement.
ELECTRIC COFFEE URN
MODEL: 18102, 58016V-1, 18103, 58016V
INSTRUCTIONS
FOR BREWING
COFFEE
YH CONSULTING LIMITED. C/O YH Consulting Limited Office 147, Centurion House, London Road, Staines-upon-Thames, Surrey, TW18 4AX
| EC | REP |
Affordable. Reliable. Home Improvement.
Electric coffee urn
MODEL: 18102, 58016V-1, 18103, 58016V
VEVOR
ELECTRIC COFFEE URN
MODEL: 18102, 58016V-1, 18103, 58016V

*1 cup = 150 mL serving
COFFEE MAKER.
INSTRUCTIONS
FOR MAKING
COFFEE
Make sure the carafe is placed properly over the hot plate.
KEEP THE CORD AWAY FROM THE EDGE OF THE COUNTER
TOP OF TABLE OR WHERE IT CAN BE
PULLED BY CHILDREN OR TORN
OVER. YOUR COFFEE MAKER HAS A LONG CORD
FOR EASY ACCESS TO ELECTRICAL
OUTLET. DO NOT ALLOW CHILDREN
NEAR ITS CLOSE OR USE THIS
COFFEE MAKER WITHOUT CLOSE
FOR ADULTS OVERVIEW.
- The coffee maker will stop working automatically.
FALL BELOW THIS LEVEL (APPROX. 2 INCHES)
COULD CAUSE OVERHEATING AND
DAMAGE TO INTERNAL COMPONENTS.
THIS WILL VOID THE WARRANTY.
INSTRUCTIONS
FOR CLEANING
COFFEE MAKER
Regular cleaning –
After each
use
- Unplug the coffee maker.
Good coverage in A dishwasher;
YH CONSULTING LIMITED. C/O YH Consulting Limited Office 147, Centurion House, London Road, Staines-upon-Thames, Surrey, TW18 4AX
| EC | REP |
Affordable. Reliable. Home Improvement.
ELECTRIC COFFEE MAKER
MODELS: 18102, 58016V-1, 18103, 58016V
VEVOR
Affordable. Reliable. Home Improvement.
ELECTRIC COFFEE URN
MODELS: 18102, 58016V-1, 18103, 58016V
DAMAGE TO INTERNAL COMPONENTS. THIS
WILL BE THE IDENTIFIER OF THIS WARRANTY.
INSTRUCTION
FOR CLEANING
COFFEE MAKER
YH CONSULTING LIMITED. C/O YH Consulting Limited Office 147, Centurion House, London Road, Staines-upon-Thames, Surrey, TW18 4AX
| EC | REP |
ELECTRIC COFFEE URN
MODEL: 18102, 58016V-1, 18103, 58016V
VEVOR
ELECTRIC COFFEE URN
MODEL: 18102, 58016V-1, 18103, 58016V
TO PREVENT PERSONAL
INJURY OR
READ
AND FOLLOW
STOMACH DAMAGE,
THE INSTRUCTIONS AND WARNINGS IN
THIS
CARE AND
INSTRUCTIONS FOR USE.

IMPORTANT
SAFETY INFORMATION

Use electricity
safely
and wisely.
Observe
safety
*1 cup = 150 mL serving
cup. Voltage changes or variations in
water temperature will affect brewing time. NEVER MAKE LESS THAN THE
MINIMUM CAPACITY OR MORE THAN THE MAXIMUM CAPACITY
OF YOUR
COFFEE MAKER.
INSTRUCTIONS
- Before
using the first
time, clean the coffee maker thoroughly. See Regular
Cleaning Instructions
page 4.
WARNING: TO PREVENT PERSONAL INJURY
OR ELECTRIC SHOCK, DO NOT IMMERSE COFFEE MAKER,
ITS PLUG OR CORD IN WATER OR OTHER LIQUIDS.
PLACE THE COFFEE MAKER ON A FLAT, STABLE SURFACE.
KEEP THE CORD AWAY FROM CHILDREN.
DO NOT LET THE CORD HANG OVER THE EDGE OF TABLE OR COUNTER.
YOUR COFFEE MAKER HAS A LONG CORD FOR EASY ACCESS TO ELECTRICAL OUTLET.
DO NOT ALLOW CHILDREN TO BE NEAR THE COFFEE MAKER.
COFFEE MACHINE WITHOUT LID
ADULT OVERLAYING VISION.
YH CONSULTING LIMITED. C/O YH Consulting Limited Office 147, Centurion House, London Road, Staines-upon-Thames, Surrey, TW18 4AX
| EC | REP |
- VEVOR
- IMPORTANT SAFEGUARDS
- SAVE THESE INSTRUCTIONS
- WARNING: THIS APPLIANCE MUST BE GROUNDED
- NOTICE
- COFFEE MEASURING GUIDE
- INSTRUCTIONS FOR MAKING COFFEE
- INSTRUCTIONS FOR CLEANING COFFEEMAKER
- REGULAR CLEANING – AFTER EACH USE
- SPECIAL CLEANING - EVERY TWO WEEKS
- INSTRUCTIONS FOR HEATING WATER FOR INSTANT BEVERAGES PLAIN
- INSTRUCTIONS
- FOR MAKING COFFEE
- COFFEE
- FOR BREWING
- FOR CLEANING
- COFFEE MAKER
- INSTRUCTION
- IMPORTANT
- SAFETY INFORMATION
Brand : Vevor
Model : 58016V
Category : Coffee machine