CS-4 - Chocolate fountain Vevor - Free user manual and instructions
Find the device manual for free CS-4 Vevor in PDF.

| Product Type | Chocolate Fountain / Chocolate Melter |
| Brand | Vevor |
| Model | CS-4 |
| Dimensions (L x W x H) | 540 x 430 x 240 mm |
| Power Supply | 220-240 V ~ 50/60 Hz (EU) or 110-120 V ~ 60 Hz (US) |
| Power | 1.5 kW |
| Maximum Chocolate Capacity | 35 lb (approx. 15.9 kg) |
| Material | Stainless steel (body and removable inner pot) |
| Adjustable Temperature Range | 80 °F to 130 °F (27 °C to 54 °C) |
| Heating System | Double boiler with stabilized thermostat |
| Temperature Control | Thermostatic dial with indicator light |
| Indicator Lights | Power light, heating light, water refill light |
| Main Functions | Melting and keeping chocolate warm, manual or continuous tempering via Revolution machine |
| Included Accessories | Stainless steel lid, removable inner pot |
| Safety | Do not immerse, use on flat surface, grounding, disconnect when not in use, reset button |
| Maintenance and Cleaning | Clean after use with a damp cloth, do not immerse, maintenance by a qualified electrician |
| Country of Manufacture | China (Vevor brand) |
Frequently Asked Questions - CS-4 Vevor
User questions about CS-4 Vevor
0 question about this device. Answer the ones you know or ask your own.
Ask a new question about this device
Download the instructions for your Chocolate fountain in PDF format for free! Find your manual CS-4 - Vevor and take your electronic device back in hand. On this page are published all the documents necessary for the use of your device. CS-4 by Vevor.
USER MANUAL CS-4 Vevor
Technical Support and E-Warranty Certificate www.vevor.com/support
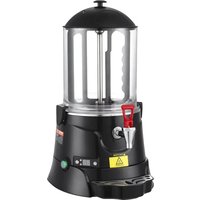
CHOCOLATE MELTER
We continue to be committed to provide you tools with competitive price. "Save Half", "Half Price" or any other similar expressions used by us only represent estimate of savings you might benefit from buying certain tools with us compared top brands and does not necessarily mean to cover all categories of tools offered are kindly reminded to verify carefully when you are placing an order with us actually saving half in comparison with the top major brands.
VEVOR®
TOUGH TOOLS, HALF PRICE
CHOCOLATE MELTER
natural_image
Line drawing of a two-tiered kitchen appliance with control panel and fan (no text or symbols)natural_image
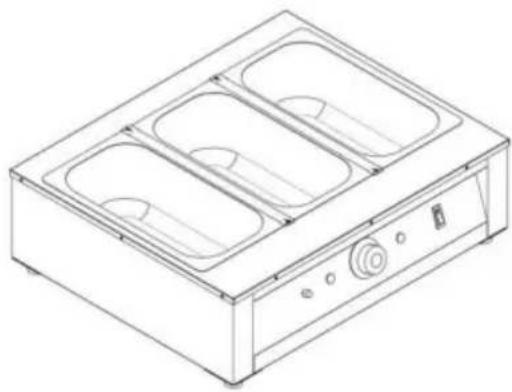
Line drawing of a three-tiered appliance with control panel and buttons (no text or symbols)
natural_image
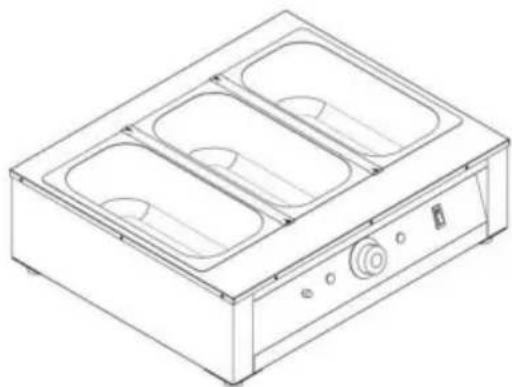
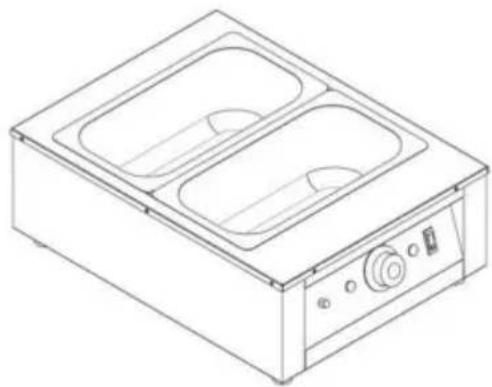
Line drawing of a rectangular kitchen appliance with two recessed compartments and a control panel (no text or symbols)CS-3-EU、CS-3-US CS-4-EU、CS-4-US
NEED HELP? CONTACT US!
Have product questions? Need technical support? Please feel free to contact us:
Technical Support and E-Warranty Certificate www.vevor.com/support
This is the original instruction, please read all manual instructions carefully before operating. VEVOR reserves a clear interpretation of user manual. The appearance of the product shall be subject to product you received. Please forgive us that we won't inform you and there are any technology or software updates on our product.
Basic Information
Chocolate Melter is a time-saving tabletop chocolate melting and manual tempering machine.
Like all ChocoVision products, the Chocolate Melter has been assembled utiliz the strictest of manufacturing guidelines to ensure precision, reliability and longevity. This stainless steel constructed unit will melt up to 35 lbs. of choc which can be tempered in one of your Revolution Series chocolate tempering machines (saving hours of waiting time throughout a day), or be tempered manually in the Chocolate Melter itself. The Chocolate Melter allows full, man temperature control with a user-friendly stabilized thermostat ranging between 80°F-130°F.
Contents of this Package
- Stainless steel Chocolate Melter unit complete with temperature-adjusting thermostat dial.
- Removable stainless steel inner pan, sized to melt and hold 35 lbs. of chocolate.
- Stainless steel cover for sanitary purposes and avoidance of heat-loss.
Specifications
| MODEL | VOLTAGE | POWER | DIMENSIONS/mm |
| CS-2-EU | 220~240V/50~60Hz | 0.8KW | 530*285*235 |
| CS-2-AU | 220~240V/50~60Hz | 0.8KW | 530*285*235 |
| CS-2-US | 110~120V/60Hz | 0.8KW | 530*285*235 |
| CS-3-EU | 220~240V/50~60Hz | 1.5KW | 620*516*245 |
| CS-3-US | 110~120V/60Hz | 1.5KW | 620*516*245 |
| CS-4-EU | 220~240V/50~60Hz | 1.5KW | 540*430*240 |
| CS-4-US | 110~120V/60Hz | 1.5KW | 540*430*240 |
Safety Precautions
- Do not submerge in water, even partially. Avoid moisture.
- Use this unit only at specified voltage.
- Make certain the unit is grounded.
- Only use the unit indoors and on a flat surface.
- Remove the plug from socket when not in use.
- Keep unit out of extreme temperatures.
- Do not take unit apart (other than pan and lid).
- When in the “off” position, keep the thermostat dial off (or turned all the way to the left).
Starting the Unit
- Always use on a flat surface with each side at least six inches from a
■ Make certain that inner tray is in place. - Plug the unit into a wall socket
- Remove the internal pan and fill the unit to 1/3 capacity with water. Do NOT TURN THE HEATER ON WITHOUT WATER INSIDE.
- DO NOT FILL WATER PASSED THE DENOTED WATER-LINE INSIDE THE MACHINE.
- Switch the power on (you will see Power Indicator light come on)
- Set the thermostat dial to desired temperature (between 80^ - 130^ ). Once the desired temperature is reached, a yellow indicator light will be on and the heater will shut off.
- Once the chocolate drops below the desired temperature point, the heat will turn back on, indicated by the yellow light turning back on and the will continue to heat once more until the chocolate has once again reached its desired temperature.
- Chocolate melts best between 30-85°C. 35 lbs of chocolate should take between 2-4 hours to melt and does so best with the lid in place.
Using the Unit as a Chocolate Melter
- Chocolate melts best with low, indirect, even heat. If heated too quickly hot, chocolate can burn. Most chocolates achieve best results melting slowly at between 110°F-115°F.
- Unevenly melted and/or burnt chocolate will hinder the tempering process
- Set the thermostat dial to your desired temperature and allow the chocolate to slowly and evenly melt to that point. Stir sporadically.
- Keep the lid in place at all times when not tempering or dispensing chocolate from the unit.
To reset the chocolate melter, follow the two steps
below:
- In the event of “WATER REFILL” indicator ignites, it means the water ins the water tank is not sufficient, please add water into the water tank immediately.
- After the temperature inside drops to 50°C or below, remove the reset c and press reset button inside, "WATER REFILL" indicator goes out, the chocolate melter is now back to normal working status.
Continual Tempering by Feeding Chocolate from
Chocolate Melter into Revolution Machine
- Temper chocolate as normal in a Revolution Series chocolate tempering machine.
- With Green “Ready” light is on, raise temperature to desire temperature
-
When the pool of chocolate is half empty, add the melted, 30C chocolate behind the baffle to fill the machine.
-
Wait a few (about 7) minutes until the chocolate in front of the baffle smooth and shiny.
- Add 10% more un-melted chocolate behind the baffle.
- Dip your items as normal.
- Make sure you always have un-melted chocolate behind baffle.
Warnings:
- The un-melted chocolate behind the baffle is constantly melting. DO NOT OVERFLOW YOUR MACHINE!.
- Whenever you add new melted chocolate, wait a few minutes for everything to mix.
Comments:
- You can produce over 100 pounds of tempered chocolate in a 6 hour period using this method.
- The only limitation is the amount of melted chocolate you have available
- When dipping, the chocolate does not thicken. Pace yourself to the melting rate of the un-melted chocolate in the back baffle, i.e., it may faster than you can dip.
Maintenance and service
- The maintenance staff shall have an electrician qualification. Don't Conduct maintenance with power-on.
- Transportation and storage: during transportation, the machine shall be carefully protected and away from shaking. The packaged machine shall be stored in the open air. It should be stored in a ventilated warehouse without corrosive gas. Prohibit putting upside down.
Trouble shooting
| Failures | Cause | Solutions |
| 1. Power indicator is not on and unit not heating | No Power to machine. | 1. Check power supply |
| 2.heating indicator is but the temperature dose not rise | 1.connection of the electric heating tube is loos | 1.fasten the two terminals between the electric heating tube and the screw2.replace the electric heating tube |
| 3.power indicator is or but the setting temperature will not rise | 1.temperature controller damaged | 1.replace the temperature controller |
| 4.temperature controller is normal but indicator is not on | 1.indicator damaged | 1.replace indicator |
VEVOR®
TOUGH TOOLS, HALF PRICE
Technical Support and E-Warranty Certificate
www.vevor.com/support
VEVOR®
TOUGH TOOLS, HALF PRICE
natural_image
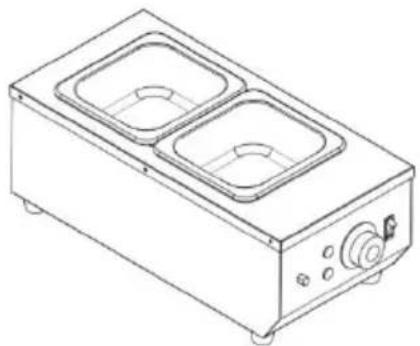
Line drawing of a rectangular kitchen appliance with two circular cavities and a control knob (no text or symbols)CS-2-EU, CS-2-AU, CS-2-US

natural_image
Line drawing of a three-tiered appliance or oven unit with control panel (no text or symbols)CS-3-EU CS-3-US

natural_image
Line drawing of a rectangular appliance with two recessed compartments and a control panel (no text or symbols)CS-4-EU CS-4-US
BESOIN D'AIDE? CONTACTEZ-NOUS!
natural_image
Line drawing of a rectangular kitchen appliance with two circular cavities and a control knob (no text or symbols)CS-2-EU, CS-2-AU, CS-2-US

natural_image
Line drawing of a three-tiered appliance with control panel and side outlets (no text or symbols)CS-3-EUÿCS-3-US CS-4-EUÿCS-4-US

natural_image
Line drawing of a rectangular appliance with two recessed compartments and a control panel (no text or symbols)www.vevor.com/support
www.vevor.com/support
VEVOR®
TOUGH TOOLS, HALF PRICE
natural_image
Line drawing of a rectangular kitchen appliance with two circular cavities and a control knob (no text or symbols)CS-2-EU, CS-2-AU, CS-2-US

natural_image
Line drawing of a three-tiered appliance with control panel and side outlets (no text or symbols)
natural_image
Line drawing of a rectangular appliance with two recessed compartments and a control panel (no text or symbols)CS-4-EU, CS-4-USCS-3-EU, CS-3-I
natural_image
Line drawing of a rectangular kitchen appliance with two circular cavities and a control knob (no text or symbols)CS-2-EU CS-2-AU CS-2-US
natural_image
Line drawing of a three-tiered appliance with control panel and side outlets (no text or symbols)
natural_image
Line drawing of a rectangular appliance with two recessed compartments and a control panel (no text or symbols)www.vevor.com/support
natural_image
Line drawing of a rectangular appliance with two circular cavities and a control knob (no text or symbols)CS-2-EU, CS-2-AU, CS-2-US
natural_image
Line drawing of a three-tiered appliance or oven unit with control panel (no text or symbols)CS-3-EU, CS-3-US CS-4-EU, CS-4-US
natural_image
Line drawing of a rectangular appliance with two recessed compartments and a control panel (no text or symbols)POTRZEBUJESZ POMOCY? SKONTAKTUJ SIĘ Z NAMI!
natural_image
Line drawing of a rectangular kitchen appliance with two circular cavities and a control knob (no text or symbols)natural_image
Line drawing of a three-tiered appliance with control panel and side outlets (no text or symbols)
natural_image
Line drawing of a rectangular appliance with two recessed compartments and a control panel (no text or symbols)CS-4-EU, CS-4-VSCS-3-EU, CS-3-
HULP NODIG? NEEM CONTACT MET ONS OP!
Chocoladesmelter in Revolution Machine
garantiecertificaat www.vevor.com/support
VEVOR®
TOUGH TOOLS, HALF PRICE
natural_image
Line drawing of a rectangular kitchen appliance with two circular cavities and a control knob (no text or symbols)CS-2-EU, CS-2-AU, CS-2-US

natural_image
Line drawing of a three-tiered appliance with control panel and side outlets (no text or symbols)CS-3-EU, CS-3-US CS-4-EU, CS-4-US

natural_image
Line drawing of a rectangular appliance with two recessed compartments and a control panel (no text or symbols)BEHÖVER HJÄLP? KONTAKTA OSS!
www.vevor.com/support