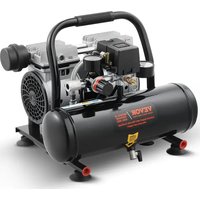
JR550GJ4L - Compressor Vevor - Free user manual and instructions
Find the device manual for free JR550GJ4L Vevor in PDF.


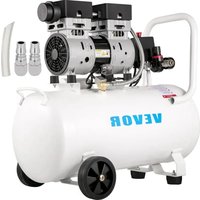
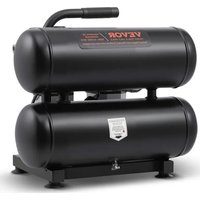
| Product Type | Oil-free horizontal air compressor |
| Brand | Vevor |
| Model | JR550GJ4L |
| Power | 1 HP (630 W) |
| Voltage | 120 V ~ 60 Hz |
| Maximum Pressure | 120 psi (8.3 bar) |
| Tank Capacity | 4 L (1 gallon) |
| Rated Speed | 1700 RPM |
| Lubrication | Oil-free - no lubrication maintenance required |
| Main Functions | Powering spray guns, impact wrenches and other pneumatic tools |
| Maintenance | Drain reservoir moisture daily; clean air filter periodically |
| Safety | Safety valve, auto-reset thermal protection, on/off switch |
| Spare Parts | Available on Vevor website; check valve, safety valve, air filter |
| Repairability | Parts replacement by qualified technician; do not modify the tank |
| Dimensions (approx.) | Not specified, but horizontal model with wheels and handle |
| Weight (approx.) | Approximately 15 kg (estimated) |
Frequently Asked Questions - JR550GJ4L Vevor
User questions about JR550GJ4L Vevor
0 question about this device. Answer the ones you know or ask your own.
Ask a new question about this device
Download the instructions for your Compressor in PDF format for free! Find your manual JR550GJ4L - Vevor and take your electronic device back in hand. On this page are published all the documents necessary for the use of your device. JR550GJ4L by Vevor.
USER MANUAL JR550GJ4L Vevor
Technical Support and E-Warranty Certificate www.vevor.com/support
HORIZONTAL AIR COMPRESSOR
MODEL:JR550/JR750
We continue to be committed to provide you tools with competitive "Save Half", "Half Price" or any other similar expressions used by represents an estimate of savings you might benefit from buying cer with us compared to the major top brands and does not necessarily cover all categories of tools offered by us. You are kindly reminded carefully when you are placing an order with us if you are actually in comparison with the top major brands.
VEVOR®
TOUGH TOOLS, HALF PRICE
HORIZONTAL AIR
COMPRESSOR
MODEL:JR550/JR750
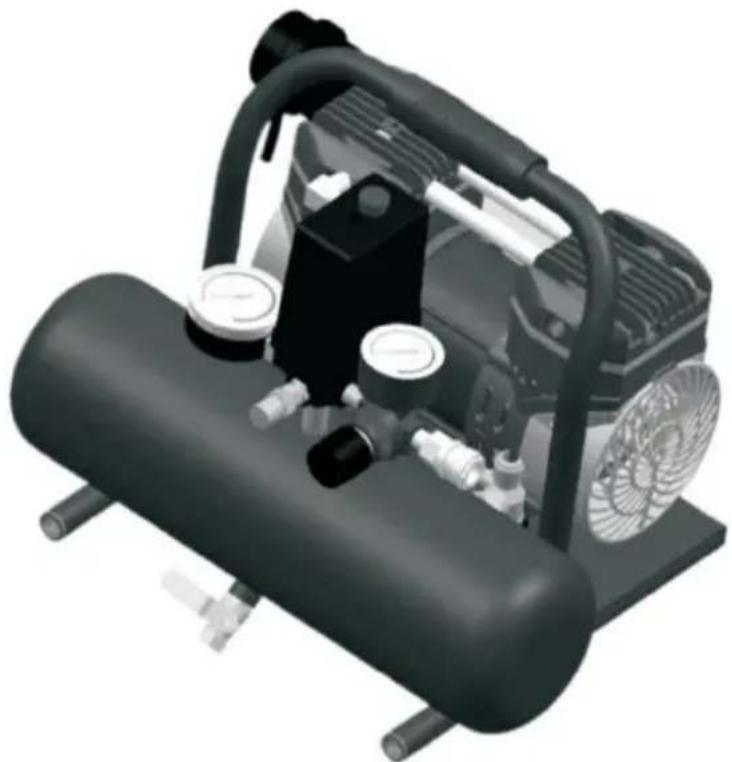
natural_image
3D rendering of an air compressor with cooling fan and pressure regulator (no text or symbols visible)NEED HELP? CONTACT US!
Have product questions? Need technical support? Please feel fr contact us:
Technical Support and E-Warranty Certificate www.vevor.com/support
This is the original instruction, please read all manual instruction carefully before operating. VEVOR reserves a clear interpretation user manual. The appearance of the product shall be subject to product you received. Please forgive us that we won't inform you there are any technology or software updates on our product.
INSTRUCTIONS
Preface
First of all, let us express our heartfelt thanks to our customers who have purchased our equipment This manual is for customer service to make better. Written with this equipment.Hope the company's products and services to bring you the canal courtesy.
Important reminder
For your own safety, before assembling and using such products, you must find this manual to clarify the unique operation, application, and possible problems of this equipment.
Describe
The oil-free compressor is designed specifically for self-service users in various household and automotive operations. These compressors provide power for spray guns, impact wrenches, and other tools. These devices can operate with oil. The compressed air from the device will contain moisture. If the application requires dry air, please install a water filter or air dryer.
Safety signs
In this operating manual and on the machine, safety symbols and warning we are used to convey important safety information. This section will help you enhance your understanding of these safety symbols and warning words.
▲DANGER!
Danger indication Emergency situations, if not avoided, can lead to death or serious injury.
▲WARNING!
Warning indicator A potentially dangerous situation, if not avoided, can lead to death or serious injury.
▲CAUTION!
Caution indicates a hazardous situation, which, if not avoided, MAY result in m or moderate injury.
▲NUTICE!
Notice indicates important information that if not followed, MAY cause damage equipment.
Unpicking
After unpacking the unit, inspect carefully for any damage that may have occurred during transit. Make sure to tighten fittings, bolts, etc, before putting unit into service.
▲WARNING!
Do not operate unit if damaged during shipping. Handling or use. Damage may result in bursting and cause injury or property damage.
▲DANGER!
Breathable Air Warning
This compressor is not equipped and should not be used "as is " to supply breathing quality air.
For any application of air for human consumption, the air compressor will need be fitted with suitable in-line safety and alarm equipment. This additional equipment is necessary to properly filter and purify the air to meet minimal specifications for Grade D breathing as described in Compressed
GasSpecificationAssociationCommodityG7.1-1966.OSHA 29 CFR
1910.134.and/or Canadian Standards Associations (CSA)
GENERAL SAFETYINFORMATION
Due to the use of air compressors and other components (material pump spr guns, filters, lubricators, hoses, etc.), which form a high-pressure pumping system the following safety measures must always be followed:
- Carefully read all manuals included with this product to thoroughly familiarize yourself with the control and correct use of the equipment.
- Comply with all local electrical and safety regulations, as well as the National Electrical Code (NEC) and Occupational Safety and Health Act (OSHA) in the United States.
- Only people familiar with these safety operating rules can use the compre
-
Keep visitors away and never allow children to enter the work area.
-
When operating pumps or devices, please wear safety glasses and use her protection.
- Do not stand or use the pump or device as a handle.
- Before each use, check the compressed air system and electrical component for signs of damage, deterioration, weakness, or leakage. Repair or replace defective items before use.
- Check all fasteners for tightness at regular intervals.
▲WARNING!
Equipment and control devices can generate arcs, igniting flammable gases or vapors. Do not operate or repair in or near flammable gases or vapors. It is prohibited to store flammable liquids or gases near the compressor.

▲CAUTION!
Even if the unit stops, the compressor components may still be hot.
- Keep your fingers away from the running compressor, as moving quickly a overheating components can cause injury and/or burns.
- If the equipment begins to vibrate abnormally, please stop the engine/motor and immediately check the cause. Vibration is usually a warning of a malfunction. To reduce the risk of fire, the exterior of the engine/motor should be kept from solvents, or excessive lubricating grease.
▲ DANGER!
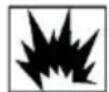
Do not attempt to repair or modify the fuel tank! Welding, drilling, or other modification can weaken the tank, leading to tank rupture or
explosion damage. Be sure to replace worn or damaged fuel tanks.
▲WARNING!
Never remove or attempt to adjust safety valve. Keep safety valve free from and other accumulations.
▲WARNING! Drain liquid from tank daily
- Tanks rust from moisture build-up, which weakens the tank. Make sure to tank regularly and inspect periodically for unsafe conditions such as rust forms and corrosion.
- Fast moving air will stir up dust and debris. which may be harmful. Release slowly when draining moisture depressurizing the compressor system.
SPRAYING PRECAUTIONS
▲WARNING!
Do not spray flammable materials in vicinity of open flame or near ignition s including the compressor unit.
15.Do not smoke when spraying paint, insecticides, or other flammable substances.
16. Use a face mask/respirator when spraying and spray in a well ventilated a prevent health and fire hazards.
17. Do not spray paint or other spraying materials directly onto the compresso Place the compressor as far away from the spraying area as possible to mix the accumulation of excessive spray on the compressor.
18. When spraying or cleaning with solvents or toxic chemicals, follow the instructions provided by the chemical manufacturer.
ASSEMBLY WHEEL ASSEMBLY
Fit the wheels shown in Figure 1.
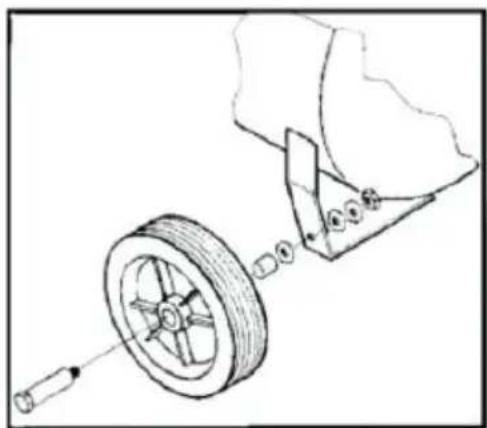
natural_image
Technical line drawing of a mechanical assembly with a wheel and gear (no text or symbols)MAIN TECHNICAL DATA
| Product Name | Bedroom air compressor | |||
| Model | JR550 | JR750 | ||
| Voltage | 120V~/60Hz | 220-240V~50Hz | 120V~/60Hz | 220-240V~/50Hz |
| Speed | 1700rpm | 1400rpm | 3400rpm | 2800rpm |
| Max pressure | 120psi | 120psi | 120psi | 120psi |
| Air storage tank capacity | 1 gallons | 4L | 2 gallons | 8L |
| Power | 1HP | 630W | 1HP | 860W |
Install
position
It is very important to install the compressor in a clean and well ventilated | The minimum gap between the compressor and the wall is 18 inches, as ob can obstruct the airflow, and the surrounding air temperature should not exceed 100 ° F.
▲CAUTION!
Do not locate the compressor air inlet near steam, paint spray, sandblast area, any other source of contamination, This debris will damage the motor.
ELECTRICAL INSTALLATION
▲WARNING!
All wiring and electrical connections should be carried out by qualified electric installation must comply with local regulations and national electrical regulations
▲CAUTION!

Never use an extension cord with this product. Use additional air heating instead of an extension cord to avoid power loss and permanent damage, Use of an extension cord voids the warranty.
▲ DANGER!

Improper use of grounding plug can result in a possible risk of electrical shock!
▲ DANGER!
Do not use a grounding adapter with this product!
- If repair or replacement of cord or plug is necessary, do not connect grow wire to either flat blade terminal. The wire with insulation having an external surface that is green (with or without yellow stripes) is the grounding wire.
▲WARNING!
Never connect green (or green and yellow) wire to a live terminal.
- Check with a qualified electrician or serviceman if grounding instructions are completely understood, or if in doubt as to whether product is properly ground. Do not modify plug provided; if it will not fit outlet, have proper outlet installed qualified electrician.
▲WARNING!
- Local electrical wiring codes differ from area to area. Source wiring, plug a protector must be rated for at least the amperage and voltage indicated motor nameplate, and meet all electrical codes for this minimum.
- Use a slow blow fuse or a circuit breaker.
OPERATION
Pressure Switch-Auto/Of Switch-In the AUTO position, the compressor shuts c automatically when tank pressure reaches the maximum preset pressure. In the OFF position.the compressor will not operate. This switch should be in the O position when connecting or disconnecting the power cord from the electrical or when changing air tools.
Regulator-The regulator controls the amount of air pressure released at the outlet.
Safety valve-This valve automatically releases air if the tank pressure exceeds the preset maximum.
Discharge Tube-This tube carries compressed air from the pump to the chec valve. This tube becomes very hot during use. To avoid the risk of severe I never touch the discharge tube.
Check Valve-A one-way valve that allows air to enter the tank, but prevents the tank from flowing back into the compressor pump.
Handle-Designed to move the compressor.
▲WARNING!
Never use the handle on wheeled units to lift the unit completely off the gro Drain Petcock-This valve is located on the bottom of the tank. Use this valve drain moisture from the tank daily to reduce the risk of corrosion.
Reduce tank pressure below 10 psi, and then drain moisture from tank daily avoid tank corrosion. Drain moisture fir om tank by opening the drain petcock located underneath the tank.
LUBRICATION
This is an oilless product and DOES NOT require lubrication to operate.
BREAK-IN PROCEDURE
▲CAUTION!
Do not attach air chuck or other tool to open end of hose until start-up has
completed and unit checks ok.
IMPORTANT: Do not operate compressor before reading instructions or damage may result.
- Turn regulator fully clockwise to open airfl
- Turn switch to OFF position and plug ir cord.
- Turn switch to AUTO position and run u
30 minutes to break in the pump parts. -
Turn regulator knob fully
counterclockwise.Compressor will build to maximum preset pressure and shut of. -
Turn regulator knob clockwise to cause
bleed off. Compressor will restart at a preset pressure.
-
Turn regulator knob counterclockwise to shut off the air and turn switch to position.
-
Attach chuck or other tool to open end of hose. Turn the regulator on. In AUTO position, the compressor pumps air into the tank. It shuts off automatic when unit reaches its maximum preset pressure. In the OFF position. the press switch cannot function and the compressor will not operate. Make sure switch OFF positionconnectingwhen01disconnecting power cord from electrical outlet.

Figure 4
NOISTUREIN COMPRESSED AIR
Moisture in compressed air will form into droplets as it comes from an air compressor pump. When humidity is high or when a compressor is in continue
use for an extended period of time, this moisture will collect in the tank. With using a paint spray or sandblast gun, this water will be carried from the tank through the hose, and out of the gun as droplets mixed with the spray mate. IMPORTANT: This condensation will cause water spots in a paint job, especially when spraying other than water based paints. If sandblasting, it will cause the sand to case and clog the gun rendering it ineffective. A filter in the air line (MP3105), located as near to the gun as possible, will help eliminate this mo
SAFETY VALVE
▲WARNING!
Do not remove or attempt to adjust the valve! This valve should be checked under pressure occasionally by pulling the ring hand. If air leaks after ring has been or valve is stuck and cannot be actuator ring, it MUST be replaced.
REGULATOR KNOB (figure 5)
-
This knob controls air pressure to a air-operated tool or paint spray gun.
-
Turn clockwise to increase air pressure outlet. When desired pressure is reached locked with nuts.
-
To lower air pressure at outlet, turning counterclockwise.
-
Turn fully counterclockwise to shut off flow of air completely then push kn down.
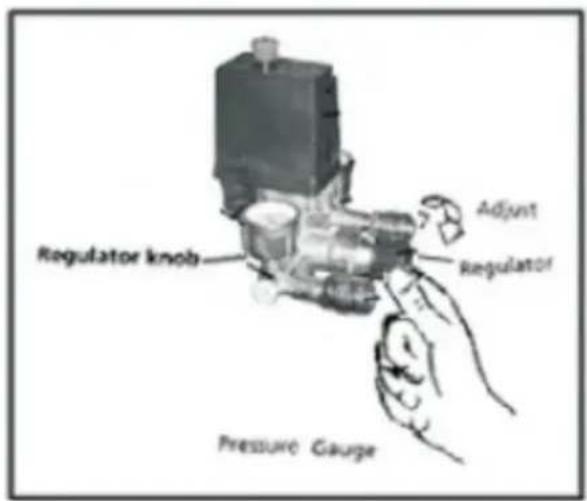
Figure 5:
TANK PRESSURE GAUGE
Gauge shows pressure in tank indicating compressor is building pressure prop
MAINTENANCE
▲ WARNING!
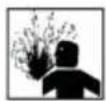
Disconnect power source then release all pressure from the system be attempting to install, service, relocate or perform any maintenance.
Check compressor often for any visible problem sand follow maintenance procedures each time compressor is used.
- Pull ring on safety valve and allow it to snap back to normal position.
▲WARNING!
Safety valve must be replaced ifit cannot be actuated or it leaks air after rir released.
- Turn compressor off and release pressure from system, Drain moisture from tank by opening drain cock underneath tank.
- Clean dust and dirt from motor, tank, and airlines and pump cooling fins compressor is still OFF.
IMPORTANT: Position the device away from the spraying area, as the hose prevent excessive spraying from clogging the filter.
LUBRICATION
This is an oil-free compressor that requires no lubrication.
▲CAUTION!
This compressor is equipped with an automatic reset thermal overload protection, which will shut off motor if it becomes overheated,
If thermal overload protector shuts motor OFF frequently, look for the following causes.
- Low voltage.
- Clogged air filter.
- Lack of proper ventilation.
▲CAUTION!
If the thermal overload protector is activated, the motor must be allowed to down before starting. The motor will automatically restart without warning if let the power socket and the unit is turned on.
Storage
- When not in use, store the hoses and compressor in a cool and dry pla
- Moisture in the drainage tank.
- Disconnect the hose and hang the open end downwards to allow water to
TROUBLESHOOTING CHART
| Symptom | Possible Cause (s) | Corrective Action |
| The compressor cannot run | 1. No electricity2. Brown fuse3. Circuit breaker disconnected4. Thermal overload ope circuit5. The pressure switch broken | 1. Is it plugged in? Check for fuses/circuit breakers motor overload2. Replace the blown fus3. Reset and determine cause of the problem4. After the motor cools down, it will restart5. Replacement |
| Symptom | Possible Cause (s) | Corrective Action |
| The motor hums but cannot operate or runs slowly | 1. Check valve defective or not loaded2. Poor contact and low circuit voltage3. Motor winding short circuit or open circuit | 1. Replacement or repair2. Check the connection. using an extension plug, clear it and check the circuit with a voltmeter3. Replace the motor Danger: Do not disassemble the check valve when there is air the fuel tank; Air release tank |
| Be careful when the fuse burns out/the circuit breaker trips repeatedly! Do not use extension cords with this product | 1. Incorrect fuse size, circuit overload2. Check valve defective or not loaded | 1. Check if the fuse is correct and use a delay fuse. Disconnect other electrical appliances from the circuit or operate the compressor on its own branch circuit2. Do not disassemble the check valve when thereair in the fuel tank durin replacement or repair; Air release tank |
| Thermal overload protector repeatedly loses power | 1. Low voltage2. Clogged air filter3. Lack of proper ventilation/room temperature too high4. Check valve malfunction5. Compressor valves failed | 1. Eliminate extension cord, check with voltmeter2. Clean filter (see Maintenance section)3. Move compressor to well ventilated area4. Replace5. Replace valve assembly |
| Knocking sound, noise, excessive vibration | 1. Loose bolts and uneven fuel tank2. Defective bearings on eccentric or motor shafts3. Worn or scored cylinders or piston rings | 1. Tighten the gasket bolts to a horizontal position2. Replacement3. Replace or repair as necessary |
| Troubleshooting Chart(Continued) Symptom | Possible Cause (s) | Corrective Action |
| The oil tank pressu drops when the compressor is turned off | 1. Loose drain cock2. Check valve leakage3. Loose connection of pressure switch or regulator | 1. Tightening2. Disassemble the check valve assembly, clean or replace it3. Check all connections with soap and aqueous solution and tighten them tightly |
| The continuous operation of the | 1. Excessive air usage and compressor too sma | 1. Reduce usage or purchase through higher a |
| compressor results in a discharge volume below normal/low discharge pressure | 2. The intake filter is blocked3. Pipeline leakage (on the machine or in exter systems)4. Damaged inlet valve5. Wear of piston rings | delivery (SCFM)2. Cleaning or replacement3. If necessary, replace t leaking parts or tighten them4. Replace the compresso valve5. Replace the piston an cylinder |
| Excessive moisture in discharge air | 1. Excessive water in tank2. High humidity | 1.Drain tank2.Move to area of less humidity: use air line filte |
| Compressor runs continuously and safety valve opens as pressure rises | 1. Defective pressure switch2. Defective safety valve | 1.Replace switch2.Replace safety valve wi genuine replacement part |
| Excessive starting and(auto start) stopping | Excessive condensation in tank | Drain more often |
| The unloader on th pressure switch is leaking air | Check valve stuck in an open position | Remove and replace chec valve |
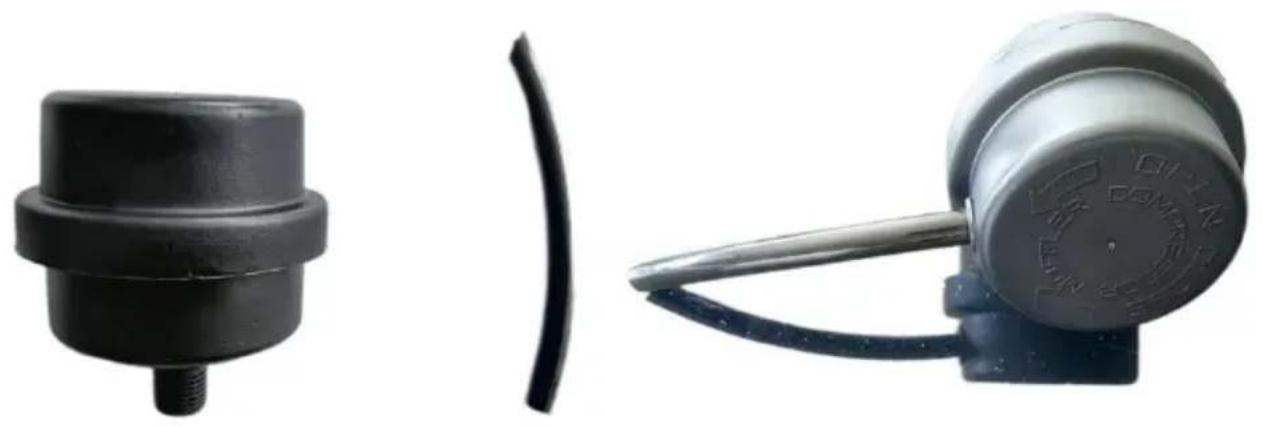
Instructions and precautions for using silencers
When the company leaves the factory, each muffler is equipped with a 100 sound-absorbing air pipe, which can reduce the noise of the equipment to a extent, usually by about 2dB. There is no special function or assistance for normal operation of the equipment. Users can choose whether to install a sil gas cylinder, and this device is optional. It is normal for the gas cylinder to during normal operation. The operation of the equipment is not affected.
natural_image
Two mechanical components: a black cylindrical component with threaded end and a gray cylindrical device with a curved cable (no visible text or symbols)Correct Disposal
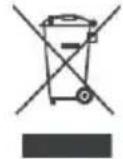
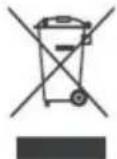
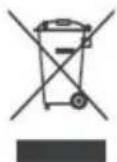
This product is subject to the provision of european Directive 2012/19. The symbol showing a wheelie bin crossed through indicates that the product requires separate refuse collection in the European Union. Th applies to the product and all accessories marked with this symbol. Products marked as such may not be discarded with normal domestic waste, but must taken to acollection point for recycling electrical and electronic devices.
Manufacturer: Shanghaimuxinmuyeyouxiangongsi
Address: Shuangchenglu 803nong11hao1602A-1609shi, baoshanqu, shanghai 200000 CN.
Imported to AUS: SIHAO PTY LTD. 1 ROKEVA STREETEASTWOOD NSW : Australia
Imported to USA: Sanven Technology Ltd. Suite 250, 9166 Anaheim Place, Rancho Cucamonga, CA 91730
| UK | REP |
YH CONSULTING LIMITED.
C/O YH Consulting Limited Office 147,
Centurion House, London Road,
Staines-upon-Thames, Surrey, TW18 4AX
| EC | REP |
E-CrossStu GmbH
Mainzer Landstr.69, 60329 Frankfurt am Ma
VEVOR®
TOUGH TOOLS, HALF PRICE
Technical Support and E-Warranty Certificate
www.vevor.com/support
VEVOR®
TOUGH TOOLS, HALF PRICE
natural_image
3D rendering of an air compressor with internal components and fan (no visible text or symbols)BESOIN D'AIDE? CONTACTEZ-NOUS!
natural_image
Technical line drawing of a mechanical assembly with a wheel and guide rail (no text or symbols)PRINCIPALES DONNÉES TECHNIQUES
Figure 4
Figure 5:
natural_image
Two electronic components: a black cylindrical sensor and a gray cylindrical device with a curved cable (no visible text or symbols)C/O YH Consulting Limited Bureau 147,
Staines-upon-Thames, Surrey, TW18 4AX
E-CrossStu GmbH
www.vevor.com/support
VEVOR®
TOUGH TOOLS, HALF PRICE
natural_image
3D rendering of an air compressor with internal components and fan base (no visible text or symbols)1910.134. und/oder Canadian Standards Associations (CSA)
natural_image
Technical line drawing of a mechanical assembly with a wheel and guide rail (no text or symbols)Abbildung 4
Figure 5:
TANKDRUCKMESSER
natural_image
Two electronic components: a black cylindrical sensor and a gray cylindrical device with a curved cable (no visible text or symbols)Richtige Entsorgung
C/O YH Consulting Limited Office 147,
Centurion House, London Road,
Staines-upon-Thames, Surrey, TW18 4AX
www.vevor.com/support
VEVOR®
TOUGH TOOLS, HALF PRICE
natural_image
3D rendering of an air compressor with internal components and fan base (no visible text or symbols)1910.134.e/o Canadian Standards Associations (CSA)
natural_image
Technical line drawing of a mechanical assembly with a wheel and guide rail (no text or symbols)DATI TECNICI PRINCIPALI
Figura 4
RUMORE NELL'ARIA COMPRESSA
Figure 5:
MANOMETRO PRESSIONE SERBATOIO
natural_image
Two electronic components: a black cylindrical sensor and a gray cylindrical device with a curved cable (no visible text or symbols)Importato in AUS: SIHAO PTY LTD. 1 ROKEVA STREETEASTWOOD NSW 2122
Australia
Importato negli USA: Sanven Technology Ltd. Suite 250, 9166 Anaheim Place, Rancho Cucamonga,
CA 91730
CONSULENZA YH LIMITATA.
C/O YH Consulting Limited Ufficio 147,
Casa del centurione, London Road,
Staines-upon-Thames, Surrey, TW18 4AX
www.vevor.com/support
VEVOR®
TOUGH TOOLS, HALF PRICE
natural_image
3D rendering of an air compressor with internal components and fan base (no visible text or symbols)natural_image
Technical line drawing of a mechanical assembly with a wheel and guide rail (no text or symbols)DATOS TÉCNICOS PRINCIPALES
Figura 4
Figure 5:
natural_image
Two electronic components: a black cylindrical sensor and a gray cylindrical device with a curved cable (no visible text or symbols)Casa Centurión, London Road,
Staines-upon-Thames, Surrey, TW18 4AX
E-CrossStu GmbH
www.vevor.com/support
VEVOR®
TOUGH TOOLS, HALF PRICE
natural_image
3D rendering of an air compressor with internal components and fan (no visible text or symbols)POTRZEBUJESZ POMOCY? SKONTAKTUJ SIĘ Z NAMI!
natural_image
Technical line drawing of a mechanical assembly with a wheel and guide rail (no text or symbols)GŁÓWNE DANE TECHNICZNE
Rysunek 4
Figure 5:
natural_image
Two electronic components: a black cylindrical sensor and a gray cylindrical device with a cable, both without any visible text or symbols.C/O YH Consulting Limited Biuro 147,
Dom Centuriona, London Road,
Staines-upon-Thames, Surrey, TW18 4AX

www.vevor.com/support
VEVOR®
TOUGH TOOLS, HALF PRICE
Technische ondersteuning en e-garantiecertificaat www.vevor.com/support
HORIZONTALE LUCHTCOMPRESSOR
MODEL: JR550/JR750
natural_image
3D rendering of an air compressor with internal components and fan base (no visible text or symbols)HULP NODIG? NEEM CONTACT MET ONS OP!
natural_image
Technical line drawing of a mechanical assembly with a wheel and guide rail (no text or symbols)Figuur 4
Figure 5:
TANKDRUKMETER
PROBLEEMOPLOSSINGSSCHEMA
natural_image
Two electronic components: a black cylindrical sensor and a gray cylindrical device with a curved cable (no visible text or symbols)C/O YH Consulting Limited Kantoor 147,
Centurionhuis, Londen Road,
Staines-upon-Thames, Surrey, TW18 4AX
E-CrossStu GmbH
Mainzer Landstr.69, 60329 Frankfurt am Main.
VEVOR®
TOUGH TOOLS, HALF PRICE
www.vevor.com/support
VEVOR®
TOUGH TOOLS, HALF PRICE
natural_image
3D rendering of an air compressor with internal components and fan base (no visible text or symbols)BEHÖVER HJÄLP? KONTAKTA OSS!
1910.134.och/eller Canadian Standards Associations (CSA)
ALLMÄN SÄKERHETSINFORMATION
natural_image
Technical line drawing of a mechanical assembly with a wheel and guide rail (no text or symbols)HUVUDSAKLIGA TEKNISKA DATA
| Produktnamn | Sovrums luftkompressor | |||
| Modell | JR550 | JR750 | ||
| Spänning | 60 Hz | 220-240V~120V~/50 Hz | 120V~/60 Hz | 220-240V~/50 Hz |
| 1700 rpm | 1400 rpm | 3400 rpmHastighet | 2800 rpm | |
| Max tryck | 120psi | 120psi | 120psi | 120psi |
| Luftförrådtankens kapacitet | 1 liter | 4L | 2 liter | 8L |
| Driva | 1 hk | 630W | 1 hk | 860W |
Installera
placera
Figur 4
Figure 5:
TANKMÄTARE
natural_image
Two electronic components: a black cylindrical sensor and a gray cylindrical device with a curved cable (no visible text or symbols)Korrekt avfallshantering
C/O YH Consulting Limited Office 147,
Centurion House, London Road,
Staines-upon-Thames, Surrey, TW18 4AX

E-CrossStu GmbH
Mainzer Landstr.69, 60329 Frankfurt am Main.
VEVOR®
TOUGH TOOLS, HALF PRICE
www.vevor.com/support
- HORIZONTAL AIR COMPRESSOR
- VEVOR®
- NEED HELP? CONTACT US!
- INSTRUCTIONS
- Preface
- Important reminder
- Describe
- Safety signs
- ▲DANGER!
- ▲WARNING!
- ▲CAUTION!
- ▲NUTICE!
- Unpicking
- Breathable Air Warning
- GENERAL SAFETYINFORMATION
- ▲ DANGER!
- ▲WARNING! Drain liquid from tank daily
- SPRAYING PRECAUTIONS
- ASSEMBLY WHEEL ASSEMBLY
- Install
- position
- ELECTRICAL INSTALLATION
- OPERATION
- LUBRICATION
- BREAK-IN PROCEDURE
- NOISTUREIN COMPRESSED AIR
- SAFETY VALVE
- REGULATOR KNOB (figure 5)
- TANK PRESSURE GAUGE
- MAINTENANCE
- ▲ WARNING!
- Storage
- Instructions and precautions for using silencers
- Correct Disposal
- TOUGH TOOLS, HALF PRICE
- BESOIN D'AIDE? CONTACTEZ-NOUS!
- TANKDRUCKMESSER
- Richtige Entsorgung
- RUMORE NELL'ARIA COMPRESSA
- MANOMETRO PRESSIONE SERBATOIO
- DATOS TÉCNICOS PRINCIPALES
- GŁÓWNE DANE TECHNICZNE
- HORIZONTALE LUCHTCOMPRESSOR
- MODEL: JR550/JR750
- HULP NODIG? NEEM CONTACT MET ONS OP!
- TANKDRUKMETER
- BEHÖVER HJÄLP? KONTAKTA OSS!
- ALLMÄN SÄKERHETSINFORMATION
- Installera
- placera
- TANKMÄTARE
- Korrekt avfallshantering
Brand : Vevor
Model : JR550GJ4L
Category : Compressor