
I-B - Car tool Vevor - Free user manual and instructions
Find the device manual for free I-B Vevor in PDF.
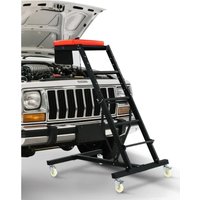


| Product Type | Foldable Automotive Creeper |
| Brand | Vevor |
| Model | I-B |
| Adjustable Height | 48 to 76 inches (122 to 193 cm) |
| Maximum Load Capacity | 400 lb (181 kg) |
| Material | Robust Powder-Coated Steel |
| Cushion | High-Density Foam Padding |
| Front Casters | 2 swivel casters without brakes |
| Rear Casters | 2 swivel casters with brakes |
| Use | Under-vehicle work, automotive maintenance |
| Assembly Required | Yes, tools included |
| Maintenance | Wipe with non-caustic fabric cleaner |
| Lubrication | Do not lubricate the casters |
| Storage | Vertical after folding, rear casters locked |
| Required Protective Equipment | Safety goggles, gloves, non-slip shoes |
| Warranty | Technical support via www.vevor.com/support |
| Origin | Made in China |
Frequently Asked Questions - I-B Vevor
User questions about I-B Vevor
0 question about this device. Answer the ones you know or ask your own.
Ask a new question about this device
Download the instructions for your Car tool in PDF format for free! Find your manual I-B - Vevor and take your electronic device back in hand. On this page are published all the documents necessary for the use of your device. I-B by Vevor.
USER MANUAL I-B Vevor
Technical Support and E-Warranty Certificate www.vevor.com/support
TOP AUTOMOTIVE CREEPER
MODEL: I-A/I-B
We continue to be committed to providing you with tools at competitive prices. "Save Half", "Half Price", or any other similar expressions used by us only represent the estimate of savings you might benefit from buying certain tools with us compared to top brands and do not necessarily mean to cover all categories of tools offered. We kindly remind you to verify carefully when placing an order with us that you are actually saving half in comparison with the top major brands.
VEVOR
TOUGH TOOLS, HALF PRICE
TOP AUTOMOTIVE CREEPER
MODEL: I-A/I-B
NEED HELP? CONTACT US!
Have product questions? Need technical support? Please feel free to contact us: Technical Support and E-Warranty Certificate www.vevor.com/support
This is the original instruction. Please read all manual instructions carefully before operating. VEVOR reserves the right to interpret the user manual. The appearance of the product shall be subject to the product you received. Please forgive us that we won't inform you of any technology or software updates on our product.
| Warning-To reduce the risk of injury, users must read instructions manual carefully. | |
| Warning- Be sure to wear eye protectors when using product. | |
| Warning- Be sure to wear gloves when using this pr |
PRODUCT PARAMETERS
| Model | I-A | I-B |
| Adjustable Height | 48-64 inch | 48-76 inch |
| Weight Capacity | 400 lbs | 400 lbs |
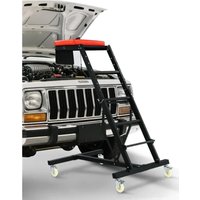
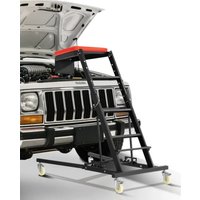
The height of the top automotive creeper can be adjusted. The heavy-duty steel construction is powder coated for protection. A high-density padded foam deck provides additional comfort.
WARNING
WORK AREA
- Operate in a safe work environment. Keep your work area clean, well-lit, and free of distractions. Place lights so you are not working in a shadow.
- Keep anyone not wearing the appropriate safety equipment away from the area.
- Store tools properly in a safe and dry location. Keep tools out of the reach of children.
PERSONAL SAFETY
WARNING! Wear personal protective equipment approved by the Canadian Standards Association (CSA) or American National Standards Institute (ANSI).
PERSONAL PROTECTIVE EQUIPMENT
- Always wear impact safety goggles that provide front and side protection for eyes. Eye protection equipment should comply with CSA Z94.3-07 or ANSI Z87 standards based on the type of work performed.
- Wear gloves that provide protection based on the work materials or reduce effects of tool vibration.
- Wear protective clothing designed for the work environment and tool.
- Non-skid footwear is recommended to maintain footing and balance in the environment.
- Wear steel toe footwear or steel toe caps to prevent a foot injury from falling objects.
PERSONAL PRECAUTIONS
Control the tool, personal movement, and the work environment to avoid personal injury or damage to the tool.
- Do not operate any tool when tired or under the influence of drugs, alcohol, or medications.
- Do not overreach when operating the tool. Proper footing and balance enable better control in unexpected situations.
SPECIFIC SAFETY PRECAUTIONS
WARNING! DO NOT let comfort or familiarity with the product (gained from repeated use) replace strict adherence to the tool safety rules. If you use the tool unsafely or incorrectly, you can suffer serious personal injury.
- Use the correct tool for the job. This tool was designed for a specific function. Do not modify or alter this tool or use it for an unintended purpose.
- DO NOT use the tool if any parts are damaged, broken, or misplaced. Replace the parts.
- ALWAYS ensure the height adjustment bar is securely fixed in one of the position slots prior to using.
- The maximum capacity listed includes the user (person), tools, equipment, and personal items. DO NOT exceed the maximum capacity.
- Lean your chest onto the chest pad deck gently. Avoid causing a shock by jumping or falling onto the chest pad deck.
- DO NOT stand or sit on the chest pad deck.
- DO NOT use the foldable top automotive creeper to work over a running engine.
- DO NOT get the foldable top automotive creeper wet or use it in damp areas or areas where there is condensation.
- Use the creeper on a smooth, level surface capable of withstanding the total load.
- ALWAYS lock the casters before using the foldable top automotive creeper.
PACKING LIST
| Item | Item | QTY | Item | Item | QTY |
| A | Base Frame | 1 | L | Bumper Pads | 3 |
| B | Ladder Assembly | 1 | M | M Leg Lock Pin | 2 |
| C | Chest Deck Frame | 1 | N | Frame Bolts | 4 |
| D | Chest Deck Pad | 1 | P | Chest Frame Bolts | 6 |
| E | Base Leg | 1 | R | Height Adjustment Plate Bolts | 4 |
| F | Connecting Column | 1 | S | Phillips Screws | 2 |
| H | Pouch | 1 | U | Flange Nut | 4 |
| I | Pouch Bracket | 1 | V | Lock Nut | 4 |
| J | Front Casters | 2 | W | Lock Nut M8 | 2 |
| K | Rear Casters | 2 | X | Lock Nut M6 | 3 |
INSTALLATION
Letter references in parentheses (A) refer to the contents.
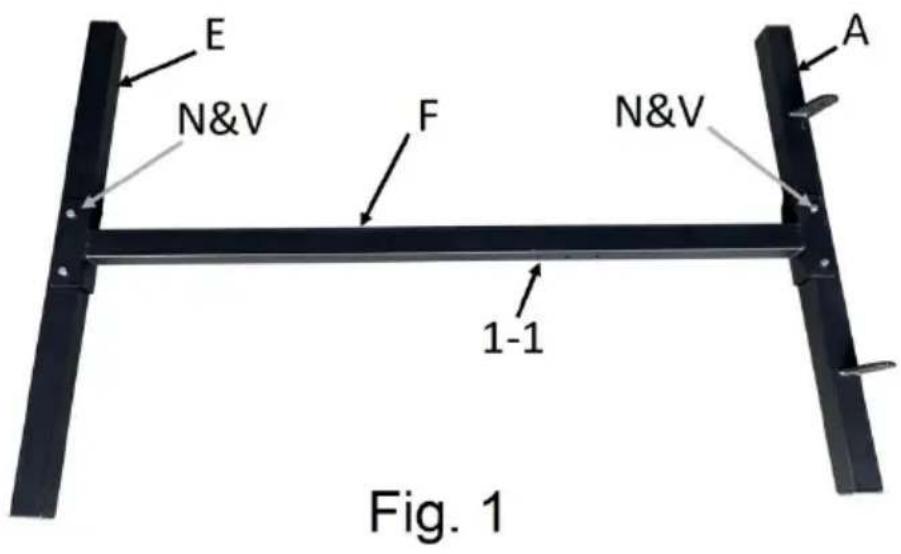
- Assemble the base leg (E) and the base frame (A) to the connecting column (F). Insert the end of the connecting column (F) into the base frame and the base leg (E), and align the bolt holes. The height adjustment holes (Fig.1 1-1) will be inside. Secure each part with a frame bolt (N) and lock nut 1 (V).
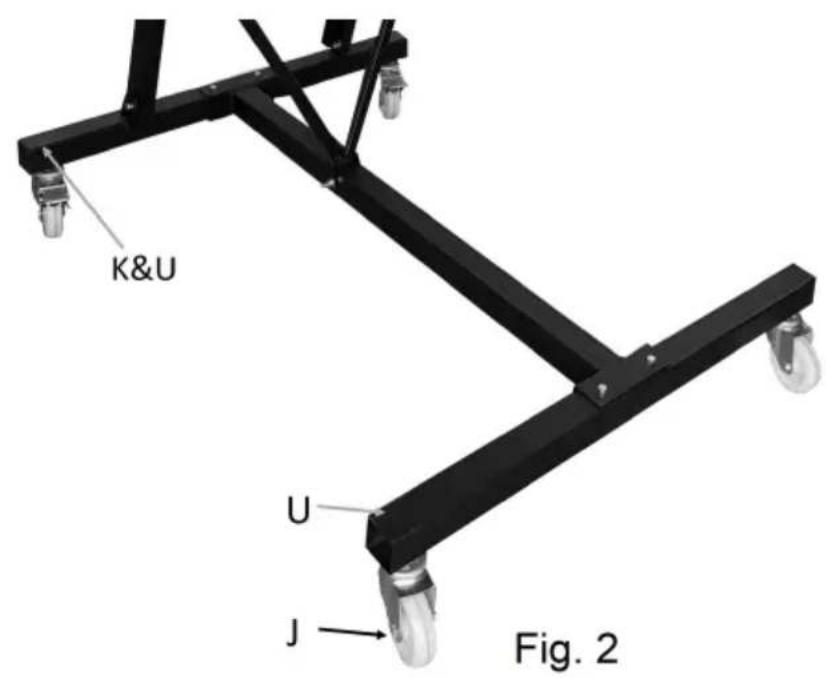
- Attach the front casters (J) by inserting the stem of each caster through each leg and securing it with a flange nut (U). Install the rear locking casters to the base frame in the same manner. Lock the rear wheels in place for the remainder of the installation.
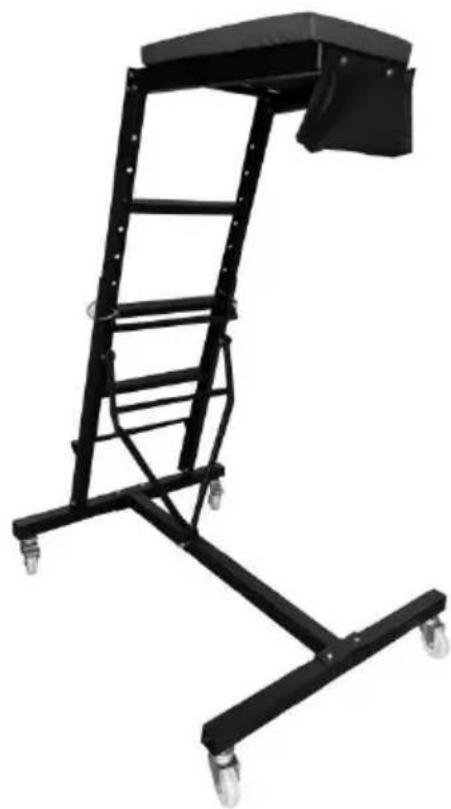
- Install the ladder assembly (B) by inserting a frame bolt (N) through each side of the base and securing it with a lock nut 1 (V). Swing the ladder's angle support (Fig.3 3-1) into the height adjustment holes (3-2). Make sure the crossbar is firmly in place.
Fig. 3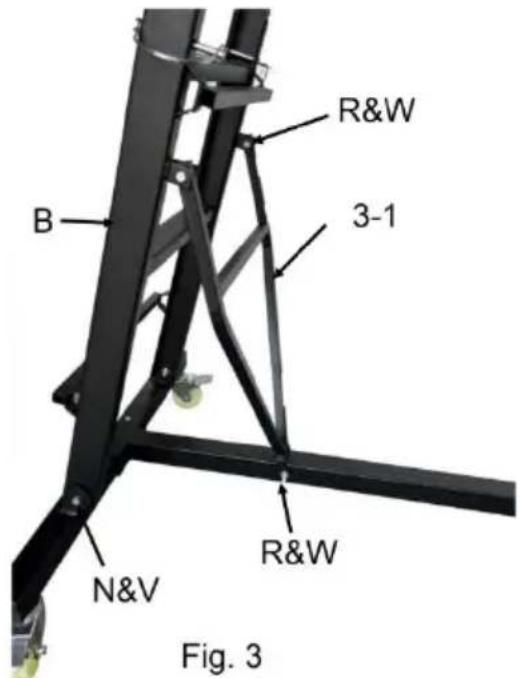
- Match the angled opening with the adjustment notches. Insert a height adjustment plate bolt (R) through the bolt hole at each end of the plate. Secure each bolt with a lock nut 2 (W). Repeat on the other side.
- Attach the chest deck frame (C) to the top of the ladder assembly (B) using
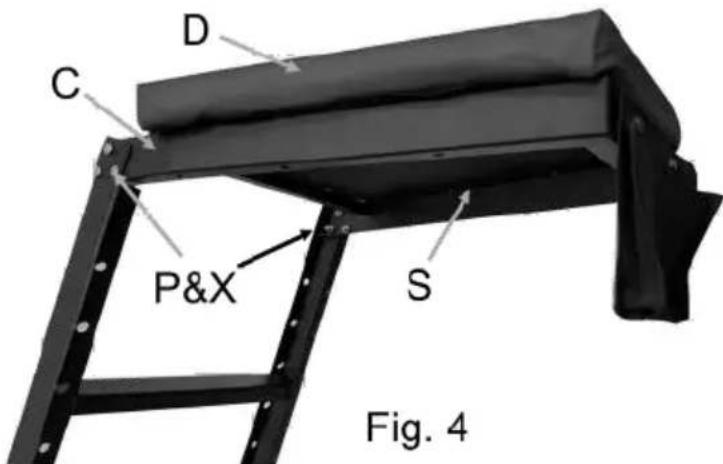
three chest frame bolts (P) and lock nut 3 (X) on each side. Attach the chest pad (D) using two Phillips screws (S) from underneath.
- Put the pouch (H) and align the screw holes. Insert two chest frame bolts
Fig. 5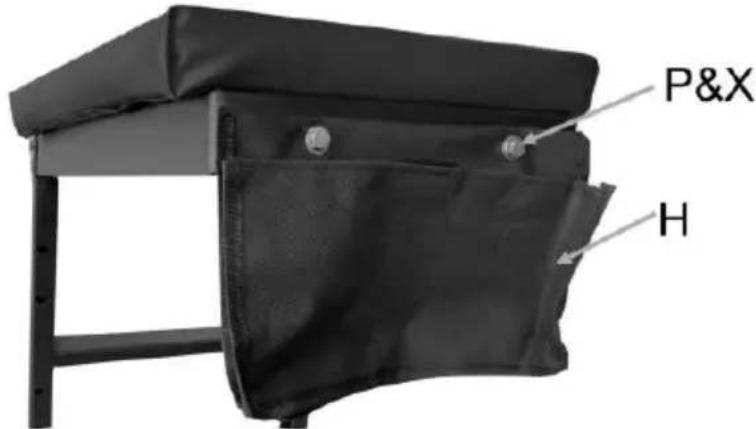
and lock nut 3 (X) through the screw holes. Line up the protruding screws with holes in the deck frame's front. Secure the pouch to the deck frame with the screws.
- Re-check and tighten all bolts and screws as necessary.
CARE & MAINTENANCE
- Maintain the tool with care. A tool in good condition is efficient, easier to use, and will have fewer problems.
- Inspect the tool components periodically. Repair or replace damaged or worn components. Only use identical replacement parts when servicing.
- Maintain the tool's labels and name plates. These carry important information. If unreadable or missing, contact Princess Auto Ltd. for replacements.
WARNING!
Only qualified service personnel should repair the tool. An improperly repaired tool may present a hazard to the user and/or others.
CLEANING
Wipe clean as needed. Use mild upholstery cleaner (not caustic) to clean the deck pad as needed.
LUBRICATION
DO NOT lubricate casters. This can damage the mechanism.
STORAGE
- Remove the leg lock pins from each leg. Hold the ladder when removing the second pin, as the base frame will fall to the floor. Store the pins in the c pouch.
- Push the ladder's angle support arms back towards the ladder.
- Lift each leg up until it rests next to the ladder assembly.
- Store the creeper vertically. Make sure the rear casters are locked once in place.
REMOVAL FROM STORAGE
- Lower each leg.
- Pull the ladder's angle support arms forward to settle in a height adjustment notch.
- Remove the leg lock pins from the pouch.
- Lift the base frame and push the leg down until the bolt holes align. Insert the leg lock pin through and turn the end down. Repeat with the other leg.
- Unlock the rear casters, and it is ready for use.
Sanven Technology Ltd.
Address: Suite 250, 9166 Anaheim Place, Rancho Cucamonga, CA 91730
Made In China
VEVOR
TOUGH TOOLS, HALF PRICE
Technical Support and E-Warranty Certificate www.vevor.com/support
VEVOR
TOUGH TOOLS, HALF PRICE
Technical Support and E-Warranty Certificate www.vevor.com/support
BEST AUTOMOTIVE CREEPER
MODEL: IA/IB
Address: Suite 250, 9166 Anaheim Place, Rancho Cucamonga, California 91730
NEED HELP? CONTACT US!
Standards Association (CSA) 1st American National Standards Institute (ANSI).
PERSONAL PROTECTIVE EQUIPMENT
Address: Suite 250, 9166 Anaheim Place, Rancho Cucamonga, CA 91730
Made in China
VEVOR
TOUGH TOOLS, HALF PRICE
Brand : Vevor
Model : I-B
Category : Car tool