1A-FS201Q - Food Processor Vevor - Free user manual and instructions
Find the device manual for free 1A-FS201Q Vevor in PDF.


User questions about 1A-FS201Q Vevor
0 question about this device. Answer the ones you know or ask your own.
Ask a new question about this device
Download the instructions for your Food Processor in PDF format for free! Find your manual 1A-FS201Q - Vevor and take your electronic device back in hand. On this page are published all the documents necessary for the use of your device. 1A-FS201Q by Vevor.
USER MANUAL 1A-FS201Q Vevor
Technical Support and E-Warranty Certificate www.vevor.com/support
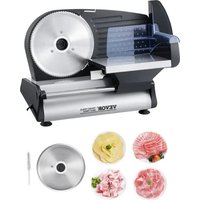
COMMERCIAL SLICER
MODEL: 1A-FS201Q
We continue to be committed to provide you tools with competitive price. "Save Half", "Half Price" or any other similar expressions used by us only represents an estimate of savings you might benefit from buying certain tools with us compared to the major top brands and does not necessarily mean to co all categories of tools offered by us. You are kindly reminded to verify carefully when you are placing an order with us if you are actually Saving Half in comparison with the top major brands.
VEVOR®
TOUGH TOOLS, HALF PRICE
COMMERCIAL SLICER
MODEL: 1A-FS201Q

natural_image
Technical line drawing of a mechanical device with gears and housing (no text or symbols)NEED HELP? CONTACT US!
Have product questions? Need technical support? Please feel free to contact us:
Technical Support and E-Warranty Certificate www.vevor.com/support
This is the original instruction, please read all manual instructions carefully before operating. VEVOR reserves a clear interpretation of user manual. The appearance of the product shall be subject to product you received. Please forgive us that we won't inform you and there are any technology or software updates on our product.
 | Warning-To reduce the risk of injury, user must re instructions manual carefully. |
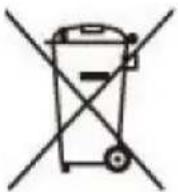
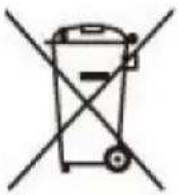
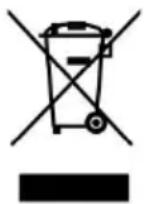 | This product is subject to the provision of European D 2012/19/EC. The symbol showing a wheelie bin cros through indicates that the product requires separate re collection in the European Union. This applies to the and all accessories marked with this symbol. Products as such may not be discarded with normal domestic w must be taken to a collection point for recycling electr electronic devices |
DESCRIPTION
- This appliance is designed for slicing foodstuff, e.g. meat, cheese, vegetables, bread, etc.
- The appliance is only intended for household indoor use. The appliance not intended for any commercial or industrial use.
- Do not use the appliance for other purposes. Any other use might damage of the appliance or personal injury.
- The manufacturer will accept no liability for damage or injuries resu from improper use or non-compliance with this manual.
IMPORTANT SAFEGUARDS
When using electrical appliances, basic safety precautions should always be followed, including the following:
- CAREFULLY READ AND UNDERSTAND ALL INSTRUCTIONS BEFORE OPERATING.
- The slicer must be connected to a 120V AC (UL)/220V AC (EU) e supply.
- Disconnect the power cord on the slicer; for cleaning, if the product appears to be malfunctioning; or when you're finished operating the appliance. To disconnect the device from the electricity supply, always
directly on the plug - never pull the plug out using the power cord.
4. Indoor use only. Never allow this device to be exposed to rain or Do not submerge the appliance in water for any reason. If the device should fall into water, ensure the device is disconnected from a power source, then and only then, remove the device from the water. After we have the slicer examined by an authorized service center before further use.
5. Do not use the slicer if your hands are wet or if you are standing floor. Do not use the slicer if it is wet or moist.
6. The slicer is designed exclusively for domestic use and not for commercial purposes.
7. Set up and store the slicer out of reach of children.
8. Do not leave the slicer unattended while the appliance is plugged in
9. Always ensure that the slicer is safely set up or installed before you operating.
10. The sliding feed table and piece holder should always be in place, appliance is in use, unless this is not possible due to the size or s the food. Do not use the slicer to slice through bones or frozen food
11. Do not use the slicer if it is damaged in any way. Have the slicer repaired immediately at an authorized service center by qualified personnel.
12. Only use the slicer with the accessories supplied by the manufactu
13. No claims under the guarantee or liability for damages will be acc if they result from improper or incorrect use of the slicer.
14. Switch off before reaching near the blade.
15. If the supply cord is damaged, it must be replaced by the manufacture of its service agent, or similarly qualified persons in order to avoid a hazard
16. Always disconnect the appliance from the supply if it is left unatent before assembling, disassembling, or cleaning.
17. Keep the appliance and its cord out of reach of pets and children
18. Each operator should thoroughly read through this owner's manual before attempting to use this appliance. The operator should always be aware of the safety procedures mentioned in this manual.
-
This appliance is NOT intended for use by people (including children with reduced physical, sensory or mental capabilities, or lack of experience and knowledge, unless they have been given supervision or instruction concerning use of the appliance by a person responsible for their safe Children should be supervised to ensure that they do not play with the appliance.
-
Children shall not play with the appliance. The slicer is not a toy.
SAVE THESE INSTRUCTIONS
Specification Data
| Model No. | Power Supply | Power | Blade Size |
| 1A-FS201Q-UL | 120V, 60Hz | 180W | 7.5” (190mm) |
| 1A-FS201Q-GS | 220V, 50Hz | 180W | 7.5” (190mm) |
OPERATION
WARNING! The appliance is suitable for a short time operation only. to operating times and speed settings for accessories within this instruction manual. Let the appliance sufficiently cool down if the housing becomes too hot. Only operate the appliance again, after it has cooled. Do not overload the appliance.
WARNING! Danger of injury! Care shall be taken when handling the sharp cutting blade, especially during assembly, disassembly and clean Keep hands or fingers away from the rotating cutting blade. Always cut food holder and food guide handle during operation.
Note: The cutting blade continues to rotate for a few seconds, after appliance is switched off. Wait until the cutting blade comes to a cor stop before removing the foodstuffs.
Note: Only slice food that is thawed, unpacked and free from bones. not slice frozen food, bones or extremely hard foodstuff.
Note: Always set the slice thickness selector to the position O after each use, during storage and transport.
Note: During breaks from slicing, set the on/off switch to position O and wait until the cutting blade comes to a complete standstill.
Before First Use
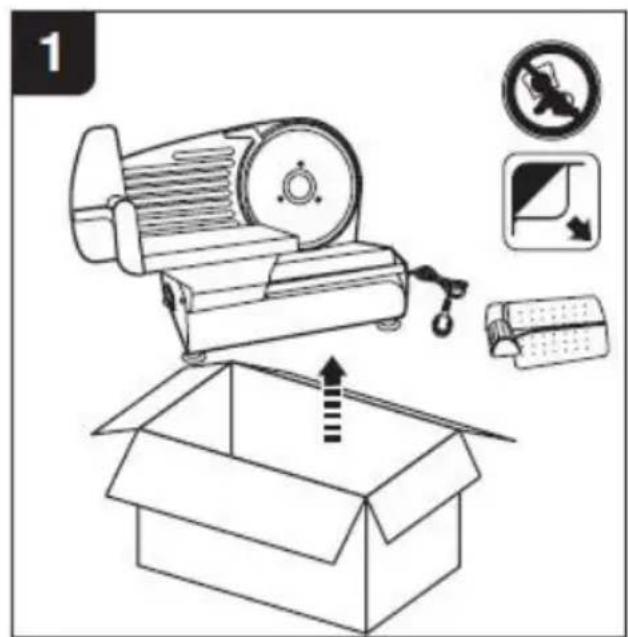
Carefully, take the slicer out of its packaging. Remove all the packag material and keep it together with the packaging. Clean the slicer bef comes into contact with any food.
Setting up the slicer
- Never set the slicer up on a hot surface or near an open flame.
- Make sure that the power cord does not pass over hot or sharp e
- Do not allow the power cord to become kinked or trapped. Do not around the slicer.
- Set up the slicer on a flat, non-slip surface close to an electrical
- Unwind the required length of power cord and plug the appliance in proper electrical outlet.
- Push the piece holder (6) on to the sliding feed table (4).
Slicing
- Never touch the blade while the slicer is on. Once the slicer is sh wait until the blade has stopped spinning before working near the bla
- Always use the piece holder (except perhaps for very large pieces food). Press the piece of food to be sliced forward using the piece
-
Use the slicer only for slicing normal household foods and no other purposes. Do not use the slicer for slicing frozen foods, bones, foods large kernels, or packaged foods.
-
Never use the slicer for more than 10 minutes continuously.
-
The cutting blade (9) continues to rotate after the slicer has been switched off.
-
When finished using the appliance, always return the Thickness Select to "0" before storing. Failure to do so may result in serious injury or chipping of the blade.
Operating the slicer
Switch the power to “ON” to power up the slicer. Ensure you do no for more than 10 minutes continuously.
During breaks from slicing, move the switch quickly to the “OFF” pos and wait until the cutting blade comes to a complete standstill.
The slice thickness can be set between 0 and approximately 15mm. the required slice thickness using the knob (3). The settings on the s do not correspond with the slice thickness in mm. For safety reasons blade is covered when set to thickness level “0”.
Place the food to be sliced on to the sliding feed table. Lightly, pres food with the piece holder (6) against the food support plate (2). Sw device on and guide the food back and forth along the cutting blade while applying light, downward pressure on the piece holder (6). After the slicer, always set thickness to “0” so that the sharp blade is coThe cutting blade (9) is ideally for cutting wafer-thin slices boiled ham cold-cuts. To safeguard your fingers, always use the sliding feed table and the piece holder (6).
AFTER USE
Cleaning
Note: Clean the appliance regularly to keep it in a safe and hygienic working condition.
- Before cleaning, unplug the appliance and let it cool down complete - Do not clean the appliance with steel wool, strong chemicals, alkali, abrasive or disinfecting agents as they may damage its surface.
- Do not immerse the appliance in water or other liquids. Never hold appliance under running water. Make sure that no water enters the appliance while cleaning it and that the electrical parts do not become or damp.
- Clean the inside and outside of the appliance with a soft damp cloth with a dry soft cloth.
- Clean the cutting blade and food holder with a soft sponge in war soapy water. Wipe with a dry soft cloth.
• The appliance may only be used again after it is dried completely.
Storage
- Before storage, always make sure that the appliance is completely and cooled down.
- Store the appliance in a cool, dry place, protected from moisture a of the reach of children.
- Preferably store the appliance in its original packaging.
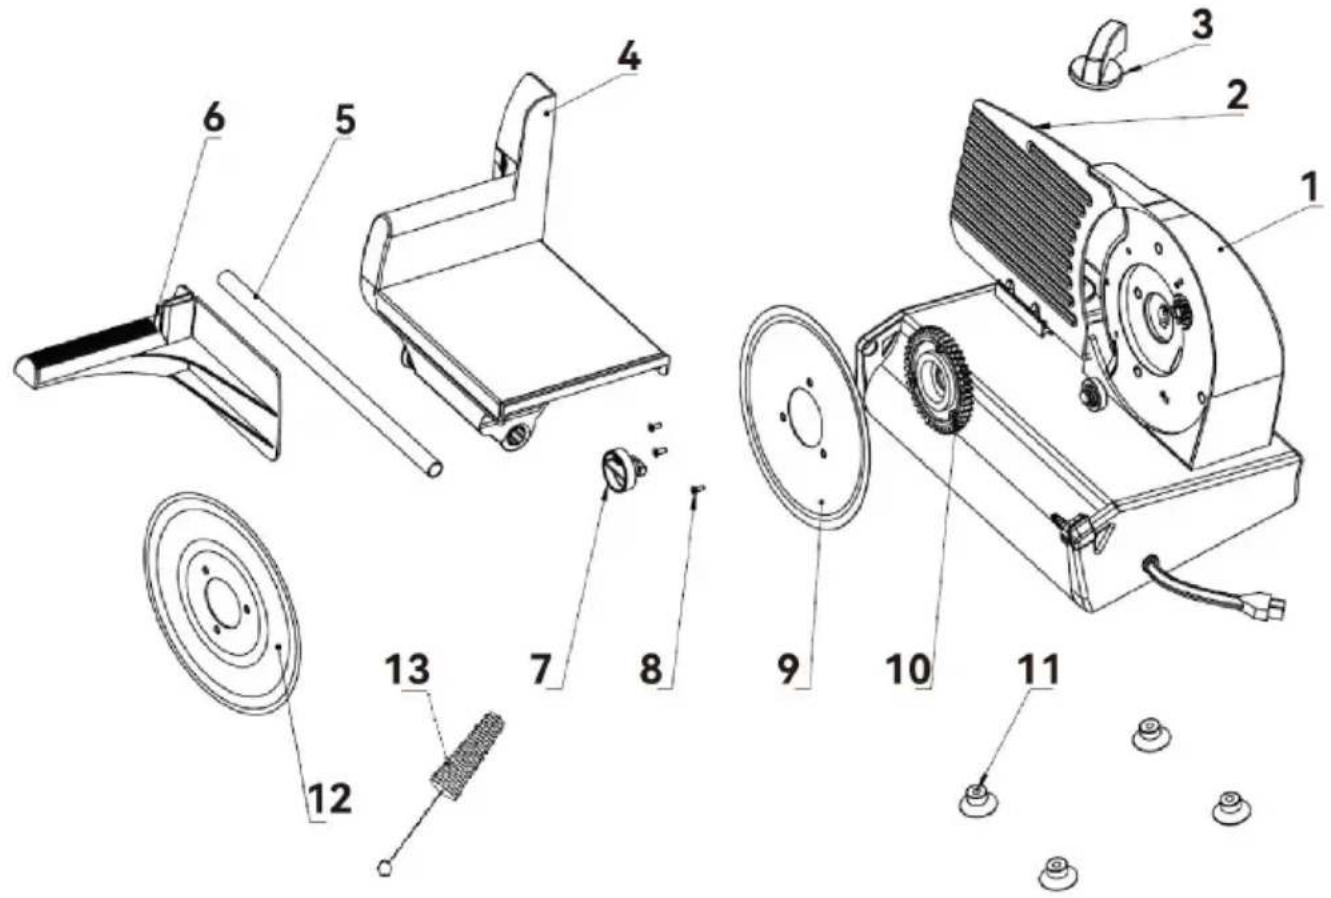
Part List
text_image
Technical diagram of a mechanical device with numbered parts for identification and assembly reference.| Part No. | Description | Part No. | Description | |
| 1 | Housing | 8 | Blade Locking Screw | |
| 2 | Thickness Adjustment Plate | 9 | Cutting Blade (Serrated Blad | |
| 3 | Thickness Adjustment Knob | 10 | Cutting Blade Hub | |
| 4 | Sliding Food Carriag | 11 | Slicer Feet (4 pieces) | |
| 5 | Food Carriage Shaf | 12 | Additional Cutting Blade (Round Blade) | |
| 6 | Food Pusher | 13 | Brush | |
| 7 | Blade Screw |
Removing the Cutting Blade
- Rotate the locking piece in blade center clockwise, then pull out the when taking out the blade, make sure that you handle it by the cer. Hand-wash the blade in warm, soapy water (not in the dish washer!) the housing behind the blade with a dry cloth or a soft brush. Do I submerge the appliance in liquid!
text_image
1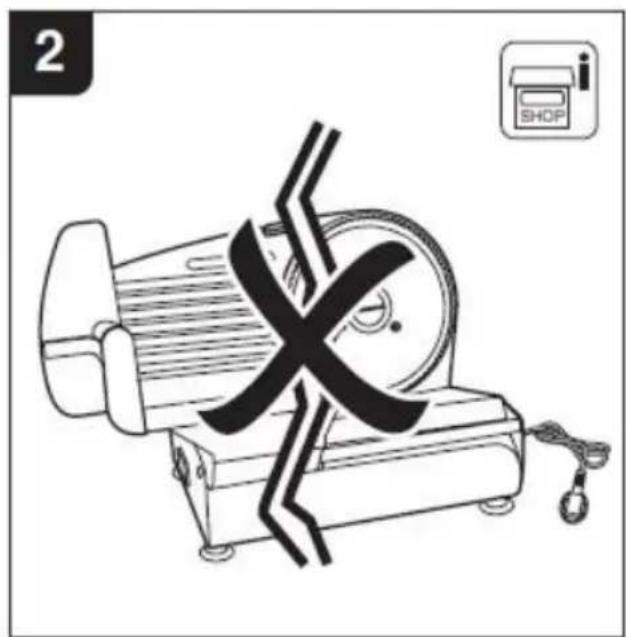
natural_image
Illustration of a mechanical device with a crossed X mark and a 'SHOP' icon (no text or symbols on the device itself)
text_image
3 OPEN 2. 1. 3.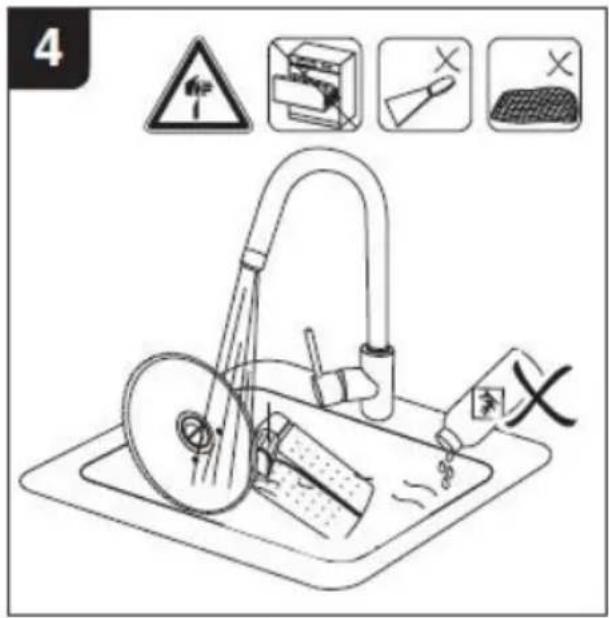
text_image
4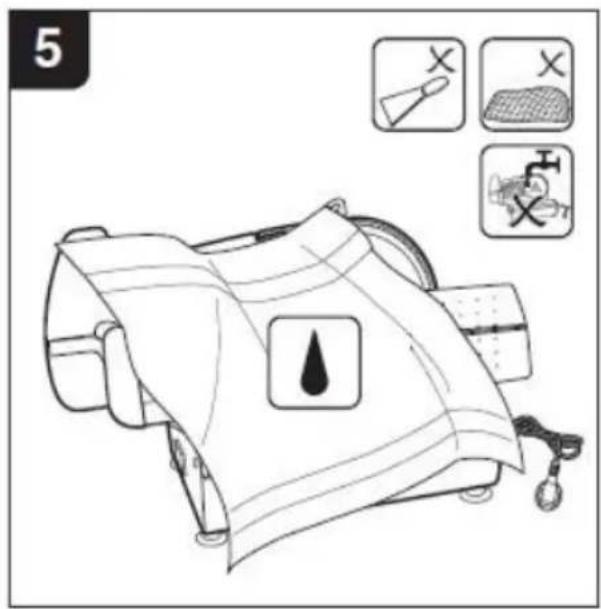
text_image
5 X X X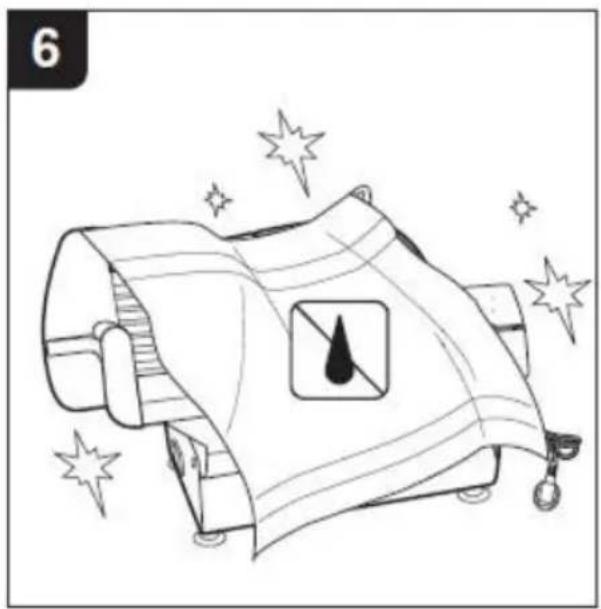
natural_image
Illustration of a stylized lamp with a water droplet symbol, surrounded by sparkles (no text or symbols)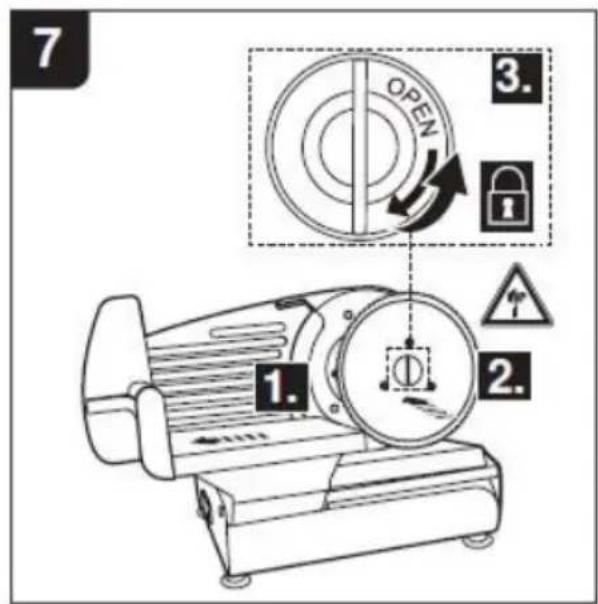
text_image
7 1. 2. 3. OPEN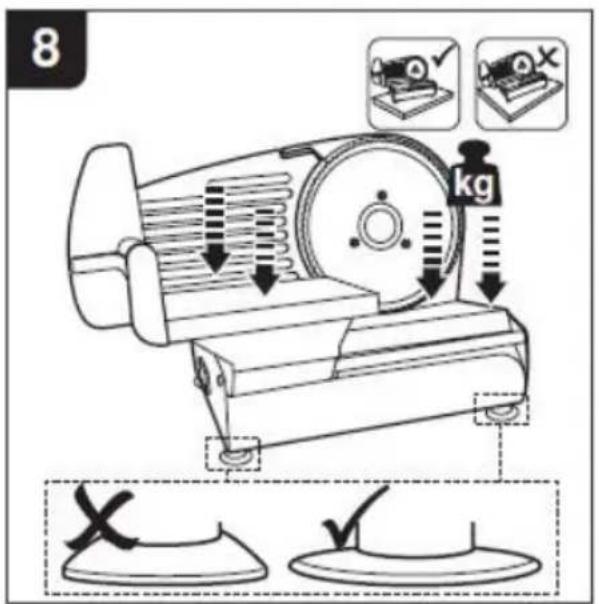
text_image
8 kg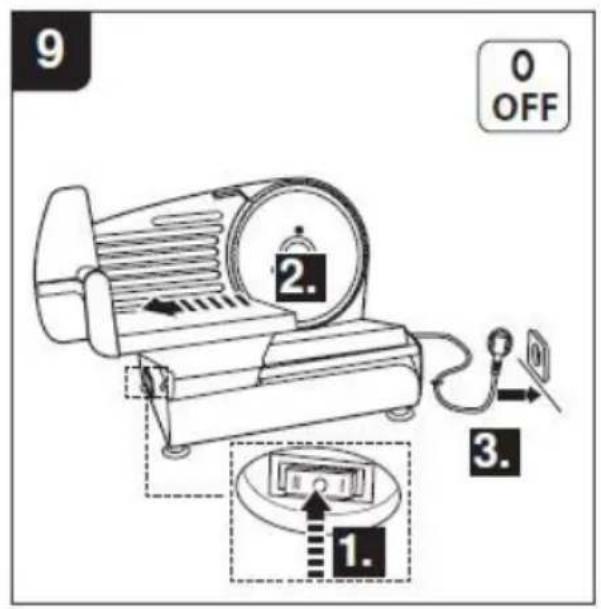
text_image
9 0 OFF 2. 3. 1.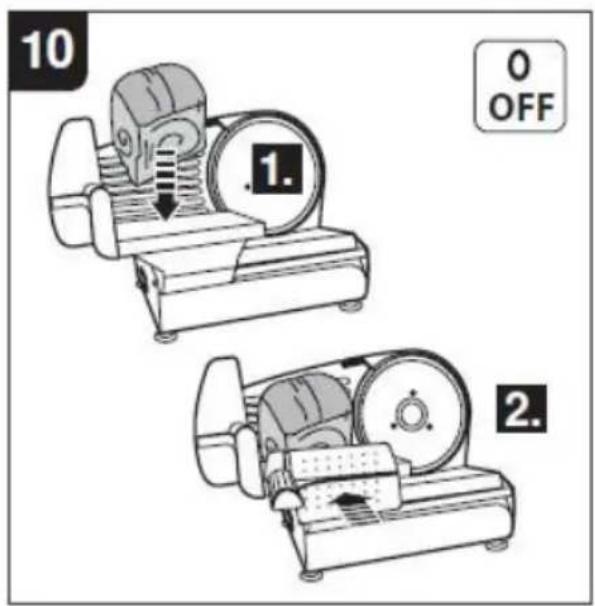
text_image
10 1. 0 OFF 2.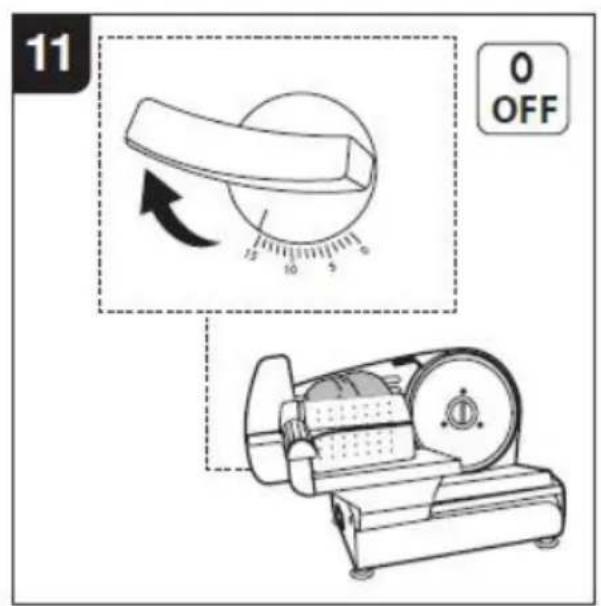
text_image
11 0 OFF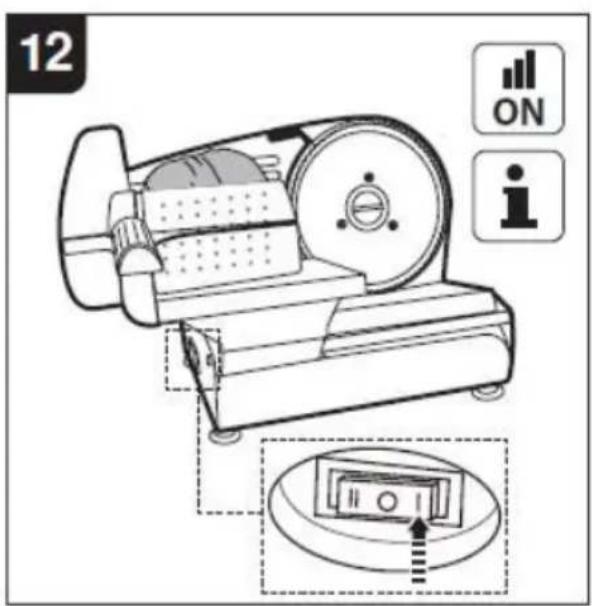
text_image
12 ON i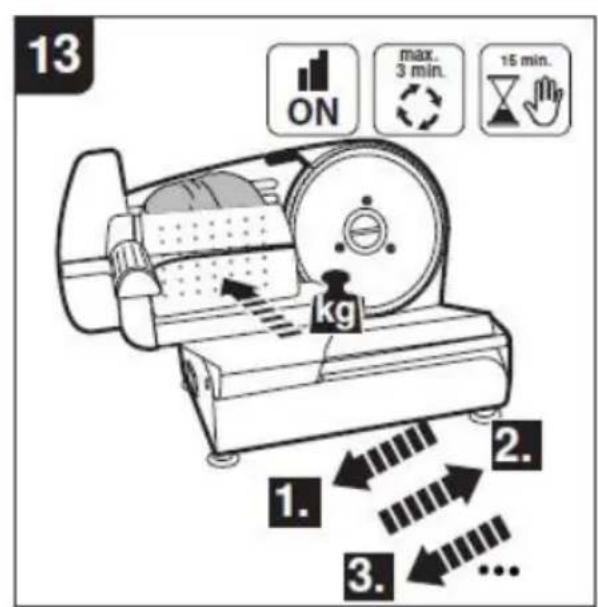
text_image
13 ON max. 3 min. 15 min. kg 1. 2. 3.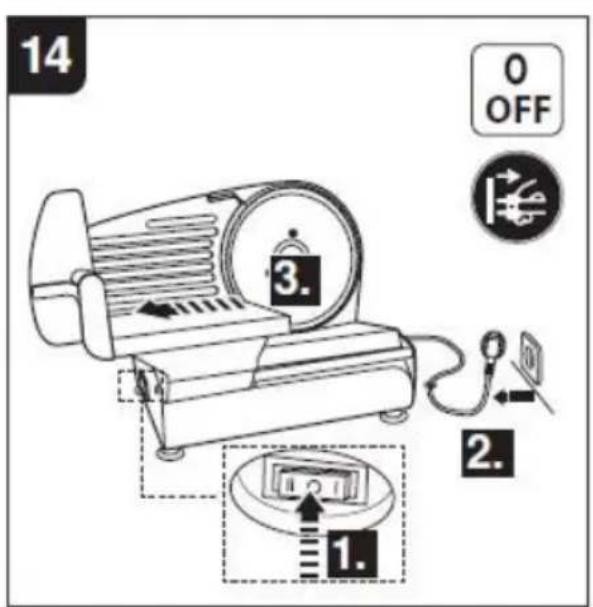
text_image
14 3. 0 OFF 2. 1.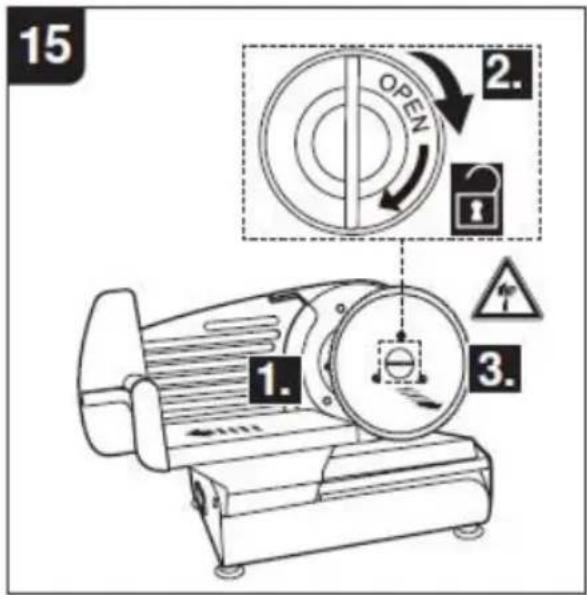
text_image
15 2. OPEN 3. 1. 2. 3.
text_image
16 X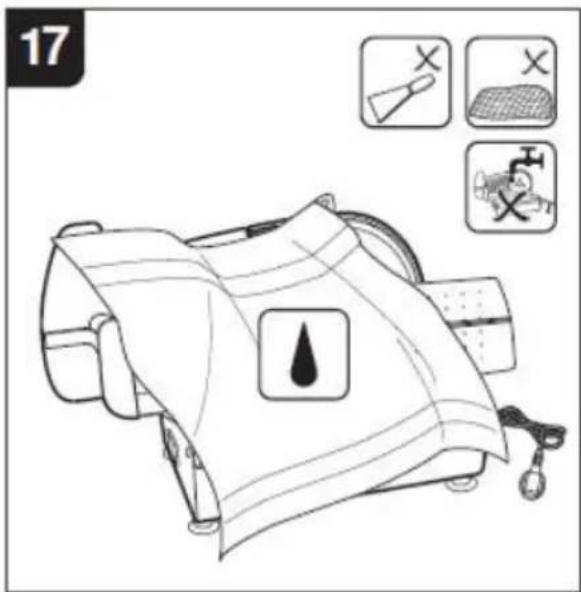
text_image
17 X X X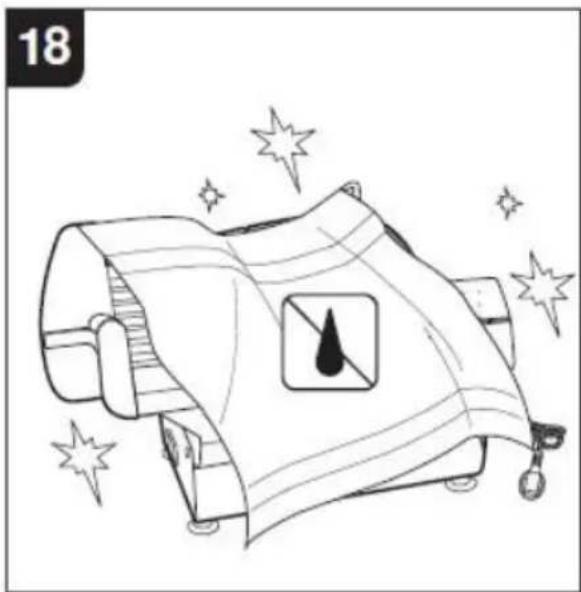
natural_image
Illustration of a stylized lamp with a water droplet symbol, surrounded by sparkles (no text or symbols)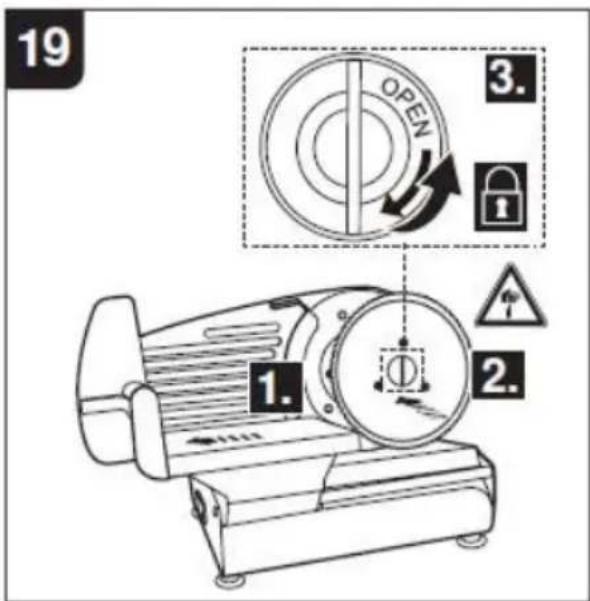
text_image
19 OPEN 3. OK 1. 2.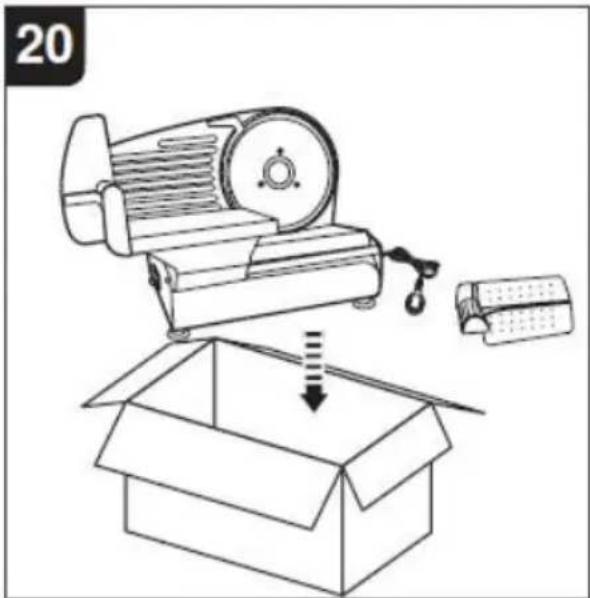
natural_image
Line drawing of an open box with a motor, clamped parts, and a paper roll (no text or symbols)CORRECT DISPOSAL
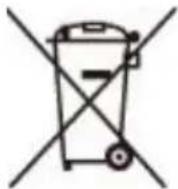
This product is subject to the provision of european Directive 2012/19/EU. The symbol showing a wheelie bin crossed through indicate that the product requires separate refuse collection in the European U This applies to the product and all accessories marked with this syml Products marked as such may not be discarded with normal domestic waste, but must be taken to acollection point for recycling electrical a electronic devices.
VEVOR®
TOUGH TOOLS, HALF PRICE
Technical Support and E-Warranty Certificate
www.vevor.com/support
VEVOR®
TOUGH TOOLS, HALF PRICE
natural_image
Technical line drawing of a mechanical device with gears and housing (no text or symbols)BESOIN D'AIDE? CONTACTEZ-NOUS!
text_image
Technical diagram of a mechanical device with numbered parts for identification and assembly reference.| Partie Non. | Partie Non. | DescriptionDescription |
natural_image
Illustration of a mechanical device with a crossed X mark and a 'SHOP' icon (no text or symbols on the device itself)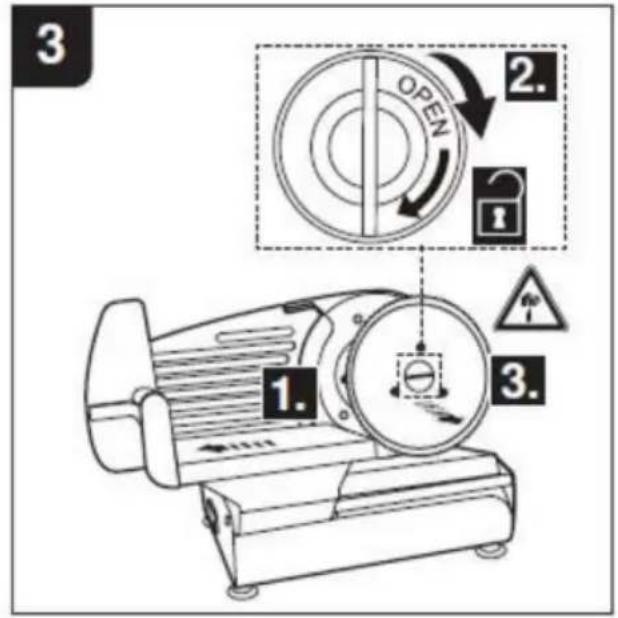
text_image
3 1. 2. OPEN 3.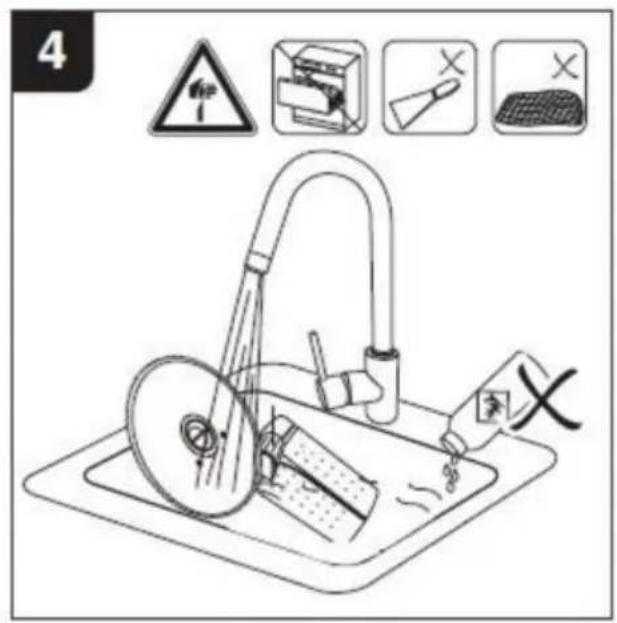
text_image
4 X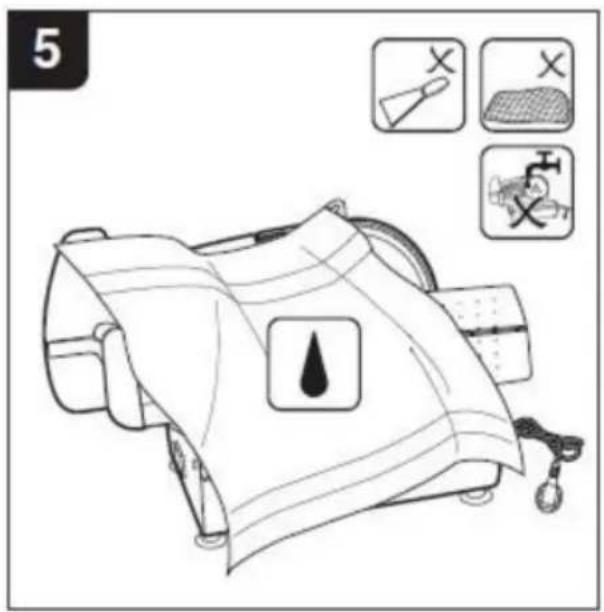
text_image
5 X X X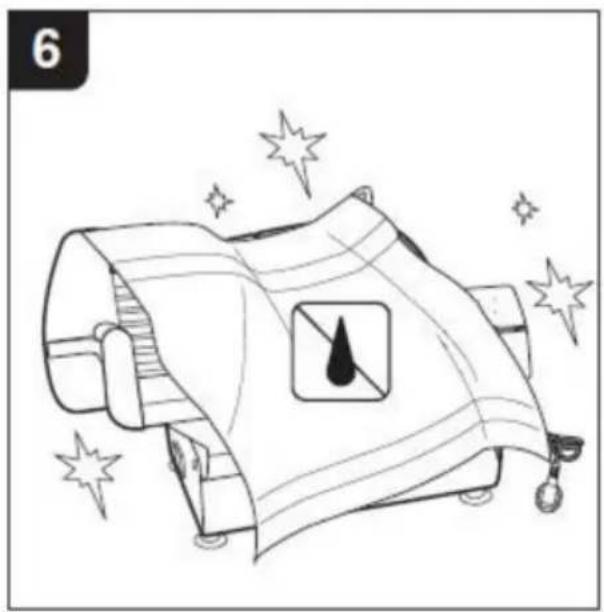
natural_image
Illustration of a stylized lamp with a water droplet symbol, surrounded by sparkles (no text or symbols)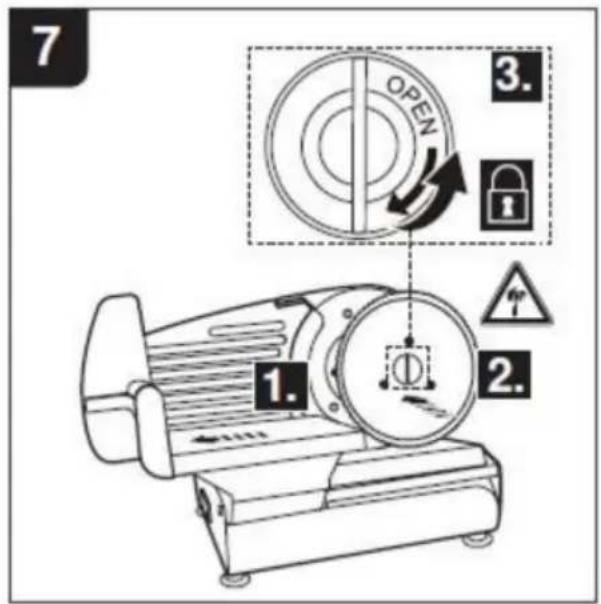
text_image
7 OPEN 3. 1. 2.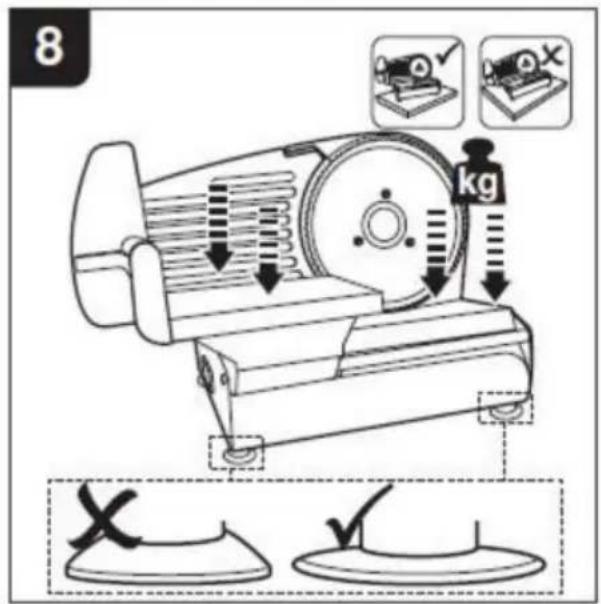
text_image
8 kg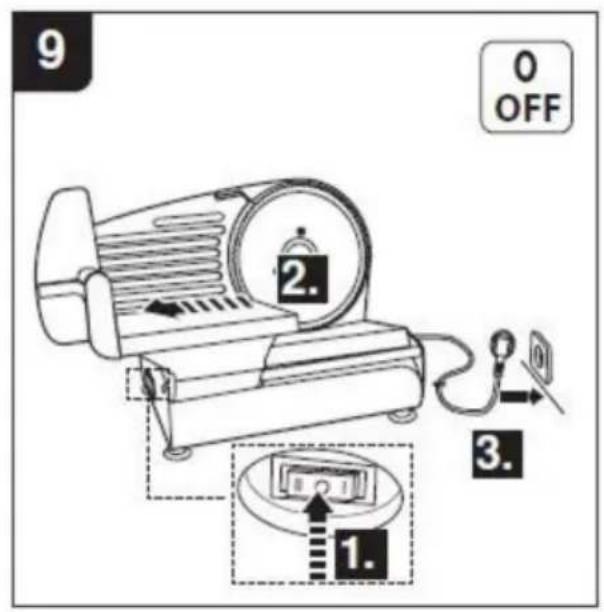
text_image
9 0 OFF 2. 3. 1.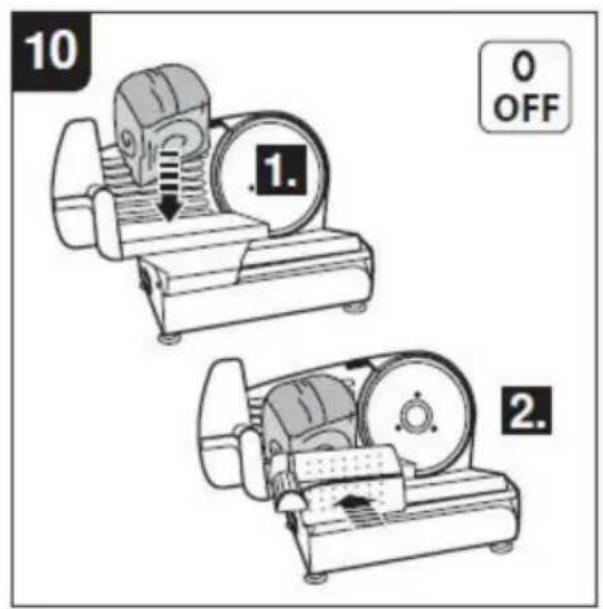
text_image
10 1. 0 OFF 2.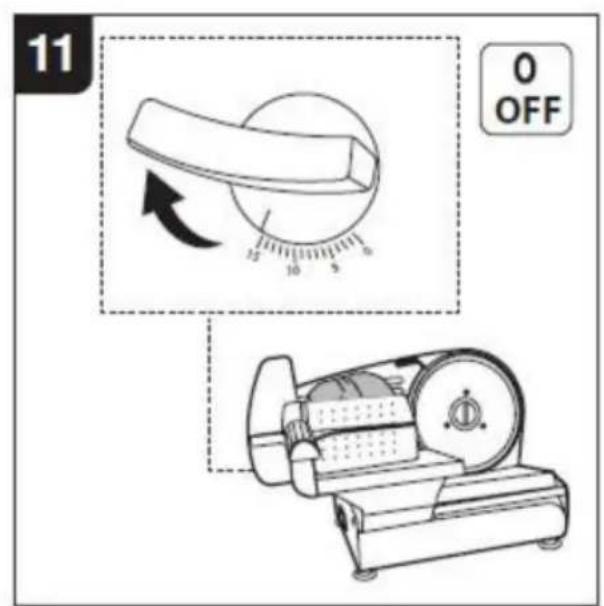
text_image
11 0 OFF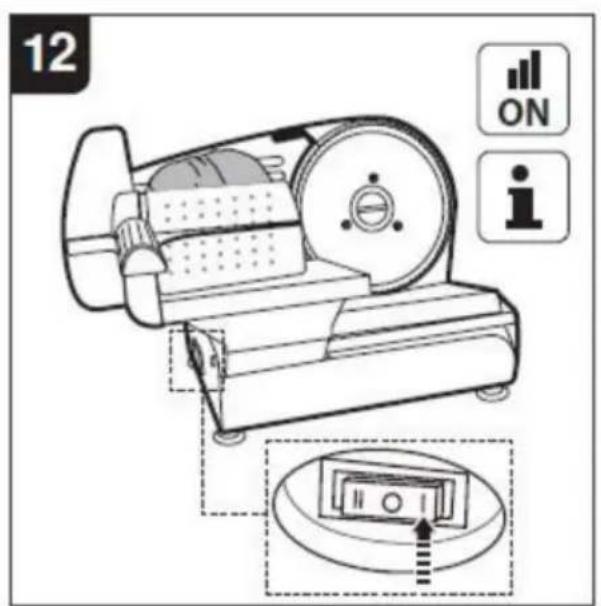
text_image
12 ON i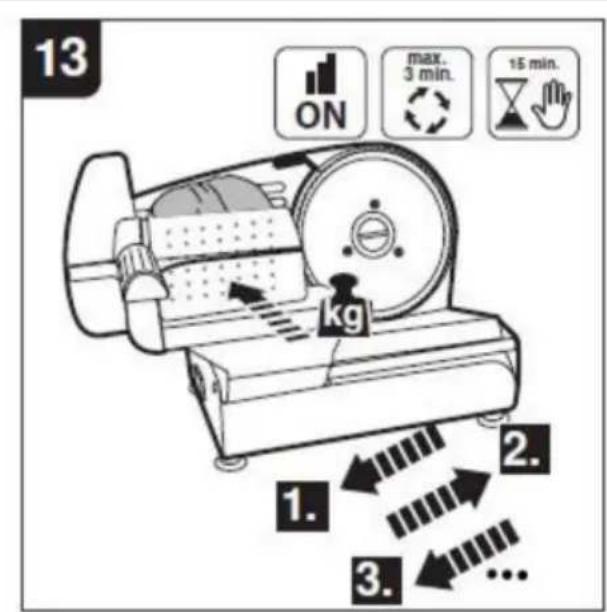
text_image
13 ON max. 3 min. 15 min. kg 1. 2. 3.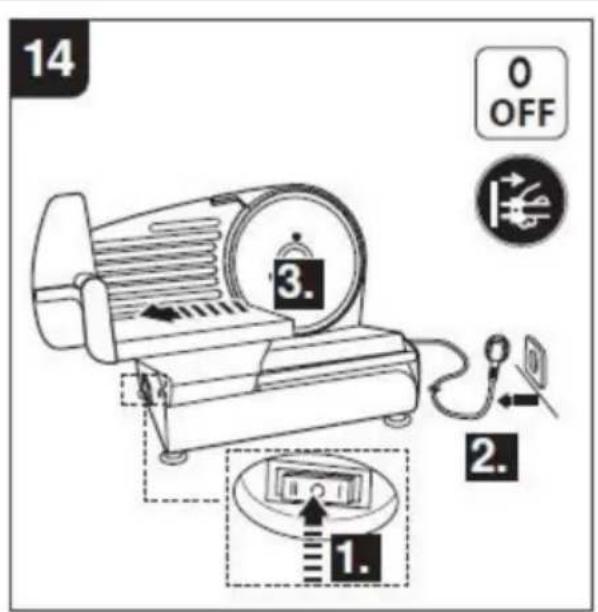
text_image
14 0 OFF 3. 2. 1.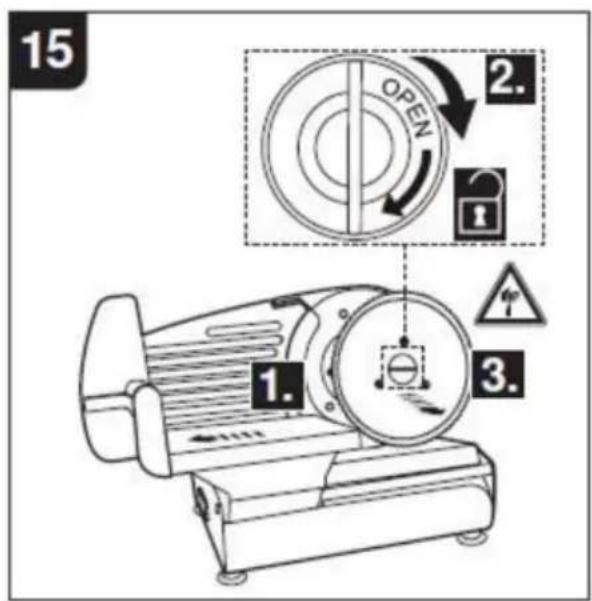
text_image
15 OPEN 2. 3. 1. 2. 3.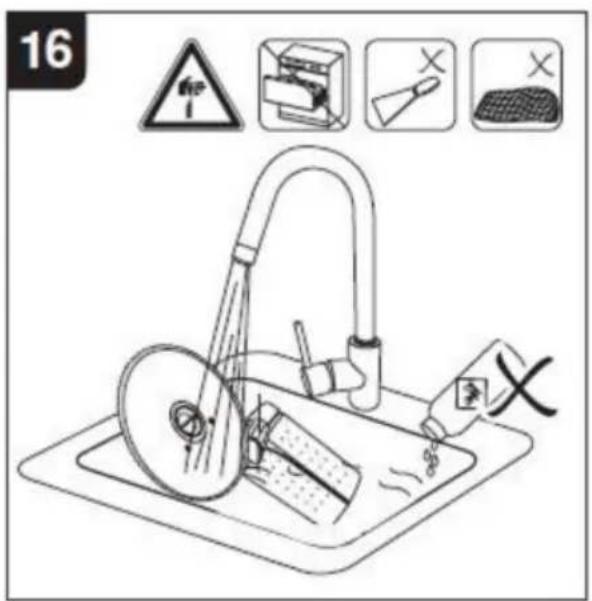
text_image
16 #P # # # X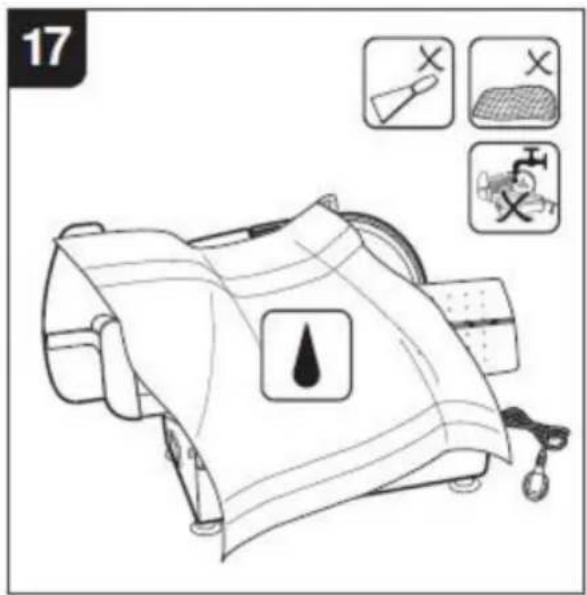
text_image
17 X X X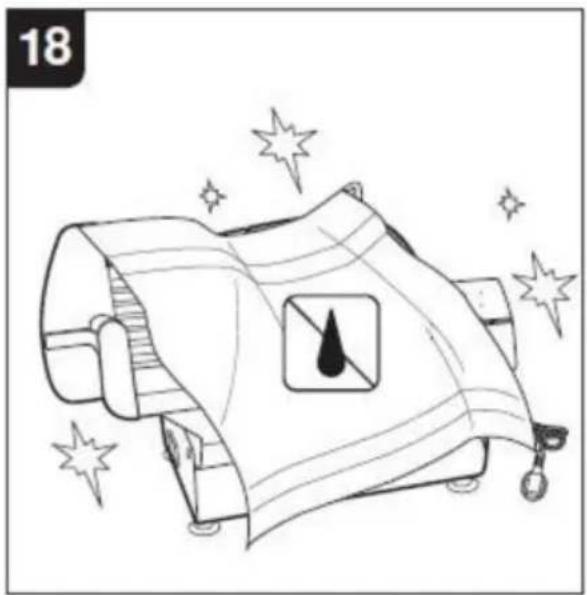
natural_image
Illustration of a stylized lamp with a droplet inside, surrounded by sparkles (no text or symbols)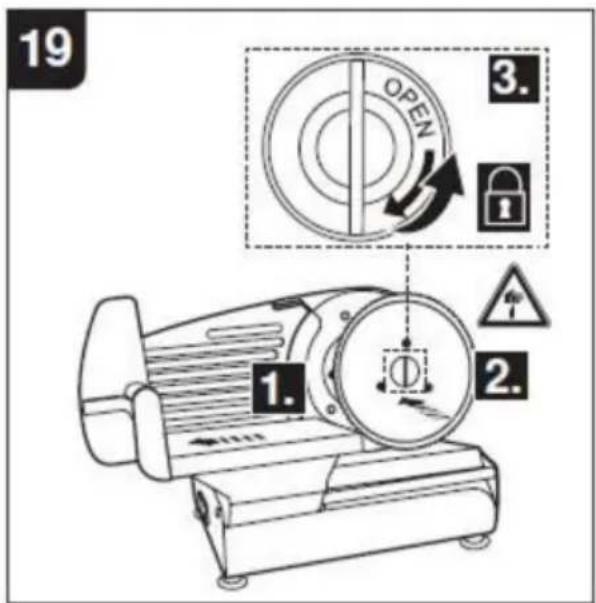
text_image
19 3. OPEN 2. 1. 2.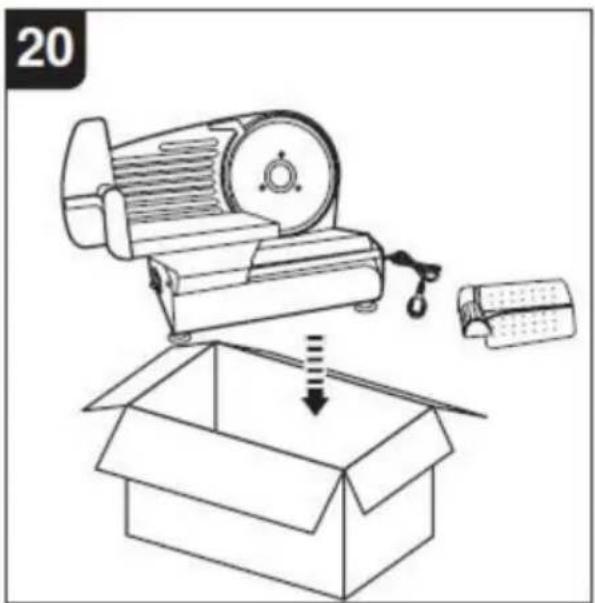
natural_image
Illustration of an open box being handled by a motor and a small box, with no visible text or symbols.ÉLIMINATION CORRECTE

natural_image
Technical line drawing of a mechanical device with gears and housing (no text or symbols)text_image
Technical diagram of a mechanical device with numbered parts for identification and assembly reference.natural_image
Illustration of a mechanical device with a crossed X mark and a 'SHOP' icon (no text or symbols on the device itself)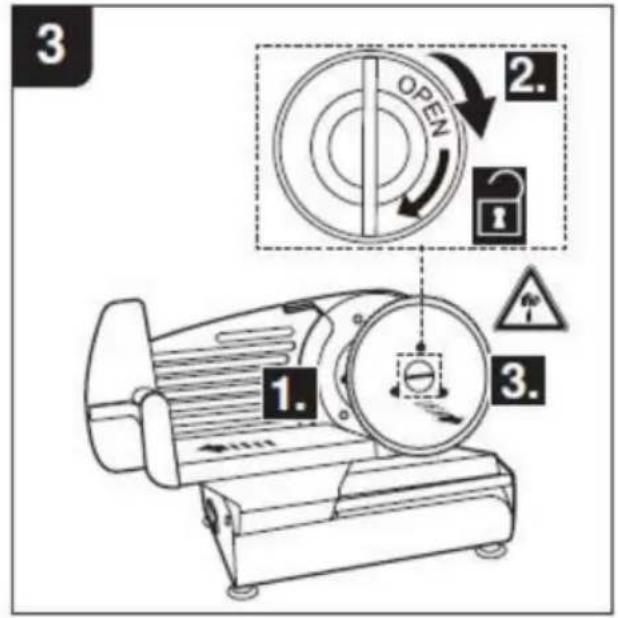
text_image
3 1. 2. OPEN 3.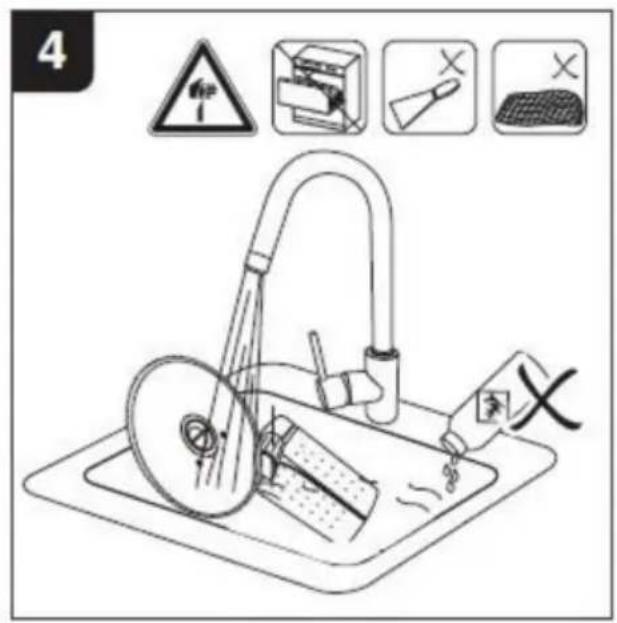
text_image
4 X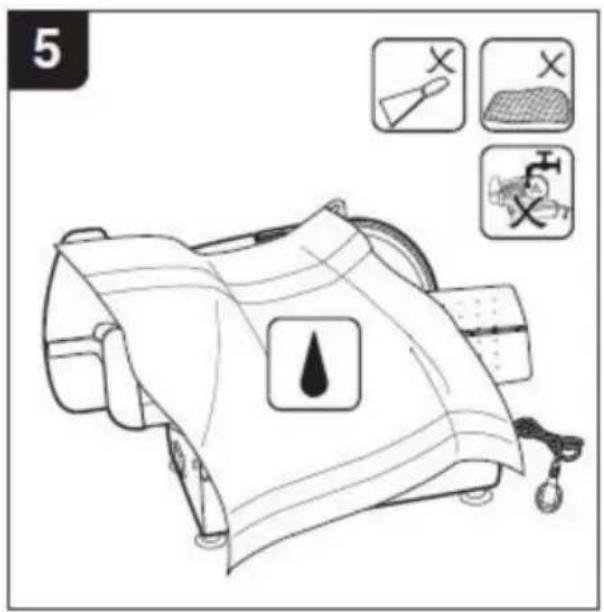
text_image
5 X X X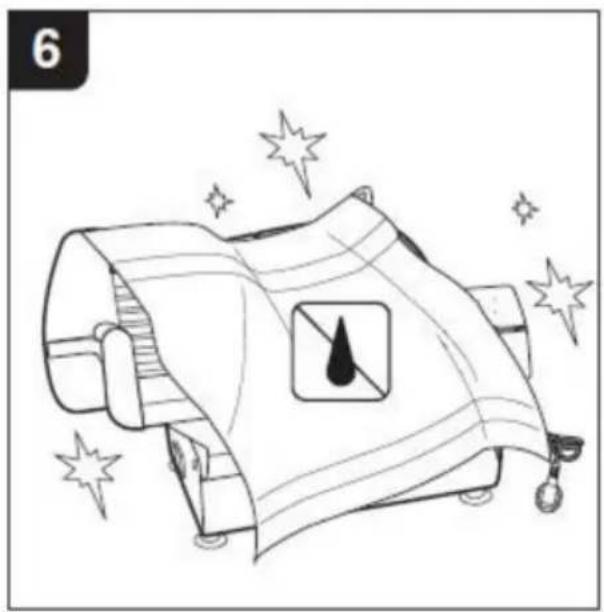
natural_image
Illustration of a stylized lamp with a water droplet symbol, surrounded by sparkles (no text or symbols)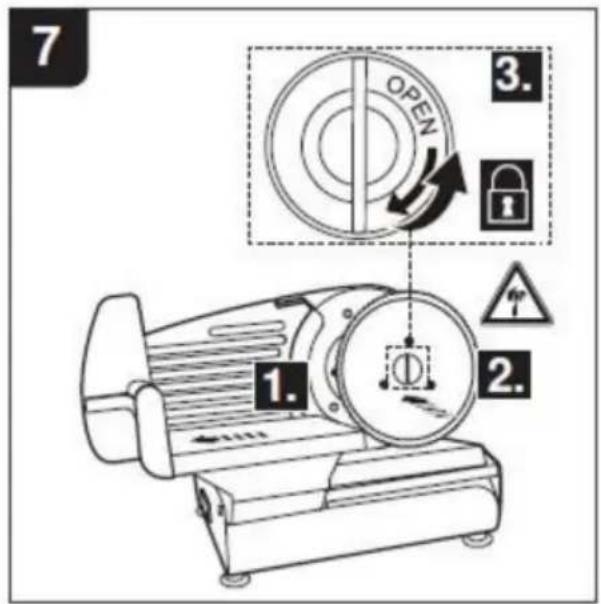
text_image
7 OPEN 3. 1. 2.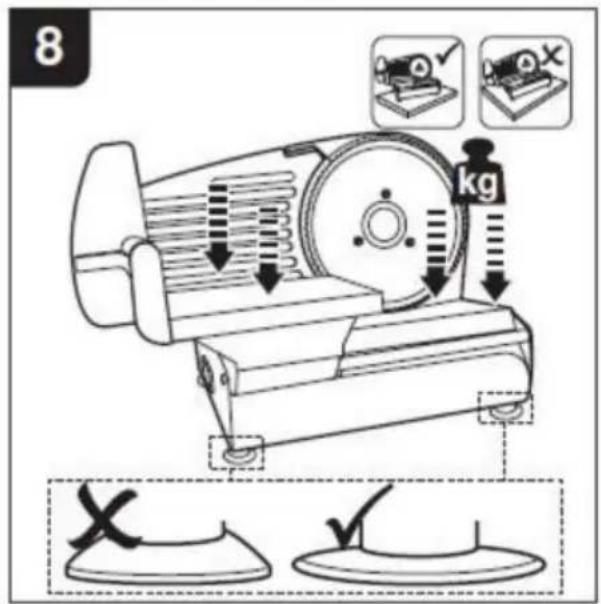
text_image
8 kg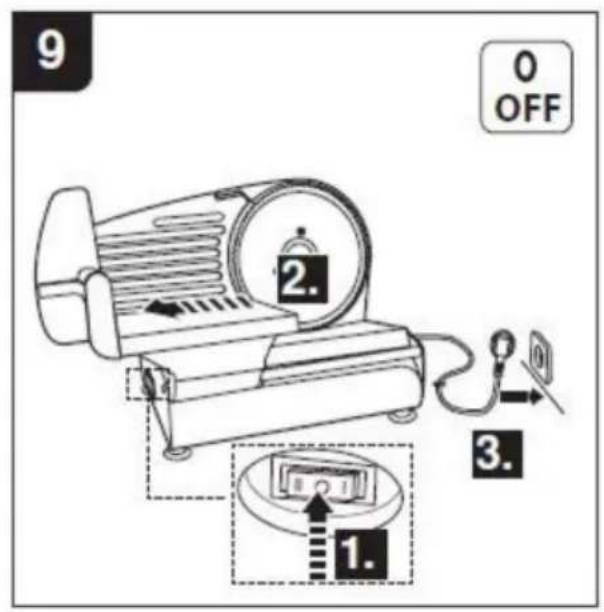
text_image
9 0 OFF 2. 3. 1.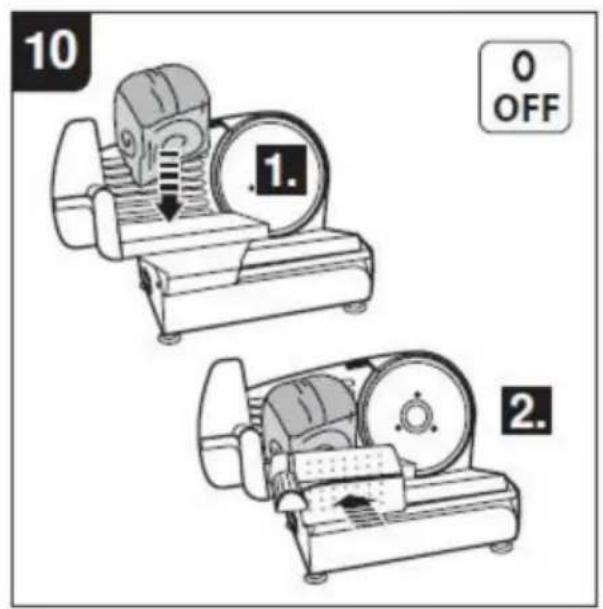
text_image
10 1. 0 OFF 2.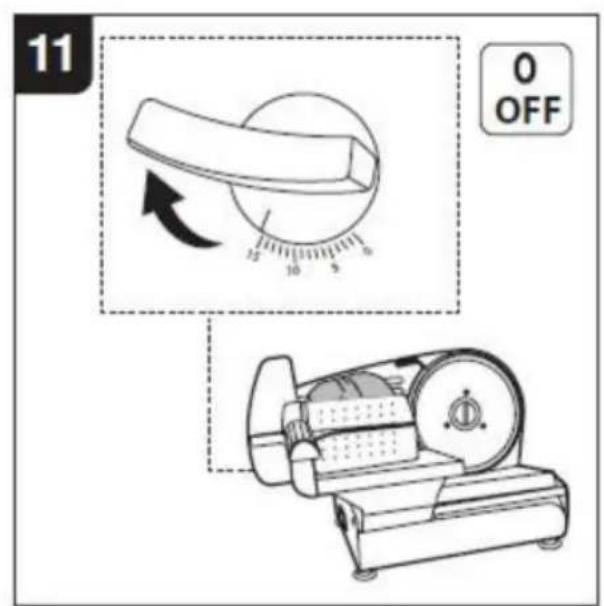
text_image
11 0 OFF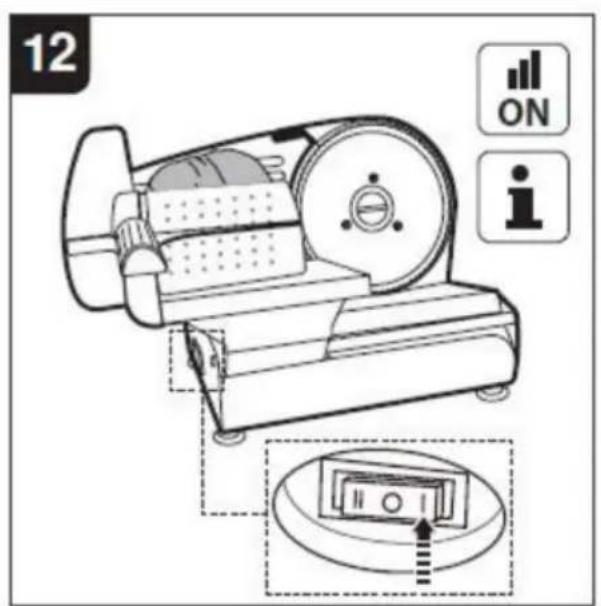
text_image
12 ON i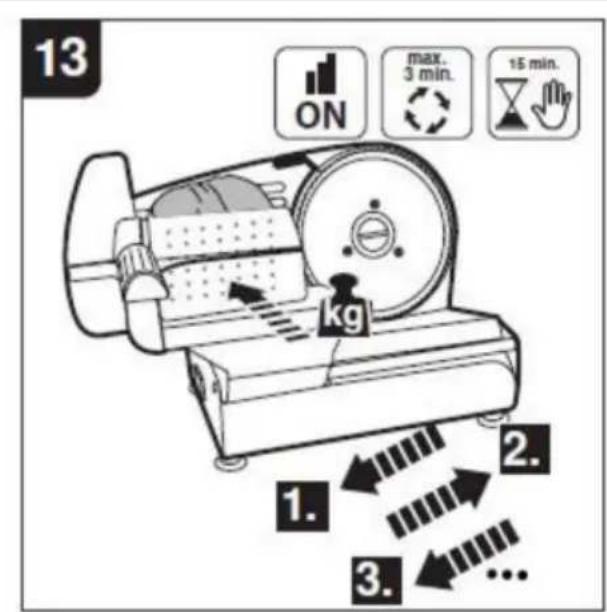
text_image
13 ON max. 3 min. 15 min. kg 1. 2. 3.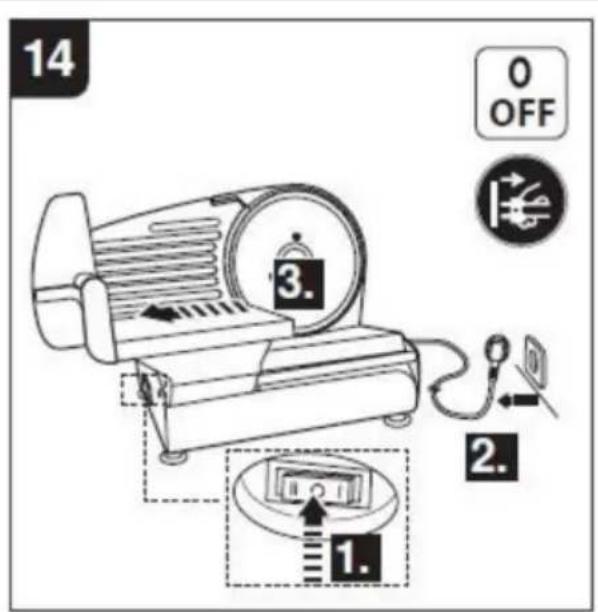
text_image
14 0 OFF 3. 2. 1.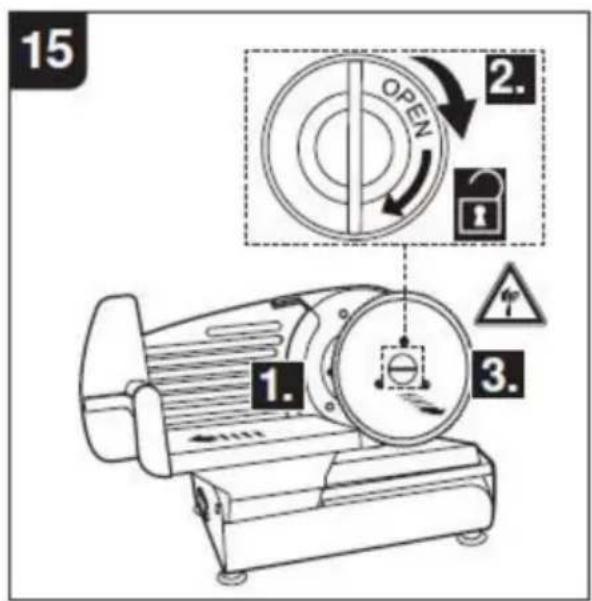
text_image
15 OPEN 2. 3. 1. 2. 3.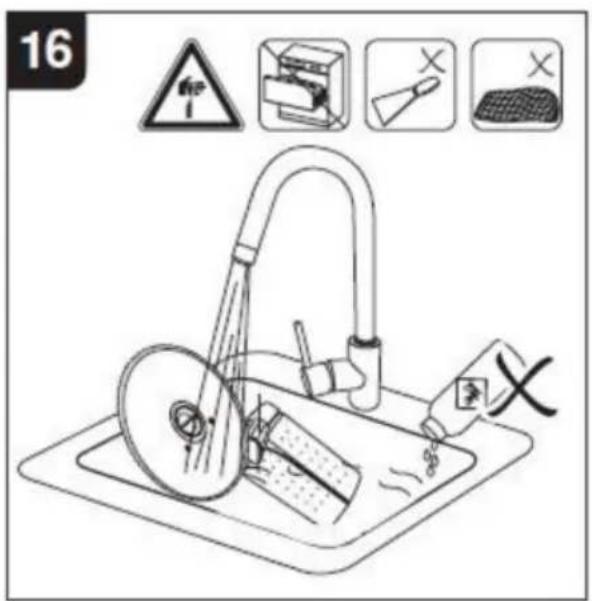
text_image
16 #P # # # X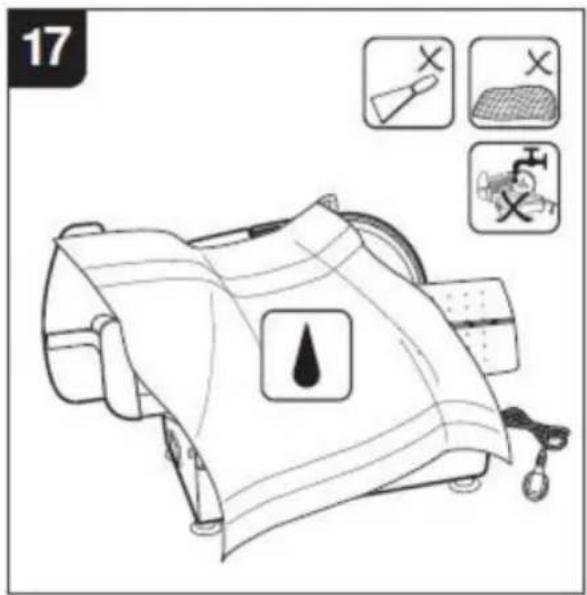
text_image
17 X X X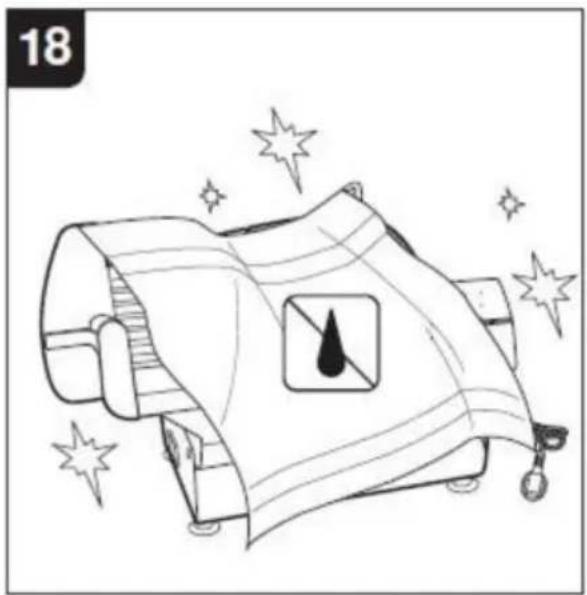
natural_image
Illustration of a stylized lamp with a droplet inside, surrounded by sparkles (no text or symbols)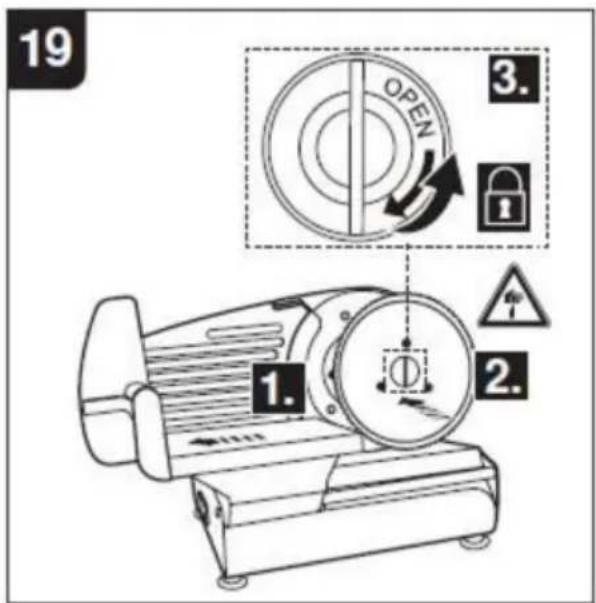
text_image
19 3. OPEN 2. 1. 2.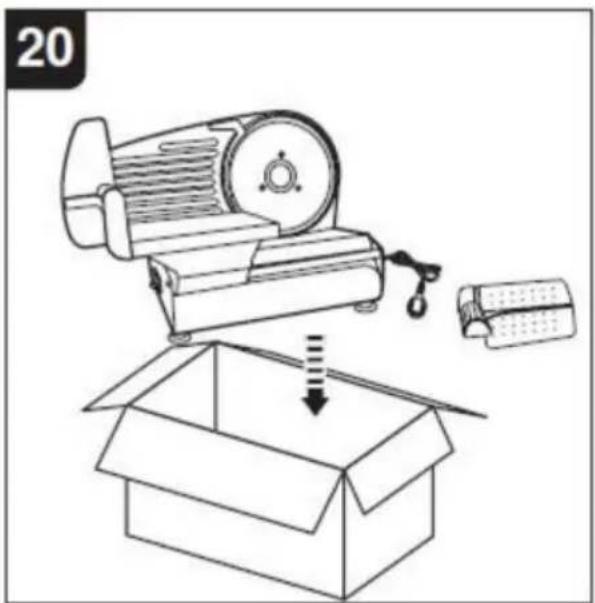
natural_image
Illustration of an open box being handled by a motor and a small box, with no visible text or symbols.KORREKTE ENTSORGUNG

www.vevor.com/support
VEVOR®
TOUGH TOOLS, HALF PRICE
natural_image
Technical line drawing of a mechanical device with gears and housing (no text or symbols)text_image
Technical diagram of a mechanical device with numbered parts for identification and assembly reference.natural_image
Illustration of a mechanical device with a crossed X mark and a 'SHOP' icon (no text or symbols on the device itself)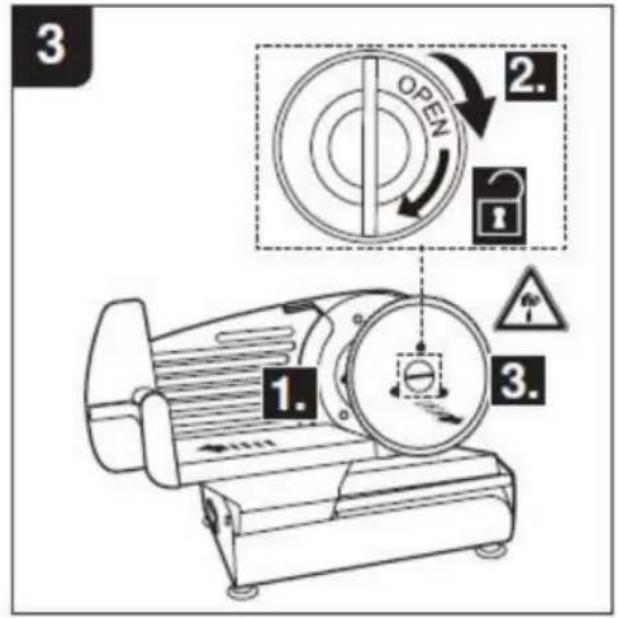
text_image
3 1. 2. OPEN 3.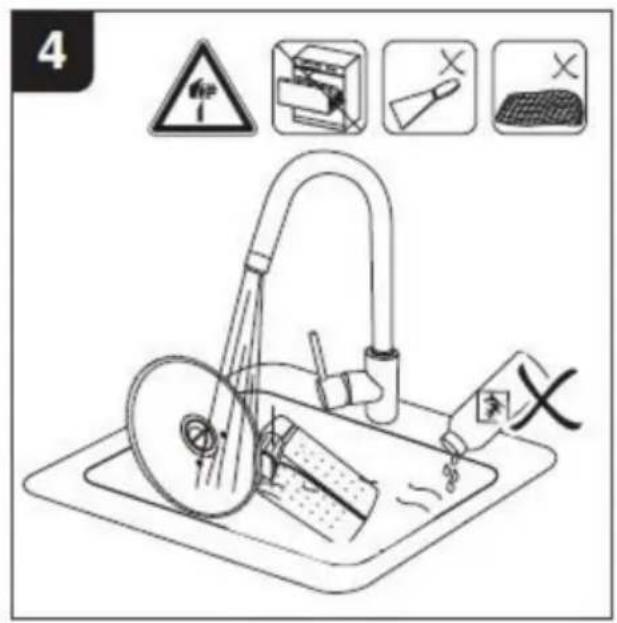
text_image
4 X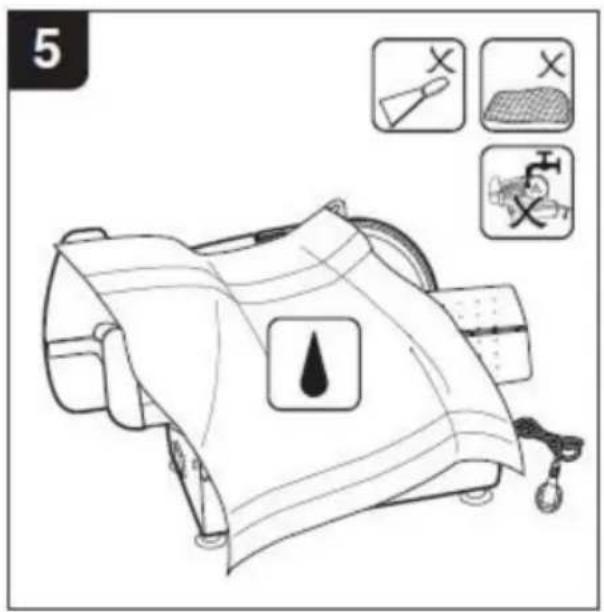
text_image
5 X X X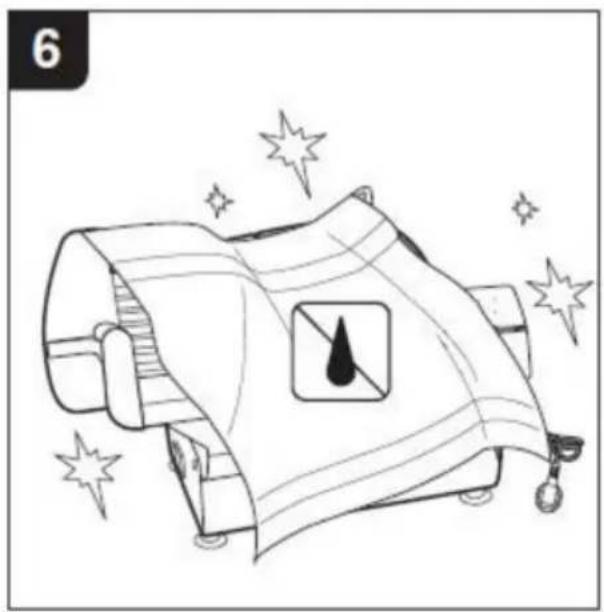
natural_image
Illustration of a stylized lamp with a water droplet symbol, surrounded by sparkles (no text or symbols)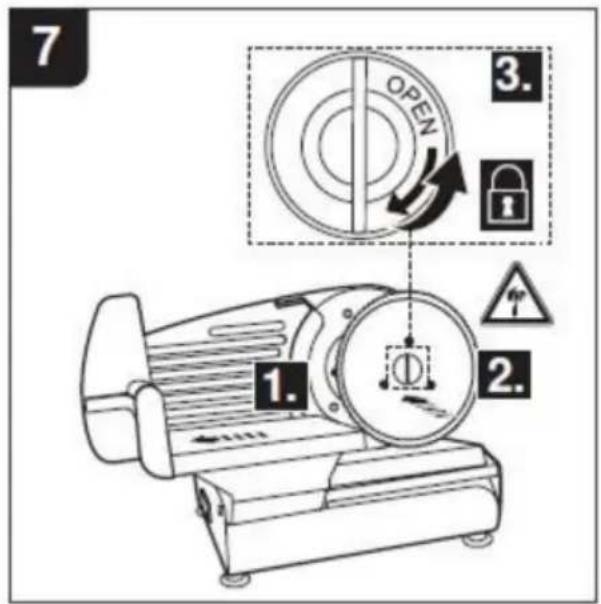
text_image
7 OPEN 3. 1. 2.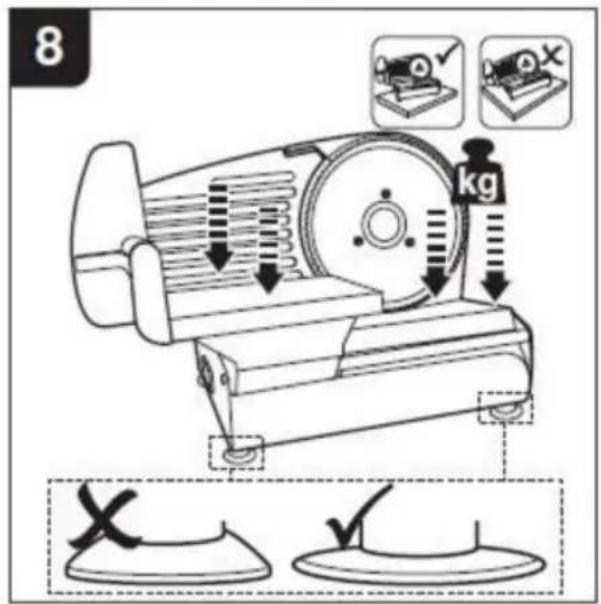
text_image
8 kg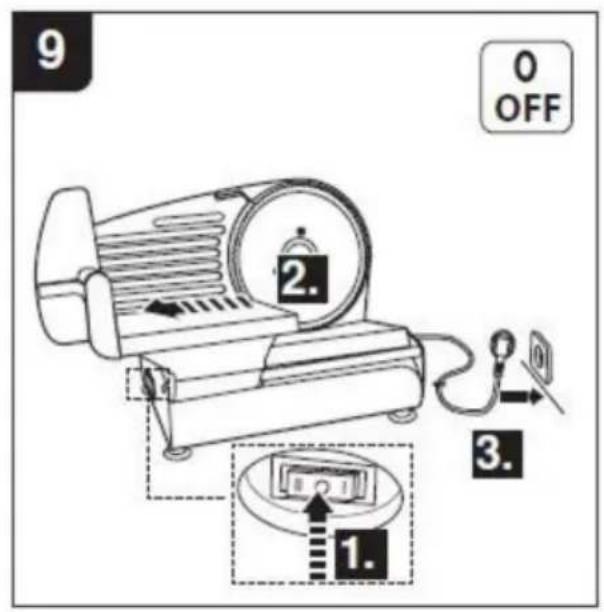
text_image
9 0 OFF 2. 3. 1.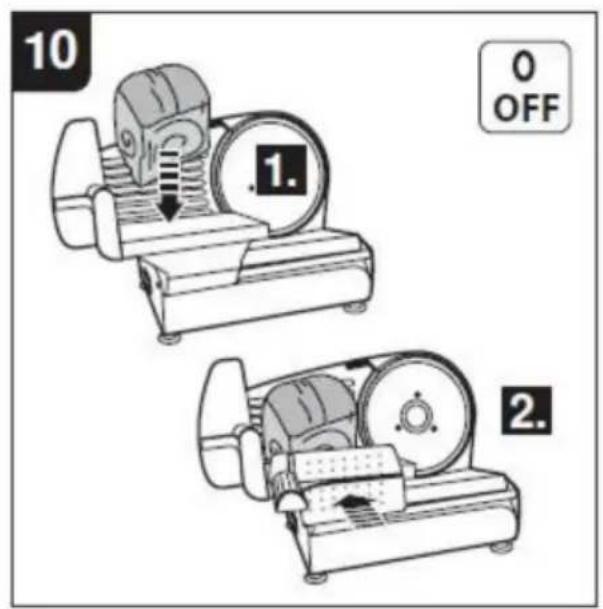
text_image
10 1. 0 OFF 2.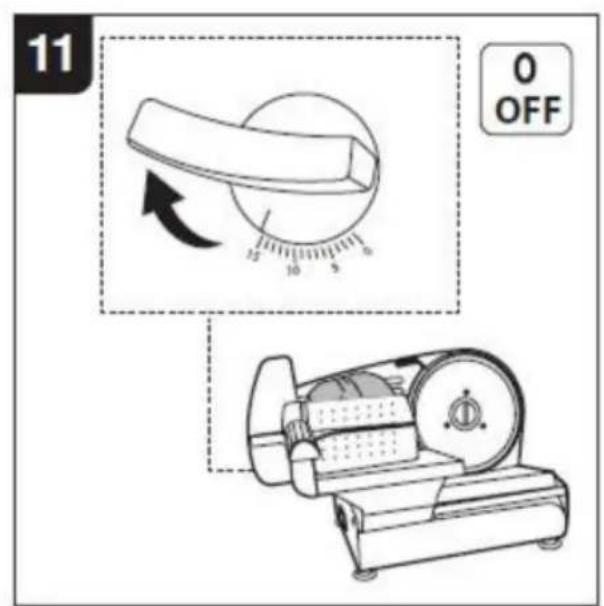
text_image
11 0 OFF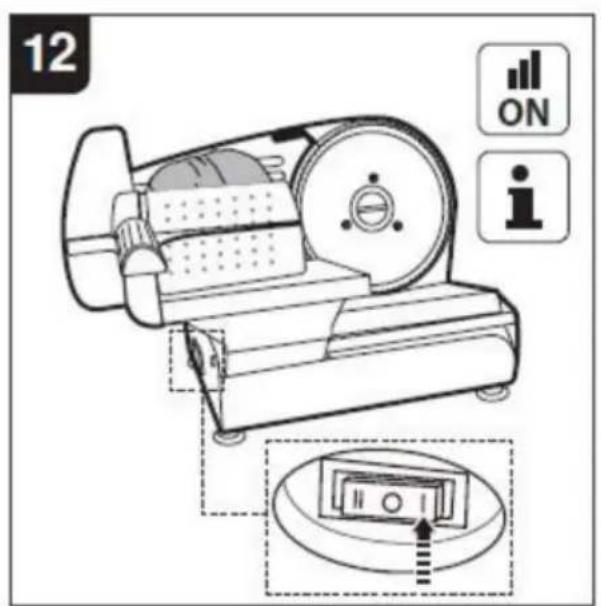
text_image
12 ON i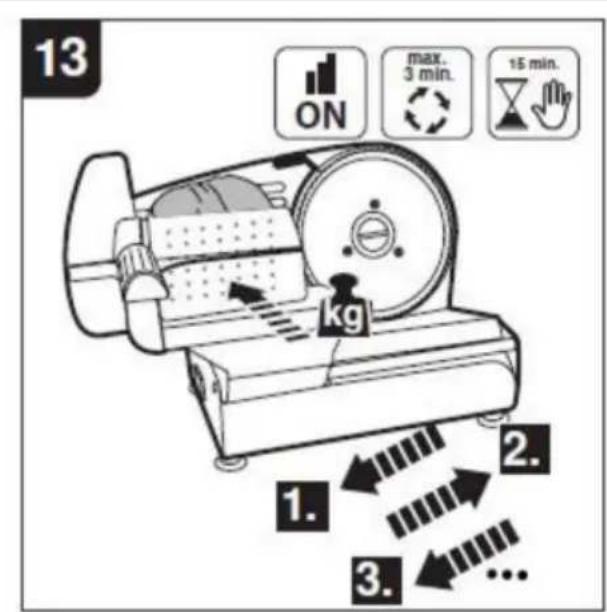
text_image
13 ON max. 3 min. 15 min. kg 1. 2. 3.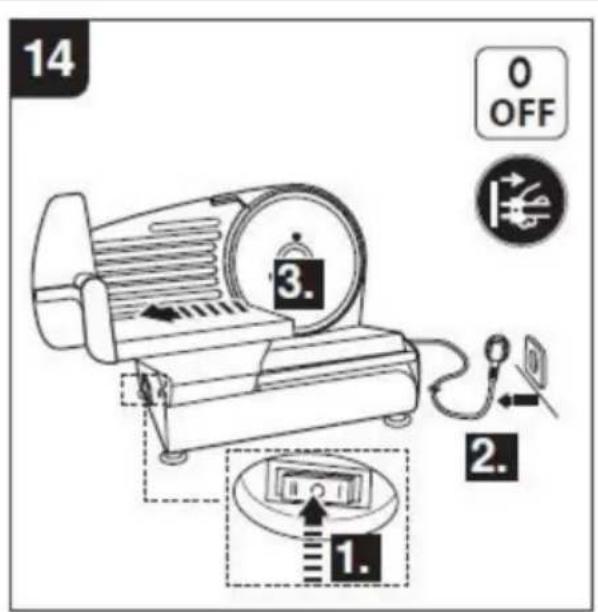
text_image
14 0 OFF 3. 2. 1.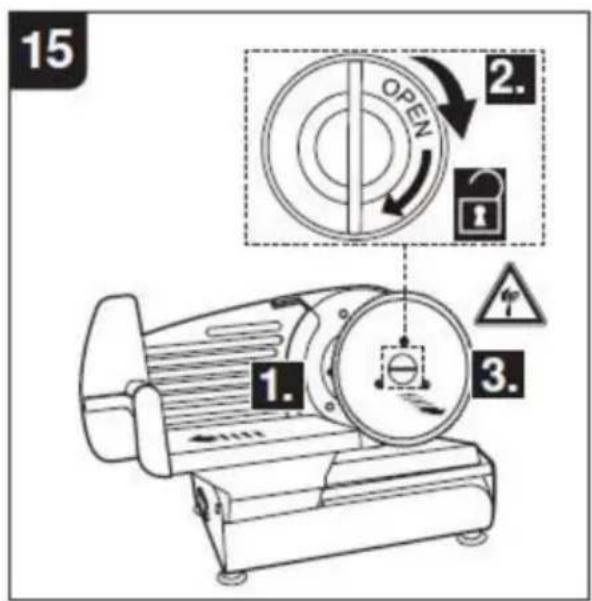
text_image
15 OPEN 2. 3. 1. 2. 3.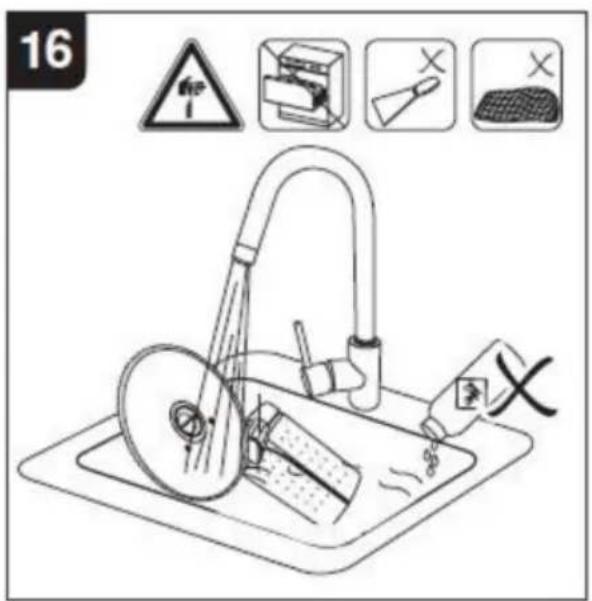
text_image
16 #P # # # X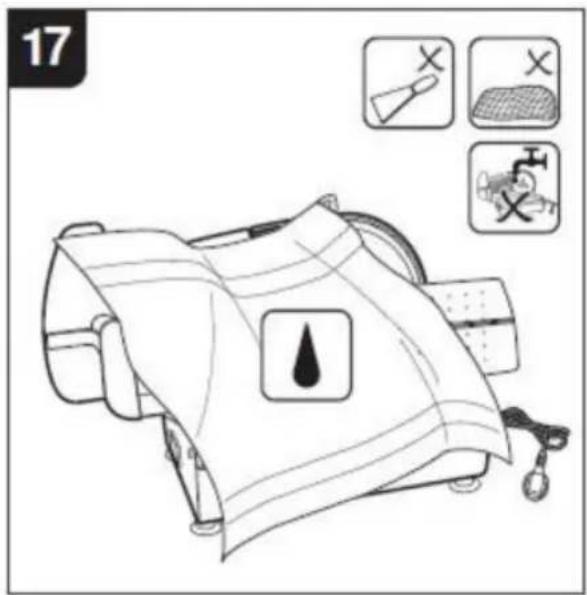
text_image
17 X X X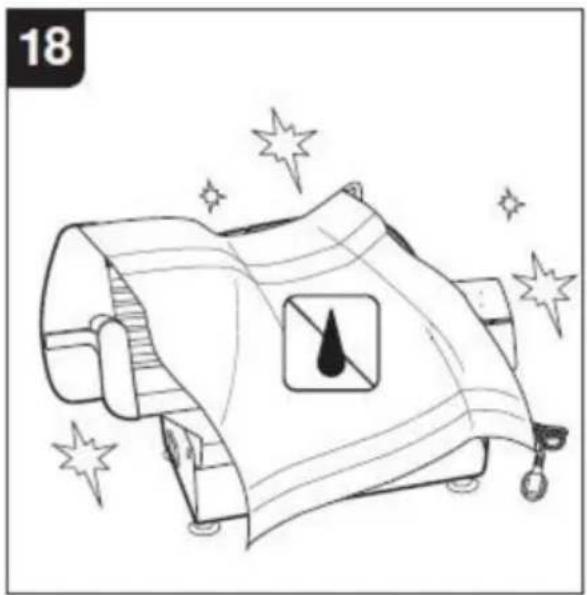
natural_image
Illustration of a stylized lamp with a droplet inside, surrounded by sparkles (no text or symbols)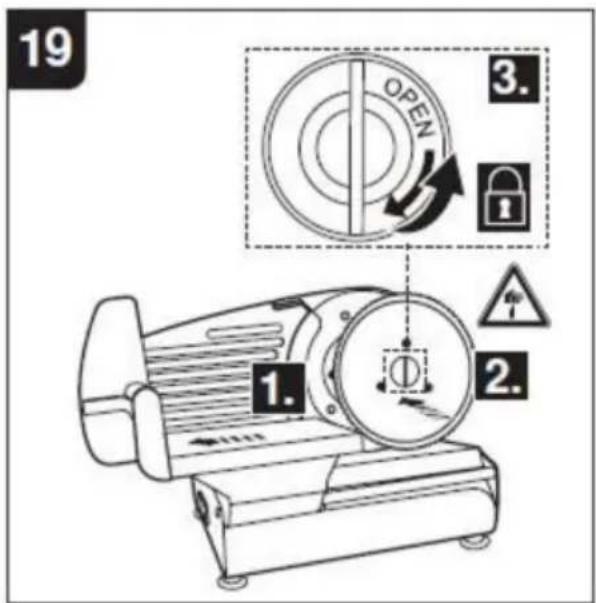
text_image
19 3. OPEN 2. 1. 2.
natural_image
Illustration of an open box being handled by a motor and a smaller box, with no visible text or symbols.elettronica www.vevor.com/support
VEVOR®
TOUGH TOOLS, HALF PRICE
natural_image
Technical line drawing of a mechanical device with gears and housing (no text or symbols)text_image
Technical diagram of a mechanical device with numbered parts for identification and assembly reference.natural_image
Illustration of a mechanical device with a crossed X mark and a 'SHOP' icon (no text or symbols on the device itself)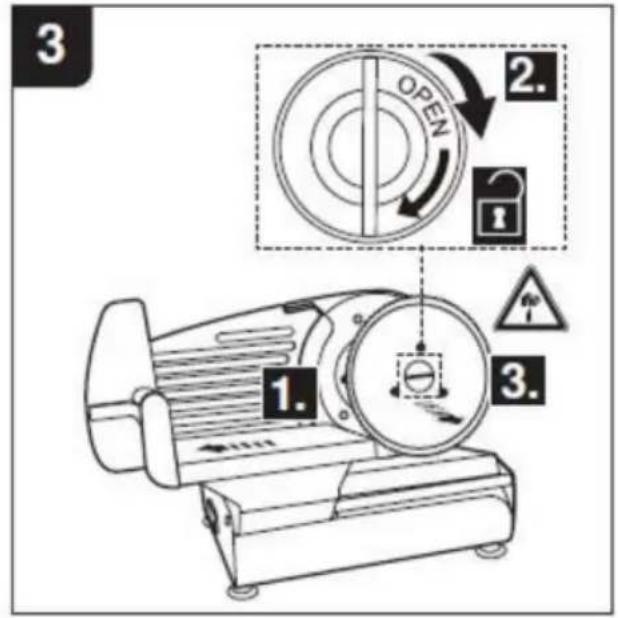
text_image
3 1. 2. OPEN 3.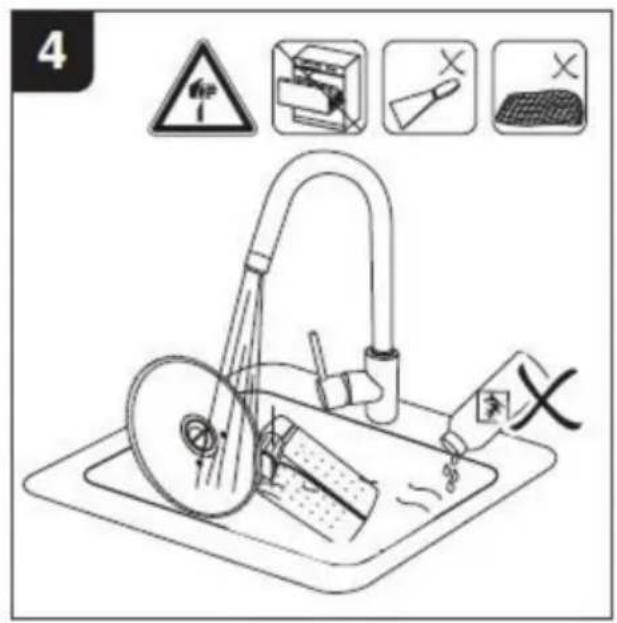
text_image
4 X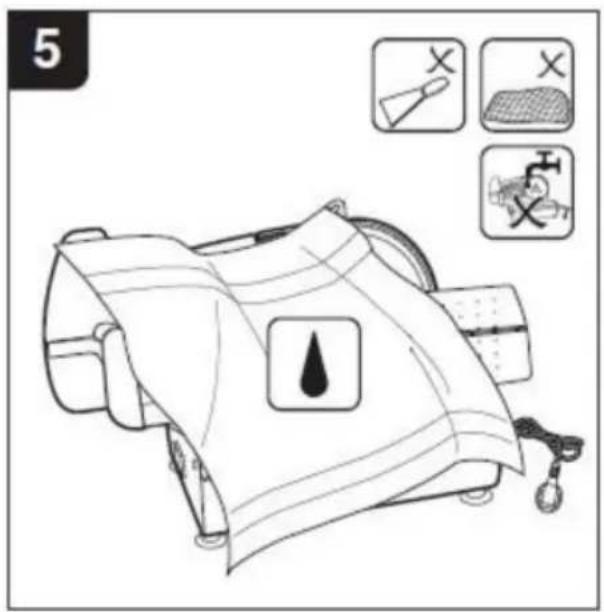
text_image
5 X X X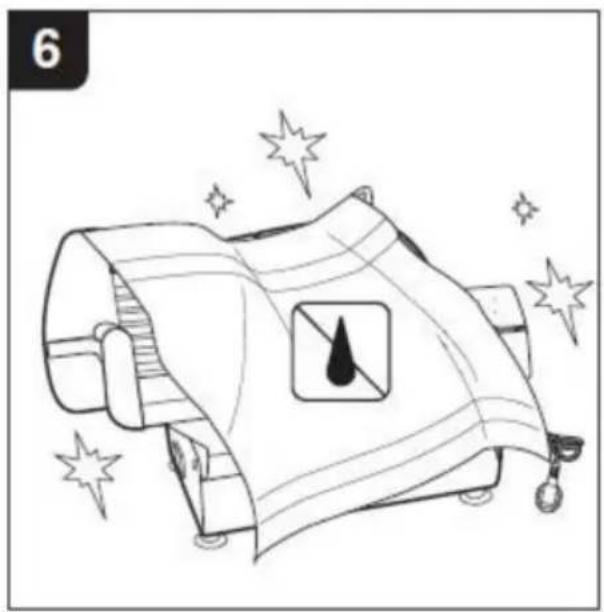
natural_image
Illustration of a stylized lamp with a water droplet symbol, surrounded by sparkles (no text or symbols)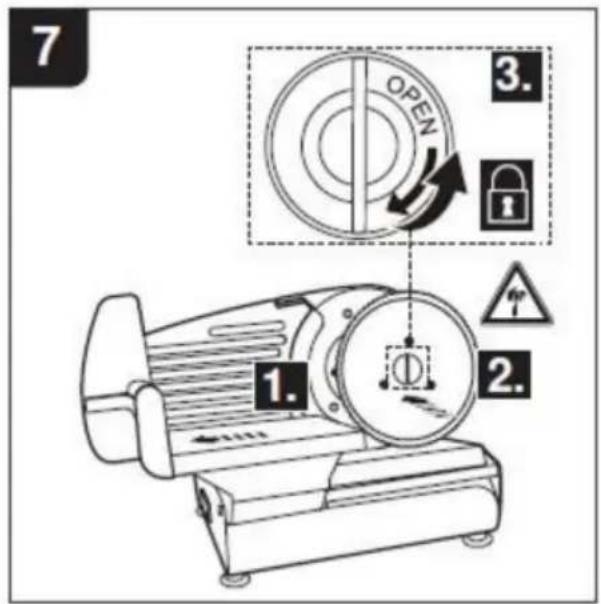
text_image
7 OPEN 3. 1. 2.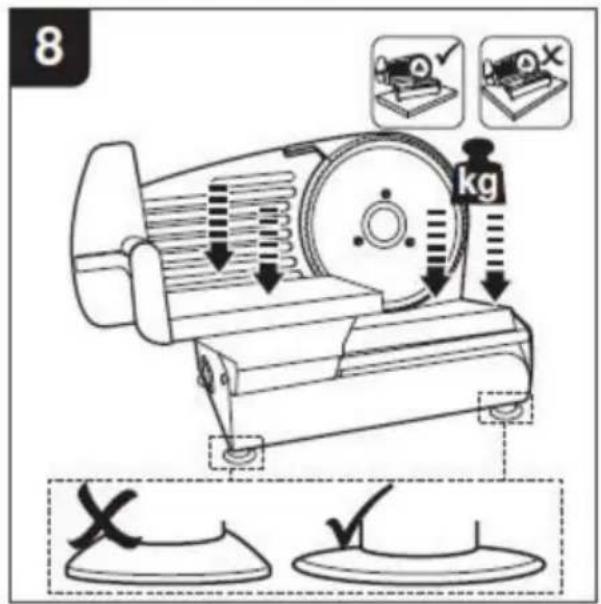
text_image
8 kg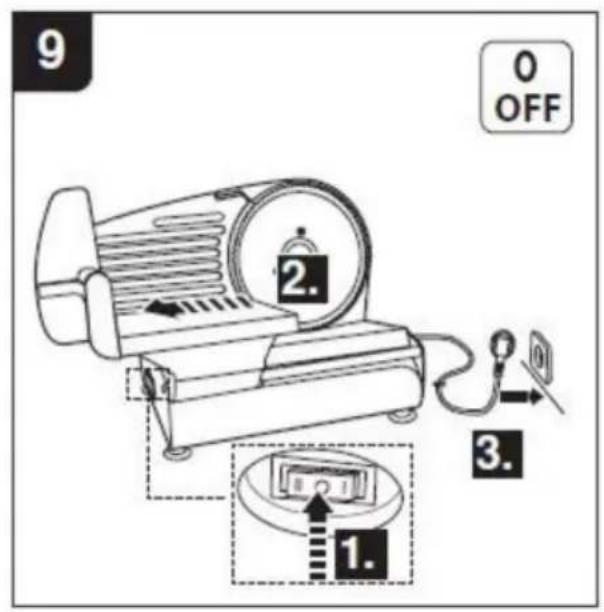
text_image
9 0 OFF 2. 3. 1.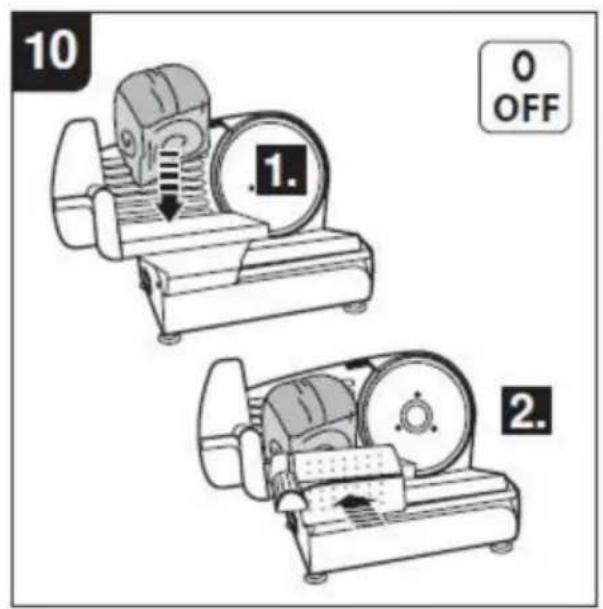
text_image
10 1. 0 OFF 2.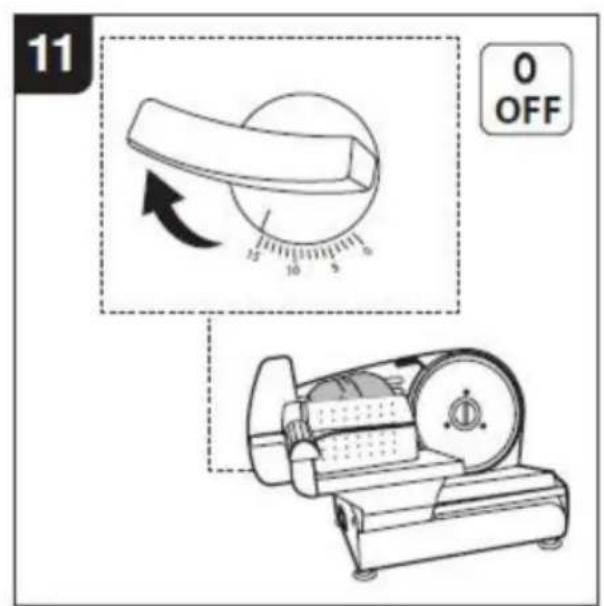
text_image
11 0 OFF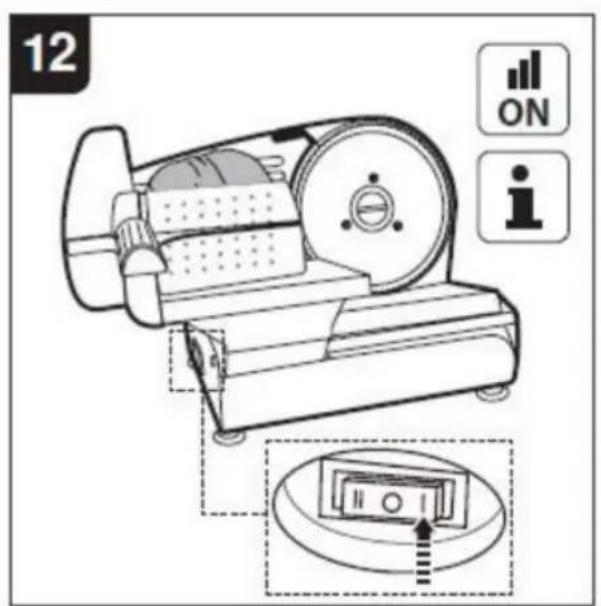
text_image
12 ON i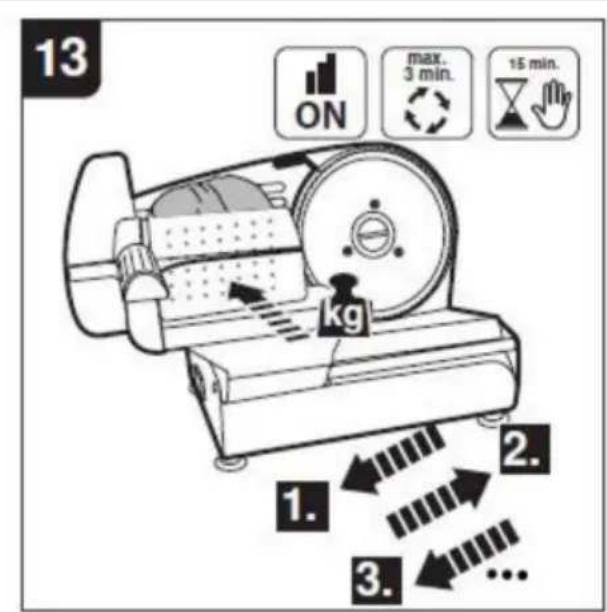
text_image
13 ON max. 3 min. 15 min. kg 1. 2. 3.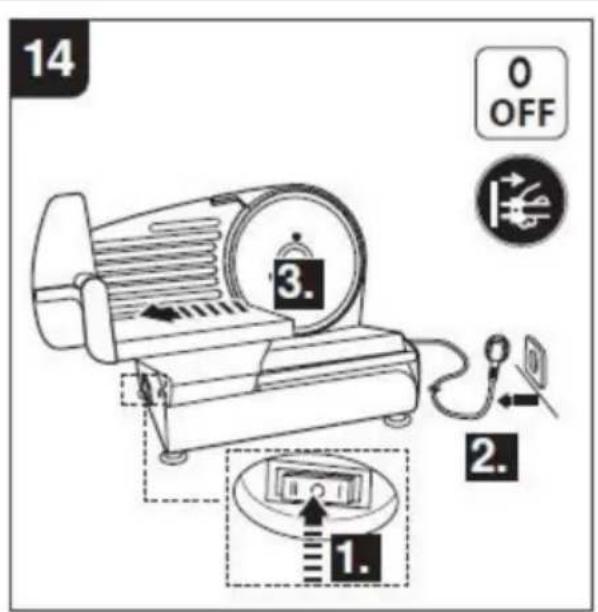
text_image
14 0 OFF 3. 2. 1.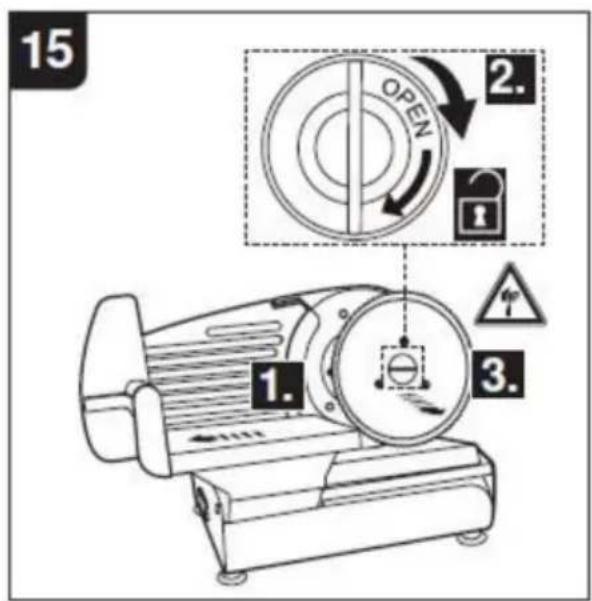
text_image
15 OPEN 2. 3. 1. 2. 3.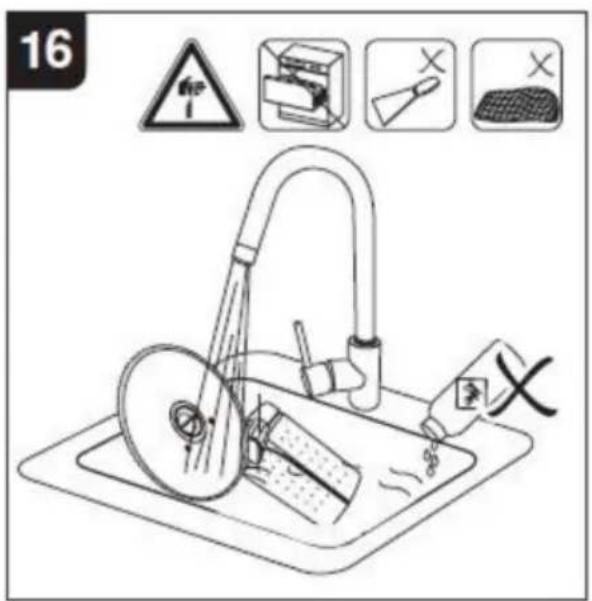
text_image
16 #P # # # X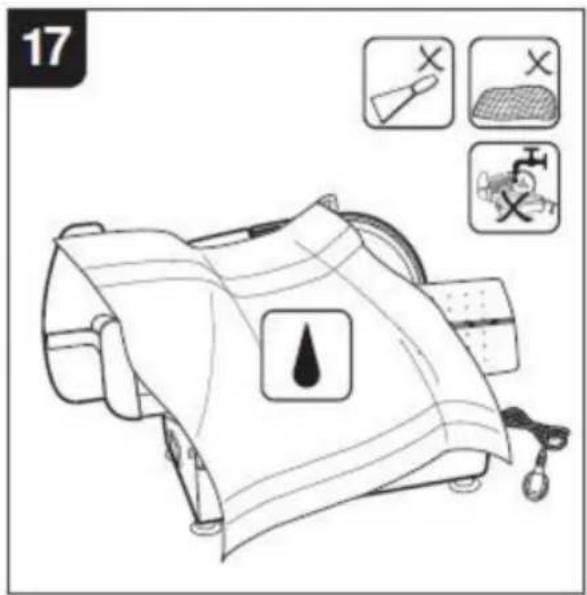
text_image
17 X X X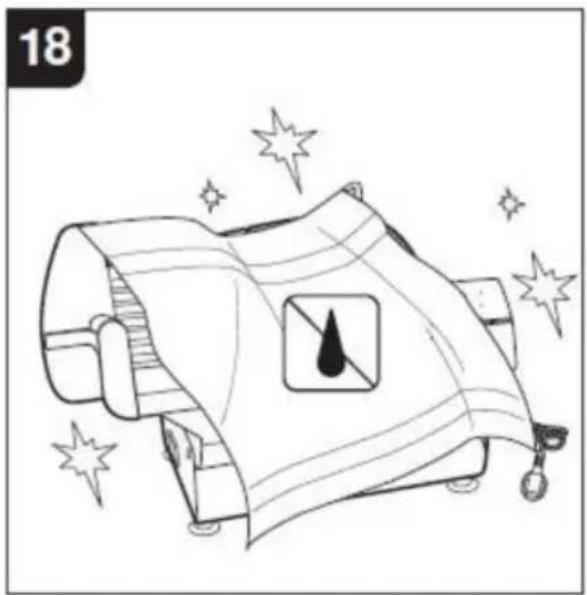
natural_image
Illustration of a stylized lamp with a droplet inside, surrounded by sparkles (no text or symbols)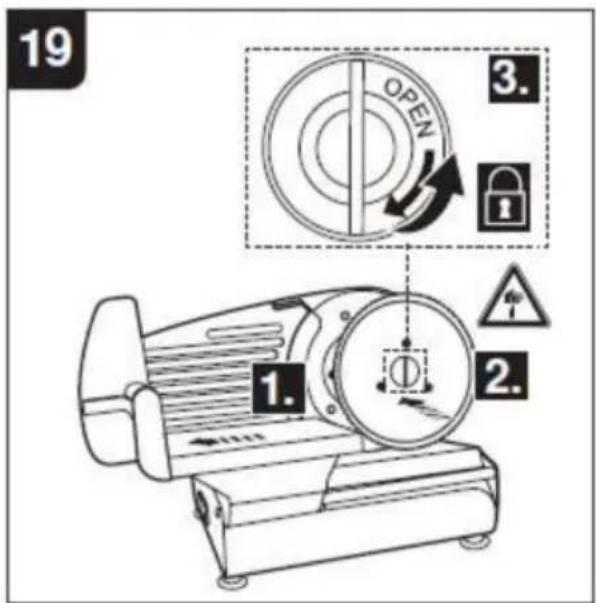
text_image
19 3. OPEN 2. 1. 2.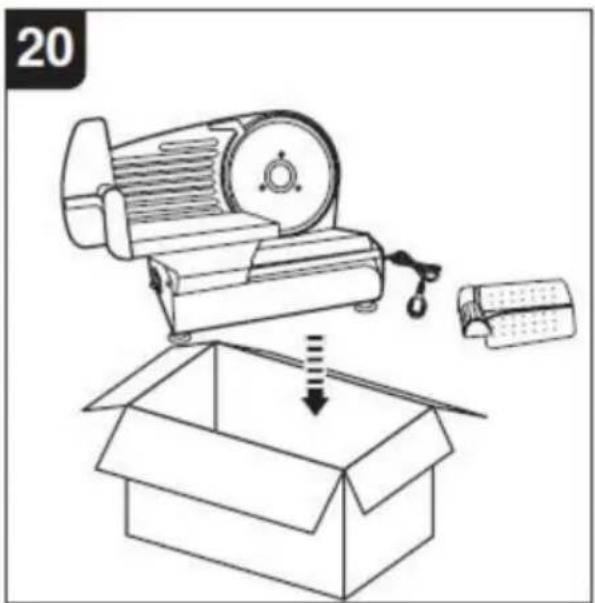
natural_image
Illustration of an open box being handled by a motor and a small box, with no visible text or symbols.natural_image
Technical line drawing of a mechanical device with gears and housing (no text or symbols)POTRZEBUJESZ POMOCY? SKONTAKTUJ SIĘ Z NAMI!
text_image
Technical diagram of a mechanical device with numbered parts for identification and assembly reference.natural_image
Illustration of a mechanical device with a crossed X mark and a 'SHOP' icon (no text or symbols on the device itself)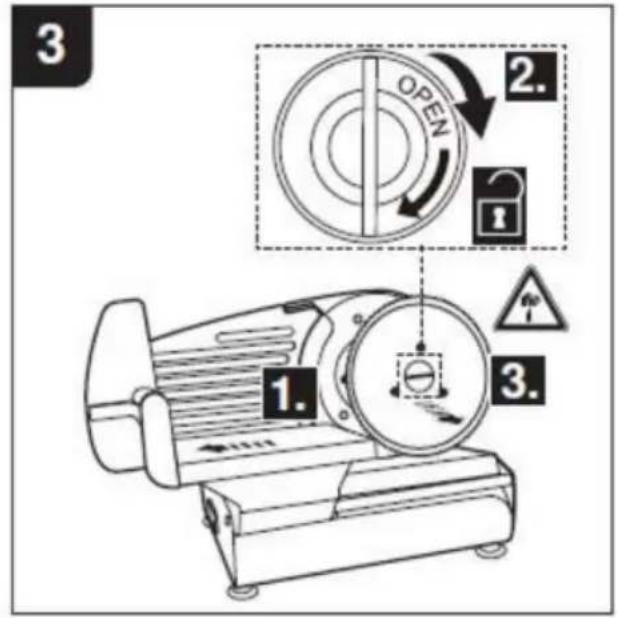
text_image
3 1. 2. OPEN 3.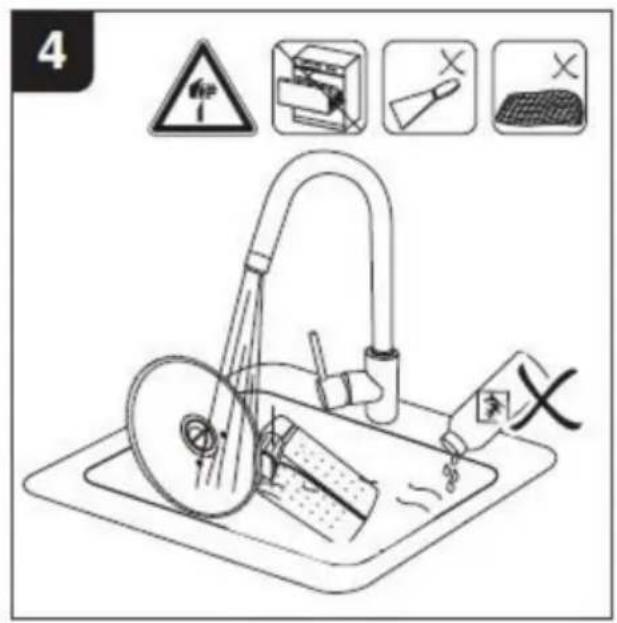
text_image
4 X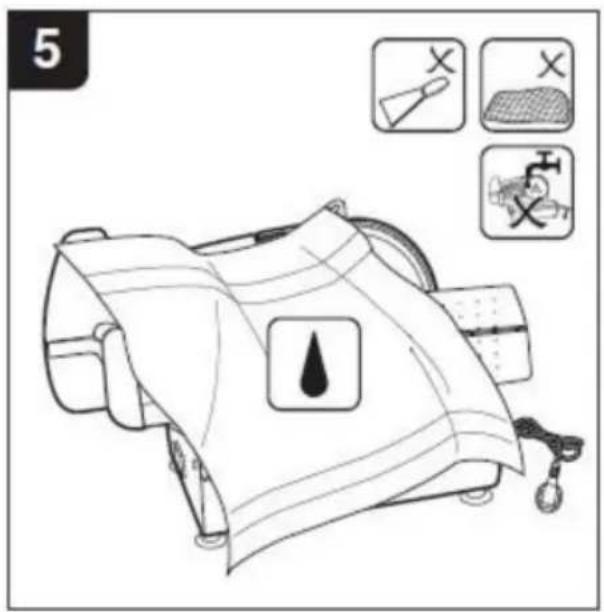
text_image
5 X X X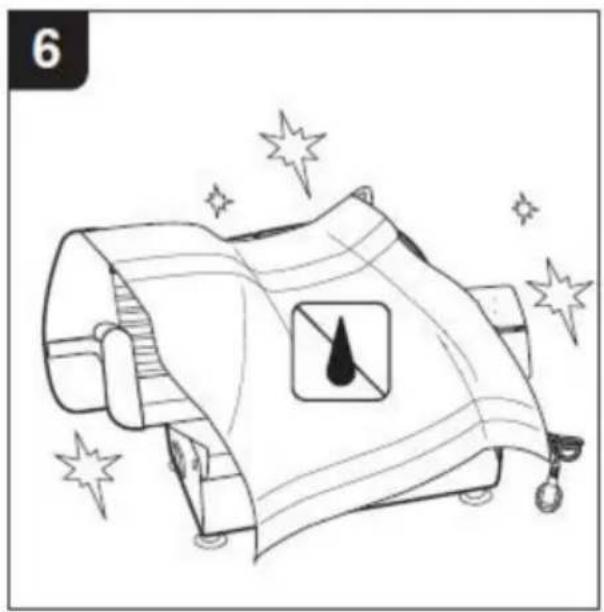
natural_image
Illustration of a stylized lamp with a water droplet symbol, surrounded by sparkles (no text or symbols)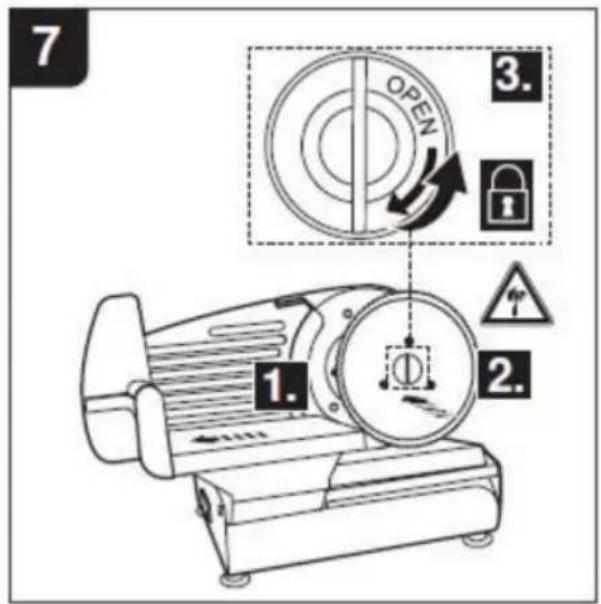
text_image
7 OPEN 3. 1. 2.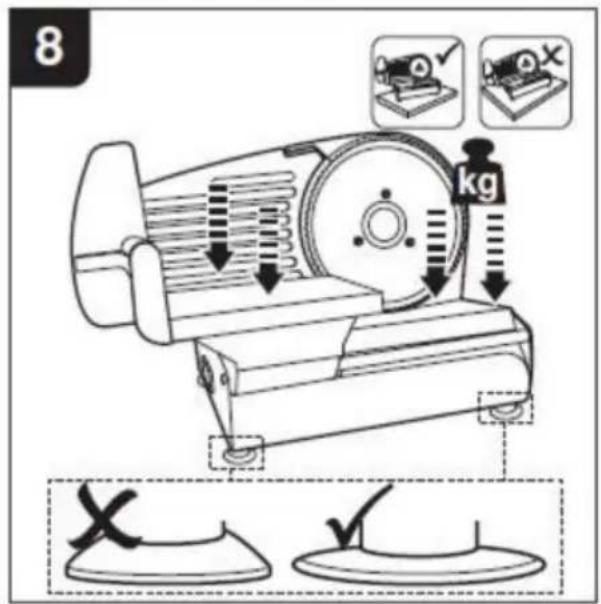
text_image
8 kg
text_image
9 0 OFF 2. 3. 1.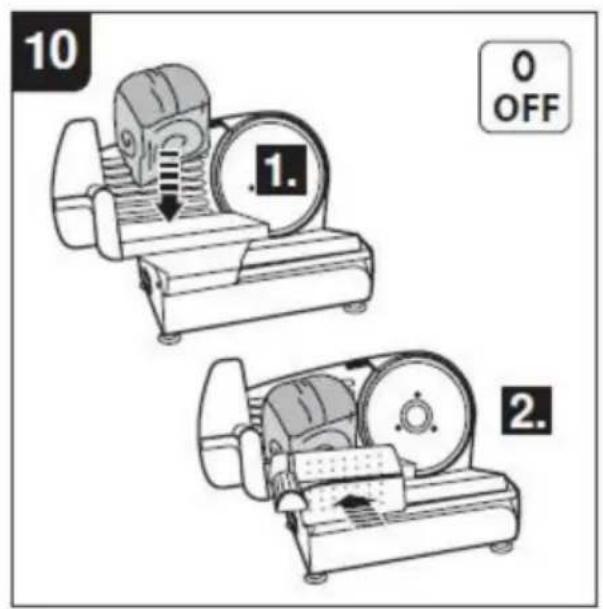
text_image
10 1. 0 OFF 2.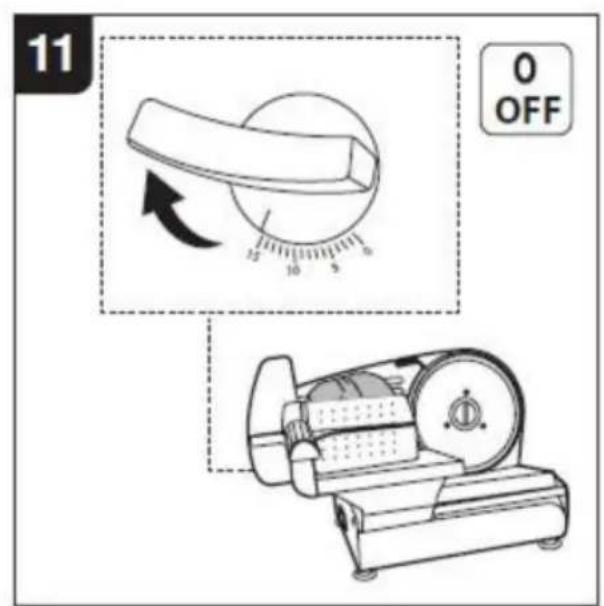
text_image
11 0 OFF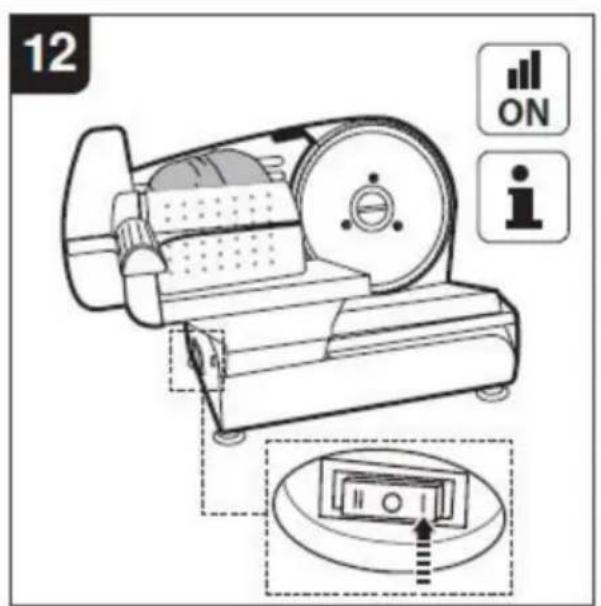
text_image
12 ON i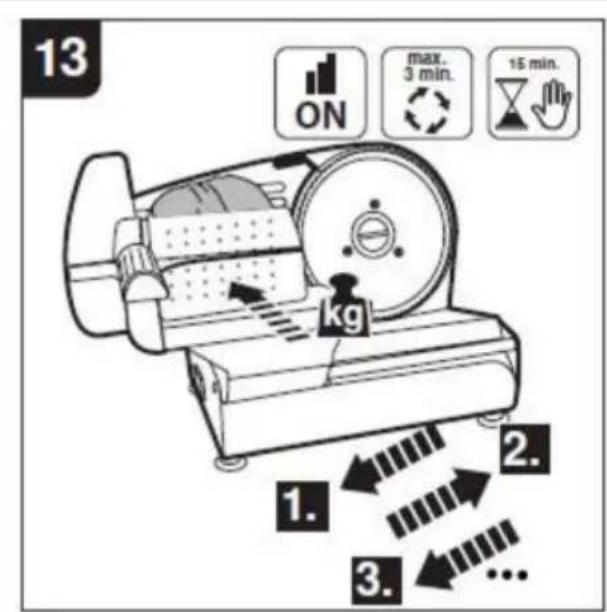
text_image
13 ON max. 3 min. 15 min. kg 1. 2. 3.
text_image
14 0 OFF 3. 2. 1.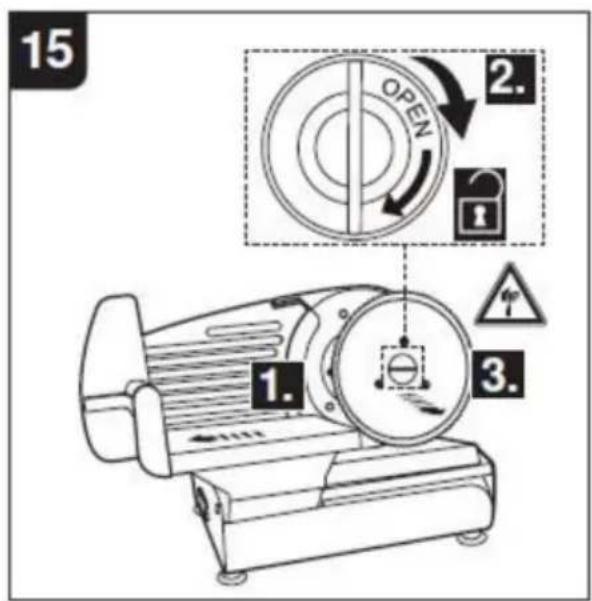
text_image
15 OPEN 2. 3. 1. 2. 3.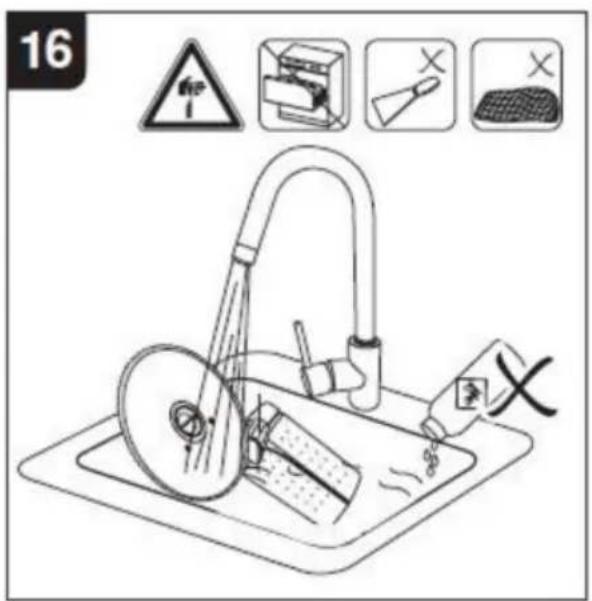
text_image
16 #P # # # X
text_image
17 X X X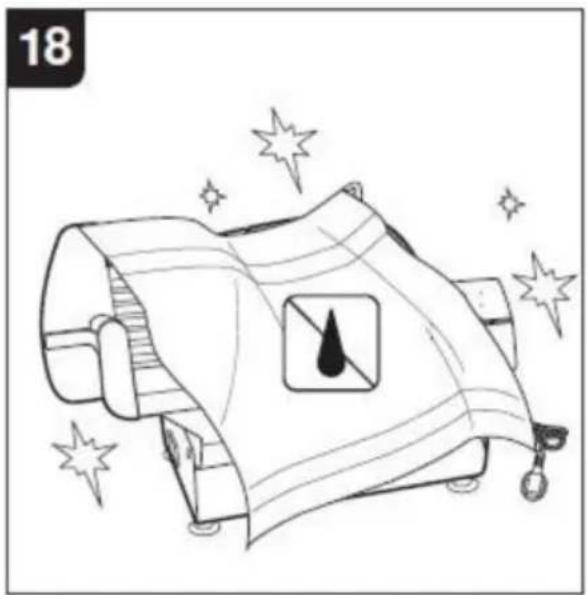
natural_image
Illustration of a stylized lamp with a droplet inside, surrounded by sparkles (no text or symbols)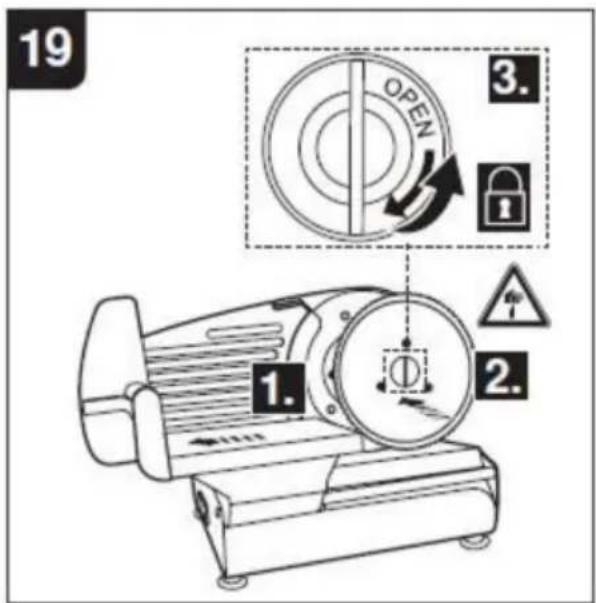
text_image
19 3. OPEN 2. 1. 2.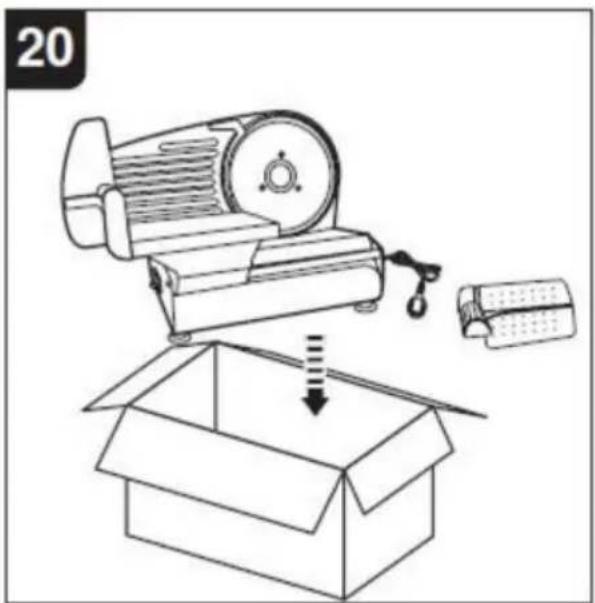
natural_image
Illustration of an open box being handled by a motor and a small box, with no visible text or symbols.PRAWIDŁOWA UTYLIZACJA

natural_image
Technical line drawing of a mechanical device with gears and housing (no text or symbols)HULP NODIG? NEEM CONTACT MET ONS OP!