
80B HELIUM - Tablet ARCHOS - Free user manual and instructions
Find the device manual for free 80B HELIUM ARCHOS in PDF.
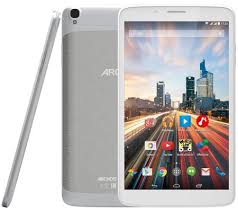



| Product Type | Tablet |
| Brand | ARCHOS |
| Model | 80B Helium |
| Operating System | Android |
| Screen Size | 8 inches (estimated) |
| Cellular Connectivity | 4G/3G/2G, dual SIM |
| Wireless Connectivity | WiFi, Bluetooth |
| Front Camera | Webcam |
| Rear Camera | Camera with flash |
| Memory Card Slot | microSD (TIF) |
| Power Supply | USB charger included |
| Battery Life | Varies by usage; charge fully before first use |
| Main Features | Web browsing, calls, Android apps, GPS, customizable home screen |
| Maintenance and Cleaning | Clean with a soft dry cloth; avoid liquids |
| Security | Screen lock via pattern, PIN, or password |
| Repairability | Reset button accessible with a pointed object |
| Box Contents | Tablet, quick start guide, warranty guide, USB cable, charger |
Frequently Asked Questions - 80B HELIUM ARCHOS
User questions about 80B HELIUM ARCHOS
0 question about this device. Answer the ones you know or ask your own.
Ask a new question about this device
Download the instructions for your Tablet in PDF format for free! Find your manual 80B HELIUM - ARCHOS and take your electronic device back in hand. On this page are published all the documents necessary for the use of your device. 80B HELIUM by ARCHOS.
USER MANUAL 80B HELIUM ARCHOS
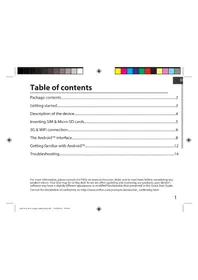
Package contents. 2 Getting started. 3 Description of the device. 4 Inserting SIM & Micro-SD cards. 5 4G & WiFi connection. 6 The AndroidTM interface. 8 Getting familiar with AndroidTM 12 Troubleshooting. 14
For more information, please consult the FAQs on www.archos.com. Make sure to read them before considering any product return. Your deal may be no big deal. As we are often updating and improving our products, your device's software may have a slightly different appearance or modified functionality than presented in this Quick Start Guide. Consult the declaration of conformity on http://www.archos.com/products/declaration_conformity.html
Package Contents
ARCHOS 80b Helium
QSG booklet
Warranty, legal & safety booklet
USB cable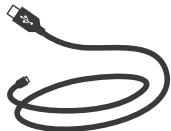
Charger
2
Getting Started
Charging
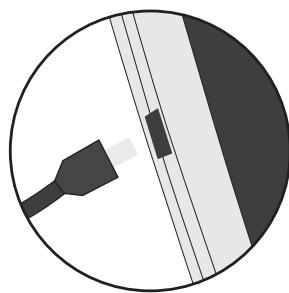
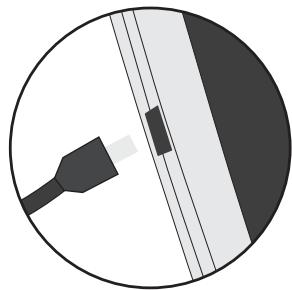
- Charge your device by plugging your power cable into the micro-USB port. The ARCHOS device will start charging.
- Press the Power button to turn on the device.
- You can use your ARCHOS whilst it charges.
- Let your device charge completely the first time you use it.
- Use only the supplied charger.
When your device is completely discharged, you need to charge it for at least 10 minutes before the charging battery icon can be displayed.
TIP:
To receive more complete service, please register your product.
From a computer, go to www.archos.com/register.
Description of the device
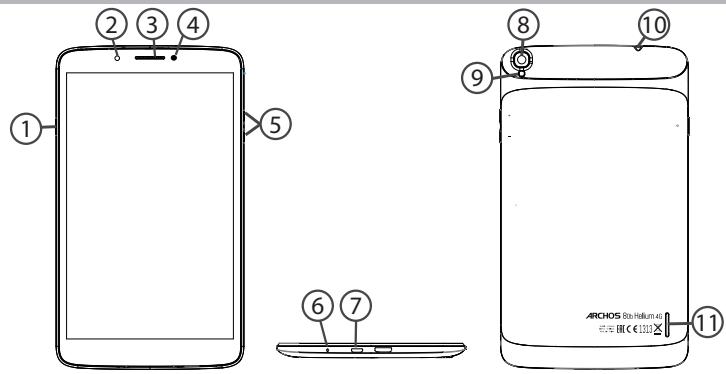
ON/OFF button ②Webcam ③Loudspeaker 4 Brightness sensor
Volume buttons ⑥ Microphone ⑦ Micro-USB port Camera
9 Flash light 10 Headphone jack 11 Loudspeaker
Inserting SIM & Micro-SD cards
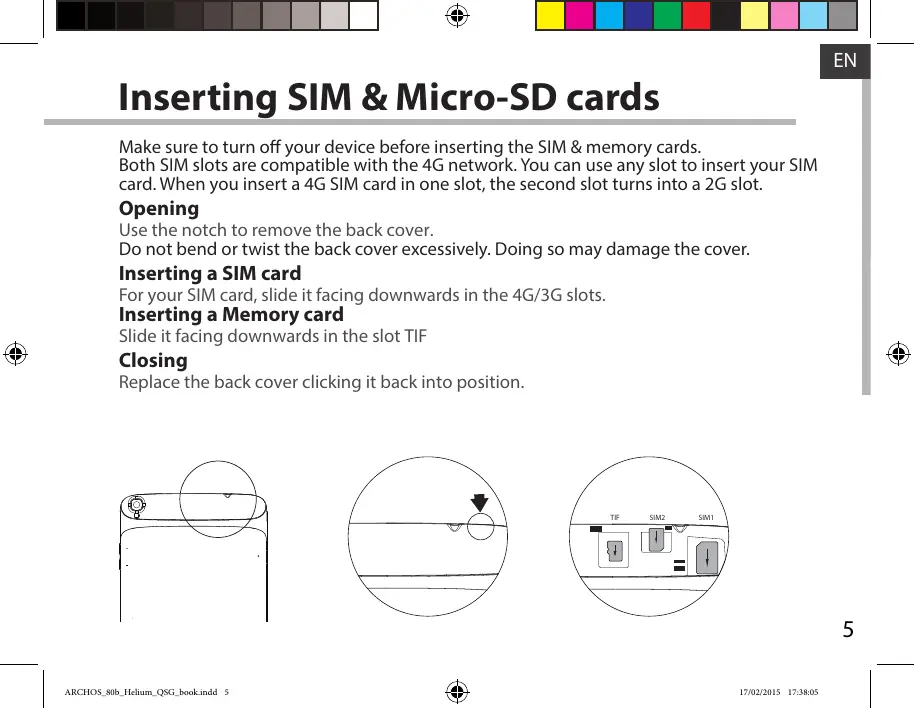
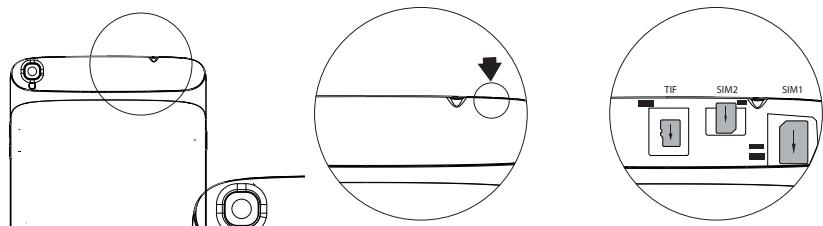
Make sure to turn off your device before inserting the SIM & memory cards.
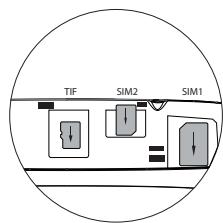
Both SIM slots are compatible with the 4G network. You can use any slot to insert your SIM card. When you insert a 4G SIM card in one slot, the second slot turns into a 2G slot.
Opening
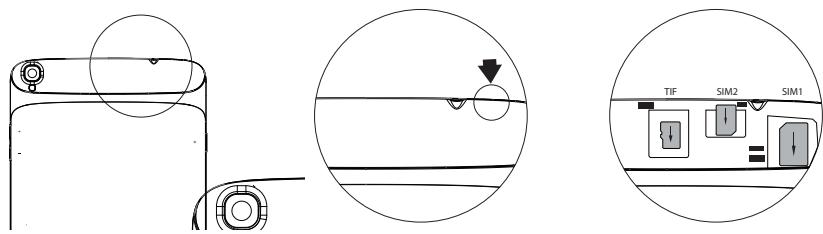
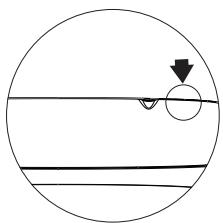
Use the notch to remove the back cover.
Do not bend or twist the back cover excessively. Doing so may damage the cover.
Inserting a SIM card
For your SIM card, slide it facing downwards in the 4G/3G slots.
Inserting a Memory card
Slide it facing downwards in the slot TIF
Closing
Replace the back cover clicking it back into position.
4G & WiFi connection
4G connection
To be able to access Internet, the mobile data icon must be activated.
Activating the mobile data
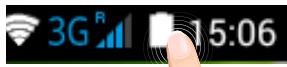
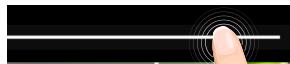
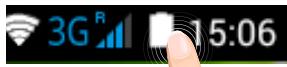
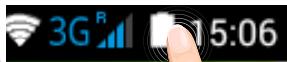
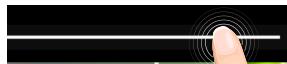
- Touch and hold the time & battery icons to reveal the status bar.
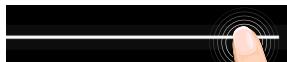
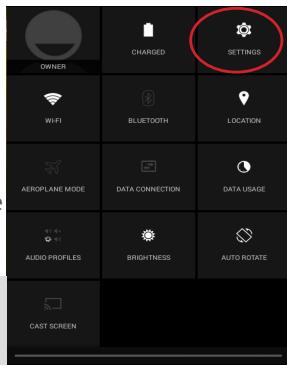
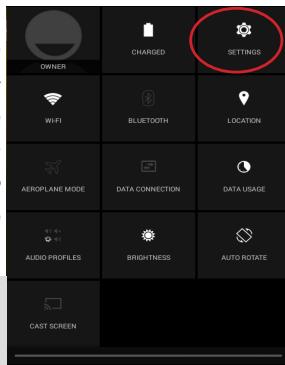
- Pull the white line down to display the status dashboard.
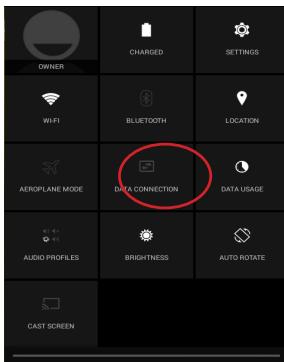
- Touch the mobile data icon to activate it.
When the mobile data is activated, it turns blue.
If your device does not connect to your 4G provider's network: Contact your 4G provider to obtain the connection parameters. On your device, tap Settings.
Select Wireless & networks > More... > Mobile networks. In Network operators, select your operator. In Access Point Names, select the correct access point name and enter the exact connection parameters.
TIP:
When you encounter connection problems, see the FAQs on www.archos.com or contact your 4G network connection provider.

WiFi connection
WARNING: Make sure that you are in a WiFi zone.
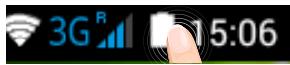
- Touch and hold the time & battery icons to reveal the status bar.
- Pull the white line down to display the status dashboard.
- Touch the "Settings" icon to open the settings menu.
- In the "Wireless & networks" section, if the WiFi is off, slide the WiFi switch to the "ON" position. Once the WiFi is on, the ARCHOS will scan for WiFi networks in range.
- Touch "WiFi" to display available networks.
- Touch the name of the network you want to connect to.
Private networks are shown with a lock icon and will require you to enter your password.
TIPS:
- When entering a WiFi password, we recommend that you select "Show password" so you can see the characters you are typing. To get the correct WiFi password (or settings) for the network, contact the WiFi network provider.
- To keep your WiFi connection ON when the device is on sleep, select the Menu icon in the "WiFi" page. Then, select Advanced > Keep WiFi on during sleep > Always.


The Android™ Interface
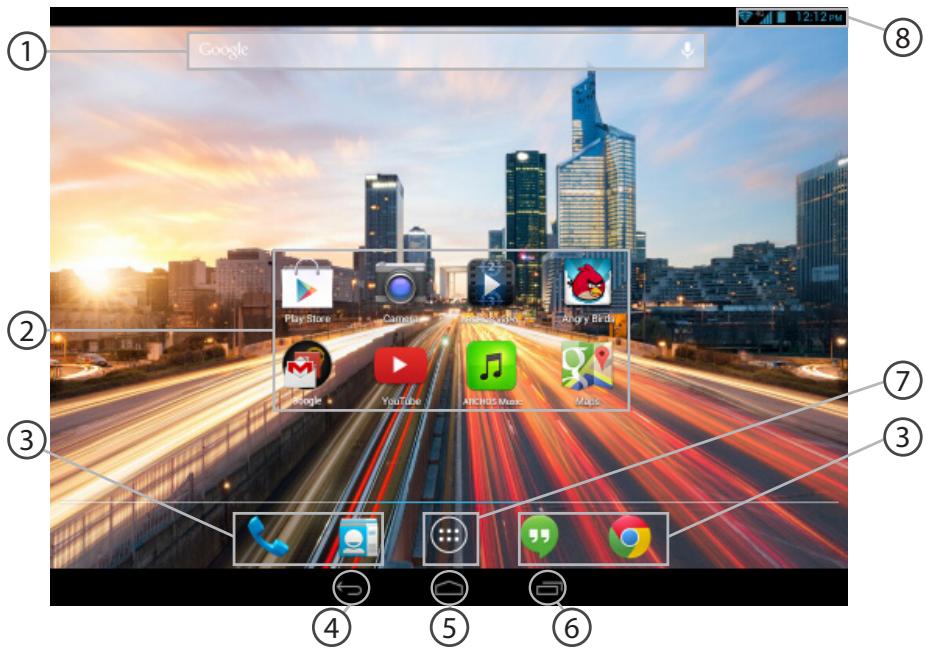

Google™ Search
Touch "Google" for text search or touch the microphone icon for voice search. 2 Android™ apps shortcuts Touch to start an application. ③ Back button Home button ⑤ Recent apps buttons 6 Permanent Android™ apps shortcuts
Touch to start an application
7 All Apps button
Touch this icon to show all the applications and widgets installed on your ARCHOS. All your downloaded applications are here. The status bar Displays notifications and quick settings


The Android™ Interface
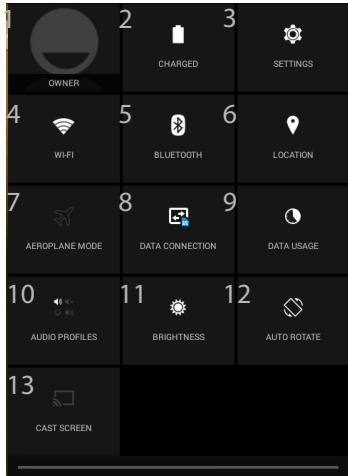
(1) New multi-user support for tablets lets different users have their own separate, customizable spaces on a single device. Add users in Settings > Device. (2) You can share movies, YouTube videos, and anything that's on your screen on an HDTV. You need to connect a wireless
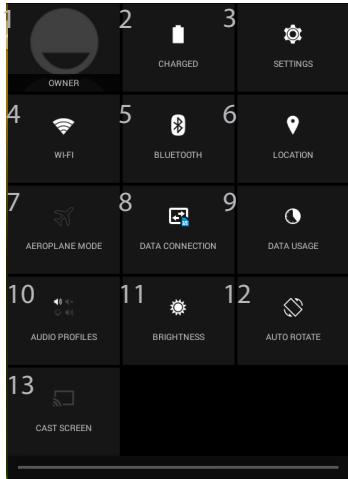
The Quick settings
1 Current user(1) 2 Percentage of battery remaining 3 To access all your settings. 4 To turn on/off your WiFi connection. 5 To turn on/off your Bluetooth connection. 6 To activate/deactivate your GPS location system. 7 To activate/deactivate all wireless connections, especially when flying. 8 To activate/deactivate the data connection. 9 To see how much data have been used. 10 To set an audio profile. 11 To adjust the screen brightness. 12 To activate/deactivate automatic screen orientation as you turn your ARCHOS. 13 To enable wireless display(2)
display adapter to any HDMI-enabled TV to mirror what's on your screen quickly and easily.


The Recent Apps
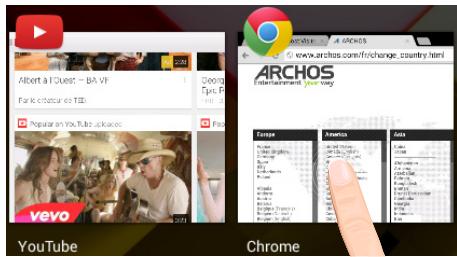
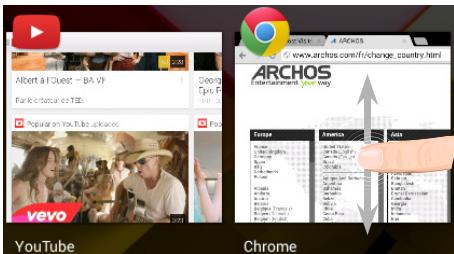
Opens a list of thumbnail images of apps you've worked with recently:
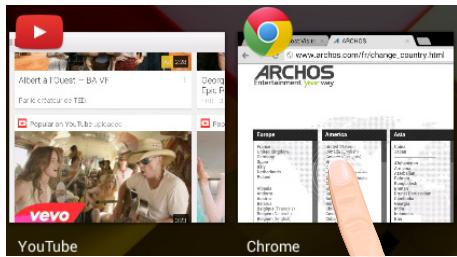
Touch: to open an app.
Hold down: to display options.
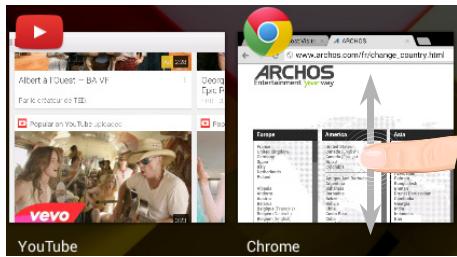
Swipe up or down: to close an app.


Getting familiar with Android™
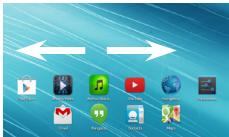
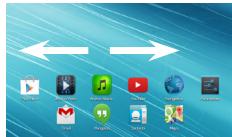
The extended home screen:
Navigate between different home screen panels by swiping left and right.
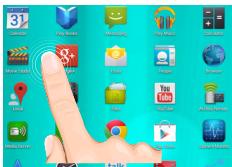
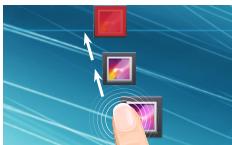
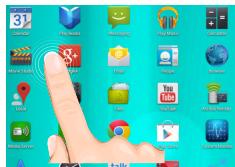
Moving a home screen item:
Touch and hold your finger onto it until the positioning gridlines appear, then slide it to the desired location, and release your finger.
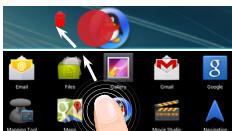
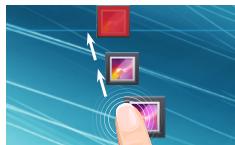
Removing a home screen item:
Touch and hold it, slide your finger towards the top of the screen and drop it over the Remove icon.
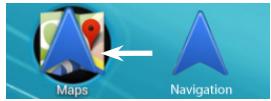
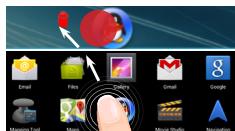
Uninstalling an item:
From the All apps screens, touch and hold it, slide your finger towards the top of the screen and drop it over Uninstall bin.


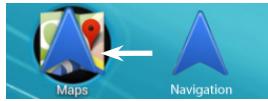
Creating application folders:
Drop one app icon over another on a home screen and the two icons will be combined.
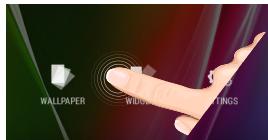
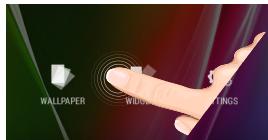
Widgets:
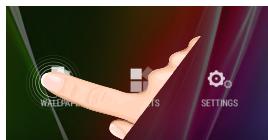
Hold your finger on a home screen at an empty location, then choose from the list: Widgets.
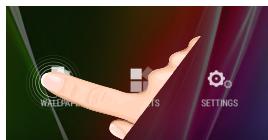
Changing your wallpaper:
Hold your finger on a home screen at an empty location, then choose from the list: Wallpaper.
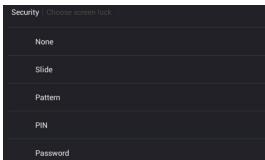
Locking the touchscreen:
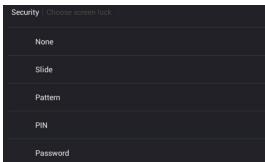
In Settings, scroll down and touch security. Touch Screen lock. Touch the type of lock you would like to use. After you set a lock, a lock screen is displayed whenever your screen wakes up, requesting the pattern, PIN or other specified key.


Troubleshooting
If your device is frozen:
Press the ON/OFF button for 10 seconds or use the reset button. To use the reset button, press the "pinhole reset" button by using a sharp object such as a toothpick.
If your device doesn't turn on:
- Charge your device.
- Press the ON/OFF button for 10 seconds or use the reset button. To use the reset button, press the "pinhole reset" button by using a sharp object such as a toothpick.
My tablet cannot connect to a network or "No service" is displayed
Try connecting in another location. Verify the network coverage with your operator.
Unable to make outgoing calls
Make sure your phone is connected to a network, and the network is not overloaded or unavailable.
Unable to receive incoming calls
Make sure your phone is switched on and connected to a network (check for overloaded or unavailable network).
SIM card PIN locked
Contact your network operator to obtain the PUK code (Personal Unblocking Key).
If your WiFi reception is too low:
Make sure you are not far from the WiFi hotspot.
Update the firmware of the device: http://www.archos.com/support.
Reset and redefine your connection parameters.
Contact your WiFi connection provider.

| Security |
| None |
| Slide |
| Pattern |
| PIN |
| Password |
WiFi network connection
4G connection
| Security |
| None |
| Slide |
| Pattern |
| PIN |
| Password |
USB cable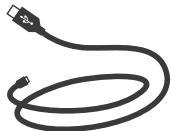
Charging device
Ready to work
Charging
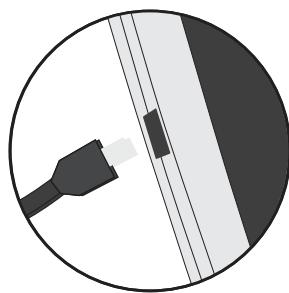
- Charge the device by connecting the power cable to the micro-USB port. The ARCHOS device will start charging.
- Press the power button to turn on the device. You can use the ARCHOS device while charging.
Before first use, the device must be fully charged. Only use the charger provided in the package.
If your device is completely discharged, it must be charged for at least 10 minutes before the charging indicator appears.
TIP:
Register your product to get support in a more comprehensive way. When using a computer, go to www.archos.com/register.


Device description
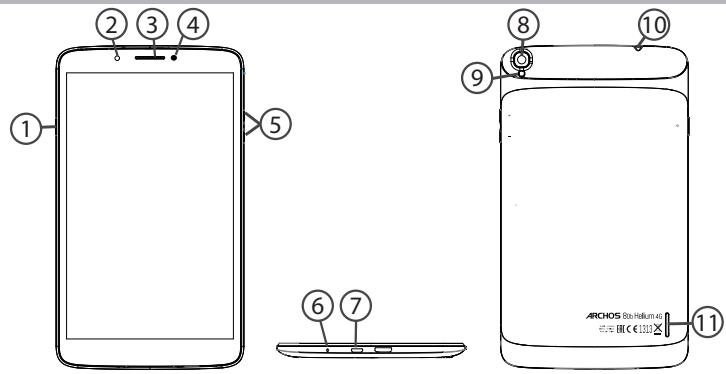
1 Power button 2 Webcam 3 Speaker 4 Micro-USB port 5 Light
9 Flashlight 10 Headphone jack 11
Inserting SIM card & Inserting memory card
Turn off the power before inserting. Both SIM slots are compatible with 4G SIM cards. You can use either slot for SIM card installation. Note: After installing a 4G SIM card in one of the slots, the other slot will operate in 2G mode.
Opening
- Remove the back cover.
Do not bend or twist the cover too much. This may damage it.
SIM card installation
To install the SIM card, insert it with the cut corner facing down into the slot (4G/3G).
Memory card installation
Insert the memory card into the slot as shown.
Closing
Install the battery cover so that it clicks completely into place.

If the device does not turn on:
1. Charge the device for at least 10 minutes. 2. Press and hold the power button for 10 seconds or use the reset button.
Cannot connect to the network, or the phone cannot connect to the network, or the message 'No service' is displayed.
Make sure the phone is connected to the network, and that the signal is available and not overloaded.
Cannot receive incoming calls
Make sure the phone is turned on and connected to the network (check that the signal is available and not overloaded).
SIM card PIN code blocked
Contact your mobile operator to obtain the PUK code (Personal Unblocking Key).
The device can be connected using a Wi-Fi connection:
Make sure you are not too far from the Wi-Fi access point.
Update the device's built-in firmware: http://www.archos.com/support.
Reset and re-enter the connection parameters.
112 Contact your Wi-Fi provider.



Therefore, {ab} > {150}



⑦
Goo 1ySso
(3)
a.
(8)
yjai
4
SD 0JlJIaIgBpaIgJLJd
.8s11 aillg g ailll lI 1J 1J J aillg ll J J J J J J J J J J
jglj1
jLJSS
alboll 1uul uol uol aul boll gl alboll g o
4aJb
.3G/4GJd jll kJlJI 1
aJlJI aJbJbJb
JU 1
. 1234567890

4G
.1111111111111111111111
a
aIbI bIgI gIgI aIbI gIgI aIgai Ie ooi baoi .1
aaiia aaii jiljolg aiial gaiia bai,aiil gaiil ngsw tll laiy iie
.15<laIgS<laI<laI<laI<laI<laI<laI<laI


148 (8)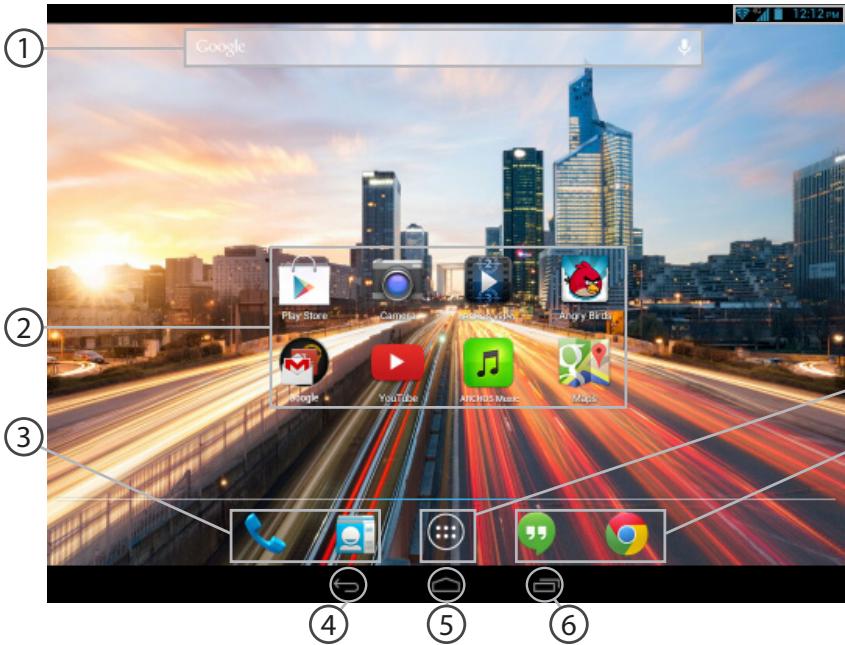


AndroidTM
.
①
ulaliluljla
(2)
.
(3)
.
aui jil
(4) (5) (6) (6)
y
aJUJUJUJUJU
∴ ( x) = ( 2x + 1) ( ax - 1) x = 4x + 3x( x > 0)
⑦ ⑦
Jz
.
ailll
.aaallllclllyglllblssylo
(8)

uJycu, pUauo u 15g g aJy jglal Ioo aUauo aUdy a, aauo u UclU eauo JU uUdy aUuo uJy cu jglal / UclUdy aUuo uUuo las, aUauu UdUd UJx u yag Ugelao g HDMU JUx o u y dUu yjglal
yullllally
1
2
3
4
5
6
7
8
9
10
11
12
13
14
Android™
y

olulil jlll lallll lalgl
gbi 1

aill 1

aJlld:
JLg jyjzjg jc g aaiyaii yaiyai i
:allllnaaic Jai
a aal kall llaa a aaa bga aai g aaiy
145
:aijllawlloraic
aai 15gai aaiwll jcl iagayll cawl oalbdo gaiyll yol ay
.
:JAc
ydy ydy dy dy dy dy dy dy dy dy dy dy dy dy dy dy dy dy dy dy dy dy dy dy dy dy dy dy dy dy dy dy dy dy dy dy dy dy dy dy dy dy dy dy dy dy dy dy dy dy dy dy dy dy dy dy dy dy dy dy dy dy dy dy dy dy dy dy dy dy dy dy dy dy dy dy dy dy dy dy dy dy dy dy dy dy dy dy dy dy dy dy dy dy dy dy dy dy dy dy dy dy
.15wol gj ydd
Android™ |djiwi
:
a 1000000000000000000000000000000000000
:Widgets,olc
jolic aai jll g aai iai ai jai jai jai jai jai jai jai jai jai jai jai jai jai jai jai jai jai jai jai jai jai jai jai jai jai jai jai jai jai jai jai jai jai jai jai jai jai jai jai jai jai jai jai jai jai jai jai jai jai jai jai jai jai jai jai jali
.Widgets
:blllggrss
aaii j 10jol aaiy jaiwai jkla b
:aaJl
a, aalll baw lglw yol no gwl alldy 100 dglw uucg awll qel 120, uauuall awll jaa jai a, awll Jaas
.》j1,PIN j0,JaallgagA《JlcIgawalJdoj0Jlal
lloolg lboy
:Jssllgdd
.10 10 10
:aaal
Entertainment your way

Uni-Group
www.uni-grp.com
/ArchosEgypt
/ArchosEgypt
National restrictions
This device is intended for home and office use in all EU countries (and other countries following the EU directive 1999/5/EC) without any limitation except for the countries mentioned below:
| Country | Restriction | Reason/remark |
| Bulgaria | None | General authorization required for outdoor use and public service |
| France | Outdoor use limited to 10 mW e.i.r.p. within the band 2454-2483.5 MHz | Military Radiolocation use. Refarming of the 2.4 GHz band has been ongoing in recent years to allow current relaxed regulation. Full implementation planned 2012 |
| Italy | None | If used outside of own premises, general authorization is required. |
| Luxembourg | None | General authorization required for network and service supply (not for spectrum) |
| Norway | Implemented | This subsection does not apply for the geographical aera within a radius of 20 km from the centre of Ny-Alesund |
| Russian Federation | None | Only for indoor applications |
Note: Frequency 2454-2483.5MHZ are restricted to indoor use in France.
Archos company declares that this device is in compliance with the essential requirements and other relevant provisions of Directive 1999/5/EC).
C€1313
Open Source Software Offer
The software bundled with this product includes software files subject to certain open source license requirements. Such open source software files are subject solely to the terms of the relevant open source software license. Such open source software is provided on an "AS IS" basis to the maximum extent permitted by applicable law. For the open source files contained herein, please access "Open source license" section located at: Settings\About tablet\Legal information on the device for the relevant copyright and licensing terms. You may obtain a copy of Apache License, Version 2.0 at http://www.apache.org/licenses/License-2.0. You may also obtain a copy of GNU General Public License, Version 2 at the Free Software Foundation, INC, 51 Franklin Street, Fifth Floor, Boston, MA 02110-1301, USA.
Until the date that is three years after our last shipment of this product, you may obtain a copy of the source code corresponding to the binaries for any GPL-Licensed file by contacting ARCHOS customer service at http://www.archos.com and ARCHOS will send you a link to such source code or will provide instructions to get the source on a physical medium.
This offer is valid to anyone in receipt of this information.
SAR
Due to the used enclosure material, the device shall only be connected to a USB interface of version 2.0 or higher. The connection to so called power USB is prohibited.
The adapter shall be installed near the equipment and shall be easily accessible.
CAUTION: RISK OF EXPLOSION IF BATTERY IS REPLACED BY AN INCORRECT TYPE. DISPOSE OF USED BATTERIES ACCORDING TO THE INSTRUCTIONS.
The SAR limit of Europe is 2.0 W/kg. Device types ARCHOS 101 Copper has also been tested against this SAR limit. The highest SAR value reported under this standard during product certification for use at the ear is 1.03 W/kg and when properly worn on the body is 0.767 W/kg. This device was tested for typical body-worn operations with the back of the handset kept 1.5 cm from the body. To maintain compliance with RF exposure requirements, use accessories that maintain a 1.5 cm separation distance between the user's body and the back of the handset. The use of belt clips, holsters and similar accessories should not contain metallic components in its assembly. The use of accessories that do not satisfy these requirements may not comply with RF exposure requirements, and should be avoided.

- PACKAGE CONTENTS
- GETTING STARTED
- CHARGING
- TIP
- DESCRIPTION OF THE DEVICE
- INSERTING SIM & MICRO-SD CARDS
- OPENING
- INSERTING A SIM CARD
- INSERTING A MEMORY CARD
- CLOSING
- G & WIFI CONNECTION
- G CONNECTION
- ACTIVATING THE MOBILE DATA
- WIFI CONNECTION
- TIPS
- THE ANDROID™ INTERFACE
- THE QUICK SETTINGS
- THE RECENT APPS
- GETTING FAMILIAR WITH ANDROID™
- THE EXTENDED HOME SCREEN
- MOVING A HOME SCREEN ITEM
- REMOVING A HOME SCREEN ITEM
- UNINSTALLING AN ITEM
- CREATING APPLICATION FOLDERS
- WIDGETS
- CHANGING YOUR WALLPAPER
- LOCKING THE TOUCHSCREEN
- TROUBLESHOOTING
- IF YOUR DEVICE IS FROZEN
- IF YOUR DEVICE DOESN'T TURN ON
- MY TABLET CANNOT CONNECT TO A NETWORK OR "NO SERVICE" IS DISPLAYED
- UNABLE TO MAKE OUTGOING CALLS
- UNABLE TO RECEIVE INCOMING CALLS
- SIM CARD PIN LOCKED
- IF YOUR WIFI RECEPTION IS TOO LOW
- WIFI NETWORK CONNECTION
- READY TO WORK
- DEVICE DESCRIPTION
- INSERTING SIM CARD & INSERTING MEMORY CARD
- IF THE DEVICE DOES NOT TURN ON
- CANNOT CONNECT TO THE NETWORK, OR THE PHONE CANNOT CONNECT TO THE NETWORK, OR THE MESSAGE 'NO SERVICE' IS DISPLAYED
- CANNOT RECEIVE INCOMING CALLS
- SIM CARD PIN CODE BLOCKED
- THE DEVICE CAN BE CONNECTED USING A WI-FI CONNECTION
- SD 0JLJIAIGBPAIGJLJD
- G
- ANDROIDTM
- YULLLLALLY
- ANDROID™
- AJLLD
- ALLLLNAAIC JAI
- AIJLLAWLLORAIC
- JAC
- ANDROID™ |DJIWI
- LLOOLG LBOY
- NATIONAL RESTRICTIONS
- C€
- OPEN SOURCE SOFTWARE OFFER
- SAR
Brand : ARCHOS
Model : 80B HELIUM
Category : Tablet