SMT 3 A1 - Hair clippers SILVERCREST - Free user manual and instructions
Find the device manual for free SMT 3 A1 SILVERCREST in PDF.


User questions about SMT 3 A1 SILVERCREST
0 question about this device. Answer the ones you know or ask your own.
Ask a new question about this device
Download the instructions for your Hair clippers in PDF format for free! Find your manual SMT 3 A1 - SILVERCREST and take your electronic device back in hand. On this page are published all the documents necessary for the use of your device. SMT 3 A1 by SILVERCREST.
USER MANUAL SMT 3 A1 SILVERCREST
Last Information Update
Seneste informationsopdatering
- Intended use ....3
- Package contents .... 4
- Device description ....5
- Technical data ...... 6
- Safety instructions......6
- Copyright 16
- Before initial use ....16
- Initial use......17
8.1 Travel safety lock 17
8.2 Turning on/off 17
8.3 Changing attachments (see Fig. G, H, I).... 18
8.4. Removing nose and ear hair....18
8.5. Trimming eyebrows....19
8.6. Trimming small beards and sideburns....20
- Cleaning/maintenance 20
9.1 Base (6)....20
9.2 Trimmer housing (3)....20
9.3 Nose and ear hair trimmer attachment (2)....21
9.4 Eyebrow trimmer attachment (5)....21
9.5 Beard contour trimmer (9) 21
9.6 Protective covers (4, 10)....21
-
Storing the device when not in use ......22
-
Troubleshooting ......22
- Environmental and waste disposal information ....23
- Marks of conformity......25
- Guarantee and service 26
Congratulations!
By purchasing the SilverCrest multi-trimmer SMT 3 A1, you have opted for a high-quality product.
Familiarise yourself with the multi-trimmer before using it for the first time and read these operating instructions carefully.
Observe the safety instructions and only use the multi-trimmer in the manner described in these operating instructions and for the indicated fields of application.
Keep these operating instructions in a safe place. Hand over all documents in the event that you pass on the multi-trimmer to a third party.
1. Intended use
The multi-trimmer may only be used for private purposes and is not for industrial or commercial use. In addition, the multi-trimmer must not be used outside of closed rooms.
The multi-trimmer is intended exclusively for the removal of human nose and ear hair and for trimming eyebrows, sideburns, moustaches and small beards.
Any use other than that described in these operating instructions is deemed improper and can lead to injury as well as damage to property.
This multi-trimmer meets the requirements of all relevant standards related to CE conformity. Compliance with these standards is no longer guaranteed if a change is made to the
multi-trimmer without the authorisation of the manufacturer. The manufacturer shall not be liable for any damages or faults arising as a result.
Please observe the national regulations and/or laws of the country in which the device is used.
2. Package contents
Unpack the multi-trimmer and all of the accessories. Remove all packaging materials and check all of the parts for completeness and signs of damage. If any parts are missing or damaged, please contact the manufacturer.
- Multi-trimmer
- Nose and ear hair trimmer attachment
- Eyebrow trimmer attachment
- Beard contour trimmer
• Duo-comb attachment (3 mm/6 mm) - Base
- Cleaning brush
• 1 battery (Mignon/AA/LR6) - This operating manual
3. Device description
This operating manual also has a cover that can be unfolded. The inside of the cover provides a schematic of the multi-trimmer and a number legend. The numbers identify the following parts/functions:
| 1 | Blade protector |
| 2 | Nose and ear hair trimmer attachment |
| 3 | Trimmer housing |
| 4 | Protective cover (eyebrow trimmer attachment) |
| 5 | Eyebrow trimmer attachment |
| 6 | Base |
| 7 | Cleaning brush |
| 8 | Duo-comb attachment (3 mm/6 mm) |
| 9 | Beard contour trimmer |
| 10 | Protective cover (nose/ear hair trimmer attachment) |
| 11 | Battery |
| 12 | Blade (eyebrow trimmer attachment) |
| 13 | Blade (beard contour trimmer) |
| 14 | Battery compartment cover |
| 15 | Blade (nose and ear hair trimmer attachment) |
| 16 | ON/OFF switch |
4. Technical data
| Model SilverCrest SMT | 3 A1 |
| Power supply 1 x 1.5 V | , LR6/Mignon/AA |
| Protection class IPX4 (protected against splashed water) | |
| Operating temperature 0°C to 35°C | |
| Storage temperature, atmospheric humidity | -10°C to +45°C; max. 85% relative humidity |
| Dimensions (base unit, without protective cover) | 26 mm x 26 mm x 124 mm |
| Sound level Approx. 45 dB(A) | |
The specifications and design are subject to change without notice.
5. Safety instructions
Before using the multi-trimmer for the first time, please read the following instructions carefully and observe all warnings, even if you are familiar with using electronic
devices. Keep this operating manual in a safe place for future reference.
Meaning of symbols used

WARNING! This signal word indicates danger involving a medium level of risk, which if not avoided, may result in severe injury or even death.

CAUTION! This signal word indicates danger involving a low level of risk, which if not avoided, may result in minor or moderate injury.

This symbol indicates that further information on the topic is available.
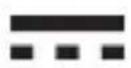
DC voltage
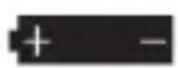
Battery polarity
Operating environment
The multi-trimmer is designed for operation in rooms with high humidity (for example, bathroom) but not in rooms with excessive dust.

WARNING! This multi-trimmer can be used by children aged eight and over, as well as by people
with reduced physical sensory or mental abilities or who lack experience and/or knowledge, providing they are supervised or have been instructed in the safe use of the device and understand the resulting dangers. The packaging material is not a toy! Children must not play with the multi-trimmer.
Cleaning and user maintenance may not be performed by children, unless they are supervised. Small parts can be lethal if
swallowed. Also keep the packaging film away from children. There is a risk of suffocation.

WARNING! If you notice any smoke, unusual noises or smells, immediately switch off the multi-trimmer and remove the battery (11). In a case like this, you must stop using the multi-trimmer until it has been checked by a specialist. Do not inhale smoke possibly caused by a burning device. If you have inhaled smoke, seek medical
attention. Inhaling smoke can be harmful to your health.

WARNING! Make sure there are no open flames (for example, burning candles) placed on or near the multi-trimmer. There is a risk of fire!

WARNING! Never operate the multi-trimmer near highly flammable materials, such as curtains or explosive and/or flammable gases or liquids. There is a risk of fire.

CAUTION! In order to avoid hazards, the multi-trimmer must not become damaged.

CAUTION! Protect the multi-trimmer against wetness! Never immerse the product in water!

CAUTION! The multi-trimmer must not be exposed to direct sources of heat (for example, heaters), direct sunlight or strong artificial light. Also avoid contact with aggressive liquids. Also make sure that the device is

not exposed to excessive shocks and vibrations.
Furthermore, no foreign bodies should penetrate into the device. This could damage the multi-trimmer.
CAUTION! Only allow the
manufacturer's service department or an authorised specialist to carry out repairs on the multi-trimmer.
Improper repairs may lead to injury! This will also void
your guarantee.
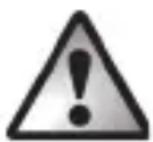
CAUTION! Never use the multi-trimmer with a faulty or
broken attachment (2, 5, 9).
There is a risk of injury!

WARNING! Batteries
Always insert battery (11) with the correct polarity. When doing so, observe the label on the product and on the battery. Do not try to recharge the battery (11) and never throw it onto a fire. Remove the battery (11) if you intend not to use the device for a longer period of time. There is a risk of explosion and leakage if the device is not used properly. The battery (11) is not a toy. In the event that the battery (11) is swallowed, seek
immediate medical attention. The battery (11) must not be opened or deformed in any way because leaking chemicals can cause injury. In case of contact with the skin or eyes, rinse/wash the area with plenty of water and seek medical attention. Remove a dead battery (11) from the device and properly dispose of it. Make sure to never short-circuit the lugs.
6. Copyright
All contents of this operating manual are subject to copyright law and are provided to the user solely as a source of information. Any form of copying or reproduction of data and information without the express written permission of the author is prohibited. This also concerns commercial use of the content and data. The text and illustrations correspond to the technical standards at the time of printing. Subject to alterations.
7. Before initial use
Inserting/changing the battery (see Fig. E and F)
Open the battery compartment by turning the battery compartment cover (14) anticlockwise to the stop. Now pull the battery compartment cover (14) down and off and remove the existing battery (11), if any. Insert the new battery (11) into the battery compartment with the plus terminal first. Close the battery compartment by putting the battery compartment cover (14) back on and turning it clockwise to the stop.
8. Initial use
8.1 Travel safety lock

The travel safety lock ensures that the multi-trimmer cannot start unintentionally, for example, when carried in a suitcase. To prevent the multi-trimmer from turning on unintentionally, remove the battery and transport multi-trimmer with both the nose and ear hair trimmer attachment (2) and the protective cover (10) attached.
8.2 Turning on/off
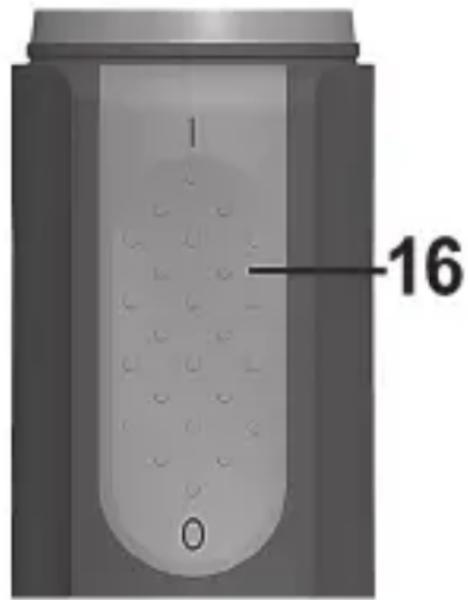
- Slide the on/off switch (16) in the direction of the marking I to turn the multi-trimmer on. When using the nose and ear hair trimmer attachment (2), the protective cover (10) must be removed, otherwise the travel safety lock is active.
- Slide the on/off switch (16) in the direction of the marking 0 to turn the multi-trimmer off.
text_image
1 168.3 Changing attachments (see Fig. G, H, I)
Always turn the multi-trimmer off to change an attachment (2, 5, 9). Remove the protective cover if applicable (10). It just slides on and can be pulled off/put on without a lot of force.
- Remove an installed attachment (2, 5, 9) by holding the multi-trimmer with one hand, grasping the attachment (2, 5, 9) with the free hand and turning anticlockwise to the stop. Now take the attachment (2, 5, 9) upwards off the trimmer housing (3).
- To install an attachment (2, 5, 9), put it onto the trimmer housing from above (3). Note the markings on the attachment (2, 5, 9) and on the trimmer housing (3). Lock the attachment (2, 5, 9) by turning it clockwise to the stop.
8.4. Removing nose and ear hair
- Use the nose and ear hair trimmer attachment (2). Remove the protective cover (10).
- Turn the multi-trimmer on.

CAUTION! Risk of injury!
To avoid injury, do not insert the blade protector (1) too far into the nose or ear! Only insert the tip of the blade protector (1) into the outer area of the nose or ear.
- Remove nose or ear hair with small, circular movements.
- Turn the multi-trimmer off after use.
- Replace the protective cover (10).
8.5. Trimming eyebrows
- Use the eyebrow trimmer attachment (5) Remove the protective cover (4).
- To obtain the desired cut length of 3 mm or 6 mm, adjust the duo-comb attachment (8) on the blade (12) accordingly. Also see Fig. C. There is a length marking (8) on the duo-comb attachment.
- Ensure that the duo-comb attachment (8) audibly clicks into place.

The eyebrow trimmer attachment (5) must be kept perpendicular to the surface of the skin to obtain the desired cut length. Please note that when fitting the eyebrow trimmer attachment (5) onto the trimmer housing (3), the on/off switch (16) must point away from the user.
- Turn the multi-trimmer on.
- Position the device perpendicular to the skin and move it slowly and evenly against the direction of hair growth. Repeat this process until the desired trim is obtained.
- If you need to remove individual hairs, adjust the blade angle and move it against the single hairs.
- Turn the multi-trimmer off after use.
- Replace the protective cover (4).
8.6. Trimming small beards and sideburns
- Use the beard contour trimmer (9).
- Turn the multi-trimmer on.
- Position the beard contour trimmer (9) perpendicular to the skin and move it slowly and evenly, alternating in and against the direction of hair growth. Repeat this process until the desired trim is obtained.
9. Cleaning/maintenance
• Always turn the multi-trimmer off before cleaning.
- Do not use abrasive or corrosive cleaning agents. The surfaces of the multi-trimmer can be damaged.
- Never immerse the trimmer housing (3) in water for cleaning. It could be irreparably damaged.
- Use the cleaning brush (7) to remove hair from the blades (12, 13, 15).
- After cleaning, put a few drops of acid-free oil on the blades (12, 13) of the eyebrow trimmer attachment (5) and bear contour trimmer (9) every so often.
9.1 Base (6)
- Clean the base (6) with a dry or slightly damp cloth.
9.2 Trimmer housing (3)
- Remove all attachments (2, 5, 9) and clean the trimmer housing (3) with a dry or slightly damp cloth.
9.3 Nose and ear hair trimmer attachment (2)
- Remove the nose and ear hair trimmer attachment (2) from the trimmer housing (3) (see Fig. G).
- Carefully clean the nose and ear hair trimmer attachment (2) under running water and then let it dry completely.
9.4 Eyebrow trimmer attachment (5)
- Remove the eyebrow trimmer attachment (5) from the trimmer housing (3) (see Fig. H).
- Carefully clean the blade (12) under running water and then let it dry completely.
9.5 Beard contour trimmer (9)
- Remove the beard contour trimmer (9) from the trimmer housing (3) (see Fig. I).
- Carefully clean the blade (13) under running water and then let it dry completely.
9.6 Protective covers (4, 10)
- Carefully clean the protective covers (4, 10) under running water and then let them dry completely.
10. Storing the device when not in use
If the multi-trimmer is not going to be used for a long period of time...

- clean it as described in the previous section.
- Remove the battery (11) from battery compartment.
- Set the multi-trimmer and all accessories into the base (6).
- Keep it in a cool, dry, clean place.
11. Troubleshooting
The multi-trimmer will not switch on
- Check whether the battery (11) is drained. Install a new type LR6/Mignon/AA battery (11) if necessary.
The blades (12, 13, 15) only move slowly
- Check whether the battery (11) is weak or almost drained. Install a new type LR6/Mignon/AA battery (11) if necessary.
- Check whether the blades (12, 13, 15) are soiled or blocked by hair. Clean the blades (12, 13, 15) as described in the 'Maintenance/cleaning' section.
12. Environmental and waste disposal information
natural_image
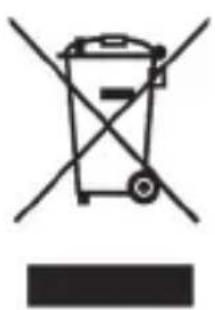
Symbol of a trash bin crossed with no text or numbers, representing waste sorting or disposal (no text present)Devices marked with this symbol are subject to the European Directive 2012/19/EU. Electrical and electronic devices may not be put in the household waste, but must be disposed of via designated public disposal centres. By properly disposing of the old device, you can avoid environmental damage and health hazards. Further information regarding proper disposal of the old device can be obtained from your local authority or the shop where you purchased the device.
natural_image
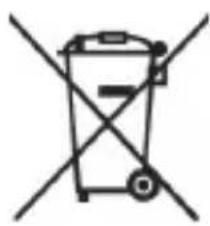
Simple line drawing of a trash bin with two crossed lines indicating no waste or prohibition (no text or symbols)Think about environmental protection. Used batteries do not belong in normal domestic waste. You must dispose of them at a collection point for old batteries.

natural_image
Silhouette of a person disposing of paper into a trash bin (no text or symbols)Make sure the packaging is disposed environmentally friendly manner. Cardboard packaging can be put out for waste-paper collection or taken to public collection points for recycling. The plastic packaging used for your device is collected by your local waste management company and disposed of in an environmentally friendly manner.

text_image
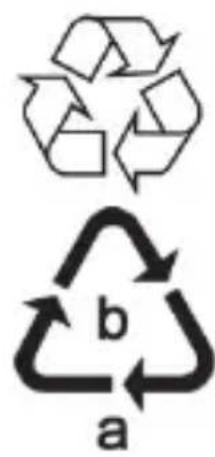
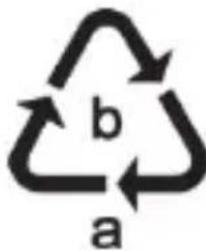
Two recycling symbols: one with a recycling arrow and the other with a 'b' inside and the other with an arrow labeled 'a'Please pay attention to the labels on packaging materials when you separate waste; these are marked with abbreviations (a) and numbers (b) that mean the following:
1-7: Plastics/20-22: Paper and cardboard/Pappe/80-98: Composite materials.
text_image
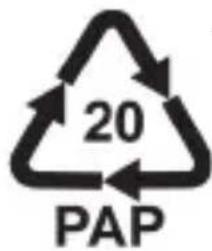
20 PAPThe sales packaging is made of corrugated cardboard and can be put out with other paper packaging materials for recycling.
text_image
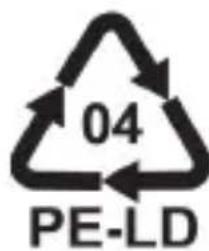
04 PE-LDThe inner plastic bag is made of low-density polyethylene (LDPE) and can be put out with plastic bottles, plastic film and other similar products for recycling.
13. Marks of conformity

This product fulfils the requirements specified in the applicable European and national policies. This product's conformity has been verified. The declarations and documents are stored with the manufacturer.
text_image
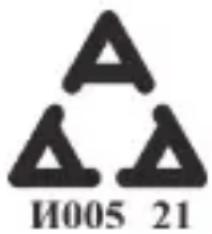
H005 21This product fulfils the requirements specified in the applicable national policies for the Republic of Serbia.

text_image
UK CAThis product fulfils the requirements specified in the applicable national policies for the United Kingdom.
You can download the full EU declaration of conformity at the following link:
https://www.targa.gmbh/downloads/conformity/367268_2101.pdf
14. Guarantee and service
Warranty of TARGA GmbH
This device is sold with three years warranty from the date of purchase. Please keep the original receipt in a safe place as proof of purchase. Before using your product for the first time, please read the enclosed documentation. Should any problems arise which cannot be solved in this way, please call our hotline. Please have the article number and, if available, the serial number to hand for all enquiries. If it is not possible to solve the problem on the phone, our hotline support staff will initiate further servicing procedures depending on the fault. Within the warranty period the product will be repaired or replaced free of charge as we deem appropriate. No new warranty period commences if the product is repaired or replaced. Consumables such as batteries, rechargeable batteries and lamps are not covered by the warranty.
Your statutory rights towards the seller are not affected or restricted by this warranty.
Service

Phone: 0800 404 7657
E-Mail: targa@lidl.co.

Phone: 1890 930 034
E-Mail: targa@lidl.ie

Phone: 800 62230
E-Mail: targa@lidl.cor
Phone: 8009 4409
E-Mail: targa@lidl.cor
IAN: 367268_2101
Manufacturer
TARGA GmbH
Coesterweg 45
59494 Soest
GERMANY
Indholdsfortegnelse
- Normale anvendelsesformål......29
- Leveringsomfang ....30
- Apparatbeskrivelse......31
- Tekniske data....32
- Sikkerhedsanvisninger......32
- Ophavsret......42
- Før ibrugtagningen ....42
- Ibrugtagning....43
natural_image
Three black-and-white icons: a lightbulb with rays, a battery with plus sign, and a circuit symbol (no text or labels)natural_image
Symbol of a trash bin crossed with diagonal lines, no text or numbers present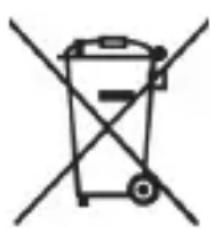
natural_image
Simple line drawing of a trash bin with crossed lines indicating no waste or restriction (no text or symbols)natural_image
Silhouette of a person sorting trash into a bin (no text or symbols)

text_image
b a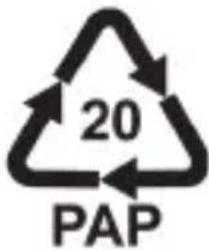
text_image
20 PAP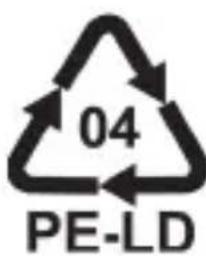
text_image
04 PE-LDhttps://www.targa.gmbh/downloads/conformity/367268_2101.pdf
14. Garanti og serviceafvikling
TARGA GmbH - Garanti
accessoire (2, 5, 9)
natural_image
Symbol of a trash bin crossed with no text or numbers, accompanied by a black horizontal bar (no text or symbols present)natural_image
Simple line drawing of a trash bin with two crossed lines indicating no waste or discharge (no text or symbols)
natural_image
Silhouette of a person sorting documents into a trash bin (no text or symbols)
https://www.targa.gmbh/downloads/conformity/367268_2101.pdf
natural_image
Symbol of a trash bin crossed with no text or numbers, representing waste sorting or disposal (no text present)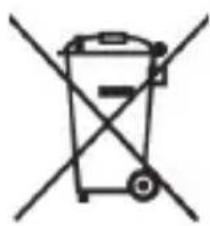
natural_image
Simple line drawing of a trash bin with two crossed lines indicating no waste or prohibition (no text or symbols)natural_image
Silhouette of a person sorting trash into a bin (no text or symbols)https://www.targa.gmbh/downloads/conformity/367268_2101.pdf
14. Garantie en serviceafwikkeling
natural_image
Symbol of a trash bin crossed with no text or numbers, representing waste sorting or disposal (no text present)natural_image
Symbol of a trash bin crossed with two crossed lines, representing no waste or discharge (no text or labels)natural_image
Silhouette of a person sorting trash into a bin (no text or symbols)text_image
Two recycling symbols: one with a recycling arrow and the other with a 'b' inside and the other with an arrow labeled 'a'https://www.targa.gmbh/downloads/conformity/367268_2101.pdf