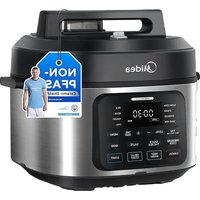
USER MANUAL MPC802SAMK MIDEA
natural_image
Line drawing of a rice cooker with lid and side panel (no text or symbols)
ELECTRIC PRESSURE COOKER
USER MANUAL
MPC802SAMK
Warning notices: Before using this product, please read this manual carefully and keep it for future reference. The design and specifications are subject to change without prior notice for product improvement. Consult with your dealer or manufacturer for details.
The diagram above is just for reference. Please take the appearance of the actual product as the standard.
LANGUAGES
EN English
DE German
IT Italian
FR France
SP Spanish
THANK YOU LETTER
Thank you for choosing Midea! Before using your new Midea product, please read this manual thoroughly to ensure that you know how to operate the features and functions that your new appliance offers in a safe way.
CONTENTS
THANK YOU LETTER 01
SAFETY INSTRUCTIONS 02
SPECIFICATIONS 06
PRODUCT OVERVIEW 07
INSTALLATION INSTRUCTIONS 08
OPERATION INSTRUCTIONS 09
CLEANING AND MAINTENANCE 18
TROUBLESHOOTING 24
TRADEMARKS, COPYRIGHTS AND LEGAL STATEMENT 26
DISPOSAL AND RECYCLING 27
DATA PROTECTION NOTICE 28
WARRANTY / SERVICE 29
SAFETY INSTRUCTIONS
Intended Use
The following safety guidelines are intended to prevent unforeseen risks or damage from unsafe or incorrect operation of the appliance. Please check the packaging and appliance on arrival to make sure everything is intact to ensure safe operation. If you find any damage, please contact the retailer or dealer. Please note modifications or alterations to the appliance are not allowed for your safety concern. Unintended use may cause hazards and loss of warranty claims.
Explanation of Symbols

Danger
This symbol indicates that there are dangers to the life and health of persons due to extremely flammable gas.

Warning of electrical voltage
This symbol indicates that there is a danger to life and health of persons due to voltage.

Warning
The signal word indicates a hazard with a medium level of risk which, if not avoided, may result in death or serious injury.

Caution
The signal word indicates a hazard with a low degree of risk which, if not avoided, may result in minor or moderate injury.

Attention
The signal word indicates important information (e.g. damage to property), but not danger.

Observe instructions
This symbol indicates that a service technician should only operate and maintain this appliance in accordance with the operating instructions.
Read these operating instructions carefully and attentively before using/commissioning the unit and keep them in the immediate vicinity of the installation site or unit for later use!
WARNING
- Read all the instructions.
- Do not use out doors.
- This appliance is not intended for use by persons with reduced physical, sensory or mental capabilities, or lack of experience and knowledge, unless they have been given supervision or instruction concerning use of the appliance by a person responsible for their safety.
- This appliance shall not be used by children. Keep the appliance and its cord out of reach of children.
• Children should be supervised to ensure that they do not play with the appliance.
-
This appliance is intended to be used in household and similar applications such as:
-
Staff kitchen areas in shops, office and other working environments.
- Farm houses.
- By clients in hotels, motels and other residential type environments.
-
Bed and breakfast type environments.
-
Do not immerse any part of the appliance in water or other liquid.
- The pressure regulator allowing the escape of steam should be checked regularly to ensure that they are not blocked.
- The container must not be opened until the pressure has decreased sufficiently.
- The heating element surface is subject to residual heat after use, do not touch.
- Warning: Avoid spillage on the connector.
- Warning: Misuse may cause potential injury.
- Do not put the pressure cooker into a heated oven.
- Move the pressure cooker under pressure with the
greatest care. Do not touch hot surfaces. Use the handles and knobs. If necessary, use protection.
- Do not let children near the pressure cooker when in use.
- Do not use the pressure cooker for a purpose other than the one for which it is intended.
- This appliance cooks under pressure. Scalds may result from inappropriate use of the pressure cooker. Make sure that the cooker is property closed before applying heat, see “instructions for use”.
- Never force open the pressure cooker. Do not open before making sure that its internal pressure has completely dropped. See the “instructions for use”.
- Never use your pressure cooker without adding water or food, this would seriously damage it.
- Use the appropriate heat source(s) according to the instructions for use.
• After cooking meat with a skin (e.g. ox tongue) which may swell under the effect of pressure, do not prick the meat which the skin is swollen; you might be scalded.
- When cooking doughy food, gently shake the cooker before opening the lid to avoid food ejection.
- Before each use, check that the valves are not obstructed. See the instructions for use.
- KEEP THESE INSTRUCTIONS.
CAUTION
- Please turn off and unplug the appliance before cleaning, maintenance or relocation and whenever it is not in use.
- Do not fill the cooker beyond 2/3 of its capacity. When cooking foodstuffs which expand during cooking, such as rice or dehydrate vegetables, do not fill the cooker to more than half of its capacity.
- Never use the pressure cooker in its pressurized mode for deep or shallow frying of food.
OBSERVE INSTRUCTIONS
- If the supply cord is damaged, it must be replaced by the manufacturer, its service agentor similarly qualified persons in order to avoid a hazard.
- The appliance is not intended to be operated by means of an external timer or a separate remote-control system.
- Do not tamper with any of the safety systems beyond the maintenance instructions specified in the instructions for use.
- Only use manufacturer's spare parts in accordance with the relevant model. In particular, use a body and a lid from the same manufacturer indicated as being compatible.
- Any repairs shall be performed by an authorized service representative.
SPECIFICATIONS
| Product Model | MPC802SAMK |
| Capacity | 7.6 L |
| Power Supply | 220-240V~ 50/60Hz |
| Rated Power | 1200W |
| Working Pressure | 40/80kPa |
| Keep Warm Temperature | 140° F~176° F |
EN
PRODUCT OVERVIEW
Product Structure
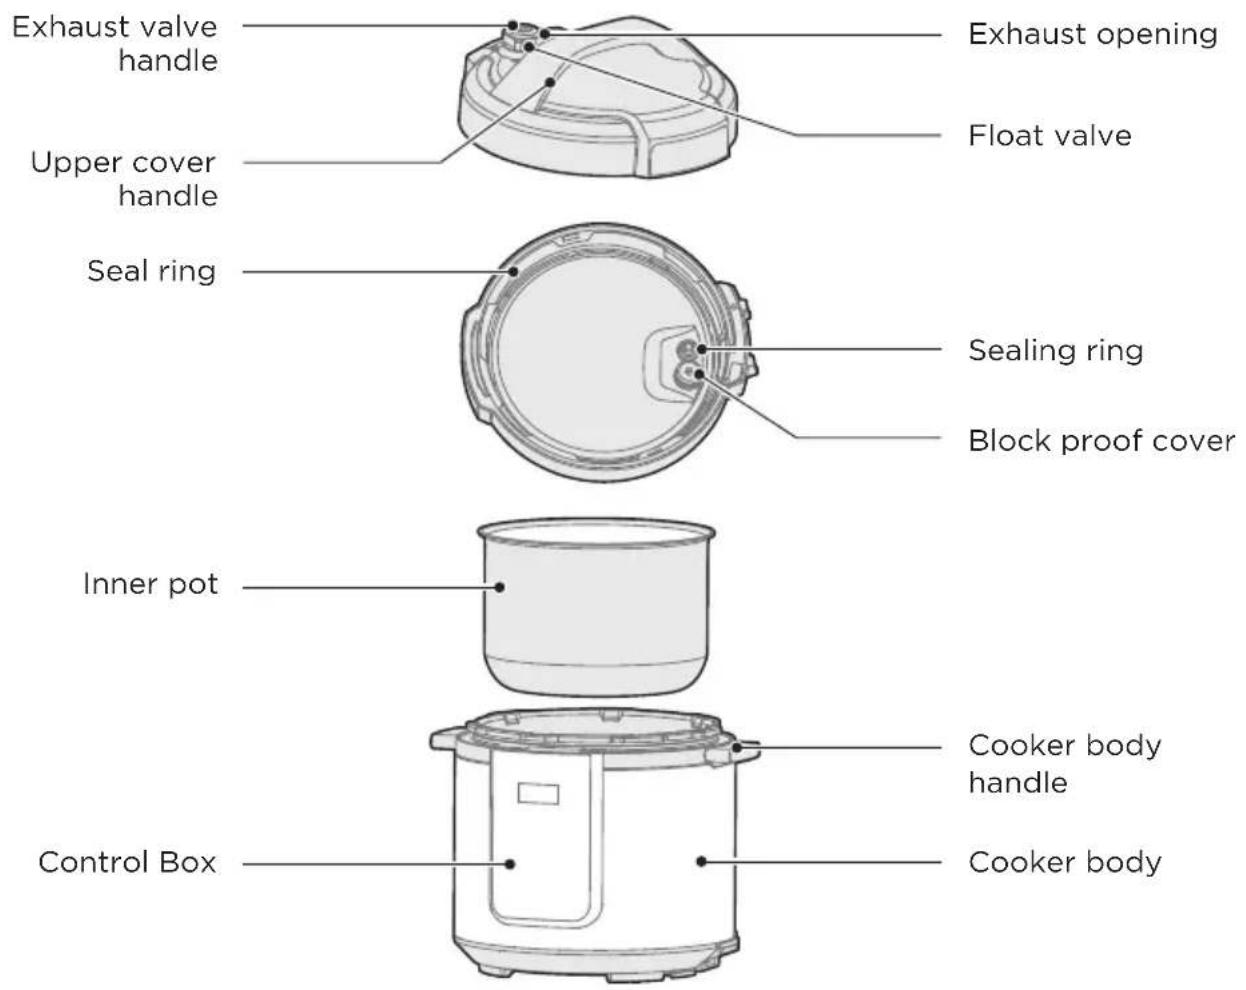
Parts List


NOTE
All the pictures in this manual are for explanation purpose only. Any discrepancy between the real object and the illustration in the drawing shall be subject to the real subject.
INSTALLATION INSTRUCTIONS

Tips:
- Please move the product with the handle of the cooker body;
- Please remove the water from the housing cover with cloth.

NOTE
- Exhaust valve: Pull out the exhaust valve from the lid. Clean the internal side of the exhaust valve and the exhaust valve and float valve of the lid with brush and cloth at least once a month.
- Sealing ring: Please remove oil and dirt from the sealing ring with detergent and brush.
- Water box: After cooking, the steam may stay in the water box of the external pot as water. Water in the box should be removed for avoiding bad odor, please clean it with clean cloth.
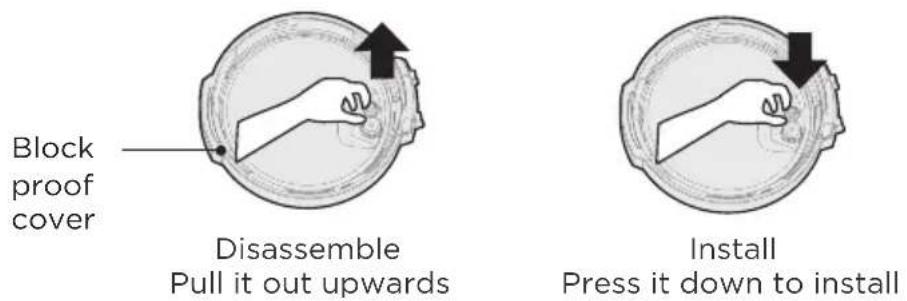
Disassemble and Install the Block Proof Cover and Seal Ring
Disassemble and install the block proof cover
- Check if the seal ring and block proof cover are correctly installed in the upper cover before use each time.
- After use, please clean the seal ring and around of block proof cover for avoiding jamming the cover, keep it clean to avoid bad odor.
Disassemble and install the seal ring
- Please do not pull the seal ring, otherwise, the distorted seal ring may influence the seal and pressure effect.
- Do not use the dam aged seal ring, please replace it at the authorized repair office.

OPERATION INSTRUCTIONS
Operation Part
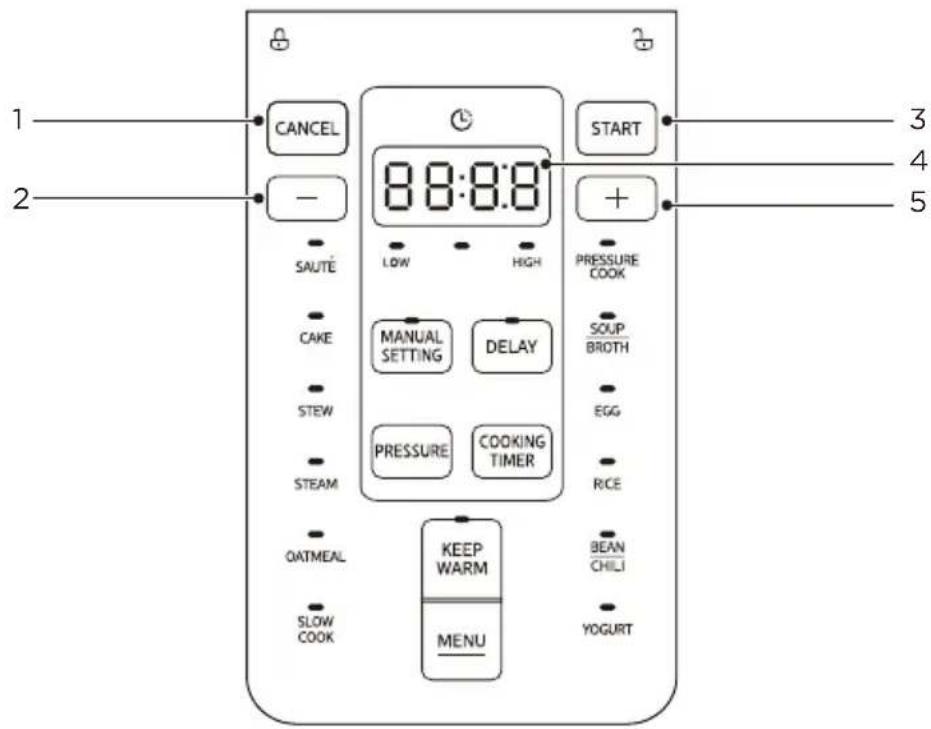
EN
| | Function description |
| 1 |  | • Cancel Button |
| 2 |  | • “-” Button |
| 3 |  | • Start Button |
| 4 |  | • Display Screen |
| 5 |  | • “+” Button |
Use and Maintain the Inner Pot
1. Do not empty
It may cause yellowish and spotted inner pot or distorted bottom if it is empty for a long time.
2. Do not use it to store the acid, alkali and preserved foods for a long period
Although the inner pot has excellent anti-corrosion performance, it may cause corrosion of certain degree, the suggested time of keep warm shall not exceed 2h.
3. Keep it clean to prolong the service life
Do not immerse it in water for a long period.
Clean the inner pot with soap, mild detergent or warm water to remove dust, oil and dirt.
- Do not use a metal shovel or other hard tool, otherwise it will damage the inner surface of pot.
Prepare for Cooking
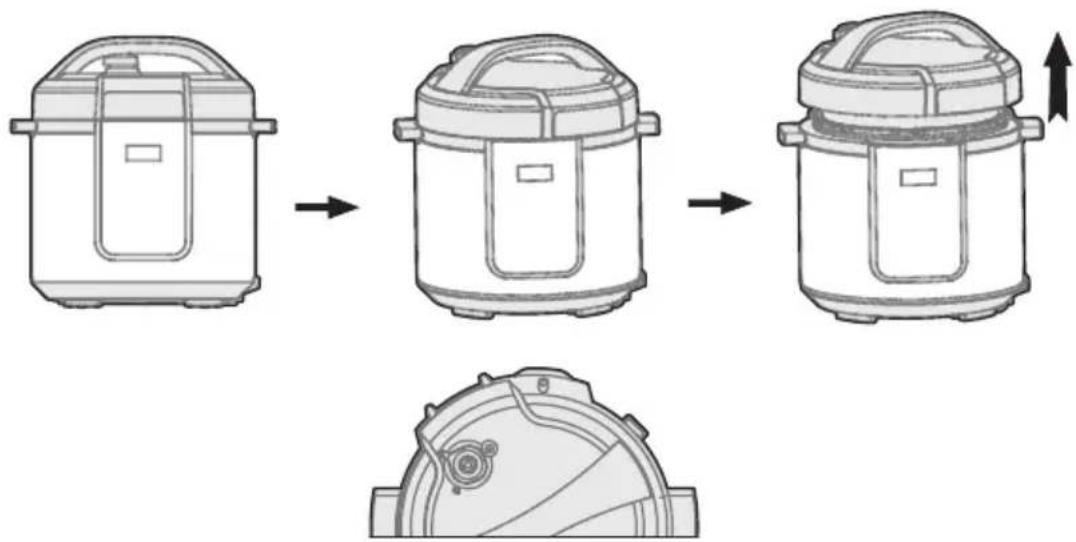
1 Opening the lid correctly
- Hold the handle of upper cover, turn it anticlockwise for about 30^ till the lid at unlock state, and then lift the upper cover.
flowchart
graph TD
    A["Original Rice Appliance"] --> B["Internal Component"]
    B --> C["Final Internal Component"]
    style A fill:#f9f,stroke:#333
    style B fill:#bbf,stroke:#333
    style C fill:#dfd,stroke:#333
Unlock State
2 Check if the parts and accessories of lid are well installed
- Check if the floater valve and exhaust valve are jammed, confirm if the sealing ring and block proof cover are well installed.
3 Take out the inner pot, put the foods and water into the inner pot
• The total amount of foods and water shall not exceed the Max marked on the inner pot.

4 Put the inner pot into the cooker
- Wipe to clean the external surface of inner pot, foreign object and water are not allowed on the inner surface of electric pressure cooker;
- Turn the inner pot to left and right to ensure good contact with the heating plate.
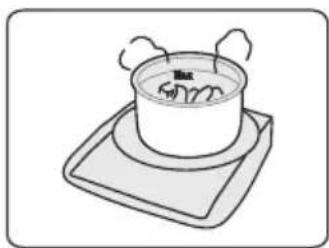
natural_image
Illustration showing a hand washing a pot and another cooking pot with a right-handled rotation arrow (no text or symbols)
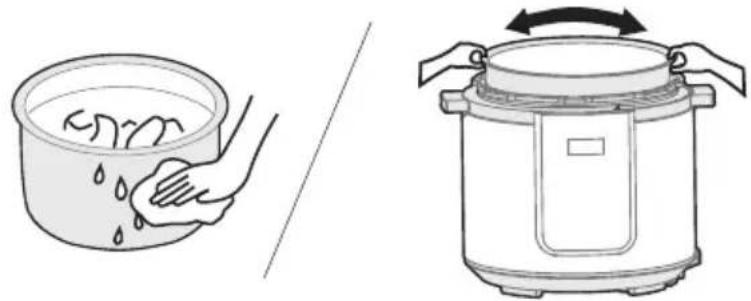
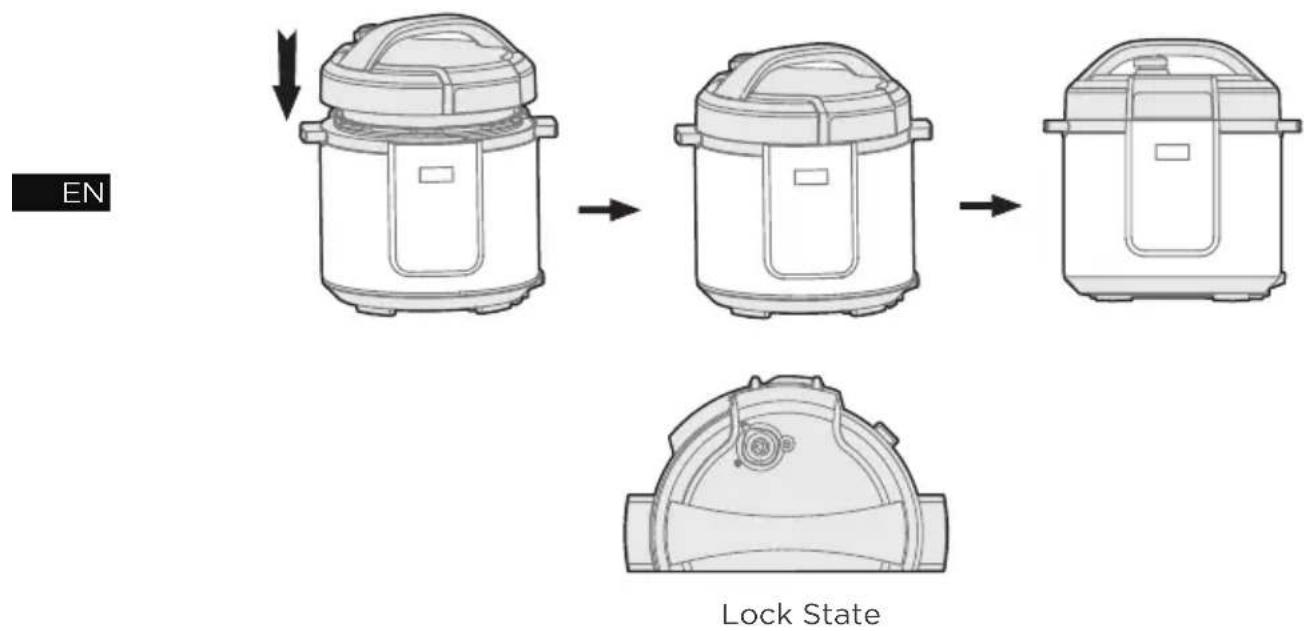
5 Safely close the lid
- Before closing the lid, check if the sealing ring is well installed.
- Hold the handle of upper cover, aim the lid as “unlock state”, put the top cover horizontally on the cooker body, turn the upper cover clockwise for about 30° to the lock place as “Lock State”.
6 Put the exhaust valve well
- When working, please turn the exhaust valve to the sealing place, which means the electric pressure cooker keeps at sealing state;
- For manual exhaust, please turn the exhaust valve handle to the exhaust place, the electric pressure cooker keeps at the exhaust state; when exhausting, do not keep the hands or face above the exhaust opening;
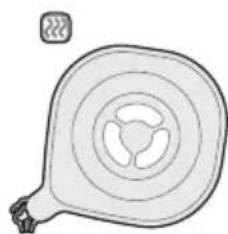
natural_image
Simple line drawing of a teapot with a circular hole and a small icon at the bottom (no text or symbols)
Sealing schematic diagram
natural_image
Simple line drawing of a circular object with internal patterns, resembling a stylized flower or abstract shape (no text or symbols)
Exhaust schematic diagram
- Check if the floater valve drops down before working (before heating, the floater valve is down).

NOTE
• (Picture are for reference only, atual product may differ from picture shown)
General Function
- Switch on If the buttons are inactive when use, please confirm if the lid is closed at the right place, the buttons are inactive if the lid is not closed correctly for product of this series.
- After cooking, the cooker may automatically enter into the keep warm state. After cooking, the cooker may automatically enter into the keep warm state(Some funtion). and the indicator display “OH(0 hour), 1H(1 hour), 2H(2 hour)...” or “L0:00(0 min), L0:01(1 min)....”

Tips:
When the cooker is working, it is normal that it makes "cluck" sound, please set your heart at relax when use.
To cook a small amount of foods, the inner pot may possibly be lifted when opening the lid, please shake the lid to drop the inner pot in the cooker body and then remove the lid.
EN
Safely Open the Lid
- Cut off power supply or remove the power plug
- Exhaust method
A. Quickly open the lid (For non-fluid foods)
Turn the exhaust valve to the exhaust place for exhausting, Some unit by pressing steam release button “ 📋 ” till the float valve drops down.
B. Generally open the lid
Keep the electric pressure cooker cool naturally till the float valve drops down.
- Open the lid
Turn the upper cover anticlockwise with the left hand, turn it to the cover open limit place, lift the upper cover with the right hand to open the lid.
Do not open the lid before the pressure in the pot has been completely released, do not open the lid fiercely if it is difficult to open.
Do not pull out the exhaust valve when turning the exhaust valve.
After cooking fluid foods (porridge and soup), do not turn the exhaust valve or press the steam release button please cut off power supply to make it cool naturally till the float drops before opening the lid.
Overall Operation Instructions
1. Function selection:
- SAUTÉ function can be selected through the "MENU" button;
- CAKE function can be selected through the "MENU" button;
- STEW function can be selected through the "MENU" button;
- STEAM function can be selected through the "MENU" button;
- OATMEAL function can be selected through the "MENU" button;
- SLOW COOK function can be selected through the "MENU" button;
- PRESSURE COOK function can be selected through the "MENU" button;
- SOUP/BROTH function can be selected through the "MENU" button;
- EGG function can be selected through the "MENU" button;
- RICE function can be selected through the "MENU" button;
- BEAN/CHILI function can be selected through the "MENU" button;
- YOGURT function can be selected through the "MENU" button;
- MANUAL SETTING function can be selected through the "MANUAL SETTING" button;
- KEEP WARM function can be selected through the "KEEP WARM" button;
After the function setting is completed, press the "START" button to start cooking.
2. Cooking time setting:
After selecting the function, press the “COOKING TIMER” button to enter the cooking time setting state, and the cooking time can be adjusted by the “-” and “+” buttons;
EN 3. DELAY TIMER setting:
After completing the function parameter setting, press the "DELAY TIMER" button to enter the DELAY TIMER setting state. In this state, the screen displays the preset start time, and the DELAY TIMER can be adjusted by the “-” and “+” buttons; after the setting is completed, press the "START" button to start the delay time countdown. When it counts down to 0, the menu starts cooking.

NOTE
DELAY TIMER cannot be set for functions such as SAUTÉ, KEEP WARM and YOGURT.
4. Keep warm setting:
In standby mode, press the “KEEP WARM” button, then press the “START” button to start keeping warm. The display shows the keep warm time, and the keep warm function will automatically start after cooking. The keep warm time is counting up, and the maximum keep warm time is 10 hours;

NOTE
YOGURT, SAUTÉ and other functions enter standby after cooking, and there is no automatic keep warm.
During function setting or delay setting, press the “CANCEL” button to return to standby. During heating or delay waiting, press the “CANCEL” button to cancel heating or delay and return to standby.
6. PRESSURE setting:
- After selecting a function, press the "PRESSURE" button to switch the pressure level. The pressure level is divided into HIGH and LOW;
7. NOTE
Pressure level cannot be set for YOGURT, SAUTÉ, CAKE, KEEP WARM, SLOW COOK functions.
Function Operation Logic
1. SLOW COOK:
- Turn on the power, put the ingredients in the inner pot, and close the upper cover;
- In standby mode, press the "MENU" button to select the "SLOW COOK" function, the "SLOW COOK" light will turn on, and the display will show the cooking time.
- Press the "COOKING TIMER" button to enter the cooking time setting;
- Press the "+" or "-" button to set the cooking time;
- Press the "START" button to start heating;
- After cooking, the cooker automatically starts to keep warm.
2. YOGURT:
- Turn on the power, put the ingredients in the inner pot, and close the upper cover;
- In standby mode, press the "MENU" button to select the YOGURT function, the "YOGURT" light will turn on, and the display will show the cooking time;
- Press the "COOKING TIMER" button to enter the cooking time setting;
- Press the "+" or "-" button to set the cooking time;
- Then press the "START" button to start heating;
- After cooking, the cooker returns to standby.
3. CAKE:
- Turn on the power, put the ingredients in the inner pot, close the upper cover, and turn the exhaust valve to the sealing position;
- In standby mode, press the "MENU" button to select the CAKE function, the "CAKE" light will turn on, and the display will show the cooking temperature;
- Press the "COOKING TIMER" button to enter the cooking time setting;
- Press the "+" or "-" button to set the cooking time;
- Then press the "START" button to start heating;
- After cooking, the cooker automatically starts to keep warm.
4. SOUP/BROTH:
- Turn on the power, put the ingredients in the inner pot, close the upper cover, and turn the exhaust valve to the sealing position;
- In standby mode, press the "MENU" button to select the SOUP/BROTH function, the SOUP/BROTH light will turn on, and the display will show the cooking time;
- Press the "COOKING TIMER" button to enter the cooking time setting;
- Press the "+" or "-" button to set the cooking time;
- Then press the "START" button to start heating;
- After cooking, the cooker automatically starts to keep warm.
5. PRESSURE COOK:
- Turn on the power, put the ingredients in the inner pot, close the upper cover, and turn the exhaust valve to the sealing position;
- In standby mode, press the "MENU" button to select the PRESSURE COOK function, the PRESSURE COOK light will turn on, and the display will show the cooking time;
- Press the "COOKING TIMER" button to enter the cooking time setting;
- Press the "+" or "-" button to set the cooking time;
- Then press the "START" button to start heating;
- After cooking, the cooker automatically starts to keep warm.
6. RICE:
- Power on the product, put the ingredients in the inner pot, and keep the upper cover open;
- In standby mode, press the "MENU" button to select the RICE function, the "RICE" light will turn on, and the display will show ----;
- Pressing the "COOKING TIMER" button cannot enter the cooking time setting;
- Pressing the “+” or “-” button cannot set the cooking time;
- Then press the "START" button to start heating;
- After cooking, the cooker automatically starts to keep warm.
*Special instructions for the RICE function: The recommended rice-water volume ratio for the RICE function is 1:1.2. You can adjust the time and rice-water volume ratio according to your personal taste;
7. SAUTÉ:
- Power on the product, put the ingredients in the inner pot, and keep the upper cover open;
- In standby mode, press the "MENU" button to select the SAUTÉ function, the "SAUTÉ" light will turn on, and the display will show the cooking time;
- Press the "COOKING TIMER" button TIMER" button to enter the cooking time setting;
- Press the "+" or "-" button to set the cooking time;
- Then press the "START" button to start heating;
- After cooking, the cooker returns to standby.
8. STEW:
- Turn on the power, put the ingredients in the inner pot, close the upper cover, and turn the exhaust valve to the sealing position;
- In standby mode, press the "MENU" button to select the MEAT/STEW function, the MEAT/STEW light will turn on, and the display will show the cooking time;
- Press the "COOKING TIMER" button to enter the cooking time setting;
- Press the "+" or "-" button to set the cooking time;
- Then press the "START" button to start heating;
- After cooking, the cooker automatically starts to keep warm.
9. STEAM:
- Turn on the power, put the ingredients in the inner pot, close the upper cover, and turn the exhaust valve to the sealing position;
- In standby mode, press the "MENU" button to select the STEAM function, the STEAM button light will turn on, and the display will show the cooking time;
- Press the "COOKING TIMER" button to enter the cooking time setting;
- Press the "+" or "-" button to set the cooking time;
- Then press the "START" button to start heating;
- After cooking, the cooker automatically starts to keep warm.
10. EGG:
- Turn on the power, put the ingredients in the inner pot, close the upper cover, and turn the exhaust valve to the sealing position;
- In standby mode, press the "MENU" button to select the EGG function, the EGG light will turn on, and the display will show the cooking time;
- Press the "COOKING TIMER" button to enter the cooking time setting;
- Press the "+" or "-" button to set the cooking time;
- Then press the "START" button to start heating;
- After cooking, the cooker automatically starts to keep warm.
11. OATMEAL:
- Turn on the power, put the ingredients in the inner pot, close the upper cover, and turn the exhaust valve to the sealing position;
- In standby mode, press the "MENU" button to select the OATMEAL function, the OATMEAL light will turn on, and the display will show the cooking time;
- Press the "COOKING TIMER" button to enter the cooking time setting;
- Press the “+” or “-” button to set the cooking time;
- Then press the "START" button to start heating;
- After cooking, the cooker automatically starts to keep warm.
12. BEAN/CHILI:
- Turn on the power, put the ingredients in the inner pot, close the upper cover, and turn the exhaust valve to the sealing position;
- In standby mode, press the "MENU" button to select the BEAN/CHILI function, the BEAN/CHILI light will turn on, and the display will show the cooking time;
- Press the "COOKING TIMER" button to enter the cooking time setting;
- Press the “+” or “-” button to set the cooking time;
- Then press the "START" button to start heating;
- After cooking, the cooker automatically starts to keep warm.
13. MANUAL SETTING:
- Turn on the power, put the ingredients in the inner pot, close the upper cover, and turn the exhaust valve to the sealing position;
- In standby mode, press the "MANUAL SETTING" button, the MANUAL SETTING light will turn on, and the display will show the cooking time;
- Press the "COOKING TIMER" button to enter the cooking time setting;
- Press the “+” or “-” button to set the cooking time;
- Then press the "START" button to start heating;
- After cooking, the cooker automatically starts to keep warm.
14. KEEP WARM:
- Turn on the power, put the ingredients in the inner pot, and close the upper cover;
- In standby mode, press the "KEEP WARM" button, the KEEP WARM light will turn on, and the display will show the cooking time;
- Press the "COOKING TIMER" button to enter the cooking time setting;
- Press the "+" or "-" button to set the cooking time;
- Then press the "START" button to start heating;
- After cooking, the cooker returns to standby.
Other Settings
Menu parameter memory function and default factory settings:
- After starting cooking, the parameters of all functions will be memorized. The next time you select the corresponding function, the function parameters will be initialized to the last memorized parameters for quick use.
- If you need to restore the unction to the default factory settings, press and hold the "CANCEL" button for 10 seconds in standby mode; a prompt tone will sound after the operation is successful.
EN
CLEANING AND MAINTENANCE
- Clean after each use.
- Before cleaning and maintenance, please unplug the power cord until the product cools.
- Remove the lid and inner pot, clean with detergent first, then rinse well with water, and wipe dry with a soft cloth.
- Clean the internal side of the lid with water, the seal ring, block proof cover, exhaust valve core and float valve can be removed for washing, timely and correctly install them after washing, and then dry the internal side of lid with cloth.
- Wipe clean the cooker body with a rag, and it is prohibited to soak the cooker body in water or spray water to it.
For use the product safely with a longer service life, please carefully check and maintain it.
| SolutionsIf followings d |
| Power cord and plug is expanded, deformation, damaged and it color is changed.One part of the power cord and plug are hotter.Power cord is flexible with discontinuous power supply.The electric pressure cooker has abnormal heating and generates bad odor.There's abnormal noise or vibration when supply power. | Stop using, and repair it by the authorized repair center. |
| There's dust or dirt on the plug or socket. Remove | the dust or dirt. |
Safety Precautions
To avoid personal injury and property loss, be sure to observe the following safety precautions.
- Meanings of the marks:
 | Means“Forbidden” items |  | GeneralForbid |  | DisassembleForbidden |  | Wet handsForbidden |
 | ContactForbidden |  | Spray WaterForbidden | | |
 | Means“Mandatory” items |  | Must beexecuted |  | Remove thepower plug | | |
- The danger caused by mistaken use if following warnings are neglected includes to two grades.

WARNING
It may possibly cause death or serious injury if the warming items are disobeyed.

CAUTION
It may cause physical injury or property damage if the caution items are disobeyed.

WARNING
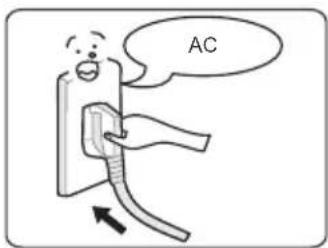

Use correct power outlet (Refer to the label)
- Failure to use correct electricity can cause fire or electric shock.
- Danger of fire if the bad socket is adopted.
natural_image
Simple line drawing of a plug inserted into a socket (no text or symbols)

A socket shall be used alone
- A socket of more than 10A rated current with grounding wire shall be used alone;
- If shared with other electrical appliances, the socket may cause abnormal heat and result in fire.
natural_image
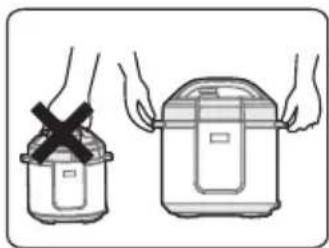
Illustration of two rice cooker models with a crossed-out X mark (no text or symbols)

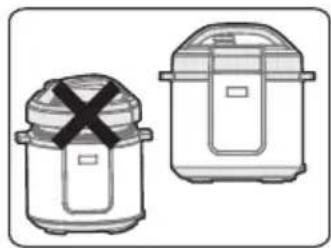
It is strictly prohibited to use other lid
- It is strictly prohibited to use other lid for heating, and in the (switching on) process, the use of non-original lid is not allowed.
- As this may cause electric shock or safety hazards.

natural_image
Simple line drawing of two electrical plugs connected to a fuse with a fuse (no text or symbols)

Stop using if the power cord is damaged
- Replace the damaged power cord with special soft cord or replace it with special assembly purchased from the manufacturer or authorized repair center.
natural_image
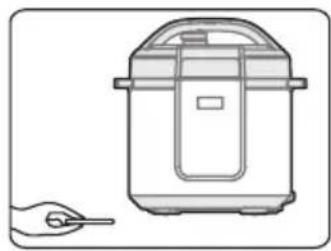
Line drawing of a rice cooker with a hand holding a pointer (no text or symbols)

Do not put foreign objects
- It is prohibited to insert metal shavings, needles and other foreign matter in the gap.
- As this may cause electric shock or movement anomalies.
natural_image
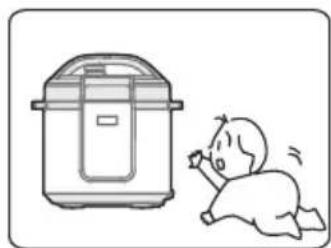
Illustration of a baby kneeling next to a rice cooker (no text or symbols)

Place the appliance in a location out of reach of infants
- Place the appliance in a location out of reach of infants.
• To avoid electric shock and scald.
natural_image
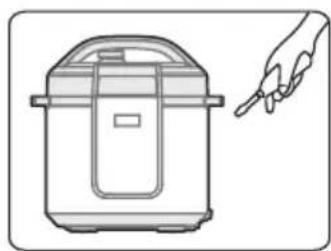
Line drawing of a rice cooker with a hand pointing to it (no text or symbols)

Modification is prohibited
- Modification or repair by non-professionals is prohibited.
• Violation may cause a fire or electric shock.
- Repair or replacement of parts shall be made in a designated service center.
natural_image
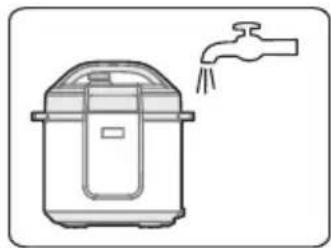
Line drawing of a rice cooker with a faucet above it (no text or symbols)

Products may not be immersed or sprinkled in water
- Doing so could cause electric shock and electrical short circuits.

Warning on Opening the lid
- When the electric pressure cooker is not working, there isn't pressure in the pot, the float valve is down;
- When the electric pressure cooker is working, pressure in the cooker rises, float valve ascends; do not fiercely open the lid before the pressure has been completely released;
- If it is difficult to open the lid, please do not open it fiercely, otherwise, it may cause scalding or physical injury.
natural_image
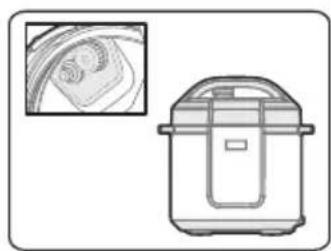
Line drawing of a rice cooker with a close-up inset showing its lid (no text or symbols)

Check periodically
- Be sure to check periodically the block proof cover and exhaust valve core to make sure that they are not be blocked;
- Do not cover the exhaust valve with heavy object or replace it with other object.
EN

CAUTION
natural_image
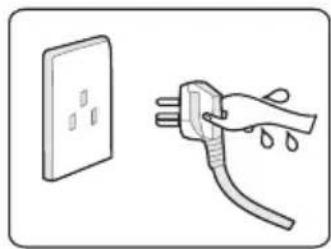
Illustration of a hand holding a plug with liquid, next to a wall-mounted electrical socket (no text or symbols)

Never pull the plug with a wet hand
• To avoid electric shock.
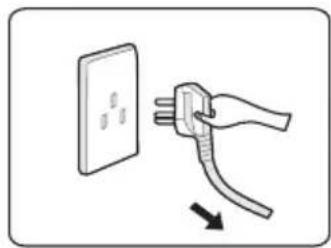
natural_image
Illustration of a hand inserting a plug into a wall socket, with an arrow indicating the cable (no text or symbols present)

When pulling the plug, you must pinch the plug
- When pulling the plug, you must pinch the plug;
- Do not pull the power cord, otherwise it will damage the cord, causing electric shock and short circuit.
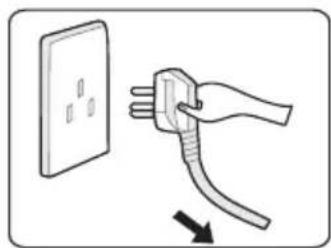
natural_image
Illustration of a hand holding a plug with a cable, next to an open electrical outlet (no text or symbols)

Unplugging when not in use
- Otherwise, it may produce leakage, fire or failure.
natural_image
Line drawing of a rice cooker with a hand holding a leaf (no text or symbols)

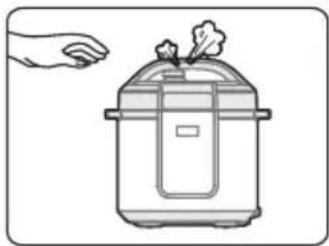
In working, never move your hands to close to the exhaust port.
- In cooking process, never move your hands to close to the exhaust port to avoid burns.
- During cooking, do not cover the vent with a cloth and other items.
natural_image
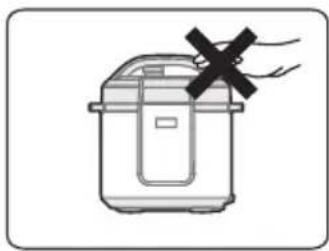
Simple line drawing of a rice cooker with a black X mark indicating the handle (no text or symbols)

When the cooker is working, please do not touch the lid
- When the cooker is working, lid has high temperature, do not touch it;
- Otherwise, it may possibly cause scalding.
natural_image
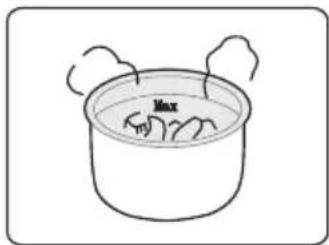
Simple line drawing of a cooking pot with steam rising from the side (no text or symbols)

The total amount of food and water can not exceed Max scale
- The total amount of food and water can not exceed Max scale, otherwise food may be cooked unfamiliar, or cause malfunction.
natural_image
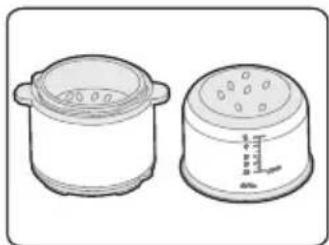
Line drawing of two cooking pot containers, one with lid and one with lid (no text or symbols)

Do not use a pot other than the dedicated pot
- When there is foreign object on the bottom of pot and heating plate surface, remove the foreign object before use.
- Otherwise, it may cause overheating and work abnormalities etc.
natural_image
Simple line drawing of a pot on a tray with steam rising from the side (no text or symbols)

Do not put the inner pot on other appliance for heating
• In order to avoid deformation or fault.
- Please use the special inner pot.
natural_image
Illustration of hands holding two food containers, one with a cross mark, no text or symbols present

When moving the product, please hold the handle of cooker body
- When moving the product, do not directly hold the handle of lid for avoiding lid dropping.

Do not use in the following locations
- Do not use in unstable locations;
- Do not use in locations near water and fire;
- Do not use near walls and furniture;
- Do not use in locations exposed to direct sunlight and oil splatter.
- Do not approach the stove for avoiding fire.
Environment for Storing the Product
- Periodically clean the cooker and remove oil and dirt if it is stored on the table.
- Put the electric pressure cooker 30cm away from other kitchen appliances.
EN
TROUBLESHOOTING
Operation of your appliance can lead to errors and malfunctions. The following tables contain possible causes and notes for resolving an error message or malfunction. It is recommended to read the tables carefully below in order to save your time and money that may cost for calling to the service center.
| | Reason SolutionProblem S/N |
| 1 | Difficult to close the lid | Sealing ring not installed properly. |
| The floater valve clamps the push rod. |
| 2 | Difficult to open the lid | Float valve in the popped-up position. |
| Pressure exists inside the cooker. |
| 3 | Steam leaks from the lid | Sealing ring installed improperly. |
| Food debris attached to the sealing ring. |
| Sealing ring damaged. |
| The lid is not closed correctly. |
| 4 | Steam leaks from float valve. | Food debris on the float valve gasket. |
| Float valve gasket worn-out. |
| 5 | Float valve unable to rise | Too little food and water in inner pot. |
| Steam leaks from the lid or exhaust valve. |
| | | Reason Solu |
| 6 | Steam comes out from exhaust valve non-stop | ·Exhaust valve not in sealing position. | ·Turn the exhaust valve to the sealing position. |
| ·Pressure control fails | ·Send to the service center for repair. |
| 7 | Power indicator doesn't light on | ·Power socket bad contact. | ·Please check the power socket. |
| 8 | All indicators flas | Display screen displays E1 | ·Bottom sensor fault. | ·Send to the service center for repair. |
| Display screen displays E2 |
| Display screen displays C1 | ·High temperature since there isn't water in the inner pot. | ·Add water according to the requirement. |
| ·High temperature since there isn't water in the inner pot. | ·Put the inner pot correctly. |
| Display screen displays E8 | ·Pressure switch fault. | ·Send to the service center for repair. |
| 9 | Rice half cooked or too hard | ·Too little water. | ·Add water accordingly. |
| ·Lid opened prematurely. | ·After cooking cycle completes, leave the lid on for 5 more minutes. |
| 10 | | · | ·Reduce water accordingly.T |
—If the fault is not removed after above check, please contact our authorized service center for repair.
TRADEMARKS, COPYRIGHTS AND LEGAL STATEMENT
Midea logo, word marks, trade name, trade dress and all versions there of are valuable assets of Midea Group and/or its affiliates (“Midea”), to which Midea owns trademarks, copyrights and other intellectual property rights, and all goodwill derived from using any part of an Midea trademark. Use of Midea trademark for commercial purposes without the prior written consent of Midea may constitute trademark infringement or unfair competition in violation of relevant laws.
This manual is created by Midea and Midea reserves all copyrights thereof. No entity or individual may use, duplicate, modify, distribute in whole or in part this manual, or bundle or sell with other products without the prior written consent of Midea.
All the described functions and instructions were up to date at the time of printing this manual. However, the actual product may vary due to improved functions and designs.
EN
DISPOSAL AND RECYCLING
Important Instructions for Environment
Compliance with the WEEE Directive and Disposing of the Waster Product: This product complies with EU WEEE Directive (2012/19/EU). This product bears a classification symbol for waster electrical and electronic equipment (WEEE).
This symbol indicates that this product shall not be disposed with other household wastes at the end of its service life. Used device must be returned to official collection point for recycling of electrical electronic devices. To find these collection systems please contact to your local authorities or retailer where the product was purchased. Each household performs important role in recovering and recycling of old appliance. Appropriate disposal of used appliance helps prevent potential negative consequences for the environment and human health.

natural_image
Symbol of a trash bin crossed with a diagonal line and a horizontal bar below (no text or labels)
EN
Compliance with RoHS Directive
The product you have purchased complies with EU RoHS Directive (2011/65/EU). It does not contain harmful and prohibited materials specified in the Directive.
Product information for power consumption and time to reach the applicable low power mode: standby mode: 0.6W
The maximum time needed to reach the applicable low power mode: 1 second.
Packaging materials of the product are manufactured from recyclable materials in accordance with our National Environment Regulations. Do not dispose of the packaging materials together with the domestic or other wastes. Take them to the packaging material collection points designated by the local authorities.

natural_image
Recycling symbol with three chasing arrows forming a triangle (no text or labels)
DATA PROTECTION NOTICE
For the provision of the services agreed with the customer,
we agree to comply without restriction with all stipulations of applicable data protection law, in line with agreed countries within which services to the customer will be delivered, as well as, where applicable, the EU General Data Protection Regulation (GDPR).
Generally, our data processing is to fulfil our obligation under contract with you and for product safety reasons, to safeguard your rights in connection with warranty and product registration questions. In some cases, but only if appropriate data protection is ensured, personal data might be transferred to recipients located outside of the European Economic Area.
Further information are provided on request. You can contact our Data Protection Officer via MideaDPO@midea.com. To exercise your rights such as right to object your personal date being processed for direct marketing purposes, please contact us via MideaDPO@midea.com. To find further information, please follow the QR Code.
EN
WARRANTY / SERVICE
We congratulate you to your new device and are convinced that you will be satisfied and have your joy with this modern appliance.
If you have any question or concerns, please email us
Email: customer_services@midea.com
In case of a technical fault, enter your exact address, telephone number, sales contract number and Device type (from the type plate of the device).
A precise fault description saves you time and money. For special questions, please contact the customer service center.
Before calling for service:
Please check whether there is an operating error or a cause that has nothing to do with the function of your device.
Please observe the note in the user manual and check whether:
- The power plug is connected
- The power plug may be damaged
- Electricity is available
EN
Warranty terms
This device has been manufactured and tested according to the most modern methods. The seller warrants for faultless material and proper manufacture for a period of 24 months from the date of sale to the end user. The unit is not suitable for commercial use.
The claim under guarantee lapses in the event of intervention by the Buyer or by a third party. Damage caused as a result of improper handling or operation, incorrect installation or storage, improper connection or installation as well as an act [...] of God or other external factors shall not be covered by this warranty.
When claims are submitted, the manufacturer reserves the right to make improvements to defective parts or to replace or exchange the device.
Only if it is not possible to achieve the intended use of the device by repairing or replacing the device, the buyer can demand a reduction of the purchase price or the cancellation of the purchase contract within 6 months from the date of purchase.
Claims for damages, including consequential damages, are excluded unless they are based on intent or gross negligence.
The guarantee claim exists only with submission of the product and the purchase receipt.
Midea Electrics Netherlands B.V.
Visiting address: Johan Cruijff Boulevard 65,
1101 DL Amsterdam
VIELEN DANK
natural_image
Simple line drawing of a hand pressing down on a circular object with an arrow indicating downward motion (no text or symbols)
natural_image
Illustration showing a hand washing clothes in a pot and another cooking into a rice cooker with a right-hand arrow indicating rotation (no text or symbols)
natural_image
Simple line drawing of a teapot with a handle and circular pattern inside (no text or symbols)
natural_image
Simple line drawing of a stylized object resembling a paddle or tool with a circular pattern (no text or symbols)
natural_image
Simple line drawing of a plug inserted into a socket (no text or symbols)

natural_image
Illustration of two rice cooker models with a crossed-out black X symbol (no text or labels)

natural_image
Simple line drawing of two electrical plugs connected to a fuse with a fuse (no text or symbols)

natural_image
Line drawing of a rice cooker with a hand pointing to it (no text or symbols)

natural_image
Illustration of a child reacting to a cooking appliance next to a rice cooker (no text or symbols)

natural_image
Line drawing of a rice cooker with a hand pointing to it (no text or symbols)

natural_image
Line drawing of a rice cooker with a faucet above it (no text or symbols)

natural_image
Line drawing of a rice cooker with an inset showing its interior components (no text or symbols)

natural_image
Illustration of a hand holding a plug with liquid, next to a wall-mounted electrical socket (no text or symbols)

natural_image
Illustration of a hand inserting a plug into a wall socket, with an arrow indicating the plug's direction (no text or symbols present)

natural_image
Illustration of a hand holding a plug with a cable, next to an open electrical outlet (no text or symbols)

natural_image
Line drawing of a hand holding a rice cooker with leafy top (no text or symbols)

natural_image
Simple line drawing of a rice cooker with a black X mark indicating the handle (no text or symbols)

natural_image
Simple line drawing of a cooking pot with steam rising from the top (no text or symbols)

natural_image
Line drawing of two cooking pot containers, one with lid and one with lid (no text or symbols)

natural_image
Simple line drawing of a pot on a tray with steam rising from the side (no text or symbols)

natural_image
Illustration of hands holding two food containers, one with a cross mark and the other a lid (no text or symbols)

natural_image
Symbol of a trash bin crossed with no visible text or labels
natural_image
Recycling symbol with three chasing arrows forming a triangle (no text or labels)
DATENSCHUTZHINWEISE
Email: customer_services@midea.com
Midea Electrics Netherlands B.V.
Anschrift: Johan Cruijff Boulevard 65,
1101 DL Amsterdam
natural_image
Illustration showing a hand washing food in a pot and another cooking into a rice cooker (no text or symbols)
natural_image
Simple line drawing of a teapot with a circular hole and a small icon at the bottom (no text or symbols)
natural_image
Simple line drawing of a stylized object resembling a hat or paddle with a circular vent and handle (no text or symbols)
natural_image
Simple line drawing of a plug inserted into a socket (no text or symbols)

natural_image
Illustration of two rice cooker models with a crossed-out X mark (no text or symbols)

natural_image
Simple line drawing of two electrical plugs connected to a fuse with a fuse (no text or symbols)

natural_image
Line drawing of a rice cooker with a hand pointing to it (no text or symbols)

natural_image
Illustration of a child reacting to a cooking appliance next to a rice cooker (no text or symbols)

natural_image
Line drawing of a rice cooker with a hand pointing to it (no text or symbols)

natural_image
Line drawing of a rice cooker with a faucet spraying water (no text or symbols)

natural_image
Line drawing of a rice cooker with an inset showing its interior components (no text or symbols)

Controllo periodico
natural_image
Illustration of a hand holding a plug with liquid, next to a wall-mounted electrical socket (no text or symbols)

natural_image
Illustration of a hand connecting a plug to a wall socket with a cable, showing electrical connection (no text or symbols)

natural_image
Illustration of a hand holding a plug with a cable, next to a wall socket (no text or symbols)

natural_image
Line drawing of a hand holding a rice cooker with leafy top (no text or symbols)

natural_image
Simple line drawing of a rice cooker with a black X mark indicating the resistance or explosion (no text or symbols)

natural_image
Simple line drawing of a cooking pot with steam rising from the side (no text or symbols)

natural_image
Line drawing of two cooking pot containers, one with lid and one with lid (no text or symbols)

natural_image
Simple line drawing of a pot on a tray with steam rising from the side (no text or symbols)

natural_image
Illustration of hands holding two food containers, one with a cross mark and the other with a lid (no text or symbols)

natural_image
Symbol of a trash bin crossed with no text or labels, accompanied by a black rectangular block below (no readable text or symbols)
natural_image
Recycling symbol with three chasing arrows forming a triangle (no text or labels)
Email: customer_services@midea.com
Midea Electrics Netherlands B.V.
Visiting address: Johan Cruijff Boulevard 65,
1101 DL Amsterdam
LETTRE DE REMERCIEMENTS
VUE D'ENSEMBLE DU PRODUIT 07
INSTALLATION DU PRODUIT 08
INSTRUCTIONS DE FONCTIONNEMENT 09
NETTOYAGE ET ENTRETIEN 18
DÉPANNAGE 24
MARQUES, DROITS D'AUTEUR ET MENTIONS LEGALES 26
ELIMINATION ET RECYCLAGE 27
AVIS SUR LA PROTECTION DES DONNEES 28
GARANTIE / SERVICE 29
CONSIGNES DE SECURITE
Usage prévu
VUE D'ENSEMBLE DU PRODUIT
natural_image
Illustration of a hand pressing down on a circular object with an upward arrow, no text or symbols present
natural_image
Simple line drawing of a hand pressing down on a circular object with an arrow indicating downward motion (no text or symbols)
natural_image
Illustration showing a hand washing food in a pot and another cooking into a rice cooker (no text or symbols)
flowchart
graph TD
    A["Top-down rice cooker with lid"] --> B["Top-down heater with lid"]
    B --> C["Top-down heater with lid"]
natural_image
Simple line drawing of a teapot with a handle and circular pattern (no text or symbols)
natural_image
Simple line drawing of a stylized object resembling a hat or platter with a circular pattern on its surface (no text or symbols)
natural_image
Simple line drawing of a plug inserted into a socket (no text or symbols)

natural_image
Illustration of two rice cooker models with a crossed-out X mark (no text or symbols)

natural_image
Simple line drawing of two electrical plugs connected to a fuse with a fuse (no text or symbols)

natural_image
Line drawing of a rice cooker with a hand pointing to it (no text or symbols)

natural_image
Illustration of a child reacting to a cooking appliance next to a rice cooker (no text or symbols)

natural_image
Line drawing of a rice cooker with a hand pointing to it (no text or symbols)

natural_image
Line drawing of a rice cooker with a faucet spraying water (no text or symbols)

natural_image
Line drawing of a rice cooker with an inset showing its interior components (no text or symbols)

natural_image
Illustration of a hand holding a plug with liquid, next to a wall-mounted electrical socket (no text or symbols)

natural_image
Illustration of a hand holding a plug with a cable, next to a wall socket (no text or symbols)

natural_image
Illustration of a hand holding a plug with a cable, next to a wall socket (no text or symbols)

natural_image
Line drawing of a rice cooker with a hand holding a leaf (no text or symbols)

natural_image
Simple line drawing of a rice cooker with a black X mark indicating the handle (no text or symbols)

natural_image
Simple line drawing of a cooking pot with steam rising from the side (no text or symbols)

natural_image
Line drawing of two cooking pot containers, one with lid and one with lid (no text or symbols)

natural_image
Simple line drawing of a pot on a tray with steam rising from it (no text or symbols)

natural_image
Illustration of hands holding two food containers, one with a cross mark and the other with a lid (no text or symbols)

natural_image
Symbol of a trash bin crossed with diagonal lines, no text or numbers present
natural_image
Recycling symbol icon with three chasing arrows forming a triangle (no text or labels)
AVIS SUR LA PROTECTION DES DONNEES
Email: customer_services@midea.com
Midea Electrics Netherlands B.V.
Visiting address: Johan Cruijff Boulevard 65,
1101 DL Amsterdam
AGRADECIMIENTOS
natural_image
Illustration showing a hand washing food in a pot and another cooking into a rice cooker (no text or symbols)
natural_image
Simple line drawing of a teapot with a circular hole and a small leaf-like object beside it (no text or symbols)
natural_image
Simple line drawing of a mechanical component with a circular feature and a small inset (no text or symbols)
natural_image
Simple line drawing of a plug inserted into a socket (no text or symbols)

natural_image
Illustration of two rice cooker models with a crossed-out X mark (no text or symbols)

natural_image
Simple line drawing of two electrical plugs connected to a fuse with a fuse (no text or symbols)

natural_image
Line drawing of a rice cooker with a hand pointing to it (no text or symbols)

natural_image
Illustration of a child reacting to a cooking appliance next to a rice cooker (no text or symbols)

natural_image
Line drawing of a rice cooker with a hand pointing to it (no text or symbols)

natural_image
Line drawing of a rice cooker with a faucet spraying water (no text or symbols)
natural_image
Line drawing of a rice cooker with an inset showing its interior components (no text or symbols)

natural_image
Illustration of a hand holding a plug with liquid, next to a wall-mounted electrical socket (no text or symbols)

natural_image
Illustration of a hand holding a plug with a cable, next to a wall socket (no text or symbols)

natural_image
Illustration of a hand holding a plug with a cable, next to an open electrical outlet (no text or symbols)

natural_image
Line drawing of a rice cooker with a hand holding a leaf (no text or symbols)

natural_image
Simple line drawing of a rice cooker with a black X mark indicating the resistance or explosion (no text or symbols)

natural_image
Simple line drawing of a cooking pot with steam rising from the side (no text or symbols)

natural_image
Line drawing of two cooking pot containers, one with lid and one with lid (no text or symbols)

natural_image
Simple line drawing of a pot on a tray with steam rising from the side (no text or symbols)

natural_image
Illustration of hands holding two food containers, one with a cross mark and the other with a lid (no text or symbols)

natural_image
Symbol of a trash bin crossed with no visible text or labels
natural_image
Recycling symbol icon with three chasing arrows forming a triangle (no text or labels)
Email: customer_services@midea.com
make yourself at home

www.midea.com
© Midea 2022 all rights reserved
| MIDEA | Midea Europe GmbH Ludwig-Erhard-Str.14, 65760 Eschborn. Germany | kundenservice@midea.com |
| MIDEA ITALIA S.R.L. Via Luigi Bodio 29/37 -Milano (MI) 20158 Italy | assistenza@midea.com |
| Midea Electrics France 253 RUE SAINT-HONORE 75001 PARIS | service_france@midea.com |
| MIDEA HOME APPLIANCES UK LTD Conavon Court Ground Floor, 12 Blackfriars Street, Salford,Manchester M3 5BQ UK | service_uk@midea.com |
Guangdong Midea Consumer Electric Manufacturing Co., Ltd 19 Sanle Road, Beijiao, Shunde, Foshan, Guangdong, China.


FR
ÉLÉMENTS
D'EMBALLAGE