Modern 10 Aqua - Digital photo frame Dragon Touch - Free user manual and instructions
Find the device manual for free Modern 10 Aqua Dragon Touch in PDF.


| Product Type | Digital Photo Frame |
| Brand | Dragon Touch |
| Model | Modern 10 Aqua |
| Screen | 9.7-inch IPS Touchscreen |
| Light Sensor | Yes, automatic brightness adjustment |
| Power Supply | Power adapter (must remain plugged in, no built-in battery) |
| Wi-Fi Connectivity | 2.4 GHz Wi-Fi |
| Internal Storage | 16 GB (estimated >40,000 photos at 300 KB each) |
| Mobile App | OurPhoto (iOS and Android) |
| Email Sharing | Yes, via dedicated email account |
| Computer Transfer | Yes, via FTP (Windows) |
| Auto Rotation | Yes, landscape or portrait |
| Scheduled On/Off | Yes, programmable auto sleep |
| Slideshow | Sequential or random mode, adjustable interval, transition effects |
| System Languages | French, English, German, Spanish, Italian, Japanese |
| Included Accessories | Power adapter, power cable, lens cloth, quick start guide, user manual |
Frequently Asked Questions - Modern 10 Aqua Dragon Touch
User questions about Modern 10 Aqua Dragon Touch
0 question about this device. Answer the ones you know or ask your own.
Ask a new question about this device
Download the instructions for your Digital photo frame in PDF format for free! Find your manual Modern 10 Aqua - Dragon Touch and take your electronic device back in hand. On this page are published all the documents necessary for the use of your device. Modern 10 Aqua by Dragon Touch.
USER MANUAL Modern 10 Aqua Dragon Touch
text_image
ABCDEFG 120mm 刻度 封白 USER MANUAL Dragon Touch Modern 10 Aqua Digital Photo Frame VCCB DRAGONTOUCH 90mm NOTES(技术要求): 1.装订后尺寸: 90*120mm 2.印刷颜色: 4C 3.材质: 1套157g排混纸/内页105g印染 4.表面处理: 到面过滤膜/内页过滤油 5.装订工艺: 胶漆 6.拆出网线: 200 lpi 7.公差: L(K)*W(次): ±1.5mm CUTURELS FOLDING UNIT PRODUCTS NAME PRODUCT NO. NO. NO. SELECT OR INSERT ORDER PROYECT NAME PROYECT NO. NO. NO. SCALE: 100% ANSUM: ISO-ENGLISH NAME EXTRAZERATION CODE SCALE: 100% SCALE: 100% SCALE: 100% SCALE: 100% SCALE: 100% SCALE: 100% SCALE: 100% SCALE: 100% SCALE: 100% SCALE: 100% SCALE: 100% SCALE: 100% SCALE: 100% SCALE: 100% SCALE: 100% SCALE: STILL 2H10 Version V1.0USER MANUAL
Dragon Touch Modern 10 Aqua Digital Photo Frame
V1.0
Please read this manual before operating your digital photo frame, and keep it for future reference.
DRAGONTOUCH
CONTENTS
01 - 16 17 - 32
English
Deutsch
49 - 6433 - 48
Español
Français
65 - 80 81 - 96
Italiano
日本語
English
WHAT'S IN THE BOX
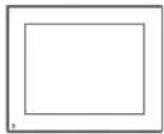
Dragon Touch Modern 10 Aqua Digital Photo Frame
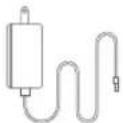
Power Adapter with Power Cable

Lens Cloth

Quick Start Guide

User Manual
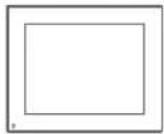
FRAME FEATURES
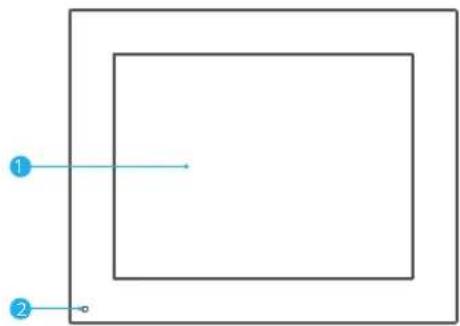
natural_image
Simple diagram with two labeled points and a rectangular boundary, no text or symbols present1
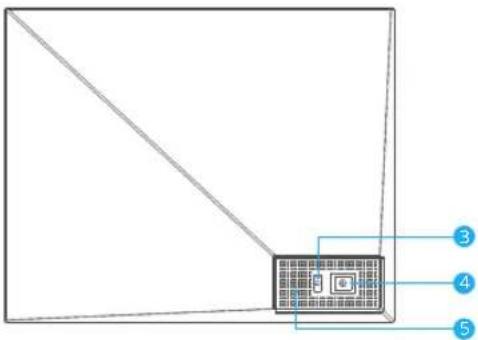
text_image
Diagram showing a device with labeled pins 3, 4, and 5 pointing to its internal components.1 9.7" Touch Screen
2 Light Sensor
3 Power Button
4 DC Power Port
5 Speaker
GETTING STARTED
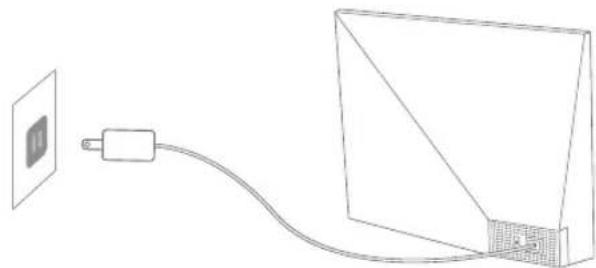
1. Connecting to Power
Plug in the power cable and connect the photo frame to a power source. The frame will power on in seconds. You can place the frame either in landscape or portrait mode (we recommend you place it in landscape mode during the first setup).
natural_image
Simple line drawing of a cable connecting a wall-mounted device to a monitor (no text or symbols)2
2. Initial Settings
There are several initial settings (Wifi, Device Info, Sleep Schedule, etc.) when you enter the system for the first time.
3. Connecting to Wifi
You can connect to Wifi during the initial settings or under the Wifi setting. Select the Wifi network you would like to connect to and enter the correct password if required. If your Wifi network is not on the list, restart the router or move your frame closer to your router, wait for seconds and check it again.
Note:
① The photo frame supports 2.4GHz Wifi networks only.
② A private Wifi network is highly recommended.
4. Frame ID
The photo frame will be activated when connecting it to Wifi for the first time. You can find the photo frame's unique Frame ID number on the photo frame: go to Settings → Device Info. The Frame ID number is required for binding your frame via the app or email.
USING THE OURPHOTO APP
1. Downloading the OurPhoto App
Please download and install the OurPhoto app on your mobile device by searching OurPhoto on the App Store or Google Play.

Download on the
App Store

GET IT ON
Google Play
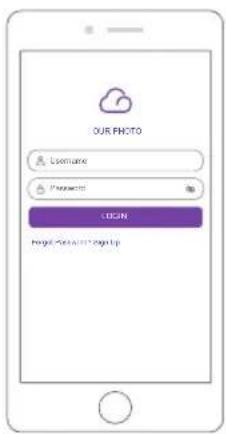
2. Creating an OurPhoto Account and Log in
① Open the OurPhoto app, select Sign Up and fill in all the required information (if you already have an account, please log in directly).
② Click the right arrow icon to verify the email address you provided. A verification code will be sent to your email address.
text_image
OUR PHOTO Username Password LOGIN Regul-StatuntLogin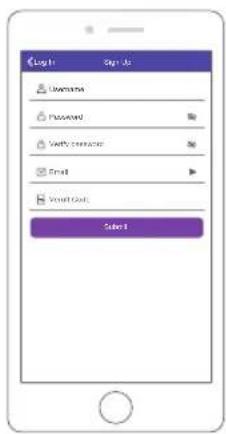
text_image
Login Sign Up Username Password Verify Resource Email Vesuit Get Select③ Collect and fill in the verification code, then click Submit to complete the account registration.
3. Inviting Friends to Download the App and Log in
Your friends and family can also send pictures or videos to your photo frame via the app. They'll need to download and install the OurPhoto app, create an account, log in to their account, and bind your frame (Please refer to "Inviting Others to Bind Your Frame via the App" below).
BINDING YOUR FRAME
1. Binding Your Frame via the App
The following instructions are only applicable to the frame owner or the user who is the first one to bind the frame.
① Log in to the OurPhoto app.
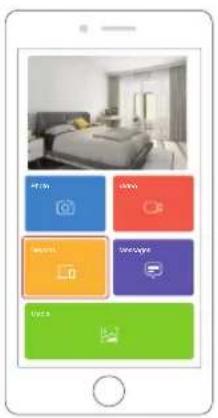
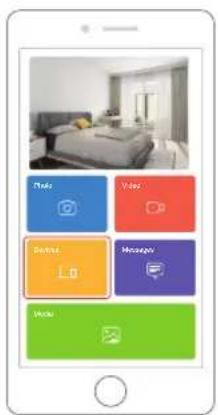
② Select Devices.
③ Click the "+" next to My Devices.
④ Enter the Frame ID.
Note: Frame ID is a 6-digit series number which can be found on your frame, go to Settings → Device Info.
⑤ Create a device name for your frame.
Note: We recommend you to name your frame after the Frame ID for easy identification, for example, if the Frame ID is 123456, please name your frame. Frame123456.
⑥ Create a unique email address for your frame.
Note: We recommend you to create the address with the Frame ID for easy identification, for example, if the Frame ID is 123456, please create such an email address frame123456@ourphoto.cn.
⑦ Then click Bind.
text_image
Mobile app interface displaying a bedroom interior with six app icons including Instagram, YouTube, and WeChat.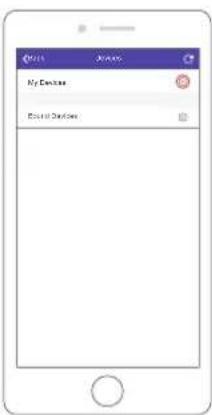
text_image
My Device Board Devices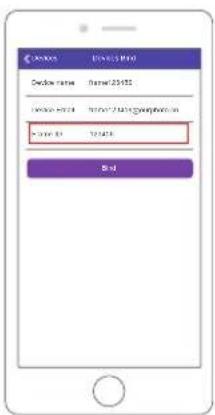
text_image
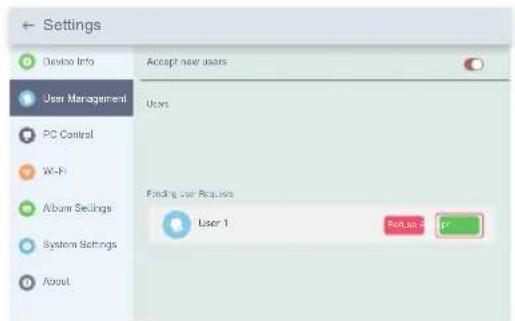
Device Login Card Card name: Email:23455 Password: 010-72161@gmail.com Access ID: 123458 End⑧ Confirm the binding request on your frame, go to Settings → User Management → Pending User Requests, click Accept.
Note: Please make sure that you turn on the "Accept New Users" to receive the binding request.
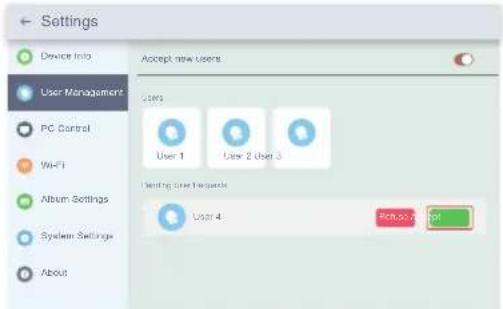
⑨ If the binding succeeds, this account will appear under the Users, and it will be the main account of your frame.
text_image
Settings Device Info User Management PC Control Wi-Fi Album Settings System Settings About Accept new users Users Finding user resources User 1 Ret,as 3.0 OKNote: The above screenshot is for reference, please update to the latest firmware version.
2. Inviting Others to Bind Your Frame via the App
The following instructions are only applicable to the non-frame owner to bind the frame. And binding requires the frame owner to operate and confirm on the frame. Here is what your friends should do:
① Download and install the OurPhoto app.
② Create a new OurPhoto account and log in. Go to Devices → Bound Devices, and then click "+".
③ Enter the frame ID number of your frame.
Note: Frame ID is a 6-digit series number which can be found on your frame, go to Settings > Device Info. Please send this Frame ID to your friends.
④ Create a device name for the frame.
Note: We recommend your friends to name the frame after the Frame ID for easy identification, for example, if your Frame ID is 123456, please name the frame Frame123456.
⑤ Then click Bind.
text_image
Mobile app interface screenshot showing a bedroom interior with five app icons: Play, View, Dinner, Message, and Music.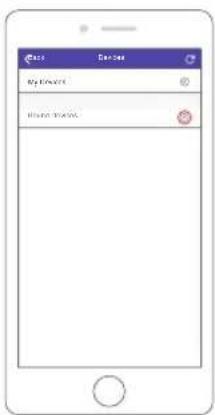
text_image
Sales Sales Top Product Sales Results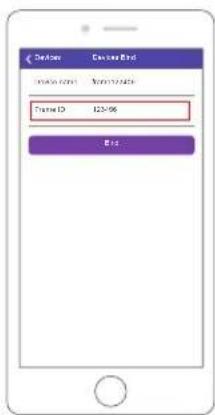
text_image
Online CustomerID Name: Form ID: 123-96 End...On your frame, you'll need to confirm your friend's binding request. Go to Settings → User Management → Pending User Requests, click Accept.
Then your friends and family will be able to share photos directly to the frame from anywhere in the world. To check the list of your frame's bound users, go to Settings → User Management → Users.
text_image
Settings Device Info User Management PC Control Wi-Fi Album Settings System Settings About Accept new Users Users User 1 User 2 User 3 Limiting User Targets User 4 PC30.75 PCNote: The above screenshot is for reference, please update to the latest firmware version.
3. Binding Your Frame via Email
You and your friends can also bind your email accounts to the frame, so that you can share photos to the frame via email. Make sure the photo frame has already been activated and bound via the app before you bind it via email. Otherwise, it cannot bind the frame via email successfully.
① Send an email with the subject "bd + Frame ID" to the frame's unique email address (the one you created when you bound your frame for the first time). For example, if your Frame ID is 123456, send an email with the subject "bd123456" to the frame's unique email address.
② Wait for seconds, you will receive a confirmation email from the OurPhoto team, and your email account is successfully bound to the frame. You can also find the bound email accounts in the User Management interface.
UPLOADING PHOTOS AND VIDEOS
1. Uploading Photos and Videos via the App
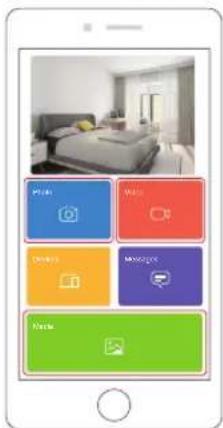
① Open the OurPhoto app and log in to your account. Make sure you have bound your account to your frame before.
② Click Media to upload your photos or videos on your mobile device. Select the photos or videos you would like to upload and choose the frame you would like to send to. Click the right arrow icon to confirm.
③ Click Photo or Video to take new photos or videos and choose the frame you would like to send to. Click the right arrow icon to confirm.
④ The photo frame will receive the photos or videos in seconds, you can check the photo or video library on the frame.
Note:
- If the frame didn't receive the photos or videos, please reboot the product or check the Wifi network.
• Each video clip is limited to 30 seconds or 100MB.
- The app supports sending Full Image to the frame. Please make sure your app version is 1.1.94 (OS)/1.0.4 (Android) or above.
text_image
Smart home screen interface displaying a bedroom photo with five app icons labeled P1, M1, N1, M2, and N3.2. Uploading Photos via Email
Send an email with photos attached to the email address of the frame. Your photos will be received in seconds, you can check the photo or video library on the frame.
Note:
• Videos cannot be uploaded via email.
• Make sure you have successfully bound the frame via email before uploading pictures.
3. Uploading Photos and Videos via a Computer
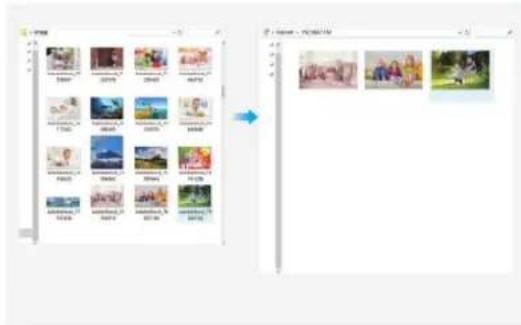
① Make sure your frame and computer are on the same Wifi network.
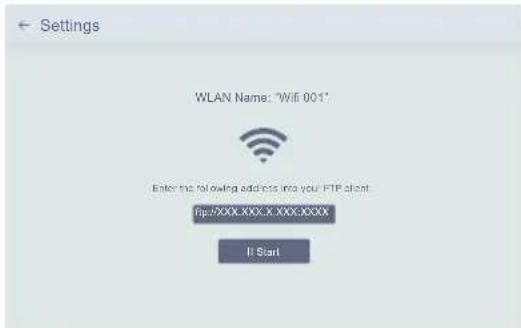
② On your frame, enter the PC Control interface, Settings → PC Control. Click the Start button, you will find an FTP address on the screen.
③ On your computer, open File Explorer. In the File Explorer, enter the FTP address in the address bar.
④ Then you can drag and drop the photo and video files on the computer that you would like to transfer to the frame folder showed up.
⑤ Click Stop on the frame to end PC connecting and uploading.
⑥ Your photos or videos will be received in seconds, you can check the photo or video library on the frame.
text_image
Settings WLAN Name: "WiFi 001" Enter the following address into your FTP client Fip/XXX.XXX.X XXXX.XXXX It Start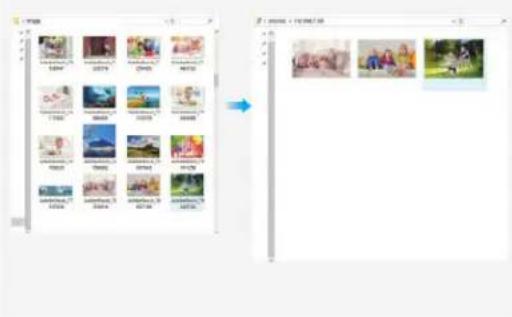
text_image
Screenshot of a photo editing software interface showing a grid of thumbnail images and a preview pane with three rows of photos.Note: The above screenshot is for reference, please update to the latest firmware version.
DELETING PHOTOS AND VIDEOS
1. Deleting Files in the Photo or Video Library
① Enter the Photo or Video library and choose Internal Storage, you will see all the photos or videos stored in the internal memory.
② Click the More icon at the upper right corner, and select the photos or videos you would like to delete from your frame.
③ Click the Delete icon at the top then choose OK to delete the photos or videos.
2. Deleting Files on a Slideshow
① When the photos or videos are displayed on the screen, click the photo or video you would like to delete.
② Click the Delete icon on the menu below, then choose OK to delete the photos or videos.
3. Deleting Files in Album Settings
Delete all the photos from internal storage.
SETTINGS MENU
1. Device Info
You can check the Frame ID and app information.
2. User Management
Turn on/off the Accept New Users button to receive or reject new user requests. You can see and manage the bound users under the Users. Choose the account you want to manage, and a submenu will allow you to view the account's photos, remark name, delete user and delete user & photos.
Accept or refuse the New User Requests under the Pending User Requests.
3. PC Control
The PC Control feature helps to upload photos and videos from a computer. To upload files, please make sure your frame and your computer are on the same Wifi network. The Wifi status is shown on the screen.
Click Start and enter the FTP address on your computer to upload files (please refer to the UPLOADING PHOTOS AND VIDEOS instruction before), and click Stop to end.
4. Wifi
You can choose the Wifi network you would like to connect to on the list.
5. Album Settings
• Full Screen
Turn on this setting to make the photo displayed in full screen.
- Slideshow
You can set Slideshow time to make the frame automatically displays photos after a period time of inactivity.
- Slideshow Mode
You can choose either Sequential or Random mode to display photos.
- Slideshow Interval
You can set Slideshow Interval to adjust the duration of each photo displays.
- Slideshow Transition Effect
You can choose the effect of slideshow transition.
- Delete Photos
Delete all the photos from internal storage.
It will remove all your user info, customized settings and files on your frame.
6. System Settings
- Sound
You can adjust the media volume.
- Display
① Brightness
You can adjust the brightness manually.
② Light Sensor
Turn on this setting, the light sensor will automatically adjust the brightness of the screen to match the ambient light.
③ Suspended ball
Turn on this button, a suspended ball will appear on the screen. It is a quick navigation key to help you easily go to the Home page and adjust the volume.
④ Auto-rotate screen
When Auto Rotate is turned on, the display will automatically adjust to either landscape or portrait mode according to the frame placement.
- Date and Time
You can set the date and time according to your preference.
• Language: English, Deutsch, Español, Français, Italiano, 日本語
Choose the system language.
7. Auto On & Off
You can set the Auto-On/Off time, as Sleep Schedule, to make the display automatically turn on and off at a specific time.
When your frame is in the sleep mode, press the power button on the back to awake the display.
8. Factory data reset
① Please disconnect your frame to Wifi first.
② Uncheck the "Delete all users and restore the device to inactive".
③ Click OK to reset your frame.
Note: If the photo frame works abnormally or crashes, press and hold the power button for about 10 seconds to force it to shut down, and then turn it back on.
FAQ
1. Does this frame have to be plugged in all the time?
Yes, you have to keep it plugged in to keep the frame on as it has no built-in battery.
2. Does this frame have to be Wifi connected to work or just in the setup process?
This frame needs to connect to a Wifi network for setup, receiving new photos/videos, receiving user requests and software updates. Other than that, the frame can play photos or video without a Wifi connection.
3. Why this frame cannot connect to Wifi?
It supports only 2.4GHz Wifi networks, select the Wifi network you would like to connect to and enter the password correctly if required. If your Wifi network is not on the list, restart your router or move your frame closer to your router, wait for seconds and check it again.
4. Can this frame be hung on the wall?
No, this model cannot be hung on the wall.
5. Can I place the frame in portrait or landscape position?
You can place the frame horizontally or vertically. When Auto-Rotate is turned on, the display will automatically adjust to either landscape or portrait mode according to the frame placement.
6. Where can I find the Frame ID?
Frame ID is a 6-digit series number which can be found in your frame. Settings → Device Info.
7. Why I cannot bind my frame via the app?
Please note that there is a difference in the binding process.
If you are the frame owner or the first to bind the frame, please follow the instructions "Binding Your Frame via the App" to bind the frame.
If you are not the frame owner, please follow the instructions "Inviting Others to Bind Your Frame via the App" to bind the frame. After receiving a binding request, the frame owner will need to operate on the photo frame and click "Accept" under
the User Management menu to confirm the binding. If the binding succeeds, the user account will appear under the Users.
8. Why I cannot bind my frame via Email?
Bind the frame via the app before binding the frame via email. If you cannot bind the frame via email, please make sure the frame has already been bound and activated via the app.
9. How do I unbind an account?
If you would like to unbind an Email or app account, please go to the User Management menu and click the bound user you want to delete, you will see there is an option for deleting a user.
10. Can I share photos and videos to the frame?
Yes, you can share both photos and videos (max 30 seconds or 100MB) to the frame.
11. Can I transfer photos or videos from a computer?
Yes, you can transfer your files from a computer by using the PC Control feature, but this feature is only available to Windows system now.
12. Where do the photos and videos store?
All the received photos and videos will be stored in the built-in 16GB memory, it is estimated to keep over 40,000 photos of 300KB/pc. The server will only cache the data for 30 days, and all the photos will be encrypted and deleted after 30 days. It can enable your photo frame to receive the photos sent when the photo frame is offline.
13. How can I delete photos and videos?
Enter the Photo or Video Library, click "more" button on the top. Select the photos or videos you would like to delete and click "delete".
14. Can I export the photos and videos?
You can export photos and videos via the PC control feature.
- Is it possible to manage the photos and videos in the frame remotely?
You can only manage/export/delete photos and videos in the frame directly.
16. Can I change the image transitions and displaying speed?
You can choose your preferred slideshow mode, interval and transition effect in Album Settings.
17. Can this frame automatically turn on/off at a specific time?
You can go to the Auto On/Off setting and set the auto on/off time as you want.
18. Can I cycle pictures and videos together?
You could only play photos or videos separately.
If you cannot find the answer to your question, please contact our customer support team, thank you!
CONTACT US
For any inquiries with Dragon Touch products, please feel free to contact us, we will respond within 24 hours.
E-mail: cs@dragontouch.com
Tel: 888-811-1140 (US) Mon-Fri (except holidays) 9am-5pm (EST)
Official website: www.dragontouch.com
Deutsch
WAS IST IN DER BOX
Dragon Touch Modern 10 Aqua
Digitaler Fotorahmen
natural_image
Simple diagram with two labeled points (1 and 2) and a rectangular outline, no text or symbols present.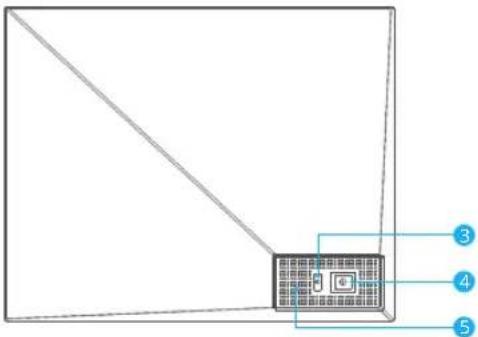
text_image
Diagram showing a device with labeled pins and connection points, including numbered annotations 3, 4, and 5.natural_image
Simple line drawing of a cable connecting a wall-mounted device to a separate panel (no text or symbols)text_image
CLIN MICRO Username Password IUGEN Forgot Password: Sign Up
text_image
Login Sign Us Documents Password Verify password Email Secret Guide Browsetext_image
Mobile app interface displaying a bedroom interior with six app categories: Photo, Video, Settings, Messages, and Audio.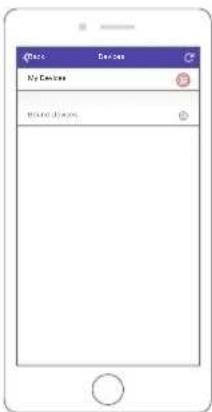
text_image
My Documents Shared Images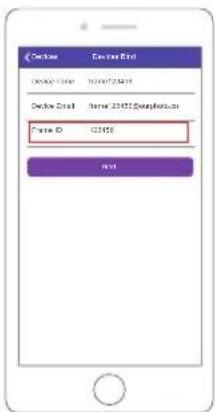
text_image
Login Login Name: 10300724591 Login Email: normal_221852/soxphoto.cn Form ID: 02456 Addtext_image
Settings Device Info User Management PC Control Wi-Fi Album Settings System Settings About Accept new users Users Playing User Networks User 1 Defaulted Endtext_image
Screenshot of a mobile app interface showing three sections: home screen with video buttons, home screen with menu options, and two separate windows displaying 'Delivery' and 'Delivery First'.text_image
Settings Device Info User Management PC Control Wi-Fi Album Settings System Settings About Accept new issues User 1 User 2 User 3 Funding User Accounts User 4 Refuse Eventtext_image
Smart home screen interface displaying a bedroom photo and four app icons with Chinese labelstext_image
Settings WLAN Name: "WiFi 001" Enter the following address into your HIP client: http://XXXX.XXXX.X-XXXX-XXXX If Start
text_image
Screenshot of a photo editing software interface showing a grid of image thumbnails with Chinese labels and a right-pointing arrow indicating transformation.natural_image
Simple diagram with two labeled points (1 and 2) and a rectangular outline, no text or symbols present.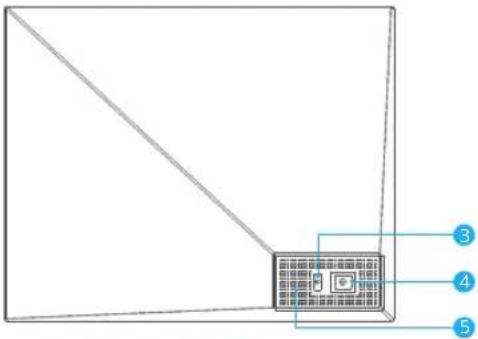
text_image
Diagram showing a control panel connected to five labeled pins (3, 4, 5) in a grid layoutnatural_image
Simple line drawing of a cable connecting a wall-mounted device to a separate panel (no text or symbols)2. Ajustes iniciales
text_image
OUR PHOTO Unsteady Passive LOOK Send Password Sign Up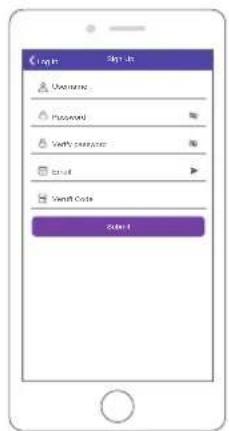
text_image
Login Username Password Verify passwords email Send Code Selecttext_image
Mobile app interface screenshot showing a bedroom photo with six app icons: Photo, Video, Database, Messenger, and Music.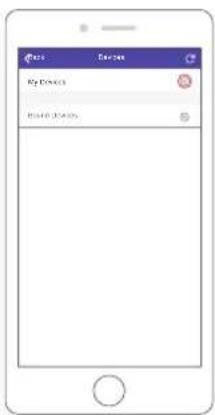
text_image
My Devices Research Sales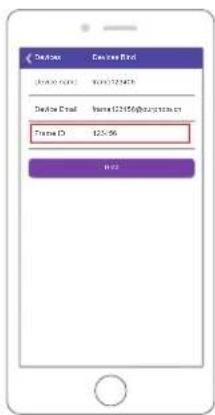
text_image
Email Email: 0001-5001 Email Email Name: 02165@zq.com.cn Email ID: 123-56 QQtext_image
Settings Device Info User Management PC Control Wi-Fi Album Settings System Settings About Accept new users Users Pending User Details User 1 Set up 7.0%text_image
Mobile app interface displaying a bedroom scene with six colored app icons labeled 'App Store', 'Sales', 'Products', 'Services', 'Other'.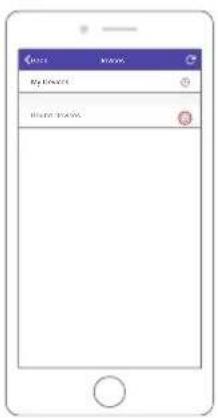
text_image
My Computer My Computer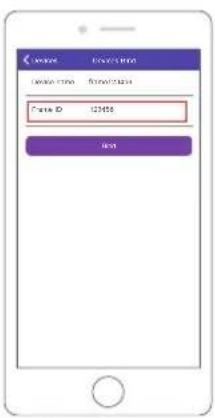
text_image
Cate Login Name: name Formal status Fate ID 12458 Logintext_image
Settings Device Info User Management PC Control Wi-Fi Album Settings System Settings About Accept new users User 1 User 2 User 3 Printing User Resources User 4 Replace grouptext_image
Mobile app interface displaying a bedroom interior with six app icons: Photo, Video, Camera, Memory+, Email, and Text.text_image
Settings WLAN Name: "WiFi 001" Enter the following address and your FTP start ftp/XXXX XXX.X XXX-XXXX It Start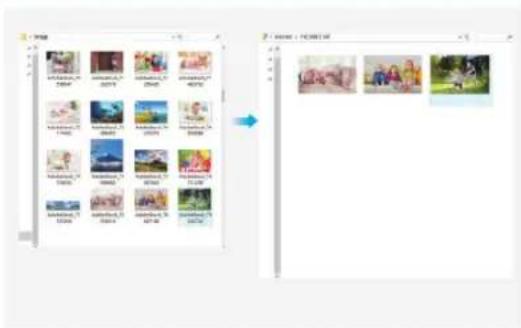
text_image
Screenshot of a photo editing interface showing a grid of individual photos with Chinese labels and an arrow indicating transformation.natural_image
Simple diagram with two labeled points (1 and 2) and a rectangular outline, no text or symbols present.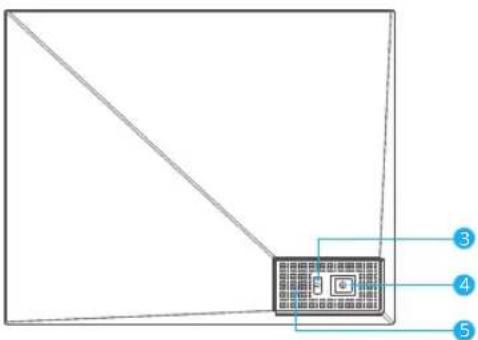
text_image
Diagram showing a device with labeled pins and connection points, including numbered annotations 3, 4, and 5.natural_image
Simple line drawing of a cable connecting a wall-mounted device to a rectangular panel (no text or symbols)L'APPLICATION OURPHOTO
text_image
OUR PHOTO Username Printed LOGN Forgot Password & Sign Up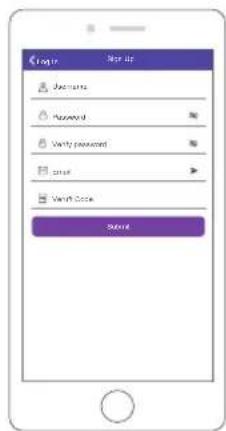
text_image
Login Accepts Password Very password User Verify Code Savetext_image
Screenshot of a mobile app interface showing three panels: home screen with device selection, device name input, and device ID input.text_image
Settings Device Info User Management PC Control WiFi Album Settings System Settings About Accept new users Users Checking User Requests User 1 Future Usertext_image
Mobile app interface displaying a bedroom interior with six app icons: Image, Video, Games, Messages, and Media.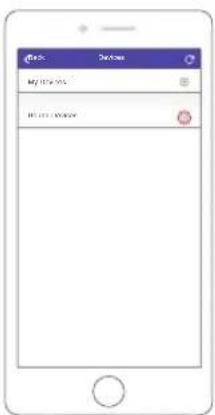
text_image
My choice My choice to choose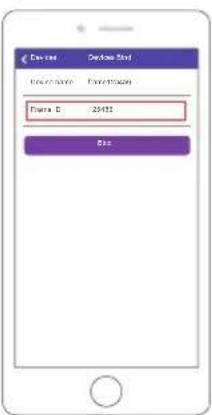
text_image
Device Options Not Importance Importation Forma C 26455 Edittext_image
Settings Device Info User Management PC Control Wi-Fi Album Settings System Settings About Accept now users User 1 User 2 User 3 Funding User Access User 4 Updates Optiontext_image
Mobile app interface displaying a bedroom interior with six labeled UI elements: Photo, Video, Calendar, Message, AR, and Text.text_image
Settings WLAN Name: "WiFi 001" Enter the following address into your FTP client Fip://XXX.XXX.X XXXX.XXXX If Start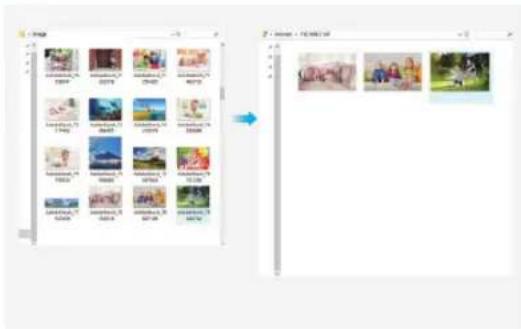
text_image
Screenshot of a photo editing interface showing a grid of image thumbnails and a right-side menu with Chinese text.natural_image
Simple diagram with two labeled points (1 and 2) and a rectangular outline, no text or symbols present.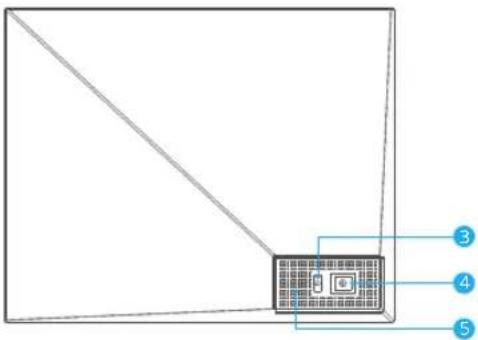
text_image
Diagram showing a device with labeled pins 3, 4, and 5 pointing to its internal components.1 9.7" IPS Touch Screen
text_image
CLASSIFIED Username Password LOGIN Login Password Sign Up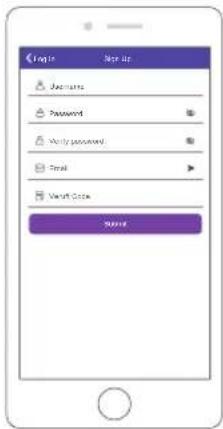
text_image
Login New user Access Password Very password. Email Sendtext_image
Mobile app interface displaying a bedroom interior with six app icons: Photo, Video, Devices, Storage, and Store.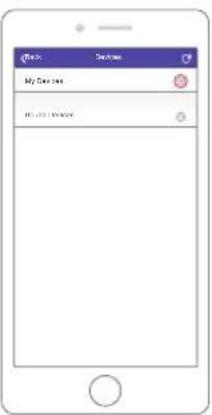
text_image
Check Finish My New Item No Entry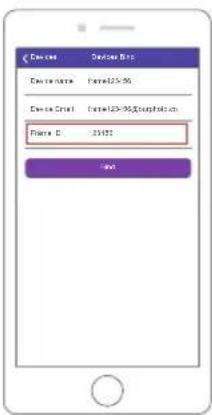
text_image
Device 1 Device B12 Device name: Frame125-90 Device Email: Frame125-95@csphb12.cn Frame C: 23452 Addtext_image
Settings Desktop Info User Management PC Control WH Album Settings System Settings About Accept new users Users Find a Use Requests User 1 100%text_image
My Devices Bened Devices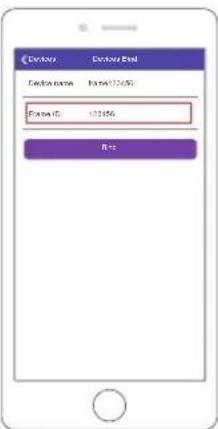
text_image
Phone Phone ID Phone name: Phone132450 Phone ID: 123166 Addtext_image
Settings Device Info User Management PC Control Wi-Fi Album Settings System Settings About Accept new users User 1 User 2 User 3 Funding User Processors User 4 Refine Systemtext_image
Mobile app interface screenshot showing a bedroom photo with five labeled UI elements: Play, Mail, Dinner, Message, and Make.2. Caricare le foto tramite e-mail
text_image
Settings WLAN Name: "WiFi 001" Enter the following podloss into your FTP client: http://XXXX.XXXX.X XXX-XXXX It Start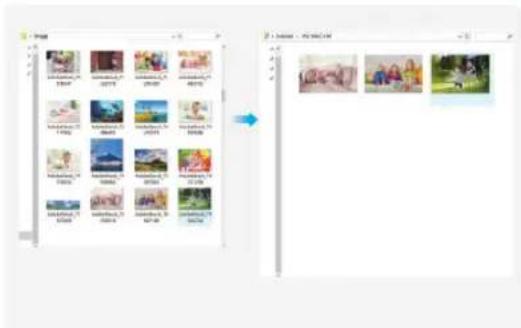
text_image
Screenshot of a photo editing software interface showing a grid of image thumbnails with timestamps and a rightward arrow indicating transformation.natural_image
Simple diagram with two labeled points (1 and 2) and a rectangular outline, no text or symbols present.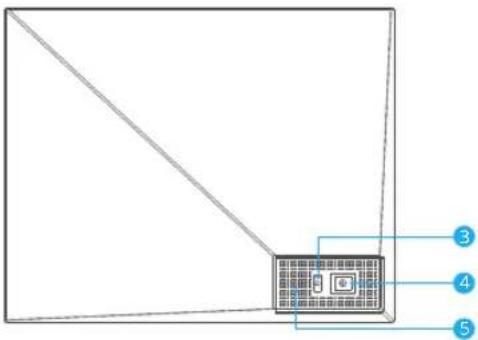
text_image
Diagram showing a device with labeled pins 3, 4, and 5 pointing to its internal components.1 9.7インチIPSタッチスクリーン
4 DC電源ポート
② ライトゼン サー
5 スピーカー
3 電源ボタン
操作說明
1. 電源を入れる
natural_image
Simple line drawing of a cable connecting a wall-mounted device to a monitor (no text or symbols)2. 初期設定
text_image
OKR Username Password OKR Login Password: Sign Up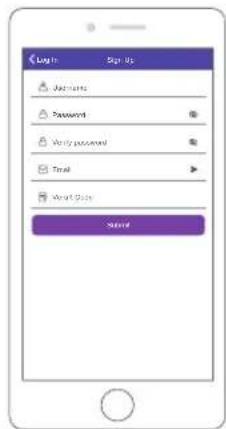
text_image
Login Sign it's Passwords Password Verify password Total About Style Sendtext_image
Mobile app interface displaying a bedroom photo with six labeled UI elements: Store, View, Dinner, Mastercard, and View.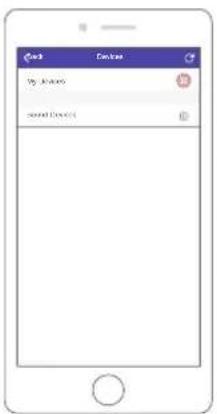
text_image
Check My Phone Sound Device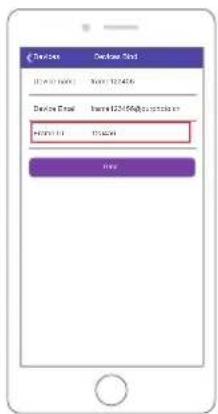
text_image
Device Email Device Email Add: 123456@e-mail.com Add: 123456@e-mail.com Add: 123456@e-mail.com Add: 123456@e-mail.com Add: 123456@e-mail.com Add: 123456@e-mail.com Add: 123456@e-mail.com Add: 123456@e-mail.com Edittext_image
Settings Device Info User Management PC Control Wi-Fi Album Settings System Settings About Accept new users Users Finding User Requests User 1 Roll off, Helptext_image
Mobile app interface displaying a bedroom photo with six app icons: Hide, Video, Services, Shouyong, and Hide.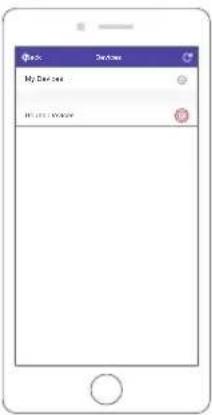
text_image
My Dave OK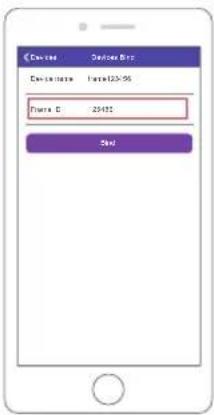
text_image
Device Device Name: Device Name: Forma 025-95 Serial ID: 23452 Serialtext_image
Settings Device Info User Management PC Control Wi-Fi Album Settings System Settings About Accepted new users Users User 1 User 2 User 3 Pending User Requests User 4 Refuse Refusetext_image
Mobile app interface displaying a bedroom interior with six colored app icons and a status bar at the bottom.2. メールで写真をアップロードする
text_image
Settings WLAN Name: "WiFi 001" Enter the following address into your FTP client: Iip/XXXX.XXX.X.XXXX.XXXX II Start