40732 - Food Warmers Vollrath - Free user manual and instructions
Find the device manual for free 40732 Vollrath in PDF.


User questions about 40732 Vollrath
0 question about this device. Answer the ones you know or ask your own.
Ask a new question about this device
Download the instructions for your Food Warmers in PDF format for free! Find your manual 40732 - Vollrath and take your electronic device back in hand. On this page are published all the documents necessary for the use of your device. 40732 by Vollrath.
USER MANUAL 40732 Vollrath
BainMarieHeatedDisplayCase
ThankyouforpurchasingthisVollrathequipment.Beforeoperatingthe equipment,readandfamiliarizeyourselfwiththefollowingoperating andsafetyinstructions.SAVETHESEINSTRUCTIONSFORFUTURE REFERENCE.Savetheoriginalboxandpackaging.Usethispackaging toshiptheequipmentifrepairsareneeded.
SAFETYPRECAUTIONS
Toensuresafeoperation, read the following statements and understand their meaning. This manual contains safety precautions which are explained below. Pleaseread carefully.

WARNING
Warningisusedtoindicatethepresenceofahazardthatwillorcan causeseverepersonalinjuryordeath.

CAUTION
Cautionisusedtoindicatethepresenceofahazardthatwillorcan causeminorormajorpersonalinjuryifthecautionisignored.
NOTICE: Notice is used to note information that is important but not hazard-related.
Toreduceriskofinjuryordamagetotheequipment
- Useonlygroundedelectricaloutletsthatmatchthevoltageratingon thenameplate.
- Haveaqualifiedpersonnelinstallthisequipmentinaccordancewithlocalcodesandordinances.
- Use equipmentinaflat, levelposition.
- Donotuseanextensioncordwiththisequipment.Donotplugthis equipmentintoapowerstripormulti-outletpowercord.
•Turnoffandunplugequipmentbeforecleaningormoving. - Donotspraycontrolsoroutsideofequipmentwithliquidsor cleaningagents.
- Donotcleantheequipmentwithsteelwool.
- Keep the equipment and power cordaway from open flames, electric burners over excessive heat.
- Donotoperateunattended.
- Donotoperateequipmentinpublicareasand/oraroundchildren.
- Donotoperateifequipmenthasbeendamagedorismalfunctioning inanyway.
FUNCTIONANDPURPOSE
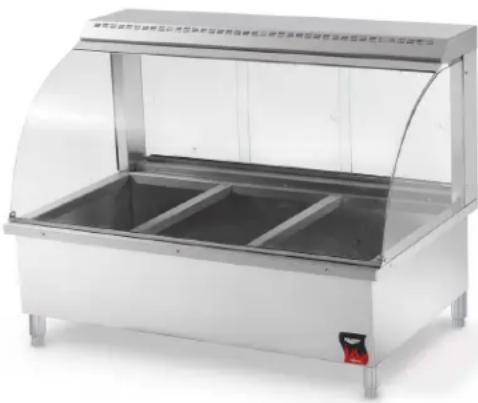
This equipment is designed to display and keep food at proper serving temperatures. Food must be prepared and placed in the equipment at proper serving temperatures. This equipment is designed for indoor use only. It is designed to on the countertop to bedropped into a countertop. It not intended to cook raw food to prepare food. This equipment is not intended for household, industrial or laboratory use.
natural_image
Exterior view of a stainless steel commercial kitchen appliance (no visible text or symbols)| ItemNo.Model | Description | |
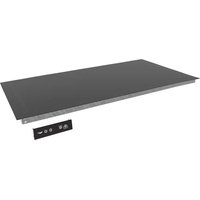
| 40732 | BMA7103 | HeatedDisplaycase |
TABLEOFCONTENTS
Installation......page2
Assembly......page2
FeaturesandControls......page4
BeforeFirstUse......page4
WetOperation......page4
DryOperation......page5
Cleaning......page5
Maintenance......page6
Troubleshooting......page7
INSTALLATION
CountertopInstallation InstalltheLegs
NOTICE: If this equipment will besetonto a countertop, the included legs must be installed.
Ensure that the equipment is level in all directions. Begin by tightening each leg securely. Then, as needed at each corner, rotate the adjustable foot.
Drop-inInstallation
SeetheincludedInstallationInstructions.
RecordYourSerialNumber
The serial number for your display case can be found on the rating plate located on the lower right corner of the back of the case. To aid in future communication about your product, please record the serial number in the space below.
SerialNumber
ASSEMBLY
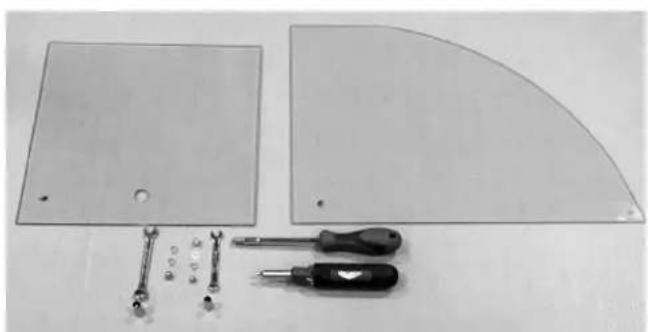
natural_image
Assorted mechanical components including screws, screws, and tools arranged on a plain surface (no text or symbols visible)ToolsyouwillNeed
•8mmsocketandwrench•Nutdriver
•10mmsocketandwrench•Phillipsheadscrewdriver
AttachtheGlassPanels SecuretheFrontGlass
- Usetwometalwashersandoneacornnuttosecurethefrontglass. Handtighten..
natural_image
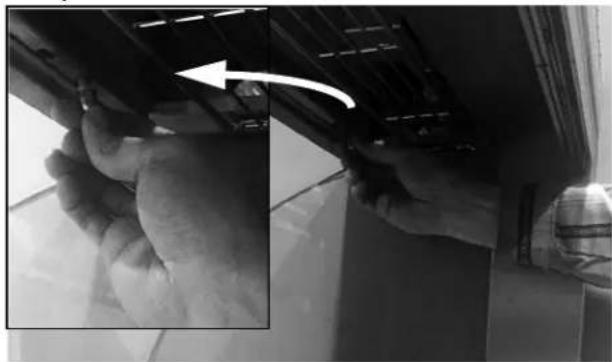
Close-up of hands performing a task with a white arrow pointing to a hand on the floor (no text or symbols visible)CurvedSidePanels
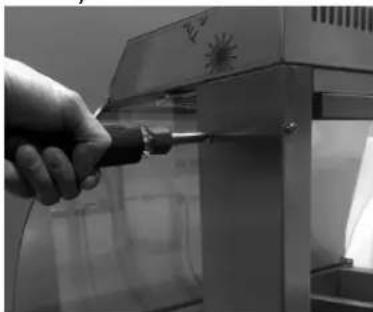
- Removethetopandbottomscrewsfromthesideofthesideofthe upright.Retainthehardware.
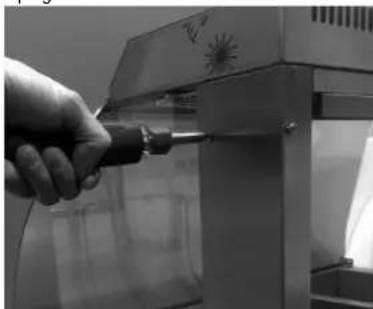
natural_image
Close-up of a hand using a power tool to press or install a device (no visible text or symbols)- Loosen, but donotremovethetopandbottomscrews from the back of the upright.
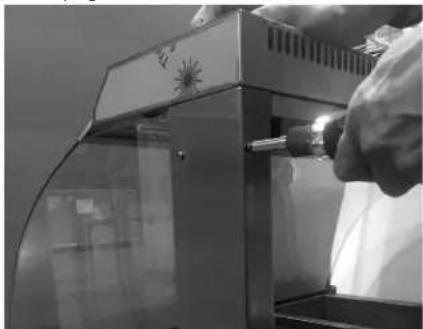
natural_image
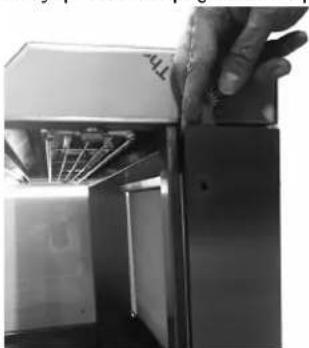
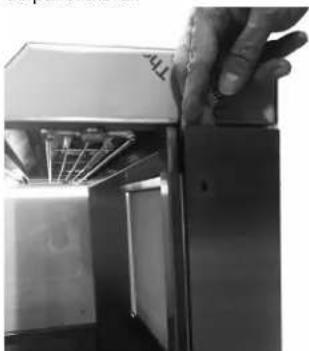
Person holding a small object inside a glass appliance (no visible text or symbols)- Gentlyopenthesideuprighttomakespaceforthesidepanelglass.
natural_image
Close-up of a hand opening a refrigerator with visible door and window (no text or symbols)ASSEMBLY(CONTINUED)
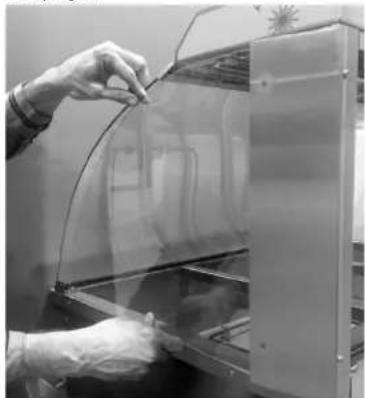
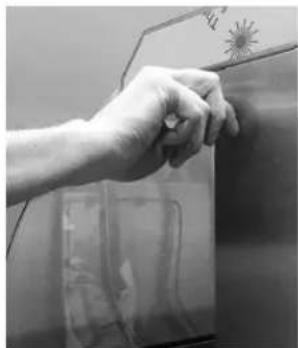
4.Slidethesidepanelglassintothechannelatthebottomandbehind theupright.
natural_image
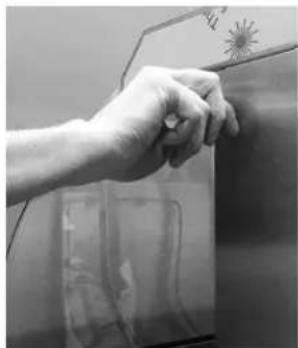
Person in cleanroom suit handling a transparent enclosure with curved glass panels (no visible text or symbols)- Insert and tightent the hardware to secure the panel behind the upright.
natural_image
Close-up of a hand pressing down on a metallic door panel (no visible text or symbols)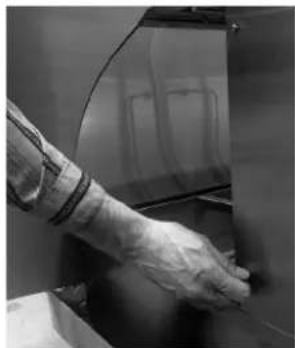
natural_image
Close-up of a hand wearing a glove, handling a curved object (no visible text or symbols)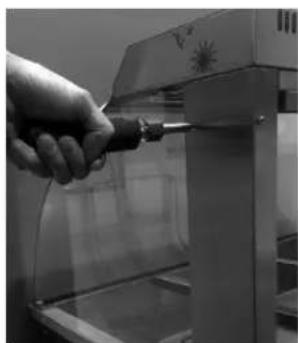
natural_image
Close-up of a hand using a tool to apply material to a transparent container (no visible text or symbols)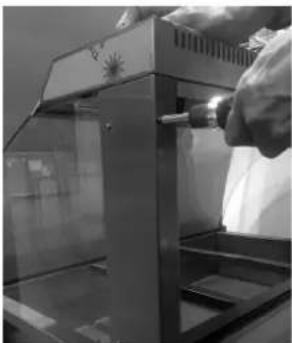
natural_image
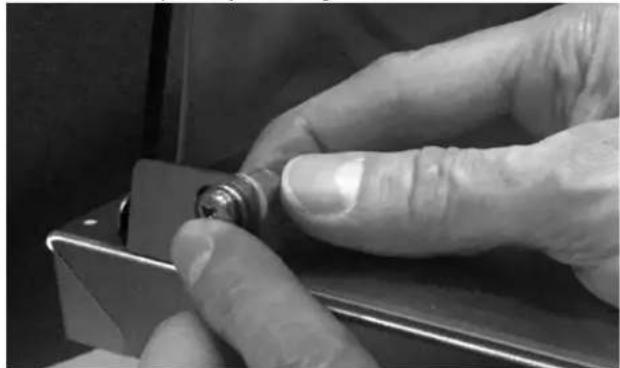
Person in protective suit operating a laboratory filtration or vacuum chamber (no visible text or symbols)- Insert the hardware.
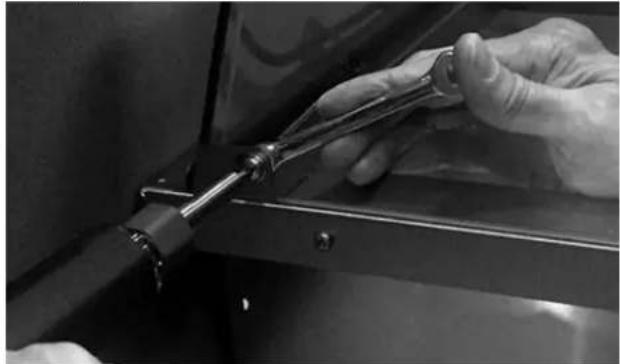
Outside:screwandmetalwasher Inside:plasticwasherandacornnut
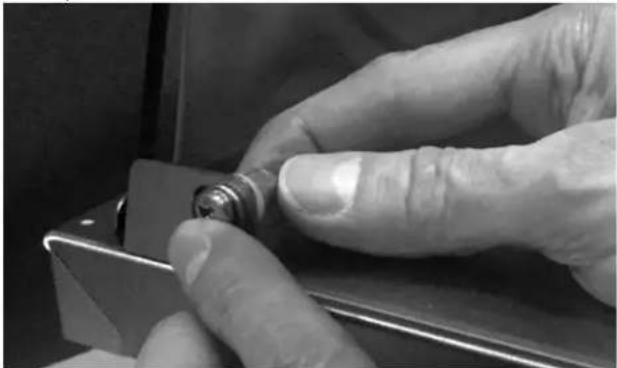
natural_image
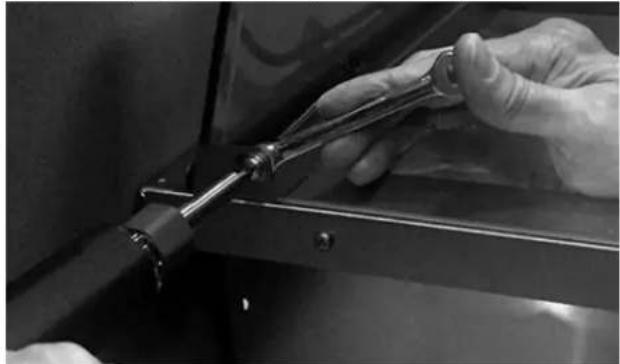
Close-up of hands adjusting a small mechanical component (no visible text or symbols)- Tightenthehardwaretosecurethefrontcornerofthepanel.
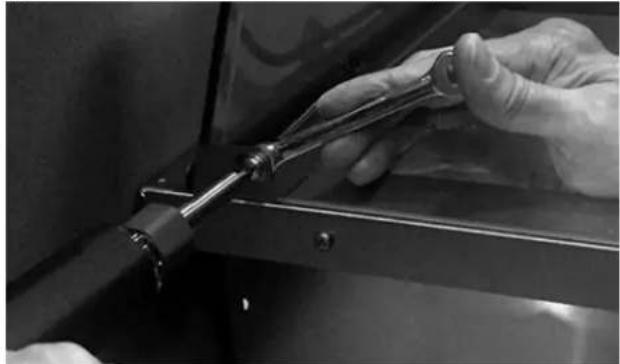
natural_image
Close-up of hands using a tool to adjust or install a mechanical component (no visible text or symbols)8.Repeatthestepstoinstalltheotherglasspanel.
SlidingBackPanels
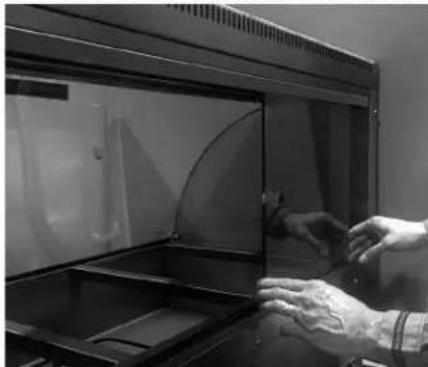
- Insertonebackpanelintothetracks.Slideittotheside.
natural_image
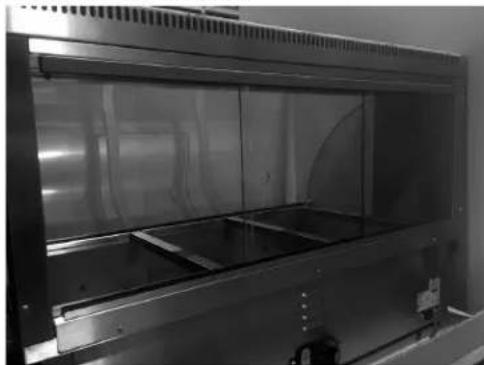
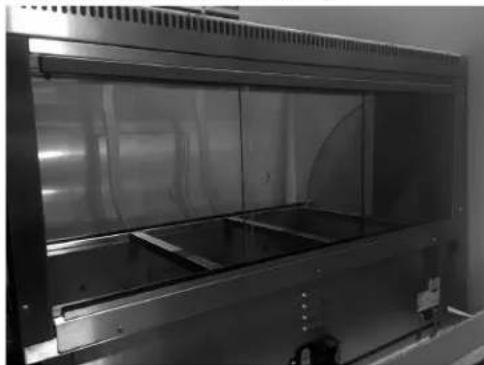
Close-up of hands adjusting a transparent glass enclosure with a curved lid (no visible text or symbols)- Insert the other twoglass panels.
natural_image
Interior view of a stainless steel industrial machine with ventilation grilles and internal compartments (no visible text or symbols)FEATURESANDCONTROLS
text_image
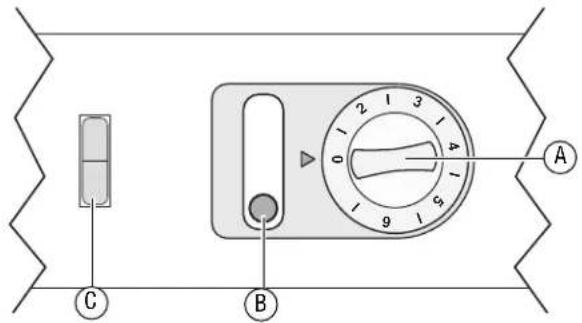
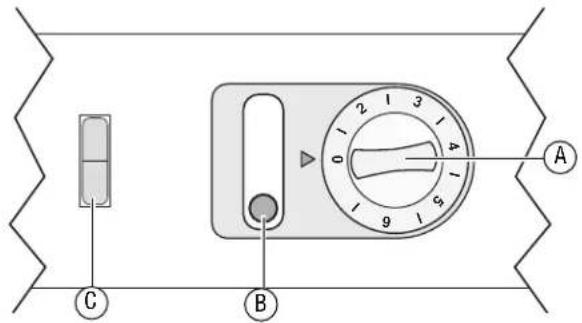
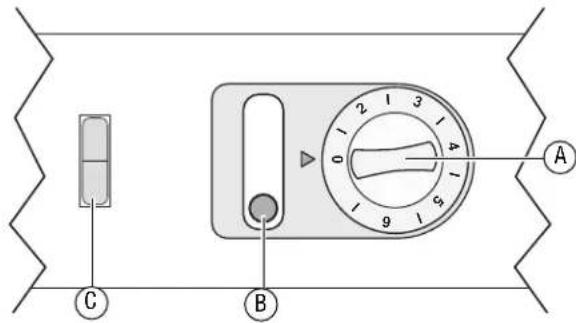
Diagram of a device with labeled parts A, B, and C, showing a dial and control knob.AHeatControl.The"0"positionis"OFF."
BlndicatorLight. Thislightindicatetheequipmentisheating. Oncethesetheatlevelisreached,thelightwillgoout. Thelight willcycleonandoffastheequipmentmaintainsheat. Thisisnot apowerindicatorlight.
CLightSwitch
BEFOREFIRSTUSE
Cleanthisequipmentbeforeusing.SeetheCLEANINGsectionofthis manual.
OPERATION


WARNING
ElectricalShockHazard
Keepwaterandotherliquidsfromenteringtheinsideofthe equipment. Liquidinsidetheequipmentcouldcausean electricalshock.
Donotspraytheunitorcontrolswithwaterorcleaningproducts. Liquidcouldcontacttheelectricalcomponentsandcauseashort circuitoranelectricalshock.Donotuseunitifpowercordisdamaged orhasbeenmodified.


CAUTION
BurnHazard
Donottouchhotfood, liquidorheatingsurfaceswhile equipmentisheatingoroperating.
WetOperation
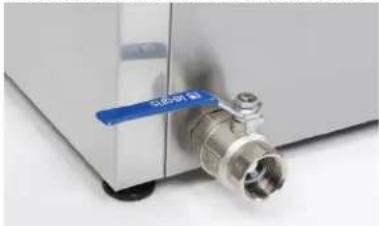
- Rotatethedrainvalvelevertotheclosedpositionasshownbelow.
natural_image
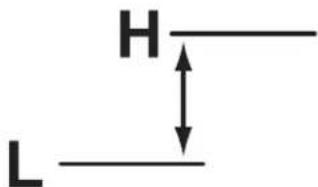
Close-up of a metallic valve component with blue handle (no visible text or symbols)- Fillthewellwithcleanfreshwater, untilthewaterlevelisbetween the "L"(low)and"H"(highmarks). Donotoverfill. Alwaysmaintain waterinthewell.
text_image
H L-
Plug the electrical power cord into a grounded outlet that matches the voltage rating on the name plate.
-
Switchthelightswitch "ONor" OFF as desired.
-
Preheatthewaterinthewellbycoveringwellwithemptyfood containersorcovers.Settheheatcontroltothemaximumheat setting.Preheatfor30minutes.
-
Place containers of hot food, above 140^ F ( 60^ C), into the preheated equipment.
-
Reducetheheatsettingtoalevelthatwillmaintainasafeholding temperatureandmaintainfoodquality.
NOTICE:Monitorfoodtemperaturecloselyforfoodsafety. The UnitedStatesPublicHealthServicerecommendsthathot foodbeheldataminimumof140°F(60°C)tohelp preventbacteriagrowth. Maintaincorrectwaterlevel andtemperaturesetting. Periodicallyremovefood containersandcheckthewaterlevel.Addwaterif needed.
TIP: Toreducefogging, positiontherearglasspanelssothereisa smallgapthroughwhichaircancirculate.
- Use gloves, mittsorpotholderstoprotechands when removing hot food containers.
When Finished Using the Equipment
-
Rotatethetemperaturecontroltothe "0" setting.
-
Unplugtheequipment.
-
Removethefoodcontainers. Use gloves, mittsorpotholdersto protect your hands when removing hot food containers from the unit.
-
Allow the equipment and watertocol completely.
-
Placeasuitablecontainerdirectlyunderthedrainvalve.Turnthe drainvalvetotheopenpositiontodrainthewaterfromthewelland intothecontainer.
-
Turnthedrainvalvetotheclosedposition.
- Plug the electrical power cord into a grounded outlet that matches the voltage rating on the name plate.
2.Switchthelightswitch"ONor"OFF"asdesired. - Preheatthewellbycoveringthewellwithemptyfoodcontainersor covers.Settheheatcontroltothemaximumheatsetting.Preheat for30minutes.
- Placecontainersofhotfood, above 140^ F( 60^ C), into the preheatedequipment.
- Reducetheheatsettingtoalevelthatwillmaintainasafeholding temperatureandmaintainfoodquality.
NOTICE:Monitorfoodtemperaturecloselyforfoodsafety. The UnitedStatesPublicHealthServicerecommendsthathot foodbeheldataminimumof140°F(60°C)tohelp preventbacteriagrowth.
TIP:Toreducefogging,positiontherearglasspanelssothereisa smallgapthroughwhichaircancirculate.
- Use gloves, mittsorpotholder stop protect your hands when removing hot food containers from the unit.
When Finished Using the Equipment
- Rotatetheheatcontrolknobto0.
- Unplugtheequipment.
- Removethefoodcontainers. Use gloves, mittsorpotholdersto protect your hands when removing hot food containers from the unit.
- Allow the equipment to cool completely.
CLEANING


CAUTION
BurnHazard
Allow equipment to cool before removing or cleaning.


WARNING
ElectricalShockHazard
Donotspraywaterorcleaningproducts.Liquidcouldcontact theelectricalcomponentsandcauseashortcircuitoran electricalshock.
NOTICE: Donotusecausticcleaningchemicals, steelwoolor commerciallimeremovalproductstocleantheequipment. Thoroughlyrinseequipmentwithwateraftercleaning.
Daily
- Unplugtheequipment.
- Allow the equipment to cool complete. If applicable, follow the procedures for draining water in the Wet Operation section of this manual.
- Using adampcloth, oraspongedipped insoapywatertoclean the equipment. Use aplastic scouring pad to cle and difficult areas to remove mineral deposits.
Ifusingwaterinthewell,cleantheheatingelementwithwhite vinegar.
- Rinsethethoroughly with clean watertoremove all soap residue.
- Drycompletelytoremoveanyhardwaterresidue.
MonthlyorasNeeded
De-calcifytheHeatingElement
- Perform the daily cleaning procedure.
2.Addenoughwatertothepantocovertheheatingelement.
3.Addtherecommended ratio of commercial deliming cleaner or one gallon of white vine garto the water. Stirwell. -
Set the heat control to the highest setting and allow the water to heat for 30 minutes.
-
Rotatetheheatcontrolknobto0.
6.Coverthewellwithemptyfoodcontainersorcovers.
-
Allow the solution to soak for at least one hour, or overnight for heavy buildups.
-
Drainthesolutionfromthepan.
-
Useaplasticscouringpadtocleananyremainingmineraldeposits.
-
Rinsethoroughlywithhotwater.
-
Drycompletely.
MAINTENANCE
Replacethelightbulb
NOTICE: Wearcleanglovesorhandlethenewbulbwithaclean cottoncloth. Donottouchthehalogenbulbwithbare hands. This candamagethebulbandcausepremature failure.
NOTICE: If the halogen bulb does come in contact with your skin, gently clean the bulbs surface with an alcohol-based liquid.
-
Turnoff and unplug the equipment.
-
Allow the light bulb to cool completely.
-
Thelightbulbisheldinplaceunderspringtension. Toremovethe lightbulb, pushthelightbulbtowardsoneend; this will releasethe otherend. Lifthelampoutoftheholder.
-
Remove and discard the old light bulb.
-
To install thenewlightbulb, push the light bulb towards one and align the other end into the bulb holder. Slowly releasethelight bulb.
TROUBLESHOOTING
| ProblemMightbeCausedByCourseofAction | |
| Lightbulbdoesnotwork.Thebulbhasburnedout.Replacethelightbulb. | |
| Equipmentdoesnotheat.Aproblemwiththeheatingelement.ContactVollrathTechnicalServices. | |
SERVICEANDREPAIR
ServiceablepartsareavailableonVollrath.com.
To avoid serious injury or damage, never attempt to repair the unit or replace a damaged power cord yourself. Do not send units directly to TheVollrathCompanyLLC.PleasecontactVollrathTechnicalServicesforinstructions.
When contacting Vollrath Technical Services, please be ready with the item number, model number (if applicable), serial number, and proof of purchaseshowingthedatetheunitwaspurchased.
WARRANTYSTATEMENTFORTHEVOLLRATHCO.L.L.C.
This warranty does not apply to products purchased for personal, family or household use, and The Vollrath Company LLC does not offer a written warranty top purchasersforsuchuses.
The Vollrath Company LLC warrants the products it manufactures or distributes against defects in materials and workmanship as specifically described in our full warranty statement. In all cases, the warranty runs from the date of the end user's original purchase date found on the receipt. Any damages from improper use, abuse, modification or damage resulting from improper packaging during return shipment for warranty repair will not be recovered under warranty.
Forcompletewarrantyinformation,productregistrationandnewproductannouncement,visitwww.vollrath.com.

www.vollrath.com
The VollrathCompany, L.L.C.
1236North18thStreet
Sheboygan, WI53081-3201U.S.A.
MainTel:800.624.2051or920.457.4851
MainFax:800.752.5620or920.459.6573
CustomerService:800.628.0830
CanadaCustomerService:800.695.8560
TechnicalServices
techservicereps@vollrathco.com
InductionProducts:800.825.6036
CountertopWarmingProducts:800.354.1970
Toasters:800-309-2250
AllOtherProducts:800.628.0832
natural_image
Exterior view of a stainless steel commercial kitchen appliance with dual compartments (no visible text or symbols)natural_image
Assorted mechanical components including screws, tools, and a curved surface on a plain surface (no text or symbols visible)Matérielnécessaire
•Douille8mmetclé•Tourne-écrou
•Douille10mmetclé•Tourneviscruciforme
Fixationdesvitres
natural_image
Close-up of a hand holding a device with a white arrow pointing to a component (no visible text or symbols)Panneauxlatérauxincurvés
natural_image
Close-up of a hand using a power tool to test or inspect the internal components of a 3D printer (no visible text or symbols)natural_image
Person in protective suit handling a glass appliance with a handle (no visible text or symbols)natural_image
Close-up of hands operating a mechanical device with a handle and internal components (no visible text or symbols)ASSEMBLAGE(SUITE)
natural_image
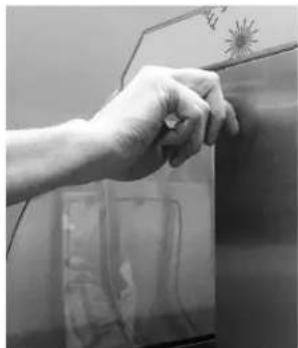
Person in protective gloves handling a transparent container with a curved handle (no visible text or symbols)5.Enfilezetserrezlavisseriepourfixerlavitrederrièrelemontant.
natural_image
Close-up of a hand adjusting a metallic door panel with a starburst decoration (no visible text or symbols)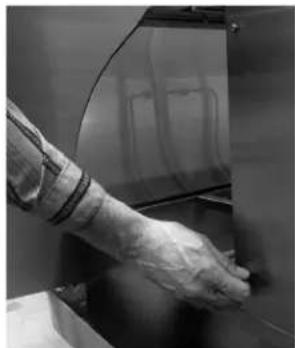
natural_image
Close-up of a gloved hand operating machinery (no visible text or symbols)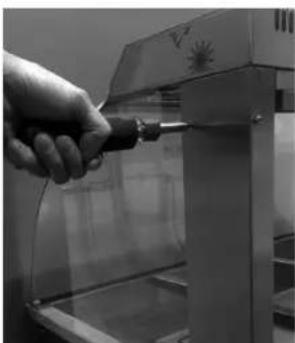
natural_image
Hand using a power tool to test or inspect a device with a starburst pattern (no visible text or symbols)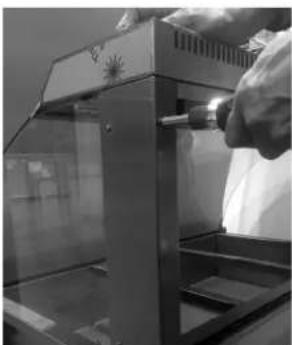
natural_image
Person in protective suit handling a glass laboratory apparatus (no visible text or symbols)6.Enfilezlavisserie.
natural_image
Close-up of a hand turning a small metallic component on a mechanical part (no visible text or symbols)7.Serrezlaquincailleriepourfixerlecoinavantdelavitre.
natural_image
Close-up of hands using a tool to adjust or install a mechanical component (no visible text or symbols)natural_image
Close-up of hands operating a transparent glass enclosure with a curved lid (no visible text or symbols)natural_image
Interior view of a stainless steel industrial cabinet or enclosure with visible internal compartments and ventilation grilles (no text or symbols)FONCTIONSETCOMMANDES
text_image
A B Cnatural_image
Close-up of a metallic valve component with a blue handle, no visible text or symbolsStandard:800.624.2051ou920.457.4851
Télécopieur:800.752.5620ou920.459.6573
Serviceclientèle:800.628.0830
ServiceclientèleCanada:800.695.8560
Servicestechniques:
techservicereps@vollrathco.com
natural_image
Exterior view of a stainless steel kitchen appliance with three internal compartments (no visible text or symbols)natural_image
Assorted mechanical components including screws, tools, and a curved surface on a plain surface (no text or symbols visible)natural_image
Close-up of hands performing a task with a tool, showing a curved arrow indicating motion (no text or symbols present)Paneleslateralescurvos
- Retirelostornillossuperioreinferiordelladodelvertical. Conserve losherrajes.
natural_image
Close-up of a hand using a power tool to test or inspect the internal components of a machine (no visible text or symbols)- Afloje, peronoquitelostornillossuperioreinferiordelaparte posteriordelvertical.

natural_image
Person cleaning a glass appliance with a brush (no visible text or symbols)- Abrasuavementeelverticallateralparadejarespacioparaelvidrio delpanellateral.
natural_image
Close-up of a hand opening a stainless steel door with internal components (no visible text or symbols)natural_image
Person in cleanroom suit handling a transparent enclosure with curved glass panels (no visible text or symbols)- Inserteyaprietelosherrajesparaafianzarelpaneldetrásdel vertical.
natural_image
Close-up of a hand pressing down on a metallic door panel (no visible text or symbols)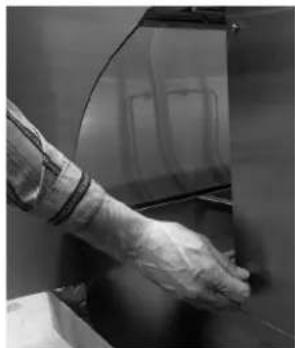
natural_image
Close-up of a gloved hand operating a machine (no visible text or symbols)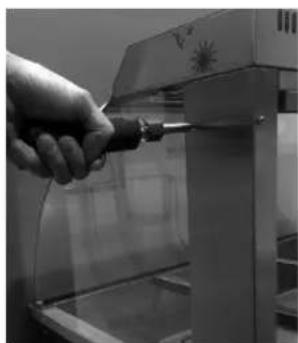
natural_image
Close-up of a hand using a tool to apply liquid in a glass container (no visible text or symbols)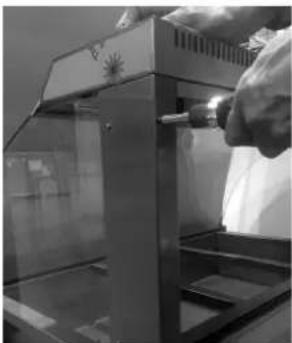
natural_image
Interior view of a laboratory or industrial equipment setup with glass enclosure and control panel (no visible text or symbols)- Insertelosherrajes. Afuera: tornilloyarandelademetal Adentro: arandelaplásticaytuercaciega
natural_image
Close-up of hands adjusting a small mechanical component (no visible text or symbols)- Aprietelosherrajesparaafianzarlaesquinadelanteradelpanel.
natural_image
Close-up of hands using a tool to adjust or install a mechanical component (no visible text or symbols)- Repitalospasosparainstalarelotropaneldevidrio.
Deslicelospanelesposteriores
natural_image
Close-up of hands operating a transparent glass enclosure with a curved lid (no visible text or symbols)- Insertelosdospanelesdevidriorestantes.
natural_image
Interior view of a stainless steel industrial cabinet or enclosure with ventilation grilles and internal compartments (no visible text or symbols)CARACTERÍSTICASYCONTROLES