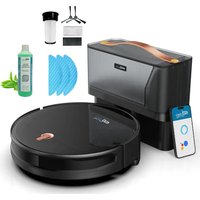
I-Bot Z5 EVO - Robot vacuum EZICLEAN - Free user manual and instructions
Find the device manual for free I-Bot Z5 EVO EZICLEAN in PDF.


User questions about I-Bot Z5 EVO EZICLEAN
0 question about this device. Answer the ones you know or ask your own.
Ask a new question about this device
Download the instructions for your Robot vacuum in PDF format for free! Find your manual I-Bot Z5 EVO - EZICLEAN and take your electronic device back in hand. On this page are published all the documents necessary for the use of your device. I-Bot Z5 EVO by EZICLEAN.
USER MANUAL I-Bot Z5 EVO EZICLEAN
ezi clean® make it easy
Manuel utilisateur
EZIclean® I-BOT Z5
natural_image
Technical line drawing of a circular mechanical component with a central knob (no text or symbols)natural_image
Simple line drawing of a circular object with a handle and a small hook at the top (no text or symbols)Robot
natural_image
Technical line drawing of a mechanical component with no visible text or symbolsnatural_image
Line drawing of a rectangular electronic device with internal components and a small display (no text or symbols)natural_image
Technical line drawing of a rectangular mechanical housing with internal components (no text or symbols)natural_image
Line drawing of a dining table with a stand and a fan, no text or symbols present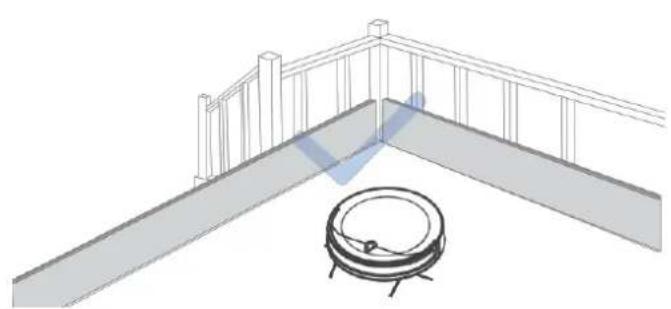
natural_image
Architectural diagram showing a balcony railing with an open circular base and a circular pipe (no text or symbols)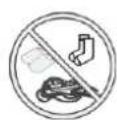
natural_image
Illustration of two hands holding a circular object with red arrows indicating direction (no text or symbols)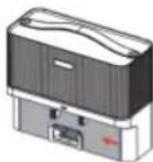

text_image
Diagram illustrating the mechanical assembly of a vehicle, showing before-and-after states with directional arrows and component labels.text_image
Diagram showing a device with a labeled electrical outlet and an upward arrow, likely indicating a positive change or direction.③ Chargement
text_image
a wide, wideband of surface broad pltext_image
ezi clean® make it easy
text_image
GET IT ON Google Play
text_image
Download on the App Storetext_image
15:33 Add Device Create Scene Scan No devices Add Device Home Scene Smart Metext_image
15:33 Add Device Searching for nearby devices. Make sure your device has entered pairing mode. Discovering devices... Add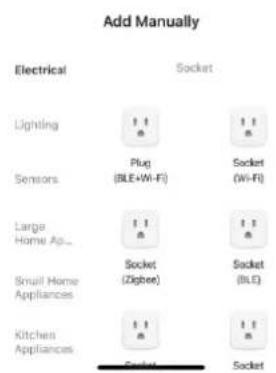
text_image
Add Manually Electrical Socket Lighting 11 a 11 a Sensors Plug (BLE+Wi-Fi) Socket (Wi-Fi) Large Home Ap... 11 a 11 a Small Home Appliances Socket (Zigbee) Socket (BLE) Kitchen Appliances 11 a 11 a Socket Sockettext_image
Enter Wi-Fi Information Choose Wi-Fi and enter password Wi-Fi Name Password
4 : Terminer
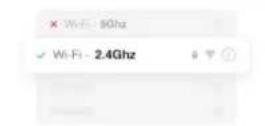
Select 2.4 GHz Wi-Fi Network and enter password. If your Wi-Fi is 5GHz, please set it to be 2.4GHz. Common router setting method
text_image
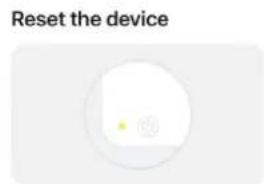
Reset the device
Power on the device, follow the instructions in user manual, long press the relevant button buttons, and confirm that indicator is blinking.

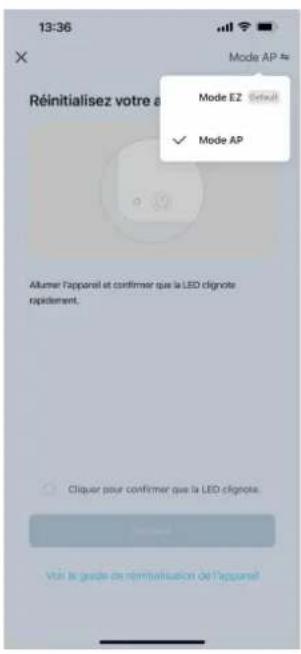
5 : Choisir le mode AP
text_image
16:27 ttt, 5G × Connecting Device Power on the device. 01:58 Scan devices... Registrar on Cloud... Initiate the drugs.natural_image
Simple line drawing of a hand holding a circular object next to a vertical panel with arrows indicating flow or movement (no text or symbols)
Commencer le nettoyage
natural_image
Simple line drawing of a hand pressing a circular component (no text or symbols)③ Fermeture
text_image
Diagram showing a device with a warning symbol and a red downward arrow indicating a reduction or change in the next step.Attention!
natural_image
Technical diagram of a mechanical assembly with two propellers and internal components, no visible text or symbolsnatural_image
Line drawing of a hand holding a small propeller or fan, no text or symbols presentnatural_image
Illustration of a hand pressing down on a laptop computer monitor (no text or symbols visible)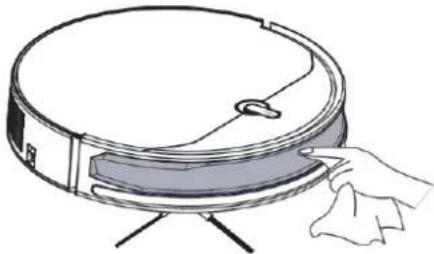
natural_image
Line drawing of a robotic vacuum cleaner with a hand adjusting the lid (no text or symbols)natural_image
Line drawing of a hand inserting a small electronic device into a device housing (no text or symbols)natural_image
Diagram of a robotic device with labeled parts (L and R), showing a hand interacting with the base panel (no text or symbols beyond labels)natural_image
Technical diagram of a mechanical assembly with labeled parts (L and R), no readable text or symbols present.text_image
Technical diagram of a mechanical assembly with labeled parts L and R, showing a hand operating a component.natural_image
Technical line drawing of a circular mechanical component with a central knob (no text or symbols)Read all instructions before operating the product. Save these instructions for future reference.
Safety Specifications
Pay attention and follow the instructions when using this product. Fully read the instruction manual before first use and store it properly.
① Attention
- Eliminate potential problems during cleaning early. Before using this device, pick up objects like power cords and loose items off the floor to avoid obstructing the cleaning path. Fold the rug fringe under the rug and keep curtains, tablecloths, etc., from touching the floor.
- If there is an overhanging environment such as stairs, please test the product to see if it can detect the edge of the overhanging area without falling. A physical barrier should be placed at the edge of the overhanging area to prevent the product from falling. It should be ensured that the physical barrier will not cause personal injury such as tripping.
- Only use the product according to the instructions in this manual. Use only the accessories recommended or sold by the manufacturer.
- Ensure that the power source voltage matches the voltage marked on the charging dock.
- Make sure the dust bin and filters are in place before using the product.
- If the power cord is damaged, it must be replaced by a professional from the manufacturer, its maintenance department, or a similar department. This is in order to avoid danger.
- Turn the power switch to the off position before cleaning and maintaining the product.
- The product must be unplugged from the power outlet before cleaning and maintenance.
- Before disposing of the product, remove the product from the charging dock, turn off the power switch, and remove the battery.
- Please disconnect the product from the power supply if the product will not be used for an extended time period.
- Before disposing of the product, the product batteries must be removed and disposed of in accordance with local laws and regulations.
-
Please follow local laws and regulations regarding the disposal of old batteries.
-
The product should not be used by children under 8 years of age or by persons with mental disabilities. If such use is necessary, please do so under the supervision and guidance of a responsible party. This product is not a toy. Do not allow children to ride on the product or play with the product.
- Use only in indoor domestic environments. Do not use outdoors, in commercial, or industrial settings.
- Do not use the product in a room with sleeping infants and children.
- Do not use the product with a damaged power cord or plug. Discontinue use if the product does not work properly due to dropping, damage, outdoor use, or water ingress. To avoid injury, return the product to the manufacturer or a service center for repairs.
- Please use the product according to the instructions in the manual. The company is not responsible for any damage or injury caused by improper use.
⚠ Warning
- Only the original charging dock exclusively assigned by the manufacturer is applicable. Users are prohibited from replacing the battery by themselves. If you suspect that the battery is damaged, please contact the manufacturer, an authorized dealer, or a professional from a similar department for replacement.
- It is prohibited to use the product in an environment with open flames or fragile objects.
- It is prohibited to use the product in an extremely hot (above 40^ C) or extremely cold (below 0^ C) environment.
- Keep all parts of the human body, such as hair, clothing, fingers, etc., from being near the openings and operating parts of the product.
- Do not use the product on wet or waterlogged floors.
- Do not use this device to pick up any items that may clog the product such as stones, waste paper, etc.
- It is prohibited for the product to pick up any flammable materials such as gasoline, printer or copy toner and color powder. It is prohibited to use the product in clean areas with flammable materials.
-
Do not allow the product to pick up any items that are burning, such as cigarettes, matches, ashes, and other items that could cause a fire.
-
Do not place objects near the suction port. Do not use the product when the suction port is clogged. Clean dust, lint, hair, etc. from the suction port to ensure smooth air circulation.
- Handle the power cord carefully to avoid damaging it. The power cord should not be used to drag or lift the product and/or charging dock, to use it as a carrying handle, to pinch it in a doorway, or to pull it around sharp corners. The product should not be pass over the power cord, and the cord should be kept away from heat sources.
- It is forbidden to use a damaged charging dock. If the charging dock is damaged, it must be repaired or replaced by the manufacturer, an authorized dealer, or a professional from a similar department. This is in order to avoid danger.
- DO NOT burn the product, even if it has been severely damaged. This may result in an explosion.
Instructions for discarding batteries
If you want to dispose of the battery, do not place it with unsorted common municipal waste. As the end-user, you must dispose of the battery by depositing it at the nearest designated battery recycling center.
The following instructions are not for general users, but for the final battery disposer.
The chemical substances contained in the built-in battery of the robot can cause damage to the environment.
Please be sure to remove the battery from the body before disposing of the robot. The battery must be disposed of at an appropriate battery recycling facility.
Beware! Leaks from batteries can cause human injury!
If the battery is leaking, do not allow the liquid to come into contact with skin or eyes.
In case of accidental contact, rinse the affected area with copious amounts of water. If you still feel unwell, seek medical advice.
Remove the battery
Caution:
The following information applies only when discarding this robot and is not a daily operating instruction! The battery may be removed only when the battery is completely depleted. The battery must NEVER come into contact with metal objects.
To remove the battery, proceed as described below.
Allow the robot to run without touching the charging dock until it is completely dead.
Turn the robot power switch off.
Remove the screws from the battery cover.
Remove the battery cover.
Unplug the connector from the battery and remove the battery.
- Product Introduction ...... 6
- Product Use....10
- Parts Maintenance....16
- Troubleshooting Common Problems.... 20
- Product Specifications ....22
1. Product Introduction / 1.1 Packing List
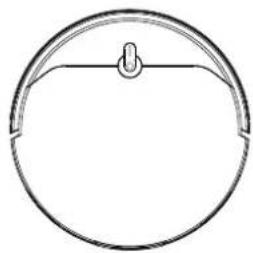
natural_image
Simple line drawing of a circular object with a handle and a small protrusion (no text or symbols)Robot
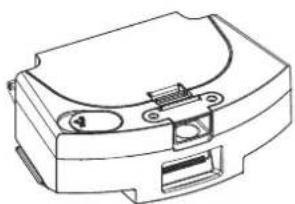
natural_image
Technical line drawing of a mechanical component with no visible text or symbolsDust bin/water tank assembly (pre-assembled)

text_image
Product Operation ManualOwner's Manual
natural_image
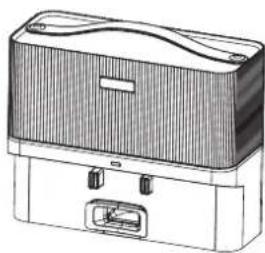
Illustration of a two-tiered electronic device with a handle and control panel (no text or symbols)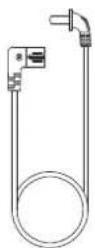
Automatic dust collection charging dock + power cord
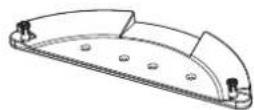
Mopping pad holder
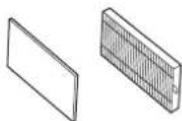
Dust bin filters
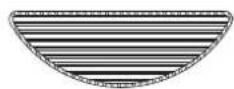
Washable mopping pad
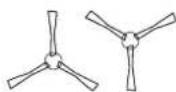
Side brushes
1. Product Introduction / 1.1 Packing List
Bottom of the robot
text_image
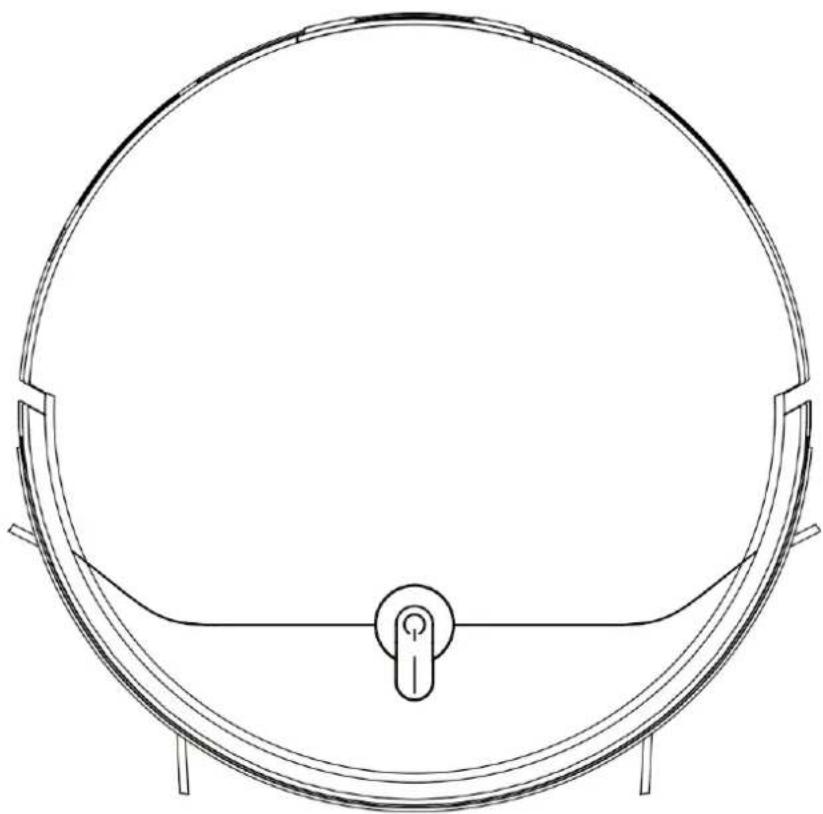
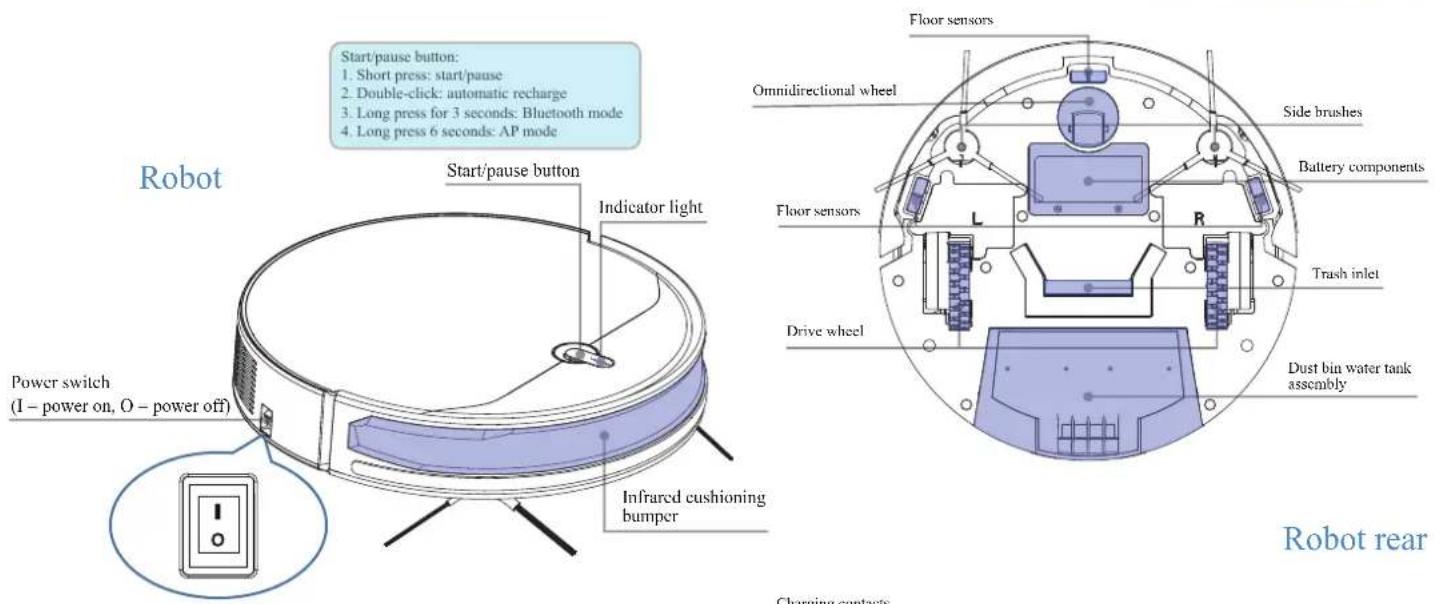
Start/pause button: 1. Short press: start/pause 2. Double-click: automatic recharge 3. Long press for 3 seconds: Bluetooth mode 4. Long press 6 seconds: AP mode Robot Start/pause button Indicator light Power switch (I - power on, O - power off) Infrared cushioning bumper Floor sensors Omnidirectional wheel Side brushes Battery components Floor sensors L R Trash inlet Drive wheel Dust bin water tank assembly Robot rear Charging contactsRobot indicator description:
- Blue light is always on: standby and working.
- Blue light flashing: back to charging status, charging.
- Flashing orange light: low battery, connection mode, fault.
text_image
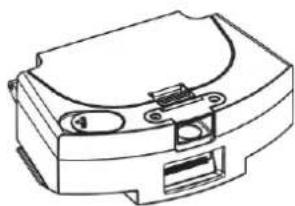
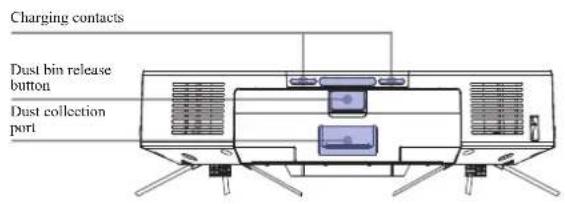
Charging contacts Dust bin release button Dust collection portDust bin water tank assembly (pre-assembled)
text_image
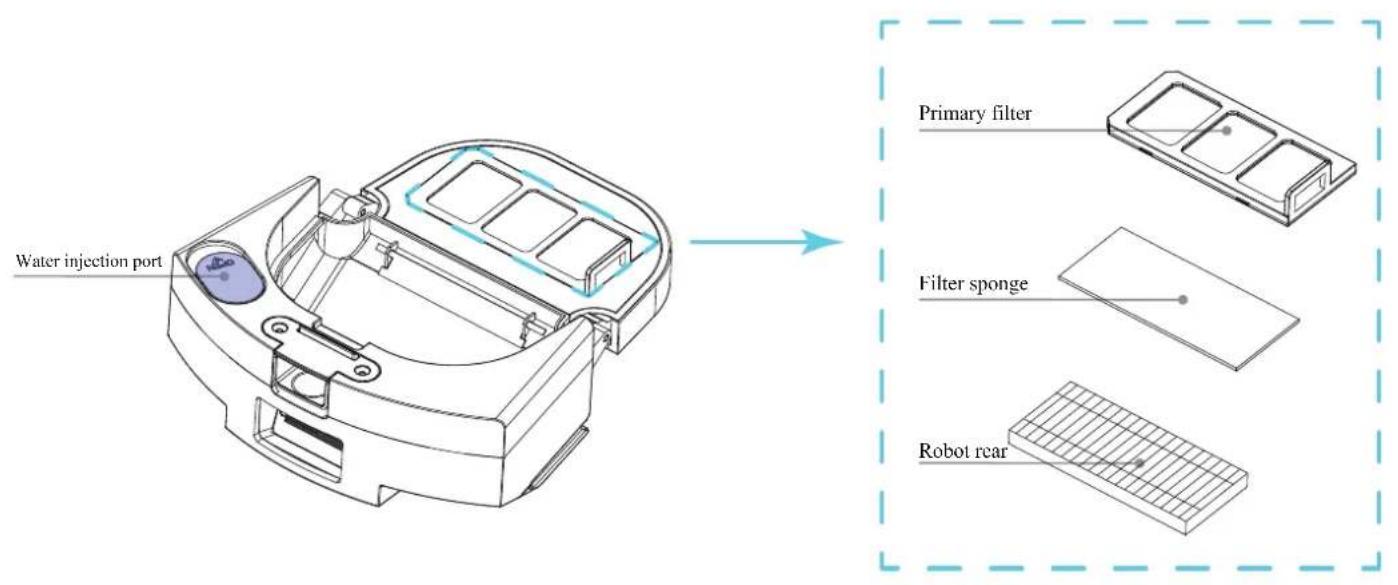
Water injection port Primary filter Filter sponge Robot rearAutomatic dust collection charging dock
text_image
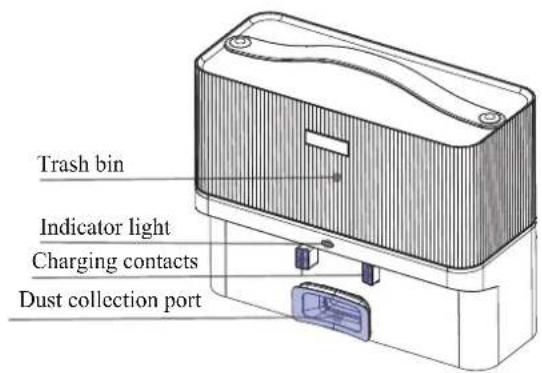
Trash bin Indicator light Charging contacts Dust collection portCharging dock indicator description.
- Blue light is always on: standby, charging, dust collection.
- Red light flashing: fault, no trash bin installed.
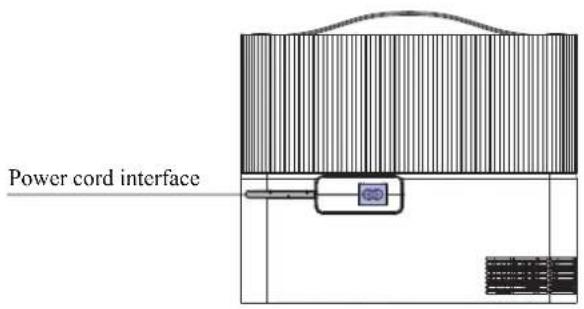
text_image
Power cord interface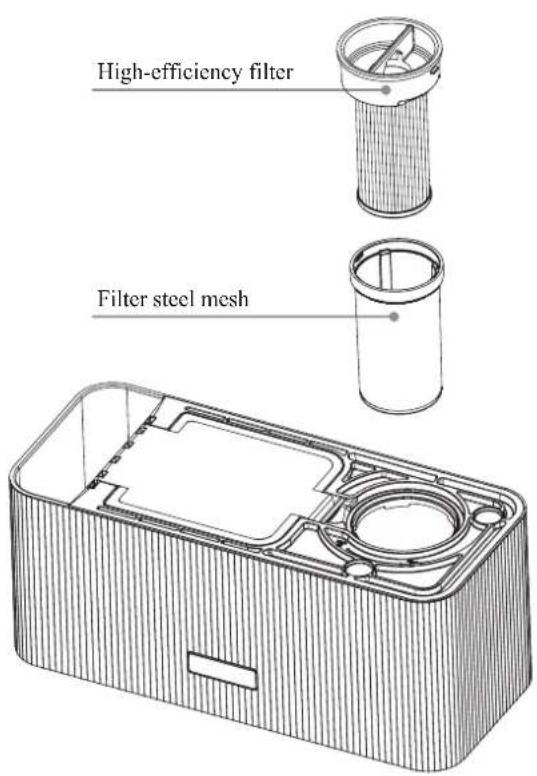
text_image
High-efficiency filter Filter steel mesh2. Product Use /2.1 Precautions
Organize floor clutter and furniture
Before use, please arrange furniture such as tables and chairs, floor fans, and other items neatly. Store low items such as weight scales, and organize them for maximum cleaning space.
Robot fall prevention
If the robot performs its task at the entrance of duplex stairs, the edge of steps, etc., please place physical barriers to ensure the robot's safety and smooth operation.
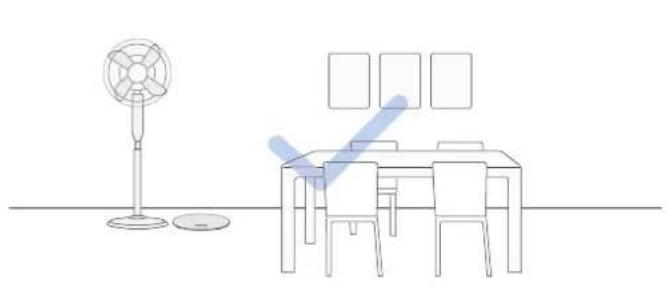
natural_image
Line drawing of a dining table with a fan, chair, and tableboard (no text or symbols)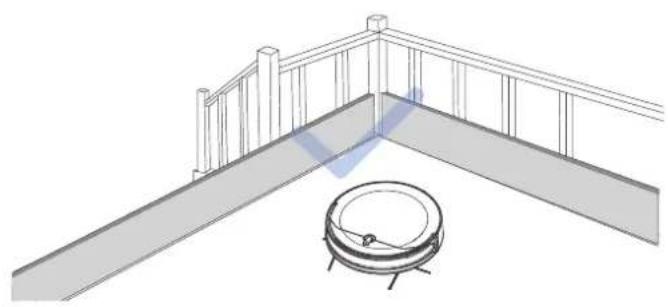
natural_image
Architectural line drawing of a balcony with railing and circular base (no text or symbols)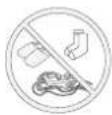
Gather miscellaneous items such as cords, rags, and slippers off the floor to improve the efficiency of the robot.
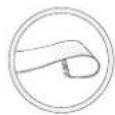
If your home rug has a fringe edge, please fold its edge under the rug in advance.
*Do not use the mopping function on rugs.
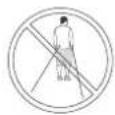
Please avoid standing in front of the robot, in narrow places such as door thresholds and aisles. This will ensure that the robot recognizes the area to be cleaned.
2. Product Use / 2.2 Preparation

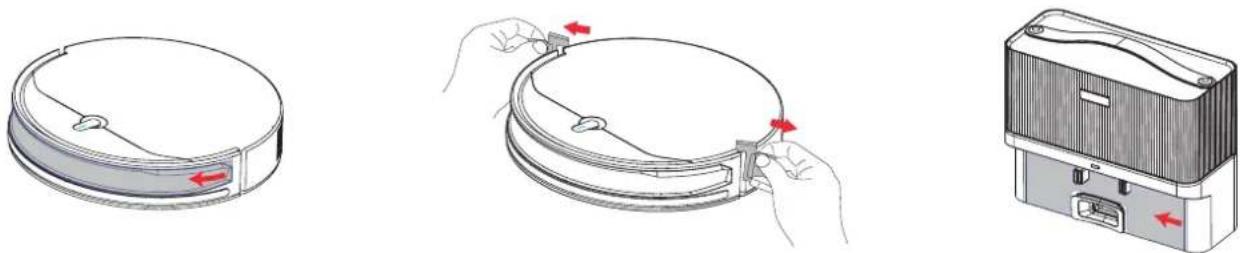
Remove protective film and cotton
Before using the product, please remove the protective film and protective cotton from the robot charging dock.

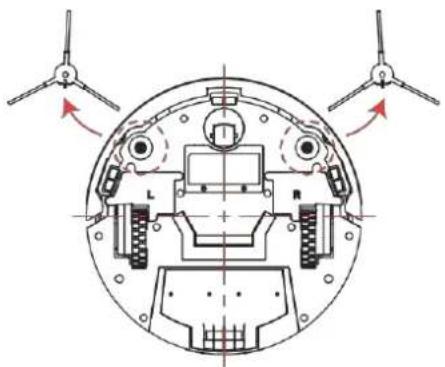
Correct installation of side brushes
Note that the L and R characters on the side brush are consistent with those on the robot.
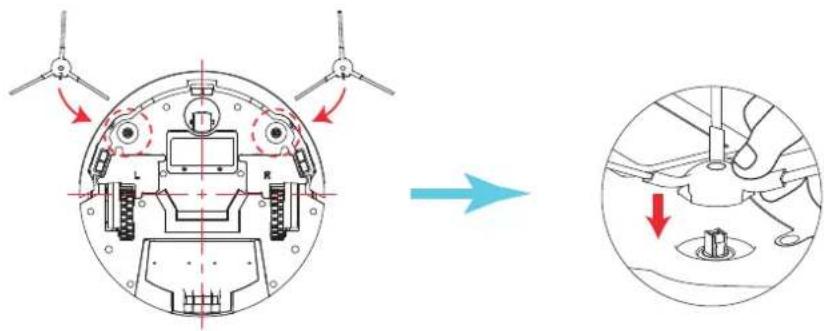
text_image
Diagram illustrating the mechanical assembly of a vehicle, showing before and after states with directional arrows and labeled components.2. Product Use /2.3 Robot Charging
1 Find a suitable location for the charging dock
Connect the power cord. At this time the indicator light on the charging dock will always be on.
Place the charging dock on a sturdy horizontal floor against a wall. Do not place objects within 0.5m to the left and 0.5m to the right and 1.5m to the front.
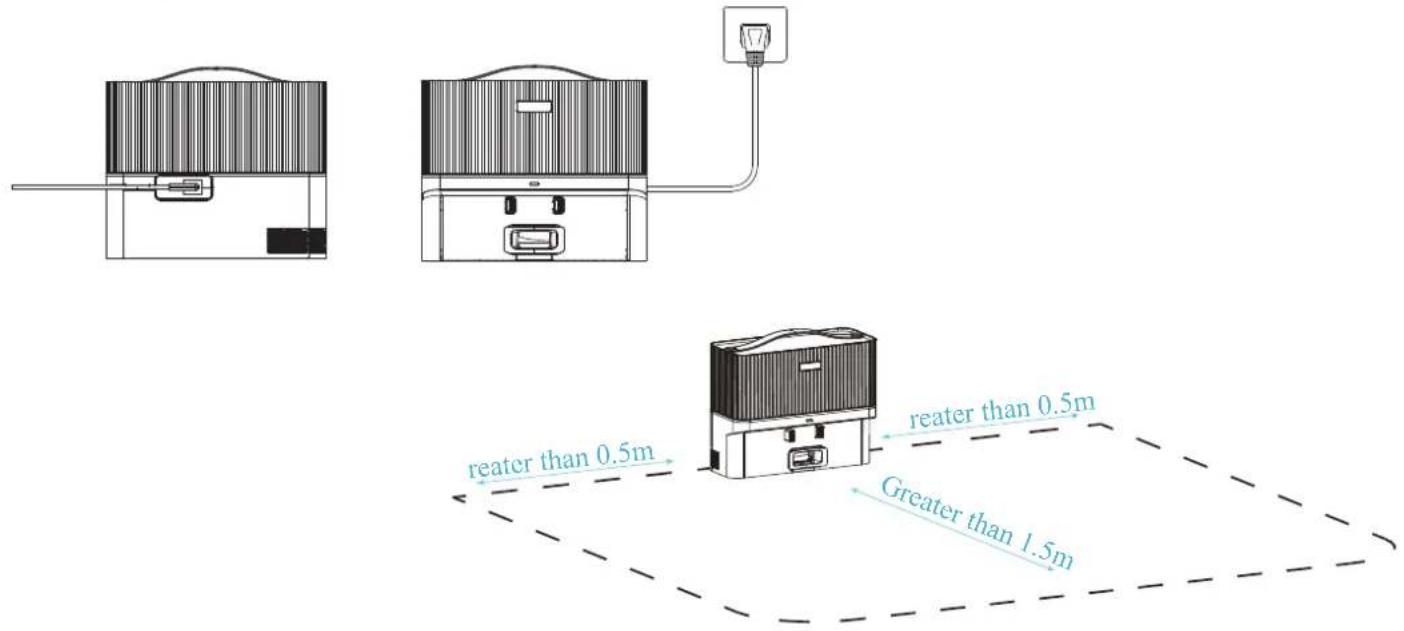
text_image
reater than 0.5m reater than 0.5m Greater than 1.5m* Placement of the charging dock in front of or next to a mirror should be avoided.
*If the charging dock is placed on the rug, it may affect the automatic recharge function of the robot.

Power on the robot ( I = power on, O = power off. )
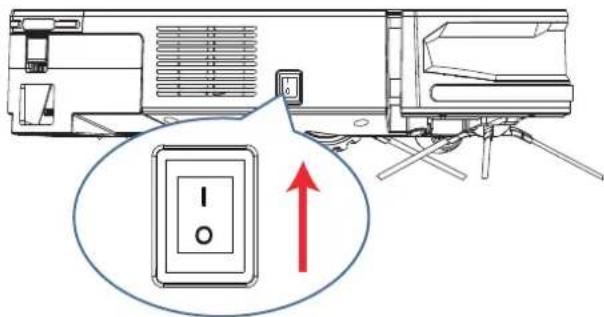
text_image
Diagram showing a device connected to a control panel with an upward arrow, indicating a positive change or operation.
Charging
Charging time > 3.5 hours, the blue light on the robot is always on to indicate that it is fully charged.
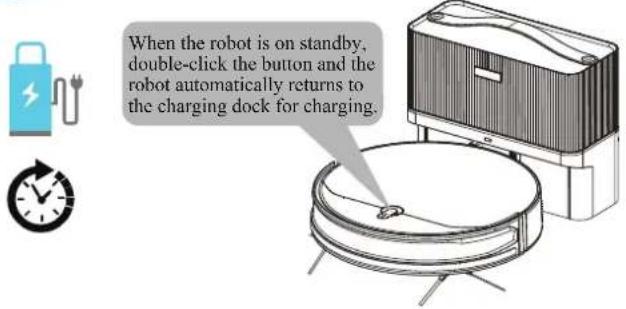
text_image
When the robot is on standby, double-click the button and the robot automatically returns to the charging dock for charging.* When charging, the robot first performs automatic dust collection, which is a normal phenomenon.
* When charging, please empty the water in the tank and remove the mopping pad holder to ensure charging safety and prevent the wet mopping pad from damaging the floor.
* First-time use: please make sure the robot is fully charged. Charging time is greater than 3.5 hours.
* In order to facilitate the robot to return to charge smoothly after finishing cleaning, it is recommended that the robot starts from the charging dock. Please do not move the charging dock during the cleaning process.
2. Product Use /2.4 App Download
Download EZIclean App to experience more features:
Method 1: Open "Scan", scan the following QR code, and follow the instructions to download and install the free app.

text_image
ezi clean® make it easy
text_image
GET IT ON Google Play
text_image
Download on the App StoreMethod 2: Open the mobile app store, search for "EZIclean", and download the app.

Friendly Tips:
* After installation, please follow the instructions on the mobile app page to complete registration, login, and network allocation.
* Please make sure your phone has Bluetooth turned on and connected to your home WiFi before pairing. (If your WiFi is 5GHz, please set it to 2.4GHz first.)
APP Connection Steps
1. Bluetooth mode
At standby mode, long press for 3 seconds, orange light flash, then Bluetooth mode
1: Click “+”, Add Device 2: Add
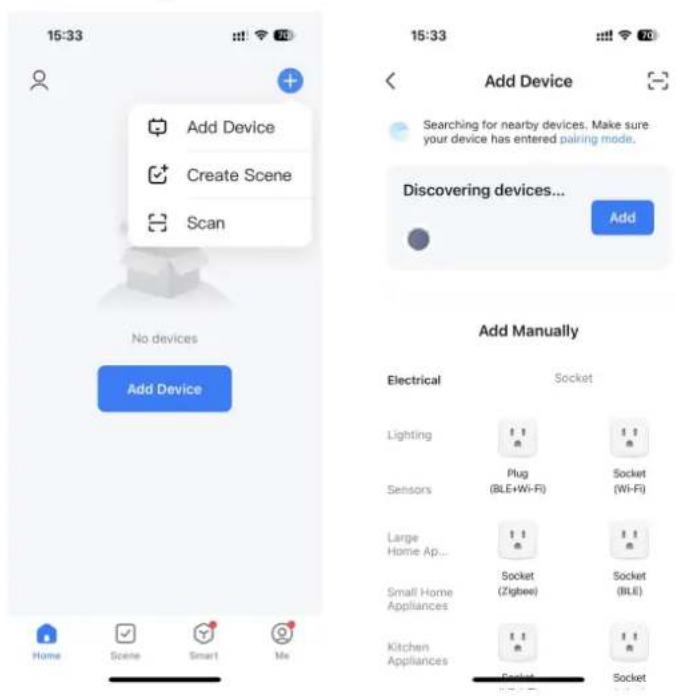
text_image
15:33 Add Device Create Scene Scan No devices Add Device 15:33 Add Device Searching for nearby devices. Make sure. your device has entered pairing mode. Discovering devices... Add Add Manually Electrical Socket Lighting Plug Sensors (BLE+Wi-Fi) Socket (Wi-Fi) Large Home Ap... Socket (Sigbee) Socket (BILE) Small Home Appliances Kitchen Appliances Pocket Socket Home Scene Smart Me3: Enter Wi-Fi Information Choose Wi-Fi and enter password
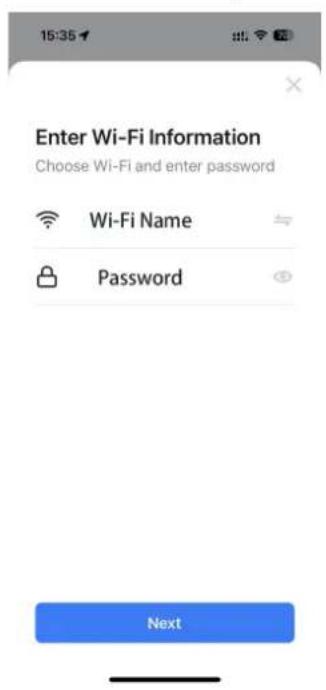
text_image
Enter Wi-Fi Information Choose Wi-Fi and enter password Wi-Fi Name Password Next4: Finish
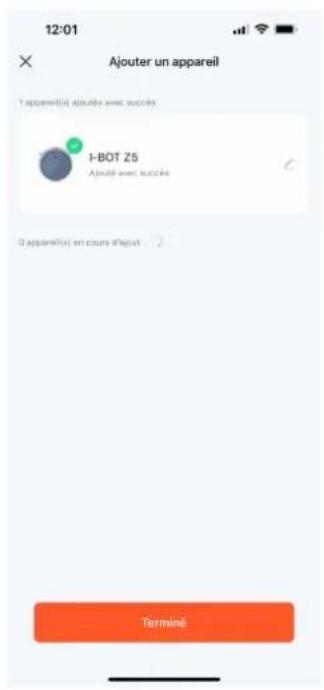
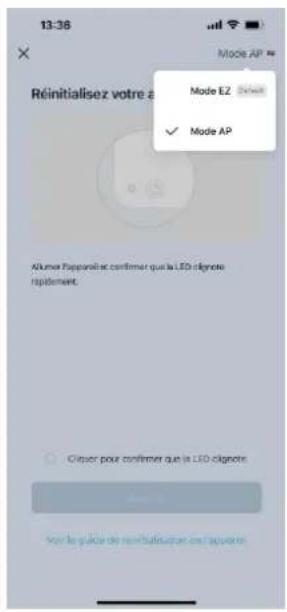
In standby mode, press and hold the button for 6 seconds, the orange LED flashes slowly, then AP mode is activated.
1 Click on "+", Add a device
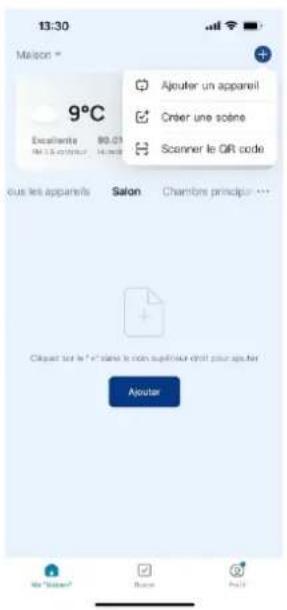
2 Click on "Floor care and select EZIclean I-BOT Z5

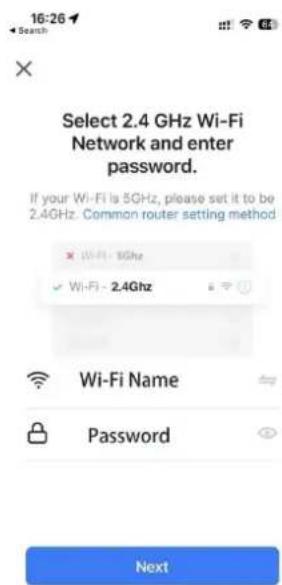
3 Select Wi-Fi network
2.4GHz and enter the password
text_image
16:26 Search Select 2.4 GHz Wi-Fi Network and enter password. If your Wi-Fi is 5GHz, please set it to be 2.4GHz. Common router setting method Wi-Fi - 8Ghz Wi-Fi - 2.4Ghz Wi-Fi Name Password Next4 Confirm that the indicator is flashing
text_image
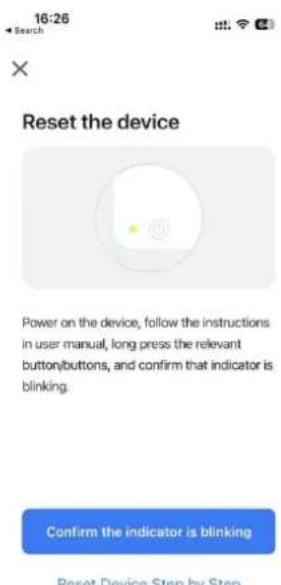
16:26 Search Reset the device Power on the device, follow the instructions in user manual, long press the relevant button buttons, and confirm that indicator is blinking. Confirm the indicator is blinking Reset Device Step by Step5 Select AP mode
6: Connect "EZICLEAN-SL-XXX" in the cell phone WIFI list
7 Return to APP and wait the device connects
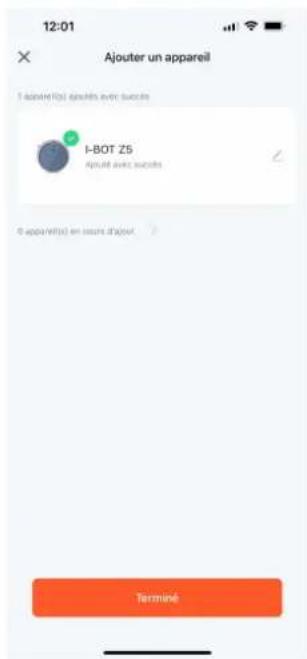
8 The product is successfully added
text_image
16:27 atl. 5G × Connecting Device Power on the device. 01:58 Scan devices. Register on Cloud. Initiate in the device.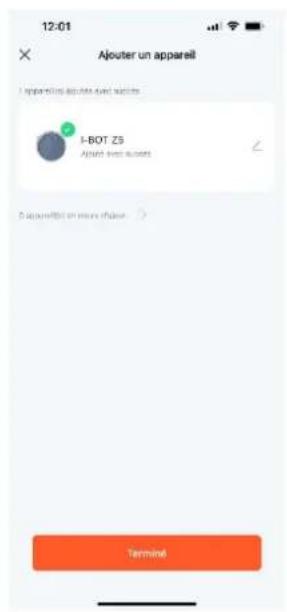
2. Product use /2.5 Robot operation
- The first time you start cleaning, make sure the product is docked and fully charged.
- When cleaning for the first time, follow the robot and help it solve any problems.

Start cleaning
- Click on the start/pause button. The robot will follow the planned zigzag path to start cleaning in the real domestic environment.
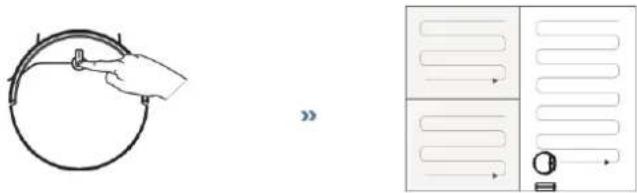
natural_image
Diagram showing a hand holding a circular component and a cabinet with arrows indicating flow or movement (no text or symbols present)
Start cleaning
- While the robot is running, briefly press the robot start/pause button to pause the robot.
- If you press the start/pause button again within 5 minutes of the robot pausing, it can continue cleaning from the position where the last cleaning was interrupted.
- If the robot is paused for more than 5 minutes, it switches to stand-by mode. Once activated, a new series of cleanings will begin. To activate the robot, first briefly press the start/pause button, then press again briefly, and the robot will start cleaning. You can also start the robot directly via the
Pause, activate and start cleaning (after waking the robot, you can restart work)
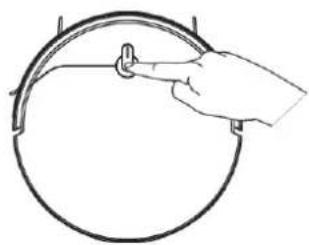
natural_image
Line drawing of a hand pressing a circular component on a curved surface (no text or symbols)
Closing
- Set the robot's power switch to O to turn it off. (I = power on, O = power off).
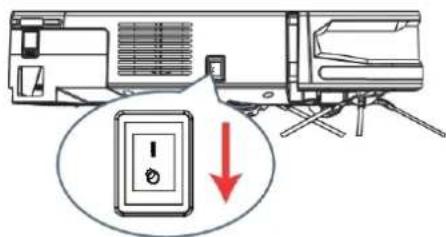
text_image
Diagram showing a device with a warning symbol and a red downward arrow indicating a reduction or change in the main component.! Watch out!
* If you're not going to be using the product for a long time, please fully charge it before storing it, then turn off the switch, and insist on recharging it every 3 months to avoid excessive battery discharge.
* If the battery is too discharged, or if it is not used for a long time, the product may not be able to be recharged.
* If the robot is not to be used for a long period, it should be fully recharged every three months.

Using the automatic dust removal function
- Once the robot has completed its cleaning task, it automatically returns to the docking station for automatic dust removal and recharging. Make sure there are no obstacles within 0.5m in front of and 1.5m on either side of the docking station. This will enable the robot to return automatically to charging and dusting.
- To ensure effective dust removal, the dust removal process may generate a loud noise. This is normal. The whole dedusting process takes about 10 seconds.
- Do not move the robot while it is collecting dust.
2. Product use / 2.6 Cleaning function
To prolong the life of the water tank, we recommend using pure or softened water. Do not use the cleaning function on carpets.
After mopping, empty the water tank as soon as possible.
After mopping, wash and dry before using again.
1. Remove the dust pan/water tank assembly.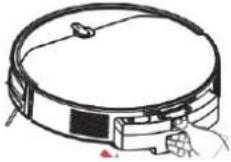 | 4. Attach the mop to its holder. Wet the mop with water.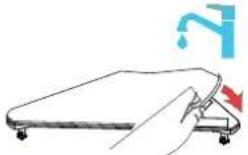 | 7. Start mopping.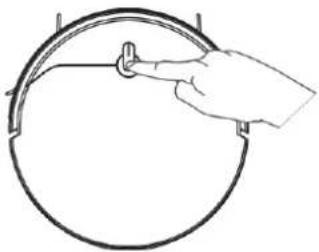 |
2. Fill the water tank with fresh water.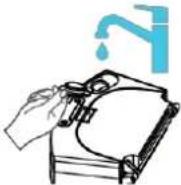 | 5. Return the filled water tank to the robot.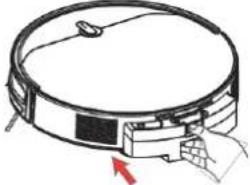 | |
3. Cover the water injection port with the rubber stopper.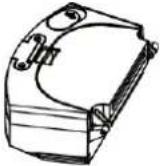 | 6. Attach the mop holder to the robot.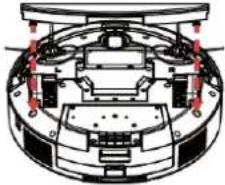 | 8. Start mopping.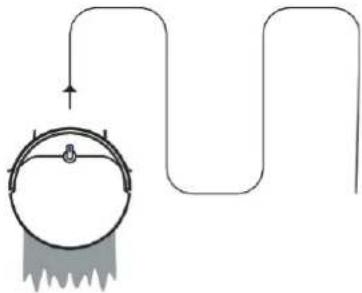 |
3. Parts maintenance/ 3.1 Dust container maintenance
When servicing parts, please turn off the robot's power switch and disconnect the power supply from the docking station.
1. Remove the dust container from the robot.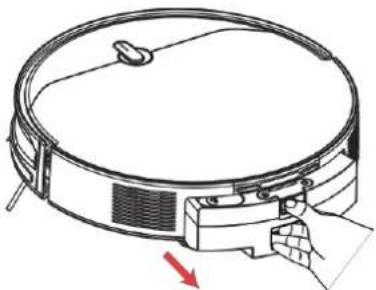 | 2. Empty the contents of the dust container.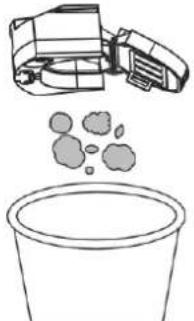 | 3. Remove filter.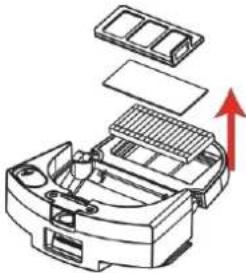 |
4. Gently tap the filter to remove dust.1Note that the high-efficiency filter cannot be washed, as washing would affect its ability to filter dust.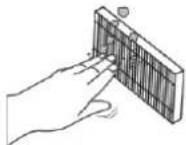  | 5. Clean the dust pan, primary filter and filter sponge with water.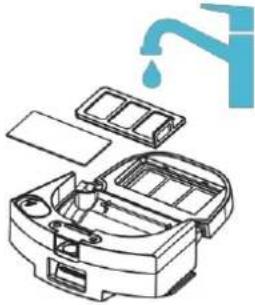 | 6. Place the dust pan, primary filter and filter sponge in a cool, well-ventilated place to dry out before placing them back on the root in direct sunlight.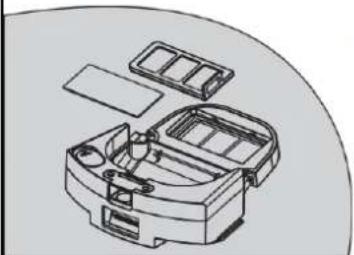 |
3. Parts maintenance/3.2 Dust collector maintenance
When servicing parts, please turn off the robot's power switch and unplug it from the docking station.
1. Remove garbage can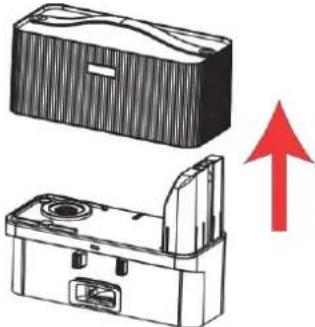 | 2. Empty the contents of the garbage can.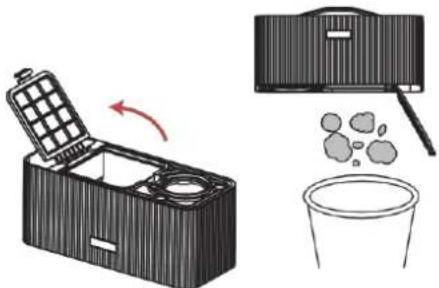 | 3. Remove filter.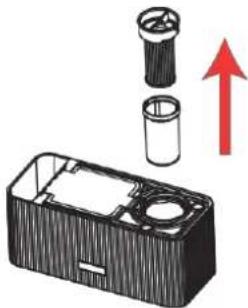 |
4. Clean dustbin and filter with water. | 5. Place the garbage can and filter in a cool, well-ventilated place to dry out before returning them to the docking station. Avoid direct sunlight.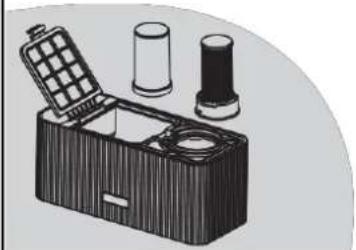 | 6. Use a screwdriver to remove the plastic parts from the bottom of the docking station, and clean the waste garbage can channel.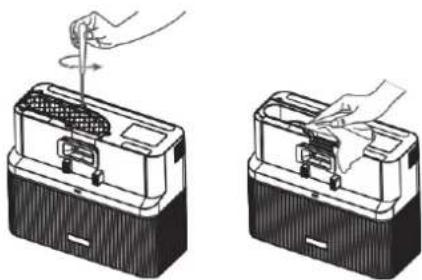 |
3. Component maintenance/3.3 Side brushes
- Remove the side brush Usea knife or scissors to clean tangled
bristles from the side brush.
natural_image
Technical diagram of a mechanical assembly with two propellers and internal components (no text or labels)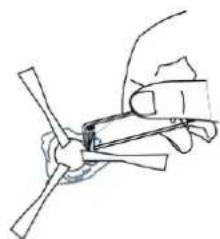
natural_image
Line drawing of a hand holding a small propeller or fan (no text or symbols)3. Component maintenance/3.4 Other components
*Clean robot charging contacts, si nalization window and dust port.
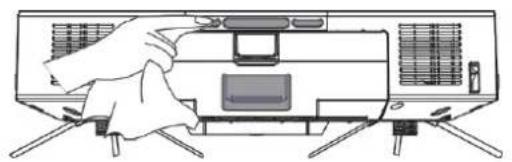
natural_image
Illustration of a hand pressing down on a device panel with a monitor and fan (no text or symbols)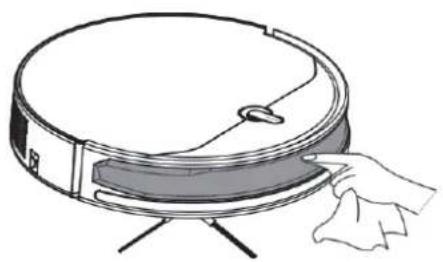
natural_image
Line drawing of a robotic vacuum cleaner with a hand adjusting its lid (no text or symbols)Clean the charging contacts and dust port on the docking station.
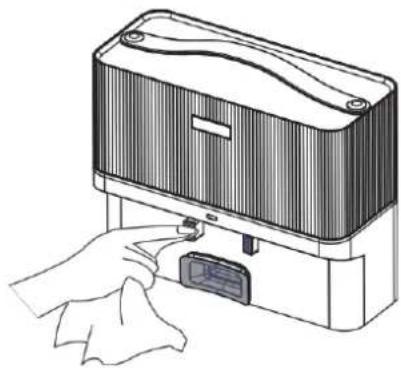
natural_image
Line drawing of a hand inserting a small electronic device into a device housing (no text or symbols)Clean dust collection port
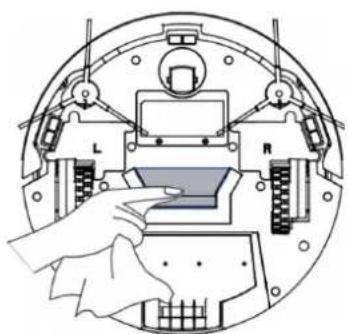
natural_image
Diagram of a robotic device with labeled parts (L and R), showing internal components without any text or symbols.Cleaning floor sensors
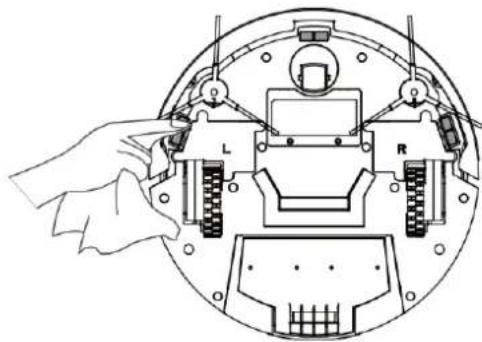
natural_image
Technical line drawing of a mechanical assembly with labeled parts (L and R), no readable text or symbols present.Clean omnidirectional and drive wheels
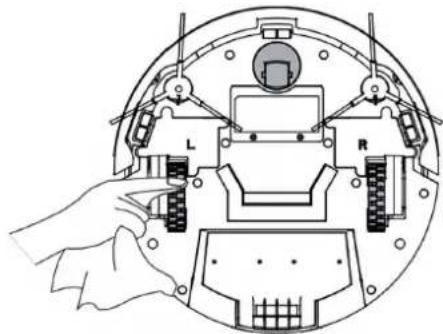
natural_image
Technical diagram of a robotic device with labeled parts (L and R), showing internal components without any text or symbols.To maintain optimum robot performance, we recommend that you perform routine maintenance according to the following table:
| Spare parts | Maintenance frequency | Replacement frequency |
| Omnidirectional wheel | Cleaning on demand | / |
| Drive wheel | Cleaning on demand | / |
| Robotic dust bin | Cleaning on demand | / |
| Dust collector garbage can | Cleaning on demand | / |
| Wiping pad | Cleaning on demand | Every 3 to 6 months |
| Side brushes | Cleaning on demand | Every 3 to 6 months |
| Robot filter | Cleaning every 2 weeks | Every 6-12 months |
| Dust collector filter | Cleaning every 1 month | Every 6-12 months |
| Robot load contacts, signal window | Cleaning every 1 month | / |
| Dust collector charging contacts | Cleaning every 1 month | / |
| Soil sensors | Cleaning every 1 month | / |
Tip: replacement frequency may depend on the actual situation, and parts should be replaced in the event of abnormal wear.
4. Troubleshooting common problems
When using the product, you may encounter the following situations. You can check the query and resolve it independently.
| Conditions | Possible problems | Solution | |
| 1 | The robot cannot connect to the application. | Incorrect router username and password. | Configure the router's network and make sure you enter the correct "user name" and "password". |
| The robot is not within the router's network coverage area. | Make sure the robot is within the router's network coverage area. | ||
| The robot is not in a pending configuration state. | The network can only be established once the robot has been configured. When the robot is switched on, briefly press the reset button and listen for the beep. This means the robot is ready to be configured. | ||
| Non-use of a 2.4GHz network. | The robot does not currently support 5GHz networks. Please use a 2.4GHz network. | ||
| 2 | The robot cannot be charged. | The robot's power switch is not activated. | The robot power switch must be set to position "I". |
| Poor contact between loading and unloading robot and docking station contacts. | Ensure that the charging contacts on the robot and docking station are properly connected. Check whether the charging contacts on the robot and docking station are dirty. Refer to the [Maintenance of parts] chapter of the manual to clean them. | ||
| The docking station is not connected to a power source. | Make sure the docking station is plugged in. | ||
| Long periods of non-use lead to excessive battery discharge. | Regular use of this product is recommended. Please contact customer service if the device cannot be recharged after a long period of disuse. | ||
| 3 | Difficulty recharging the robot. | The docking station is not correctly positioned. | Configure the router's network and make sure you enter the correct "user name" and "password". |
| The docking station is disconnected or has been moved. | Make sure the robot is within the router's network coverage area. | ||
| The robot is blocked by an obstacle on the floor (such as a wire, a carpet fringe, the base of an electric fan, etc.), or the door to the room where the docking station is located is closed, making it impossible to return to the docking station. | The network can only be established once the robot has been configured. When the robot is switched on, briefly press the reset button and listen for the beep. This means the robot is ready to be configured. | ||
| The robot does not start cleaning from the docking station. | The robot does not currently support 5GHz networks. Please use a 2.4GHz network. | ||
| 4 | There are cases of disordered running, deviation, repeated cleaning and leakage on small surfaces during operation. | Objects such as wires and slippers placed on the floor affect the robot's normal movement. | Before the robot goes to work, please sort out any wires, slippers or other objects scattered on the floor, and minimize floor clutter. If there is a leak, the robot will fill it in on its own. Do not intervene artificially (by moving the robot or blocking its trajectory, for example). |
| Working on freshly waxed and polished ground reduces friction between the drive wheels and the ground. | We recommend waiting for the wax to air-dry before using this unit. | ||
| Due to the diversity of domestic environments, some areas may be inaccessible to the robot for cleaning. | It's advisable to arrange furniture so that the robot can reach it for cleaning. |
| Conditions | Possible problems | Solution | |
| 5 | The robot has jammed during operation. | The robot is entangled or blocked by loose wires on the floor, falling curtains, carpet hangs, etc. | The robot will try several methods to disengage. If this fails, please untangle the robot manually. |
| The robot can be attached to nearby furniture. | We recommend upholstering furniture or protecting it artificially. | ||
| 6 | Excessive noise during operation | Tangled side brushes, clogged dust trays or filters, etc. | Regular cleaning and maintenance of side brushes, dust container, filters, etc. is recommended. |
- Product specifications
| Product model | EZIclean I-BOT Z5 (H1) | ||
| Rated robot input | 19 V0 ——— 6A 11.4W | ||
| Charging time | >3.5 hours | ||
| Docking station model | H1 charger | ||
| Rated output voltage | 19V—— | Rated output current | 0.6A |
| Charging the docking station Input voltage, power | 120V/650W | ||
| Output parameters | 19V ——— 0.6A | ||
*Due to the need for constant product improvement, the information contained in this manual depends on the corresponding product, and we reserve the right to update our products.