
Multipic Veer - Projector Overmax - Free user manual and instructions
Find the device manual for free Multipic Veer Overmax in PDF.

| Brand | Overmax |
| Model | Multipic Veer |
| Product type | Multimedia projector |
| Power supply | 41.8 W power adapter |
| Internal battery | Built-in rechargeable battery |
| Connectivity | HDMI, USB, 3.5 mm audio jack, Bluetooth, Wi-Fi |
| Supported video formats | DAT, MPG, MPEG, AVI, MP4, MKV, MOV |
| Supported audio formats | MP3, MP4 |
| Supported image formats | JPG, BMP, PNG |
| Bluetooth function | Connection to speakers, headphones or external audio systems |
| Wi-Fi function | Network connection for streaming and updates |
| Miracast function | Wireless casting from Android devices |
| iOS Cast function | Wireless casting from Apple devices |
| NightSky mode | Star projector with multiple images |
| Ambiente mode | Light ambiance |
| Base rotation | Up to 240° |
| Focus adjustment | Manual via rotary button |
| Cleaning the housing | With a damp cloth |
| Cleaning the lens | With a soft glasses cloth |
| Cleaning the filter | Regularly using a soft brush |
| Safety | Do not disassemble, protect from humidity, do not block ventilation, do not look into the lens, turn off after 6 hours of continuous use |
| Intended use | Household use only |
Frequently Asked Questions - Multipic Veer Overmax
User questions about Multipic Veer Overmax
0 question about this device. Answer the ones you know or ask your own.
Ask a new question about this device
Download the instructions for your Projector in PDF format for free! Find your manual Multipic Veer - Overmax and take your electronic device back in hand. On this page are published all the documents necessary for the use of your device. Multipic Veer by Overmax.
USER MANUAL Multipic Veer Overmax
PL|EN|DE|IT|FR|ES|NL|LT|HR| HU|CS|SK
Multipic VEER
Instrukcja obsługi | User Manual | Bedienungsanleitung | Manuale d'uso | Manuel de l'Utilisateur | Manual de usuario | Handleiding | Vartotojo vadovas | Korisnički priručnik | Használati utasítás | Uživatelská příručka | Návod na použitie
natural_image
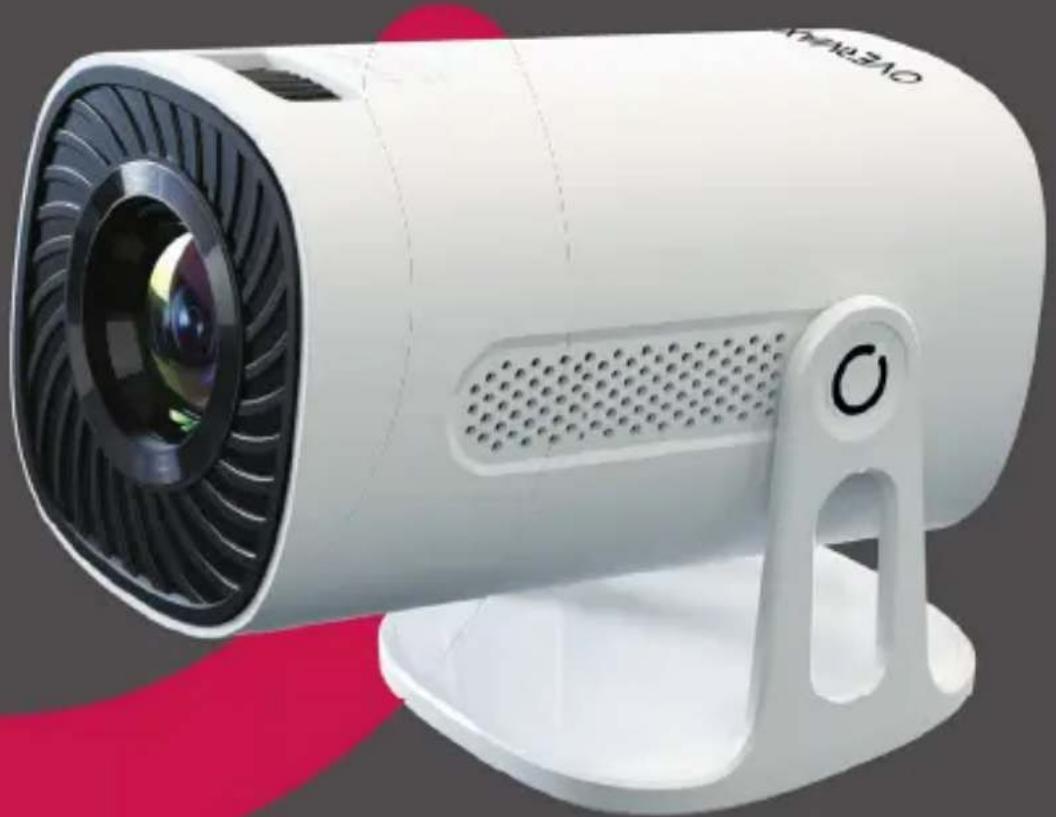
White portable air purifier with black ventilation grille and red accent, no visible text or symbolsOVERMAX
A
B
1
area
| Measurement | Height (m) | Value (in.) | | :--- | :--- | :--- | | 1 | 2.64 | 104.4 | | 2 | 3.3 | 130.8 | | 3 | 4 | 157.2 | | 4 | 4.15 | 163.3 | | 5 | 5.55 | 218.5 | | Total Height | 2.22 | 87.4 | | Total Height | 2.77 | 109 | | Total Height | 3.33 | 131.1 | | Total Height | 3.81 | 150 | | Total Height | 5.08 | 200 |2
natural_image
Simple line drawing of a mechanical lever or support structure (no text or symbols)0°
natural_image
Diagram of a mechanical device with a rotating lever and textured internal structure (no text or symbols)45^
natural_image
Diagram of a thermometer mounted on a stand with an arrow indicating rotational direction (no text or symbols)90^
natural_image
Diagram of a mechanical lever system with a curved arrow indicating motion (no text or symbols present)135^
natural_image
Diagram of a mechanical component with an arrow indicating rotational motion (no text or symbols)180^
natural_image
Diagram of a mechanical assembly with a curved arrow indicating motion or force, no text or symbols present240^
3
Settings


4
Bluetooth Setting
Press the menu key to delete
5
Application


Wprowadzenie
PL
Drogi Kliencie!
Thank you for placing trust in us and choosing Overmax.
Thanks to the use of high-quality materials and modern solutions, we provide you with a product perfect for everyday use. We are convinced that the product will satisfy your requirements as it has been manufactured with utmost care. Before you use the product, please read this operating manual carefully.
Should you have any remarks or questions concerning the product, please do not hesitate to contact us: pomoctechniczna@overmax.pl
WARNINGS
Before using the projector, read and then follow the instructions in this manual. Incorrect handling of the device can lead to electric shock and increase the risk of fire. Please follow the instructions below when using and maintaining the projector.
-
For better image quality, use the projector in rooms with drawn curtains or in dark rooms.
-
Use the projector with care. Dropping or malfunctioning can damage parts or cause blurred images and incorrect display.
-
Do not dismantle the device yourself – risk of electric shock.
-
Protect the device from moisture and keep it away from water or other liquids.
-
When the projector is on, ensure that the ventilation openings of the device are not obstructed. Do not place the projector on soft surfaces or cover it with any fabrics.
-
Use only the batteries or power adapter provided in the kit to power the projector.
-
Only connect the projector directly to the included 41.8W power adapter.
EN
- Be careful when using the power cord, avoid excessive bending of the cord; damage to the power cord can cause electric shock or fire.
- Do not look into the lens while the device is operating.
- It is recommended to switch off the device after 6 hours of continuous operation.
- Unplug the power cord after switching off the power supply.
- It is advisable to use the original packaging to transport the device.
- Do not place any objects on the projector.
- Do not expose the projector to sunlight.
- Do not use the projector in a humid environment.
- Store the projector only in a dry environment with moderate temperatures.
- The device is intended for domestic use only. Do not use it for any other purpose incompatible with its intended use.
WARNINGS FOR REMOTE CONTROL BATTERIES
- Disposable, non-rechargeable batteries should not be charged.
- Avoid mixing different types of batteries or combining new and used batteries in the device.
- Ensure batteries are inserted with the correct polarity.
- Remove used batteries from the product.
- The power supply terminals must not be short-circuited.
- If the product is not used for a long period of time, remove the batteries from the compartment.
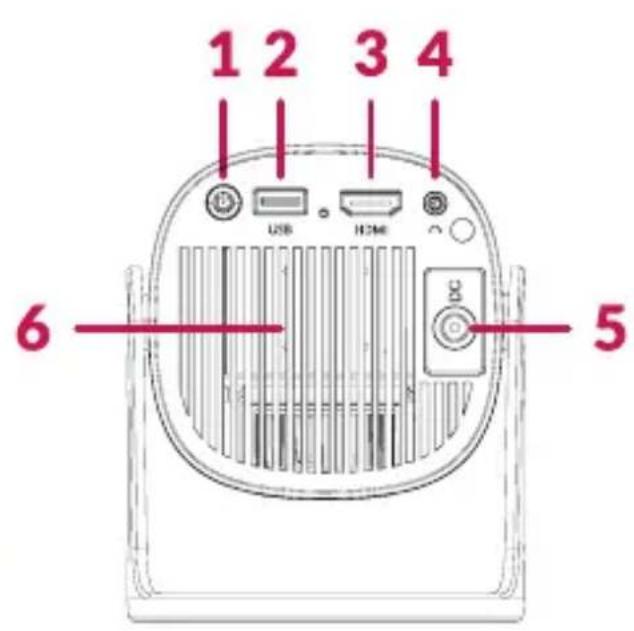
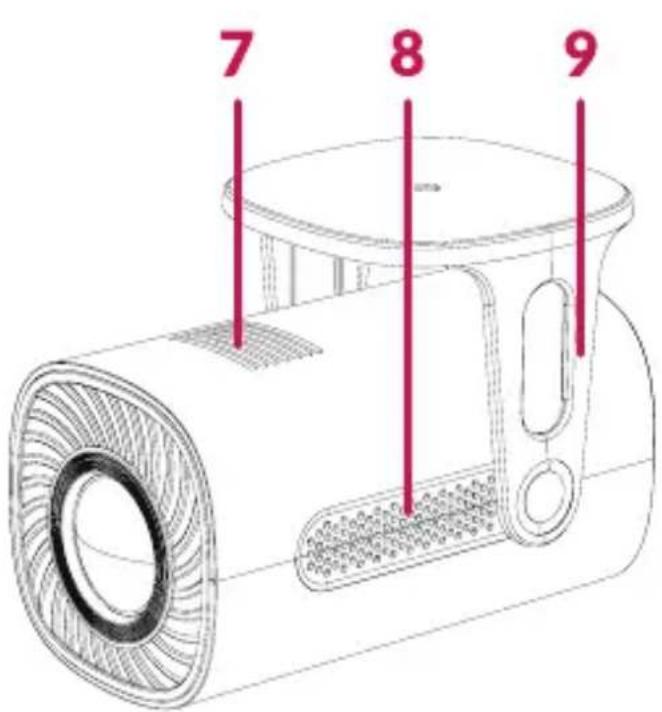
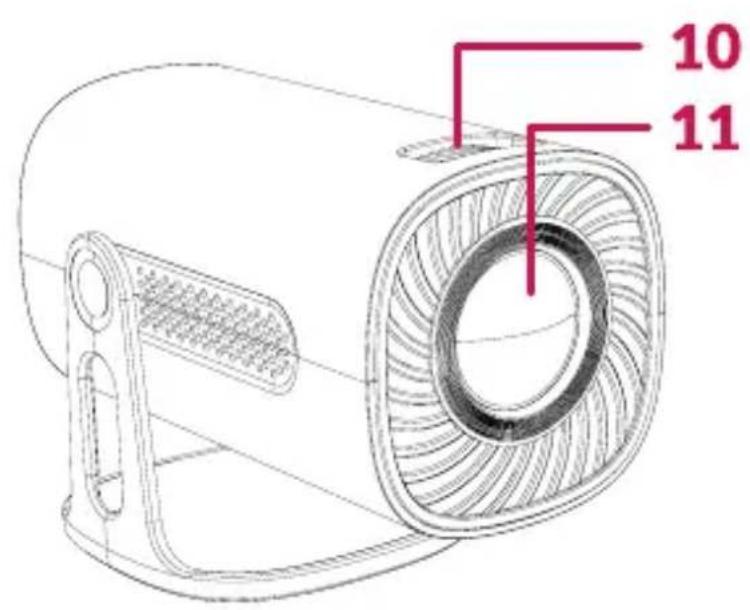
DESCRIPTION OF PARTS (FIG. A)
- ON/OFF switch
- USB port
- HDMI port
- Audio input 3.5 mm
- Charging port
-
Ventilation grille
-
Filter
- Air outlet
- Swivel base
- Focus adjustment knob
- Lens
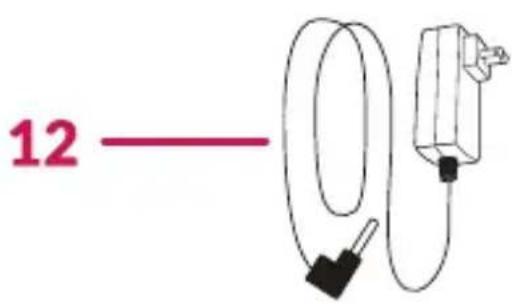
- Charger
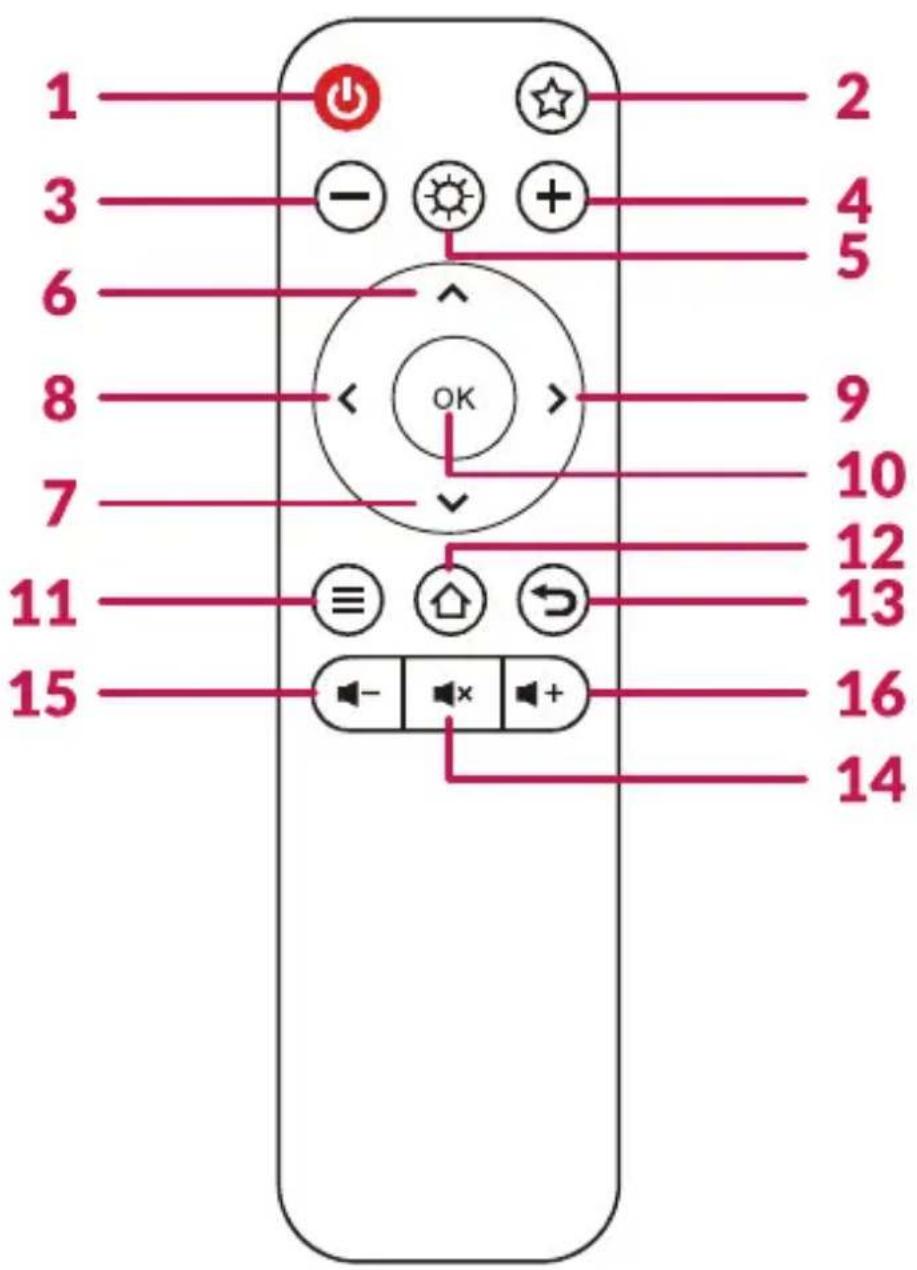
REMOTE CONTROL (FIG. B)
- ON/OFF switch
- Switch for NightSky star projector mode
- Change to previous NightSky mode image
- Change to next NightSky mode image
- Activate Ambiente mode
- Move up
- Move down
- Move left
- Move right
- OK button
- Menu
- Homepage
- Back
- Mute
- Volume down
- Volume up
Important! To prevent damage, turn off the device before unplugging the power cord from the outlet.
Supported formats:
• Video formats: DAT/MPG/MPEG/AVI/MP4/MKV/MOV/AVI
• Audio formats: MP3/MP4
• Image formats: JPG/BMP/PNG
PROJECTOR OPERATION
CONNECTION TO POWER SUPPLY
To charge the device, connect the power adapter with cord (12, Fig. A) to the projector's charging port (5, Fig. A) and to a power source. Correct charging connection is indicated by the red light on the switch (1, Fig. A).
ON AND OFF SWITCHING
When the projector is connected to a power source, it enters standby mode, and the switch on the top of the housing (1, Fig. A) lights up red. To switch the projector on or off, press the on/off switch or the on/off button on the remote control (1, Fig. B). Then confirm the operation.
When the projector is powered on and ready for use, the switch on the top of the housing (1, Fig. A) will illuminate in white.
SETTINGS
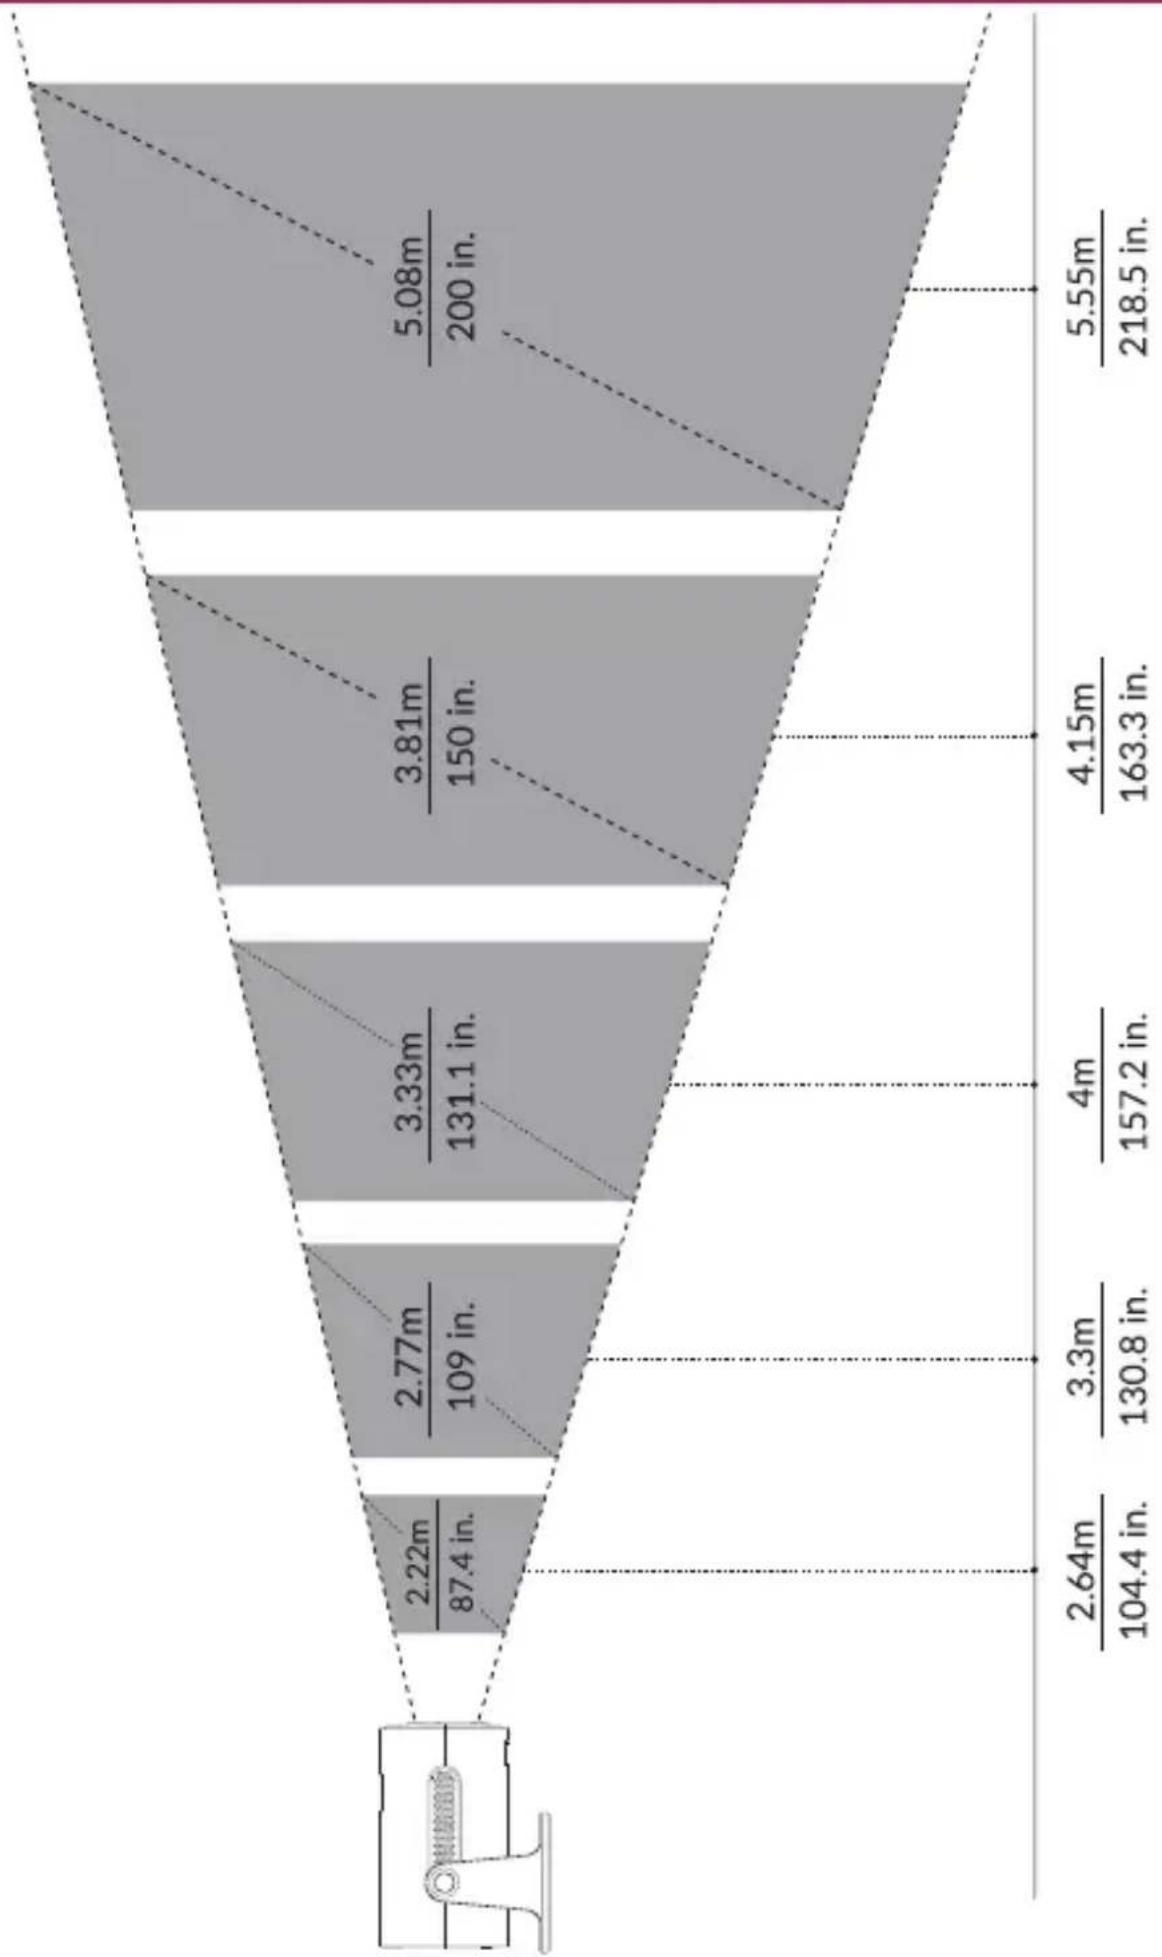
Refer to the table below to adjust the image size and projector distance (Fig. 1).
| Aspect ratio 16:9 | |
| Image diagonal (metres / inches) Projection distance (metres / inches) | |
| 2.22 / 87.4 2.64 / 104.4 | |
| 2.77 / 109 3.3 / 130.8 | |
| 3.33 / 131.1 4 / 157.2 | |
| 3.81 / 150 4.15 / 163.3 | |
| 5.08 / 200 5.55 / 218.5 | |
Important! During installation, ensure the projector is placed on a stable surface or mounted on a tripod. Do not cover or block the ventilation openings. If the distance between the projector and the screen is less than the minimum distance or significantly greater, the image may be blurred.
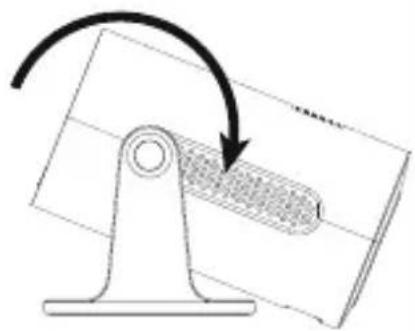
FOCUS ADJUSTMENT
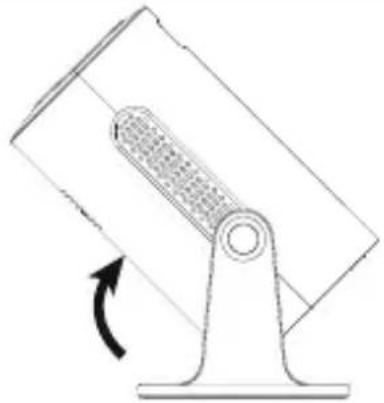
- Position the projector so that the lens is perpendicular to the wall or screen where the image will be projected. Depending on preference, the projector can be tilted up to 45^ .
- To adjust the sharpness of the projected image, turn the focus knob on the top panel (10, Fig. A) until the image is clear.
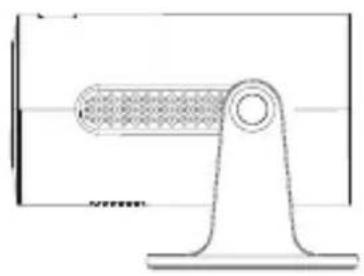
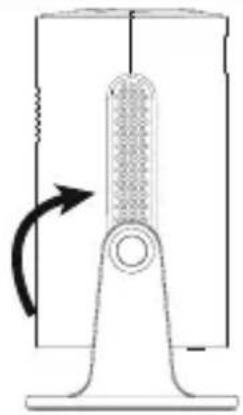
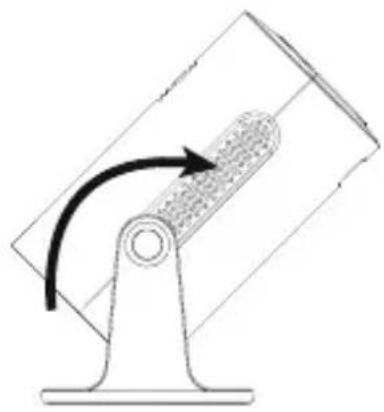
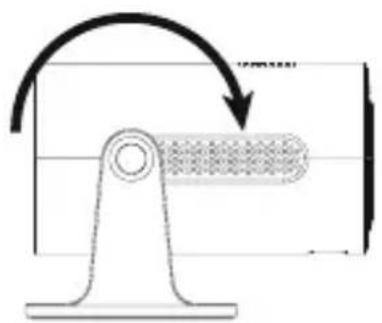
ROTATION (FIG. 2)
The swivel base allows the device to be rotated up to 240^ .
SYSTEM SETTINGS (FIG. 3)
To change the system settings, press the Menu button on the remote control (8, Fig. B) or enter Settings.
In Settings, you can change language, date and time; audio settings, Bluetooth settings; connect to Wi-Fi; update the system; and modify display preferences.
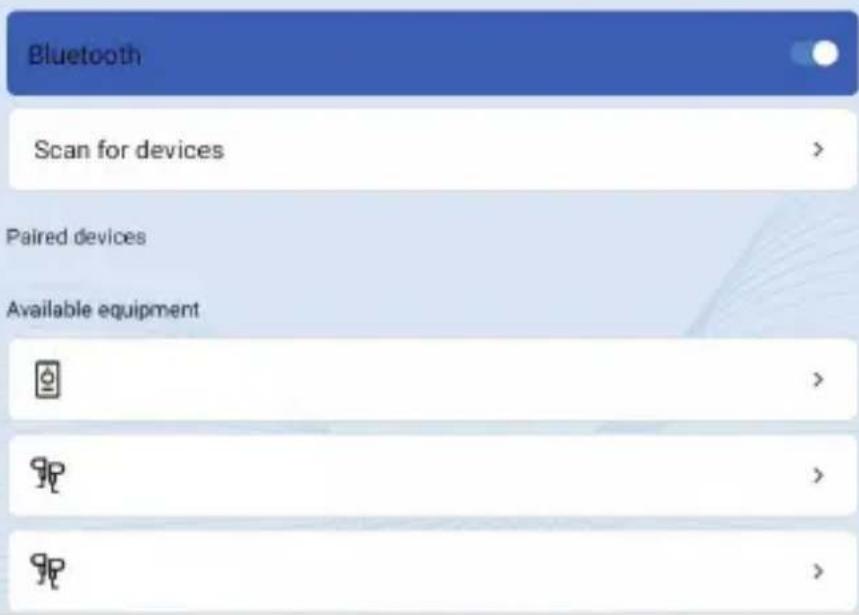
BT FUNCTION (FIG. 4)
IMPORTANT! The BT function supports connection to receiving devices such as speakers, headphones, or audio systems. The projector will not connect via BT to your phone or other transmitting devices.
To connect to the device via BT, press the Menu button on the remote control (8, Fig. B) and enter the “BT” icon by pressing the confirmation button on the remote control (6, Fig. B). Select the device you wish to connect to from the list.
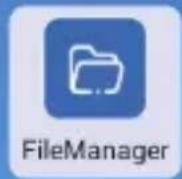
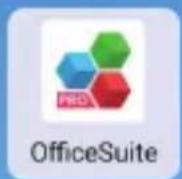
APP MANAGEMENT (FIG. 5)
To manage the apps, press the Menu button on the remote control (11, Fig. B), enter the "App" icon by pressing the confirmation button on the remote control (10, Fig. B). To delete an app, press the Menu button on the remote control.
CONNECTION TO WI-FI NETWORK
To connect to the Wi-Fi network, press the Menu button on the remote control (11, Fig. B), enter the “Network” icon by pressing the confirmation button on the remote control (10, Fig. B). Select the network from the list, enter the password, and confirm.
CONNECTION TO EXTERNAL MEDIA SOURCE
The projector allows images to be projected from a variety of devices. Depending on the device, use the appropriate input at the top of the housing:
USB input (2, Fig. A) – for devices such as USB flash drives and external hard drives.
HDMI input (3, Fig. A) – for devices such as computers, laptops, consoles, satellite receivers, and phones (supporting MHL technology and only via dedicated MHL cable).
MIRACAST (FOR ANDROID DEVICES)
Press the Menu button on the remote control (11, Fig. B). Enter the “App” icon by pressing the confirmation button on the remote control (10, Fig. B), and select the Miracast app.
Ensure both the projector and mobile phone are connected to the same Wi-Fi network.
Open your chosen screen mirroring app, or select this feature on your phone, and connect to your device by selecting “Multipic Veer”.
IOS CAST
Press the Menu button on the remote control (11, Fig. B). Enter the “App” icon by pressing the confirmation button on the remote control (10, Fig. B), select the IOS Cast app, and follow the instructions on the screen.
NIGHTSKY MODE
To activate the star projector mode, press the NightSky star projector switch (2, Fig. B). To change the image, press the selection buttons (3 and 4, Fig. B). To deactivate the star projector mode, press the back button (13, Fig. B).
AMBIENTE MODE
To access the Ambiente mode, press the button (5, Fig. B). To change, press the Ambiente mode switch again. To deactivate the Ambiente mode, press the back button (13, Fig. B).
CLEANING
- Before cleaning the device, unplug the power cord.
-
Clean the housing regularly with a damp cloth.
-
Use an eyeglass tissue or soft cloth to clean the projector lens to avoid scratches.
- Regularly clean the projector's vents and speakers with a soft brush to prevent blockage and ensure proper ventilation.
- Clean the filter regularly.
TROUBLESHOOTING
| Problem Possible causes | |
| The projector does not turn on when the switch is pressed. | · The power cord is not properly connected.· The switch is faulty. |
| The remote control does not work when operating the projector. | · The remote control has no batteries or the batteries are depleted. |
| No image. · Incorrect input source. | · No input signal.· The input cable is not connected. |
| Automatic shut-off. · The projector's ventilation is blocked. | · The voltage is not stable.· The projector has overheated. Check to ensure the fan is functioning properly. |
The photos are for illustrative purposes only, the actual appearance of the products may differ from that shown in the photos.
Einführung
CONNESSIONE CON RETE WI-FI
LA GESTION DES APPLICATIONS (FIG. 5)
CONNEXION AU RÉSEAU WI-FI
APP BEHEREN (AFB. 5.)
EN: The product complies with requirements of EU directives.
Pursuant to the Directive 2012/19/EU, this product is subject to selective collection. The product must not be disposed of along with domestic waste as it may pose a threat to the environment and human health. The worn-out product must be handed over to the electrics and electronics recycling center.

- Multipic VEER
- Wprowadzenie
- Drogi Kliencie!
- WARNINGS
- EN
- WARNINGS FOR REMOTE CONTROL BATTERIES
- DESCRIPTION OF PARTS (FIG. A)
- REMOTE CONTROL (FIG. B)
- PROJECTOR OPERATION
- CONNECTION TO POWER SUPPLY
- ON AND OFF SWITCHING
- SETTINGS
- FOCUS ADJUSTMENT
- ROTATION (FIG. 2)
- SYSTEM SETTINGS (FIG. 3)
- BT FUNCTION (FIG. 4)
- APP MANAGEMENT (FIG. 5)
- CONNECTION TO WI-FI NETWORK
- CONNECTION TO EXTERNAL MEDIA SOURCE
- MIRACAST (FOR ANDROID DEVICES)
- IOS CAST
- NIGHTSKY MODE
- AMBIENTE MODE
- CLEANING
- Einführung
- CONNESSIONE CON RETE WI-FI
- LA GESTION DES APPLICATIONS (FIG. 5)
- CONNEXION AU RÉSEAU WI-FI
- APP BEHEREN (AFB. 5.)
Brand : Overmax
Model : Multipic Veer
Category : Projector