Multipic 3.6 - Projector Overmax - Free user manual and instructions
Find the device manual for free Multipic 3.6 Overmax in PDF.

| Product type | LED projector |
| Brand | Overmax |
| Model | Multipic 3.6 |
| Native resolution | 1280 x 720 pixels |
| Image format | 16:9 |
| Image size | 50 to 150 inches |
| Projection distance | 1.53 m to 4.50 m |
| Connectivity | HDMI, USB, AV, Wi-Fi, Bluetooth |
| Speakers | 2 built-in speakers |
| Light source | LED (lifespan not specified) |
| Power | 100-240 V ~ 50/60 Hz |
| Weight | Approximately 1.5 kg |
| Dimensions (W x D x H) | Approximately 250 x 200 x 100 mm |
| Main features | Manual focus, inverted projection, iOS Cast, Miracast, multimedia playback (video, music, photos, documents) |
| Safety | Do not look at the lens, turn off after 6 hours of operation, do not obstruct the vents |
| Cleaning | Soft cloth for the casing, lens cloth for the lens, soft brush for the vents |
| Spare parts and repairability | Not user-serviceable - no accessible detachable parts |
| Supplied accessories | Remote control, power cable, AV cable (not confirmed) |
| File compatibility | XLSX, DOCX, PPTX, TXT, common video and audio formats |
Frequently Asked Questions - Multipic 3.6 Overmax
User questions about Multipic 3.6 Overmax
0 question about this device. Answer the ones you know or ask your own.
Ask a new question about this device
Download the instructions for your Projector in PDF format for free! Find your manual Multipic 3.6 - Overmax and take your electronic device back in hand. On this page are published all the documents necessary for the use of your device. Multipic 3.6 by Overmax.
USER MANUAL Multipic 3.6 Overmax
natural_image
Line drawing of a portable electronic device with buttons and ventilation slots (no text or symbols)1
natural_image
Line drawing of a mechanical device with a handle and perforated panel (no text or symbols)1
natural_image
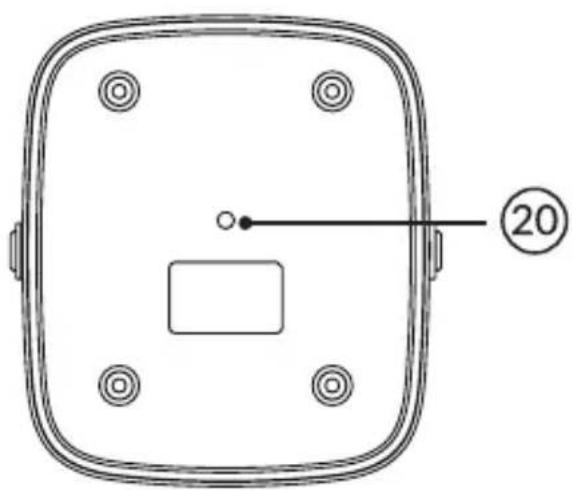
Technical line drawing of a square mechanical component with mounting holes and a central rectangular feature, labeled with number 20 (no text or symbols beyond basic geometry)2
3
bar
| X-axis (m) | Value | |---|---| | 1.53 | 50 | | 2.14 | 70 | | 3.03 | 100 | | 3.60 | 120 |4

5
6
7
8
9
10

11
12
13
Wprowadzenie
PL
Drogi Kliencie!
Thank you for placing trust in us and choosing Overmax.
Thanks to the use of high-quality materials and modern solutions, we provide you with a product perfect for everyday use. We are convinced that the product will satisfy your requirements as it has been manufactured with utmost care. Before you use the product, please read this operating manual carefully.
Should you have any remarks or questions concerning the product, please do not hesitate to contact us: pomoctechniczna@overmax.pl
Important information
Before using the projector, please read and then follow the instructions in this guide. Improper operation of the device can lead to electric shock and increase the risk of fire. Follow these instructions when using and maintaining your projector.
Note
Installation and use
- For better image quality, use the projector in rooms with drawn curtains or in dark rooms.
- Use the projector carefully. Dropping or malfunctioning may damage parts or cause image blurring and incorrect display.
- Do not disassemble the device yourself – risk of electric shock.
- Protect the device from moisture and keep it away from water or other liquids.
- When the projector is switched on, make sure that the ventilation holes of the device are not obstructed. Do not place it on soft surfaces or cover it with materials.
- Use only the supplied cables.
- Be careful when using the power cord, avoid excessively bending the cord; damage to the power cord can cause electric shock or fire.
- Do not look into the lens while the device is running.
- It is recommended to switch off the appliance after 6 hours of uninterrupted operation.
- Disconnect the power cord after switching off the power.
• It is recommended to use the original packaging for transporting the device.
- When the projector is switched on, make sure that the ventilation holes of the device are not obstructed. For this reason, it should not be placed on soft surfaces or covered with materials.
- Do not look into the lens while it is working.
- Do not place heavy objects on the projector.

The product complies with the requirements of European Union directives. In accordance with Directive 2012/19/EU, this product is subject to separate collection. The product should not be disposed of with municipal waste as it may pose a risk to the environment and human health. Return the used product to the recycling centre for electrical and electronic equipment.
EN
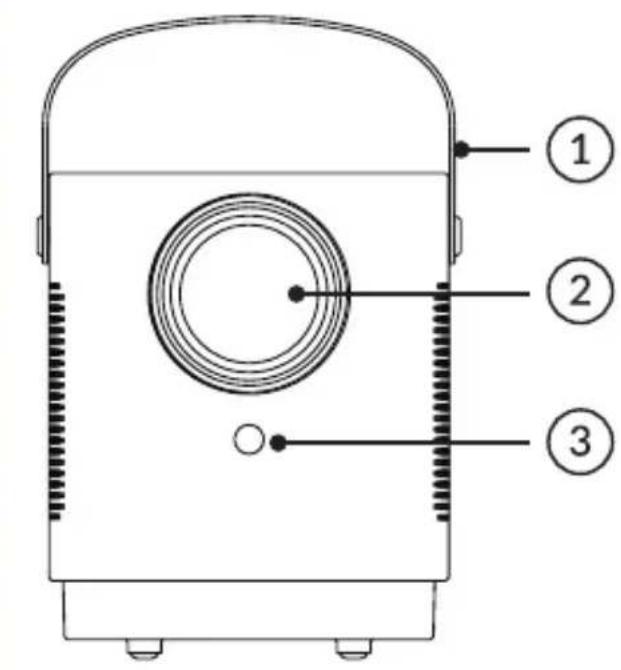
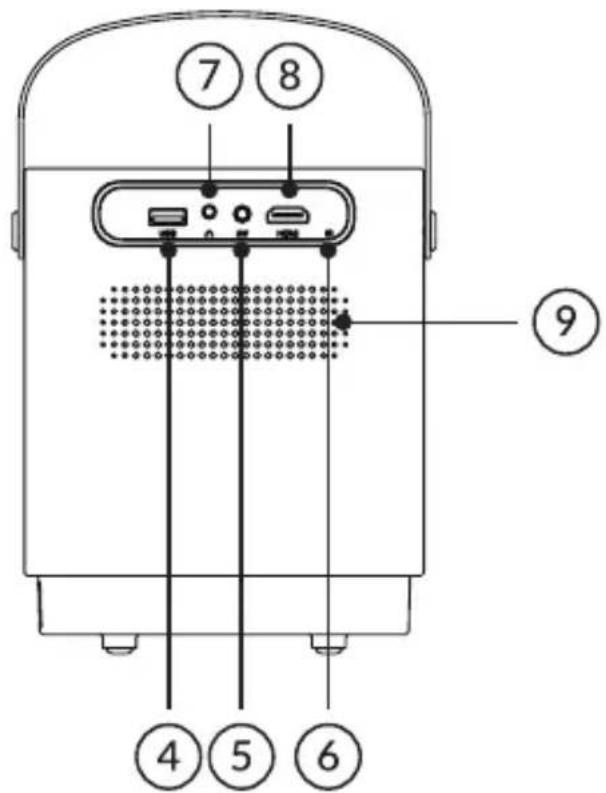
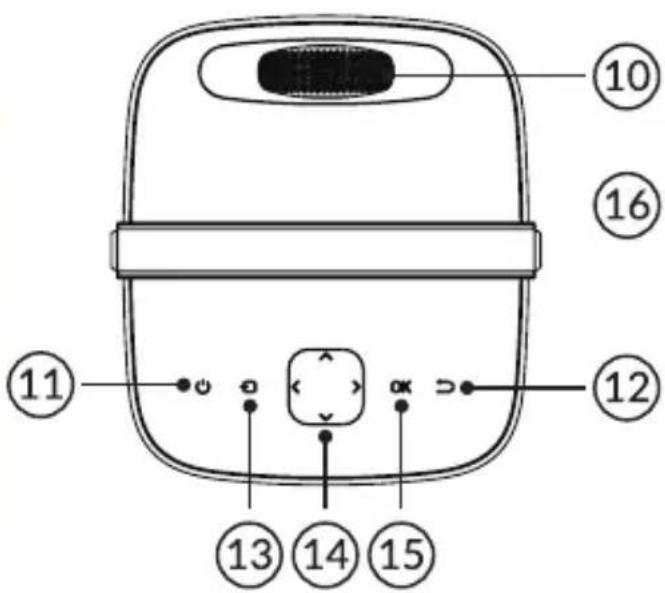
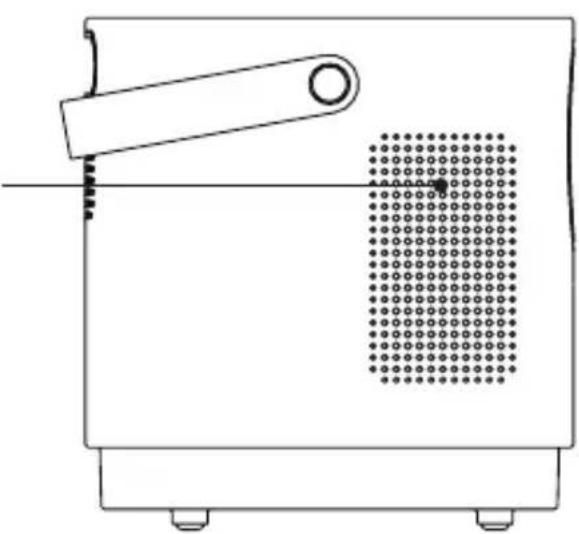
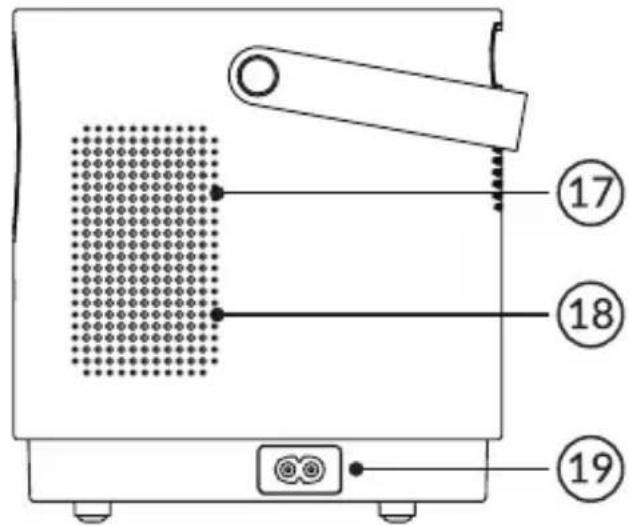
Appearance (fig. 1)
- Handle
- Lens
- USB port
- AV port
- IR signal receiver
- Focus adjuster
- On/off switch
- Back
- Input source selection
- Direction buttons
- Confirmation button
- IR signal receiver (remote control signal)
- Mini - Jack (3.5 mm audio output)
- HDMI port
- Fan
- Speaker1
- Speaker2
- Fan
- Power outlet
- Stand socket (not supplied)
Back panel
Top panel
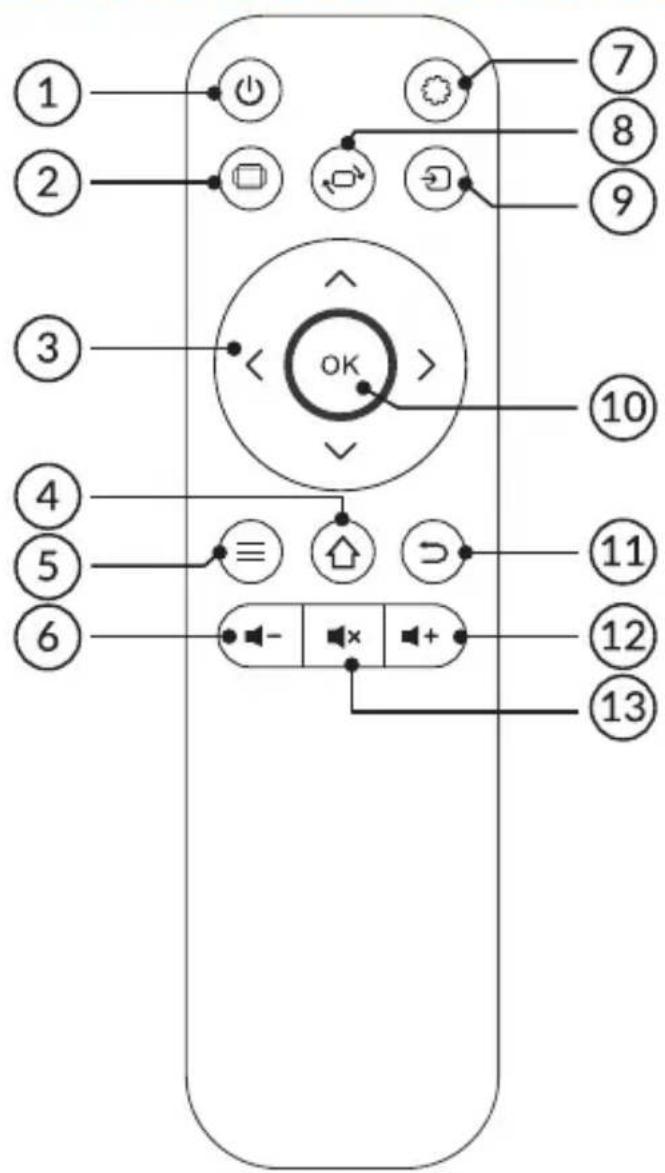
Remote control (fig. 2)
- On/Off button
- Display aspect ratio selection button
- Direction buttons
- Home page
- Video and audio settings
- Reduce audio volume
- Projector settings
- Projection screen rotation
- Source selection
- Confirmation
- Back button
- Volume increase
- Mute
Supported formats
File formats: XLSX/DOCX/PPTX/TXT
Video formats: MP4/3GP/AVI/FLV/M2TS/MKV/TS/VOB/DAT/MPG
Audio formats: MP3/OGG/AAC/M4A/FLAC/WAV
Installation
Standard settings
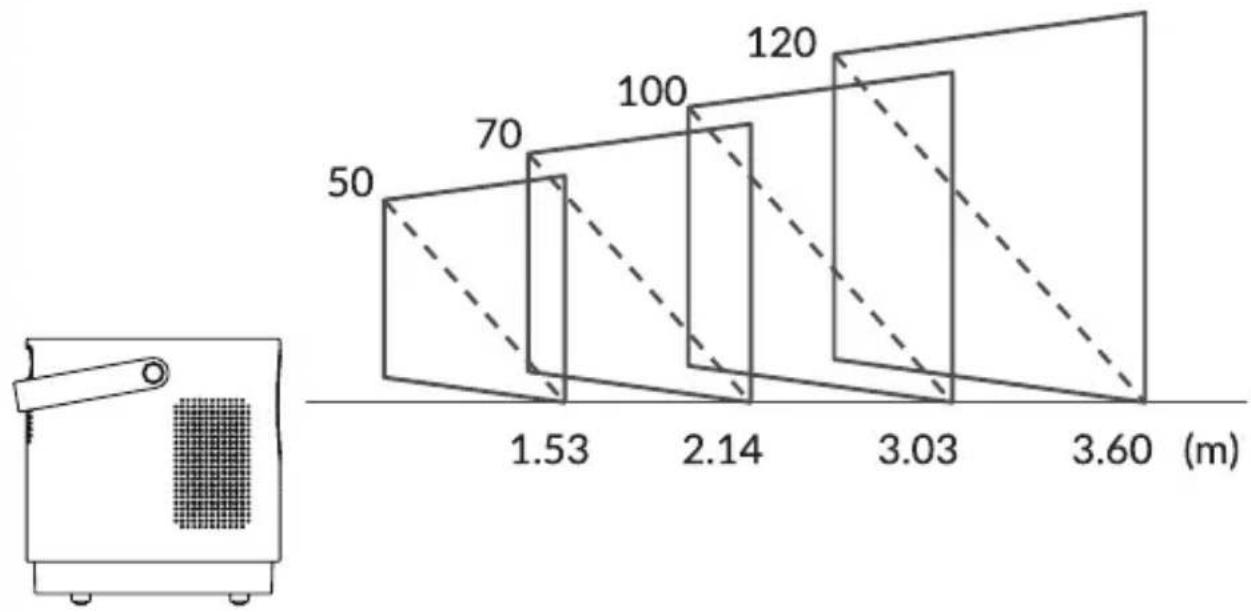
Refer to the table below to adjust the image size and projector distance (fig. 3).
EN
| Proportion ratio 16:9 | |
| Image size (inches) Projection distance | |
| 50 1,53 | |
| 70 2,14 | |
| 100 3,03 | |
| 120 3,60 | |
| 150 4,50 | |
- During installation, place the projector on a stable surface or set it on a stand. Do not cover or block ventilation holes.
• If the distance between the projector and the screen is less than the minimum distance or is much greater, the image may be blurred.
Device operation
Switching on and off
- When the projector is connected to the power source, it enters standby mode. The indicator light will turn red.
- To turn the projector on or off, press the on/off switch on the top of the cabinet or the on/off button on the remote control. The projector is ready for operation when the light turns blue.
Focus adjustment
- Place the projector so that the lens remains perpendicular to the wall or screen on which the image is to be projected.
- o improve the focus of the projected image, turn the focus knob on the top panel until the image comes into focus.
- If the image is not displayed perpendicularly, it will be distorted.
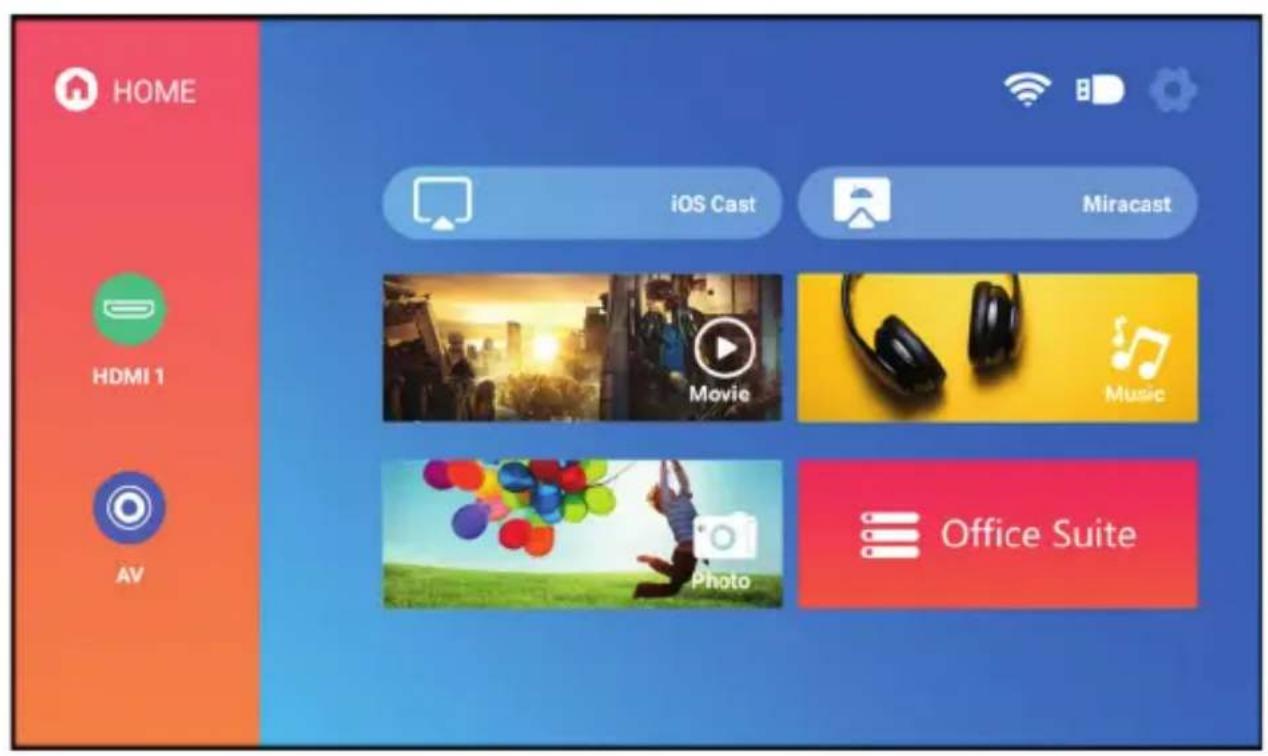
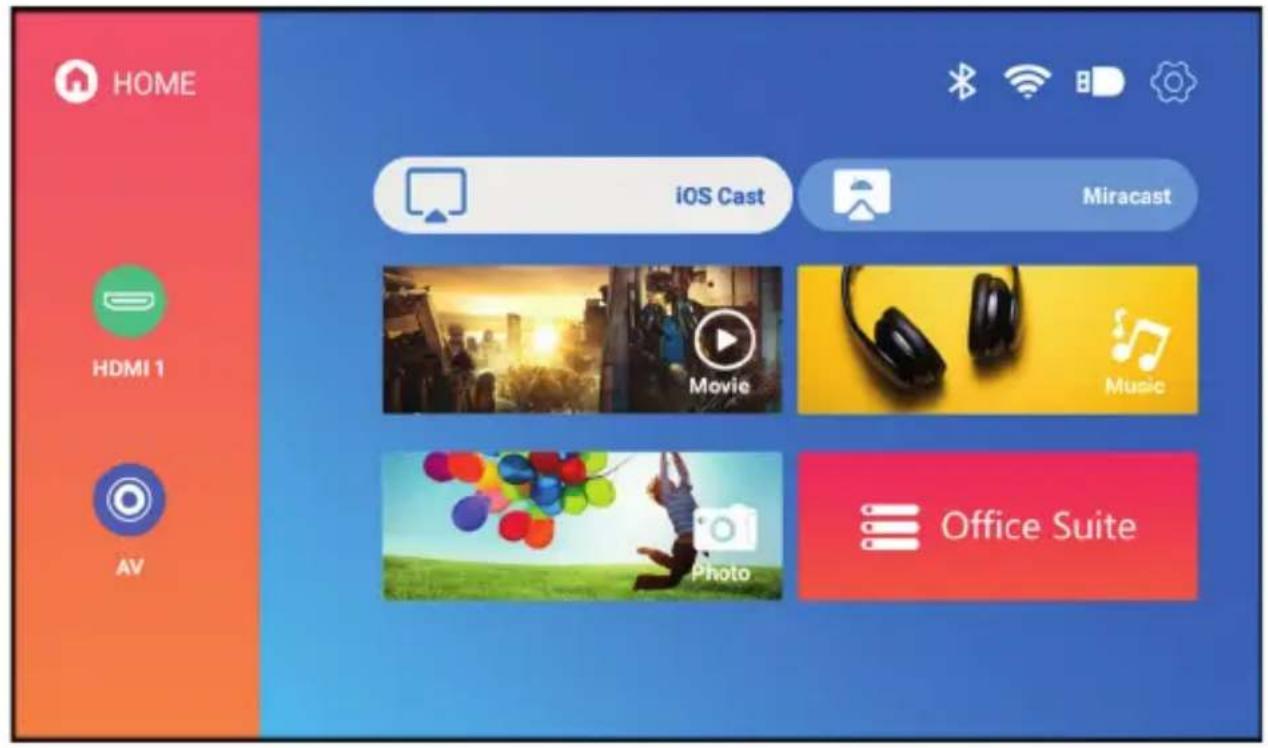
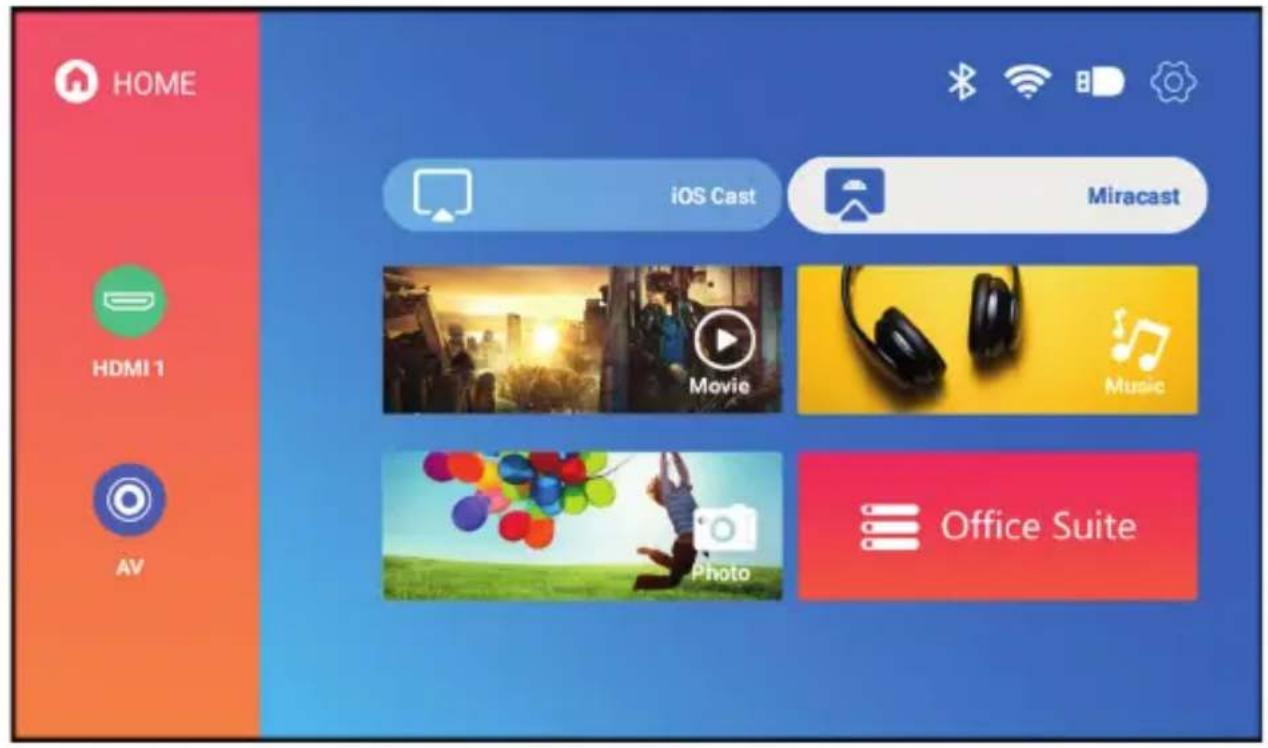
Signal source settings
Switch on the projector, and then select your preferred signal source in the main interface (fig. 4).
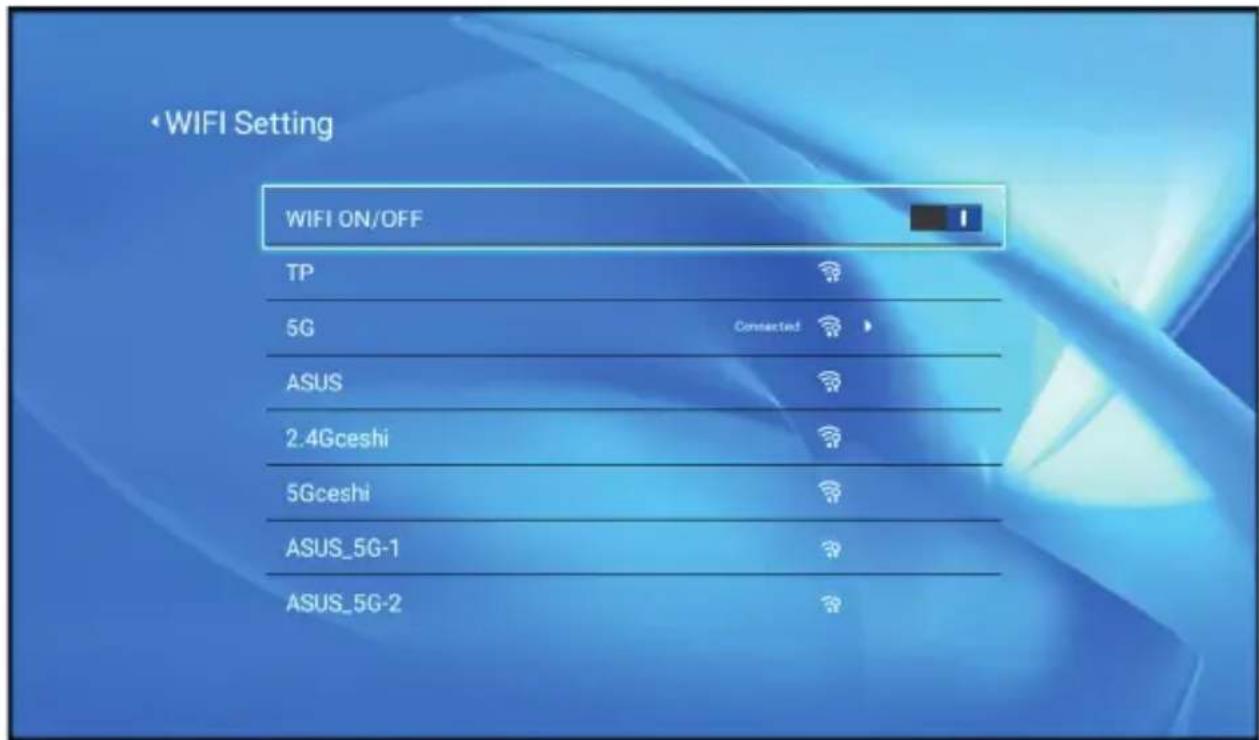
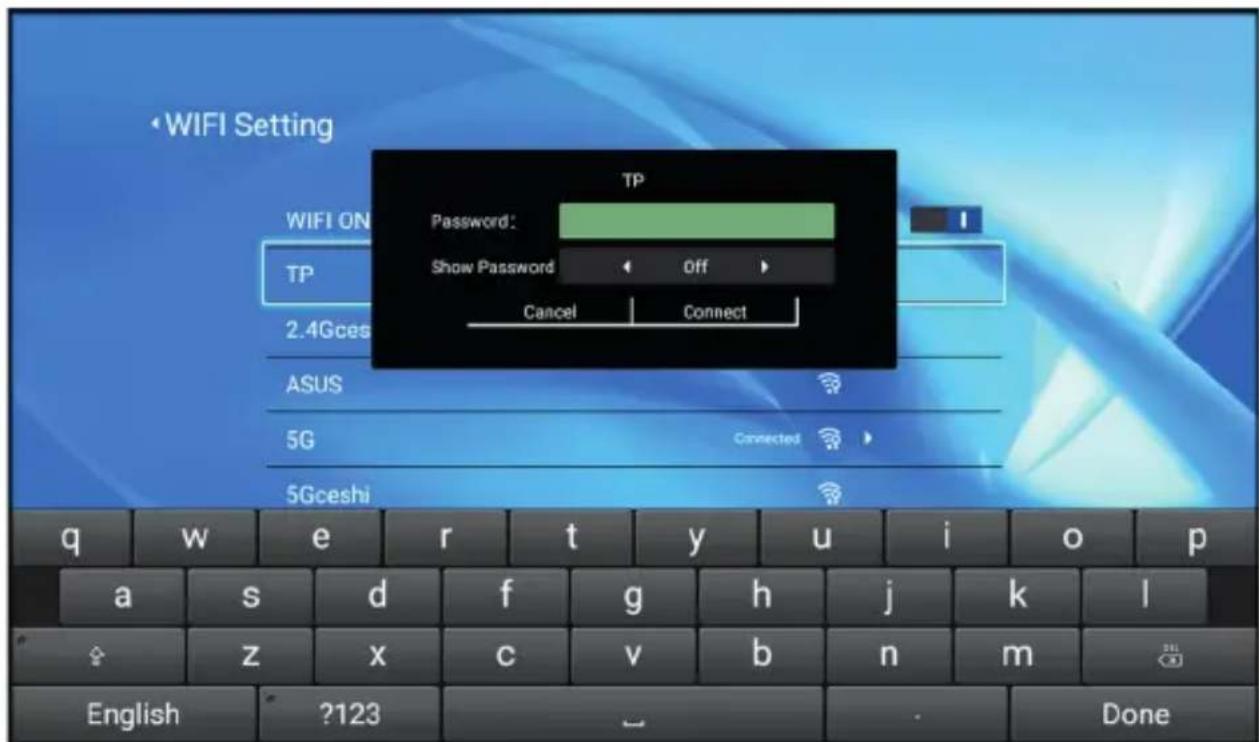
Wi-Fi network connection
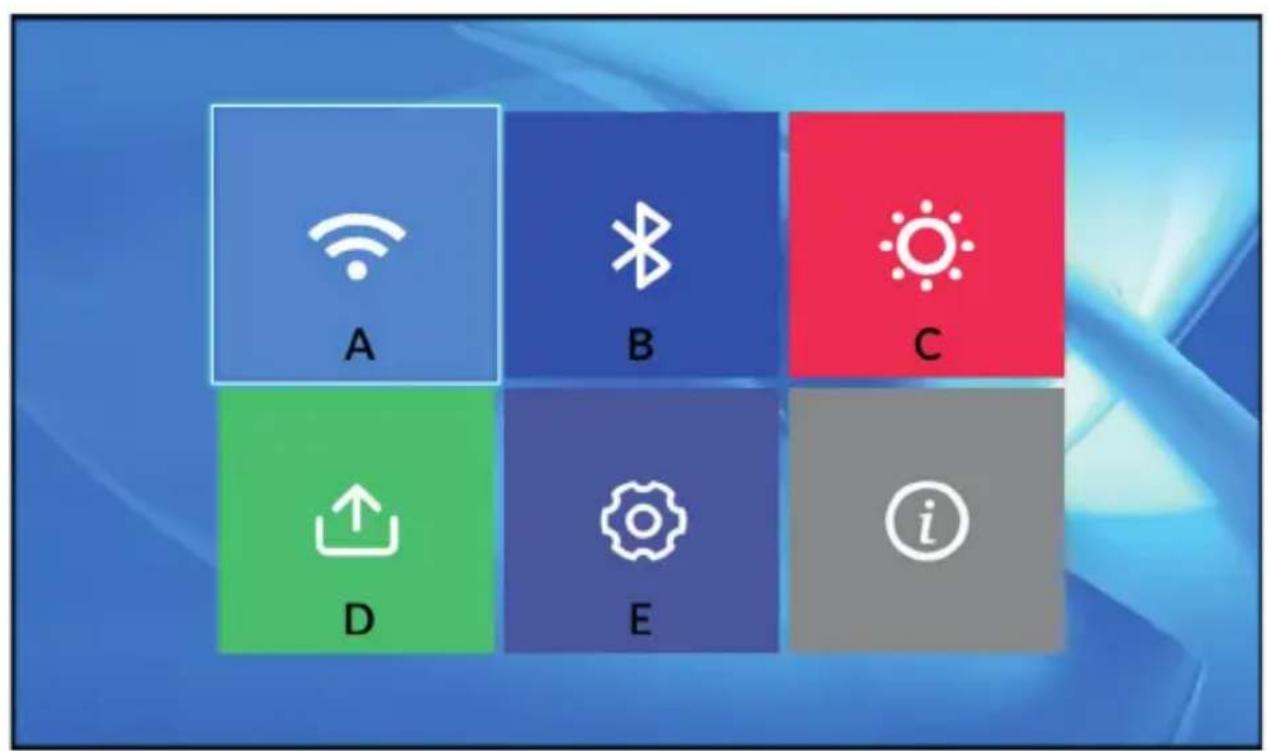
In the main interface, select Settings (fig. 5) and then Network Settings (A, fig. 6). Search for the Wi-Fi network you want to connect to, enter your password, and confirm (fig. 7).
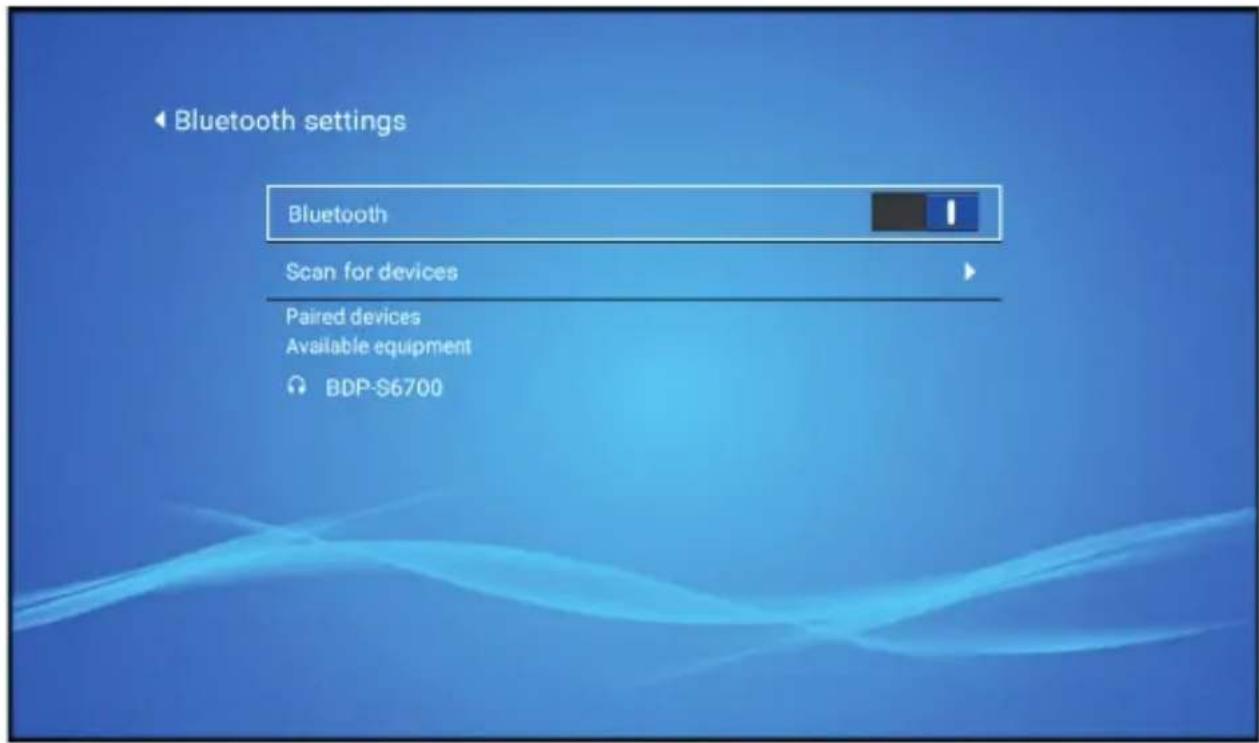
Bluetooth connectivity
In the main interface, select Settings and then Bluetooth Settings (B, fig. 6). Find an available device to connect to (fig. 8).
EN
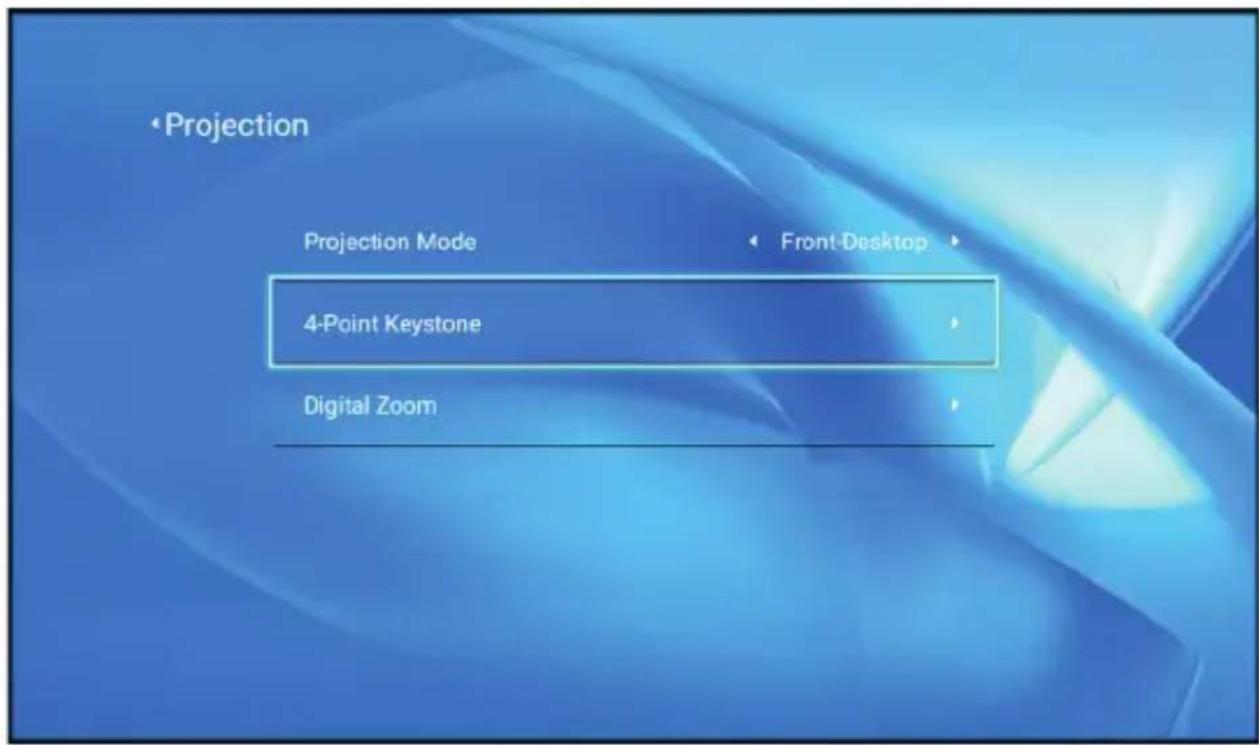
Projection settings
• In the main interface, select Settings and then Projection settings (C, fig. 6).
• Depending on the installation method and projector setting, select one of the available picture settings (fig. 9).
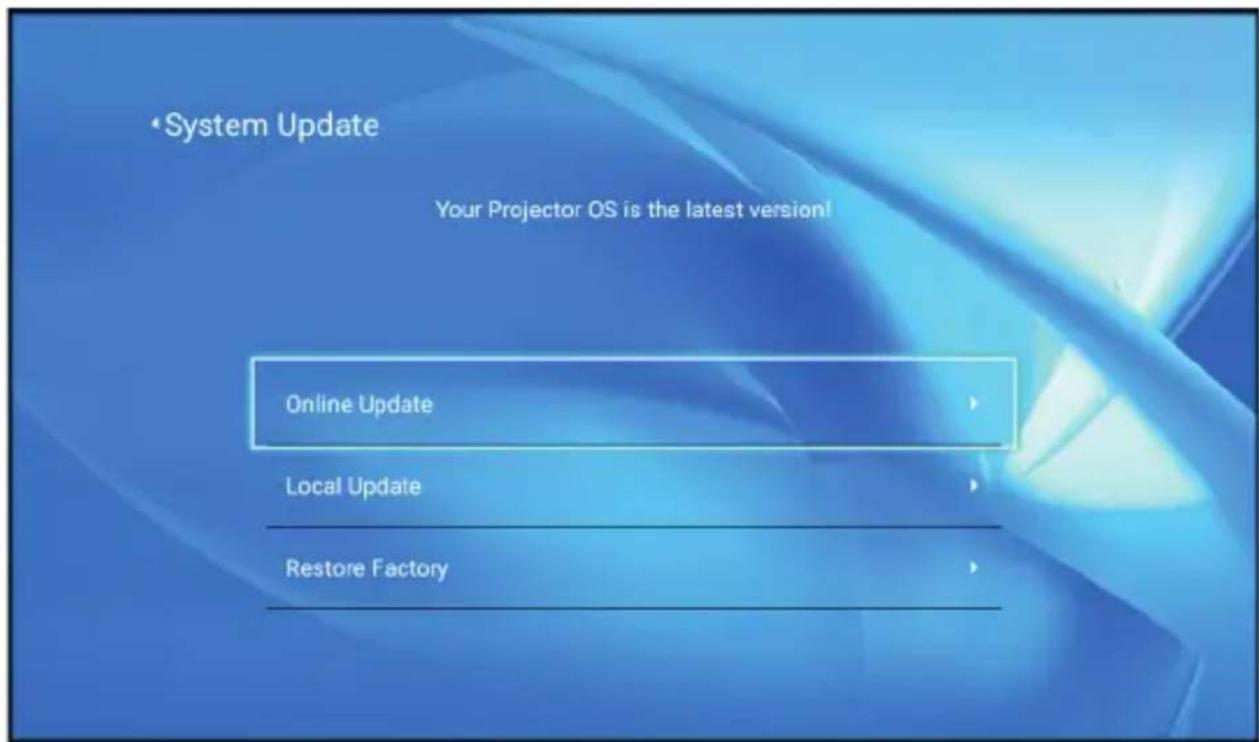
System settings
- In the main interface, select Settings, then System updates or Other settings (D,E, fig. 6).
- In Settings you can change the language, restore factory settings and perform a local or online update (fig. 10).
Multimedia
Insert the external drive into the USB port of the projector. In the main interface, select a category: Film, Music, Photo or Office and then the file you want to view (fig. 5).
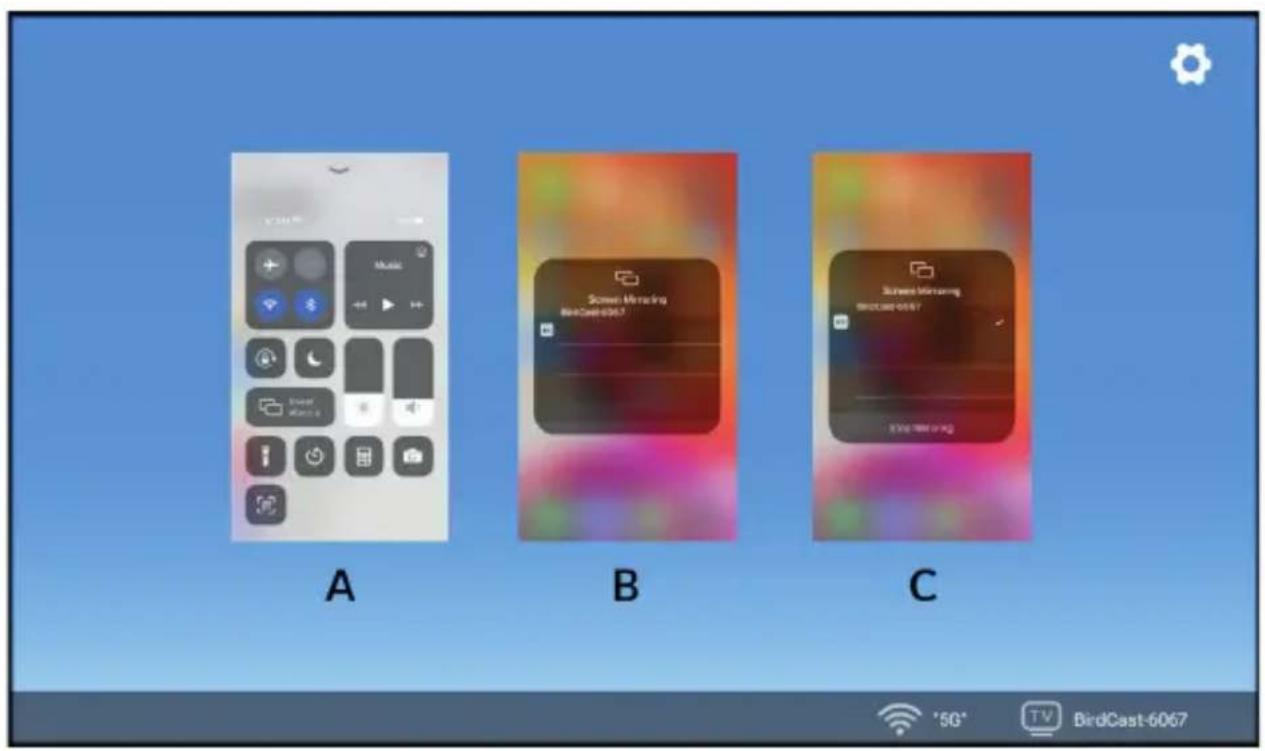
iOS Cast
- From the main interface, select iOS Cast (fig. 11).
- Connect the projector and your mobile phone to the same Wi-Fi network, or connect your iOS device to the projector's wireless access point (AP).
- On your iOS device, open the phone's interface, then select "Clone screen" (A, fig. 12). When the device searches for the projector (B, fig. 12), select the device with which you want to connect (C, fig. 12).
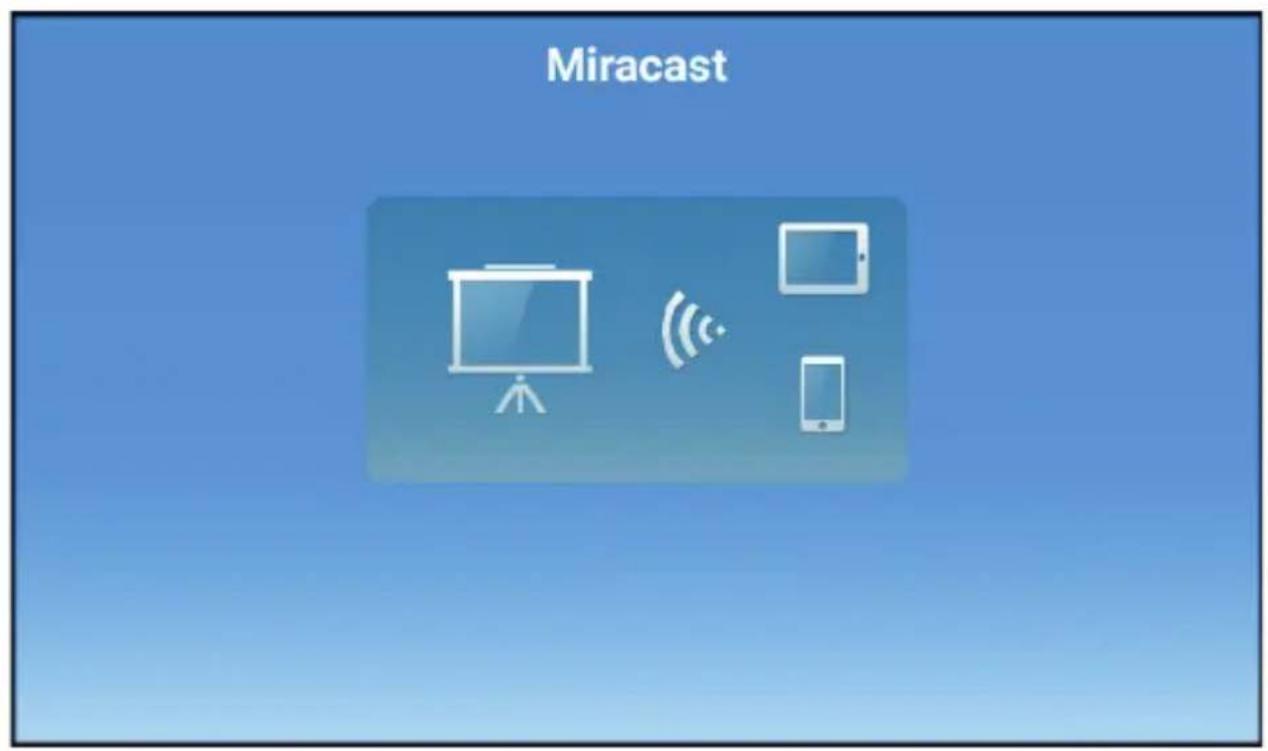
Miracast
- From the main interface, select Miracast (fig. 13).
- Connect the projector and mobile phone to the same Wi-Fi network.
- Open the screen cloning application of your choice or select this function on your phone and connect to the device (fig. 13).
EN
Cleaning
- Unplug the power cord before cleaning the device.
- Clean the housing regularly with a damp cloth.
- To clean the projector lens, use an eyeglass tissue or soft cloth to avoid scratches.
- Regularly clean the ventilation holes and speakers of the projector with a soft brush, otherwise the ventilation may become blocked. Clean the dust filter regularly.
The photos are for reference only, the actual look of the products may differ from the ones shown in the pictures.
Einführung
Audioformate: MP3/OGG/AAC/M4A/FLAC/WAV