Scandi - Baby swing Lionelo - Free user manual and instructions
Find the device manual for free Scandi Lionelo in PDF.

| Product type | Baby swing |
| Brand | Lionelo |
| Model | Scandi |
| Recommended age | From birth (0+) until the child can sit up independently |
| Maximum child weight | 9 kg |
| Dimensions (approx) | 70 x 50 x 60 cm (L x W x H) |
| Product weight | Approximately 3.5 kg |
| Power supply | 2 LR6 alkaline batteries (not included) |
| Main functions | Vibration (3 intensities), music (multiple melodies), rocking, height adjustment (4 positions), folding for transport |
| Safety harness | 3-point, height adjustable (3 levels) |
| Rocking lock | Yes, for stationary use |
| Materials | Frame in metal/alloy, textile padding |
| Padding maintenance | Hand wash at 30°C max with mild detergent; do not bleach, machine dry, or iron |
| Frame and accessory cleaning | Damp cloth and mild detergent; do not immerse |
| Safety | Use on a flat, stable surface, never leave child unattended, do not use on soft surfaces, do not use as car seat, do not use near stairs, do not carry with child |
| Spare parts | Contact customer service: help@lionelo.com |
| Repairability | Only by an authorized service; do not disassemble or modify yourself |
| General information | Compliant with European directives (2014/30/EU, 2009/48/EC); manufacturer: BrandLine Group Sp. z o. o. |
Frequently Asked Questions - Scandi Lionelo
User questions about Scandi Lionelo
0 question about this device. Answer the ones you know or ask your own.
Ask a new question about this device
Download the instructions for your Baby swing in PDF format for free! Find your manual Scandi - Lionelo and take your electronic device back in hand. On this page are published all the documents necessary for the use of your device. Scandi by Lionelo.
USER MANUAL Scandi Lionelo
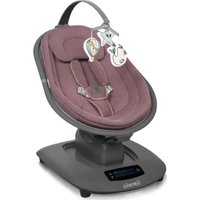
natural_image
Modern baby car seat with animal-themed design, featuring a cat and lion figurines (no text or symbols visible)
flowchart
graph TD
    A["Step 1: Eye Slice"] --> B["Step 2: Eye Slice"]
    B --> C["Step 3: Eye Slice"]
    C --> D["Step 4: Eye Slice"]
    D --> E["Step 5: Eye Slice"]
    E --> F["Step 6: Eye Slice"]
    F --> G["Step 7: Eye Slice"]

    subgraph Stage 1
        A --> B --> C
    end

    subgraph Stage 2
        B --> C
    end

    subgraph Stage 3
        C --> D
    end

    subgraph Stage 4
        D --> E
    end

    subgraph Stage 5
        E --> F
    end

    subgraph Stage 6
        F --> G
    end
5
natural_image
Illustration of a hand using a tool to press down a curved pipe or pipe fitting (no text or symbols present)
natural_image
Technical line drawing of a mechanical component or bracket (no text or symbols)6
natural_image
Line drawing of a person performing a hand gesture with an object nearby (no text or symbols)
natural_image
Line drawing of a mechanical assembly with no visible text or symbols
natural_image
Line drawing of a human torso with medical tubing (no text or symbols)7
8
natural_image
Simple line drawing of a symmetrical mechanical or architectural component (no text or symbols)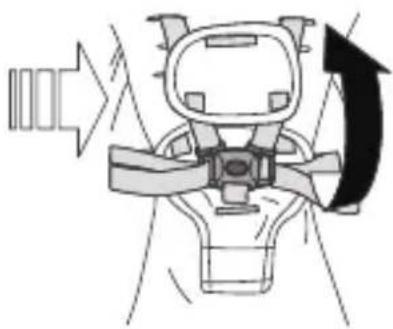
natural_image
Diagram of a vehicle seatbelt mechanism with directional arrows indicating motion (no text or symbols)
natural_image
Diagram of a hand adjusting a mechanical component with directional arrows indicating movement (no text or symbols)9
natural_image
Illustration of a hand holding an insect, with a magnified inset showing the insect inside (no text or symbols)10
11
2x

1.5V
AA/LR6

[Non-Text]
natural_image
Illustration of a screwdriver on a mechanical device with no visible text or symbols→

1.5V
2x AA/LR6
natural_image
Pure mechanical diagram showing a checkmark and a circular component with arrows, no text or symbols present.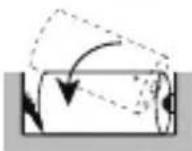
natural_image
Illustration of a screwdriver working on an American football helmet (no text or symbols)12
flowchart
graph TD
    A["Feeding Head"] --> B["Feeding Body"]
    B --> C["Feeding Body with Insect"]
    C --> D["Feeding Body with Insect"]
13
14
natural_image
Line drawing of two identical eyeglasses with different angles and front views, no text or symbols present15
16
◀»-A
8-B
- C
- D
17
Dear customer!
Should you have any remarks or questions concerning the product, please do not hesitate to contact us: help@lionelo.com
Producer:
BrandLine Group Sp. z o. o.
Note! Keep this manual for future reference.
- This bouncer is not intended as a place for a longer sleep of the child.
- The reclined cradle can also be used by new-born babies (0+).
- Do not use this reclined cradle when your child can sit alone.
- The maximum weight of the child for whom the product is intended is 9 kg.
- Never use the product on a platform or sloping surfaces because child's movements may cause the product to slip or collapse.
- Never use the product on a soft surface (e.g. bed, sofa, cushion) because the product may collapse and suffocate the child. Use the product on a flat and stable surface.
- The reclined cradle can be assembled by adults only.
- Never leave the child unattended.
- Never lift or move the reclined cradle when the child is inside. Do not adjust or modify the product if the child is inside.
- This reclined cradle does not replace a crib or bed. If your baby needs sleep, he or she should be placed in an appropriate crib or bed.
• Always use safety belts. - Do not let other children play with the reclined cradle.
- Do not use the product as a car safety seat!
- Do not use the product near stairs.
- Do not move the product with the use of the bow.
- Do not repair the product on your own and do not modify it. Only an authorized service technician is allowed to perform these operations.
-
Unfold and fold the product out of reach of children.
-
If you do not use the product, keep it out of reach of children.
- Do not put items which may pose a threat to your child into the reclined cradle.
- Do not cover the reclined cradle with items which may prevent airflow or pose a threat to the child.
- Do not suspend any items which affect stability of the reclined cradle on the handle with toys.
- Do not place the reclined cradle with the child near drapes or electric wires as they may lead to suffocation or electric shock.
- Do not use accessories or spare parts other than supplied by the manufacturer.
- Do not use the product for other purposes than designed.
- Use and store the product away from fire, sources of heat, moisture and liquids.
- The product is ready for use only when all locking mechanisms have been secured.
- Before each use or assembly, check the reclined cradle for damage, loose connections, missing parts or sharp edges. Do not use the recliner if any part is damaged or missing. In this case, contact the manufacturer's service department.
To reduce the risk of hazards related to batteries, please follow the rules below.
- Keep batteries out of reach of children.
- Put the battery into the compartment in accordance with marking.
- Do not throw batteries into the fire as they may explode.
- Do not store batteries at high temperatures (e.g. in the car).
- If you do not use the product for a long time, remove the battery from the compartment.
- Always remove the worn-out battery. If you leave it in the product, the battery may leak or explode and damage the product.
- Do not charge single-use batteries.
- To charge the battery, remove it from the compartment.
- When replacing batteries, use the same type only (alkaline LR6).
- Do not mix batteries - old with new ones, or alkaline with standard or multiple-use batteries.
- Dispose of batteries in accordance with regulations, throw into special containers.
- Batteries must be charged under adult supervision.
- Power terminals should not be short-circuited.
- The batteries must be inserted with the correct polarity.
The sound and vibration module needs two LR6 alkaline batteries to operate. These batteries are not part of the set.
Product description (fig. 1)
- Left skid of the chair
- Right skid of the chair
- Sound and vibration module
- Rear part of the seat frame with a rocking lock
- Left part of the seat frame
- Right part of the seat frame
- Covering
- Rear part of the seat frame with a height adjustment
- Bow with toys
- Bow with toys
- Rocking lock
- Chair folding key
- Seat height adjustment
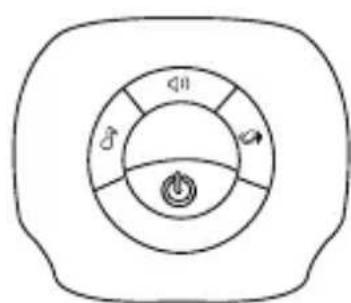
Sound and vibration module:
A. Change volume
B. Change melody
C. Vibration on/off
D. Module on/off
How to use
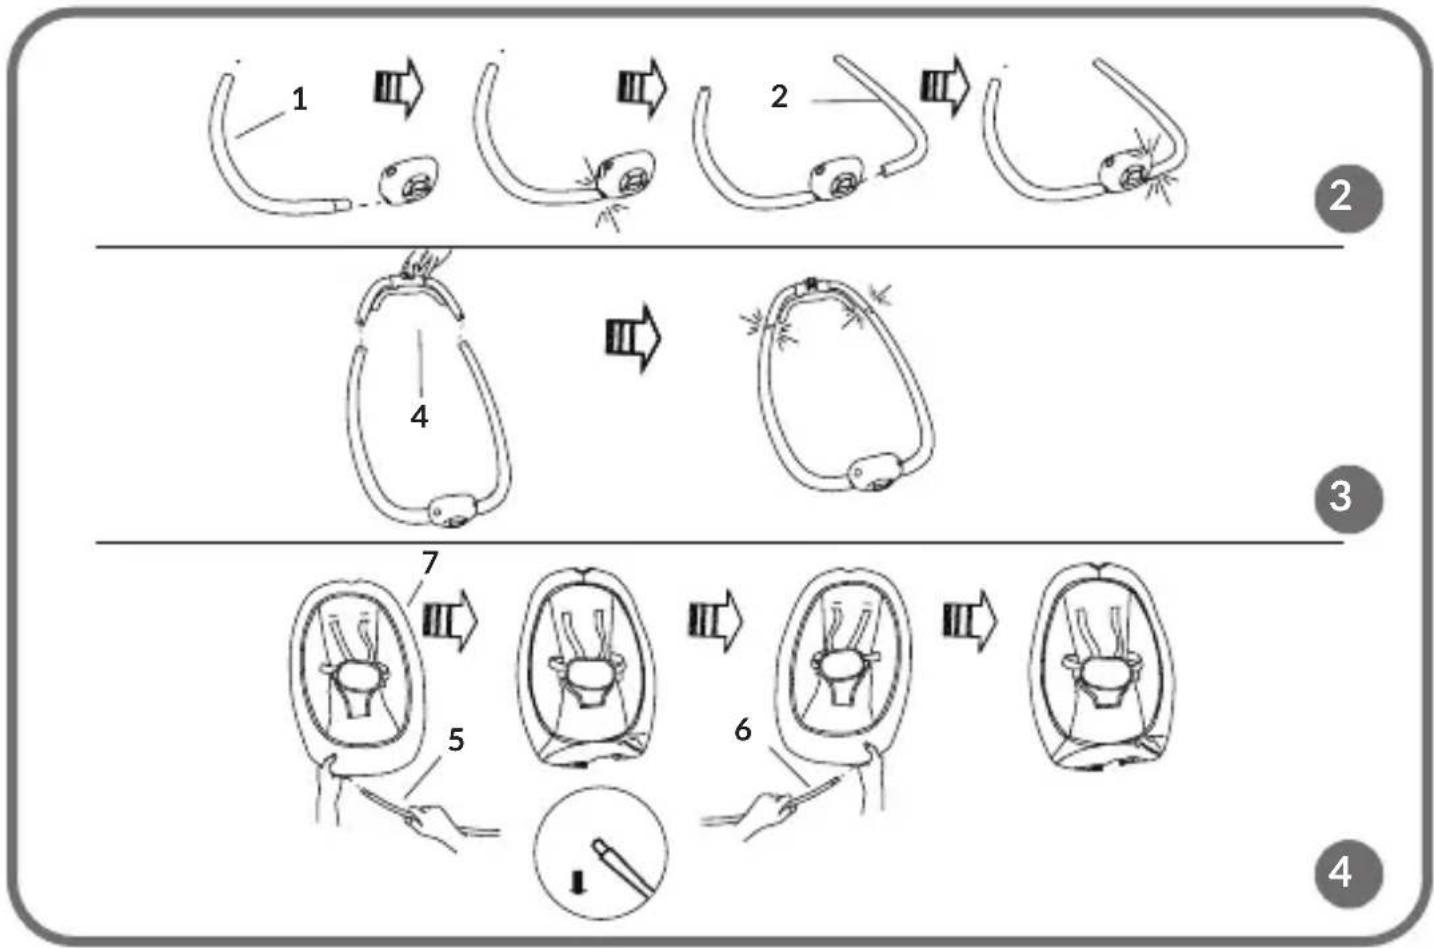
1. How to assemble the reclined cradle
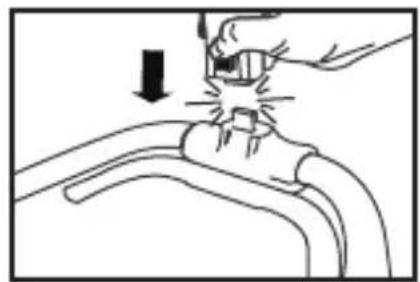
- Insert the left and right skid of the reclined cradle (1,2) in holes in the sound and vibration module (3) (fig. 2). If you can hear a „click”, it means the skids have been secured properly.
- Slide both skids (1,2) in holes in the rear part of the frame (4) (fig. 3). If you can hear a „click”, it means they have been secured properly.
- Slide both parts of the seat frame (5, 6) in holes in the covering (fig. 4).
- Next slide both seat frames in holes in the upper part of the sound and
vibration module (fig. 4). If you can hear a „click”, it means they have been secured properly.
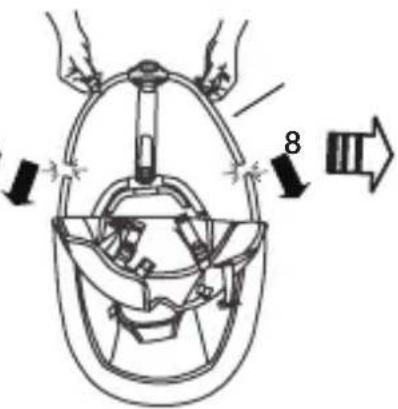
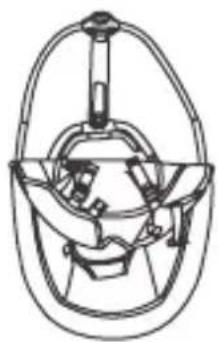
- Connect rear elements of the frame (8,4) and then slide them in the seat frame (fig. 6).
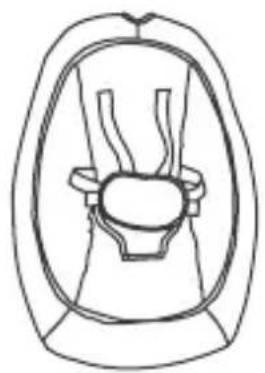
- Pull the belts through the covering and secure with clips on the other side. Fasten the covering belt under the reclined cradle bracket. Note: it is an indispensable element which assures carrying capacity of the covering (fig. 7).
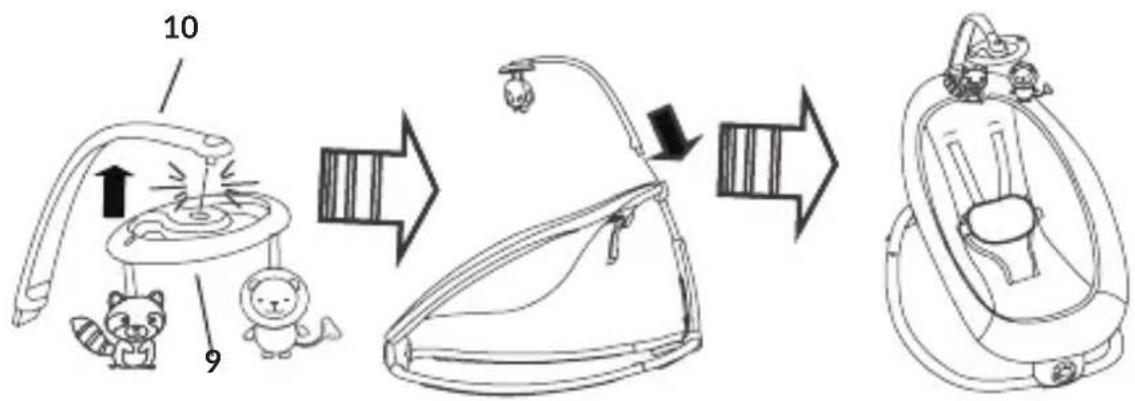
- Mount the carousel (9,10) by sliding it in the base. Now the reclined cradle is ready.
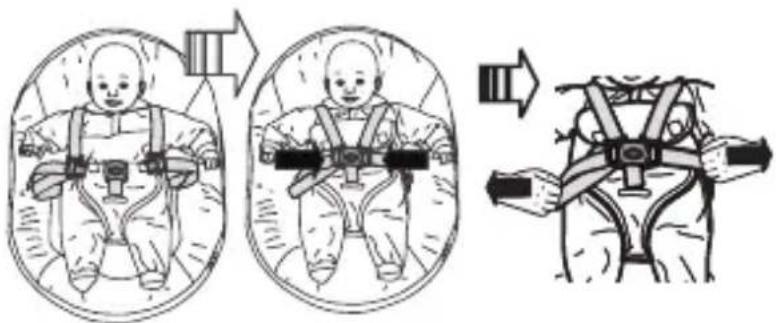
2. Safety belts
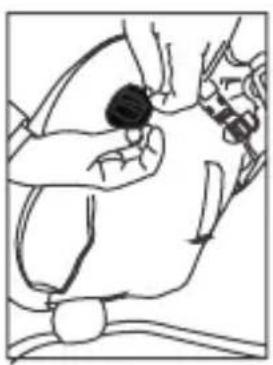
- To undo the belts, unfasten the buckle cover and press the key on the belt buckle (fig. 9).
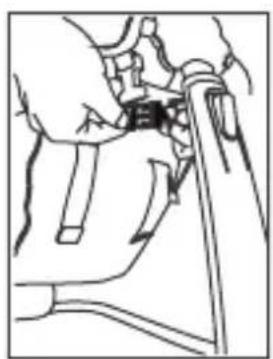
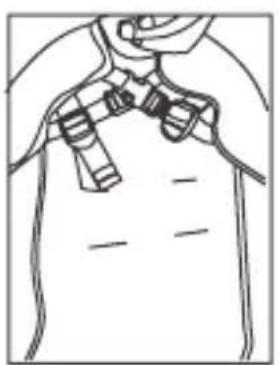
- To fasten the belts properly, pull the child's hands through the harness, as showed in the figure 10 and connect the belts in the buckle. Adjust the belts length to the child's body so that they fit tight but do not cause discomfort.
- Secure the belts with clips at the back side of the covering.
- The belts can be adjusted at 3 levels of height.
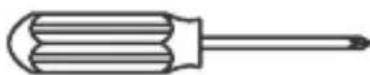
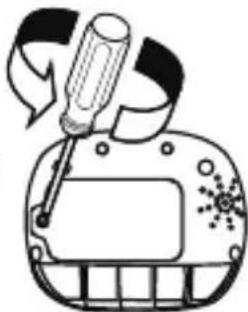
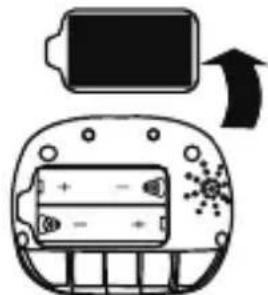
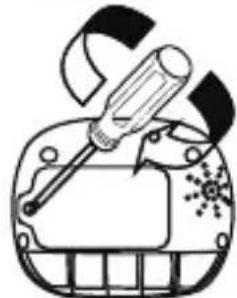
3. How to replace battery
To replace the battery, you need a hex screwdriver (not supplied).
To replace the battery, unscrew the bolt from the cover and place 2 LR6 batteries there, remember to follow marking. Close the cover by screwing the bolt in (fig. 12).
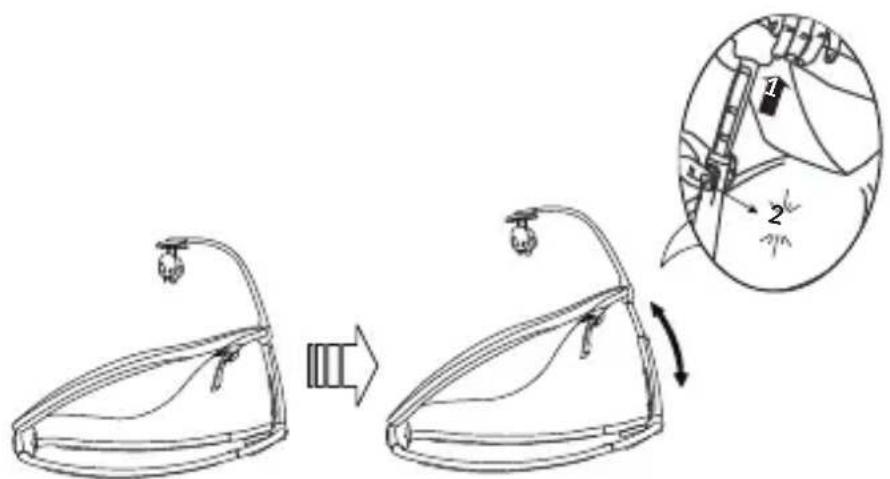
4. How to change height
You can set the height of the reclined cradle in one out of four available positions.
Note: The reclined cradle is equipped with a locking mechanism which secures the product against accidental change of height. To change the height of the reclined cradle, at first lift the backrest of the reclined cradle gently, next press the height adjustment button (13) and finally set the desired position.
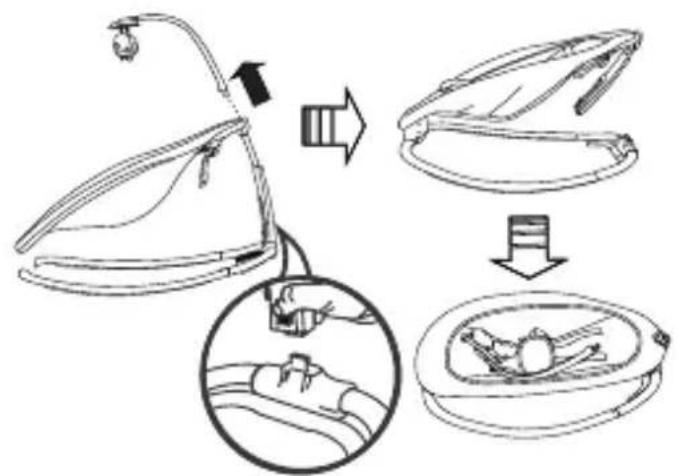
5. How to transport the reclined cradle
Pull out the bow with toys and then press the reclined cradle folding key (12).
Detach the rear part of the frame in the chair base, fold the product (fig. 14) and secure the bracket with the belt on the reverse of the covering.
Note! This position is intended for transporting the product only. It is forbidden to use the product in the transportation position.
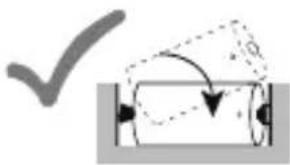
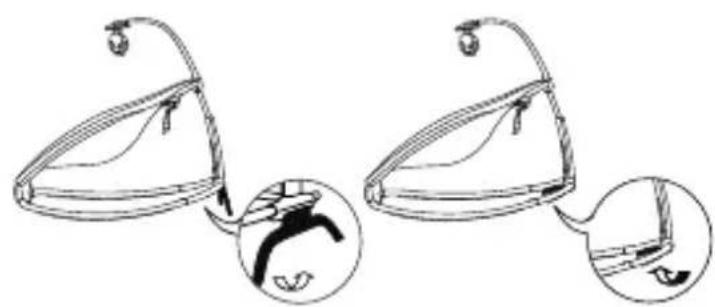
6. How to lock rocking
To lock reclined cradle rocking, pull out the lock located at the back of the frame (11) and lean it against the floor (fig. 15). To use the rocking feature again, slide the lock back in (fig. 16).
7. Sound and vibration module
The product is equipped with a sound-emitting and vibrating module (3) (fig. 17). To activate it, press the on/off switch (marked as D in the fig. 17). To change volume, press the key marked as A several times to set the desired volume.
Press the key marked as C several times to activate vibrations, change its intensity or disable this function. Press the key marked as B several Times to change the tune.
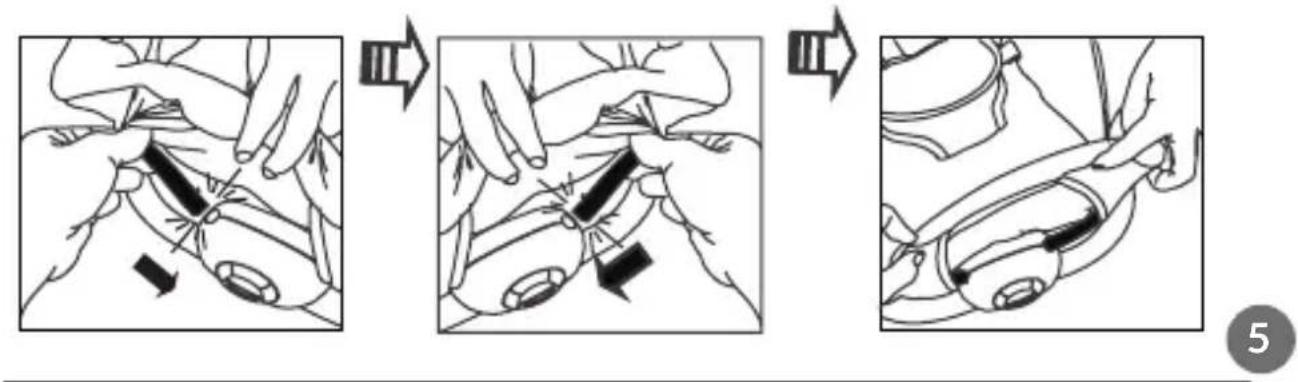
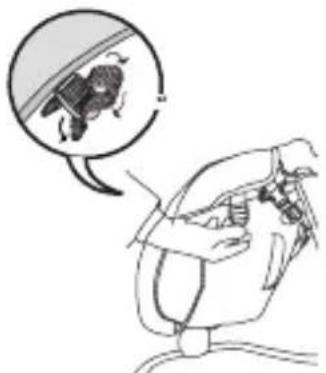
8. How to disassemble the covering
Detach the protective buckles at the back of the covering. Loosen safety belts of the product. Use a longitudinal item to press the clip located at the bottom of the module. Detach the frame of the product and remove the covering.
How to clean and maintain
Wash the upholstery manually at the temperature of up to 30 °C with the use of a soft detergent (e.g. soap). Do not bleach the upholstery, do not dry it mechanically or iron Clean the frame, bow and toys with a wet cloth immersed in a soft detergent. It is forbidden to bleach or use caustic cleaning agents. It is forbidden to immerse these elements in water.
The pictures are for reference only. The real design of the products may differ from the pictures presented.

The product complies with requirements of EU directives.
Pursuant to the Directive 2012/19/EU, this product is subject to selective collection. The product must not be disposed of along with domestic waste as it may pose a threat to the environment and human health. The worn-out product must be handed over to the electrics and electronics recycling center.
Drogi Kliencie!
BrandLine Group Sp. z o.o.
BrandLine Group Sp. z o.o.
EN: Simplified EU / EC declaration of conformity
BrandLine Group Sp. z o. o. hereby declares that the reclined cradle Pascal complies with the directive: 2014/30/UE - EMC Directive, 2009/48/EC - Toy Directive (Toy set only). Full content of EU / EC declaration of conformity is available on the following website:
Detailed warranty conditions are available on the website:
Thank you for purchasing our product