USER MANUAL Blossom Lionelo
natural_image
Line drawing of a baby care machine with star-shaped and light bulb components (no text or symbols)

C

natural_image
Diagram of a curved mechanical component with a labeled arrow and 'a' indicating direction (no text or symbols beyond labels)

natural_image
Two technical line drawings of a mechanical device with labeled parts (a and b), showing a rotation arrow indicating motion (no text or symbols beyond labels)

natural_image
Line drawing of a car seat assembly with a cable and plug, no text or symbols present
natural_image
Line drawing of a baby washing machine with a close-up inset showing the device's rotation (no text or symbols)
natural_image
Line drawings of a device with curved arms and a connector, shown in two different states (no text or symbols)
natural_image
Two identical diagrams of a device with curved and straight ends, showing mechanical components (no text or symbols)
Dear Customer!
In case of any questions or comments on the purchased product, please contact us: help@lionelo.com
Producer:
BrandLine Group Sp. z o. o.
IMPORTANT! READ CAREFULLY AND KEEP FOR FUTURE REFERENCE WARNING
- Never leave the child unattended.
- Stop using the product when the child starts trying to sit up.
- Never use this product on an elevated surface (e.g. a table).
- Always use the restraint system.
- Never use the toy bar to carry the product.
- Do not move or lift this product with the baby inside it.
- Do not let the child sleep in the product. The product is not intended as a substitute for a baby cot. If the child falls asleep, move them to a suitable cot.
- Do not use the product if any of the components are damaged or missing.
- Do not use accessories or replacement parts other than those approved by the manufacturer.
- WARNING: This product contains a coin/button battery. A coin/button battery can cause serious internal chemical burns if swallowed.
- WARNING: Dispose of used batteries immediately. Keep new and used batteries away from children. If you think batteries may have been swallowed or placed inside any part of the body, seek immediate medical attention.
- The transformer used with the product should be regularly inspected for damage to the cord, plug, housing, and other components. Do not use it if any damage is found.
- The product should only be used with the recommended transformer.
- When the product is connected to a music player, ensure that the volume of the music player is set to a low value.
BATTERY WARNINGS
- Disposable, non-rechargeable batteries should not be charged.
- Avoid mixing different types of batteries or combining new and used batteries in the device.
- Ensure batteries are inserted with the correct polarity.
- Remove used batteries from the remote control.
- The power supply terminals must not be short-circuited.
- If the product is not used for a long period of time, remove the batteries from the compartment in the remote control.
Frequency: 2.402–2.480GHz (BT)
RF output power: -2.52dBm (BT)
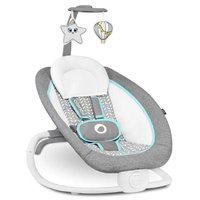
LIST OF PRODUCT PARTS (FIG. A)
-
Base
-
Seat
-
Seat bracket
- Remote control
- AC adapter
- Allen key
- Screw x2
- Toy bar
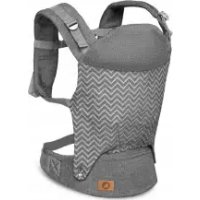
CONTROL PANEL (FIG. B)
- ON/OFF switch
- Rocking mode selection
- Tune selection
- Changing the rocking speed
- Rocking speed indicator
- Changing the volume
- Volume indicator
REMOTE CONTROL (FIG. C)
- ON/OFF switch
- Rocking mode selection
- Rocking speed selection
- Tune selection
- Volume up/down
INSTALLING REMOTE CONTROL BATTERIES (FIG. D)
- To open the battery compartment cover, slide the locking element (a, Fig. D) and pull out the battery tray.
- Place a button battery in the tray and then insert the entire tray into the remote control.
- Close the battery compartment. A clicking sound indicates that the compartment is closed correctly.
ASSEMBLY RECLINER ASSEMBLY
-
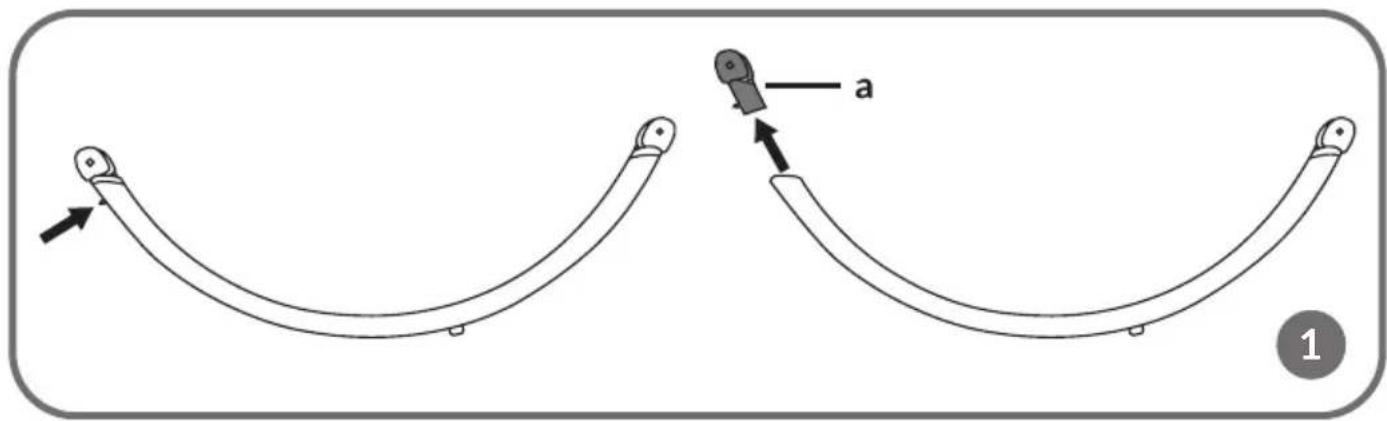
Press the metal tab to remove the plastic connecting piece from the seat bracket (a, Fig. 1).
-
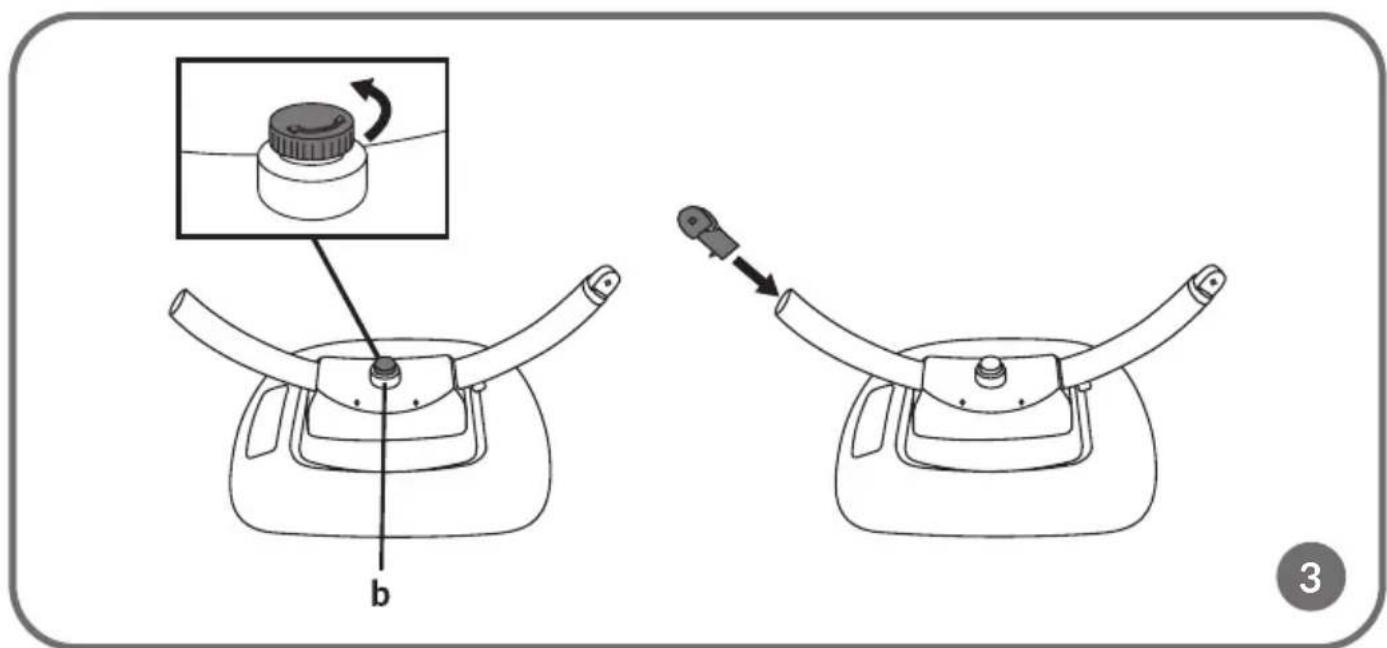
Rotate the knob in the centre of the recliner base to the Loose setting (b, Fig. 3) and then slide the seat support (3, Fig. A) into the fixing holes on both sides of the recliner base (a, Fig. 2).
-
Securely tighten the knob in the centre of the recliner's base (b, Fig. 3), then reattach the connecting element to the top of the seat bracket (a, Fig. 1). Before using the recliner, ensure the knob is securely tightened.
-
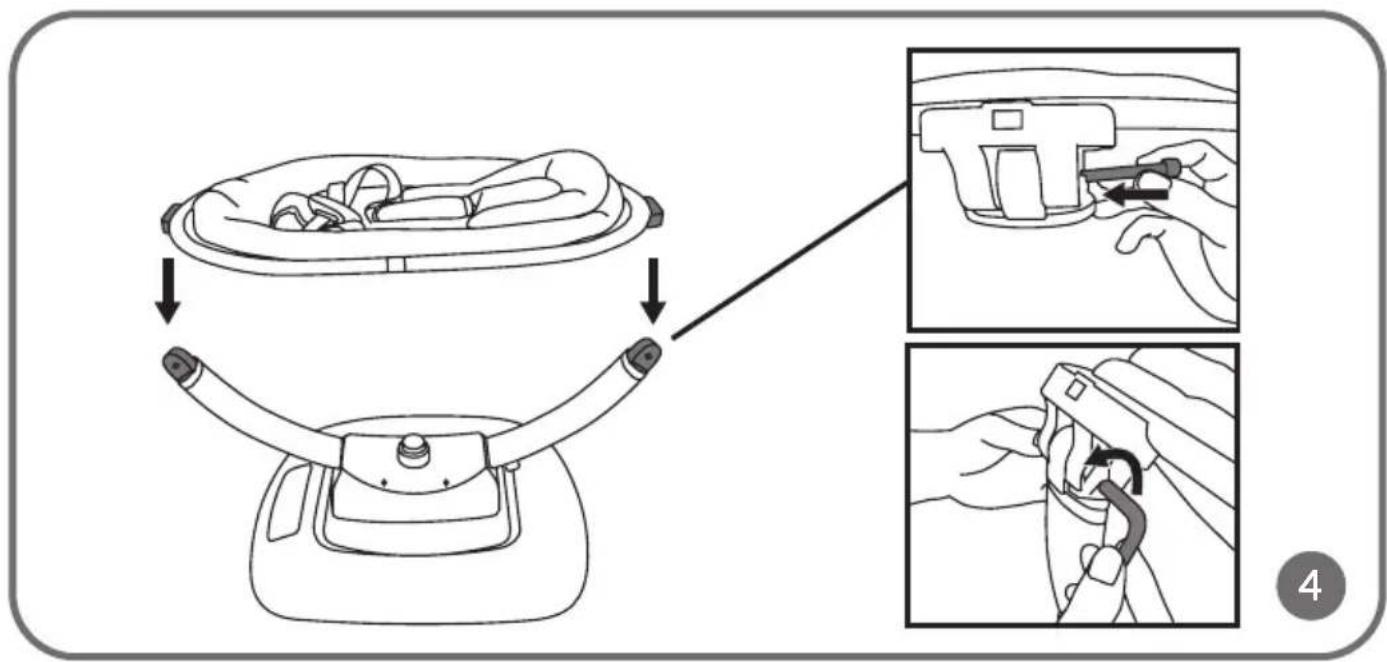
Attach the seat on both sides of the bracket. Secure the connecting elements with screws (Fig. 4). Check that the mounting direction is correct. Ensure that the metal tab is positioned on the outside of the seat bracket (b, Fig. 5). A clicking sound indicates that the elements are mounted correctly.
MOUNTING THE FABRIC-COVERED SEAT
Place the fabric-covered seat on the seat frame. Secure the zip and Velcro fasteners on both sides of the seat frame.
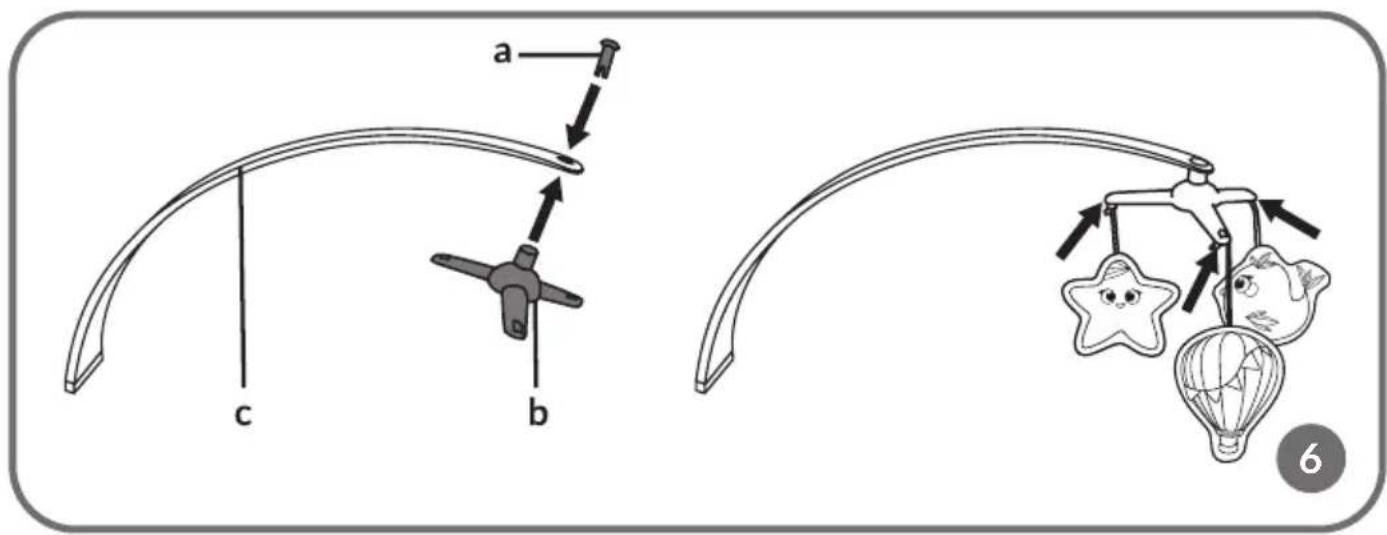
ATTACHING THE TOY BAR
- Secure the carousel (b, Fig. 6) to the toy bar (c, Fig. 6) using the plastic connector. Attach the hanging toys to the carousel.
- To assemble the toy bar, slide it into the guides in the seat frame (a, Fig. 7). If the installation is correct, you will hear a click (Fig. 7).
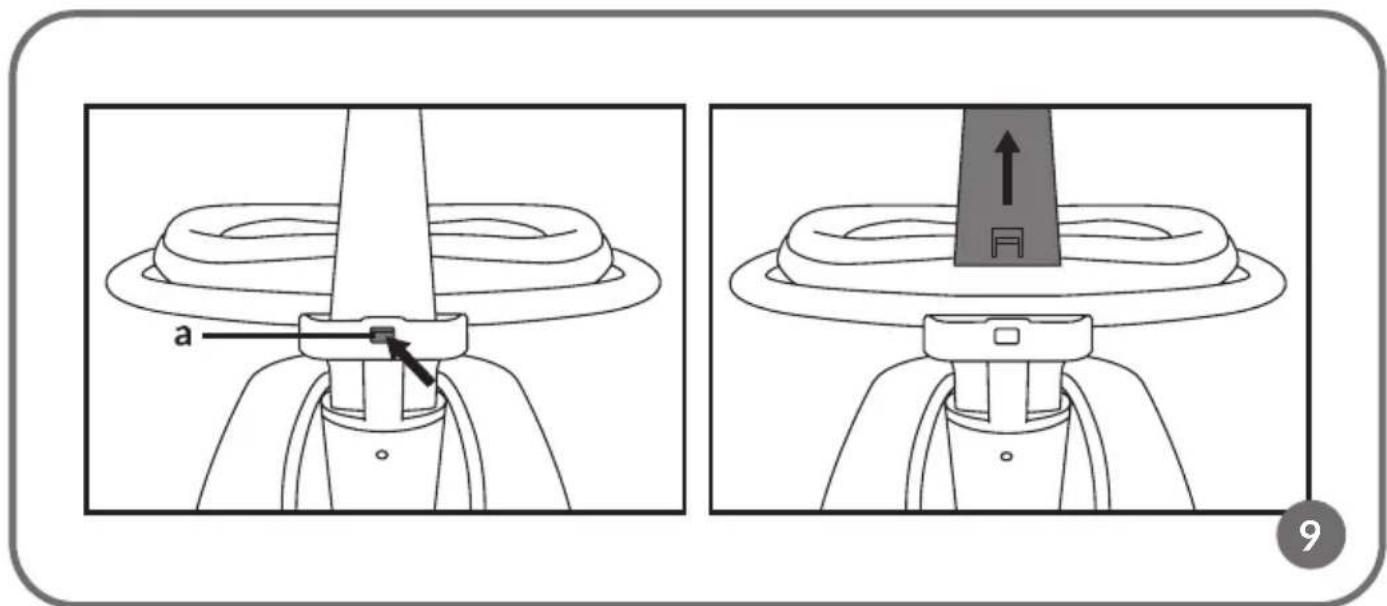
- To detach the toy bar, press the plastic tab (a, Fig. 9) and then pull the toy bar upwards.
DISASSEMBLY
DISASSEMBLING THE RECLINER
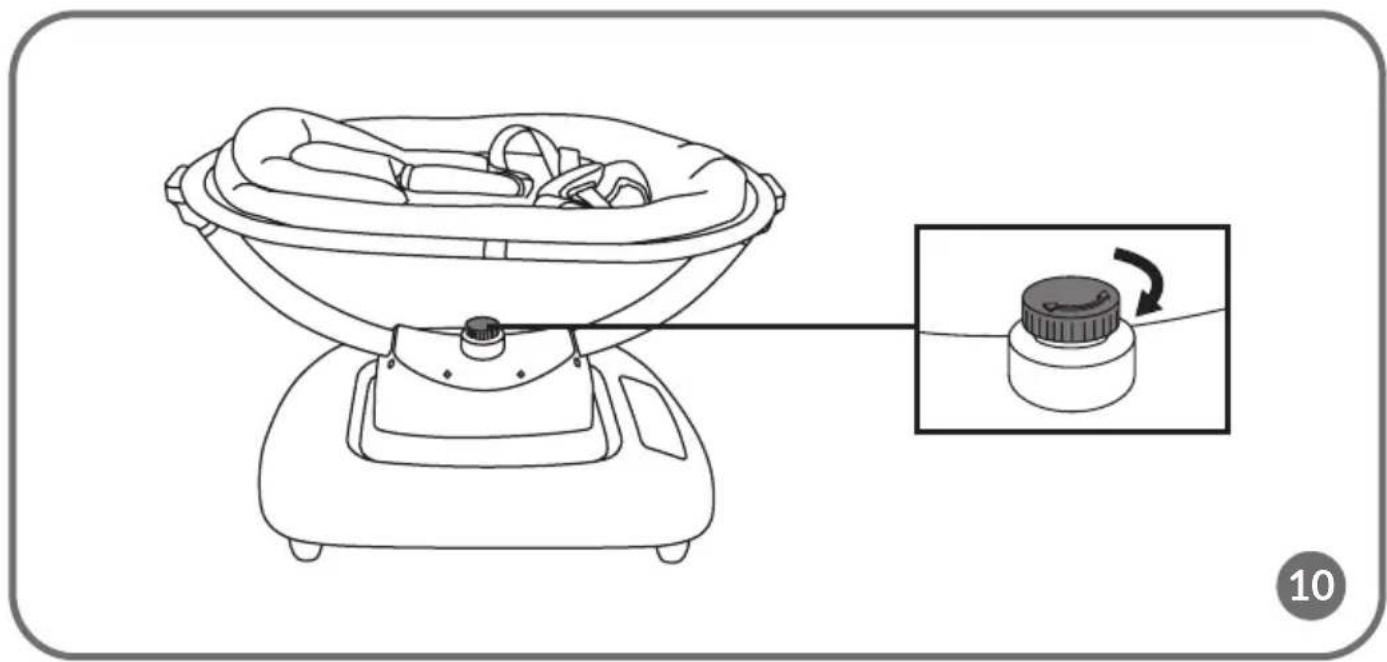
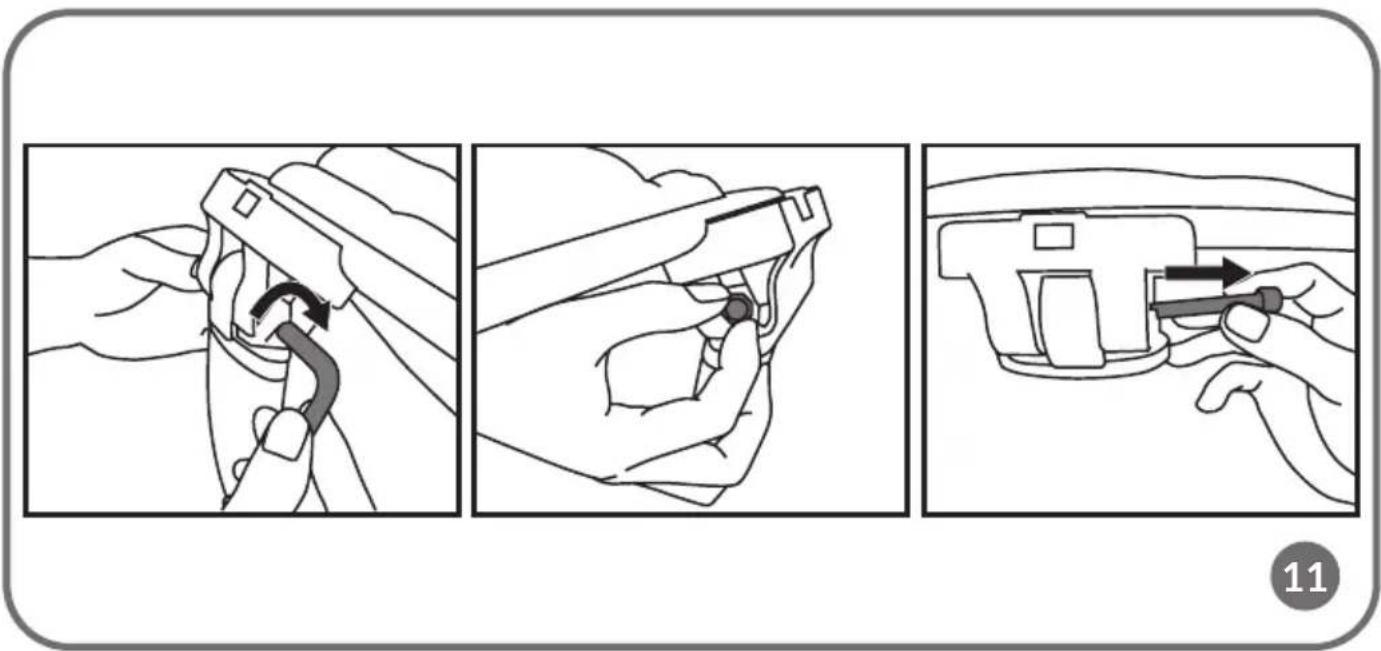
- Loosen the knob in the centre of the recliner base (Fig. 10).
- Loosen the screws connecting the seat components (Fig. 11) and disassemble them.
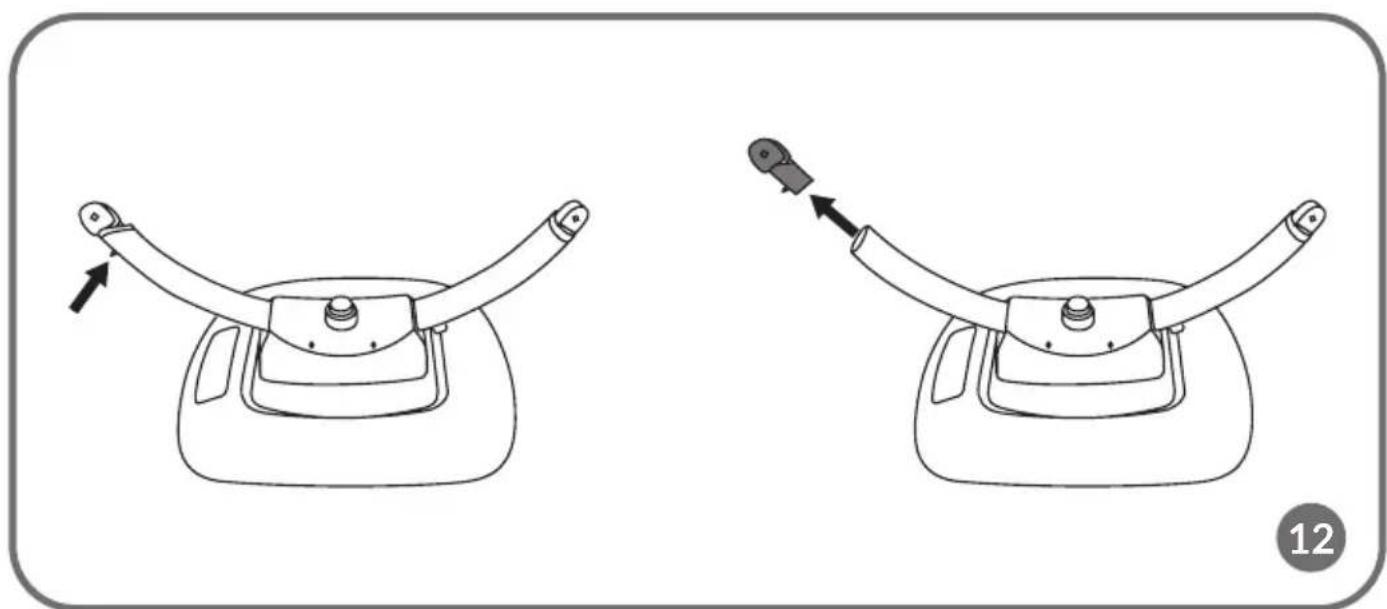
- Press the metal tab to remove the connecting piece from the seat bracket (Fig. 12).
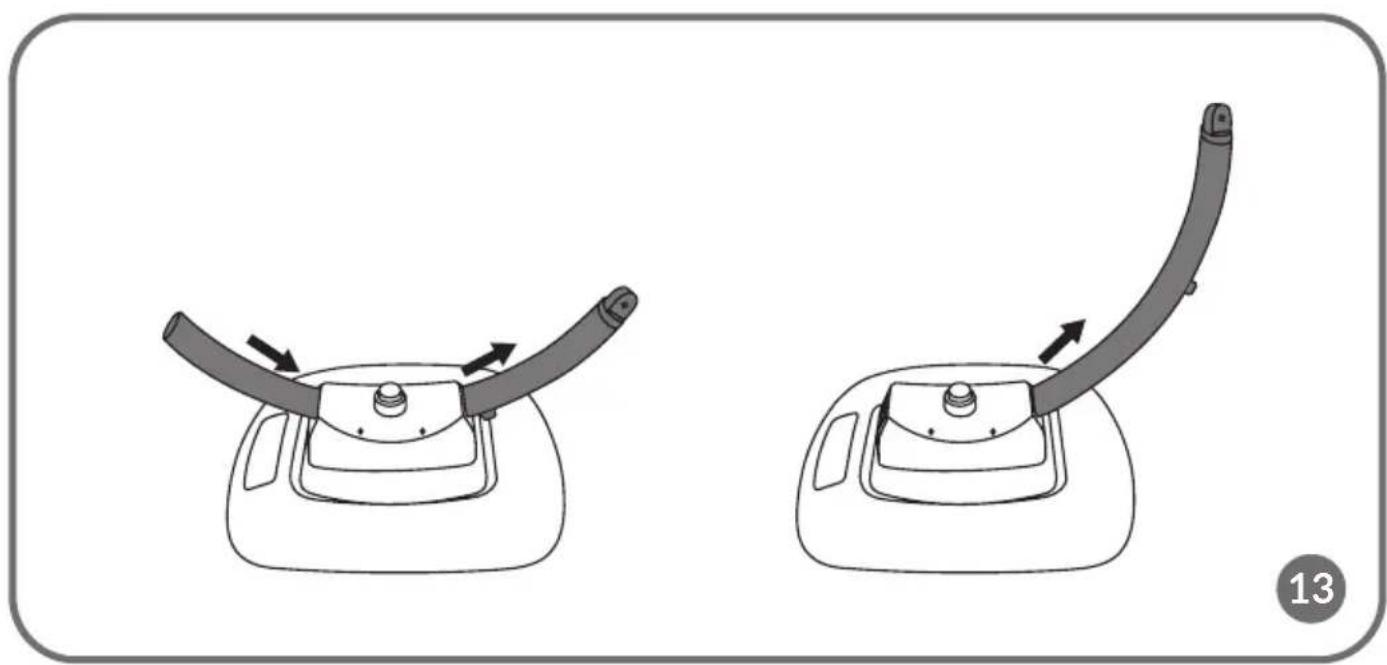
- Slide the seat bracket (Fig. 13) out of the fixing holes.
REMOVING THE FABRIC-COVERED SEAT
To remove the fabric-covered seat, unfasten the zip and undo the Velcro fasteners on both sides of the seat frame.
OPERATION
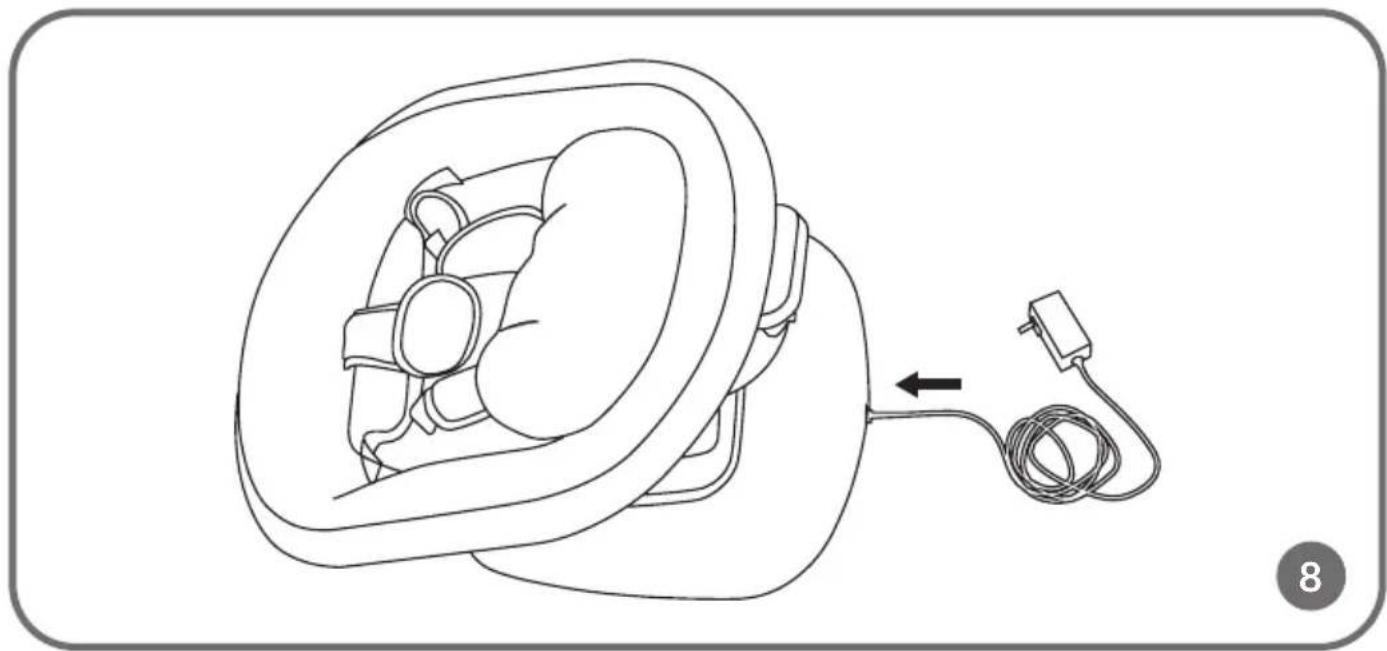
MAINS POWER SUPPLY
To access all of the product's functions, connect the recliner base to a power supply (Fig. 8) using the included 12V 2A power adapter (5, Fig. A). Next, press the ON button on the remote control (1, Fig. C) or on the control panel (1, Fig. B).
Rocking mode
The product offers a selection of five different rocking modes. When switched on, the button with the selected rocking mode will illuminate in blue. To stop the rocking motion, press the rocking mode selection button again. To change the rocking motion, press the rocking mode selection buttons on the control panel (2, Fig. B) or on the remote control (2, Fig. C).
The product also offers 5-position rocking speed adjustment. To change the rocking speed, press the rocking speed change button on the control panel (4, Fig. B) or on the remote control (3, Fig. C). Depending on the mode, the position of the LED light (5, Fig. B) will also change. When the speed is at the highest level, pressing the rocking speed change button on the control panel (4, Fig. B) or on the remote control (3, Fig. C) again will automatically reset it to the lowest level.
Seat tilt adjustment
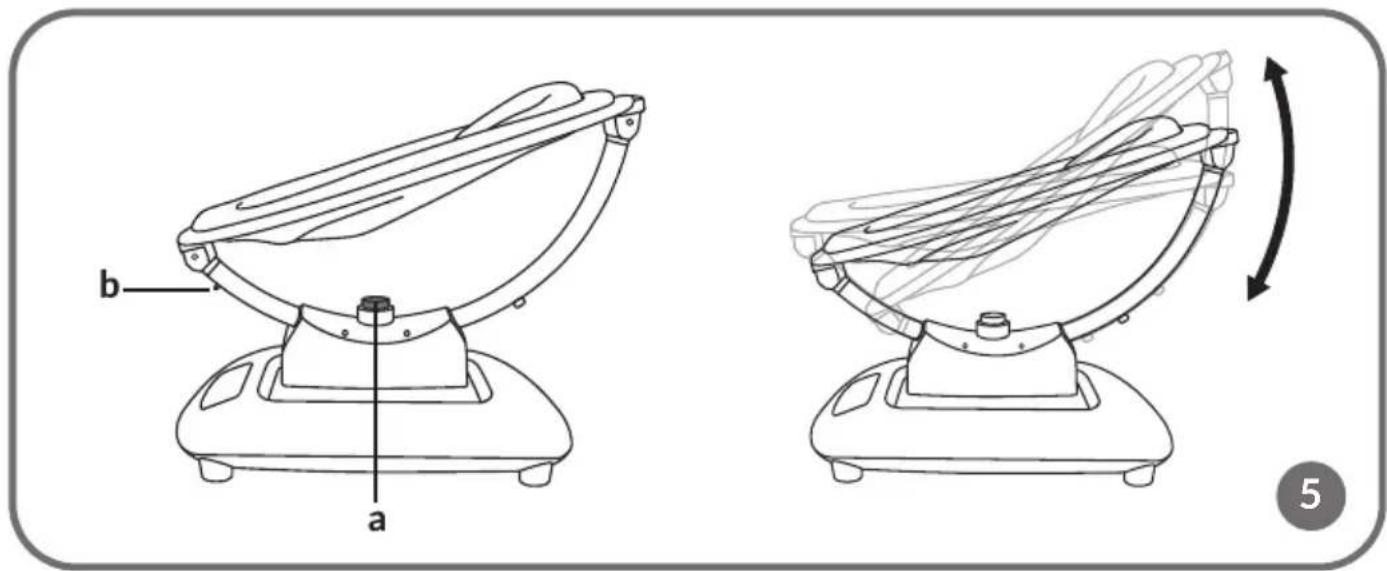
To adjust the seat position, turn the knob (a, Fig. 5) on the recliner base and adjust the seat to the desired tilt (from 10^ to 40^ ). After adjusting the seat, fasten the knob tightly.
Important: Do not change or adjust the position of the recliner when the child is inside.
Tune selection
Press the tune selection button on the control panel (3, Fig. B) or on the remote control (4, Fig. C). When switched on, the button will illuminate in blue. To switch off the tune, press the button again.
Volume up/down
To change the volume, press the volume change button on the control panel (6, Fig. B) or on the remote control (5, Fig. C). The device has five volume levels.
Each time the button is pressed, the volume increases. Depending on the mode, the position of the LED light (7, Fig. B) will also change. When the volume is at the highest level, pressing the volume change button on the control panel (6, Fig. B) or on the remote control (5, Fig. C) again will automatically reset it to the lowest level.
Bluetooth mode
To use the recliner in Bluetooth speaker mode, activate the Bluetooth function on your mobile device. Open the settings menu and look for available devices. The list will display "lionelo" – select this device to connect. Once the pairing is complete, your mobile device will connect automatically to the speaker.
CLEANING AND MAINTENANCE
- To remove minor soiling from the seat cover, clean it with a damp cloth and a mild detergent.
- The cover can be removed and hand-washed at temperatures up to 30^ C, using a mild detergent.
- Do not use bleach or other aggressive cleaning agents.
- Do not machine wash or tumble dry.
- Lay out the wet cover and let it dry completely.
- Clean the frame and plastic elements with a damp cloth and a mild detergent. Dry the frame and plastic elements thoroughly before using the product again.
- Store the product in a dry place, away from heat and humidity.
The photos are for reference only, the actual appearance of products may differ from the photos.
PL
Drogi Kliencie!
Frequenz: 2,402-2,480GHz (BT)
Dažnis: 2,402-2,480GHz (BT)
MONTÁŽ OBLOUKU NA HRAČKY
LISTE OVER PRODUKTDELE (FIG. A)
LEPOTUOLIN PURKAMINEN
BrandLine Group Sp. z o. o. hereby declares that the "BLOSSOM" product complies with the directive: 2014/53/EU - RED Directive, 2011/65/EU - RoHS Directive, 2009/48/EC - Toy Directive (Toy set only). Full content of EU / EC declaration of conformity is available on the following website: