
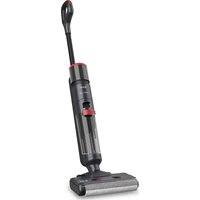
SS-16160 - Vacuum Cleaner Sogo - Free user manual and instructions
Find the device manual for free SS-16160 Sogo in PDF.

| Product type | Cordless stick vacuum |
| Model | SS-16160 |
| Brand | Sogo |
| Power supply | Li-ion battery 29.6V / 2200 mAh |
| Runtime | 30 min (high speed) / 45 min (low speed) |
| Charging time | 4 to 5 hours |
| Power | 135 W |
| Suction | 7 kPa (low speed) / 10 kPa (high speed) |
| Speeds | 2 speeds (normal and turbo) |
| Filter type | Washable filter (casing + filter) |
| Dust container capacity | Not specified (transparent container) |
| Included accessories | Electric brush, metal tube, bristle brush, long crevice tool, wall mount, charging base |
| Functions | Stick vacuum and handheld vacuum (2 in 1) |
| Noise level | Not specified |
| Maintenance | Clean the filter with water, dry completely before reassembly |
| Safety | Automatic shut-off if low battery, do not use near water, do not vacuum liquids |
| Usage | Household only, dry surfaces |
| Repairability | Manufacturer-recommended spare parts, repair by qualified personnel |
| Warranty | Not specified (after-sales service: www.sogosat.com) |
| Dimensions (approx.) | Height ~110 cm (assembled), width ~25 cm |
Frequently Asked Questions - SS-16160 Sogo
User questions about SS-16160 Sogo
0 question about this device. Answer the ones you know or ask your own.
Ask a new question about this device
Download the instructions for your Vacuum Cleaner in PDF format for free! Find your manual SS-16160 - Sogo and take your electronic device back in hand. On this page are published all the documents necessary for the use of your device. SS-16160 by Sogo.
USER MANUAL SS-16160 Sogo
natural_image
White Cyclone System vacuum cleaner with red and white body, no visible text or symbols on the device itself.
ASPIRADOR VERTICAL RECARGABLE RECHARGEABLE STICK VACUUM CLEANER ASPIRATEUR DE BÂTON RECHARGEABLE ASPIRADOR DE PAU RECARREGÁVEL WIEDERAUFLADBARE HANDSTAUBSAUGER ASPIRAPOLVERE BASTONE RICARICABILE
natural_image
Technical line drawing of a mechanical component before and after assembly (no text or symbols)natural_image
Technical line drawing showing a mechanical component being adjusted to form a long rod (no text or symbols present)natural_image
Line drawing of a handheld device inside a transparent cube (no text or symbols)Pared
natural_image
Technical line drawing of a mechanical component with an arrow indicating direction (no text or symbols)natural_image
Circular mechanical component with concentric rings and a central axis, no visible text or symbolsnatural_image
Simple line drawing of two floating structures on water, one with a grid pattern and the other with a rectangular base (no text or symbols)natural_image
Simple line drawing of a sun above two trash bins (no text or symbols)natural_image
Technical diagram showing a mechanical component before and after assembly, with no visible text or symbols.natural_image
Technical line drawing of a mechanical component with a side view showing internal structure and an arrow indicating direction (no text or symbols)natural_image
Line drawing of a handheld device with a downward arrow indicating motion or force (no text or symbols)Please read these instructions carefully before use. This manual can also be downloaded from our website www.sogo.es.
Check that your mains voltage corresponds to that stated on the appliance.
- Only use the appliance for domestic purposes and household or similar applications such as: - Staff kitchen areas, in shops, offices and other working environments.
- By clients in hotels, motels and other residential type environments.
- Environment type like: Farm Houses, Bed and Breakfast.
- Only use the appliance in the way indicated in these instructions.
- Never use this unit near bathtub, shower, wash-hand basins or other containers with water.
- Never use this apparatus near water projections.
- Never use this apparatus with the wet hands.
- If, unfortunately the apparatus is wet, immediately withdraw the cord of the socket-outlet.
- Inform potential users of these instructions.
- Never leave the appliance unsupervised when in use.
- The appliance must be used only for its intended purpose. No responsibility can be taken for any possible damage caused by incorrect use or improper handling.
- Children and persons with disabilities are not always aware of the danger posed by the use of
appliances.
-
This device can be used by children aged 8 years and older and adults, with reduced physical, sensory or mental capabilities or lack of experience and knowledge, if they have been given supervision or instruction concerning use of the appliance in a safe way and understand the hazards involved.
-
Children shall not play with the appliance.
-
Cleaning and user maintenance shall not be made by children unless they are supervised.
-
Keep the appliance and its cord out of reach of children aged less than 8 years of age when it is energized or cooling down.
-
This device is not a toy, do not leave small children or people with disabilities to play with.
-
In order to ensure your children's safety, please keep all packaging (plastic bags, boxes, polystyrene etc.) out of their reach.
-
Caútión ! Do not allow small children to play with the foil:
THERE IS A DANGER OF SUFFOCATION !
-
From time to time check the cord for damages. Never use the appliance if cord or appliance shows any signs of damage.
-
Never immerse the appliance in water or any other liquid for any reason whatsoever.
-
Never place it into the dishwasher.
-
Never use the appliance near hot surfaces.
-
Do not operate the appliance with a damaged cord or plug, or after the appliance has been damaged in any manner.
-
If the supply cord or appliance is damaged, it must be replaced by the manufacturer or its service agent or a similarly qualified person in
order to avoid a hazard.
-
Disconnect the power source cable before any operation of cleaning of maintenance and accessories assembly.
-
Never use the appliance outside and always place it in a dry environment.
-
Never use accessories, which are not recommended by the producer. They could constitute a danger to the user and risk to damage the appliance.
-
Never use any other connector than the one provided.
-
Never move the appliance by pulling the cord. Make sure the cord cannot get caught in any way.
-
Never wind the cord around the appliance and do not bend it.
-
Ensure that the power cord does not come into contact with hot parts of this unit.
-
Make sure the appliance has cooled down before cleaning and storing it.
-
The temperature of accessible surfaces may be very high when the appliance is operating. Never touch these parts, of apparatus, to avoid burning itself.
-
Make sure the appliance never comes into contact with flammable materials, such as curtains, cloth, etc...& the power cord and plug do not come in contact with water.
-
Before cleaning, always unplug the appliance from the power supply and let it cool down.
-
This appliance is not intended to be operated by means of an external timer or separate remote control system.
-
Always place the unit on a flat surface. Ensure,
also, not to cover the device and not to put anything on it.
-
Always remove the plug from the wall socket when the appliance is not in use.
-
When using an extension lead always make sure that the entire cable is unwound from the reel. Use solely CE approved extension leads.
-
Incorrect operation and improper use can damage the appliance and cause injury to the user.
-
This device, designed for home use, complies with standards relating to this type of product.
-
The appliance must be used and rested on a table or flat & stable surface.
-
The item must not be left unattended when it is connected to main supply.
-
The item is not to be used, if it has been dropped or if there are visible signs of damage or if it is leaking.
-
This appliance is only intended for household use.
Personal Safe
- Store it indoors in a dry place out of the reach of children.
- Always use responsibly. This appliance can be used by children aged from 10 years of experience and knowledge if they have been given supervision or instructions concerning use of the appliance in a safe way and understand the hazards involved.
- Not intended for use by children age 10 and under. Close supervision is necessary when used or maintained near children.
- Use only manufacturers recommended attachments as described in this manual misuse or use of any accessory or attachment other than those recommended, may present a risk of personal injury.
- Take extra care when cleaning stairs.
- Keep the appliance and accessories away from hot surface.
- Do not block the appliances openings or hinder air flow, keep openings free of any objects including dust, lint, clothing, fingers (and all parts of the body).
Electrical Safety
- Only use batteries and chargers supplied by the manufactur.
- Never modify the charger in any way.
-
The charger has been designed for a specific voltage. Always check that the voltage the same as that stated on the rating plate.
-
A charger that is suitable for one type of battery pack may create a risk of fire when used with another battery pack.
- Before using, check the charger cord for signs of damage or ageing. A damaged or entangled charger cord increases the risk of fire and electric shock.
- Do not abuse the charger cord.
- Never carry the charger by the cord.
- Do not pull the cord to disconnect it from a socket, grasp the plug and pull to disconnect it.
- Don't wrap the cord around the charger when storing.
- Keep the charger cord away from hot surfaces and sharp edges.
- The supply cord cannot be replaced. If the cord is damaged, the charger should be replaced.
- Do not handle the charger or the appliance with wet hands.
- Do not store or charge the appliance outdoors.
- The charger must be removed from the socket before removing the battery, cleaning or maintaining the appliance.
Battery Safety
- This appliance includes Li-ion batteries, do not incinerate batteries or expose to high temperatures, as they may explode.
- Please use the original battery. Using the wrong type of battery may cause danger.
- The battery is prohibited to be disassembled, hit, squeezed or thrown into the fire. If severe
bulging occurs, stop using it.
- To avoid liquid leakage, do not disassemble or collide the battery.
- Shorting the battery terminals may cause burns or fire.
- When you dispose the appliance, remove the battery and dispose the battery safely in accordance with local regulations.
Service
- Before using the appliance and after any impact, check for signs of wear of damage and repair as necessary.
- Do not use the appliance if any part is damaged or defective.
- Repairs should be carried out by a service agent or a suitably qualified person in accordance with relevant safety regulations. Repairs by unqualified people could be dangerous.
- Never modify the appliance in any way as this may increase the risk of personal injury.
- Only use replacement parts or accessories provided or recommended by manufacturer.
Intended Use
- This appliance has been designed for domestic dry vacuum cleaning only.
- Do not pick up liquids or use on wet surfaces.
- Do not pick up anything that is flammable, burning or smoking.
- Use only as described in this manual.
- Don't use on concrete, tarmacadam or other rough surfaces.
Warning
-
Do not use water, solvents, or polishes to clean the outside of the appliance: wipe clean with a dry cloth.
-
Never immerse the unit in water and do not clean in a dish washer Remind again: To reduce the risk or fire, electric shock or injury, please observe above instructions.
INSTRUCTION OF COMPONENTS

HOW TO USE
I. Use as the stick vacuum cleaner:
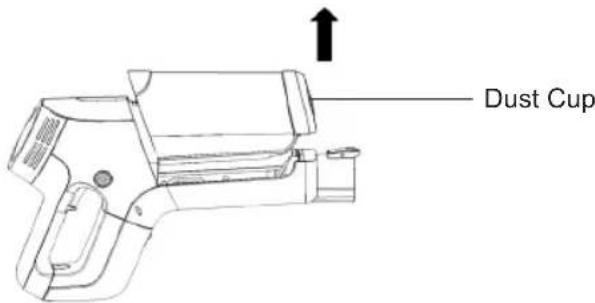
- Assemble the battery into the dust cup, make sure the battery bolt head is inserted into thr dust cup slot rightly as below.
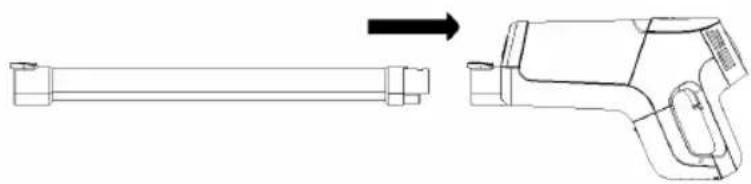
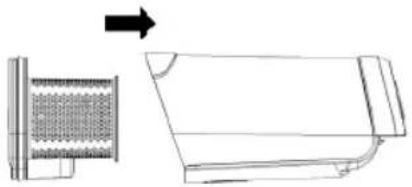
- Attach the metal tube to the main part as below until the hearing the click sound.
natural_image
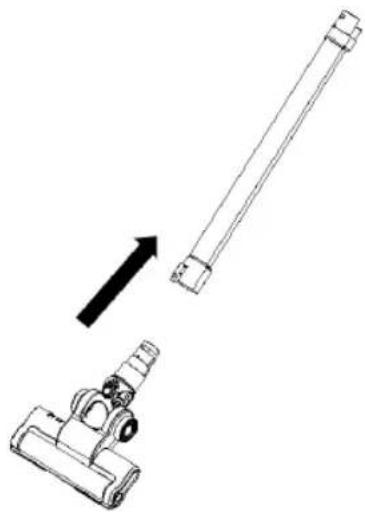
Technical line drawing of a mechanical component before and after assembly (no text or symbols)- Attach the power brush to the tube as showed below.
natural_image
Technical line drawing of a mechanical component with an arrow indicating assembly (no text or symbols)- Press the switch to start the machine.
Two suction speeds control.
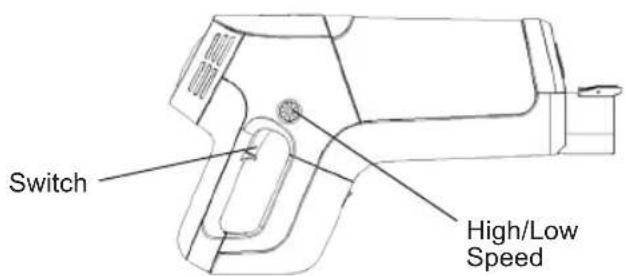
a. Normal speed
First press to use the low speed
b. Turbo Speed
Press again to use the turbo speed
c. Turn Off
Press for the third time to stop the machine
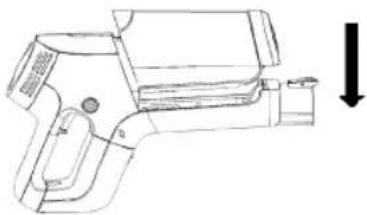
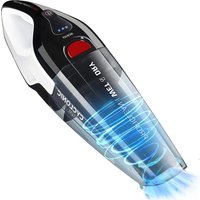
II. How to use as a hand vacuum:
Insert the accessory(bristle brush or long crevice) to the main part as showed below until hearing the click sound
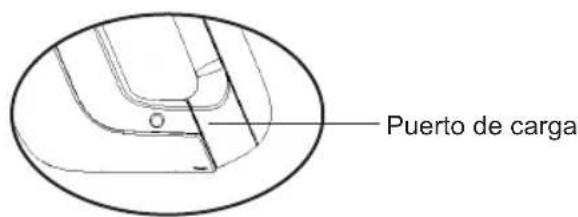
III. How to charge:
1) When only one indicator light is blinking, please turn off the appliance, put it back to the charging base, then make sure the plug of the charger has been inserted into the socket. When charging, the indicate lights will become flashing green
Note : How to use the wall bracket
-
Hang it on the wall with screws
-
Use 3M stickers to make the bracket glued to the wall, for storing the vacuum cleaner (make sure the height is the same as the vacuum cleaner itself, total hanging away from floor is not acceptable)
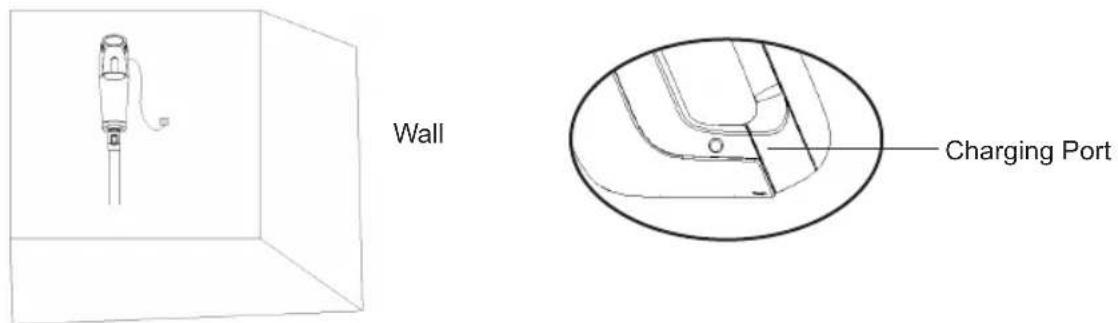
2) It will have 3 green lights on after fully charged.

IV. How to Maintain the Filter:
1) Press the handle locker to remove the battery from dust cup
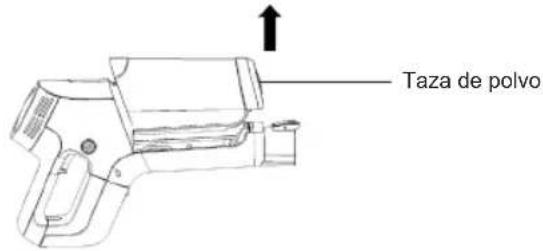
2) Separate and remove the top cover as showed below
natural_image
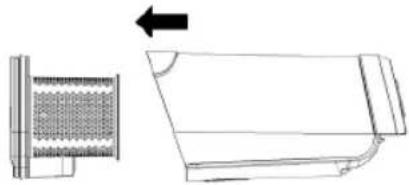
Technical line drawing of a mechanical component with an arrow indicating direction (no text or symbols)3) Take out the filter case, then take out the filter
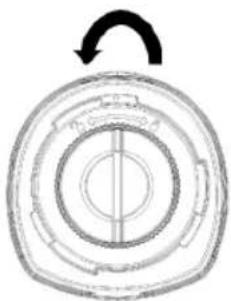
natural_image
Circular mechanical component with concentric rings and a central axis (no text or symbols)4) Wash the filter case and the filter by water
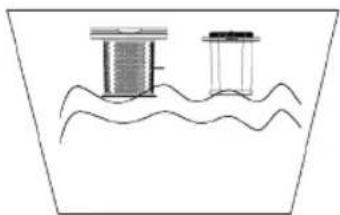
natural_image
Simple line drawing of two floating structures on water, one with a grid pattern and the other with a rectangular base (no text or symbols)5) Please dry the filter and the filter case completely before assembling back
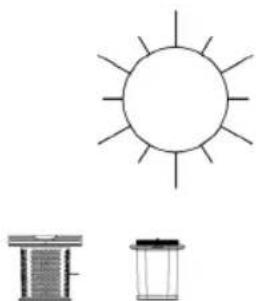
natural_image
Simple line drawing of a sun above two trash bins (no text or symbols)6) After drying, assemble the filter to the case
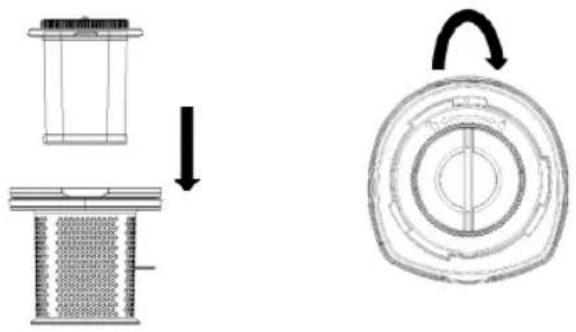
natural_image
Technical diagram showing a mechanical component before and after assembly, with no visible text or symbols.7) Put the filter case back to the dust cup
natural_image
Technical line drawing of a mechanical component with a side view showing internal structure (no text or symbols)8) Assemble the top cover to the dust cup
natural_image
Line drawing of a handheld device with a downward arrow indicating motion or force (no text or symbols)TROUBLESHOOTING:
| Suction gets weak 1. Empty the dust cup2. Check if the dust cup is installed correctly3. Check if the filter case and the filter are installed correctly4. Clean the filter |
| Stop working 1. Charge the vacuum2. Clean the roller brush and the bearing thoroughly |
| Battery doesn’t hold a charger1. Check if the plug has been inserted already2. Check if the socket is useful |
TECHNICAL SPECIFICATION
Battery: 29.6V - 2200mAh
Charging time: 4 - 5 hours
Working time: 30 minutes (High speed) & 45 mins (low speed)
Power: 135W
Largest Suction: 7kpa Low speed & 10kpa High speed
MISES EN GARDE IMPORTANTES
natural_image
Technical line drawing of a mechanical component before and after assembly (no text or symbols)natural_image
Technical line drawing showing a mechanical component being adjusted to form a long rod (no text or symbols present)natural_image
Technical line drawing of a mechanical component with an arrow indicating direction (no text or symbols)natural_image
Circular mechanical component with concentric rings and a central axis (no text or symbols)natural_image
Simple line drawing of two containers on a surface with wavy lines below (no text or symbols)natural_image
Simple line drawing of a sun above two trash bins (no text or symbols)natural_image
Technical diagram showing a mechanical component before and after assembly, with no visible text or symbols.natural_image
Technical line drawing of a mechanical component with a side view showing internal structure (no text or symbols)natural_image
Line drawing of a handheld device with a downward arrow indicating motion or force (no text or symbols)RÉSOLUTION DES PROBLÈMES:
natural_image
Technical line drawing of a mechanical component before and after assembly (no text or symbols)natural_image
Technical line drawing showing a mechanical component being adjusted to form a cylindrical rod (no text or symbols present)natural_image
Technical line drawing of a mechanical component with a side view and an arrow indicating direction (no text or symbols)natural_image
Diagram of a circular mechanical component with concentric rings and a central axis (no text or symbols)natural_image
Simple line drawing of two floating structures on water, no text or symbols presentnatural_image
Simple line drawing of a sun above two trash bins (no text or symbols)natural_image
Technical diagram showing a mechanical component before and after assembly, with no visible text or symbols.natural_image
Technical line drawing of a mechanical component with an arrow indicating transformation (no text or symbols)8) Monte a tampa superior no copo de poeira

natural_image
Line drawing of a handheld device with a downward arrow indicating motion or force (no text or symbols)natural_image
Technical line drawing of a mechanical component before and after assembly (no text or symbols)natural_image
Technical line drawing showing a mechanical component being adjusted to form a cylindrical rod (no text or symbols present)natural_image
Technical line drawing of a mechanical component with an arrow indicating direction (no text or symbols)natural_image
Circular mechanical component with concentric rings and a central axis, no visible text or symbolsnatural_image
Simple line drawing of two rectangular structures partially submerged in wavy water, enclosed within a trapezoidal boundary (no text or symbols)natural_image
Simple line drawing of a sun above two trash bins (no text or symbols)natural_image
Technical diagram showing a mechanical component before and after assembly, with no visible text or symbols.natural_image
Technical line drawing of a mechanical component with a side view showing internal structure (no text or symbols)natural_image
Line drawing of a handheld device with a downward arrow indicating motion or force (no text or symbols)FEHLERBEHEBUNG:
natural_image
Technical line drawing of a mechanical component before and after assembly (no text or symbols)natural_image
Technical line drawing showing a mechanical component being adjusted to form a cylindrical rod (no text or symbols present)natural_image
Technical line drawing of a mechanical component with a side view and an arrow indicating rotation (no text or symbols)natural_image
Circular mechanical component with concentric rings and a central axis, no visible text or symbolsnatural_image
Simple line drawing of two floating structures on water, no text or symbols presentnatural_image
Simple line drawing of a sun above two trash bins (no text or symbols)natural_image
Technical diagram showing a mechanical component before and after assembly, with no visible text or symbols.natural_image
Technical line drawing of a mechanical component with a side view showing internal structure (no text or symbols)natural_image
Line drawing of a handheld device with a downward arrow indicating motion or force (no text or symbols)RISOLUZIONE DEI PROBLEMI:
DECLARATION OF CONFORMITY
This device complies with Low Voltage Directive 2014/35/EC, Electromagnetic Compatibility Directive 2014/30/EU, Directive 2015/863/EU on the restriction of the use of certain hazardous substances in electrical and electronic equipment and Directive 2009/125/EC on the eco-design requirements applicable to energy-related products.
DÉCLARATION DE CONFORMITÉ
This symbol means that in case you wish to dispose of the product once its working life has ended, take it to an authorised waste agent for the selective collection of waste electrical and electronic equipment (WEEE).

Imported by:
Sanysan Appliances S.L, NIF: B98753056, C/ Barcas 2, 2
46002 Valencia, Spain
Product made in P.R.C. – Designed by SOGO based on the European Quality Standards
Customer Service: www.sogosat.com / sogosat@sogosat.com / 0034 902 222 161


- THERE IS A DANGER OF SUFFOCATION !
- Personal Safe
- Electrical Safety
- Battery Safety
- Service
- Intended Use
- Warning
- HOW TO USE
- How to use as a hand vacuum:
- How to charge:
- How to Maintain the Filter:
- TECHNICAL SPECIFICATION
- MISES EN GARDE IMPORTANTES
- DECLARATION OF CONFORMITY
- DÉCLARATION DE CONFORMITÉ
- Imported by:
Brand : Sogo
Model : SS-16160
Category : Vacuum Cleaner