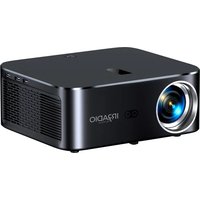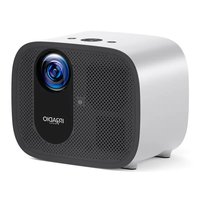
VDP-IR250HD - Projector Irradio - Free user manual and instructions
Find the device manual for free VDP-IR250HD Irradio in PDF.


User questions about VDP-IR250HD Irradio
0 question about this device. Answer the ones you know or ask your own.
Ask a new question about this device
Download the instructions for your Projector in PDF format for free! Find your manual VDP-IR250HD - Irradio and take your electronic device back in hand. On this page are published all the documents necessary for the use of your device. VDP-IR250HD by Irradio.
USER MANUAL VDP-IR250HD Irradio
natural_image
Illustration of an IR radio device with a circular lens and hexagonal patterned body (no text or symbols on the device itself)natural_image
Simple line drawing of a rectangular device with a circular top and rounded bottom, no text or symbols present.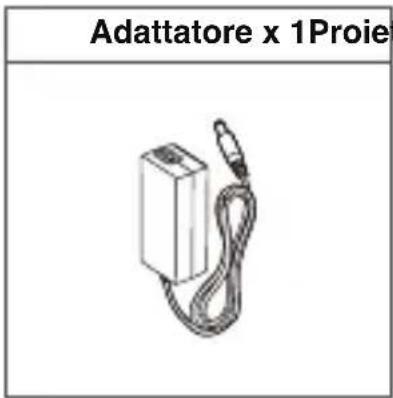
natural_image
Line drawing of a remote control with buttons and a red scroll (no text or symbols)
text_image
Manuale utente x 1Tel User Manual
text_image
comando x 1text_image
Labeled diagram of a remote control with numbered buttons and icons, including Netflix, Disney+, and other services.Inizia
Posizionamento
text_image
1.1m 40" 4.1m 150"natural_image
Two-step diagram showing a hand inserting a device into a battery, with no visible text or symbols.Accensione
text_image
nsione ② ① ③ ④ OKtext_image
Bluetooths Pairing to Enable Voice Search Please hold the remote time before Or the remote press the "Volume, limits" and "OK" keys together for about 40 seconds that releases. 20ms wireframe monitoring connectouttext_image
Select your Wi-Fi network AMT 2017.13 AMT 2018.10 AMT 2019.10 Apple COMPOS Apple Home Data LLC Send AMT 2020.10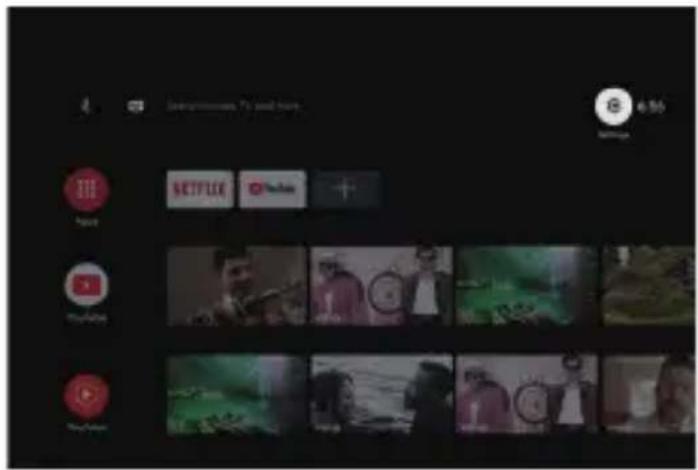
text_image
Screenshot of a mobile app interface showing navigation tabs, platform icons, and a timeline of video thumbnails.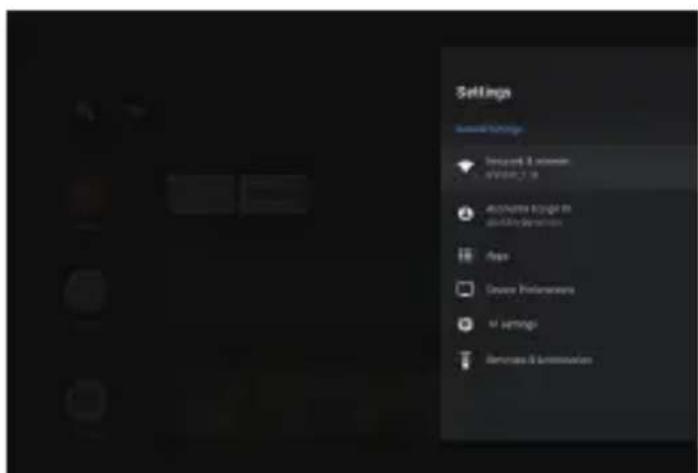
text_image
Settings Session & session OPTION 7.19 Accelerate to get in your own Service Pass Source Preferences of Settings Remove & limitationsImpostazioni
natural_image
Simple line drawing of a person sitting on the left and a desk with a pointer (no text or symbols)Proiezione frontale
natural_image
Simple line drawing of a person sitting on the floor next to a table with a hanging object (no text or symbols)natural_image
Two gray icons: a person sitting on the left and a triangular ruler on the right, both without any text or symbols.natural_image
Simple line drawing of a person sitting on the left next to a table with a small object on top (no text or symbols)flowchart
graph TD
    A["Monitor with shaded screen"] --> B["Remote with circular icon"]
    B --> C["Arrow pointing right"]
    C --> D["Remote with rectangular frame"]
natural_image
Two rectangular panels showing a central yellow circle with concentric circles and crosshairs, connected by an arrow (no text or symbols)Read all instructions before you use this device. Do not make any changes that are not described in this manual. If physical injury, loss of data, or damage is caused by failure to follow instructions, the warranty does not apply.
Setup
- To reduce the risk of fire and/or electric shock, do not expose the device to rain or moisture, and objects filled with liquids, such as vases, should not be placed on the device.
- Do not place the device on soft surfaces such as tablecloths or carpets as doing so could be a fire-hazard.
- Do not place the device in areas susceptible to excessive dust and dirt or near any appliance generating a strong magnetic field.
- To prevent overheating, do not block or clog the ventilation openings. Never place the device in a confined space. Always leave enough space around the device for ventilation.
- Protect the device against direct sunlight, heat, large temperature fluctuations and moisture.
- When the device runs for a long period of time and the surface becomes hot, shut it down and unplug the power cord. Resume operation only after the device has cooled.
- Always handle the device with care. Avoid touching the lens.
- Never place heavy or sharp objects on the device or the power cord. To avoid electric shock, do not disassemble.
- Only use attachments or accessories specified by the manufacturer. Avoid extreme vibration. It may damage the internal components.. Do not allow children to handle the device without supervision.
- Under the following conditions, a layer of moisture can appear inside the device which can lead to malfunctions:
a) if the device is moved from a cold to a warm area;
b) after a cold room is heated;
c) when the device is placed in a damp room.
To avoid any moisture, seal the device in a plastic bag before moving it to another room, and wait for one to two hours before you take it out of the bag.
Power Supply
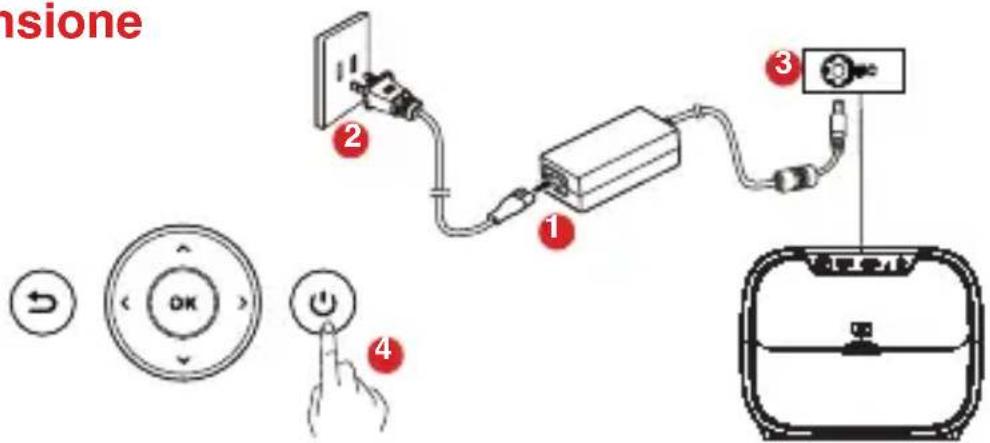
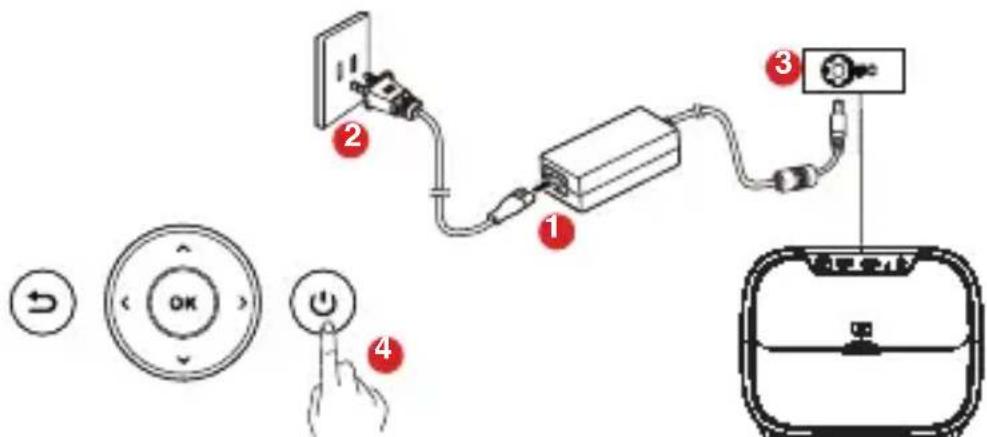
- Use only the provided power adapter.
- Power off the device before removing the power supply from the socket.
- Protect the power cord from being walked on or pinched, particularly at plugs, convenience receptacles, and the point where they exit from this device.
- Unplug this device if there are lightning storms or when unused for a long period of time.
- Where the power plug or an appliance coupler is used as the disconnect device, the disconnect device shall remain readily operable.
- Before you make or change any connections, ensure that all devices are disconnected from the power outlet.
- Do not touch the power cable or the power connector with wet hands.
Hearing Safety
To avoid hearing damage, do not listen for extended periods at high volume. Set the volume at a safe level.
Cleaning
- Power off the device and remove it from the power supply before cleaning the surface.
- Use a soft, lint-free cloth. Never use liquid, gaseous, or easily flammable cleansers (like sprays, abrasives, polishes, and alcohol). Wipe over the surfaces gently. Be careful that you do not scratch the surfaces.
- Do not use any liquid cleaning agents to clean the lens as they may damage the protective coating on the lens. Use lens cleaning paper to clean the lens of the projector.
Repairs
- Do not make any repairs to the device by yourself. Only have your device repaired by an authorized service center.
- Improper maintenance can result in injuries or damage to the device.
• Refer all servicing to qualified service personnel.
Caution
- Do not stare at operating beam, the bright light may hurt your eyes.
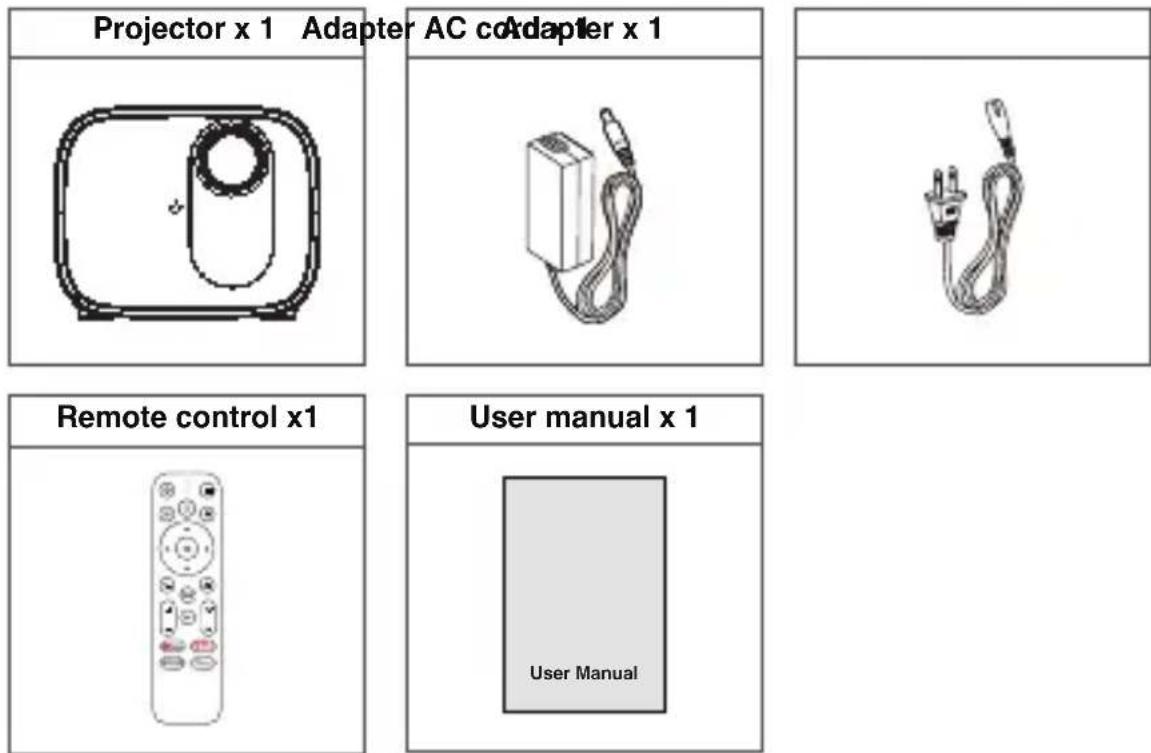
What's Included
Overview
Projector
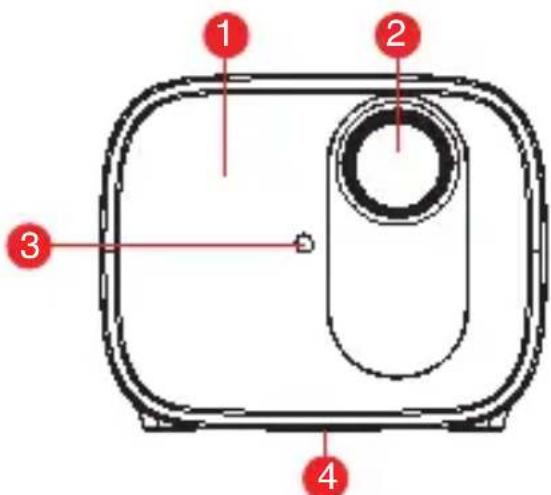
Rear ViewFront View
text_image
1 2 3 4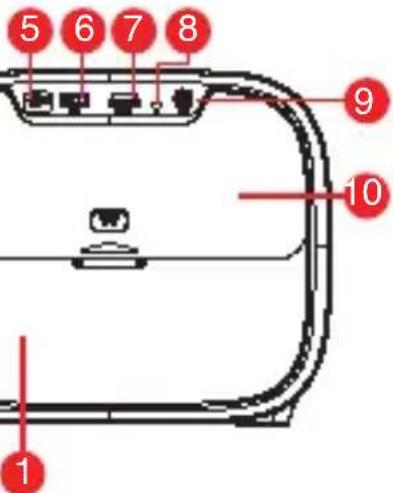
text_image
5 6 7 8 9 10 1① Air ventilation(Outlet)
② Lens
③ Tof (Auto focus)
⑩ Back cover
④Tripod screw hole
⑤DC -in
⑥USB port
⑦HDMI Port
⑧IR receiver
⑨Aux Port

Attention:
- Please do not look into the lens directly to avoid harm for your eyes.
- Please do not block the air ventilation (Outlet).
text_image
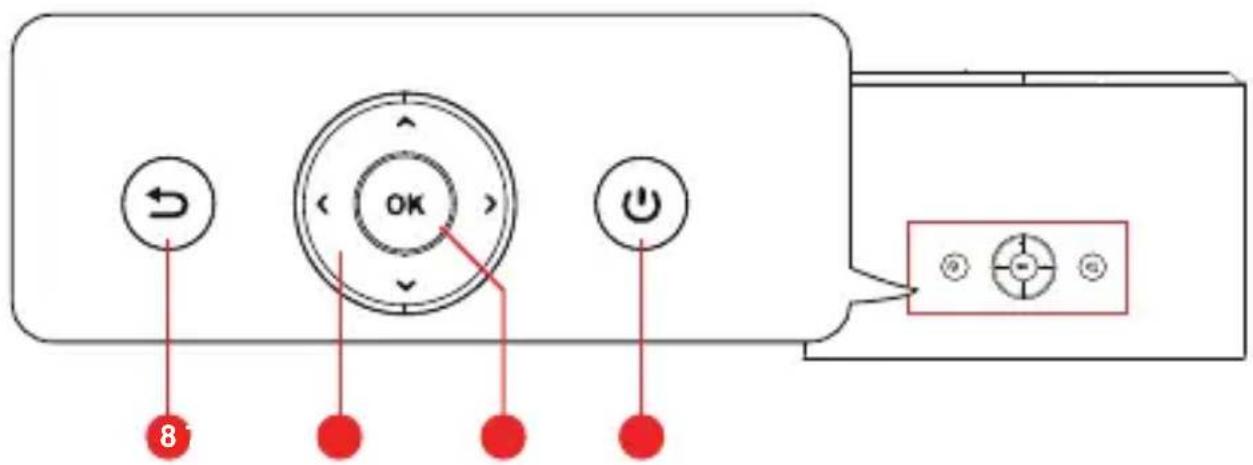
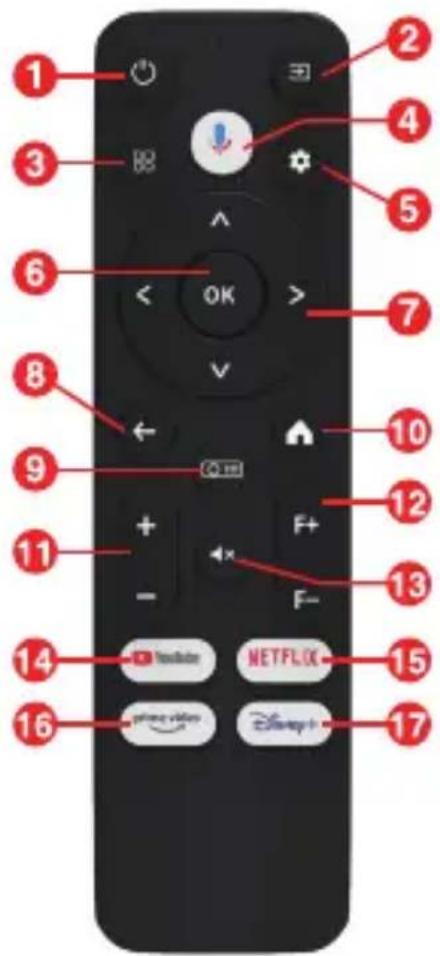
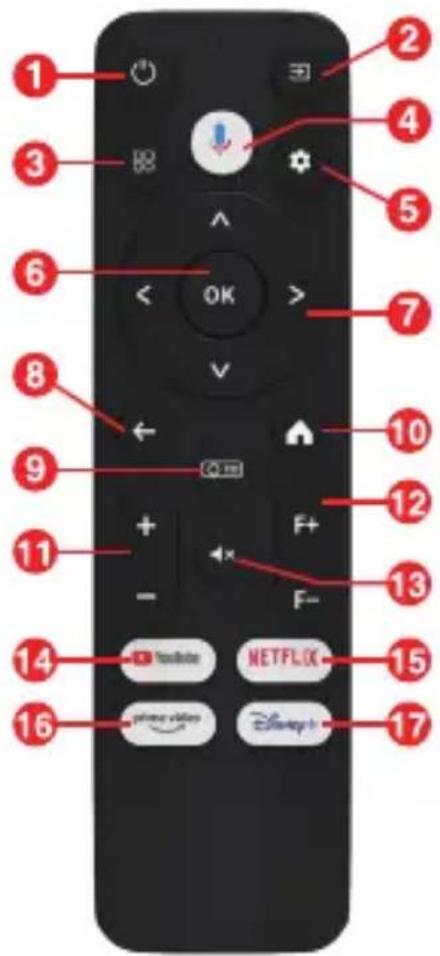
8 OKPress once to turn on and twice to turn off
2 → Signal source
3 Access more options while playing (availability depends on source)
4 Activate Google Assistant, Google's voice-based virtual assistance service
5 ✿ Projector setup
6 OK Press to confirm a selection or entry
7 ∧ ∨ > < Navigate the menus or adjust the selected content
8 ← Return to the previous menu
Go to the projector home page
Go to the Android home page
11 - + Volume up / down
12 F+ F- Adjust focus
13 Mutes the projector sound
14 YouTube Launch the Youtube app
15 NETFLIX Launch the Netflix app
16 prime video Launch the Amazon Prime Video app
17 Disney+ Launch the Disney + app
text_image
Labeled diagram of a remote control with numbered buttons and icons for navigation, streaming, and Disney+ functions.Get Started
Placement
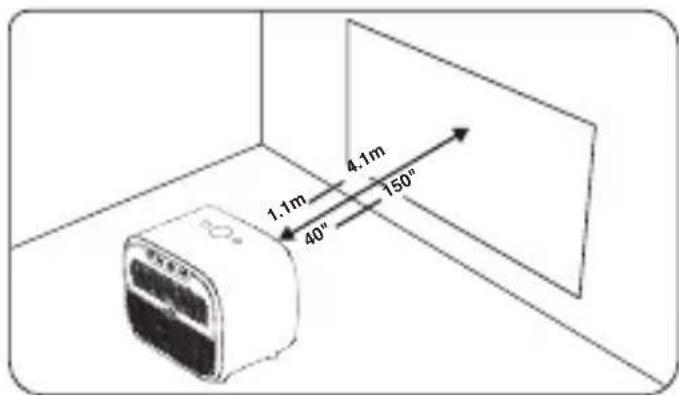
① Place the projector right towards the projection surface to get a rectangle picture.
② The distance between the projector and the projection surface determines the picture size.
③ Check the projection distance and screen size on the specifications part.
text_image
1.1m 40" 4.1m 150"Prepare the Remote Control
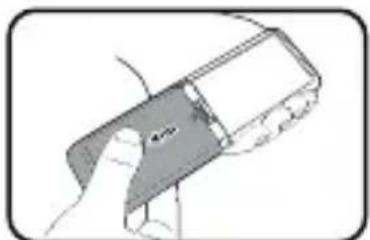
Install the remote control batteries (batteries not included).
① Press and open the battery cover, as illustrated.
② Install two AAA batteries. Make sure that the positive and negative ends are positioned correctly, as illustrated.
③ Place the battery cover back until it clicks into place.
④ The distance between the remote and the projector should not exceed 10 m / 33 ft.
natural_image
Illustration of a hand holding a rectangular object with a shaded section, no visible text or symbols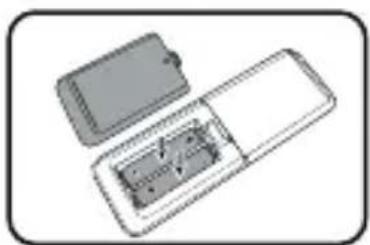
natural_image
Illustration of a device with an open lid and internal components (no text or symbols)Power On

text_image
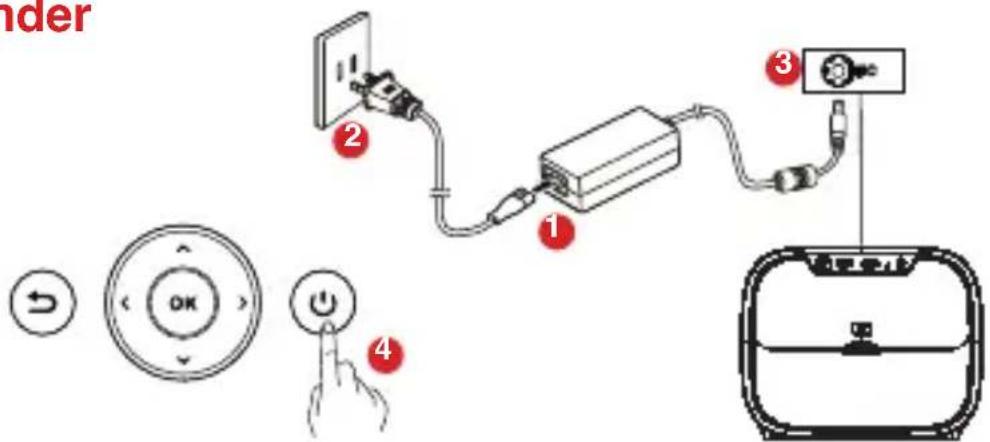
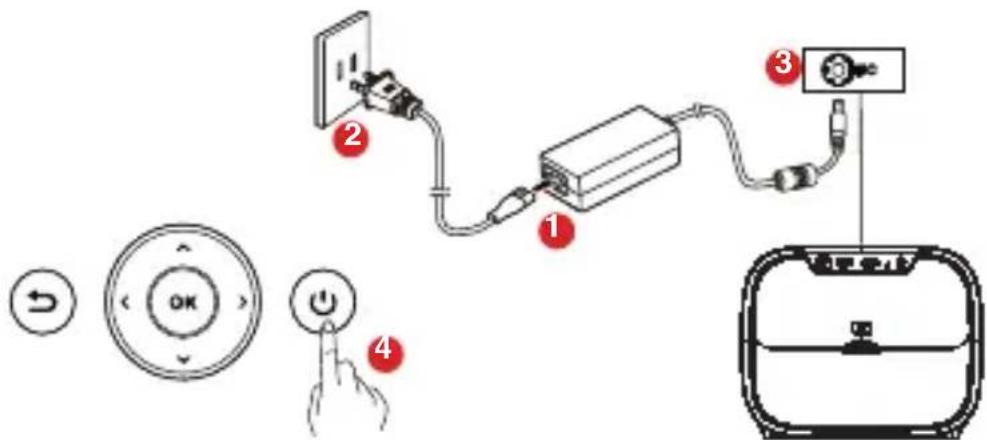
Diagram showing connected devices with numbered labels and control buttons, including a doorbell icon and a power button.- Press the power button once to power on.
- Press the power button twice to power off.
Focus
Auto Focus
Place the projector towards a suitable projection surface or wall, the projector will automatically focus the image.
Manual Focus
You can also manually focus through the remote control. Press the 🔊 button on the remote control, and press the ◀ or ▶ button, until the picture is clear.
Note: The projection distance must between 1.1m to 4.1m.
Select Your Language
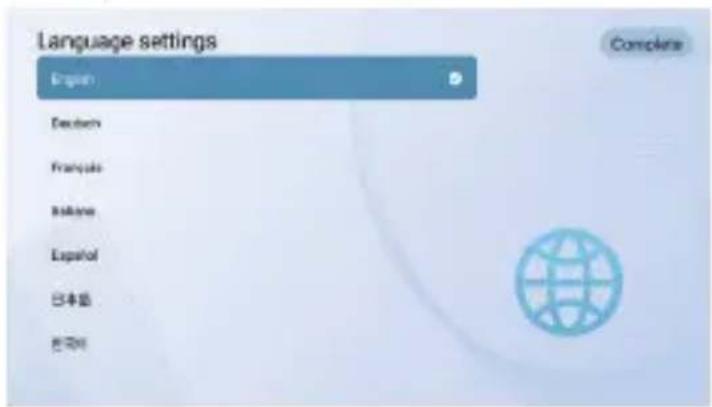
When start the projector for the first time, you will be guided to a page to select language, use remote control ▲ or ▼ to select your language. Then press the right button ▶ and select "Complete" to enter the next page.
text_image
Language settings English Deutsch Française Bilbao Español 日本語 意大利Pair Remote Control in Bluetooth Mode
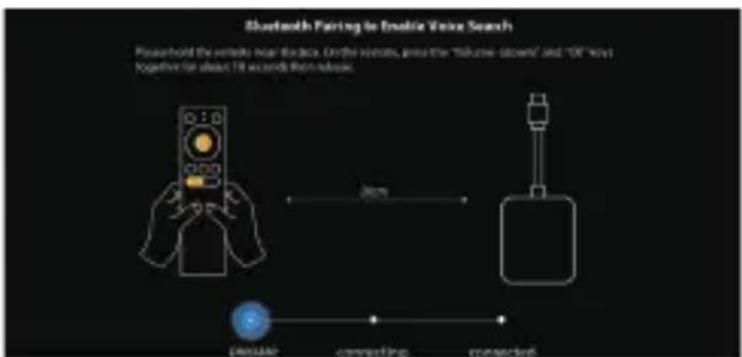
After selecting a language, you will be at a Bluetooth remote pairing page, follow the instructions on the page.
① Please hold the remote near the projector.
② Press the [Volume-] and [OK] keys together for about 10 seconds.
③ When the screen shows"Connected", your remote LED indicator turns blue, and the remote control is paired
flowchart
graph LR
    A["Device"] -->|Connection| B["Connector"]
    B -->|Connection| C["Wireless Device"]
    style A fill:#f9f,stroke:#333
    style B fill:#ccf,stroke:#333
    style C fill:#cfc,stroke:#333
Set up Android TV
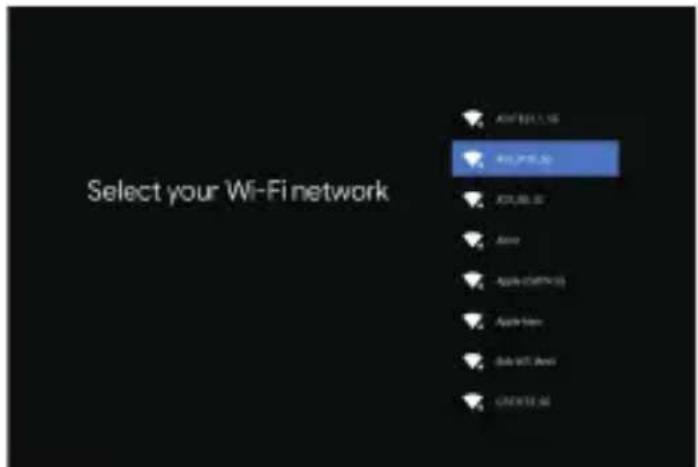
Follow the setup wizard on Android TV, select your language, set up a Wi-Fi connection, sign in to a Google account, and carry out other related procedures.
When you complete the Android TV setup wizard, the Android TV home screen will appear. Now you can start watching your favorite shows by downloading streaming apps.
text_image
Select your Wi-Fi network Add 1.1 GB Add 2.0 GB Add 3.0 GB Add Apple (GPTC) Apple Tree Data SET: New CREATE: AI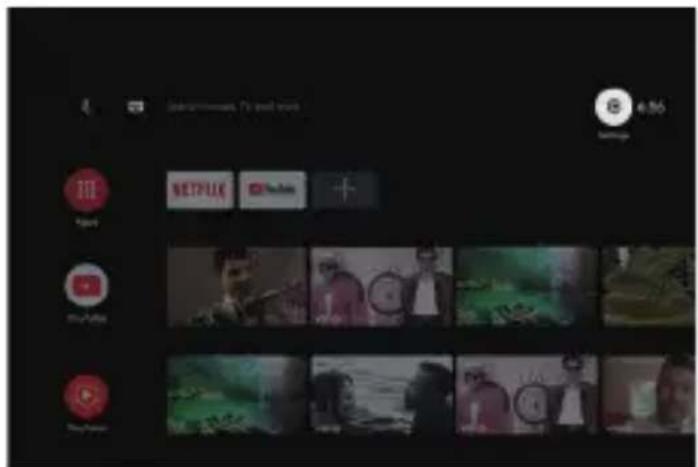
text_image
Screenshot of a mobile app interface showing navigation tabs, platform icons, and a timeline with multiple video thumbnails.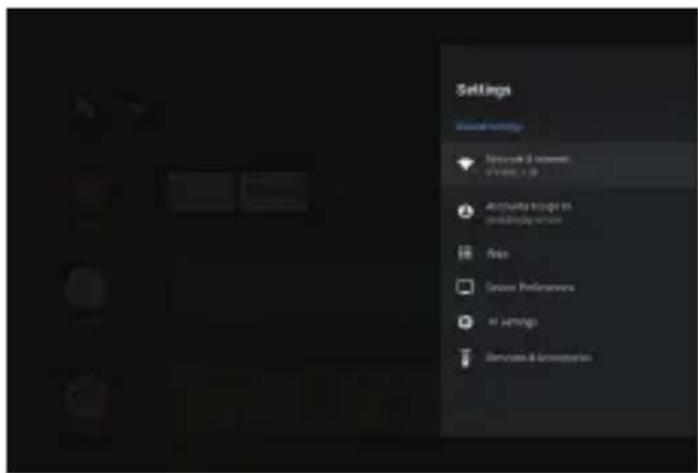
text_image
Settings Microsoft 2.0 version C:\Users\1.0 Accounts Manager to ########are Price Source Preferences MAYarnings Services & AccessoriesSettings
Android TV Setting
Bluetooth Pairing
If you want to connect to Bluetooth speakers/headphones on the Android TV interface, select Settings→Remotes&Accessories→Add accessory, then select the device to be connected. Bluetooth connection only works while on the Android TV system.
Android TV Remote App
The Android TV system could be controlled by downloading the remote app on a smartphone.
Make sure your device is connected to the same Wi-Fi network as the projector, Bluetooth is turned on, and your Android/iOS device is updated to the newest version.
- Android Devices:
Download the "Android TV Remote" app from Google Play, open the app, choose "ETOE mini" from Remote tab, click "connect", enter the verification code displayed on the projector screen.
- iOS Devices:
Download the "Android TV" app from the App Store, open the app, allow it to use the local network to set up and control your connected devices, choose "ETOE mini" from Remote tab, click "connect", enter the verification code displayed on the projector screen.
Adding Accounts
For new Google users, sign up for a new Google account using the TV for easier login and payment security. Add an account or switch accounts under Accounts in the Settings Menu.
Dolby Audio not Supported
The projector does not support Dolby Audio. If you are watching videos with Dolby Audio, please turn off all Dolby Digital-related output on your video resource.
Projection Settings
Press the button ⚙️ === on the remote control, go to projector homepage, and select Settings.
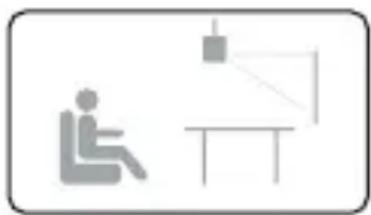
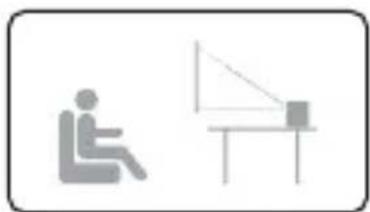
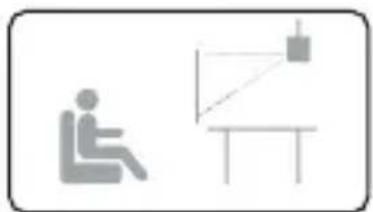
Projection Mode
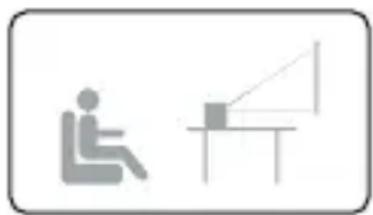
natural_image
Simple line drawing of a person sitting on the left and a desk with a triangular pointer (no text or symbols)Desktop Front Projection
natural_image
Simple line drawing of a person sitting on a chair next to a table with a lamp (no text or symbols)Ceiling Front Projection
natural_image
Simple line drawing of a person sitting on the left and a triangular ruler on the right (no text or symbols)Desktop Rear Projection
natural_image
Simple line drawing of a person sitting on the left and a table with a geometric diagram on top (no text or symbols)Ceiling Rear Projection
Zoom in/out
Use the remote control to resize the picture size from 50% to 100% without moving the projector.
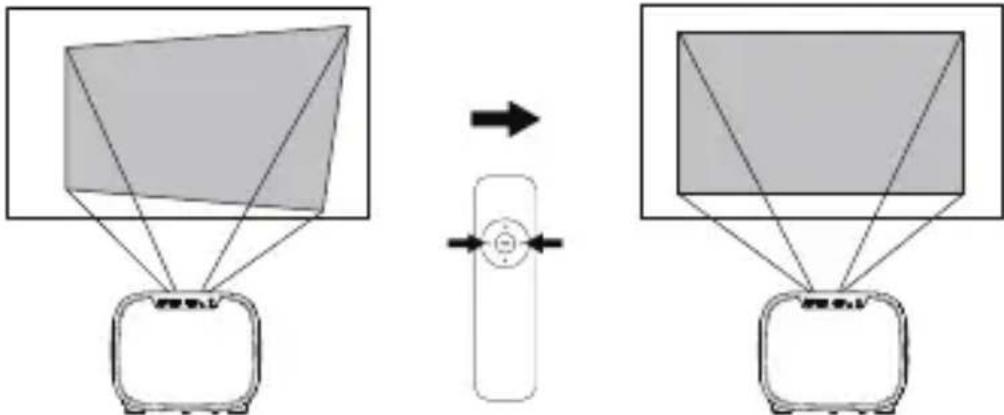
Keystone Correction
This Projector support Auto keystone correction, digital keystone correction, and remote four-point keystone correction.
• Auto Keystone Correction
When the projector image is distorted, it will perform auto keystone correction to restore the image to a rectangle. If you find the auto keystone correction does not work as well as before, follow the instructions below to optimize it.
① Press the 🔊 button to go to projector homepage, into [Settings] -> [Projection Settings] -> [Calibration Settings].
② Select [Keystone Benchmark Correction], and adjust the projector for the correct image.
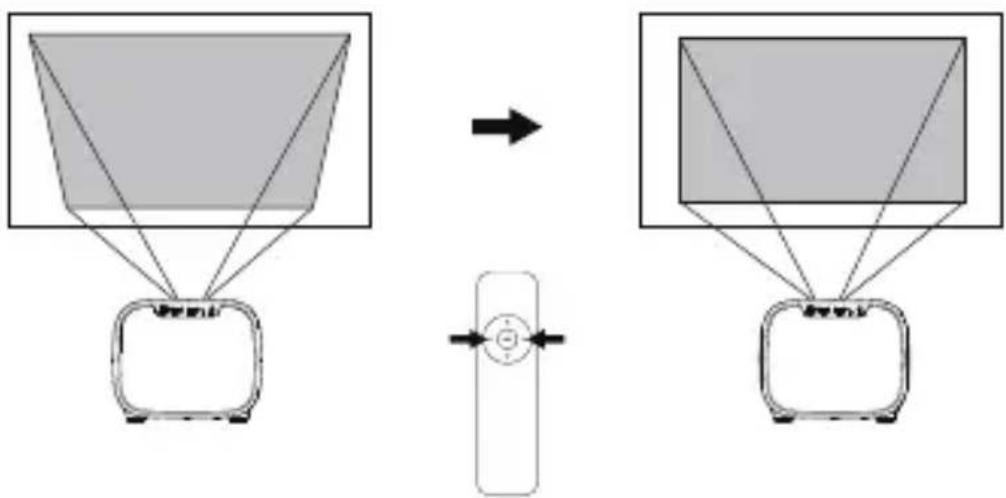
• Digital Keystone Correction
When fixing your projector in a place, use digital keystone correction. Press the 📄 button to go to projector homepage, select [Settings] -> [Projection Settings] -> [Vertical Correction] / [Horizontal Correction], press left or right button on the remote control to adjust.
Vertical Correction
flowchart
graph TD
    A["3D Object"] --> B["Rectangular Object"]
    C["→"] --> D["Rectangular Object"]
Horizontal Correction
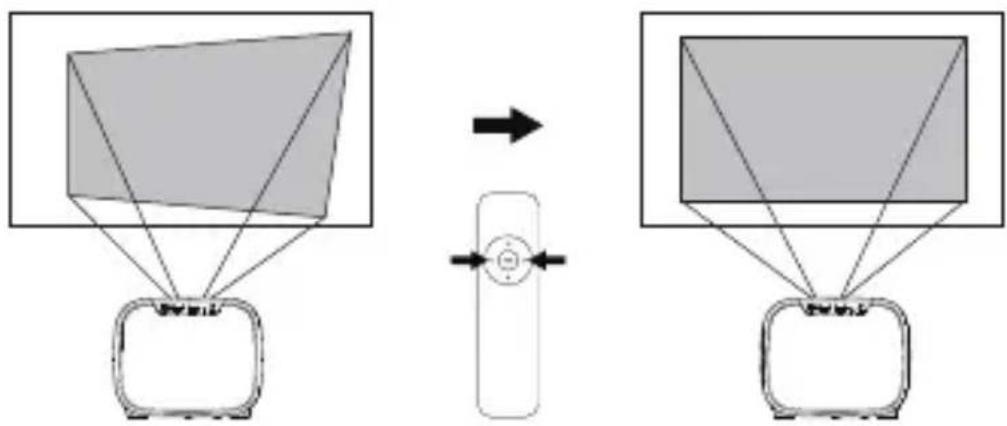
flowchart
graph TD
    A["3D Rectangle with shaded faces"] --> B["Computer monitor"]
    C["Arrow"] --> D["Computer monitor with screen and mouse"]
- Four Point Correction
If the projected image is stretched or distorted along both axes due to the angle of the projection, press the ⏻ button to go to projector homepage, and select [Settings] -> [Projection Settings] -> [Four point Correction], choose the corner you want and press left or right button on the remote control to adjust.
Four Point Correction
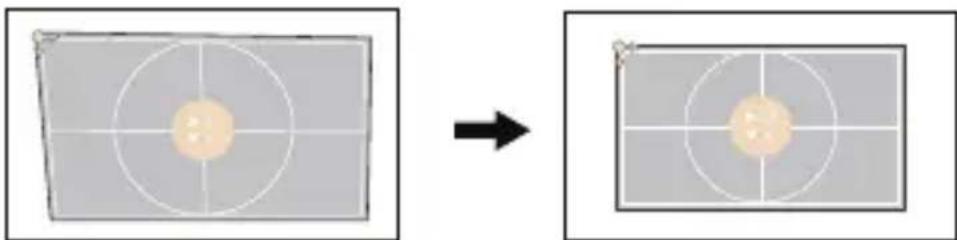
natural_image
Two identical rectangular panels showing a central yellow circle with white crosshairs, connected by an arrow (no text or symbols)- Keystone Correction Reset
To restore the default settings, select Keystone Correction Reset and press "OK".
Other settings
Screen Saver
The screen saver automatically starts whenever your projector sits idle for the default time. You could change the default time or turn it off.
Screensaver Video
Select default screen saver video.
Screensaver Timeout Shutdown
Set the shutdown timer for the projector.
Language Settings
Select an on-screen display language.
Reset your device and restore factory setting.
Chromecast (Wireless Connection)
The Chromecast feature only works while you are in the Android TV system.
- Cast from Chromecast-enabled Sites/Apps (for Android/iOS devices)
① Make sure your device and the Android TV (ETOE mini) are connected to the same Wi-Fi network, and that you are running the latest version of the Chromecast-enabled app.
② Launch the Chromecast-enabled site/app.
③ Tap the cast button 📋 and choose the ETOE mini.
- Cast from Chrome Browser tab (for Computers)
① Connect your computer and projector to the same Wi-Fi network.
② Click "Cast" at the top right : of the Chrome browser tab, and then choose from the sources whether you want to cast the tab or the screen.
③ Choose the “ETOE mini” to cast.
- Mirror from Android Devices
① Make sure your Android device is on the same Wi-Fi network as your Android TV (ETOE mini).
② Download the "Google Home" app on your Android device.
③ Open the "Google Home" app, choose "ETOE Mini".
④ Tap "Cast my screen".
- Mirror from iOS Devices
① Make sure your iOS device is connected to the same Wi-Fi network as your Android TV (ETOE mini).
② Download the "AirScreen" app AS from the Google Play Store of Android TV system.
③ Open the "AirScreen" app and follow the on-screen instructions on AirScreen.
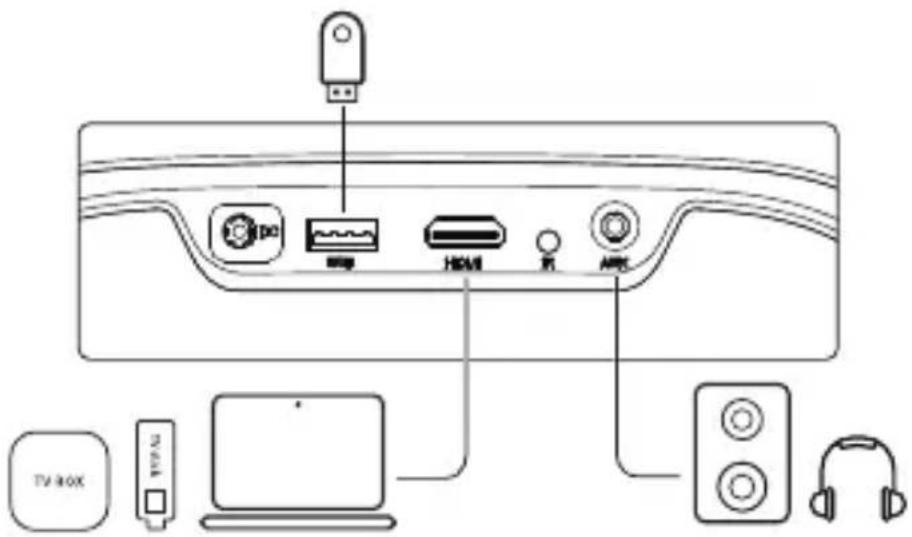
Wired Connections
text_image
TV BOX HDMI HDMI ARX1. Connect to an HDMI Playback Device
This projector supports connections with various HDMI playback devices such as PC, TV stick, TV box, DVD player, set-top box (STB), game console or other devices.
① Connect this projector to an HDMI playback device with an HDMI cable (not provided).
② Press the button ⚙ === on remote control to go to projector homepage, select [HDMI], and press[OK].
2. Connect to a Flash Drive
With this projector, you can enjoy music, video, and pictures, that are stored on a USB storage device.
① Plug in the USB storage device.
② Press the button on ⏻ remote control to go to projector homepage, select [USB], and press.
③ Select the file you plan to play from the file and folder menu.
④ Press [OK] to start playing.
3. Connect to a Headphone via AUX Cable
You can connect a headphone or speaker to Projector via AUX cable as well.
① Plug in the 3.5mm AUX cable connector to projector AUX port.
② Plug the other connector of the 3.5mm AUX cable to your headphone or speaker.
③ Play your media on projector.
Shortcut Menu
Long-press the button to pop up the shortcut menu
- Press navigation button to select the option
- Press ➤ button to go to the next page
- Press < or > button to adjust parameter
- Press "OK" button to save
| Image Mode | Standard | Keeps natural looking colors with a balance of warm and cool tones |
| Light | Provides more picture details and color sharpness | |
| Soft | Provides warm colors with lower light | |
| Personal | Manually set the Brightness, contrast, Saturation, Sharpness and Hue | |
| Color Temp | Cold | Provides cold color temp |
| Normal | Provides normal temp | |
| Warm | Provides warm temp | |
| Personal | Manually set the Red, Green and Blue | |
| Sound Mode | Standard | Provides standard tones |
| Music | Provides more detailed tone | |
| Movie | Provides home theater-style sound | |
| Personal | Manually set the sound of each frequency band | |
| Projection Setting | Zoom In/Out | Zoom in or out of the projection image |
| Vertical Correction | Perform keystone correction | |
| Horizontal Correction | ||
| Keystone Correction Reset | Reset keystone correction |
Specifications
Specifications
CPU: ARM Quad 64-bit Cortex-A53
Android OS: Android ^TM 10.0
Bluetooth: Bluetooth 5.1
Wi-Fi: 2.4G/5 GHz 802.11a/b/g/n/ac
Native Resolution: 1920*1080
Throw Ratio: 1.22
Contrast Ratio: 3000:1
Aspect Ratio: 16:9 / 4:3 Adaptive
Speaker: 10W*2 Stereo Speaker
Connection Port: HDMI*1; USB*1; AUX*1
Projection Size: 40"-150"
Zoom: 50%-100%
Keystone Correction: ±40^ , Auto keystone support
Recommended Ambient: 41°F to 95°F / 5°C to 35°C
Relative Humidity: 15% \~ 85% (non-condensing)
Projection Distance and Screen Size
| Screen size (inch) | Width (inch) | Width (cm) | Height (inch) | Height (cm) | Distance (ft) | Distance (cm) |
| 3.5 108 | .049.819.688.634.940 | |||||
| 5.3 162 | .174.729.4132.852.360 | |||||
| 7.1 216 | .199.639.2177.169.780 | |||||
| 8.9 270 | .1124.549.0221.487.2100 |
Product compliance
The producer Melchioni Spa declares that the product SMART video projector with ANDROID TV Model VDP-IR250HD IRRADIO (code 558100334) is in compliance with Directive 2014/35/EU of the European Parliament and of the Council, of 26 february 2014, on the harmonisation of the laws of the Member States relating to the making available on the market of electrical equipment designed for use within certain voltage limits.
SIMPLIFIED EU DECLARATION OF CONFORMITY
Hereby, manufacturer Melchioni Spa declares that the radio equipment type SMART video projector with ANDROID TV Model VDP-IR250HD IRRADIO (code 558100334) is in compliance with Directive 2014/53/EU. The full text of the EU declaration of conformity is available at the following internet address: http://www.melchioni.it.
The producer Melchioni Spa declares that the product SMART video projector with ANDROID TV Model VDP-IR250HD IRRADIO (code 558100334) is in compliance with Directive 2009/125/EC of the European Parliament and of the Council, of 21 october 2009, establishing a framework for the setting of ecodesign requirements for energy-related products.
The producer Melchioni Spa declares that the product SMART video projector with ANDROID TV Model VDP-IR250HD IRRADIO (code 558100334) is in compliance with Directive 2011/65/EU of the European Parliament and of the Council, of 8 June 2011 and subsequent Commission Delegated Directive 2015/863, on the restriction of the use of certain hazardous substances in electrical and electronic equipment.
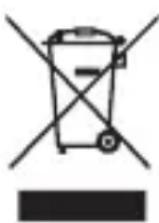
According to Directive 2012/19/EU of the European Parliament and of the Council, of 4 July 2012, on waste electrical and electronic equipment (WEEE), the presence of the crossed-out bin symbol indicates that this appliance is not to be considered as urban waste: its disposal must therefore be carried out by separate collection. Disposal in a non-separate manner may constitute a potential harm to the environment and health. This product can be returned to the distributor when purchasing a new device. Improper disposal of the appliance constitutes misconduct and is subject to sanctions by the Public Security Authority. For further information, contact the local administration responsible for environmental matters.
Product warranty
Melchioni Spa, based in Milan (Italy), via Colletta 37, recognizes a conventional guarantee on the product for a period of two years from the date of the first purchase by the consumer. This guarantee does not affect the validity of the legislation in force concerning consumer goods (Legislative Decree 6 September 2005 n. 206 art. 128 and following), of which the consumer remains the owner. This guarantee applies to the entire territory of the European Union. The components or parts that are found to be defective for ascertained manufacturing causes will be repaired or replaced free of charge through the dealer, during the above warranty period. Melchioni Spa reserves the right to make a complete replacement of the device, if repairability is impossible or excessively expensive, with another device of similar characteristics (Legislative Decree 6 September 2005 no. 206 art. 130) during the warranty period. In this case, the validity of the warranty remains that of the original purchase: the service provided under warranty does not extend the warranty period.
In any case, this appliance will not be considered defective in terms of materials or manufacture should it be adapted, changed or adjusted, in order to comply with national or local safety and / or technical standards, in force in a country other than that for which it is was originally designed and manufactured. This appliance has been designed and built for domestic use only: any other use will invalidate the benefits of the guarantee.
The warranty does not cover:
- parts subject to wear or tear, nor those parts that require periodic replacement and / or maintenance
• professional use of the product - malfunctions or any defects due to incorrect installation, configuration, software / BIOS / firmware update not performed by authorized Melchioni Spa
- repairs or interventions carried out by persons not authorized by Melchioni Spa
- manipulation of assembly components or, where applicable, of the software
• defects caused by fall or transport, lightning, voltage fluctuations, liquid infiltration, opening of the appliance, bad weather, fire, public disturbances, inadequate ventilation or incorrect power supply - any accessories, for example: boxes, bags, batteries, etc. used with this product
• home interventions for convenience checks or presumed defects
The recognition of the guarantee by Melchioni Spa is subject to the presentation of a tax document that proves the actual date of purchase. The same must not show any tampering or deletions, in the presence of which Melchioni Spa reserves the right to refuse the provision of treatment under warranty.
The warranty will not be recognized if the serial number or model of the appliance is non-existent, abraded or modified.
This warranty does not include any right to compensation for direct or indirect damage, of any nature, to people or things, caused by any inefficiency of the appliance. Any extensions, promises or services in this regard, insured by the retailer, will be borne by the latter.
natural_image
Simple line drawing of a rectangular device with a circular top and side base (no text or symbols)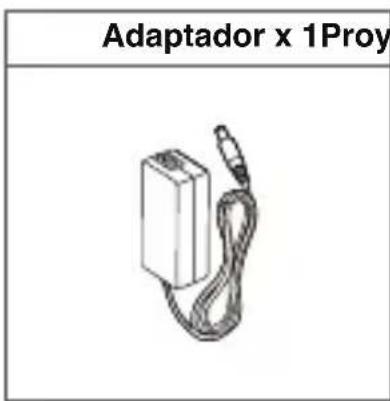
text_image
Adaptador x 1Proy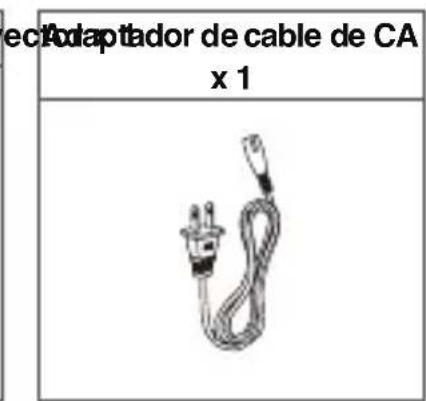
text_image
Electroptador de cable de CA x 1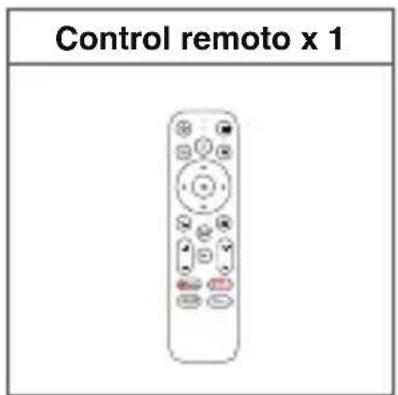
text_image
Control remoto x 1
text_image
Labeled diagram of a remote control with numbered buttons and icons for navigation, streaming, and Netflix services.Empezar a trabajar
Colocación
text_image
1.1m 40" 4.1m 150"natural_image
Two-step diagram showing a hand inserting a device into a device with an open lid (no text or symbols visible)Encender
text_image
nder ① ② ③ ④ OKtext_image
Get screen now, TV and touch 6:56 GETTLENT YouTube +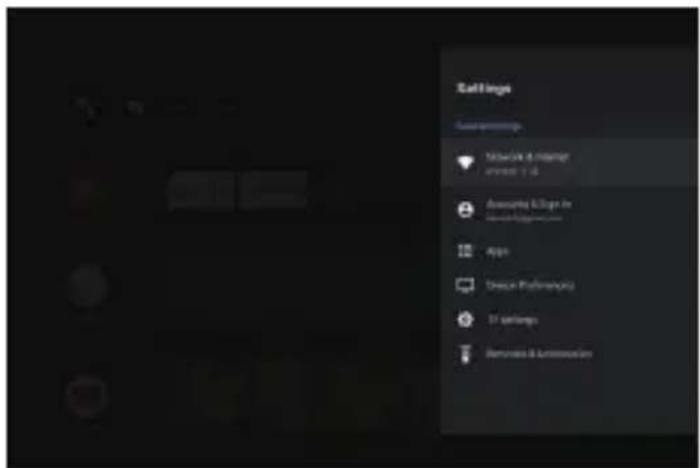
text_image
Settings Customizations Network & Internet Internet & Store Community & Store in Demstrate & AdministrationConfiguraciones
natural_image
Simple line drawing of a person sitting on a chair next to a desk with an upward arrow (no text or symbols)natural_image
Simple line drawing of a person sitting on a chair next to a table with a hanging weight (no text or symbols)flowchart
graph TD
    A["Screen with shaded region"] --> B["Remote Control"]
    B --> C["Arrow pointing to the remote control unit"]
    style A fill:#ccc,stroke:#333
    style B fill:#fff,stroke:#333
    style C fill:#ccc,stroke:#333
natural_image
Two rectangular panels showing a central yellow sphere with concentric circles, connected by an arrow (no text or symbols)Native Resolution: 1920*1080
Throw ratio: 1.22
Contrast ratio: 3000:1
Aspect Ratio: 16:9 / 4:3 Adaptive
Speaker: 10W*2 Stereo Speaker
Connection port: HDMI*1; USB*1; AUX*1
Projection size: 40"-150"
Zoom: 50%-100%
Keystone Correction: ±40°, Auto keystone support
Recommended ambient: 41°F to 95°F / 5°C to 35°C
Relative humidity: 15% \~ 85% (non-condensing)
natural_image
Simple line drawing of a rectangular device with a circular top and rounded bottom, no text or symbols present.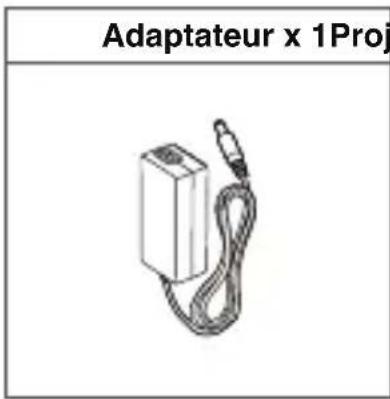
text_image
Adaptateur x 1Proj
16 prime video Lancer l'application Amazon Prime Video
17 Disney+ Lancer l'application Disney +
text_image
Labeled diagram of a remote control with numbered UI components and function buttonsCommencer
Mise en place
text_image
1.1m 40" 4.1m 150"natural_image
Two-step diagram showing a hand inserting a device into a device, with the second panel showing internal components (no text or symbols)Mise sous tension
text_image
Diagram showing a device connection with labeled parts including power switch, switch, and air conditioner unittext_image
Bluetooth Pairing to Enable Voice Search Please hold the remote true interface. On the remote goes the "Volume, colour" and "OK" keys together for about 40 seconds then release. 20ms ON/OFF/CC non-converting non-convertingConfigurez Android TV
natural_image
Simple line icons showing a person sitting on the left and a desk with an upward arrow (no text or symbols)natural_image
Simple line drawing of a person sitting on a chair next to a table with a hanging weight (no text or symbols)natural_image
Simple line drawing of a person sitting on the left and a triangular ruler on the right (no text or symbols)natural_image
Simple line drawing of a person sitting on the left and a table with a geometric diagram on the right (no text or symbols)Correction verticale

flowchart
graph TD
    A["Monitor with triangular screen"] --> B["Remote Control"]
    B --> C["Interface with circular icon"]
    C --> D["→ Interface"]
Correction Horizontale
• Correction de Quatre Points
natural_image
Two identical rectangular panels showing a central yellow sphere with white crosshairs, connected by a red arrow (no text or symbols)natural_image
Simple line drawing of a rectangular device with a circular top and rounded bottom, no text or symbols present.
natural_image
Simple line drawing of a rectangular device connected to a cable, no text or symbols present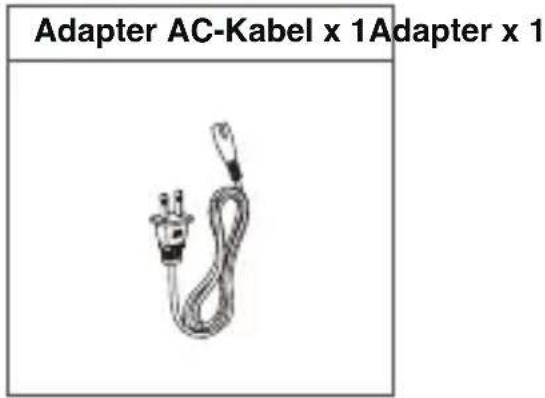
text_image
Adapter AC-Kabel x 1Adapter x 1
text_image
Fernbedienung x 1
text_image
8 OK ⑧ ⑨ ⑩text_image
Labeled diagram of a remote control with numbered buttons and icons, including Netflix, Disney+, and YouTube.Inbetriebnahme
Aufstellen
text_image
1.1m 40" 4.1m 150"natural_image
Two-step diagram showing a hand holding a device with a close-up view of its internal components (no text or symbols)Einschalten
text_image
Diagram showing connected devices with numbered labels and control buttons, including a doorbell icon and a power button.text_image
Screenshot of a mobile app interface showing navigation tabs, platform icons, and a grid of video thumbnails.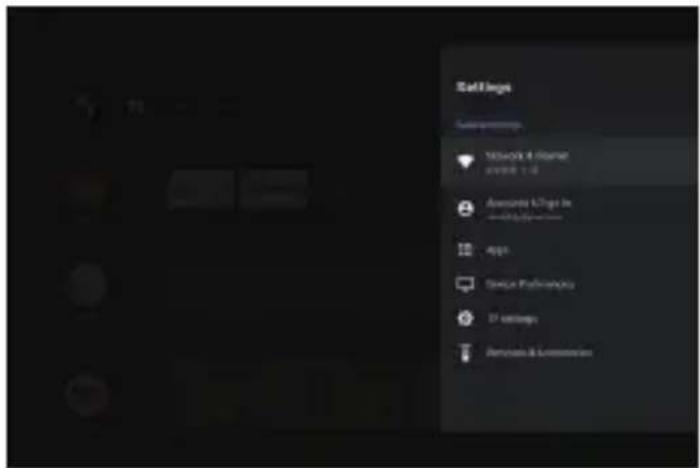
text_image
Settings Network & Manager 2018年 1-6 Server Manager In 3D Settings 400 Server Professional 3D Settings Demographic & AdministrationEinstellungen
Android TV Remote App
natural_image
Simple line drawing of a person sitting on the left and a desk with a triangular pointer (no text or symbols)natural_image
Simple line drawing of a person sitting at a desk with a lamp and table, no text or symbols present.natural_image
Simple line drawing of a person sitting on a chair next to a table with a pointer (no text or symbols)natural_image
Simple line icons showing a person sitting and a table with a geometric diagram (no text or symbols)flowchart
graph TD
    A["Monitor with shaded screen"] --> B["Remote Control with circular indicator"]
    B --> C["Arrow pointing right"]
    C --> D["Monitor with shaded screen"]
flowchart
graph TD
    A["Monitor with screen"] --> B["Remote Control"]
    B --> C["Change from Screen to Remote Control"]