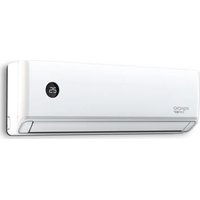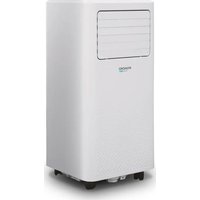
ALASTOR 24 - Air-conditioner Irradio BelAir - Free user manual and instructions
Find the device manual for free ALASTOR 24 Irradio BelAir in PDF.


| Product type | Wall-mounted split air conditioner with heat pump |
| Model | ALASTOR 24 (24 000 BTU) |
| Brand | Irradio BelAir |
| Power supply | 220-240 V ~ 50 Hz |
| Cooling capacity | 7,10 kW |
| Heating capacity | 7,42 kW |
| Rated current (outdoor unit) | 15,9 A |
| Rated current (indoor unit) | 0,14 A |
| Refrigerant | R32, 900 g |
| Sound level outdoor unit | 59-64 dB(A) |
| Sound level indoor unit | 43 dB(A) |
| Weight outdoor unit | 34 kg |
| Weight indoor unit | 14 kg |
| Airflow (indoor) | 880-1310 m³/h |
| Protection rating outdoor unit | IPX4 |
| Protection rating indoor unit | IPX0 |
| Operating modes | Auto, Cool, Dry, Heat, Fan |
| Special functions | Turbo, Quiet, ECO, Sleep, Auto clean, Health (optional), Swing, Timer, Child lock |
| Remote control | Yes, with backlit LCD display |
| Air filter | Washable with water and neutral detergent |
| Warranty | 2 years |
Frequently Asked Questions - ALASTOR 24 Irradio BelAir
User questions about ALASTOR 24 Irradio BelAir
0 question about this device. Answer the ones you know or ask your own.
Ask a new question about this device
Download the instructions for your Air-conditioner in PDF format for free! Find your manual ALASTOR 24 - Irradio BelAir and take your electronic device back in hand. On this page are published all the documents necessary for the use of your device. ALASTOR 24 by Irradio BelAir.
USER MANUAL ALASTOR 24 Irradio BelAir
natural_image
Front view of a white air conditioner unit with a circular indicator showing '25' (no text or symbols on the device itself)IT Manuale d'uso 2
EN User manual 18
Please read the user's manual carefully before using the product
natural_image
Hand holding a plug with a small bulb, pointing right (no text or symbols)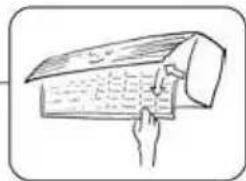
natural_image
Illustration of a hand pressing down on a wooden beam (no text or symbols)
natural_image
Illustration of a girl pointing at a wrench and a stick (no text or symbols)
natural_image
Cartoon illustration of a smiling cube character with arms and legs, surrounded by cheering faces (no text or symbols)
natural_image
Simple line drawing of two stacked cubes, one with a curved arrow indicating motion (no text or symbols)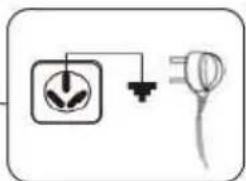
natural_image
Simple line drawing of an electrical plug and bulb (no text or symbols)
natural_image
Illustration of a girl pointing with a wrench (no text or symbols present)Analisi dei guasti
Installation and Operation Manual for Air Conditioner
The Manual is for the Split Wall-hanging Room Air Conditioner
Thank you for choosing our air conditioner!
Before using the product, please carefully read this manual and keep it in safe for later reference.
Please ask for professionals to install the product.
NOTE:
- This appliance is not intended for use by persons (including children) with reduced physical, sensory or mental capabilities, or lack of experience and knowledge, unless they have been given supervision or instruction concerning use of the appliance by a person responsible for their safety. Children should be supervised to ensure that they do not play with the appliance.
- If the supply cord is damaged, it must be replaced by the manufacturer, its service agent or similarly qualified persons in order to avoid a hazard.
- The appliance shall be installed in accordance with national wiring regulations.
- How to fixed the appliance to its support please refer to detail information of installation.
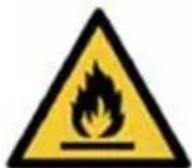
- Risk of fire: flammable materials - The refrigerant circuit of the appliance contains a natural refrigerant gas with a high level of environmental compatibility, which however is flammable. During transport and installation of the appliance, make sure
that none of the components of the refrigeration circuit are damaged.
- If the refrigeration circuit is damaged, avoid open flames and ignition sources and thoroughly ventilate the room in which the appliance is located
Safety Precautions
Never use broken or unspecified power cable, power plug and socket.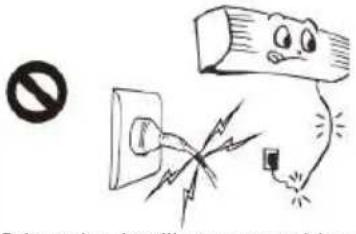 Otherwise it will cause accidents such as electric shock, short circuit Otherwise it will cause accidents such as electric shock, short circuit | Never use the same power socket with other electrical appliances or use too long power cables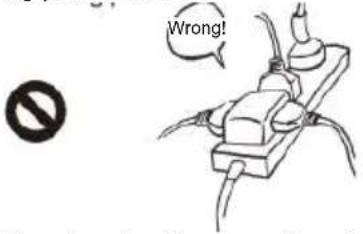 Otherwise it will cause fire disaster, electric shock, short circuit, etc. Otherwise it will cause fire disaster, electric shock, short circuit, etc. | Never use fuse with improper capacity or other metal fuses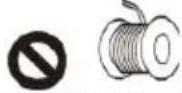 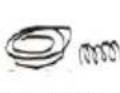 Fuse with larger steel wire or smaller capacity or copper wire Fuse with larger steel wire or smaller capacity or copper wire  Otherwise it will cause malfunction or fire disaster. Otherwise it will cause malfunction or fire disaster. |
The air conditioner must be well grounded and the grounding wire should not be connected to the gas pipe, water supply pipe, lighting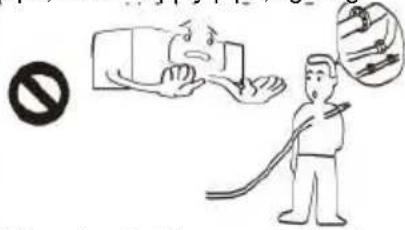 Otherwise it will cause accidents Otherwise it will cause accidents | Never put air conditioner in the place where the combustible gas may be leaked. Never use it in the environment full of inflammable, explosive and corrosive gases.cor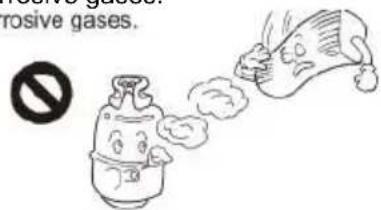 Otherwise it will cause accidents like fire disaster or explosion. Otherwise it will cause accidents like fire disaster or explosion. | Never put chemical spray or paint near the air conditioner or spray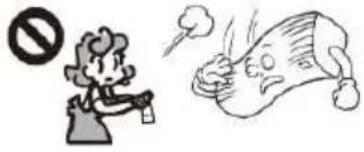 Otherwise it will cause accidents like explosion or fire disaster. Otherwise it will cause accidents like explosion or fire disaster. |
Never wash air conditioner with water or other fluid, as the water may penetrate into the panel.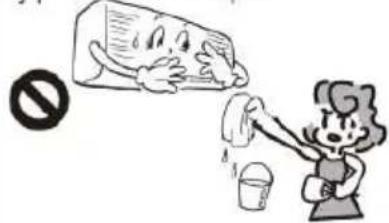 Otherwise, the internal electrical parts may be damaged. Otherwise, the internal electrical parts may be damaged. | When fan blade is running, do not touch the air outlet of indoor unit and outdoor unit and do not put your hand or any other objects into the grilles.the grilles.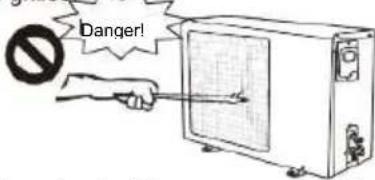 Otherwise it will cause personnel injury or damage to the air conditioner. Otherwise it will cause personnel injury or damage to the air conditioner. | Never let the air conditioner to blow toward the heater appliances.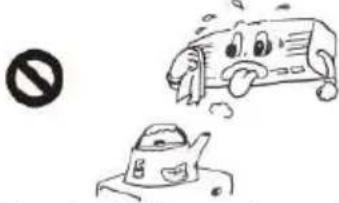 Otherwise it will cause incomplete combustion and gas poisoning. Otherwise it will cause incomplete combustion and gas poisoning. |
| Do not maintain or repair the air conditioner.Otherwise it will cause electric shock and fire disaster. Please contact our authorized service center to send professional maintenance personnel to repair. | ||
| The place for installation should be capable of load-bearing. If the installation bracket for outdoor unit is broken, do not place air conditioner on it.Otherwise the outdoor unit will be dropped down or fell over and cause personal injury or damage to equipment. | ||
| Do not stand on the outdoor unit or put objects on it.Otherwise people or objects may be fell down and cause personal injury or damage to equipment. | ||
| Do not plug or unplug the power plugs with wet hands and do not operate remote control with wet hands.Otherwise it will damage the electrical appliances or cause electric shock. | ||
| If abnormal conditions are found, such as the burnt smell, stop the air conditioner immediately and cut off power supply.If measures are not taken in time, the air conditioner will be damaged and electric shock or fire disaster may be occurred. Please contact our dealer or service center. | ||
| Make sure the power plug is completely inserted into the socket.If the plug is not completely inserted into the socket, it will cause fire disaster by heating. | ||
| Regularly clean the dust on the power plugDust on the power plug and moisture may cause poor insulation and even fire disaster. | ||
Do not block the air inlet and outlet of indoor unit and outdoor unit 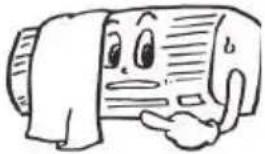 Otherwise it will influence the function of air conditioner and even machine halt. Otherwise it will influence the function of air conditioner and even machine halt. | If the air conditioner is not used for a long time or it is to clean the air conditioner, please disconnect the power supply.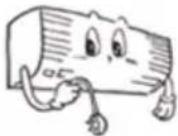 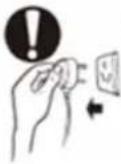 Otherwise it will cause personal injury or damage to the air conditioner. Otherwise it will cause personal injury or damage to the air conditioner. | Do not blow the cold air at human body for a long time and do not cool down the room temperature too low.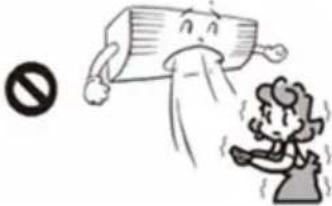 Or it will do harm to your health. Or it will do harm to your health. | |
 | Do not use the air conditioner for the precision equipment, animals, plants, foods or art works.Otherwise it will cause harmful effect. | ||
| Do not directly blow at children, animals and plantsOtherwise it will do harm to them. | |||
| Do not put the objects, which need to avoid moisture, under the indoor unit and outdoor unit.Sometimes the moisture in the air will be condensed as water-drop, thus damaging the objects which need to avoid moisture. | |||
| Do not touch the aluminum parts of indoor unit or outdoor unit of air conditioner.Sharp aluminum sheet may cause personnel injury. | |||
 | Tubing for the drain hose should ensure the good drainageIn case of bad tubing, the water will penetrate into the room and moisten the items in the room. | ||
| Frequently ventilateInsufficient ventilation will cause oxygen deficiency and headache. If the air conditioner is used simultaneously with the gas burning appliances, please remember to keep good ventilation. | |||
| During air conditioning refrigeration, reduce the heat in the room and keep away the sun light and hot wind.Otherwise it will influence the refrigeration effect. | |||
| If the air conditioner is to be used when the season changes, please remember to remove the hood.If the hood is not removed before operation, the outdoor unit will be in poor heat dissipation and the compressor will stop running and even be damaged. | |||

Temperature Conditions
In the following temperature range, the air conditioning protective equipment will run and the air conditioner will stop. As a result, to ensure the normal operation of air conditioner, the following temperature conditions should be avoided.
| * Heating | Outdoor temperature -5-24°C Refrigerating Outdoor | temperature 21-43°C |
| Room temperature 20-27°C |
If the power is not cut off, and the machine is started immediately after stoppage or the mode is changed during operation, the protective device in the unit will work. The air condition compressor has to wait for 3 minutes to start running.

Features in Heating Operation (for cooling and heating equipment)
Pre-heating:
After heating is started, the indoor unit will be preheated for 2 to 5 minutes. After pre-heating process, the warm air comes out. When the room temperature is low, the electric heating will be activated, (for the cooling and heating equipment with auxiliary heater)
Defrosting:
During heating process, if the outdoor unit is frosted, the air conditioner will perform auto defrosting to enhance the heating effect. During defrosting, the fans of both indoor and outdoor unit will stop. After defrosting is finished, the heating process is recovered.

Inspection before operation
| Newly installed air conditioner | 1. Check if the installation is reasonable; 2. Check if the batteries are installed in the remote controller; 3. Check if the power supply is connected. |
Names and Functions of each Parts
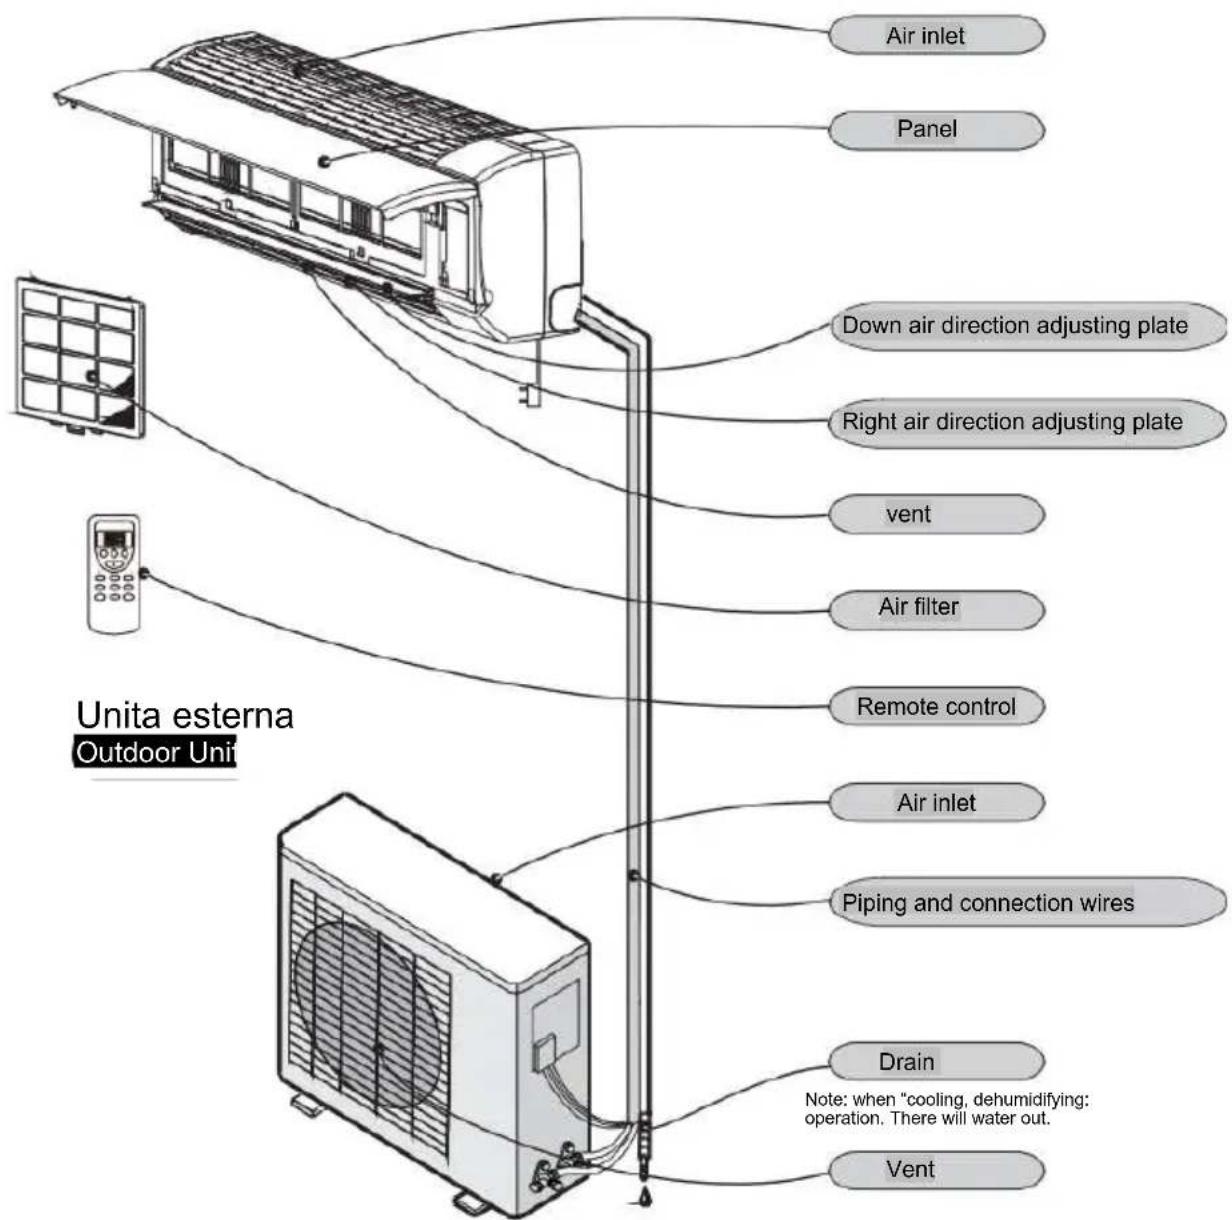
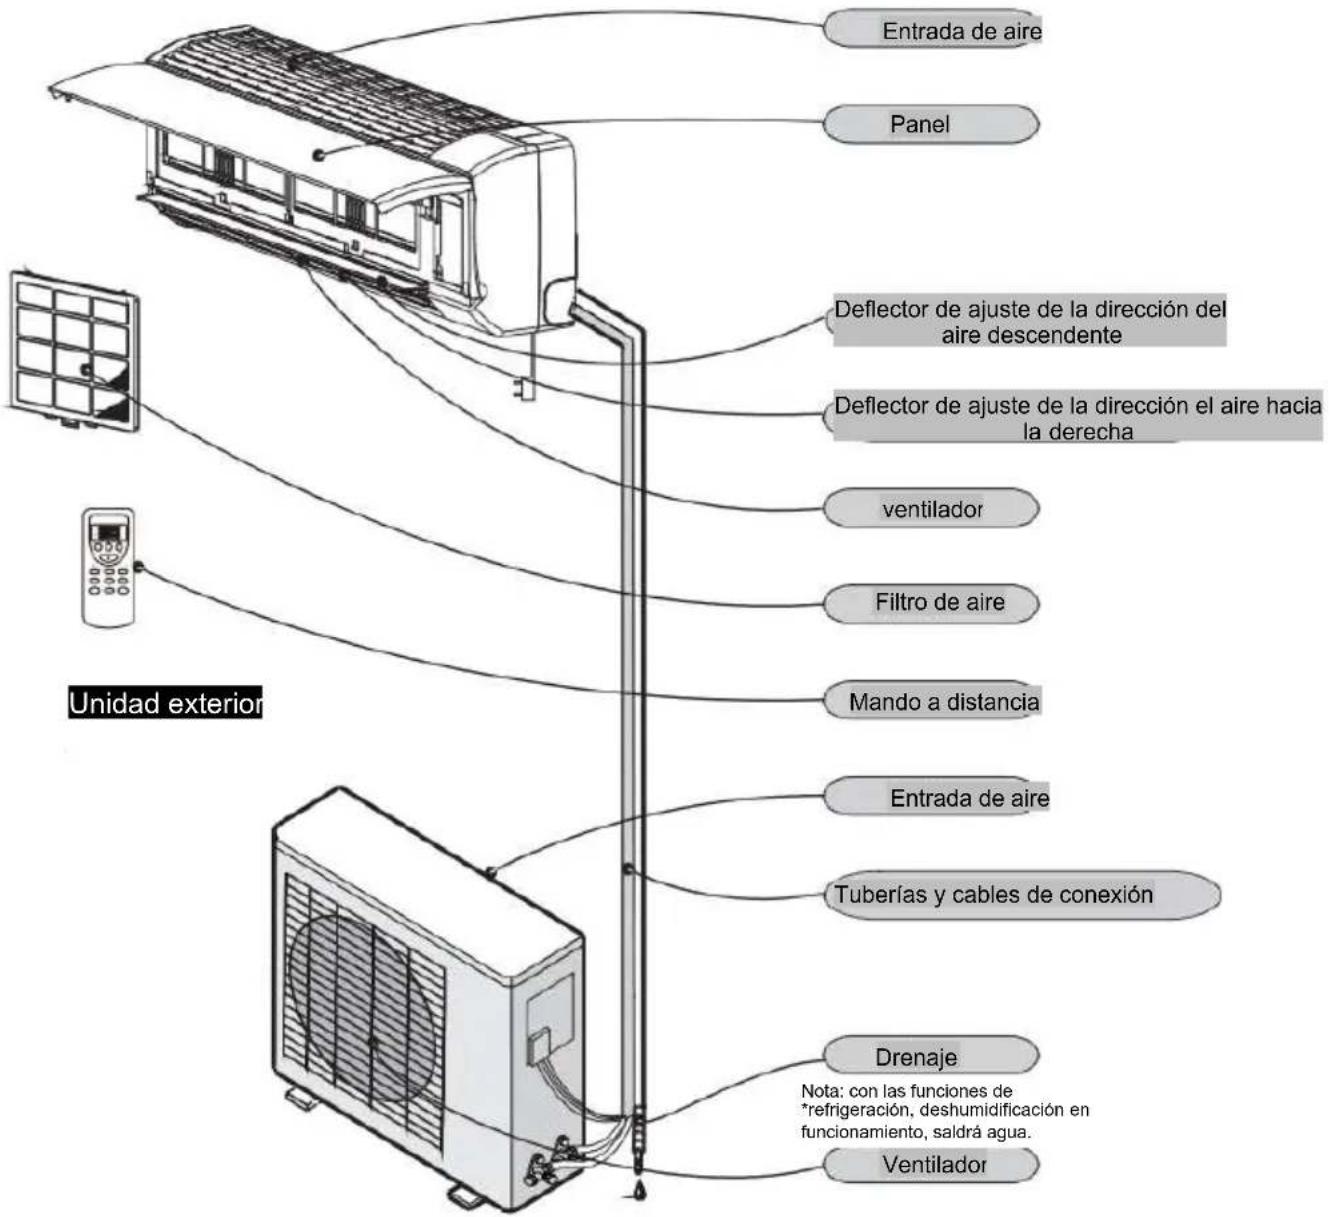
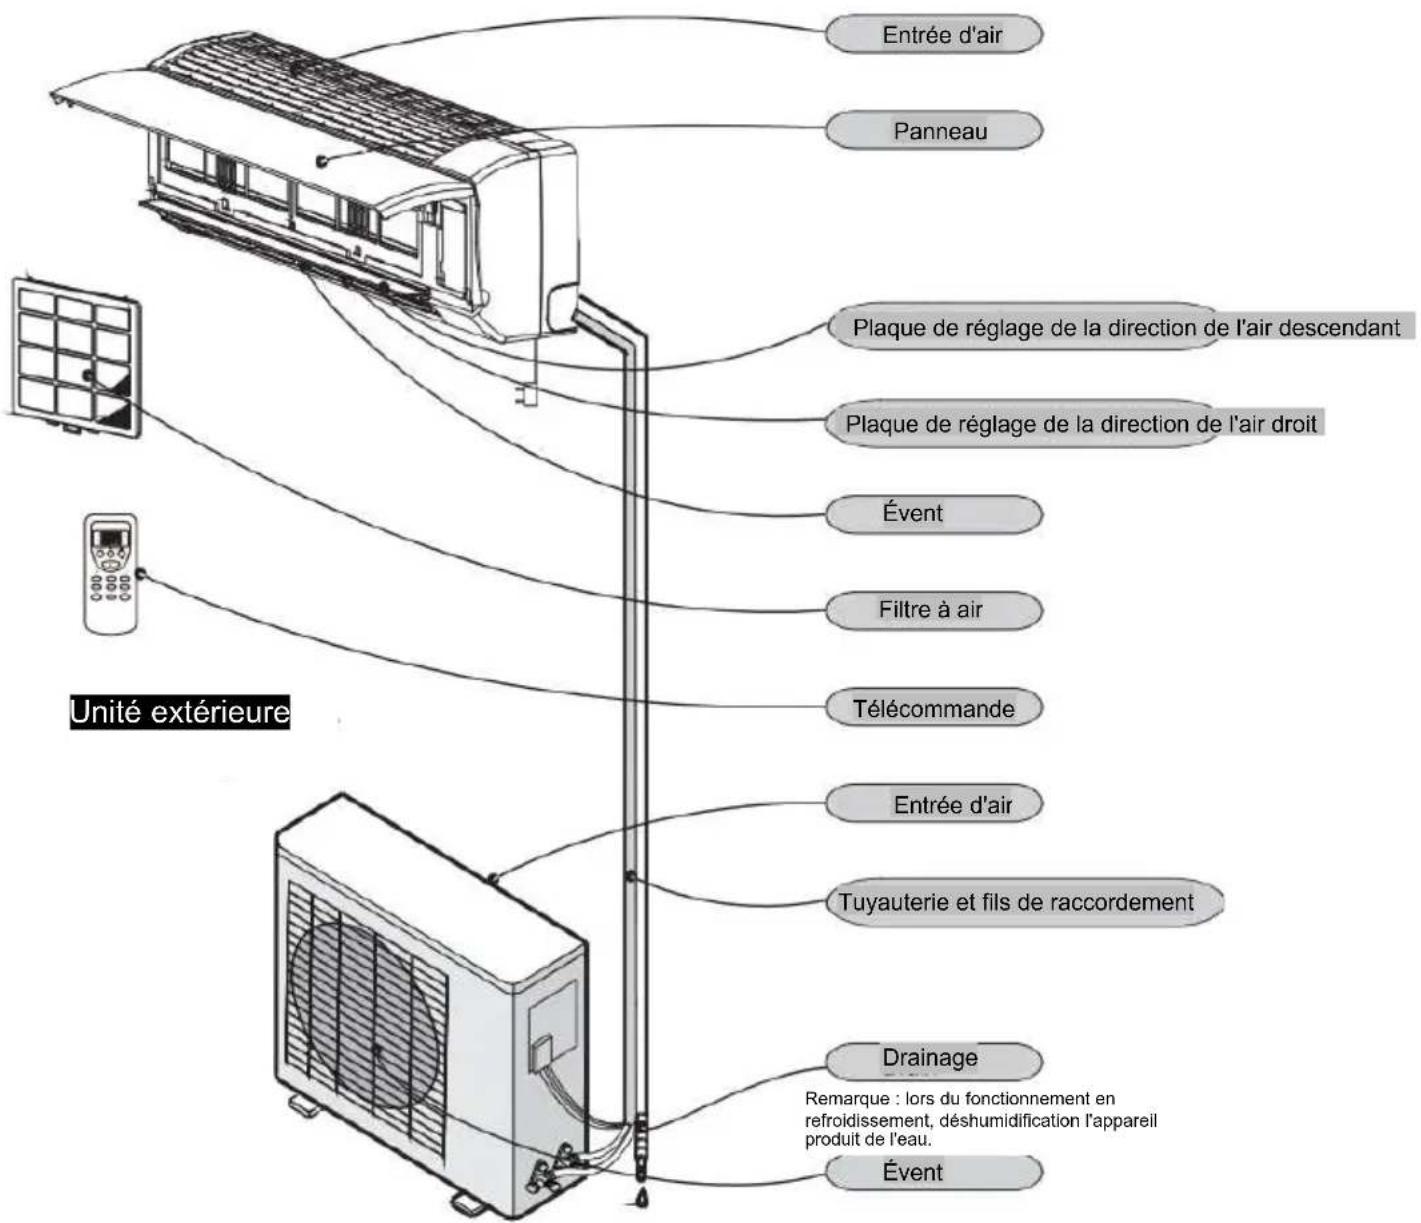
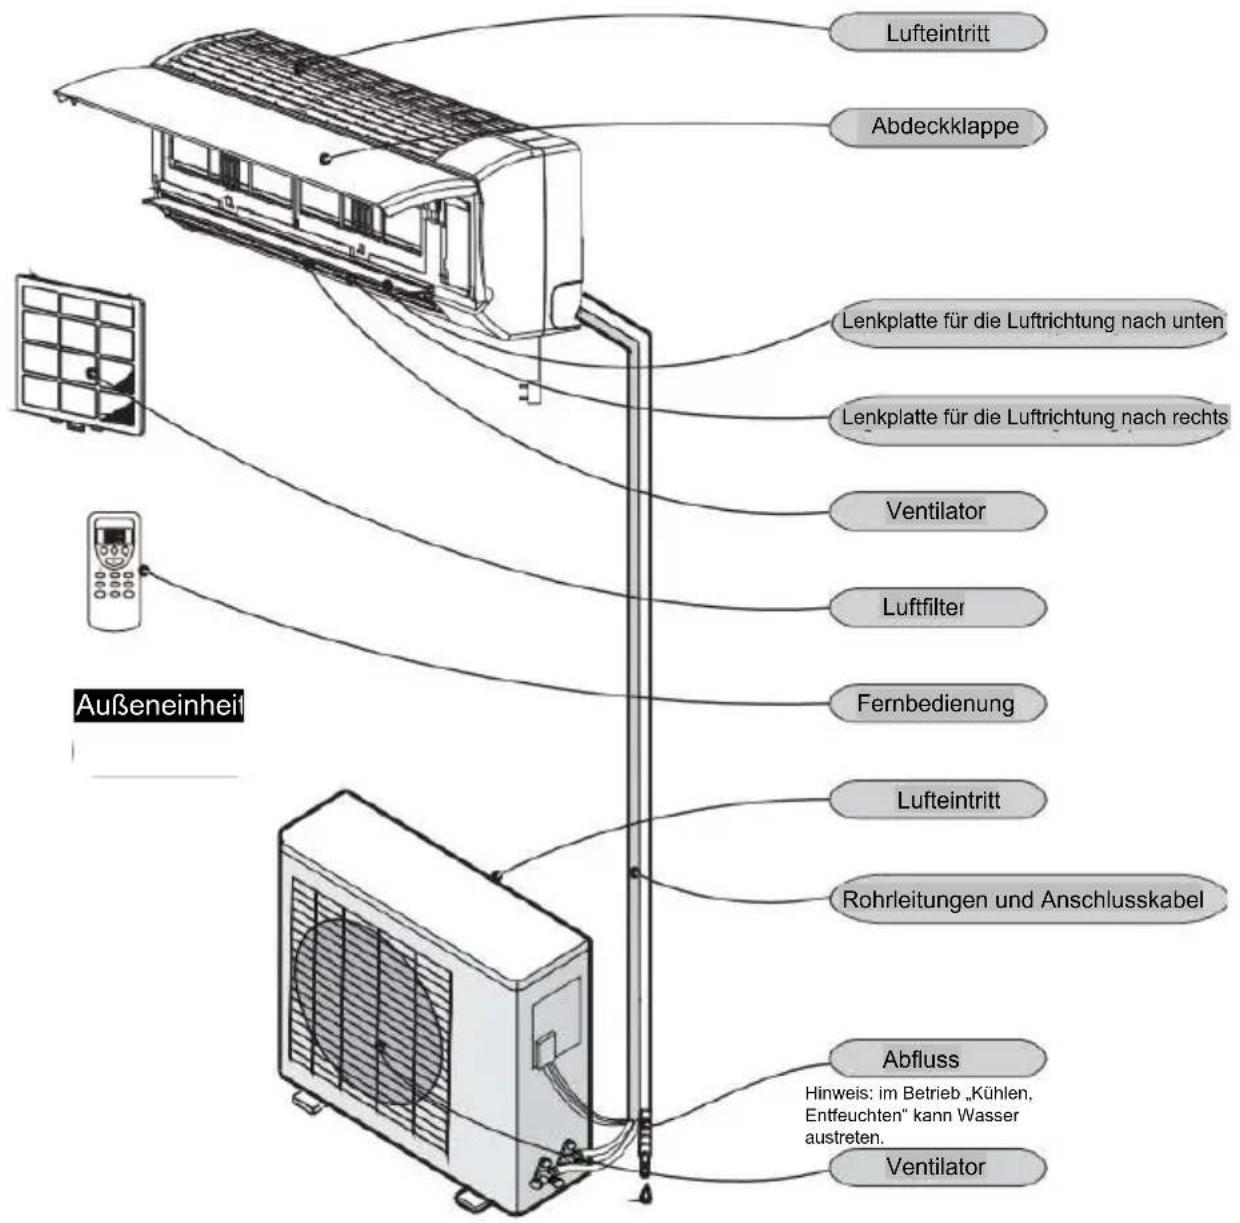
Because there are many models, features and appearance will vary, we only introduce the follow
Indoor Unit Unita interna
text_image
Air inlet Panel Down air direction adjusting plate Right air direction adjusting plate vent Air filter Remote control Air inlet Piping and connection wires Drain Note: when "cooling, dehumidifying: operation. There will water out. Vent Unita esterna Outdoor UniThe picture shows the structure diagram, rather than the product.
Display icon
Running indicator: ⏻
Timer indicator: ⏱ ⏱ ⏱ ⏱
Sleep indicator: 🎨 🎩 🎩 🎩
Cooling indicator: ✦ ✦ ✦
Heating indicator:
Dehumidifying indicator:
Ventilation run icon: ≡ ✿ ✿
Auto indication icon:
Low wind run icon:
Stroke run icon:
The high wind run icon:
Strong run icon: 📂
Digital display tube icon: 88
Electric heating run icon: 🍴 🌐 ≈
Above figure shows all indications for the purpose of the explanation but practically only the partinent parts are indicated.
The indicator may be changed, but it does not affect your operation.
Note: You can check product parameters from the nameplate.
Use of remote control
- On first use, insert battery and ensure the Plus-n-Minus is in correct connection.
- Ensure that remote controller is pointed at the signal receiver without any obstruction; Do not make the remote controller fall off or throw it carelessly; Any liquid cannot flow into the remote controller; Do not put the remote controller near the high temperature objects or on the place exposed to direct sunlight or strong light.
- If the remote controller is unable to be operated, please reinsert the batteries after removing it for 30 second. If it is still unable to be operated, please replace new batteries. The useless batteries should be disposed as relevant national regulations.
- Do not mix use of new-and-used batteries or different type batteries, otherwise, the remote controller should be unable to be operated.
- If the remote controller is not used for a long time, please take out the batteries to prevent the remote controller from being damaged by the leaked fluid.
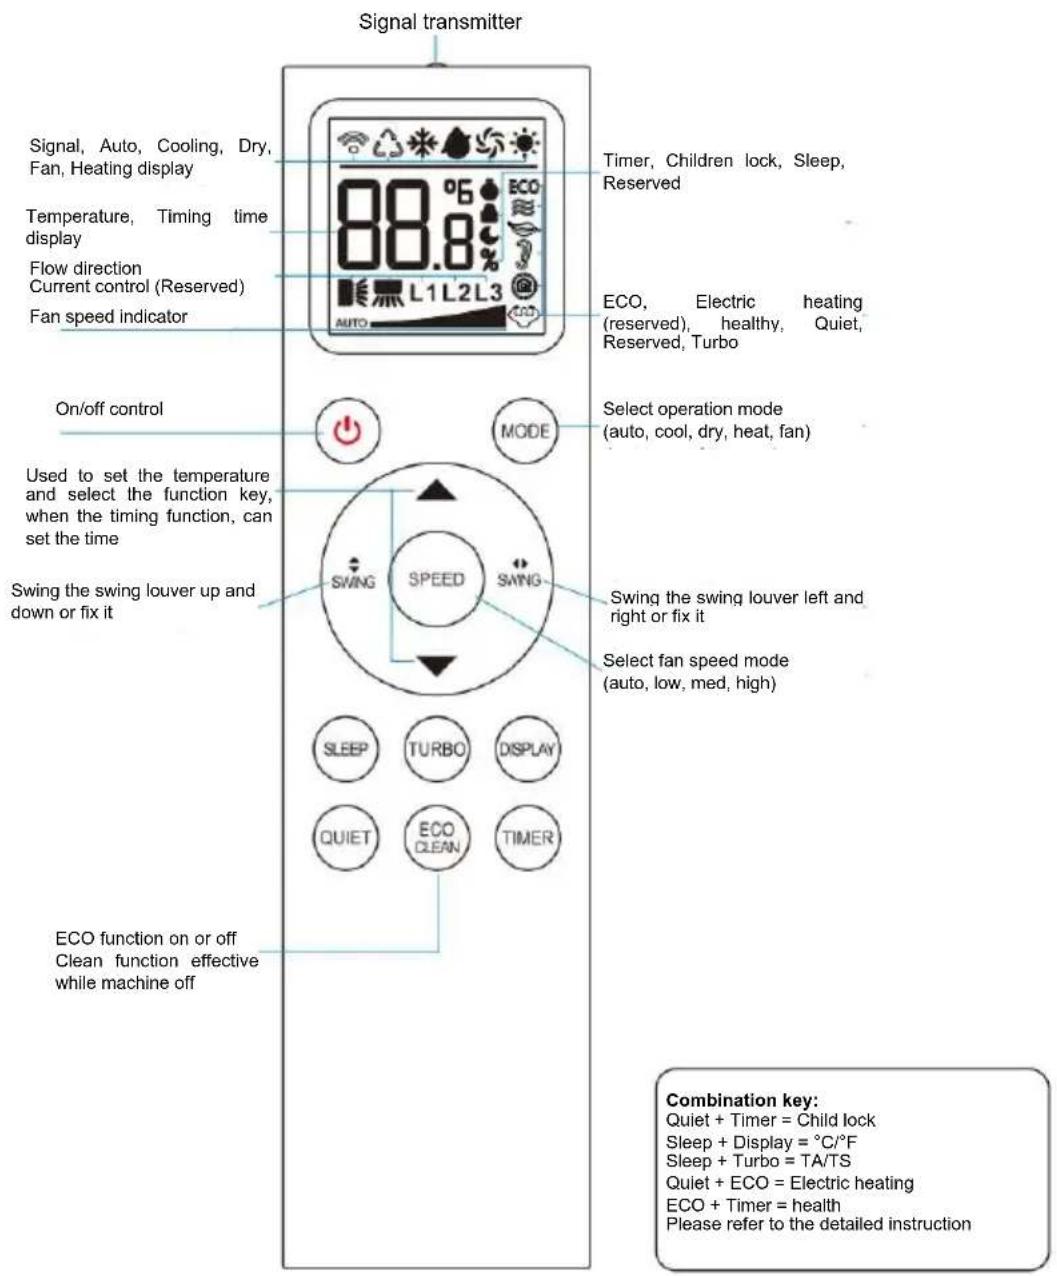
- Please understand that this type of remote controller is general type, including the entire function button. The specific function is subject to the function of A/C.
text_image
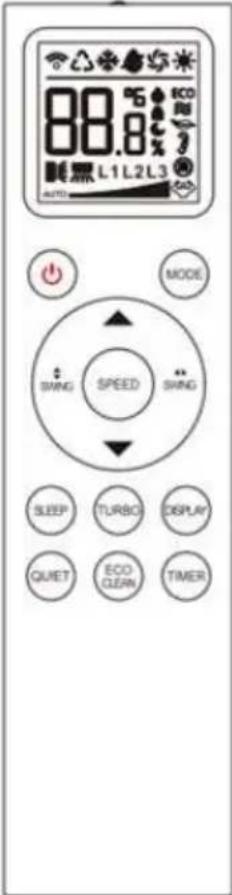
Signal transmitter Signal, Auto, Cooling, Dry, Fan, Heating display Temperature, Timing time display Flow direction Current control (Reserved) Fan speed indicator On/off control Used to set the temperature and select the function key, when the timing function, can set the time Swing the swing louver up and down or fix it ECO function on or off Clean function effective while machine off Timer, Children lock, Sleep, Reserved ECO, Electric heating (reserved), healthy, Quiet, Reserved, Turbo Select operation mode (auto, cool, dry, heat, fan) SWING SPEED SWING MODE Switch the swing louver left and right or fix it Select fan speed mode (auto, low, med, high) SLEEP TURBO DISPLAY QUIET ECO CLEAN TIMER Combination key: Quiet + Timer = Child lock Sleep + Display = °C/°F Sleep + Turbo = TA/TS Quiet + ECO = Electric heating ECO + Timer = health Please refer to the detailed instruction★ The picture of the remote control is for reference only, please refer to the actual product.
text_image
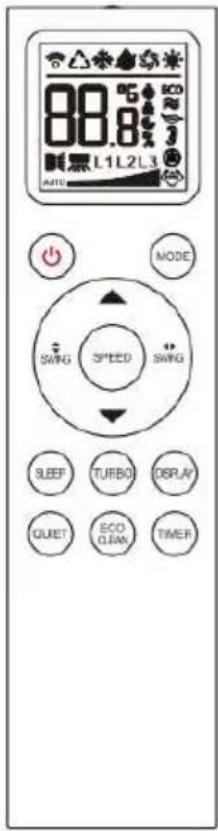
88.8 L1L2L3 AUTO MODE SWING SPEED SWING SLEEP TURBO DBRAY QUIET ECO CLAW TIMER
Button
* On/Off control, for the air conditioning turned on or off.

Button
*Pressing ECO to switch cyclically according to "ECO-STOP ECO-ECO"
Button Mode
* Cycle mode when this button is pressed as follows: AUTO--COOL--DRY--HEAT--FAN--AUTO

(Temperature/Time) Button
* Press once to set the temperature to rise by 1^ , press V once to decrease the temperature by 1^ .
* Temperature setting range is 16-32°C
Note: This button is invalid in DRY/FAN mode.
Button Guide Louver
*Flap guide louver up-and-down when this button is pressed. Re-press to fix louver.

Button Swing Louver
* Button swing louver (internal louver): swing "swing louver" left-and-right or fix louver.

(only available for the A/C with this function)
Button Fan speed
* Cycle fan speed when this button is pressed, as follow:
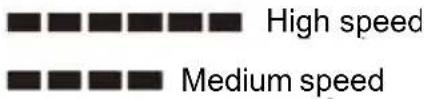
text_image
High speed Medium speed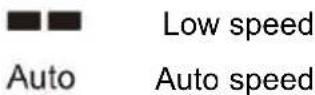
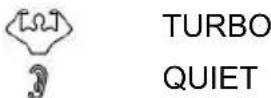
Button Display
When the air conditioner is on, press "DISPLAY" to turn on the room machine display and press again to turn off the air conditioner.
Button Sleep
*A/C enters low speed mode by default under sleep mode. Fan speed is adjustable.
text_image
88.8 L1 L2 L3 AUTO MODE SWING SPEED SHING SLEEP TURBO DISPLAY QUIET ECO CLEAN TIMERButton Cleaning
*Only under remoter controller condition of power off, can it transmit "auto clean" signal when this button is pressed to power on. The remote control and indoor unit will display CL. Press CLEAN or ON/OFF again to exit the automatic cleaning function. In automatic cleaning mode, the air conditioner will run for 10 to 15 minutes and then shut down automatically.
of Button Health (only available for the A/C with this function)
*Press the ECO and TIMER keys to enable the health function. Then press again to cancel the feature.
*Only by adding related auxiliary components (such as UV lamp and anion generator) can it be realized. This feature is optional and is not available by default.
Button Timer
*Δ/∇(temp/timer) control button, each time press “Δ” to set temperature rises 1°C, press “∇” to set temperature drops 1. *Temperature setting range is 16\~32°C.
PS: The button is invalid when in clean and fan mode. Button "TIMER" should be operated with "time". Specific operation is subject to button timer description.
Pressing a key other than the open key will exit the timing display, but the timing is still valid. After the timed shutdown function is enabled, press the shutdown button to exit the timed shutdown function. After the timed startup function is enabled, press the power button to exit the timed startup function.
°C/°F
When the air conditioner is on, press the SLEEP and DISPLAY keys at the same time to switch between the °C and °F displays. The default value is Celsius.
Child Lock function
* Press the QUIET and TIMER keys at the same time to lock all the functions of the remote control, Press again to unlock.
Electric heating function
In the heating mode, press the ECO and QUIET
keys to enable the electric heating function. will be displayed on the remote control.
The electric heating function is disabled by default.
Note: Only heat pump air conditioners may be charged heating devices!

Cleaning and Maintenance
The power must be shut off before maintenance.
1. Remove the filter screen
Make sure the air conditioner is turned off.
Gently push up the panel for small distance and turn over outward for a certain angle to open the panel. Lift up the filter screen and pull out toward yourself to remove.
2. Clean the filter screen
Gently pat it or clean with vacuum cleaner. If the filter screen is too dirty, it can be washed by the solution containing small amount of neutral detergent. After washing, dry the filter screen and install it to the original location.
Note: The filter screen should not be exposed to sunlight, dried by stove fire, or washed with hot water above 40^ C. Otherwise it will be deformed.
3. Clean the air conditioner
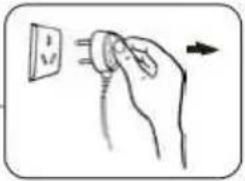
For safety purpose, the power plug must be unplugged before cleaning to avoid electric shock.
Do not wash the air conditioner with water Wipe the machine with soft cloth.
Do not wash the machine with volatile oil, gasoline, diluent, putty powder, etc.
For fingerprint or oil contamination, please wash with household neutral detergent.
4. Before the using season
Check if the air inlet and air outlet of indoor unit and outdoor unit are blocked.
The protective cover of outdoor unit must be removed.
Check if the installation base is corrosive or rusted.
Check if the power cable and grounding wire are in normal condition.
Check if the drain hose is bent, end is lifted, or is blocked.
Before operation, check and make sure the air filter screen is well installed. If the machine is running without air filter screen, the air conditioner may be damaged by dust and foreign substances.
5. After using season
Shut down the air conditioner and pull out the power plug.
Note: For common air conditioner, it will consume 5W power during standby status if the power plug is not pulled out. The standby power consumption of the machine marked with * is only 1W. 1W standby power consumption is measured in accordance with the enterprise standard Q/ZG 119 'Measuring Method of Standby Power Consumption for Household Air Conditioner".
Please carefully clean and maintain the air filter screen and other parts.
Cover the outdoor unit with plastic cloth to prevent the dust or waste from entering into the machine.
natural_image
Hand holding a plug inserted into an electrical outlet, with an arrow indicating direction (no text or symbols)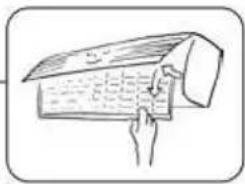
natural_image
Illustration of a hand holding a wooden log, no text or symbols present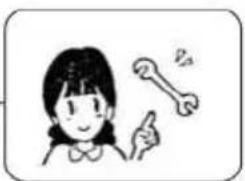
natural_image
Illustration of a girl pointing at a wrench (no text or symbols present)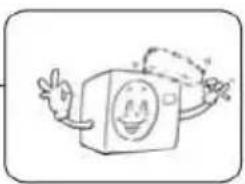
natural_image
Cartoon illustration of a smiling cube character with arms and legs, no text or symbols present
natural_image
Simple line drawing of two stacked cubes, one with a folded edge and the other with a cube (no text or symbols)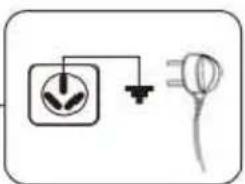
natural_image
Simple line drawing of an electrical socket connected to a plug, no text or symbols present
natural_image
Illustration of a girl pointing at a wrench symbol (no text or labels present)Fault Analysis
The following examples are not faults.
| After shutting down, the air conditioner cannot restart immediately. | If the user restarts the air conditioner when it is just stopped, the 3-minute protective tinner of air conditioner will be automatically activated and the air will the restarted 3 minutes later. |
| If the air conditioner is shut down when it is in refrigerating mode, the wind supply should not be turned off immediately and wind deflector should not be closed immediately, (for machine type marked with *) | It is because that the air conditioner is executing the mould-proof operation and the indoor unit is running with low wind and wind deflector will be closed after 30 seconds. |
| No wind is supplied in the beginning of heating | Before the heat exchanger of indoor unit is warm, stop wind supply to avoid blowing cold wind (for 2 to 5 minutes). |
| There is strange smell coming out when start-up. | It is because that the smoke and smell from cosmetics, wall or furniture is attached on the air conditioner and is dissipated by wind blowing. |
| Water flow sound can be heard during operation of the air conditioner | It is the flowing sound of internal refrigerant of the air conditioner |
| Crackle can be heard after starting or stopping the heating or refrigerating | It is caused by the thermal expansion and extraction. |
Before contacting the service department, please check the following items, which may save your time and expense.
| “Malfunction” | Analysis on the “Malfunction” |
| Air conditioner is unable to run. 1 | Check if power is failed.2 Check if power is connected.3 Check if Timing ON/OFF function is set.4 Check if the voltage is too high or too low.5 Check if the residual current circuit breaker is switched off. |
| Cooling (heating) effect is not good. | 1 Check if the set temperature is OK.2 Check if the air inlet and outlet of indoor and outdoor unit are blocked.3 Check if the air filter screen is blocked by too much dirt.4 Check if all the doors and windows are closed.5 Check if there are any heat resources. |
| Remote control is not functional | 1 When the remote control is exposed to direct sunlight or strong light, the remote signal may not be received. In this case, please bock out the sunlight or dim the lighting.2 Check if it is within the reception range and if any obstacles.3 Check if the battery voltage is sufficient. Or you should replace with new batteries.4 If the remote control display is not clear, please replace with new batteries. |
In case of following situations, please stop operation immediately, shut off power, and contact our dealers or authorized service center.
- The fuse always burn out and electric switch is always disconnected.
• Electric wire is abnormally heated or the wire insulation is broken.
• Other abnormal status.
Notices for Installation
Installation environment
The air conditioner must be installed by professionals. The “Installation Instructions” is only for the reference of professional installation personnel! The installation must conform to our after-sale service regulations.
-
Requirements for installation environment of indoor unit
-
Install on the non-vibration and solid wall and make horizontal adjustment. Put the back of wall-hanging unit against the wall.
- There are no obstacles prevent the proper air circulation at air inlet and outlet.
- Keep away from the heat source and inflammables and places where the moisture is strong.
- The panel of the indoor unit should avoid being exposed to sunlight. The operation location should not have strong electromagnetic interference.
- It should be convenient for connecting the outdoor unit and draining through drain hose.
- It should be near to the power socket for dedicated line.
- Install by following the instructions on the diagram to ensure the distance between the unit and wall, ceiling, and other obstacles, so as to ensure the normal operation and maintenance of unit.
-
Height of the indoor unit to the floor should be higher than the sight level.
-
Requirements for installation environment of outdoor unit
-
Installation foundation should be solid and firm.
- Install by following the instructions in the diagram to ensure the distance between the unit and other obstacles.
- It should add weather-proof and sunshade shelter to prevent the outdoor unit from being damaged by rain and sunlight. Be careful not to influence the heat dissipation.
- Keep away from the heat source and inflammables.
- It should install in a proper place to prevent the operation noise and circulated gas of outdoor unit from influencing the neighbors.
Notices for Installation
- The fuse types for the series of indoor unit include 50T or 50F and the rated parameter is T3.15A250V. No fuse is equipped on the machine. Please select proper fuses or other over-current protective equipment for power supply in accordance with the requirements on the main nameplate.
- The series of air conditioners can be safely used under the external static pressure of 0.8-1.05 times of standard atmospheric pressure.
- The air conditioner should be installed in accordance with national wiring rules.
- Please check if the electric circuit connection, electric wires, electric meter, fuses, sockets, and switches for air conditioners conform to the national electrical safety standards. Make sure there is good grounding protection. Grounding wire must not be connected to the water supply pipe, gas pipe and other unreliable places. (Note: Installation and connection of electrical equipment should be performed by qualified professional technical personnel holding electrician certificate so as to avoid accidents).
- Please check if the power supply for air conditioner conforms to the requirements of national standards: AC 50Hz 220V-240±10%lt is the basic requirement for the safe and long-term use of your air conditioner.
| When installing or handling the air conditioner, no other gases except for specified refrigerant is allowed to mix in the refrigerant pipeline system.Otherwise the refrigerating cycle will be in abnormal high pressure and lead to pipe breaking and even personal injury. | |
| The unused power lines should not be tied up with bandage. Keep the lines in the piping tank in the back of the indoor unit.Otherwise it may cause heating and even fire. | |
| Do not process or prolong the power lines and use multiple distribution wiresOtherwise it may cause problems like poor contact, poor insulation and exceeding the permissible current, which may lead to dangerous situations like electric shock, fire, etc. | |
| The connecting terminals for Indoor and outdoor units must be firmly connected and fixed with fixed device.Otherwise the terminal connecting position will be heated and cause fire. | |
| The air conditioner must use independent circuit and must be equipped with delay action circuit breaker or auto-circuit breaker.If the air conditioner use shared line with other devices, it may be heated and cause fire. | |
| After installation, check to make sure no refrigerant is leaked, refrigerant system is well sealed and drain hose Is unobstructed.Otherwise the refrigerating effect will be influenced and the refrigerant leakage will do harm to human's health. |
Installation instructions [Installation Guidance]
Installation Diagram for Indoor and Outdoor unit
More than 15cm (Distance to the wall)
![Irradio BelAir ALASTOR 24 - Installation instructions [Installation Guidance] - 1](/content/2026/04/721254/images/6ed9d723b8b15d9767ac3d585771bf36fba16bb584a8d1f71818c93e9cb125aa.jpg)
text_image
More than 25cm (Distance to the ceiling) More than 15cm (Distance to the wall) Indoor unit More than 230cm (Distance to the floor) Distance to the wall More than 50cm Bandage 30cm (de) More than 30cm (Air inlet side) More than 200cm (Air outlet side) Outdoor unit Additional Refrigerant Piping length for Adding of Refrigerant| Cooling Capacity | Maximum Piping Length (m) | Maximum height Difference (m) | Additional Refrigerant (g/m) | Piping length for Adding of Refrigerant (m) |
| 1P/1.5P | 10 | 5 | 20 | 4 |
| 2P/3P | 10 | 8 | 30 | 4 |
Outdoor unit
Recommended cable specification
| Cooling Capacity Suggested that type 1P 1.5P/2P 3P | |||
| Indoor power cord HOSW-F ≥1.0mm | ^2 | ≥1.5mm ^2 | ≥2.5mm ^2 |
| Indoor and outdoor power cord H07RN ≥1.0mm | ^2 | ≥1.5mm ^2 | ≥2.5mm ^2 |
| Indoor and outdoor signal line H05RN ≥0.75mm | ^2 | ≥0.75mm ^2 | ≥0.75mm ^2 |
![Irradio BelAir ALASTOR 24 - Installation instructions [Installation Guidance] - 2](/content/2026/04/721254/images/328b3884c8bd6a46eea1aa0d48b834b336156d2ba904794c16b5a8b7398da53e.jpg)
This is the schematic diagram and not the product appearance drawing
| Warning | When the drainage nozzle is in the right of the indoor unit, as shown above, the left side of the indoor unit should not be 10mm lower and 20mm higher than the right side, so as to ensure the smooth draining of condensed water.When the drainage nozzle is in the left of the indoor unit, the right side of the indoor unit should not be 10mm lower or 20mm higher than the left side, so as to ensure the smooth draining of condensed water. |
[Installation Guidance]
Installation of Indoor unit
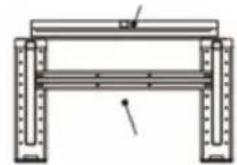
- Mount the wall-hung plate and locate the wall-through hole.
- Find proper location and adjust the mounting plate horizontally with level meter.
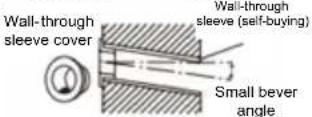
- By considering the actual situation, the wall-through hole should be made outer part downward a little than the inner part. Insert the wall-through sleeve and put on the cover.
- Wall-hung plate should be fixed with at least 5 screws. The screws should be distributed evenly.
Note:
The number of cables of different air conditioning models will be different, please refer to the electrical diagram for wiring according to the actual number.
Steps:
Open the panel, remove the cover plate. and connect the cable correctly as shown in the electrical diagram.
Outdoor side
Indoor side

text_image
Panel Electrical cover plate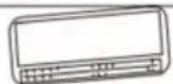
×
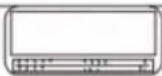
√
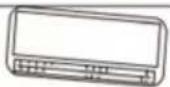
×
- Arrange pipeline and Install the Indoor unit
- Arrange the connecting pipe, drainage pipe and electric wire at bottom to facilitate drainage. Electric wire and indoor & outdoor connecting wire should not be entangled together.
Note:
Drain hose of indoor unit can only be drawn out from its own side.
- Fix the indoor unit on the wall-hung board.
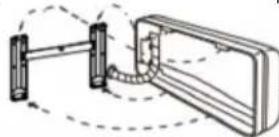
Wall-hung board Wall-through sleeve cover
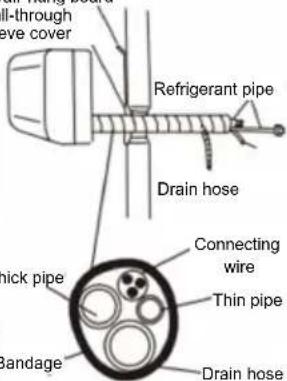
text_image
All-through eve cover Refrigerant pipe Drain hose Thick pipe Connecting wire Thin pipe Bandage Drain hoseInstallation of Outdoor Unit
• Installation and Fixation
Fix the mounting bracket (to be purchased additionally) on the wall and fix the outdoor unit firmly on the mounting bracket and remain level.
- Connect the electric wire of outdoor unit
-
Loosen the screws of large handle of outdoor unit.
-
Connect the connecting lines of indoor and outdoor units according to the connecting diagram for the large handle.
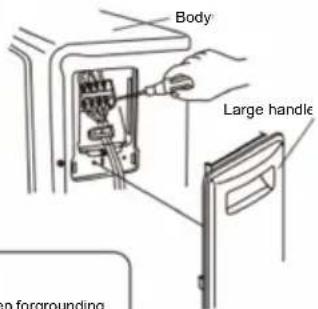
text_image
Body Large handle on forgrounding
Warning
The complete measures must be taken for grounding connection. When the electric wire is suffering the external force, it should ensure the core wires (yellow/green lines) of grounding wire to be stretched after other current-conductor core wires.
Piping Connection
- Joint Connection
- Align with the center of pipe, fasten the screws wit hand.
- Screw the nuts with torque spanner and wrench. Screw according to the instructions of torque spanner. The torque should not be too large or too small.
Torque spanner
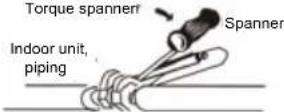
Outdoor
unit, piping
| Diameter of connecting pipe (mm) | Tightening torque of nut (N·m) |
| 6 or 6.35 | 15-20 |
| 9.52 | 31-35 |
| 12 or 12.7 | 45-50 |
| 15.88 or 16 | 6C-65 |
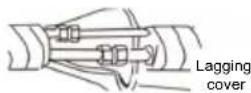
- wrap the connector with lagging cover
Operation Method for Exhausting Air
• Method for exhausting air
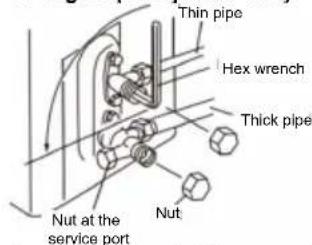
- Remove the nuts on the two-way valve and three-way valve.
- Turn the valve handle of two-way valve for 90 degree and keep for 10 seconds, and then close.
- Check the connecting part of pipe with soapy water to see if it leaks air. If no air leakage, open the two-way valve and then close.
90 degree (one quarter turn)
text_image
Thin pipe Hex wrench Thick pipe Nut at the service port Nut-
During exhausting air, press the pin on the service port of three-way valve with hex wrench for 3 seconds and then release for 1 minute. Open the two-way valve and then close. Repeat the above procedure for 3 times to exhaust air.
-
Open the two-way valve and three-way valve with hex wrench. Screw in the nuts and finish the operation of exhausting air.
• Vacuum method (must be used for R410A refrigerant)
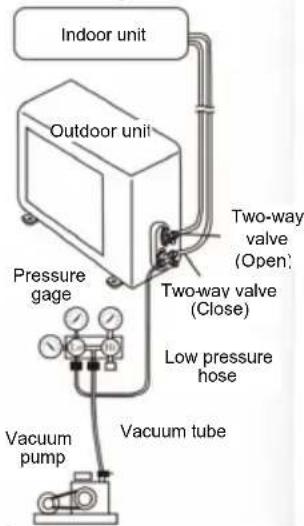
- Remove the nut on the two-way valve and three-way valve and nut on service port. Connect the low-pressure hose on the dedicated pressure gage to the service port. (The shut-off valve on two-way and three-way valve are in off status)
- Fully open the low-pressure switch on the pressure gage and start vacuum pump.
- Vacuumize for at least 25 minutes and make sure the pressure gage indication is -0.1 MPa. Close the low-pressure switch and then close vacuum pump. If the pressure does not increase within 5 minutes, please perform the next operation. Otherwise you should vacuumize again.
text_image
Indoor unit Outdoor unit Pressure gage Two-way valve (Open) Two-way valve (Close) Low pressure hose Vacuum pump Vacuum tube- After vaccumizing,
counterclockwise open the shutoff valve on the two- way valve and keep 10 seconds and then stop Check the leakage (If any leakage is found, reconnect the pipe and then perform the above procedure again).
- Quickly remove the low-pressure hose and open two-way valve and three-valve with hex wrench.
- Fasten the nut on the valve body.
Inspection after installation
| Inspection Items Problems caused byImproper Installation | |
| Check if installation is firm Machine may be fell down, vibrated or made noise | |
| Check if there is any leakage | It may cause insufficiency of cooling (heating) capacity |
| Check if the heat insulation of machine is sufficient | Condensation or water drop may appear |
| Check if the drainage is smooth | Condensation or water drop may appear |
| Check if the power voltage conforms to that on the product nameplate | The machine may be malfunctioned or the parts may be burnt. |
| Check if the lines and pipes are properly installed. | The machine may be malfunctioned or the parts may be burnt. |
| Check if the machine is safely grounded. | Electric leakage may occur. |
| Check if the electric wire type conforms to the specification. | The machine may be malfunctioned or the parts may be burnt. |
| The air outlet and inlet of indoor and outdoor unit are obstructed. | It may cause insufficiency of cooling (heating) capacity |
Pilot run
• Preparation for test run
- Power should not be turned on before completion of all installation works.
- All lines are properly connected and all the electric wires are firmly connected.
- Open the shut-off valve of thick and thin pipes
- All the unnecessary materials, especially metal wire and thread, should be removed from the machine.
• Method for test run
- Turn on the power, press ON/OFF button on the remote control to start the air conditioner.
- Press Mode button to select the required mode and check if the running is normal.
PRODUCT CONFORMITY
The producer Melchioni Spa declares that the product Air conditioner with heat pump Mod. ALASTOR 9,12,18,24 (Cod. 158660051/158660052/158660053/158660054) is in compliance with Directive 2014/30/EU of the European Parliament and of the Council, of 26 february 2014, on the harmonisation of the laws of the Member States relating to electromagnetic compatibility.
The producer Melchioni Ready Srl declares that the product Air conditioner with heat pump Mod. ALASTOR 9,12,18,24 (Cod. 158660051/158660052/158660053/158660054) is in compliance with Directive 2014/35/EU of the European Parliament and of the Council, of 26 february 2014, on the harmonisation of the laws of the Member States relating to the making available on the market of electrical equipment designed for use within certain voltage limits.
The producer Melchioni Ready Srl declares that the product Air conditioner with heat pump Mod. ALASTOR 9,12,18,24 (Cod. 158660051/158660052/158660053/158660054) is in compliance with Directive 2009/125/EC of the European Parliament and of the Council, of 21 october 2009, establishing a framework for the setting of ecodesign requirements for energy-related products.
The producer Melchioni Ready Srl declares that the product Air conditioner with heat pump Mod. ALASTOR 9,12,18,24 (Cod. 158660051/158660052/158660053/158660054) is in compliance with Directive 2011/65/EU of the European Parliament and of the Council, of 8 June 2011 and subsequent Commission Delegated Directive 2015/863, on the restriction of the use of certain hazardous substances in electrical and electronic equipment.
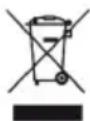
According to Directive 2012/19/EU of the European Parliament and of the Council, of 4 July 2012, on waste electrical and electronic equipment (WEEE), the presence of the crossed-out bin symbol indicates that this appliance is not to be considered as urban waste: its disposal must therefore be carried out by separate collection. Disposal in a non-separate manner may constitute a potential harm to the environment and health. This product can be returned to the distributor when purchasing a new device. Improper disposal of the appliance constitutes misconduct and is subject to sanctions by the Public Security Authority. For further information, contact the local administration responsible for environmental matters.
PRODUCT WARRANTY
Melchioni Spa, based in Milan (Italy), via Colletta 37, recognizes a conventional guarantee on the product for a period of two years from the date of the first purchase by the consumer. This guarantee does not affect the validity of the legislation in force concerning consumer goods (Legislative Decree 6 September 2005 n. 206 art. 128 and following), of which the consumer remains the owner. This guarantee applies to the entire territory of the European Union.
The components or parts that are found to be defective for ascertained manufacturing causes will be repaired or replaced free of charge through the dealer, during the above warranty period. Melchioni Spa reserves the right to make a complete replacement of the device, if repairability is impossible or excessively expensive, with another device of similar characteristics (Legislative Decree 6 September 2005 no. 206 art. 130) during the warranty period. In this case, the validity of the warranty remains that of the original purchase: the service provided under warranty does not extend the warranty period.
In any case, this appliance will not be considered defective in terms of materials or manufacture should it be adapted, changed or adjusted, in order to comply with national or local safety and / or technical standards, in force in a country other than that for which it is was originally designed and manufactured. This appliance has been designed and built for domestic use only: any other use will invalidate the benefits of the guarantee.
The warranty does not cover:
- parts subject to wear or tear, nor those parts that require periodic replacement and / or maintenance
• professional use of the product - malfunctions or any defects due to incorrect installation, configuration, software / BIOS / firmware update not performed by authorized Melchioni Spa
• repairs or interventions carried out by persons not authorized by Melchioni Spa - manipulation of assembly components or, where applicable, of the software
- defects caused by fall or transport, lightning, voltage fluctuations, liquid infiltration, opening of the appliance, bad weather, fire, public disturbances, inadequate ventilation or incorrect power supply
- any accessories, for example: boxes, bags, batteries, etc. used with this product
• home interventions for convenience checks or presumed defects
The recognition of the guarantee by Melchioni Spa is subject to the presentation of a tax document that proves the actual date of purchase. The same must not show any tampering or deletions, in the presence of which Melchioni Spa reserves the right to refuse the provision of treatment under warranty.
The warranty will not be recognized if the serial number or model of the appliance is non-existent, abraded or modified.
This warranty does not include any right to compensation for direct or indirect damage, of any nature, to people or things, caused by any inefficiency of the appliance. Any extensions, promises or services in this regard, insured by the retailer, will be borne by the latter.
| External units | 9000 | 12000 | 18000 | 24000 |
| Model | Alastor 9E | Alastor 12E | Alastor 18E | Alastor 24E |
| Supply voltage | 220-240 V AC 50 Hz | 220-240 V AC 50 Hz | 220-240 V AC 50 Hz | 220-240 V AC 50 Hz |
| Maximum absorption | 8,3 A | 9,1 A | 11,2 A | 15,9 A |
| Cooling capacity | 2,65 KW | 3,54 KW | 5,28KW | 7,10 KW |
| Heating capacity | 2,75 KW | 3,68 KW | 5,40 KW | 7,42 KW |
| Degree of protection | IPX4 | IPX4 | IPX4 | IPX4 |
| Max. working pressure | 4,2 Mpa | 4,2 Mpa | 4,2 Mpa | 4,2 Mpa |
| Max. suction pressure | 1,2 Mpa | 1,2 Mpa | 1,2 Mpa | 1,2 Mpa |
| Noise level (± 3 db) internal/external | 53/60 db | 52/60 db | 55/61 db | 59/64 db |
| Weight | 25 Kg | 25 Kg | 30 Kg | 34 Kg |
| Refrigerant gas | R32 - 310 g | R32 - 430 g | R32 - 720 g | R32 - 900 g |
| GWP | 675 | 675 | 675 | 675 |
| tCO2eq | 0,209 | 0,29 | 0,486 | 0,608 |
| Unità interne | 9000 | 12000 | 18000 | 24000 |
| Modello | Alastor 9I | Alastor 12I | Alastor 18I | Alastor 24I |
| Tensione di alimentazione | 220-240 V AC 50 Hz | 220-240 V AC 50 Hz | 220-240 V AC 50 Hz | 220-240 V AC 50 Hz |
| Assorbimento nominale | 0,06 A | 0,06 A | 0,14 A | 0,14 A |
| Capacità refrigerante | 2,65 KW | 3,54 KW | 5,28 KW | 7,10 KW |
| Capacità riscaldante | 2,75 KW | 3,68 KW | 5,40 KW | 7,42 KW |
| Grado di protezione | IPX0 | IPX0 | IPX0 | IPX0 |
| Pressione di esercizio max | 4,2 Mpa | 4,2 Mpa | 4,2 Mpa | 4,2 Mpa |
| Pressione aspirazione max | 1,2 Mpa | 1,2 Mpa | 1,2 Mpa | 1,2 Mpa |
| Rumorosità (± 3 db) | 35 db | 35 db | 42 db | 43 db |
| Peso | 8 Kg | 8,5 Kg | 10 Kg | 14 Kg |
| Gas refrigerante | R32 | R32 | R32 | R32 |
| Portata d'aria min/max | 400/580 m^3/h | 420/610 m^3/h | 610/880 m^3/h | 880/1.310 m^3/h |
Because there are many models, features and appearance will vary, we only introduce the following
Unidad interior
natural_image
Hand holding a plug with a bulb, pointing right (no text or symbols)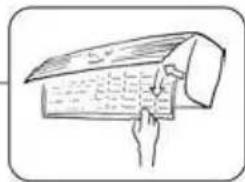
natural_image
Illustration of a hand pressing down on a textured surface with a curved object above (no text or symbols)
natural_image
Illustration of a girl pointing at a wrench and a pair of tools (no text or symbols)
natural_image
Cartoon illustration of a smiling cube character with arms outstretched (no text or symbols)
natural_image
Simple line drawing of two stacked cubes, one larger and one smaller, with no text or symbols present.
natural_image
Simple line drawing of an electrical plug and socket connected to a power outlet (no text or symbols)
natural_image
Illustration of a girl pointing at a wrench (no text or symbols present)CONFORMIDAD DEL PRODUCTO
natural_image
Cartoon illustration of a smiling cylindrical object with a bandage and a finger pointing at it (no text or symbols)text_image
Illustration showing a hand holding a plug and a battery with warning symbol, alongside a cartoon illustration of a plug being charged.text_image
Cartoon illustration showing a person sneezing with a bottle and a 'no' symbol, likely indicating no smoking or no smoking.Because there are many models, features and appearance will vary, we only introduce the following
Unité intérieure
natural_image
Hand holding a plug inserted into an electrical socket, with an arrow indicating direction (no text or symbols)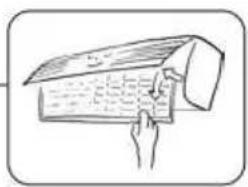
natural_image
Illustration of a hand holding a wooden beam with visible grain (no text or symbols)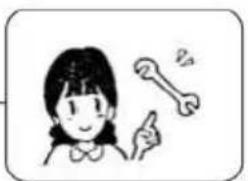
natural_image
Illustration of a girl pointing at a wrench (no text or symbols present)
natural_image
Cartoon illustration of a smiling cube character with arms and legs, no text or symbols present
natural_image
Simple line drawing of a cube and a rectangular block, no text or symbols present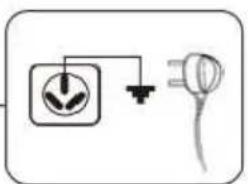
natural_image
Simple electrical circuit diagram showing a socket connected to an outlet and plug (no text or symbols)
natural_image
Illustration of a girl pointing at a wrench (no text or symbols present)Analyse des pannes
CONFORMITÉ DES PRODUITS
Because there are many models, features and appearance will vary, we only introduce the following
Inneneinheit
natural_image
Hand holding a plug with a power outlet, no text or symbols visible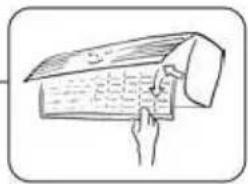
natural_image
Illustration of a hand pressing down on a wooden beam (no text or symbols)
natural_image
Illustration of a girl pointing at a wrench (no text or symbols present)
natural_image
Cartoon illustration of a smiling cube character with arms and legs, no text or symbols present
natural_image
Simple line drawing of two stacked cubes, one with a folded paper and the other with a cube (no text or symbols)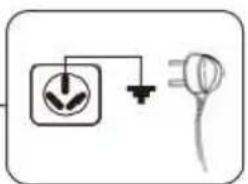
natural_image
Simple electrical circuit diagram showing a plug and bulb connected to a wire (no text or symbols)