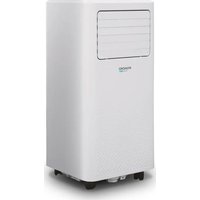
USER MANUAL VIGO 7 Irradio BelAir
Please read the user's manual carefully before using the product
FUNZIONAMENTO

UP

POWER

DOWN
FUNZIONAMENTO

Tubo di
scarico
Installation and Operation Manual for Air Conditioner
The Manual is for the Portable Air Conditioner
Thank you for choosing our air conditioner!
Before using the product, please carefully read this manual and keep it in safe for later reference.
Please ask for professionals to install the product.
NOTE:
- This appliance is not intended for use by persons (including children) with reduced physical, sensory or mental capabilities, or lack of experience and knowledge, unless they have been given supervision or instruction concerning use of the appliance by a person responsible for their safety. Children should be supervised to ensure that they do not play with the appliance.
- If the supply cord is damaged, it must be replaced by the manufacturer, its service agent or similarly qualified persons in order to avoid a hazard.
- The appliance shall be installed in accordance with national wiring regulations.
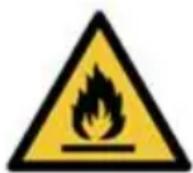
- Risk of fire: flammable materials - The refrigerant circuit of the appliance contains a natural refrigerant gas with a high level of environmental compatibility, which however is flammable. During transport and installation of the appliance, make sure that none of the
components of the refrigeration circuit are damaged.
- If the refrigeration circuit is damaged, avoid open flames and ignition sources and thoroughly ventilate the room in which the appliance is located
SAFETY PRECAUTIONS

This symbol indicates that ignoring instructions may cause death or serious injury.

WARNING: To prevent death or injury to the user or other people and property damage, the following instructions must be followed.
Incorrect operation due to ignoring of instructions may cause death, harm or damage.
- Installation must be performed according to the installation instructions. Improper installation can cause water leakage, electrical shock, or fire.
- Use only the included accessories and parts, and specified tools for the installation. Using non-standard parts can cause water leakage, electrical shock, fire, and injury or property damage.
- Make sure that the outlet you are using is grounded and has the appropriate voltage. The power cord is equipped with a three-prong grounding plug to protect against shock. Voltage information can be found on the nameplate of the unit.
- Your unit must be used in a properly grounded wall receptacle. If the wall receptacle you intend to use is not adequately grounded or protected by a time delay fuse or circuit breaker (the fuse or circuit breaker needed is determined by the maximum current of the unit. The maximum current is indicated on the nameplate located on unit), have a qualified electrician install the proper receptacle.
- Install the unit on a flat, sturdy surface. Failure to do so could result in damage or excessive noise and vibration.
- The unit must be kept free from obstruction to ensure proper function and to mitigate safety hazards.
-DO NOT modify the length of the power cord or use an extension cord to power the unit.
- DO NOT share a single outlet with other electrical appliances. Improper power supply can cause fire or electrical shock.
-DO NOT install your air conditioner in a wet room such as a bathroom or laundry room. Too much exposure to water can cause electrical components to short circuit.
- DO NOT install the unit in a location that may be exposed to combustible gas, as this could cause fire.
- The unit has wheels to facilitate moving. Make sure not to use the wheels on thick carpet or to roll over objects, as these could cause tipping.
-DO NOT operate a unit that it has been dropped or damaged.
- The appliance with electric heater shall have at least 1 meter space to the combustible materials.
-Do not touch the unit with wet or damp hands or when barefoot.
- If the air conditioner is knocked over during use, turn off the unit and unplug it from the main power supply immediately. Visually inspect the unit to ensure there is no damage. If you suspect the unit has been damaged, contact a technician or customer service for assistance.
- In a thunderstorm, the power must be cut off to avoid damage to the machine due to lightning.
- Your air conditioner should be used in such a way that it is protected from moisture, e.g. condensation, splashed water, etc. Do not place or store your air conditioner where it can fall or be pulled into water or any other liquid. Unplug immediately if it occurs.
- All wiring must be performed strictly in accordance with the wiring diagram located inside of the unit.
- The unit's circuit board (PCB) is designed with a fuse to provide overcurrent protection. The specifications of the fuse are printed on the circuit board, such as: T 3.15A/250V, etc.
Cautions

- This appliance can be used by children aged from 8 years and above and person with reduced physical, sensory or mental capabilities or lack of experience and knowledge if they have been given supervision or instruction concerning use of the appliance in a safe way and understand
the hazards involved. Children shall not play with the appliance. Cleaning and user maintenance shall not be made by children without supervision, (be applicable for the European Countries)
- This appliance is not intended for use by persons (including childern) with reduced physical, sensory or mental capabilities or lack of experience and knowledge, unless they have been given supervision or instruction concerning use of the appliance by a person responsible for their safety, (be applicable for other countries except the European Countries)
- Children should be supervised to ensure that they do not play with the appliance. Children must be supervised around the unit at all times.
- If the supply cord is damaged, it must be replaced by the manufacturer, its service agent or similarly qualified persons in order to avoid a hazard.
- Prior to cleaning or other maintenance, the appliance must be disconnected from the supply mains.
- Do not remove any fixed covers. Never use this appliance if it is not working properly, or if it has been dropped or damaged.
-Do not run cord under carpeting. Do not cover cord with throw rugs, runners, or similar coverings. Do not route cord under furniture or appliances. Arrange cord away from traffic area and where it will not be tripped over.
- Do not operate unit with a damaged cord, plug, power fuse or circuit breaker. Discard unit or return to an authorized service facility for examination and/or repair.
- To reduce the risk of fire or electric shock, do not use this fan with any solid-state speed control device.
-The appliance shall be installed in accordance with national wiring regulations.
-Contact the authorised service technician for repair or maintenance of this unit.
-Contact the authorised installer for installation of this unit.
-Do not cover or obstruct the inlet or outlet grilles.
-Do not use this product for functions other than those described in this instruction manual.
-Before cleaning, turn off the power and unplug the unit.
-Disconnect the power if strange sounds, smell, or smoke comes from it.
Cautions

-Do not press the buttons on the control panel with anything other than your fingers.
- Do not remove any fixed covers. Never use this appliance if it is not working properly, or if it has been dropped or damaged.
-Do not operate or stop the unit by inserting or pulling out the power cord plug.
- Do not use hazardous chemicals to clean or come into contact with the unit. Do not use the unit in the presence of inflammable substances or vapour such as alcohol, insecticides, petrol, etc.
- Always transport your air conditioner in a vertical position and stand on a stable, level surface during use.
- Always contact a qualified person to carry out repairs. If the damaged power supply cord must be replaced with a new power supply cord obtained from the product manufacturer and not repaired.
-Hold the plug by the head of the power plug when taking it out.
-Turn off the product when not in use.
PREPARATION
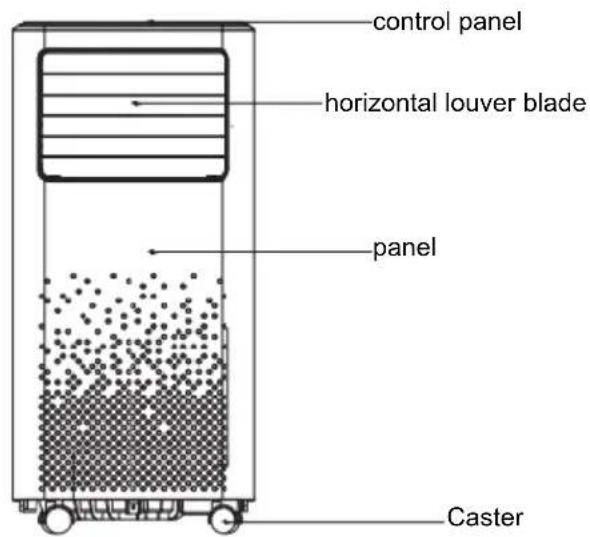
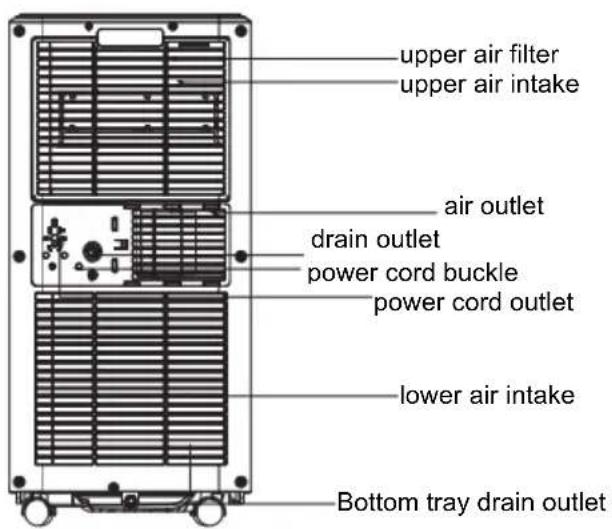
INSTALLATION
Choosing The Right Location
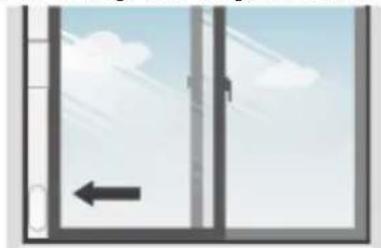
Recommend
Installation
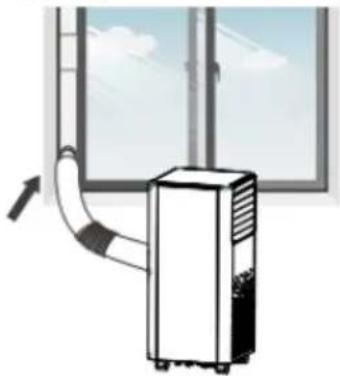
Your installation location should meet the following requirements:
-Make sure that you install your unit on an even surface to minimize noise and vibration.
-The unit must be installed near a grounded plug, and the Collection Tray Drain (found on the back of the unit) must be accessible.
-The unit should be located at least 30cm (12") from the nearest wall to ensure proper air conditioning.
-DO NOT cover the Intakes, Outlets or Remote Signal Receptor of the unit, as this could cause damage to the unit.
NOTE:
All the illustrations in the manual are for explanation purpose only. Your machine may be slightly different.
The unit can be controlled by the unit control panel alone or with the remote controller.
STANDARD ACCESSORIES
Exhaust flat nozzle
Exhaust pipe joint
INSTALLATION
Window Installation Kit
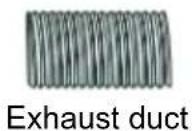
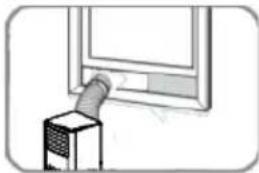
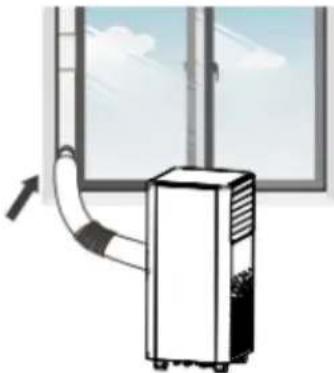
Step One: Preparing the Exhaust Hose assembly Press the exhaust hose into the window slider adaptor and unit adaptor, clamp automatically by elastic buckles of the adaptors.
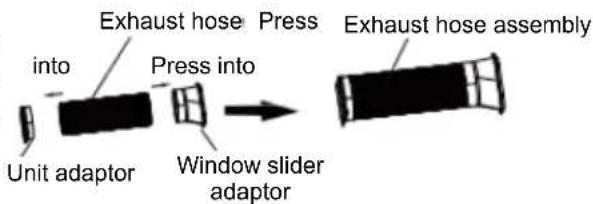
Step Two: Install the Exhaust hose assembly to the unit
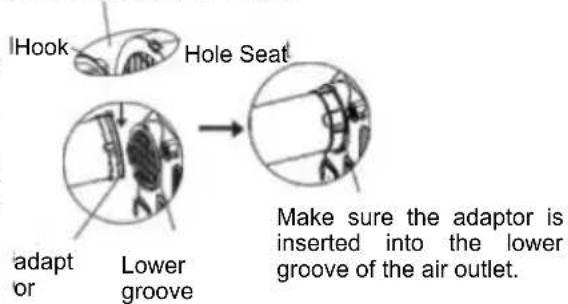
Insert unit adaptor of the Exhaust hose assembly into the lower groove of the air outlet of the unit while the hook of the adaptor is aligned with the hole seat of the air outlet and slide down the Exhaust hose assembly along the arrow direction for installation.
Make sure the hook of the adaptor is aligned with the hole seat of the air outlet.
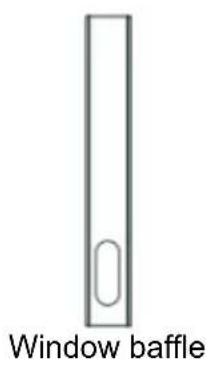
Step Three: Preparing the Adjustable Window Slider
- Depending on the size of your window, adjust the size of the window slider.
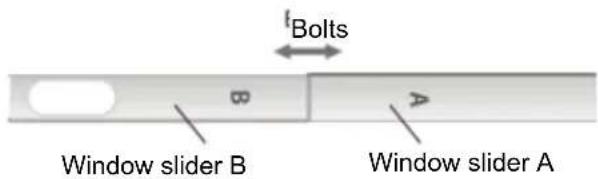
- If the length of the window requires two window sliders, use the bolt to fasten the window sliders once they are adjusted to the proper length.
- For some models, if the length of the window requires three window sliders(optional), use two bolts to fasten the window sliders once they or are adjusted to proper length.
Note: Once the Exhaust Hose assembly and Adjustable Window Slider re prepared, choose from one of the following Installation methods. Type 1: Hung Window or Sliding Window Installation(optional)
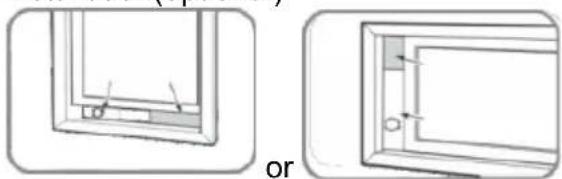
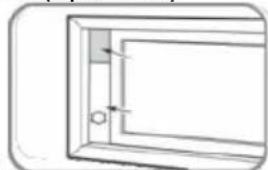
1 Insert the window slider assembly into the window opening.
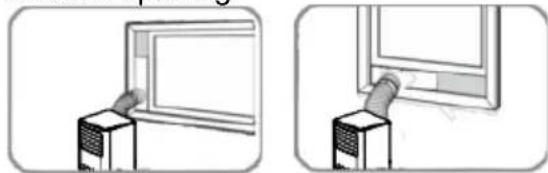
- Insert the window slider adaptor into the hole of the window slider.
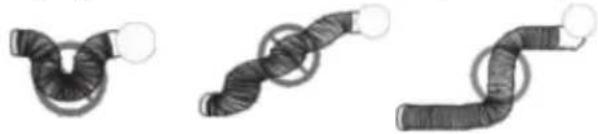
Note: To ensure proper function, DO NOT overextend or bend the hose. Make sure that there is no obstacle around the air outlet of the exhaust hose (in the range of 500mm) in order to the exhaust system works properly. All the illustrations in this manual are for explanation purpose only. Your air conditioner may be slightly different. The actual shape shall prevail.
OPERATION
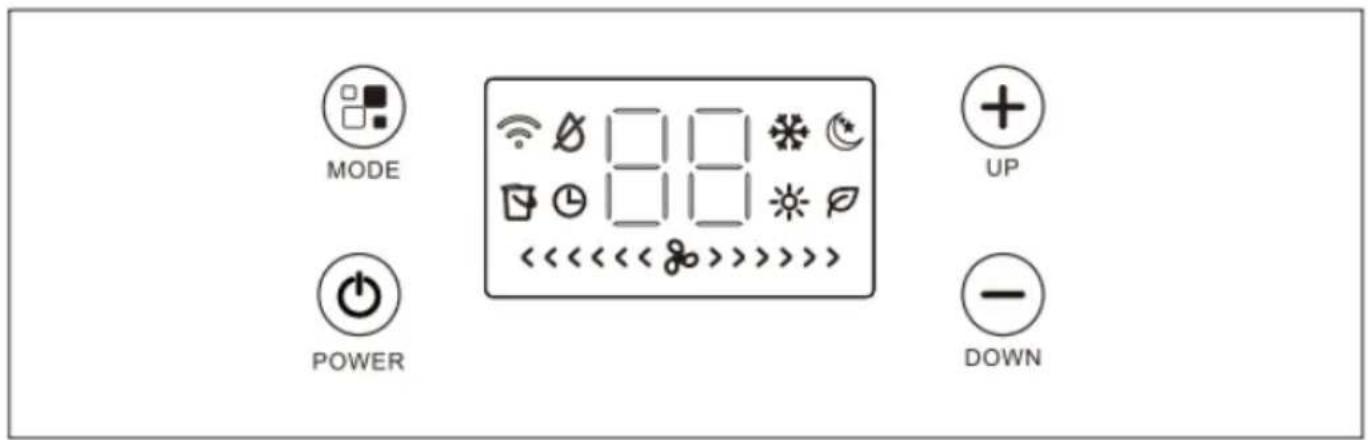
NOTE: The control panel may be look like one of the followings:
OPERATION

Power button
Power switch on/off.
Selects the appropriate operating mode. Each time you press the button, a mode is selected in a sequence that goes from AUTO), COOL, DRY, HEAT (cooling only models without) and FAN.
Used to adjust (increasing/decreasing) temperature settings in 1°C increments in a range of 16°C to 32°C or the TIMER setting in a range of 0\~24hrs.

LED display
Shows the set temperature in ° C and the Auto-timer settings. While on DRY and FAN modes, it shows the Shows Error codes and protection code:
E1 - Error with outdoor coil sensor (excluding single cooled models).
E2-Indoor temperature sensor error.
E3-Indoor tube temperature sensor error.
E4-High water level fault.

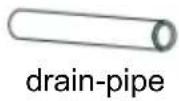
- Bottom tray is full-Connect the drain hose and drain the collected water away. If protection repeats, call for service. Note: When one of the above malfunctions occurs, turn off the unit, and check for any obstructions. Restart the unit, if the malfunction is still present, turn off the unit and unplug the power cord. Contact the manufacturer or its service agents or a similar qualified person for service.
Operation Instructions
COOL operation
- Press the "MODE" button until the "indicator light comes on.

-Press the ADJUST buttons "+" or "-" to select your desired room temperature. The temperature can be set within a range of 16°C\~32°C.
HEAT operation (cooling only models without)
-Press the "MODE" button until the "indicator light comes on.

-Press the ADJUST buttons "+" or "-" to select your desired room temperature. The temperature can be set within a range of 16°C\~32°C.
DRY operation
-Press the "MODE" button until the "indicator light comes on.

-Under this mode, you cannot select a fan speed or adjust the temperature. The fan motor operates at LOW speed.
-Keep windows and doors closed for the best dehumidifying effect.
-Do not put the duct to window.
FAN operation F
-Press the "MODE" button until the" indicator light comes on.

AUTO operation
-When you set the air conditioner in AUTO mode, it will automatically select cooling, heating (cooling only models without), or fan only operation depending on the room temperature.
-The air conditioner will control room temperature automatically
-Under AUTO mode, you can not select the fan speed.
REMOTE CONTROL
- On first use, insert battery and ensure the Plus-n-Minus is in correct connection.
- Ensure that remote controller is pointed at the signal receiver without any obstruction; Do not make the remote controller fall off or throw it carelessly; Any liquid cannot flow into the remote controller; Do not put the remote controller near the high temperature objects or on the place exposed to direct sunlight or strong light.
- If the remote controller is unable to be operated, please reinsert the batteries after removing it for 30 second. If it is still unable to be operated, please replace new batteries. The useless batteries should be disposed as relevant national regulations.
- Do not mix use of new-and-used batteries or different type batteries, otherwise, the remote controller should be unable to be operated.
- If the remote controller is not used for a long time, please take out the batteries to prevent the remote controller from being damaged by the leaked fluid.
- Please understand that this type of remote controller is general type, including the entire function button. The specific function is subject to the function of A/C.
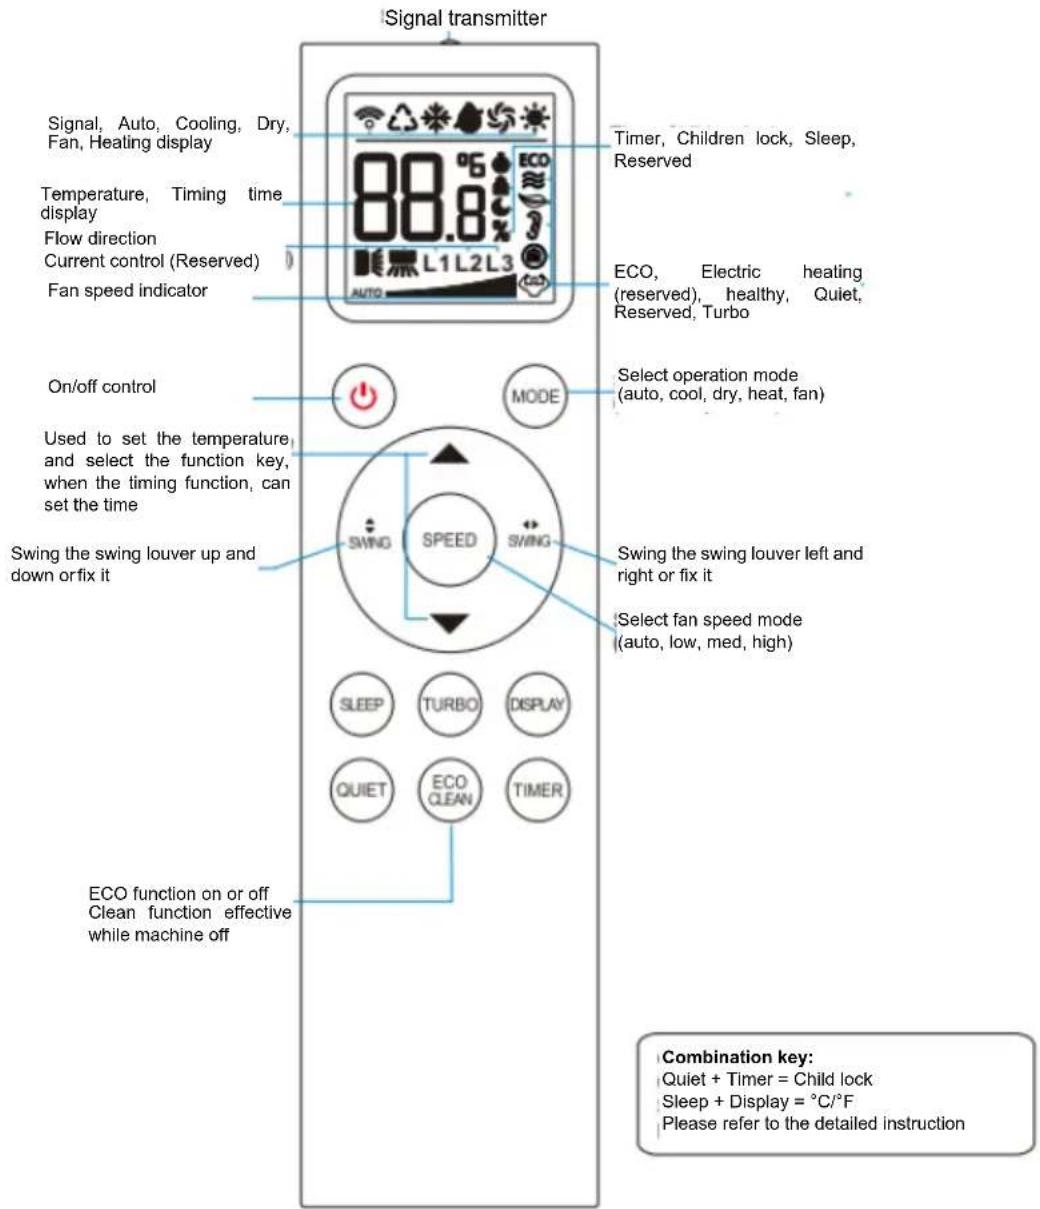
Description: This remote control is universal, some functions can not be used on the portable air conditioner, please refer to the follow-up instructions for details! ★ The picture of the remote control is for reference only, please refer to the actual product.
Remote control

* On/Off control, for the air conditioning turned on or off.
* Cycle mode when this button is pressed as follows:
AUTO--COOL--DRY--HEAT--FAN--AUTO
* Cycle fan speed when this button is pressed, as follow:



Auto
Low speed
Auto speed

(Temperature/Time) Button
* Press once to set the temperature to rise by 1°C , press V once to decrease the temperature by 1°C .
* Temperature setting range is 16-32°C
Note: This button is invalid in DRY/FAN mode.
When the air conditioner is on, press "DISPLAY" to turn on the room machine display and press again to turn off the air conditioner.
*A/C enters low speed mode by default under sleep mode. Fan speed is adjustable.
*Δ/ (temp/timer) control button, each time press “ Δ ” to set temperature rises 1°C, press “ ” to set temperature drops 1.
*Temperature setting range is 16\~32°C.
PS: The button is invalid when in clean and fan mode. Button "TIMER" should be operated with "time". Specific operation is subject to button timer description.
PS: The button is invalid when in clean and fan mode. Button "TIMER" should be operated with "time". Specific operation is subject to button timer description.
Pressing a key other than the power on will exit the timing display, but the timing is still valid. After the timed shutdown function is enabled, press the shutdown button to exit the timed shutdown function. After the timed startup function is enabled, press the power button to exit the timed startup function.
* Only under remoter controller condition of power off, can it transmit "auto clean" signal when this button is pressed to power on.
The remote control and indoor unit will display CL. Press CLEAN or ON/OFF again to exit the automatic cleaning function. In automatic cleaning mode, the air conditioner will run for 10 to 15 minutes and then shut down automatically.
C/F function
Please press and hold the SLEEP and DISPLAY buttons at the same time to switch the Celsius and brightness display.
Child lock function
*Press the QUIET and TIMER keys at the same time to lock all the functions of the remote control, Press again to unlock.
Instructions:
The remote control is a universal multi-functional remote control, only the above part of the button function is suitable for portable air conditioner, please understand!
OPERATION
WAIT 3 MINUTES BEFORE RESUMING OPERATION
After the unit has stopped, it can not be restarted operation in the first 3 minutes. This is to protect the unit. Operation will automatically start after 3 minutes.
POWER MANAGEMENT
Feature (on some models) When the ambient temperature is lower than the setting temperature for a period of time, the unit will be automatically operate power management feature. The compressor and fan motor stop. When the ambient temperature is higher than the setting temperature, the unit will be automatically quit the power management feature.
The compressor and fan motor stop. When the ambient temperature is higher than the setting temperature, the unit will be automatically quit the power management feature. The compressor and (or) fan motor run.
Water drainage
NOTE: Make sure the hose is secure so there are no leaks.
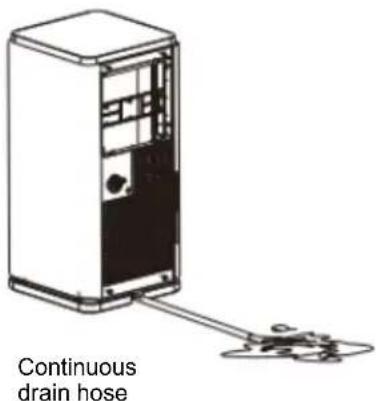
-When the water level of the bottom tray reaches a predetermined level, the digital display area shows "E5". At this time the air conditioning will immediately stop.
MAINTENANCE
WARNING:
- Always unplug the unit before cleaning or servicing.
- DO NOT use flammable liquids or chemicals to clean the unit.
- DO NOT wash the unit under running water. Doing so causes electrical danger.
- DO NOT operate the machine if the power supply was damaged during cleaning. A damaged power cord must be replaced with a new cord from the manufacturer.
Clean the Air Filter
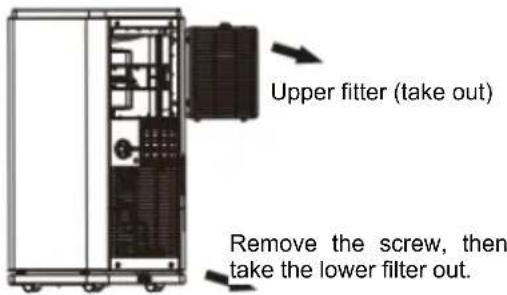
Remove the air filter
CAUTION
-DO NOT operate the unit without filter because dirt and lint clog it and reduce performance.
Maintenance Tips
- Be sure to clean the air filter every 2 weeks for optimal performance.
- The water collection tray should be drained immediately after E5 error occurs, and before storage to prevent mold.
- In households with animals, you will have to periodically wipe down the grill to prevent blocked airflow due to animal hair.
Clean the Unit
Clean the unit using a damp, lint-free cloth and mild detergent. Dry the unit with a dry, lint-free cloth.
Store the unit when not in use
-Drain the unit's water collection tray according to the instructions in the following section.
-Run the appliance on FAN mode for 12 hours in a warm room to dry it and prevent mold.
-Turn off the appliance and unplug it.
-Clean the air filter according to the instructions in the previous section. Reinstall the clean, dry filter before storing.
-Remove the batteries from the remote control. Be sure to store the unit in a cool, dark place. Exposure to direct sunshine or extreme heat can shorten the lifespan of the unit.
NOTE: The cabinet and front may be dusted with an oil-free cloth or washed with a cloth dampened in a solution of warm water and mild liquid dishwashing detergent. Rinse thoroughly and wipe dry. Never use harsh cleansers, wax or polish on the cabinet front. Be sure to wring excess water from the cloth before wiping around the controls.
Excess water in or around the controls may cause damage to the unit.
FAULTS DIAGNOSIS
Please check the machine according to the following form before asking for maintenance:
| Problem | Possible Cause | Troubleshooting |
| Unit does not turn on when pressing ON/OFF button | Error Code | The Water Collection Tray is full. Turn off the unit, drain the water from the Water Collection Tray and restart the unit. |
| In COOL mode: room temperature is lower than the set temperature | Reset the temperature |
| Unit does not cool well | The air filter is blocked with dust or animal hair | Turn off the unit and clean the filter according to instructions |
| Exhaust hose is not connected or is blocked | Turn off the unit, disconnect the hose, check for blockage and reconnect the hose |
| The unit is low on refrigerant | Call a service technician to inspect the unit and top off refrigerant |
| Temperature setting is too high | Decrease the set temperature |
| The windows and doors in the room are open | Make sure all windows and doors are closed |
| The room area is too large | Double-check the cooling area |
| There are heat sources inside the room | Remove the heat sources if possible |
| The unit is noisy and vibrates too much | The ground is not level | Place the unit on a flat, level surface |
| The air filter is blocked with dust or animal hair | Turn off the unit and clean the filter according to instructions |
| The unit makes a gurgling sound | This sound is caused by the flow of refrigerant inside the unit | This is normal |
DESIGN AND COMPLIANCE NOTES
Design Notice
The design and specifications are subject to change without prior notice for product improvement.
Consult with the sales agency or manufacturer for details.
Unit Temperature Range
| Mode Temperature Range |
| Cool 16-32°C |
| Dry 15-35°C |
| Pump heat 5-30°C |
The producer Melchioni Spa declares that the product Portable air conditioner with heat pump Mod. VIGO 7/9 (Cod. 158660055/158660056) is in compliance with Directive 2014/30/EU of the European Parliament and of the Council, of 26 february 2014, on the harmonisation of the laws of the Member States relating to electromagnetic compatibility.
The producer Melchioni Ready Srl declares that the product Portable air conditioner with heat pump Mod. VIGO 7/9 (Cod. 158660055/158660056) is in compliance with Directive 2014/35/EU of the European Parliament and of the Council, of 26 february 2014, on the harmonisation of the laws of the Member States relating to the making available on the market of electrical equipment designed for use within certain voltage limits.
The producer Melchioni Ready Srl declares that the product Portable air conditioner with heat pump Mod. VIGO 7/9 (Cod. 158660055/158660056) is in compliance with Directive 2009/125/EC of the European Parliament and of the Council, of 21 october 2009, establishing a framework for the setting of ecodesign requirements for energy-related products.
The producer Melchioni Ready Srl declares that the product Portable air conditioner with heat pump Mod. VIGO 7/9 (Cod. 158660055/158660056) is in compliance with Directive 2011/65/EU of the European Parliament and of the Council, of 8 june 2011 and subsequent Commission Delegated Directive 2015/863, on the restriction of the use of certain hazardous substances in electrical and electronic equipment.
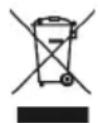
According to Directive 2012/19/EU of the European Parliament and of the Council, of 4 July 2012, on waste electrical and electronic equipment (WEEE), the presence of the crossed-out bin symbol indicates that this appliance is not to be considered as urban waste: its disposal must therefore be carried out by separate collection. Disposal in a non-separate manner may constitute a potential harm to the environment and health. This product can be returned to
the distributor when purchasing a new device. Improper disposal of the appliance constitutes misconduct and is subject to sanctions by the Public Security Authority. For further information, contact the local administration responsible for environmental matters.
PRODUCT WARRANTY
Melchioni Spa, based in Milan (Italy), via Colletta 37, recognizes a conventional guarantee on the product for a period of two years from the date of the first purchase by the consumer. This guarantee does not affect the validity of the legislation in force concerning consumer goods (Legislative Decree 6 September 2005 n. 206 art. 128 and following), of which the consumer remains the owner. This guarantee applies to the entire territory of the European Union.
The components or parts that are found to be defective for ascertained manufacturing causes will be repaired or replaced free of charge through the dealer, during the above warranty period. Melchioni Spa reserves the right to make a complete replacement of the device, if repairability is impossible or excessively expensive, with another device of similar characteristics (Legislative Decree 6 September 2005 no. 206 art. 130) during the warranty period. In this case, the validity of the warranty remains that of the original purchase: the service provided under warranty does not extend the warranty period.
In any case, this appliance will not be considered defective in terms of materials or manufacture should it be adapted, changed or adjusted, in order to comply with national or local safety and / or technical standards, in force in a country other than that for
which it is was originally designed and manufactured. This appliance has been designed and built for domestic use only: any other use will invalidate the benefits of the guarantee.
The warranty does not cover:
• parts subject to wear or tear, nor those parts that require periodic replacement and / or maintenance
• professional use of the product
- malfunctions or any defects due to incorrect installation, configuration, software / BIOS / firmware update not performed by authorized Melchioni Spa
• repairs or interventions carried out by persons not authorized by Melchioni Spa
• manipulation of assembly components or, where applicable, of the software
• defects caused by fall or transport, lightning, voltage fluctuations, liquid infiltration, opening of the appliance, bad weather, fire, public disturbances, inadequate ventilation or incorrect power supply
• any accessories, for example: boxes, bags, batteries, etc. used with this product
• home interventions for convenience checks or presumed defects
The recognition of the guarantee by Melchioni Spa is subject to the presentation of a tax document that proves the actual date of purchase. The same must not show any tampering or deletions, in the presence of which Melchioni Spa reserves the right to refuse the provision of treatment under warranty.
The warranty will not be recognized if the serial number or model of the appliance is non-existent, abraded or modified. This warranty does not include any right to compensation for direct or indirect damage, of any nature, to people or things, caused by any inefficiency of the appliance. Any extensions, promises or services in this regard, insured by the retailer, will be borne by the latter.
| Transportable | 7000 | 9000 |
| Model | Vigo 7 | Vigo 9 |
| Supply voltage | 220-240 V AC 50 Hz | 220-240 V AC 50 Hz |
| Nominal absorption | 3,7 A | 4,5 A |
| Cooling capacity | 7000 BTU | 9000 BTU |
| Heating capacity | 7000 BTU | 9000 BTU |
| Degree of protection | IPX0 | IPX0 |
| Max. working pressure | 2,4 Mpa | 2,4 Mpa |
| Max. suction pressure | 1,0Mpa | 1,0 Mpa |
| Noise | 63 db | 63 db |
| Weight | 25 Kg | 26 Kg |
| Refrigerant gas | R290 - 170 g | R290- 250 g |
| Volume of air treated | 280 m2/h | 320 m2/h |
0
FUNCIONAMIENTO

FUNCIONAMIENTO

FONCTIONNEMENT

FONCTIONNEMENT

Avis de conception
Empfohlene Installation
BETRIEB

UP

POWER

DOWN
BETRIEB