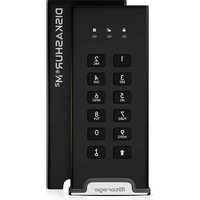
diskAshur M² - Secure USB Drive iStorage - Free user manual and instructions
Find the device manual for free diskAshur M² iStorage in PDF.


| Product Type | Secure USB / Encrypted Portable SSD |
| Brand | iStorage |
| Model | diskAshur M2 |
| Capacity | From 120 GB to 2 TB |
| Dimensions (L x W x H) | 111 mm x 45 mm x 11 mm |
| Housing Material | Hard anodized extruded aluminum |
| Keypad | Wear-resistant polymer-coated alphanumeric keypad |
| Power Supply | USB bus (powered USB port) |
| Interface | USB (USB-C and USB-A cables included) |
| Encryption | Hardware AES-XTS 256-bit full disk encryption |
| Security Certifications | FIPS 140-3 Level 3 (pending), Common Criteria EAL5+ (certified microprocessor) |
| Authentication | Admin PIN, user PIN, recovery PIN, self-destruct PIN |
| PIN Length | 7 to 15 digits (alphanumeric possible via letters on keys) |
| Security Features | Brute force protection, self-destruct, auto-lock (5-99 minutes), read-only mode |
| System Compatibility | Windows, macOS, Linux |
| Bootable | Configurable as bootable |
| Warranty | 36 months |
| Package Contents | diskAshur M2 drive, protective sleeve, case, USB-C and USB-A cables, quick start guide |
| Maintenance and Cleaning | Clean with a soft dry cloth. Avoid liquids. |
| Repairability | Contains no user-serviceable parts. If issues arise, contact technical support. |
Frequently Asked Questions - diskAshur M² iStorage
User questions about diskAshur M² iStorage
0 question about this device. Answer the ones you know or ask your own.
Ask a new question about this device
Download the instructions for your Secure USB Drive in PDF format for free! Find your manual diskAshur M² - iStorage and take your electronic device back in hand. On this page are published all the documents necessary for the use of your device. diskAshur M² by iStorage.
USER MANUAL diskAshur M² iStorage

User Manual....2
Please make sure you remember your PIN (password), without it, there is no way to access the data on the drive.
If you are having diffi culty using your diskAshur M please contact our support team by email - support@istorage-uk.com or by phone on +44 (0) 20 8991 6260.
Copyright © iStorage, Inc 2020. All rights reserved.
Windows is a registered trademark of Microsoft Corporation.
All other trademarks and copyrights referred to are the property of their respective owners.
Distribution of modified versions of this document is prohibited without the explicit permission of the copyright holder.
Distribution of the work or derivative work in any standard (paper) book form for commercial purposes is prohibited unless prior permission is obtained from the copyright holder.
DOCUMENTATION IS PROVIDED AS IS AND ALL EXPRESS OR IMPLIED CONDITIONS, REPRESENTATIONS AND
WARRANTIES, INCLUDING ANY IMPLIED WARRANTY OF MERCHANTABILITY. FITNESS FOR A PARTICULAR
PURPOSE OR NON-INFRINGEMENT, ARE DISCLAIMED, EXCEPT TO THE EXTENT THAT SUCH DISCLAIMERS ARE HELD TO BE LEGALLY INVALID

All trademarks and brand names are the property of their respective owners
Trade Agreements Act (TAA) Compliant


vmware®
Table of Contents
Introduction 5
Box contents 5
diskAshur M² Layout 5
- LED indicators and their actions 6
- LED States 6
- First Time Use....7
- Unlocking diskAshur M² with the Admin PIN 8
- How to Enter Admin Mode 8
- Changing the Admin PIN 9
- Setting a User PIN Policy 10
- How to delete the User PIN Policy 11
- How to check the User PIN Policy 11
- Adding a New User PIN in Admin Mode 12
- Changing the User PIN in Admin Mode 13
- Deleting the User PIN in Admin Mode 13
- How to Unlock diskAshur M² with User PIN 14
- Changing the User PIN in User Mode 14
- Creating a One-Time User Recovery PIN 15
- Deleting the One-Time User Recovery PIN 15
- Activating Recovery Mode and Creating New User PIN 16
- Set User Read-Only in Admin Mode 16
- Enable User Read/Write in Admin Mode 17
- Set Global Read-Only in Admin Mode 17
- Enable Global Read/Write in Admin Mode 18
- How to configure a Self-Destruct PIN 18
- How to delete the Self-Destruct PIN 19
- How to Unlock with the Self-Destruct PIN 19
- How to Configure an Admin PIN after a Brute Force attack or Reset 20
- Setting the Unattended Auto-Lock 20
- Turn off the Unattended Auto-Lock 21
- How to check the Unattended Auto-Lock 22
- Set Read-Only in User Mode 22
- Enable Read/Write in User Mode 23
- Brute Force Hack Defence Mechanism 23
- Admin PIN Brute Force Hack Defence Mechanism 24
- How to set the User PIN Brute Force Limitation 24
- How to check the User PIN Brute Force Limitation 25
- How to perform a complete reset 26
- How to confi gure diskAshur M as Bootable 26
- How to disable the diskAshur M² Bootable feature 27
- How to check the Bootable setting 27
- Initialising and formatting diskAshur M^2 for Windows 28
- Initialising and formatting diskAshur M² in Mac OS 30
- Initialising and formatting diskAshur M² in Linux OS 32
- Hibernating, Suspending or Logging off from the Operating System 35
- How to check Firmware in Admin Mode 35
- How to check Firmware in User Mode 36
- Technical Support 37
- Warranty and RMA information 37
Introduction
Thank you for purchasing the new iStorage diskAshur M ^2 , an ultra-secure and easy to use, hardware encrypted, PIN authenticated portable Solid State Drive (SSD) with capacities of 120GB to 2TB and rising.
Designed to be FIPS 140-3 Level 3, the diskAshur M² encrypts data in transit and at rest using AES-XTS 256-bit full disk hardware encryption.
The diskAshur M ^2 incorporates a Common Criteria EAL 5+ (Hardware Certifi ed) secure microprocessor, which employs built-in physical protection mechanisms designed to defend against external tamper, bypass attacks and fault injections.
Unlike other solutions, the diskAshur M ^2 reacts to an automated attack by entering the deadlock frozen state, which renders all such attacks as useless. In plain and simple terms, without the PIN there's no way in!
Box Contents
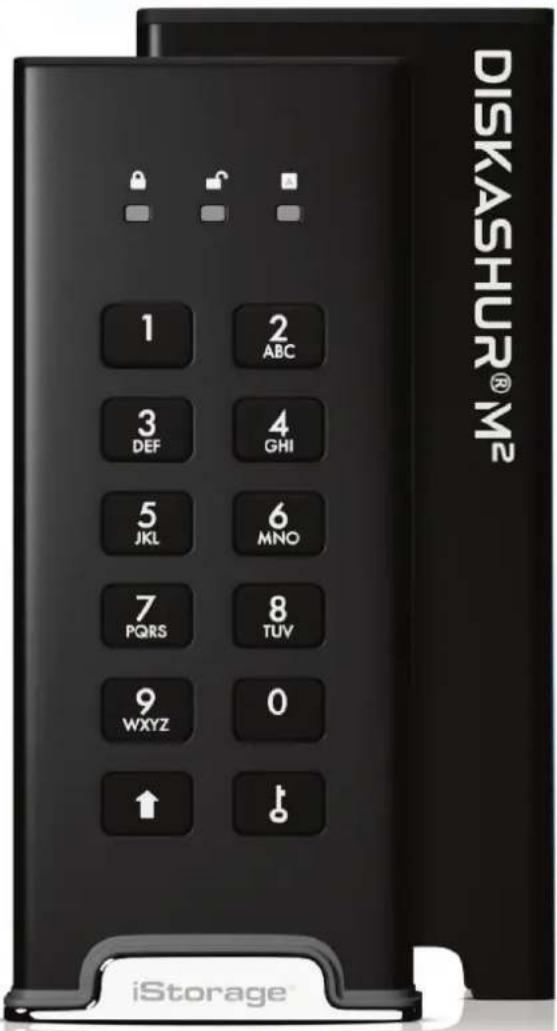
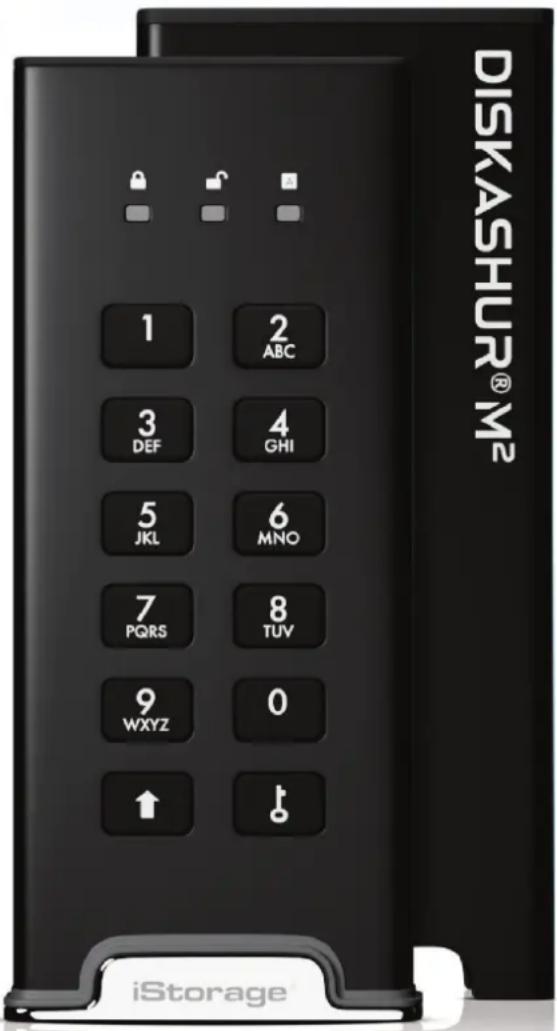
- diskAshur M ^2 portable SSD & Protective Sleeve
- Protective carry case
- USB C & A Cables
- Quick start guide & Product disclaimer
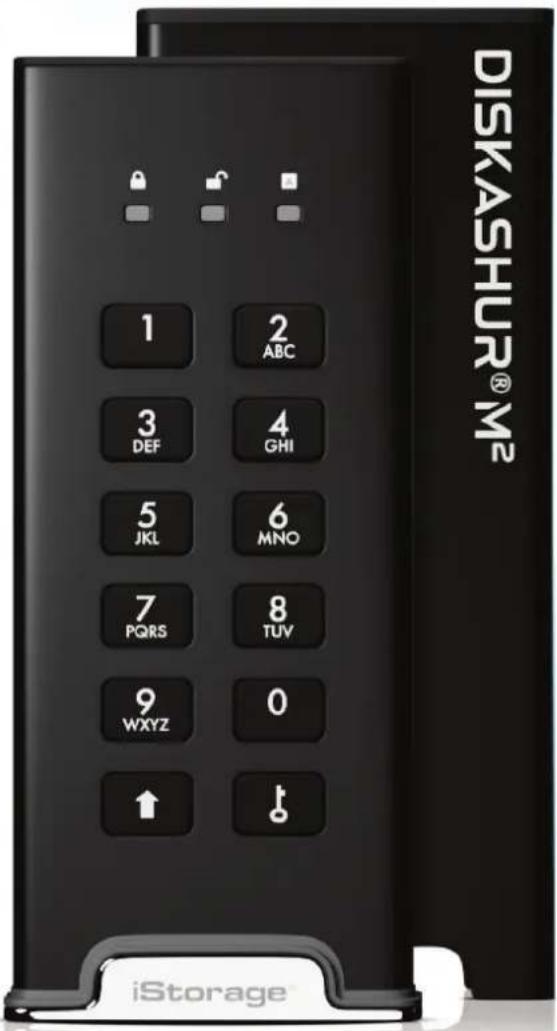
diskAshur M² Layout
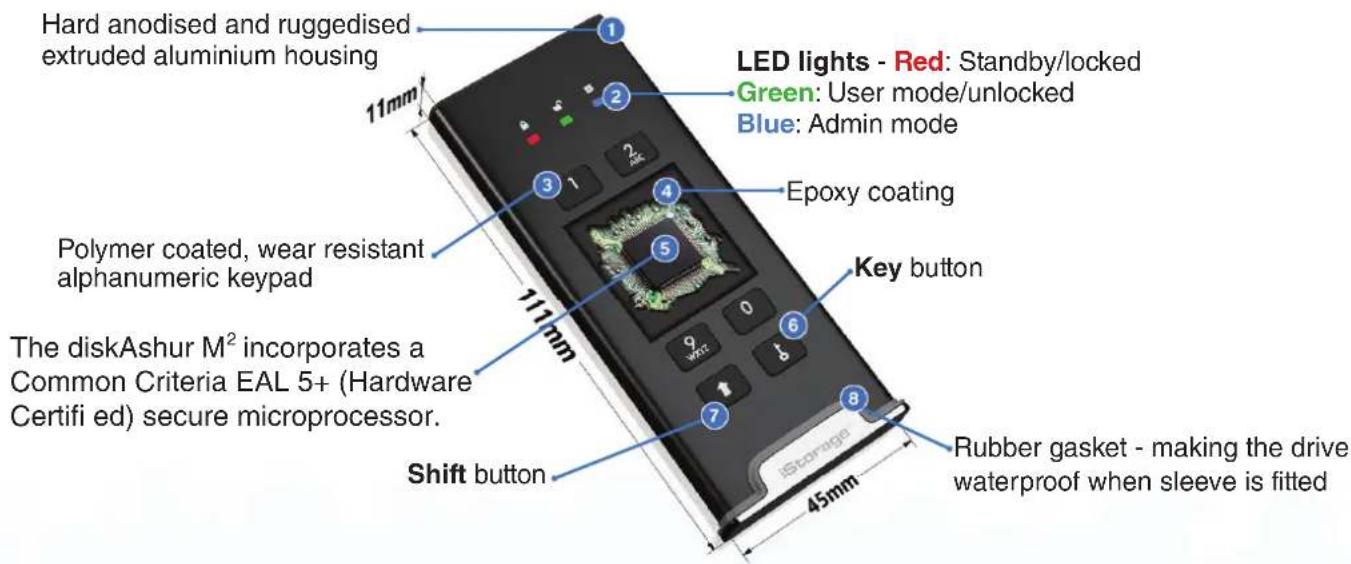
1. LED indicators and their actions
LED LED State Description LED LED State Description
 | RED Solid Locked drive (in either Standby or Reset states) | BLUE Solid | Drive in Admin mode | |
| [87CS] | RED Double blink Incorrect PIN entry | RED, GREEN and BLUE Blinking together | Waiting for User PIN entry | |
| [05CZ] | GREEN Solid Drive unlocked | GREEN and BLUE Blinking together | Waiting for Admin PIN entry | |
 | GREEN Blinking Data transfer in progress | GREEN and BLUE Blinking alternately | Authentication in progress |
2. LED States

Note: The normal function of the diskAshur M² may be disturbed by strong Electro-Magnetic Interference. If so, simply power cycle the product (power off then power on) to resume normal operation. If normal operation does not resume, please use the product in a different location.
To wake from Idle State
Idle state is defined as when diskAshur M is not being used and all LEDs are off.
To wake diskAshur M^2 from the idle state do the following.
| Connect the diskAshur M2 to a powered USB port on your computer | RED, GREEN and BLUE LEDs blink once in sequence then the GREEN LED blinks twice and fi nally switches to a solid RED LED indicating the drive is in Standby State |
To enter Idle State
To force diskAshur M^2 to enter Idle State, execute either of the following operations:
- Disconnect the drive if connected to a USB port, all LEDs will switch off (idle state).
Power-on States
After the drive wakes from the Idle State, it will enter one of the following states shown in the table below.
| Power-on State LED | indication | Encryption Key | Admin PIN | Description |
| Initial Shipment State | RED and GREEN Solid | √ | ✕ | Waiting for configuration of an Admin PIN (First Time Use) |
| Standby | RED Solid | √ | √ | Waiting for Admin or User PIN entry |
| Reset | RED Solid | ✕ | ✕ | Waiting for configuration of an Admin PIN |
3. First Time Use
diskAshur M² is supplied in the 'Initial Shipment State' with no pre-set Admin PIN. A 7-15 digit Admin PIN must be configured before the drive can be used. Once an Admin PIN has been successfully configured, it will then not be possible to switch the drive back to the 'Initial Shipment State'.
PIN Requirements:
- Must be between 7-15 digits in length
- Must not contain only repetitive numbers, e.g. (3-3-3-3-3-3-3-3)
- Must not contain only consecutive numbers, e.g. (1-2-3-4-5-6-7), (7-8-9-0-1-2-3-4), (7-6-5-4-3-2-1)
Password Tip: You can configure a memorable word, name, phrase or any other Alphanumerical PIN combination by simply pressing the button with the corresponding letters on it.
Examples of these types of Alphanumerical PINs are:
- For "Password" press the following buttons:
7 (pqrs) 2 (abc) 7 (pqrs) 7 (pqrs) 9 (wxyz) 6 (mno) 7 (pqrs) 3 (def) - For "iStorage" press the following buttons:
4 (ghi) 7 (pqrs) 8 (tuv) 6 (mno) 7 (pqrs) 2 (abc) 4 (ghi) 3 (def)
Using this method, long and easy to remember PINs can be configured.
To configure an Admin PIN and unlock the diskAshur M for the first time, please follow the simple steps in the table below.
| Instructions - First Time Use LED LED State | ||
| 1. Connect the diskAshur M^2 to a powered USB port on your computer | RED, GREEN and BLUE LEDs blink once in sequence then the GREEN LED blinks twice and finally switches to solid RED and GREEN LEDs indicating the drive is in the Initial Shipment State | |
| 2. Press and hold down both KEY (δ) + 1 buttons | LEDs turn to blinking GREEN and solid BLUE | |
| 3. Enter a New Admin PIN (7-15 digits) and press the KEY (δ) button once | Blinking GREEN and solid BLUE LEDs switch to a GREEN blink then back to Blinking GREEN and solid BLUE LEDs | |
| 4. Re-enter your New Admin PIN and press the KEY (δ) button again | BLUE LED rapidly blinks then switches to a solid BLUE LED and finally to a solid GREEN LED indicating the Admin PIN has been successfully configured and drive unlocked | |
Locking the diskAshur M²
To lock the drive, safely eject the diskAshur M ^2 from your host operating system and then unplug from the USB port. If data is being written to the drive, unplugging the diskAshur M ^2 will result in incomplete data transfer and possible data corruption.
4. Unlocking diskAshur M² with the Admin PIN
To unlock the diskAshur M with the Admin PIN, please follow the simple steps in the table below.
| 1. Connect the diskAshur M2 to a USB port on your computer | 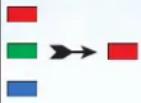 | RED, GREEN and BLUE LEDs blink once in sequence then the GREEN LED blinks twice and finally switches to a solid RED LED indicating the drive is in Standby State |
| 2. In Standby State (solid RED LED) press the KEY (♂) button once |  | and BLUE LEDs blink together |
| 3. With the GREEN and BLUE LEDs blinking together, enter the Admin PIN and press the KEY (♂) button again | 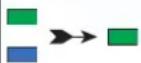 | GREEN and BLUE LEDs will alternately blink several times and then to a solid BLUE LED and changing to a solid GREEN LED indicating the drive has been successfully unlocked as Admin |
5. How to Enter Admin Mode
To Enter Admin Mode, do the following.
| 1. Connect the diskAshur M2 to a powered USB port on your computer | 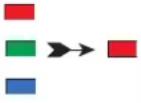 | RED, GREEN and BLUE LEDs blink once in sequence then the GREEN LED blinks twice and finally switches to a solid RED LED indicating the drive is in Standby State |
| 2. In Standby State (solid RED LED) Press and hold down both KEY (♂) + 1 buttons |  | BLUE LEDs blink together |
| 3. Enter your Admin PIN and press the KEY (♂) button once | 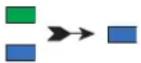 | GREEN and BLUE LEDs will rapidly blink together several times and then switch to a solid GREEN LED and finally changing to a solid BLUE LED indicating the drive is in Admin mode |
To Exit Admin Mode
To immediately exit Admin Mode (solid BLUE LED), press and hold down the SHIFT (↑) button for a second - the solid BLUE LED switches to a solid RED LED.
6. Changing the Admin PIN
PIN Requirements:
- Must be between 7-15 digits in length
- Must not contain only repetitive numbers, e.g. (3-3-3-3-3-3-3-3)
- Must not contain only consecutive numbers, e.g. (1-2-3-4-5-6-7), (7-8-9-0-1-2-3-4), (7-6-5-4-3-2-1)
Password Tip: You can configure a memorable word, name, phrase or any other Alphanumerical PIN combination by simply pressing the button with the corresponding letters on it.
Examples of these types of Alphanumerical PINs are:
- For "Password" press the following buttons:
7 (pqrs) 2 (abc) 7 (pqrs) 7 (pqrs) 9 (wxyz) 6 (mno) 7 (pqrs) 3 (def) - For "iStorage" press the following buttons:
4 (ghi) 7 (pqrs) 8 (tuv) 6 (mno) 7 (pqrs) 2 (abc) 4 (ghi) 3 (def)
Using this method, long and easy to remember PINs can be configured.
To change the Admin PIN, first enter the "Admin Mode" as described in section 5. Once the drive is in Admin Mode (solid BLUE LED) proceed with the following steps.
| 1. In Admin mode press and hold down both the KEY (♂) + 2 buttons |  | Solid BLUE LED will change to blinking GREEN and solid BLUE LEDs |
| 2. Enter NEW Admin PIN and then press the KEY (♂) button once | 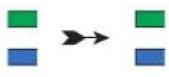 | Blinking GREEN and solid BLUE LEDs will switch to a single GREEN LED blink and then back to blinking GREEN and solid BLUE LEDs |
| 3. Re-enter the NEW Admin PIN and then press the KEY (♂) button once | 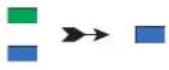 | Blinking GREEN and solid BLUE LEDs change to a rapidly blinking BLUE LED and finally to a solid BLUE LED indicating the Admin PIN has been successfully changed |
Note: To immediately exit Admin Mode (solid BLUE LED), press and hold down the SHIFT (↑) button for a second - the solid BLUE LED switches to a solid RED LED.
7. Setting a User PIN Policy
The Administrator can set a restriction policy for the User PIN. This policy includes setting the minimum length of the PIN (from 7 to 15 digits), as well as requiring or not the input of one or more 'Special Characters'. The "Special Character" functions as both the 'SHIFT (↑) + digit' buttons pressed down together.
To set a User PIN Policy (restrictions), you will need to enter 3 digits, for instance '091', the first two digits (09) indicate the minimum PIN length (in this case, 9) and the last digit (1) denotes that one or more 'Special Characters' must be used, in other words 'SHIFT (↑) + digit'. In the same way, a User PIN Policy can be set without the need of a 'Special Character', for instance '120', the first two digits (12) indicate the minimum PIN length (in this case, 12) and the last digit (0) meaning no Special Character is required.
Once the Administrator has set the User PIN Policy, for instance '091', a new User PIN will need to be configured - see section 10, 'Adding a New User PIN in Admin Mode'. If the Administrator configures the User PIN as '247688314' with the use of a 'Special Character' (SHIFT (↑) + digit pressed down together), this can be placed anywhere along your 7-15 digit PIN during the process of creating the User PIN as shown in the examples below.
A. 'SHIFT (↑) + 2', '4', '7', '6', '8', '8', '3', '1', '4',
B. '2', '4', 'SHIFT (↑) + 7', '6', '8', '8', '3', '1', '4',
C. '2', '4', '7', '6', '8', '8', '3', '1', 'SHIFT (↑) + 4',

Note:
- If a 'Special Character' was used during the configuration of the User PIN, for instance, example 'B' above, then the drive can only be unlocked by entering the PIN with the 'Special Character' entered precisely in the order configured, as per example 'B' above - ('2', '4', 'SHIFT (↑) + 7', '6', '8', '8', '3', '1', '4').
- More than one 'Special Character' can be used and placed along your 7-15 digit PIN.
- Users are able to change their PIN but are forced to comply with the set 'User PIN Policy' (restrictions), if and when applicable.
- Setting a new User PIN Policy will automatically delete the User PIN if one exists.
- This policy does not apply to the 'Self-Destruct PIN'. The complexity setting for the Self-Destruct PIN and Admin PIN is always 7-15 digits, with no special character required.
To set a User PIN Policy, first enter the "Admin Mode" as described in section 5. Once the drive is in Admin Mode (solid BLUE LED) proceed with the following steps.
| 1. In Admin mode, press and hold down both KEY (δ) + 7 buttons | Solid BLUE LED will change to blinking GREEN and BLUE LEDs | |
| 2. Enter your 3 digits, remember the first two digits denote minimum PIN length and last digit (0 or 1) whether or not a special character has been used. | Blinking GREEN and BLUE LEDs will continue to blink | |
| 3. Press the SHIFT (↑) button once | Blinking GREEN and BLUE LEDs will change to a solid GREEN LED and finally to a solid BLUE LED indicating the User PIN Policy has been successfully set. |
Note: To immediately exit Admin Mode (solid BLUE LED), press and hold down the SHIFT (↑) button for a second - the solid BLUE LED switches to a solid RED LED.
8. How to delete the User PIN Policy
To delete the User PIN Policy, first enter the "Admin Mode" as described in section 5. Once the drive is in Admin Mode (solid BLUE LED) proceed with the following steps.
| 1. In Admin mode, press and hold down both KEY (♂) + 7 buttons | 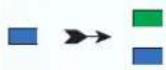 | Solid BLUE LED will change to blinking GREEN and BLUE LEDs |
| 2. Enter 070 and press the SHIFT (↑) button once |  | Blinking GREEN and BLUE LEDs will change to a solid GREEN LED and finally to a solid BLUE LED indicating the User PIN Policy has been successfully deleted |
Note: To immediately exit Admin Mode (solid BLUE LED), press and hold down the SHIFT (↑) button for a second - the solid BLUE LED switches to a solid RED LED.
9. How to check the User PIN Policy
The Administrator is able to check the User PIN Policy and can identify the minimum PIN length restriction and whether or not the use of a Special Character has been set by noting the LED sequence as described below.
To check the User PIN Policy, first enter the "Admin Mode" as described in section 5. Once the drive is in Admin Mode (solid BLUE LED) proceed with the following steps.
| 1. In Admin mode press and hold down bothSHIFT (↑) + 7 buttons | Solid BLUE LED will change to blinking GREEN andBLUE LEDs | |
| 2. Press the KEY (♂) button and the following happens;a. All LED's (RED, GREEN & BLUE) become solid for 1 second.b. A RED LED blink equates to ten (10) units of a PIN.c. Every GREEN LED blink equates to a single (1) unit of a PIND. A BLUE blink indicates that a 'Special Character' was used.e. All LED's (RED, GREEN & BLUE) become solid for 1 second.f. LEDs return to solid BLUE | ||
The table below describes the LED behaviour whilst checking the User PIN Policy, for instance if you have set a 12 digit User PIN with the use of a Special Character (121), the RED LED will blink once (1) and the GREEN LED will blink twice (2) followed by a single (1) BLUE LED blink indicating that a Special Character must be used.
| PIN Description 3 digit Setup RED GREEN BLUE | ||||
| 12 digit PIN with use of a Special Character 121 1 Blink 2 Blinks 1 Blink | ||||
| 12 digit PIN with NO Special Character used 120 1 Blink 2 Blinks 0 | ||||
| 9 digit PIN with use of a Special Character 091 0 9 Blinks 1 Blink | ||||
| 9 digit PIN with NO Special Character used | 090 0 9 Blinks 0 |
Note: To immediately exit Admin Mode (solid BLUE LED), press and hold down the SHIFT (↑) button for a second - the solid BLUE LED switches to a solid RED LED.
10. Adding a New User PIN in Admin Mode

Important: The creation of a New User PIN must comply with the 'User PIN Policy' if one has been configured as described in section 7, which imposes a minimum PIN length and whether a 'Special Character' has been used. The Administrator can Refer to section 9 to check the user PIN restrictions.
PIN requirements:
• Must be between 7-15 digits in length
- Must not contain only repetitive numbers, e.g. (3-3-3-3-3-3-3)
- Must not contain only consecutive numbers, e.g. (1-2-3-4-5-6-7), (7-8-9-0-1-2-3-4), (7-6-5-4-3-2-1)
- The SHIFT (↑) button can be used for additional PIN combinations - e.g. SHIFT (↑) + 1 is a different value than just 1. See section 7, 'Setting a User PIN Policy'.
To add a New User PIN, first enter "Admin Mode" as described in section 5. Once the drive is in Admin Mode (solid BLUE LED) proceed with the following steps.
| 1. In Admin mode press and hold down both KEY (♂) + 3 buttons | Solid BLUE LED will change to blinking GREEN and solid BLUE LEDs | |
| 2. Enter New User PIN and press KEY (♂) button | Blinking GREEN and solid BLUE LEDs will switch to a single GREEN LED blink and then back to blinking GREEN and solid BLUE LEDs | |
| 3. Re-enter the New User PIN and press KEY (♂) button again | Blinking GREEN and solid BLUE LEDs change to a rapidly blinking GREEN LED and finally to a solid BLUE LED indicating a New User PIN has been successfully confi gured |
Note: To immediately exit Admin Mode (solid BLUE LED), press and hold down the SHIFT (↑) button for a second - the solid BLUE LED switches to a solid RED LED.
11. Changing the User PIN in Admin Mode

Important: Changing the User PIN must comply with the 'User PIN Policy' if one has been configured as described in section 7, which imposes a minimum PIN length and whether a 'Special Character' has been used. The Administrator can refer to section 9 to check the user PIN restrictions.
To change an existing User PIN, first enter the "Admin Mode" as described in section 5. Once the drive is in Admin Mode (solid BLUE LED) proceed with the following steps.
| 1. In Admin mode press and hold down both KEY (♂) + 3 buttons |  | Solid BLUE LED will change to blinking GREEN and solid BLUE LEDs |
| 2. Enter New User PIN and press KEY (♂) button once | 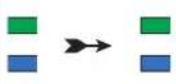 | Blinking GREEN and solid BLUE LEDs will switch to a single GREEN LED blink and then back to blinking GREEN and solid BLUE LEDs |
| 3. Re-enter the New User PIN and press KEY (♂) button once | 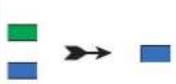 | Blinking GREEN and solid BLUE LEDs change to a rapidly blinking GREEN LED and finally to a solid BLUE LED indicating the User PIN has been successfully changed |
Note: To immediately exit Admin Mode (solid BLUE LED), press and hold down the SHIFT (↑) button for a second - the solid BLUE LED switches to a solid RED LED.
12. Deleting the User PIN in Admin Mode
To delete an existing User PIN, first enter the "Admin Mode" as described in section 5. Once the drive is in Admin Mode (solid BLUE LED) proceed with the following steps.
| 1. In Admin mode press and hold down bothSHIFT (↑) + 3 buttons |  | Solid BLUE LED will change to a blinking RED LED |
| 2. Press and hold down bothSHIFT (↑) + 3 buttons again |  | Blinking RED LED will change to a solid RED LEDand then to a solid BLUE LED indicating the UserPIN has been successfully deleted |
Note: To immediately exit Admin Mode (solid BLUE LED), press and hold down the SHIFT (↑) button for a second - the solid BLUE LED switches to a solid RED LED.
13. How to Unlock diskAshur M² with User PIN
To unlock the diskAshur M ^2 with the User PIN, proceed with the following steps.
| 1. In a standby state (solid RED LED) Press and hold down both the SHIFT (↑) + KEY (♂ buttons | 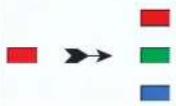 | RED LED switches to all LEDs, RED, GREEN & BLUE blinking on and off |
| 2. Enter User PIN and press the KEY (♂) button once | 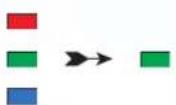 | RED, GREEN and BLUE blinking LEDs will change to alternating GREEN and BLUE LEDs then to a solid GREEN LED indicating drive successfully unlocked in User Mode |
14. Changing the User PIN in User Mode
To change the User PIN, first unlock the diskAshur M with the User PIN as described in section 13. Once the drive is in User Mode (solid GREEN LED) proceed with the following steps.
| 1. In User mode (GREEN LED) press and hold down both KEY (♂) + 4 buttons | 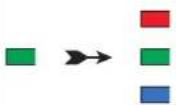 | Solid GREEN LED will change to all LEDs, RED, GREEN & BLUE blinking on and off |
| 2. Enter your Existing User PIN and press the KEY (♂) button once | 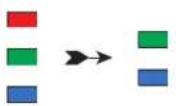 | GREEN and solid BLUE LEDs will alternate on and off and will then switch to a single GREEN LED blink and then back to blinking GREEN and solid BLUE LEDs |
| 3. Enter New User PIN and press the KEY (♂) button once | 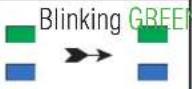 | N and solid BLUE LEDs will switch to a single GREEN LED blink and then back to blinking GREEN and solid BLUE LEDs |
| 4. Re-enter New User PIN and press the KEY (♂) button once |  | Blinking GREEN and solid BLUE LEDs will switch to a rapidly blinking GREEN LED and then to a solid GREEN LED indicating the User PIN has been successfully changed |

Important: Changing the User PIN in User mode (GREEN LED) must comply with the 'User PIN Policy' if one has been configured as described in section 7, which imposes a minimum PIN length and whether a 'Special Character' has been used.
15. Creating a One-Time User Recovery PIN
The User Recovery PIN is extremely useful in situations where a user has forgotten their PIN to unlock the diskAshur M ^2 .
To activate the recovery mode, the user must first enter the correct One-Time Recovery PIN, if one has been configured. The user PIN recovery process does not impact the data, encryption key and Admin PIN, however the user is forced to configure a new 7-15 digit User PIN.
To configure a One-Time 7-15 digit User Recovery PIN, first enter the "Admin Mode" as described in section 5. Once the drive is in Admin Mode (solid BLUE LED) proceed with the following steps.
| 1. In Admin mode press and hold down both KEY (♂) + 4 buttons | 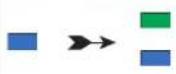 | Solid BLUE LED will change to blinking GREEN and solid BLUE LEDs |
| 2. Enter a One-Time Recovery PIN and press KEY (♂) button | 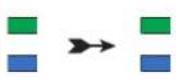 | Blinking GREEN and solid BLUE LEDs will switch to a single GREEN LED blink and then back to blinking GREEN and solid BLUE LEDs |
| 3. Re-enter your One-Time Recovery PIN and press KEY (♂) button again | 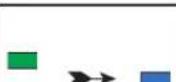 | Blinking GREEN and solid BLUE LEDs change to a rapidly blinking GREEN LED and fi nally to a solid BLUE LED indicating the One-Time Recovery PIN has been successfully confi gured |
Note: To immediately exit Admin Mode (solid BLUE LED), press and hold down the SHIFT (↑) button for a second - the solid BLUE LED switches to a solid RED LED.
16. Deleting the One-Time User Recovery PIN
To delete the One-Time User Recovery PIN, first enter the "Admin Mode" as described in section 5. Once the drive is in Admin Mode (solid BLUE LED) proceed with the following steps.
| 1. In Admin mode press and hold down bothSHIFT (↑) + 4 buttons |  | Solid BLUE LED will change to blinkingRED LED |
| 2. Press and hold down bothSHIFT (↑) + 4 buttons again |  | Blinking RED LED will become solid RED and then switch to a solid BLUE LED indicating that the One-Time User Recovery PIN has been successfully deleted |
Note: To immediately exit Admin Mode (solid BLUE LED), press and hold down the SHIFT (↑) button for a second - the solid BLUE LED switches to a solid RED LED.
17. Activating Recovery Mode and Creating New User PIN
The User Recovery PIN is extremely useful in situations where a user has forgotten their PIN to unlock the diskAshur M2.
To activate the recovery mode, the user must first enter the correct One-Time Recovery PIN, if one has been configured. The user PIN recovery process does not impact the data, encryption key and Admin PIN, however the user is forced to configure a new 7-15 digit User PIN.
To activate the Recovery process and configure a new User PIN, proceed with the following steps.
| 1. In Standby State (RED LED) press and hold down both KEY (♂) + 4 buttons | Solid RED LED will change to blinking RED and GREEN LEDs | |
| 2. Enter the One-Time Recovery PIN and press the KEY (♂) button | GREEN and BLUE LEDs alternate on and off then to a solid GREEN LED and finally to blinking GREEN and solid BLUE LEDs | |
| 3. Enter a New User PIN and press the KEY (♂) button | Blinking GREEN and solid BLUE LEDs change to a single GREEN LED blink then back to blinking GREEN and solid BLUE LEDs | |
| 4. Re-enter your New User PIN and press the KEY (♂) button again | GREEN LED blinks rapidly then becomes solid GREEN indicating the recovery process has been successful and a new user PIN confi gured |

Important: The creation of a new User PIN must comply with the 'User PIN Policy' if one has been configured as described in section 7, which imposes a minimum PIN length and whether a special character has been used. Refer to section 9 to check the user PIN restrictions.
18. Set User Read-Only in Admin Mode
With so many viruses and Trojans infecting USB drives, the Read-Only feature is especially useful if you need to access data on the USB drive when used in a public setting. This is also an essential feature for forensic purposes, where data must be preserved in its original and unaltered state that cannot be modified or overwritten.
When the Administrator configures the diskAshur M and restricts User access to Read-Only, then only the Administrator can write to the drive or change the setting back to Read/Write as described in section 19. The User is restricted to Read-Only access and cannot write to the drive or change this setting in user mode.
To set the diskAshur M ^2 and restrict User access to Read-Only, first enter the “Admin Mode” as described in section 5. Once the drive is in Admin Mode (solid BLUE LED) proceed with the following steps.
| 1. In Admin mode, press and hold down both “7 + 6” buttons. | Solid BLUE LED will change to blinking GREEN and BLUE LEDs | |
| 2. Press the KEY (♂) button once | GREEN and BLUE LEDs will change to a solid GREEN LED and then to a solid BLUE LED indicating the drive has been confi gured and restricts User access to Read-Only |
Note: To immediately exit Admin Mode (solid BLUE LED), press and hold down the SHIFT (↑) button for a second - the solid BLUE LED switches to a solid RED LED.
19. Enable User Read/Write in Admin Mode
To set the diskAshur M ^2 back to Read/Write, first enter the "Admin Mode" as described in section 5. Once the drive is in Admin Mode (solid BLUE LED) proceed with the following steps.
| 1. In Admin mode, press and hold down both “7 + 9” buttons. | Solid BLUE LED will change to blinking GREEN and BLUE LEDs | |
| 2. Press the KEY (♂) button once | GREEN and BLUE LEDs change to a solid GREEN LED then to a solid BLUE LED indicating the drive is configured as Read/Write |
Note: To immediately exit Admin Mode (solid BLUE LED), press and hold down the SHIFT (↑) button for a second - the solid BLUE LED switches to a solid RED LED.
20. Set Global Read-Only in Admin Mode
When the Administrator configures the diskAshur M and restricts it to Global Read-Only, then neither the Administrator nor the User can write to the drive and both are restricted to Read-Only access. Only the Administrator is able to change the setting back to Read/Write as described in section 21.
To set the diskAshur M ^2 and restrict Global access to Read-Only, first enter the "Admin Mode" as described in section 5. Once the drive is in Admin Mode (solid BLUE LED) proceed with the following steps.
| 1. In Admin mode, press and hold down both “5 + 6” buttons. | Solid BLUE LED will change to blinking GREEN and BLUE LEDs | |
| 2. Press KEY (♂) button | GREEN and BLUE LEDs will change to a solid GREEN LED and then to a solid BLUE LED indicating the drive has been confi gured and restricts Global access to Read-Only |
Note: To immediately exit Admin Mode (solid BLUE LED), press and hold down the SHIFT (↑) button for a second - the solid BLUE LED switches to a solid RED LED.
21. Enable Global Read/Write in Admin Mode
To set the diskAshur M² back to Read/Write from the Global Read-Only setting, first enter the "Admin Mode" as described in section 5. Once the drive is in Admin Mode (solid BLUE LED) proceed with the following steps.
| 1. In Admin mode, press and hold down both “5 + 9” buttons. | Solid BLUE LED will change to blinking GREEN and BLUE LEDs | |
| 2. Press KEY (♂) button | GREEN and BLUE LEDs change to a solid GREEN LED then to a solid BLUE LED indicating the drive is configured as Read/Write |
Note: To immediately exit Admin Mode (solid BLUE LED), press and hold down the SHIFT (↑) button for a second - the solid BLUE LED switches to a solid RED LED.
22. How to configure a Self-Destruct PIN
You can configure a self-destruct PIN which when entered performs a Crypto-Erase on the drive (encryption key is deleted). This process deletes all configured PINs and renders all data stored on the drive as inaccessible (lost forever), the drive will then show as unlocked GREEN LED. Running this feature will cause the self-destruct PIN to become the New User PIN and the drive will need to be formatted before it can be reused.
To set the Self-Destruct PIN, first enter the "Admin Mode" as described in section 5. Once the drive is in Admin Mode (solid BLUE LED) proceed with the following steps.
| 1. In Admin mode, press and hold down both KEY (♂) + 6 buttons | Solid BLUE LED will change to blinking GREEN and solid BLUE LEDs | |
| 2. Confi gure and enter a 7-15 digit Self-Destruct PIN and press the KEY (♂) button | Blinking GREEN and solid BLUE LEDs will switch to a single GREEN LED blink and then back to blinking GREEN and solid BLUE LEDs | |
| 3. Re-enter your Self-Destruct PIN and press the KEY (♂) button | GREEN LED will rapidly blink for several seconds and then changes to a solid BLUE LED to indicate the Self-Destruct PIN has been successfully confi gured |
Note: To immediately exit Admin Mode (solid BLUE LED), press and hold down the SHIFT (↑) button for a second - the solid BLUE LED switches to a solid RED LED.
23. How to Delete the Self-Destruct PIN
To delete the Self-Destruct PIN, first enter the "Admin Mode" as described in section 5. Once the drive is in Admin Mode (solid BLUE LED) proceed with the following steps.
| 1. In Admin mode, press and hold down both SHIFT (↑) + 6 buttons |  | Solid BLUE LED will change to a blinking RED LED |
| 2. Press and hold down SHIFT (↑) + 6 buttons again |  | Blinking RED LED will become solid and then change to a solid BLUE LED indicating the Self-Destruct PIN was successfully deleted |
Note: To immediately exit Admin Mode (solid BLUE LED), press and hold down the SHIFT (↑) button for a second - the solid BLUE LED switches to a solid RED LED.
24. How to Unlock with the Self-Destruct PIN

Warning: When the Self-Destruct mechanism is activated, all data, the encryption key and the Admin/User PINs are deleted. The Self-Destruct PIN becomes the User PIN. No Admin PIN exists after the Self-Destruct mechanism is activated. The diskAshur M² will need to be reset (see 'How to perform a complete reset' Section 35, on page 26) first in order to confi gure an Admin PIN with full Admin privileges including the ability to confi gure a new User PIN.
When used, the self-destruct PIN will delete ALL data, Admin/User PINs and then unlock the drive. Activating this feature will cause the Self-Destruct PIN to become the New User PIN and the diskAshur M² will need to be formatted before any new data can be added to the drive.
To activate the Self-Destruct mechanism, the drive needs to be in the standby state (solid RED LED) and then proceed with the following steps.
| 1. In Standby State (solid RED LED), press and hold down both the SHIFT (↑) + KEY (♂ buttons | 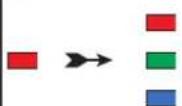 | RED LED switches to all LEDs, RED, GREEN & BLUE blinking on and off |
| 2. Enter the Self-Destruct PIN and press the KEY (♂) button | 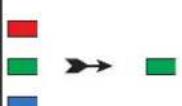 | RED, GREEN and BLUE blinking LEDs will change to GREEN and BLUE LEDs alternating on and off for a few seconds and finally shifts to a solid GREEN LED indicating the diskAshur M2 has successfully self-destructed |
25. How to Configure an Admin PIN after a Brute Force attack or Reset
It will be necessary after a Brute Force attack or when the diskAshur M ^2 has been reset to configure an Admin PIN before the drive can be used.
PIN Requirements:
- Must be between 7-15 digits in length
- Must not contain only repetitive numbers, e.g. (3-3-3-3-3-3-3-3)
- Must not contain only consecutive numbers, e.g. (1-2-3-4-5-6-7), (7-8-9-0-1-2-3-4), (7-6-5-4-3-2-1)
If the diskAshur MP has been brute forced or reset, the drive will be in standby state (solid RED LED). to configure an Admin PIN proceed with the following steps.
| 1. In Standby state (solid RED LED), press and hold down both SHIFT (↑) + 1 buttons | Solid RED LED will change to blinking GREEN and solid BLUE LEDs | |
| 2. Enter New Admin PIN and press KEY (♂) button | Blinking GREEN and solid BLUE LEDs will switch to a single GREEN LED blink and then back to blinking GREEN and solid BLUE LEDs | |
| 3. Re-enter the New Admin PIN and press KEY (♂) button | Blinking GREEN LED and solid BLUE LED change to BLUE LED rapidly blinking for a few seconds and then to a solid BLUE LED indicating the Admin PIN was successfully confi gured. |
Note: To immediately exit Admin Mode (solid BLUE LED), press and hold down the SHIFT (↑) button for a second - the solid BLUE LED switches to a solid RED LED.
26. Setting the Unattended Auto-Lock
To protect against unauthorised access if the drive is unlocked and unattended, the diskAshur M^2 can be set to automatically lock after a pre-set amount of time. In its default state, the diskAshur M^2 Unattended Auto Lock time-out feature is turned off. The Unattended Auto Lock can be set to activate between 5 - 99 minutes.
To set the Unattended Auto Lock time-out feature, first enter the "Admin Mode" as described in section 5. Once the drive is in Admin Mode (solid BLUE LED) proceed with the following steps.
| 1. In Admin mode, press and hold down both KEY (♂) + 5 buttons |  | Solid BLUE LED will change to blinking GREEN and BLUE LEDs |
| 2. Enter the amount of time that you would like to set the Auto Lock time-out feature for, the minimum time that can be set is 5 minutes and the maximum being 99 minutes (5-99 minutes). For example enter:05 for 5 minutes (press ‘0’ followed by a ‘5’)20 for 20 minutes (press ‘2’ followed by a ‘0’)99 for 99 minutes (press ‘9’ followed by another ‘9’) | ||
| 3. Press the SHIFT (↑) button | 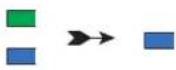 | Blinking GREEN and BLUE LEDs will change to a solid GREEN for a second and then finally to a solid BLUE LED indicating the Auto Lock time-out is successfully confi gured |
Note: To immediately exit Admin Mode (solid BLUE LED), press and hold down the SHIFT (↑) button for a second - the solid BLUE LED switches to a solid RED LED.
27. Turn off the Unattended Auto-Lock
To turn off the Unattended Auto Lock time-out feature, first enter the "Admin Mode" as described in section 5. Once the drive is in Admin Mode (solid BLUE LED) proceed with the following steps.
| 1. In Admin mode, press and hold down both KEY (♂) + 5 buttons | 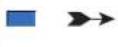 | Solid BLUE LED will change to blinking GREEN and BLUE LEDs |
| 2. Enter 00 and press the SHIFT (↑) button |  | Blinking GREEN and BLUE LEDs will change to a solid GREEN for a second and then fi nally to a solid BLUE LED indicating the Auto Lock time-out has been successfully disabled |
Note: To immediately exit Admin Mode (solid BLUE LED), press and hold down the SHIFT (↑) button for a second - the solid BLUE LED switches to a solid RED LED.
28. How to check the Unattended Auto-Lock
The Administrator is able to check and determine the length of time set for the Unattended Auto Lock time-out feature by simply noting the LED sequence as described in the table below.
To check the unattended auto-lock, first enter the "Admin Mode" as described in section 5. Once the drive is in Admin Mode (solid BLUE LED) proceed with the following steps.
| 1. In Admin mode press and hold downSHIFT (↑) + 5 | Solid BLUE LED will change to blinking GREEN andBLUE LEDs | |
| 2. Press the KEY (♂) button and the following happens;a. All LED's (RED, GREEN & BLUE) become solid for 1 second.b. Each RED LED blink equates to ten (10) minutes.c. Every GREEN LED blink equates to one (1) minute.d. All LED's (RED, GREEN & BLUE) become solid for 1 second.e. LEDs return to solid BLUE | ||
The table below describes the LED behaviour whilst checking the unattended auto-lock, for instance if you have set the drive to automatically lock after 25 minutes, the RED LED will blink twice (2) and the GREEN LED will blink five (5) times.
| Auto-Lock in minutes RED GREEN | ||
| 5 minutes 0 5 Blinks | ||
| 15 minutes 1 Blink 5 Blinks | ||
| 25 minutes 2 Blinks 5 Blinks | ||
| 40 minutes 4 Blinks 0 |
Note: To immediately exit Admin Mode (solid BLUE LED), press and hold down the SHIFT (↑) button for a second - the solid BLUE LED switches to a solid RED LED.
29. Set Read-Only in User Mode
To set the diskAshur M² to Read-Only, first enter the "User Mode" as described in section 13. Once the drive is in User Mode (solid GREEN LED) proceed with the following steps.
| 1. In User mode, press and hold down both “7 + 6” buttons. (7=Read + 6=Only) | Solid GREEN LED will change to blinking GREEN and BLUE LEDs | |
| 2. Press KEY (♂) button | GREEN and BLUE LEDs will change to a solid GREEN LED indicating the drive is configured as Read-Only |

Note: 1. If a User set the drive as Read-Only, Admin can override this by setting the drive as Read/Write in Admin mode.
- If Admin set the drive as Read-Only, the User cannot set the drive as Read/Write.
30. Enable Read/Write in User Mode
To set the diskAshur M ^2 to Read/Write, first enter the "User Mode" as described in section 13. Once the drive is in User Mode (solid GREEN LED) proceed with the following steps.
| 1. In User mode, press and hold down “7 + 9”buttons. (7=Read + 9=Write) | Solid GREEN LED will change to blinking GREENand BLUE LEDs | |
| 2. Press KEY (♂) button | GREEN and BLUE LEDs will change to a solidGREEN LED indicating the drive is configured asRead/Write |

Note: 1. If a User set the drive as Read-Only, Admin can override this by setting the drive as Read/Write in Admin mode.
- If Admin set the drive as Read-Only, the User cannot set the drive as Read/Write.
31. Brute Force Hack Defence Mechanism
The diskAshur M ^2 incorporates a defence mechanism to protect the drive against Brute Force attacks. By default, the initial shipment state values of the brute force limitation (consecutive incorrect PIN entries) for both the Admin PIN and User PIN is 10 and 5 for the Recovery PIN. Three independent brute force counters are used to record the incorrect attempts for each PIN authorisation (Admin, User and Recovery) as set out below.
- If a user enters an incorrect User PIN 10 consecutive times, the User PIN will be deleted but the data, Admin PIN and Recovery PIN remain intact and accessible.
- If an incorrect Recovery PIN is entered 5 consecutive times, the Recovery PIN is deleted but the data and Admin PIN remain intact and accessible.
- If an incorrect Admin PIN is entered 10 consecutive times, the drive will reset. All PINs and data are deleted and lost forever.
The table below assumes that all three PINs have been set up and highlights the effect of triggering the brute force defence mechanism of each individual PIN.
| PIN used to unlock drive | Consecutive incorrect PIN entries | Description of what happens |
| User PIN 10 | The User PIN is deleted.The Recovery PIN, the Admin PIN and all data remain intact and accessible. | |
| Recovery PIN 5 | The Recovery PIN is deleted.The Admin PIN and all data remain intact and accessible. | |
| Admin PIN 10 • | The diskAshur M | ^2 will reset. All PINs and data are deleted and lost forever. |
Note: The brute force limitation is defaulted to initial shipment state values when the drive is completely reset, or self-destruct feature is activated, or brute forced. If Admin changes the User PIN, or a new User PIN is set when activating the recovery feature, the User PIN brute force counter is zeroed (0) but the brute force limitation is not affected. If Admin changes the Recovery PIN, the Recovery PIN brute force counter is zeroed.
Successful authorisation of a certain PIN will zero the brute force counter for that particular PIN, but not affect the other PINs brute force counter. Failed authorisation of a certain PIN will increase the brute force counter for that particular PIN, but not affect the other PINs brute force counter.
32. Admin PIN Brute Force Hack Defence Mechanism
The diskAshur M² Admin PIN is equipped with a more sophisticated defence mechanism in comparison to the User PIN or the Recovery PIN. This is meant to protect against accidentally entering an incorrect Admin PIN 10 consecutive times and subsequently losing all of your data. So after 5 consecutive incorrect Admin PIN entries, the diskAshur M² will lock and all LEDs light up and become solid.
WARNING: Do not attempt the following instructions if you unlock your diskAshur M² using the 'USER PIN' only and you do not know the 'ADMIN PIN'.
Refer to the instructions in the table below to enable further Admin PIN entries up to a maximum of 10.
| Consecutive incorrect Admin PIN entries | Description of what happens to the diskAshur M^2 | Instructions |
| 5 | All LEDs, RED, GREEN & BLUE light up and become solid. | Enter the following PIN ‘47867243’ and press the KEY (♪) once, with both RED and GREEN LEDs alternately blinking on and off, the diskAshur M^2 is ready to accept a further 3 Admin PIN entries. |
| 8 | All LEDs, RED, GREEN & BLUE alternately blink on and off. | Enter the following PIN ‘47867243’ and press the KEY (♪) once, with both RED and GREEN LEDs alternately blinking on and off, the diskAshur M^2 is ready to accept a further 2 Admin PIN entries. |
| 10 | RED LED will light up and become solid. | After a total of 10 incorrect Admin PIN entries, the encryption key, all PINs and data will be deleted and lost forever. |
33. How to set the User PIN Brute Force Limitation
Note: The User PIN brute force limitation setting is defaulted to 10 consecutive incorrect PIN entries when the drive is either completely reset, brute forced or the self-destruct PIN is activated.
The brute force limitation for diskAshur M² User PIN can be reprogrammed and set by the administrator. This feature can be set to allow attempts from 1 to 10 consecutive incorrect PIN entries.
To configure the User PIN brute force limitation, first enter the "Admin Mode" as described in section 5. Once the drive is in Admin Mode (solid BLUE LED) proceed with the following steps.
| 1. In Admin mode, press and hold down both7 + 0 buttons | SolidBLUE LED will change toGREENandBLUELEDs blinking together | |
| 2. Enter the number of attempts for the brute force limitation (between 01-10), for example enter:01for 1 attempt10for 10 attempts | ||
| 3. Press theSHIFT(↑)button once | BlinkingGREENandBLUELEDs will switch to asolidGREENLED for a second and then to a solidBLUELED indicating the brute force limitation wassuccessfully confi gured | |
Note: To immediately exit Admin Mode (solid BLUE LED), press and hold down the SHIFT (↑) button for a second - the solid BLUE LED switches to a solid RED LED.
34. How to check the User PIN Brute Force Limitation
The Administrator is able to observe and determine the number of consecutive times an incorrect User PIN is allowed to be entered before triggering the Brute Force defence mechanism by simply noting the LED sequence as described below.
To check the brute force limitation setting, first enter the "Admin Mode" as described in section 5. Once the drive is in Admin Mode (solid BLUE LED) proceed with the following steps.
| 1. In Admin mode press and hold down both2 + 0 buttons | Solid BLUE LED will change to blinking GREEN andBLUE LEDs | |
| 2. Press the KEY (♂) button and the following happens;a. All LED's (RED, GREEN & BLUE) become solid for 1 second.b. Each RED LED blink equates to ten (10) units of a brute force limitation number.c. Every GREEN LED blink equates to one (1) single unit of a brute force limitation number.d. All LED's (RED, GREEN & BLUE) become solid for 1 second.e. LEDs return to solid BLUE | ||
The table below describes the LED behaviour whilst checking the brute force limitation setting, for instance if you have set the drive to brute force after 5 consecutive incorrect PIN entries, the GREEN LED will blink five (5) times.
| Brute Force Limitation Setting RED GREEN | ||
| 2 attempts 0 2 Blinks | ||
| 5 attempts 0 5 Blinks | ||
| 10 attempts 1 Blink 0 |
Note: To immediately exit Admin Mode (solid BLUE LED), press and hold down the SHIFT (↑) button for a second - the solid BLUE LED switches to a solid RED LED.
35. How to perform a complete reset
To perform a complete reset, the diskAshur M ^2 must be in standby state (solid RED LED). Once the drive is reset then all Admin/User PINs, the encryption key and all data will be deleted and lost forever and the drive will need to be formatted before it can be reused. To reset the diskAshur M ^2 proceed with the following steps.
| 1. In standby state (solid RED LED), press and hold down “0” button | Solid RED LED will change to all LEDs, RED, GREEN and BLUE blinking alternately on and off | |
| 2. Press and hold down both 2 + 7 buttons | RED, GREEN and BLUE alternating LEDs will become solid for a second and then to a solid RED LED indicating the drive has been reset |

Important: After a complete reset a new Admin PIN must be configured, refer to Section 25 on page 20 on 'How to Configure an Admin PIN after a Brute Force attack or Reset', thediskAshur M² will also need to be formatted before any new data can be added to the drive.
36. How to configure diskAshur M as Bootable

Note: When the drive is set as bootable, ejecting the drive from Operating System will not force the LED to turn RED. The drive stays solid GREEN and needs to be unplugged for next time use. The default setting of the diskAshur M2 is configured as non-bootable.
The diskAshur M^2 is equipped with a bootable feature to accommodate power cycling during a host boot process. When booting from the diskAshur M^2 , you are running your computer with the operating system that is installed on the diskAshur M^2 .
To set the drive as bootable, first enter the "Admin Mode" as described in section 5. Once the drive is in Admin Mode (solid BLUE LED) proceed with the following steps.
| 1. In Admin mode, press and hold down both KEY (♂) + 8 buttons | Solid BLUE LED will change to blinking GREEN and BLUE LEDs | |
| 2. Press “0” followed by a “1” (01) | GREEN and BLUE LEDs will continue to blink | |
| 3. Press the SHIFT (↑) button once | Blinking GREEN and BLUE LEDs will change to a solid GREEN LED and finally to a solid BLUE LED indicating the drive has been successfully confi gured as bootable |
Note: To immediately exit Admin Mode (solid BLUE LED), press and hold down the SHIFT (↑) button for a second - the solid BLUE LED switches to a solid RED LED.
37. How to disable the diskAshur M² Bootable feature
To disable the diskAshur M² Bootable Feature, first enter the "Admin Mode" as described in section 5. Once the drive is in Admin Mode (solid BLUE LED) proceed with the following steps.
| 1. In Admin mode, press and hold down both KEY (♂) + 8 buttons | 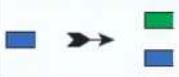 | Solid BLUE LED will change to blinking GREEN and BLUE LEDs |
| 2. Press “0” followed by another “0” (00) | 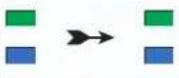 | GREEN and BLUE LEDs will continue to blink |
| 3. Press the SHIFT (↑) button once | 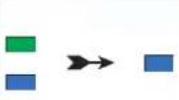 | Blinking GREEN and BLUE LEDs will change to a solid GREEN LED and fi nally to a solid BLUE LED indicating the bootable feature has been successfully disabled |
Note: To immediately exit Admin Mode (solid BLUE LED), press and hold down the SHIFT (↑) button for a second - the solid BLUE LED switches to a solid RED LED.
38. How to check the Bootable setting
To check the bootable setting, first enter the "Admin Mode" as described in section 5. Once the drive is in Admin Mode (solid BLUE LED) proceed with the following steps.
| 1. In Admin mode press and hold down bothSHIFT (↑) + 8 buttons | 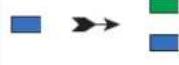 | Solid BLUE LED will change to blinking GREEN andBLUE LEDs |
| 2. Press the KEY button and one of the following two scenarios will happen;If datAshur PRO ^2 is confi gured as Bootable, the following happens;a. All LED's (RED, GREEN & BLUE) become solid for 1 second.b. GREEN LED blinks once.c. All LED's (RED, GREEN & BLUE) become solid for 1 second.d. LEDs return to solid BLUEIf datAshur PRO ^2 is NOT confi gured as Bootable, the following happens;a. All LED's (RED, GREEN & BLUE) become solid for 1 second.b. All LEDs are offc. All LED's (RED, GREEN & BLUE) become solid for 1 second.d. LEDs return to solid BLUE | ||
Note: To immediately exit Admin Mode (solid BLUE LED), press and hold down the SHIFT (↑) button for a second - the solid BLUE LED switches to a solid RED LED.
39. Initialising and formatting diskAshur M² for Windows
After a 'Brute Force Attack' or a complete reset the diskAshur M ^2 will delete all PINs, data and the encryption key. You will need to initialise and format the diskAshur M ^2 before it can be used.
To format your diskAshur M^2 , do the following:
- Configure a new Admin PIN - see page 20, section 25, 'How to configure an Admin PIN after a Brute Force attack or reset'.
- With the diskAshur M² in standby state (RED LED), press the KEY (⚡) button once and enter New Admin PIN to unlock (blinking GREEN LED).
-
Attach the diskAshur M^2 to the computer.
-
Windows 7: Right click Computer and then click Manage and then select Disk Management
Windows 8: Right-click left corner of desktop and select Disk Management
Windows 10: Right click on the start button and select Disk Management
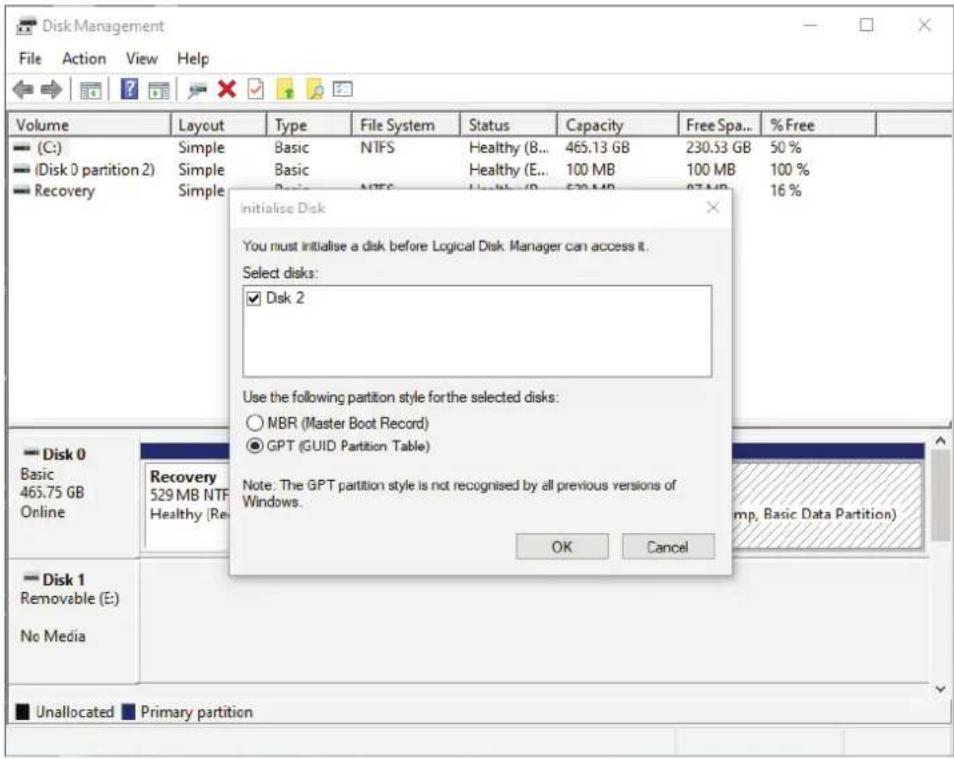
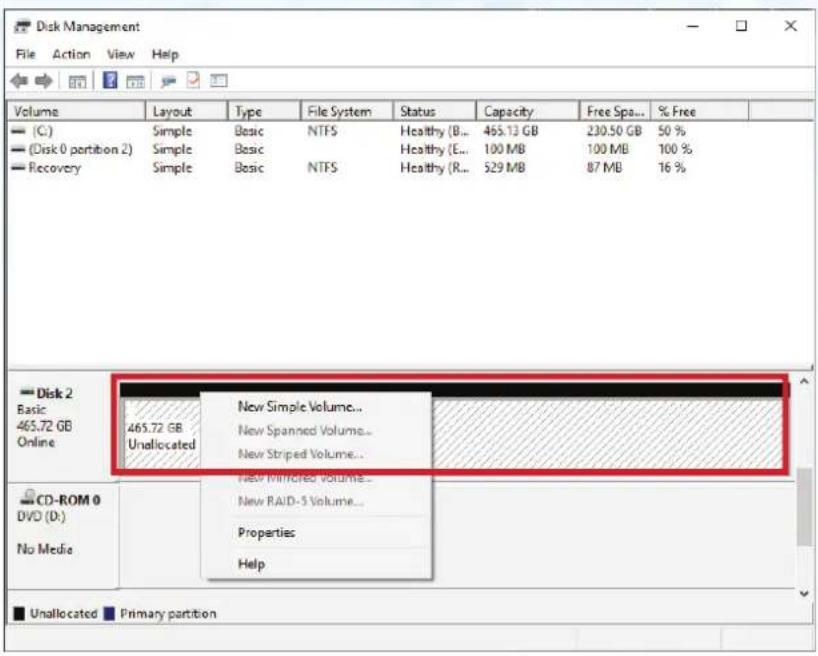
- In the Disk Management window, the diskAshur M² is recognised as an unknown device that is uninitialized and unallocated. A message box should appear for you to choose between MBR and GPT partition style. GPT stores multiple duplicates of this data over the disk, as a result it's much more robust. On an MBR disk, the partitioning and boot information is stored inside single place.
Select the partition style and click OK.
- Right-click in the blank area over the Unallocated section, and then select New Simple Volume.
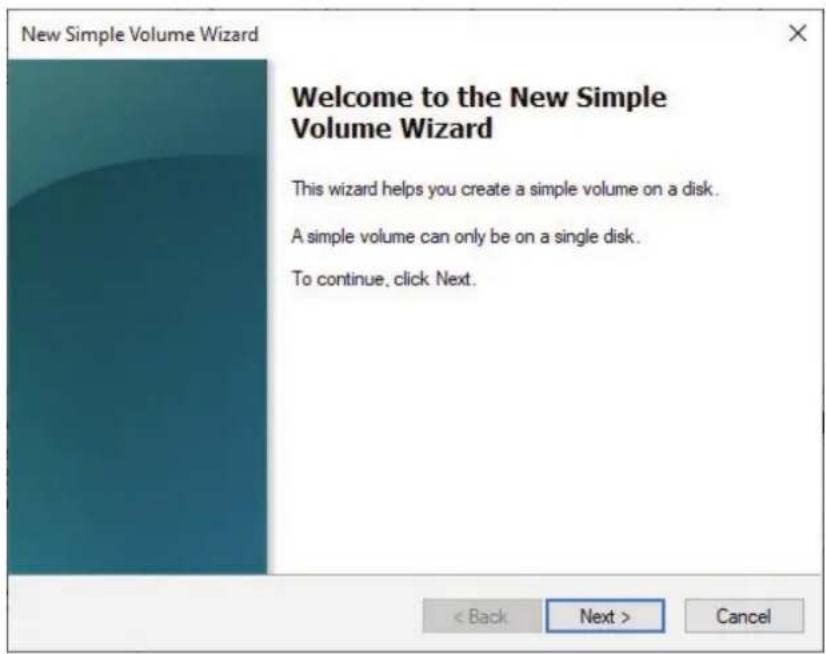
- The Welcome to the New Simple Volume Wizard window opens. Click Next.
- If you need only one partition, accept the default partition size and click Next.
- Assign a drive letter or path and click Next.
- Create a volume label, select Perform a quick format, and then click Next.
- Click Finish.
- Wait until the format process is complete. The diskAshur M ^2 will be recognised and it is available for use.
40. Initialising and formatting diskAshur M² in Mac OS
After a 'Brute Force Attack' or a complete reset the diskAshur M ^2 will delete all PINs, data and the encryption key. You will need to initialise and format the diskAshur M ^2 before it can be used.
To initialize and format the diskAshur M²:
- Select diskAshur M ^2 from the list of drives and volumes. Each drive in the list will display its capacity, manufacturer, and product name, such as 'iStorage diskAshur M ^2 Media'.
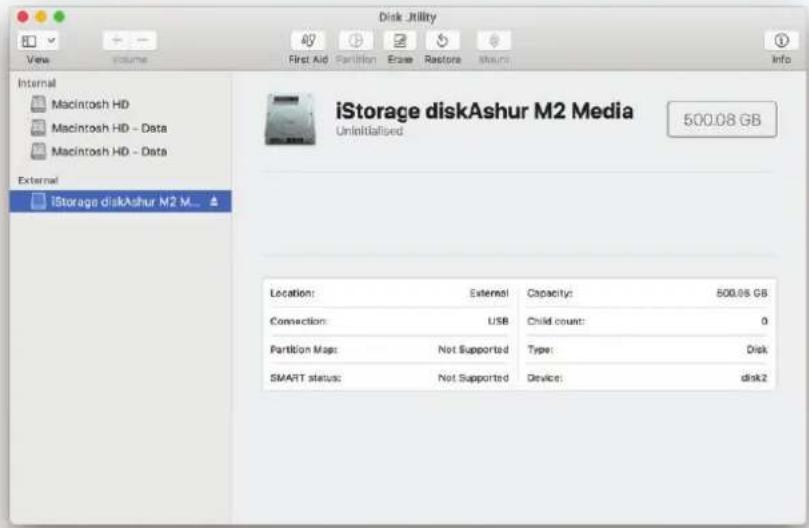
- Click the 'Erase' button under Disk Utility.
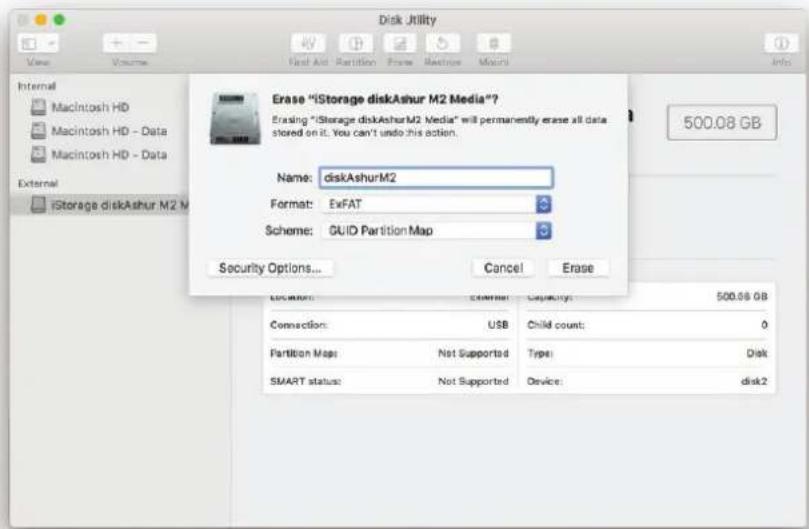
- Enter a name for the drive. The default name is Untitled. The name of the drive will eventually appear on the desktop.
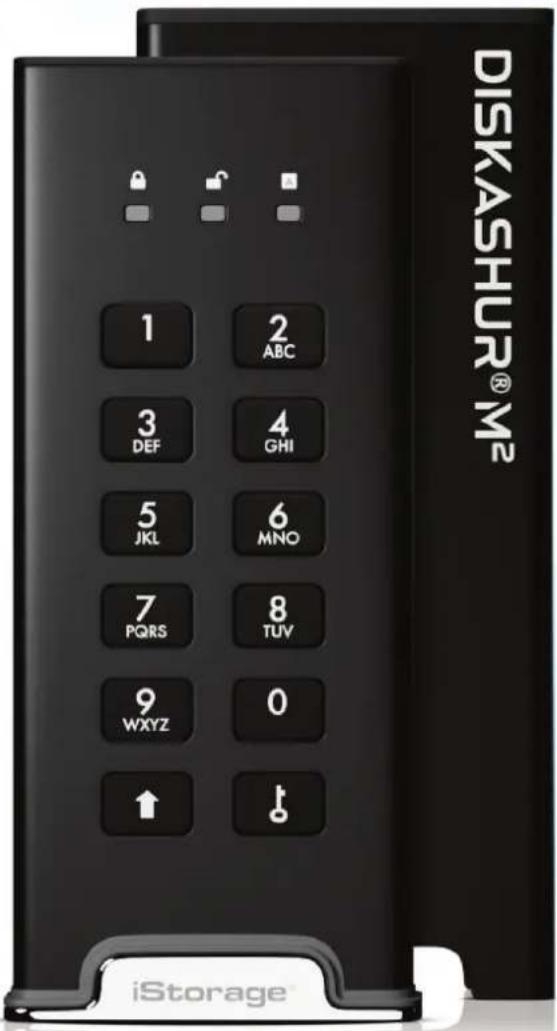
DISKASHUR® M²
iStorage®
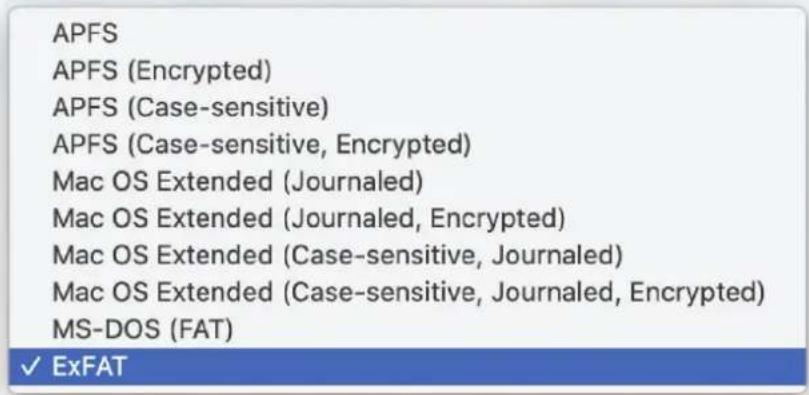
- Select a scheme and volume format to use. The Volume Format dropdown menu lists the available drive formats that the Mac supports. The recommended format type is 'Mac OS Extended (Journaled).' For cross platform use exFAT. The scheme format dropdown menu lists the available schemes to use. We recommend using 'GUID Partition Map' on drives larger than 2TB.
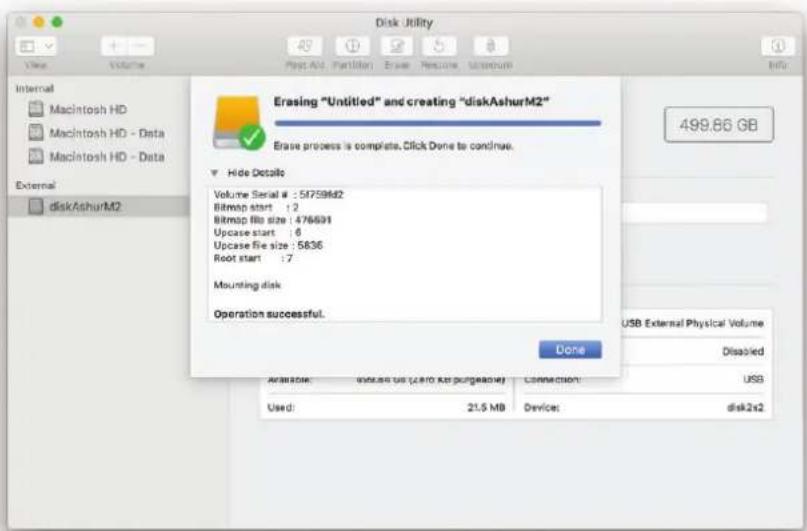
- Click the 'Erase' button. Disk Utility will unmount the volume from the desktop, erase it, and then remount it on the desktop.
41. Initialising and formatting diskAshur M² in Linux OS
- Open 'Show Application' and type 'Disks' in the search box. Click on the 'Disks' utility when displayed.

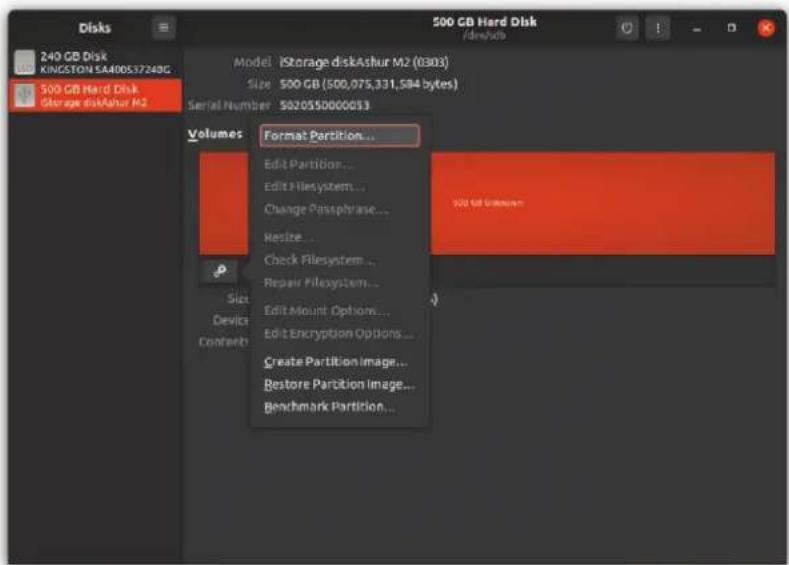
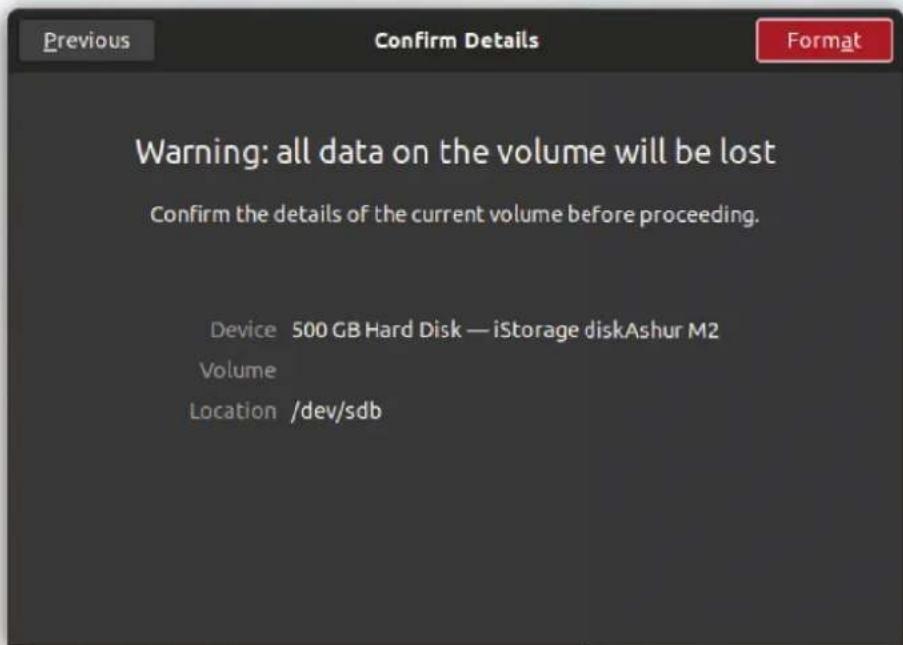
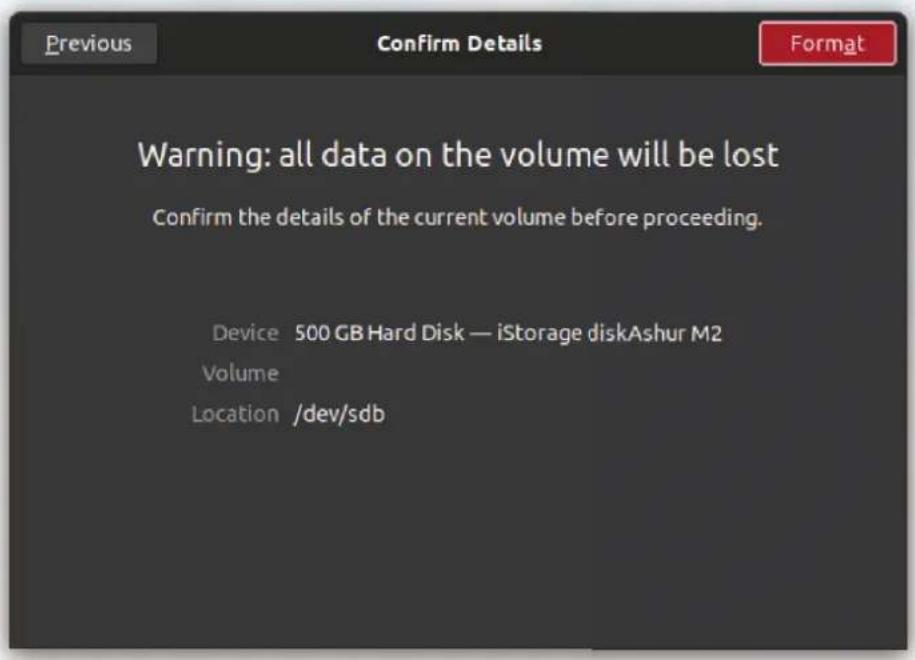
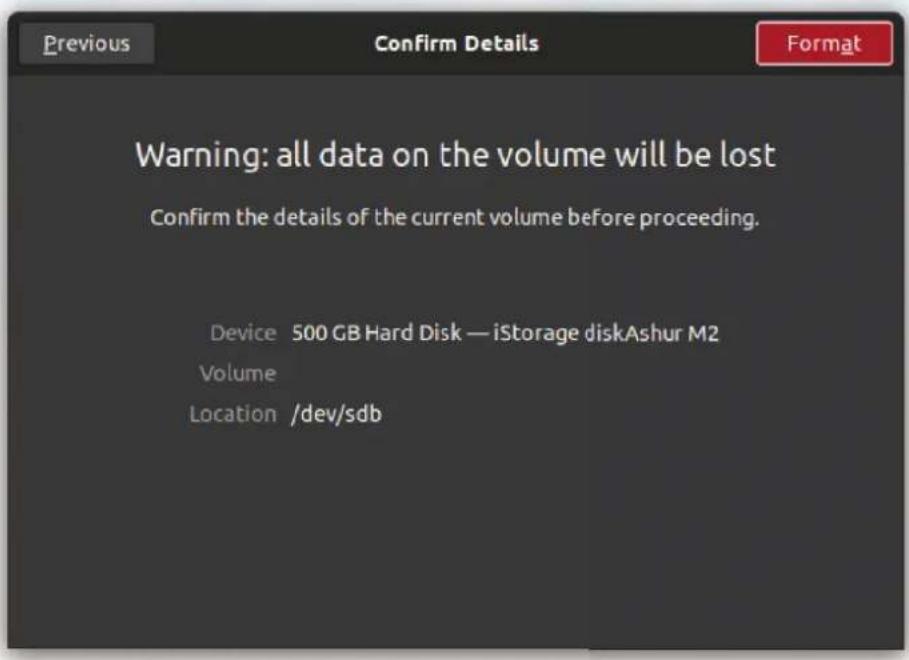
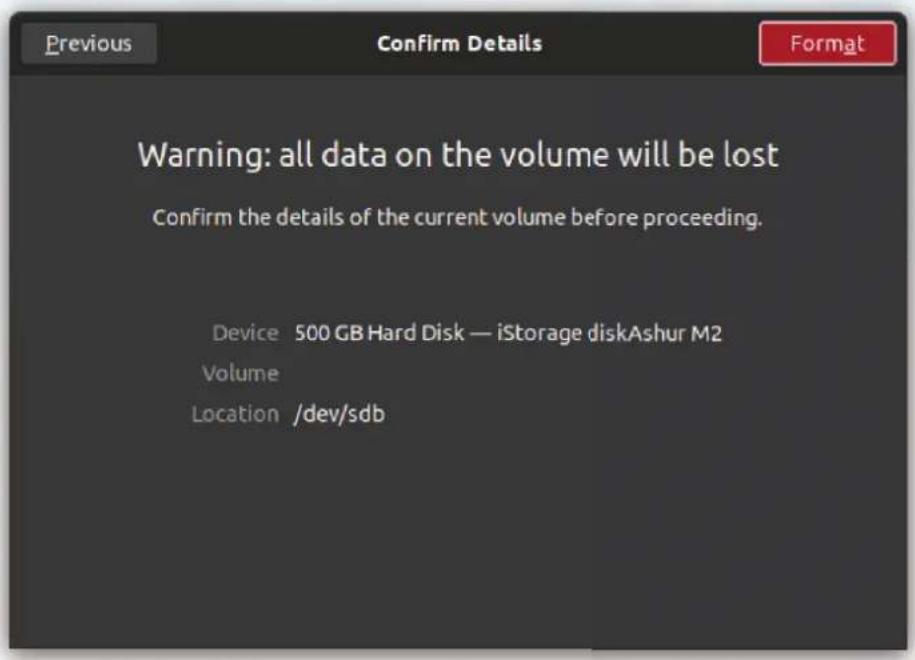
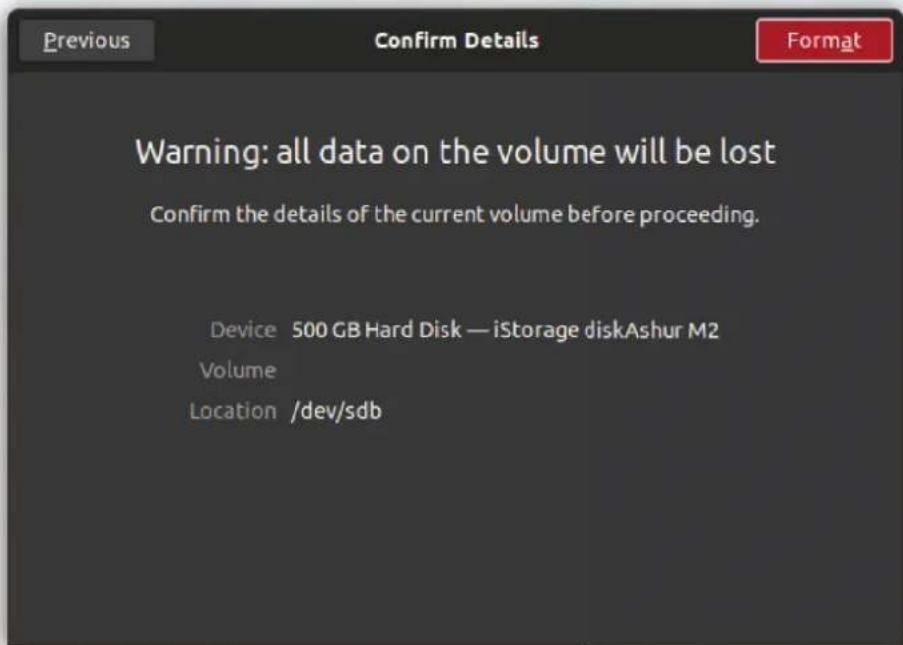
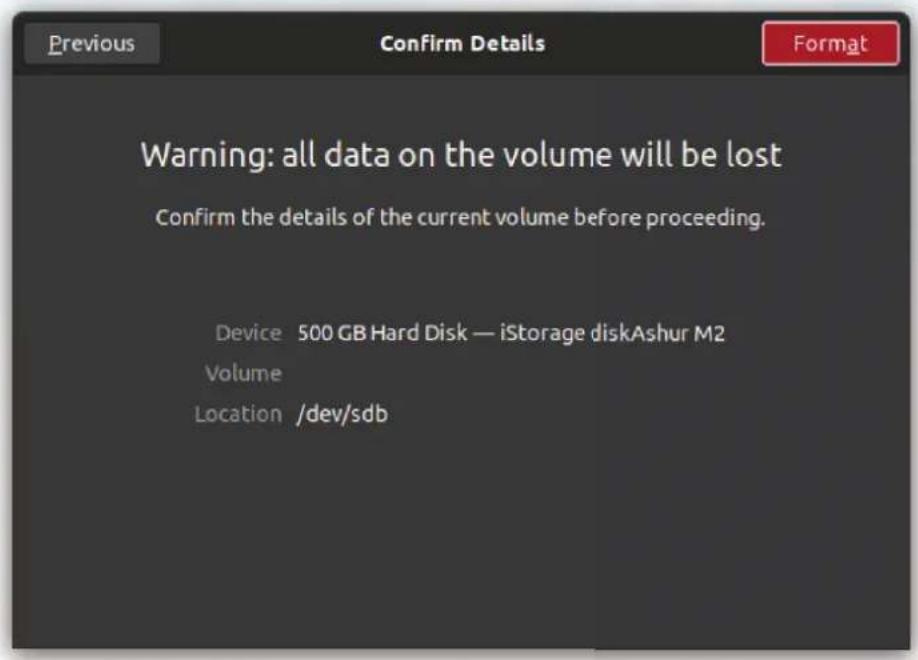
- Click to select the drive (500 GB Hard Disk) under 'Devices'. Next click on the gears icon under 'Volumes' and then click on 'Format Partitons'.
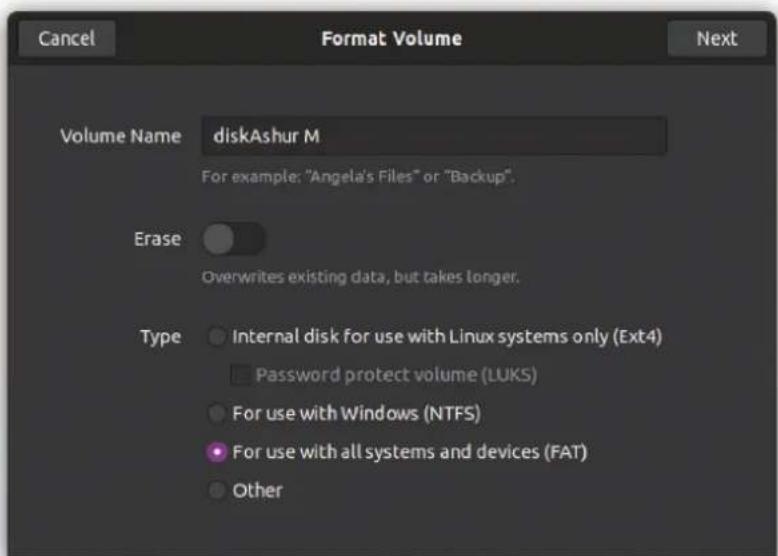
- Select 'Compatible with all systems and devices (FAT)' for the 'Type' option. And enter a name for the drive, e.g: diskAshur M². Then, click the 'Format' button.
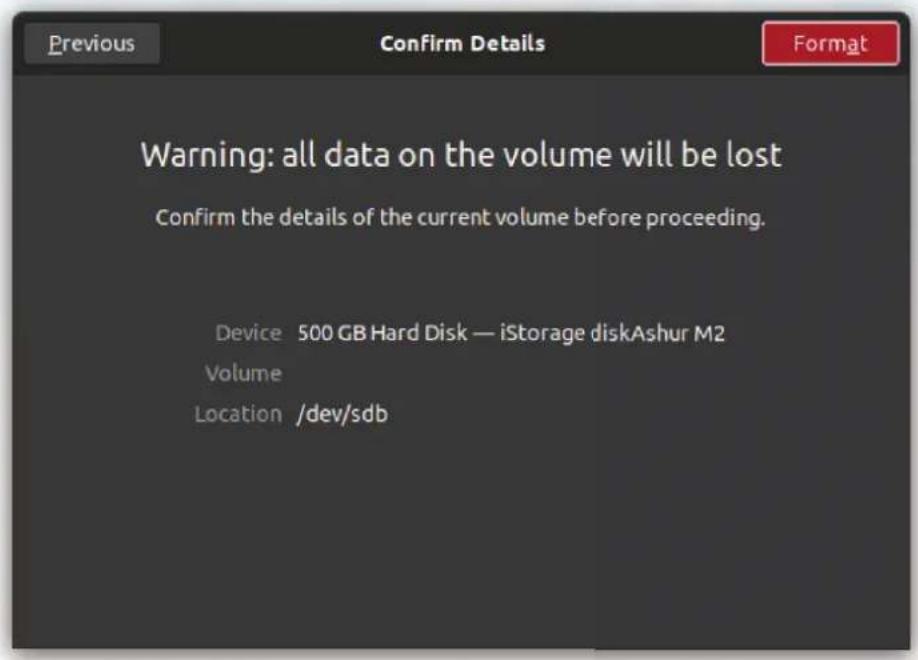
- After the format process is finished, click Play button to mount the drive to Ubuntu.
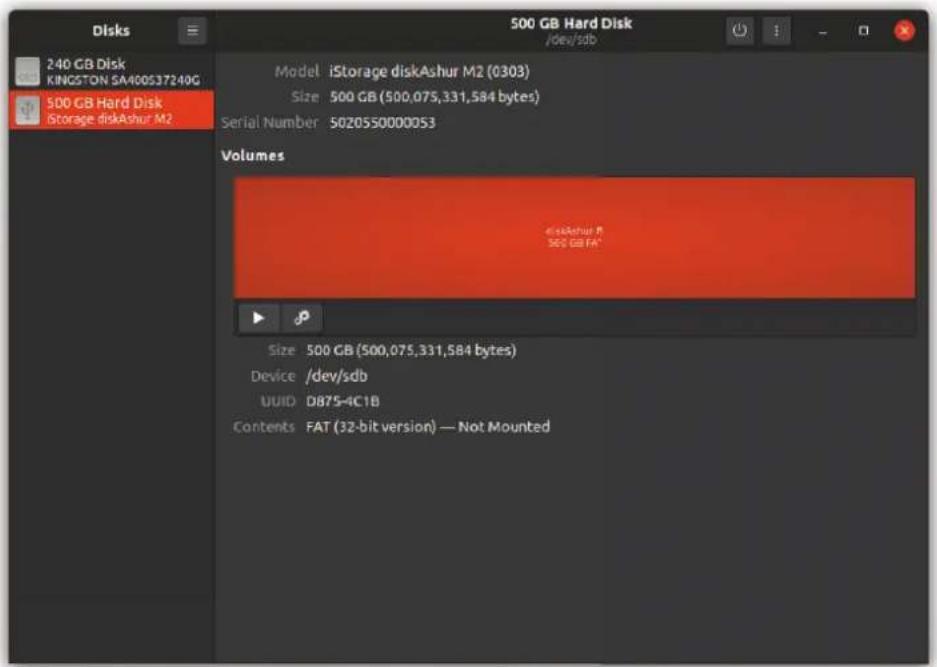
DISKASHUR® M²
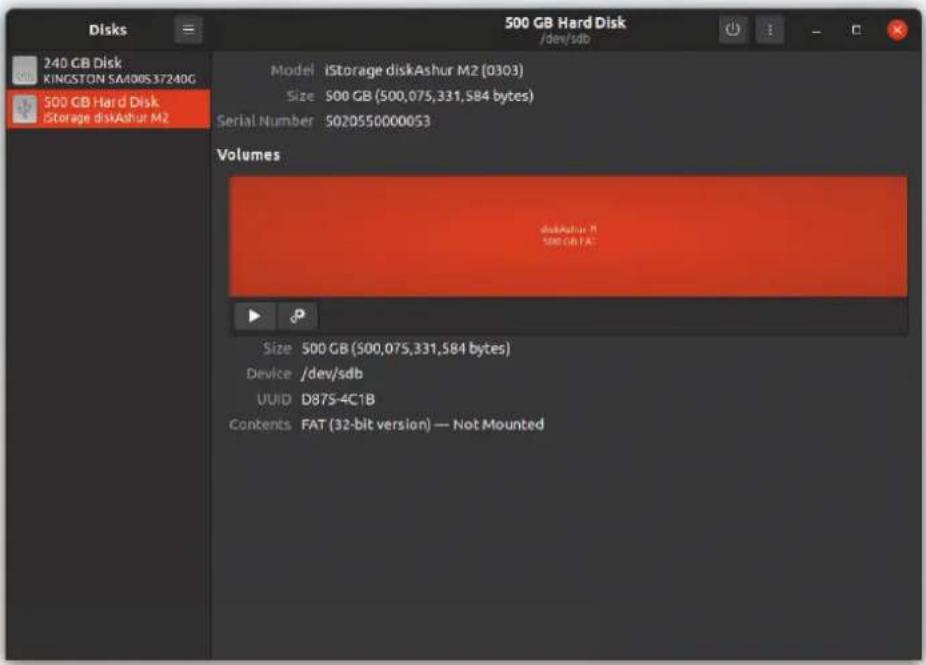
- Now the drive should be mounted to Ubuntu and ready to use.
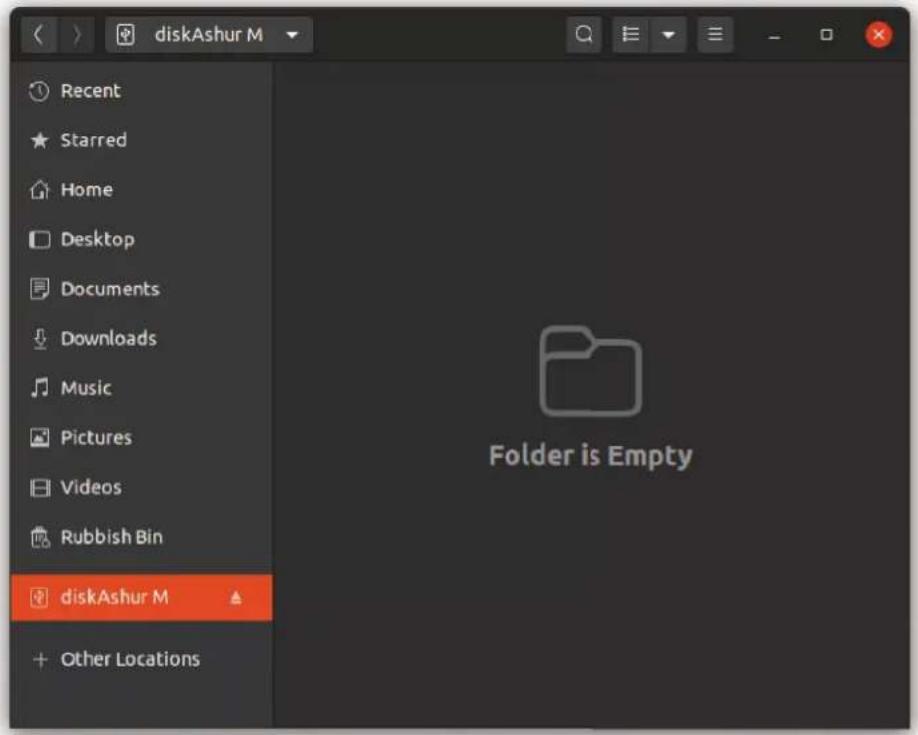
- The disk will be shown as seen in the image below. You can click the disk icon to open your drive.
42. Hibernating, Suspending, or Logging off from the Operating System
Be sure to save and close all the files on your diskAshur M before hibernating, suspending, or logging off from the operating system.
It is recommended that you lock the diskAshur M ^2 manually before hibernating, suspending, or logging off from your system.
To lock the drive, safely eject the diskAshur M^2 from your host operating system and then unplug from the USB port. If data is being written to the drive, unplugging the diskAshur M^2 will result in incomplete data transfer and possible data corruption.

Attention: To ensure your data is secure, be sure to lock your diskAshur M² if you are away from your computer.
43. How to check Firmware in Admin mode
To check the firmware revision number, first enter the "Admin Mode" as described in section 5. Once the drive is in Admin Mode (solid BLUE LED) proceed with the following steps.
| 1. In Admin mode press and hold down both “3 + 8” buttons | Solid BLUE LED will change to blinking GREEN and BLUE LEDs | |
| 2. Press the KEY (δ) button once and the following happens;a. All LED's (RED, GREEN & BLUE) become solid for 1 second.b. RED LED blinks indicating the integral part of the fi rmware revision number.c. GREEN LED blinks indicating the fractional part.d BLUE LED blinks indicating the last digit of the fi rmware revision numbere. All LED's (RED, GREEN & BLUE) become solid for 1 second.f. RED, GREEN & BLUE LEDs switch to a solid BLUE LED | ||
For example, if the firmware revision number is '2.3', the RED LED will blink twice (2) and the GREEN LED will blink three (3) times. Once the sequence has ended the RED, GREEN & BLUE LED's will blink together once and then return to Admin mode, a solid BLUE LED.
44. How to check Firmware in User Mode
To check the firmware revision number, first enter the "User Mode" as described in section 13. Once the drive is in User Mode (solid GREEN LED) proceed with the following steps.
| 1. In User mode press and hold down both “3 + 8”buttons until GREEN and BLUE LEDs blink together | Solid GREEN LED will change to blinking GREENand BLUE LEDs | |
| 2. Press the KEY (♂) button and the following happens;a. All LED’s (RED, GREEN & BLUE) become solid for 1 second.b. RED LED blinks indicating the integral part of the fi rmware revision number.c. GREEN LED blinks indicating the fractional part.d. BLUE LED blinks indicating the last digit of the fi rmware revision numbere. All LED’s (RED, GREEN & BLUE) become solid for 1 second.f. RED, GREEN & BLUE LEDs switch to a solid BLUE LED | ||
For example, if the firmware revision number is '2.3', the RED LED will blink twice (2) and the GREEN LED will blink three (3) times. Once the sequence has ended the RED, GREEN & BLUE LED's will blink together once and then return to the User mode, a solid GREEN LED.
45. Technical Support
iStorage provides the following helpful resources for you:
Website:
https://www.istorage-uk.com
E-mail Support:
support@istorage-uk.com
Telephone Support:
+44 (0) 20 8991-6260.
iStorage Technical Support Specialists are available from 9:00 a.m. to 5:30 p.m. GMT - Monday through Friday.
46. Warranty and RMA information
ISTORAGE PRODUCT DISCLAIMER AND WARRANTY
iStorage warrants that on delivery and for a period of 36 months from delivery, its Products shall be free from material defects. However, this warranty does not apply in the circumstances described below. iStorage warrants that the Products comply with the standards listed in the relevant data sheet on our website at the time you place your order.
These warranties do not apply to any defect in the Products arising from:
- fair wear and tear;
- wilful damage, abnormal storage or working conditions, accident, negligence by you or by any third party;
- if you or a third party fail(s) to operate or use the Products in accordance with the user instructions;
- any alteration or repair by you or by a third party who is not one of our authorised repairers; or
- any specification provided by you.
Under these warranties we will, at our option, either repair, replace, or refund you for, any Products found to have material defects, provided that upon delivery:
- you inspect the Products to check whether they have any material defects; and
- you test the encryption mechanism in the Products.
- you inspect the Products to check whether they have any material defects; and - you test the encryption mechanism in the Products.
We shall not be liable for any material defects or defects in the encryption mechanism of the Products ascertainable upon inspection on delivery unless you notify such defects to us within 30 days of delivery. We shall not be liable for any material defects or defects in the encryption mechanism of the Products which are not ascertainable upon inspection on delivery unless you notify such defects to us within 7 days of the time when you discover or ought to have become aware of such defects. We shall not be liable under these warranties if you make or anyone else makes any further use of the Products after discovering a defect. Upon notification of any defect, you should return the defective product to us. If you are a business, you will be responsible for the transportation costs incurred by you in sending any Products or parts of the Products to us under the warranty, and we will be responsible for any transportation costs we incur in sending you a repaired or replacement Product. If you are a consumer, please see our terms and conditions.
Products returned must be in the original packaging and in clean condition. Products returned otherwise will, at the Company's discretion, either be refused or a further additional fee charged to cover the additional costs involved. Products returned for repair under warranty must be accompanied by a copy of the original invoice, or must quote the original invoice number and date of purchase.
If you are a consumer, this warranty is in addition to your legal rights in relation to Products that are faulty or not as described. Advice about your legal rights is available from your local Citizens' Advice Bureau or Trading Standards offi ce.
The warranties set out in this clause apply only to the original purchaser of a Product from iStorage or an iStorage authorized reseller or distributor. These warranties are non-transferable.
EXCEPT FOR THE LIMITED WARRANTY PROVIDED HEREIN, AND TO THE EXTENT PERMITTED BY LAW, ISTORAGE DISCLAIMS ALL WARRANTIES, EXPRESS OR IMPLIED, INCLUDING ALL WARRANTIES OF MERCHANTABILITY; FITNESS FOR A PARTICULAR PURPOSE, NONINFRINGEMENT. ISTORAGE DOES NOT WARRANT THAT THE PRODUCT WILL OPERATE ERROR-FREE. TO THE EXTENT THAT ANY IMPLIED WARRANTIES MAY NONETHELESS EXIST BY OPERATION OF LAW, ANY SUCH WARRANTIES ARE LIMITED TO THE DURATION OF THIS WARRANTY. REPAIR OR REPLACEMENT OF THIS PRODUCT, AS PROVIDED HEREIN, IS YOUR EXCLUSIVE REMEDY.
IN NO EVENT SHALL ISTORAGE BE LIABLE FOR ANY LOSS OR ANTICIPATED PROFITS, OR ANY INCIDENTAL, PUNITIVE, EXEMPLARY, SPECIAL, RELIANCE OR CONSEQUENTIAL DAMAGES, INCLUDING, BUT NOT LIMITED TO, LOST REVENUES, LOST PROFITS, LOSS OF USE OF SOFTWARE, DATA LOSS, OTHER LOSS OR RECOVERY OF DATA, DAMAGE TO PROPERTY, AND THIRD-PARTY CLAIMS, ARISING OUT OF ANY THEORY OF RECOVERY, INCLUDING WARRANTY, CONTRACT, STATUTORY OR TORT, REGARDLESS OF WHETHER IT WAS ADVISED OF THE POSSIBILITY OF SUCH DAMAGES. NOTWITHSTANDING THE TERM OF ANY LIMITED WARRANTY OR ANY WARRANTY IMPLIED BY LAW, OR IN THE EVENT THAT ANY LIMITED WARRANTY FAILS OF ITS ESSENTIAL PURPOSE, IN NO EVENT WILL ISTORAGE'S ENTIRE LIABILITY EXCEED THE PURCHASE PRICE OF THIS PRODUCT. | 4823-2548-5683.3
iStorage®
© iStorage, 2020. All rights reserved.
iStorage Limited, iStorage House, 13 Alperton Lane
Perivale, Middlesex. UB6 8DH, England
Tel: +44 (0) 20 8991 6260 | Fax: +44 (0) 20 8991 6277
e-mail: info@istorage-uk.com | web: www.istorage-uk.com
DISKASHUR® M²
iStorage®
45. Support technique
iStorage Limited, iStorage House, 13 Alperton Lane
Perivale, Middlesex. UB6 8DH, Angleterre
Tél. : +44 (0) 20 8991 6260 | Fax: +44 (0) 20 8991 6277
e-mail: info@istorage-uk.com | web: www.istorage-uk.com
Benutzerhandbuch
DISKASHUR® M²
iStorage®
iStorage Limited, iStorage House, 13 Alperton Lane
Perivale, Middlesex. UB6 8DH, England
Tel: +44 (0) 20 8991 6260 | Fax: +44 (0) 20 8991 6277
E-Mail: info@istorage-uk.com | Web: www.istorage-uk.com
Manuale d'uso
Conforme al Trade Agreements Act (TAA)


vmware®
Indice
Introduzione 116
DISKASHUR® M²
iStorage®
iStorage Limited, iStorage House, 13 Alperton Lane
Perivale, Middlesex. UB6 8DH, Inghilterra
Tel: +44 (0) 20 8991 6260 | Fax: +44 (0) 20 89916277
e-mail: info@istorage-uk.com | web: www.istorage-uk.com
ユーザーガイド
DISKASHUR® M²
iStorage®
DISKASHUR® M²
iStorage®
41. Initialiseren en formatteren van diskAshur M² in Linux OS
iStorage Limited, iStorage House, 13 Alperton Lane
Perivale, Middlesex. UB6 8DH, Engeland
Tel: +44 (0) 20 8991 6260 | Fax: +44 (0) 20 8991 6277
e-mail: info@istorage-uk.com | website: www.istorage-uk.com
Manual del usuario
DISKASHUR® M²
iStorage®
41. Iniciar y formatear diskAshur M² en Linux OS
iStorage Limited, iStorage House, 13 Alperton Lane
Perivale, Middlesex. UB6 8DH, Inglaterra
Tel: +44 (0) 20 8991 6260 | Fax: +44 (0) 20 8991 6277
correo electrónico: info@istorage-uk.com | web: www.istorage-uk.com
- Table of Contents
- Introduction
- Box Contents
- diskAshur M² Layout
- LED indicators and their actions
- LED States
- To wake from Idle State
- To enter Idle State
- Power-on States
- First Time Use
- PIN Requirements:
- Examples of these types of Alphanumerical PINs are:
- Locking the diskAshur M²
- Unlocking diskAshur M² with the Admin PIN
- How to Enter Admin Mode
- To Exit Admin Mode
- Changing the Admin PIN
- Setting a User PIN Policy
- Note:
- How to delete the User PIN Policy
- How to check the User PIN Policy
- Adding a New User PIN in Admin Mode
- Changing the User PIN in Admin Mode
- Deleting the User PIN in Admin Mode
- How to Unlock diskAshur M² with User PIN
- Changing the User PIN in User Mode
- Creating a One-Time User Recovery PIN
- Deleting the One-Time User Recovery PIN
- Activating Recovery Mode and Creating New User PIN
- Set User Read-Only in Admin Mode
- Enable User Read/Write in Admin Mode
- Set Global Read-Only in Admin Mode
- Enable Global Read/Write in Admin Mode
- How to configure a Self-Destruct PIN
- How to Delete the Self-Destruct PIN
- How to Unlock with the Self-Destruct PIN
- How to Configure an Admin PIN after a Brute Force attack or Reset
- Setting the Unattended Auto-Lock
- Turn off the Unattended Auto-Lock
- How to check the Unattended Auto-Lock
- Set Read-Only in User Mode
- Enable Read/Write in User Mode
- Brute Force Hack Defence Mechanism
- Admin PIN Brute Force Hack Defence Mechanism
- How to set the User PIN Brute Force Limitation
- How to check the User PIN Brute Force Limitation
- How to perform a complete reset
- How to configure diskAshur M as Bootable
- How to disable the diskAshur M² Bootable feature
- How to check the Bootable setting
- Initialising and formatting diskAshur M² for Windows
- Initialising and formatting diskAshur M² in Mac OS
- DISKASHUR® M²
- iStorage®
- Initialising and formatting diskAshur M² in Linux OS
- Hibernating, Suspending, or Logging off from the Operating System
- How to check Firmware in Admin mode
- How to check Firmware in User Mode
- Technical Support
- Warranty and RMA information
- ISTORAGE PRODUCT DISCLAIMER AND WARRANTY
- Support technique
- Benutzerhandbuch
- Manuale d'uso
- Indice
- ユーザーガイド
- Initialiseren en formatteren van diskAshur M² in Linux OS
- Manual del usuario
- Iniciar y formatear diskAshur M² en Linux OS
Brand : iStorage
Model : diskAshur M²
Category : Secure USB Drive