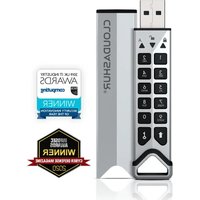
cloudAshur SHARE - Secure USB Drive iStorage - Free user manual and instructions
Find the device manual for free cloudAshur SHARE iStorage in PDF.


| Product Type | Hardware Security Module (Secure USB Drive) |
| Brand | iStorage |
| Model | cloudAshur SHARE |
| Intended Use | Encryption and secure access to cloud and local files |
| Unlock Method | Administrator PIN code (7 to 15 digits) |
| Default PIN Code | 11223344 (must be changed) |
| PIN Code Length | 7 to 15 digits |
| Registration Modes | Personal or Enterprise (with centralized management) |
| OS Compatibility | Windows and macOS (client application) |
| Power | Powered USB port (20-30 min initial charge possible) |
| Dimensions (estimated) | 7.5 x 2 x 1 cm |
| Weight (estimated) | 20 g |
| Connectivity | USB (system supported) |
| Security Features | Hardware encryption, PIN authentication, administrator mode |
| LED Indicators | Red, green, blue LEDs for status and mode |
| Client Application | cloudAshur for Windows and macOS (free download) |
| Support | Free lifetime support after product registration |
| Maintenance | Clean with a soft, dry cloth |
| Spare Parts | No detachable parts available |
| Repairability | Not user-serviceable |
| Warranty | See iStorage website for details |
Frequently Asked Questions - cloudAshur SHARE iStorage
User questions about cloudAshur SHARE iStorage
0 question about this device. Answer the ones you know or ask your own.
Ask a new question about this device
Download the instructions for your Secure USB Drive in PDF format for free! Find your manual cloudAshur SHARE - iStorage and take your electronic device back in hand. On this page are published all the documents necessary for the use of your device. cloudAshur SHARE by iStorage.
USER MANUAL cloudAshur SHARE iStorage
A complete and detailed user manual can be found here: https://istorage-uk.com/product-documentation/
Please note: Your cloudAshur hardware security module may need to be charged before use for 20-30 minutes by inserting into a powered USB port.
Your cloudAshur hardware security module ships with the following default Admin PIN: 11223344.
Important! Please Read: In its default state, the cloudAshur hardware security module cannot be registered. You MUST change the default Admin PIN immediately as described under the heading 'How to change Admin Pin' in order to register your cloudAshur hardware security module via the cloudAshur client App.
To unlock your cloudAshur hardware security module, please follow the three simple steps under the heading 'First Time Use'.
First Time Use
- Press and hold down the SHIFT (↑) button for one second. LED becomes solid RED.
- Press the KEY (♩) button once. GREEN and BLUE LEDs blink on and off together.
- Enter the default Admin PIN (11223344) and press the KEY (💡) button once. The GREEN LED blinks on and off indicating the cloudAshur is unlocked.
You MUST change the Admin PIN from the default state
to your own unique 7-15 digit PIN by following the steps under the heading 'How to change Admin PIN' in order to register your cloudAshur hardware security module via the cloudAshur client App.
How to change Admin PIN
- Unlock your cloudAshur hardware security module with the default Admin PIN (11223344) as described under 'First Time Use'
- With the GREEN LED blinking on and off, press the KEY (☐) button 3 times (KEY (☐) x 3) within 2 seconds. LED will change to solid BLUE (Admin Mode).
- With the device in Admin Mode (solid BLUE LED) press and hold down together both 'KEY (💡) + 2' buttons. LEDs will change to blinking GREEN and solid BLUE.
- Enter your NEW 7-15 digit Admin PIN and Press the KEY (💡) button once. GREEN LED will continue to blink and the BLUE LED will remain solid.
- Re-enter your NEW Admin PIN and press the KEY (button once. BLUE LED will rapidly blink and then become solid indicating the Admin PIN has been successfully changed.
To exit Admin Mode (solid BLUE LED), press and hold down the SHIFT (↑) button for one second, LED becomes solid RED and then fades out.
To unlock your cloudAshur hardware security module with your unique Admin PIN follow the steps in the heading 'Unlocking with the Admin PIN'
Unlocking with the Admin PIN
- Press and hold down the SHIFT (↑) button for one second. The RED LED will become solid.
- In Standby State (solid RED LED) press the KEY (💡) button once. GREEN and BLUE LEDs blink together.
- Enter your Admin PIN and press the KEY (button again. GREEN LED will blink on and off indicating the cloudAshur has been successfully unlocked as Admin.
Note: Once your cloudAshur hardware security module has been successfully unlocked, the GREEN LED will remain blinking for 30 seconds only, during which time your cloudAshur needs to be connected to a powered USB port.
cloudAshur Registration
Please download the Windows or macOS cloudAshur client Apps from the following link: https://istorage-uk.com/software-and-updates/
Important! Please Read: To register your cloudAshur hardware security module please choose one of the following registration methods that apply to you:
- Personal - cloudAshur NOT to be used with Remote Management (central management software).
- Enterprise - cloudAshur used in conjunction with Remote Management (central management software).
Personal Registration
As your cloudAshur hardware security module will not be used in conjunction with the 'Remote Management', you will NOT require a 'PIN Number' or 'License Key' during the registration process. Simply complete (step 3 - page 6) field numbers 1-6, leave the checkbox in field number 7 unchecked, skip field numbers 8 and 9 and then click 'Register' and start using your cloudAshur.
Enterprise Registration
The cloudAshur hardware security module is to be used by organisations that will centrally manage and monitor all employees who use the cloudAshur modules issued by the organisation through the use of the cloudAshur Remote Management Console (central management software).
If you are an employee and have been issued with a cloudAshur module by your organisation's Administrator, a 'You Have Been Invited' email will be sent to you by your Administrator containing the following important registration information:
- A link to download the Windows or macOS cloudAshur client Apps.
- A PIN Number - this will be required to be entered in field No. 8 during the registration process (step 3).
- A License Key - this will also be required to be entered in field No. 9 during the registration process (step 3).
Step 01
Once you have finished installing either a Windows or macOS client App, unlock your cloudAshur hardware security module as described in the heading 'Unlocking with the Admin
PIN: With your cloudAshur unlocked (blinking GREEN LED), connect to your computer's USB port.
Step 02
Open your Windows or macOS client App (image 1: Windows App - Login Form) and click 'Registration' to register your cloudAshur hardware security module. In the macOS client App, click 'Sign Up' to register.
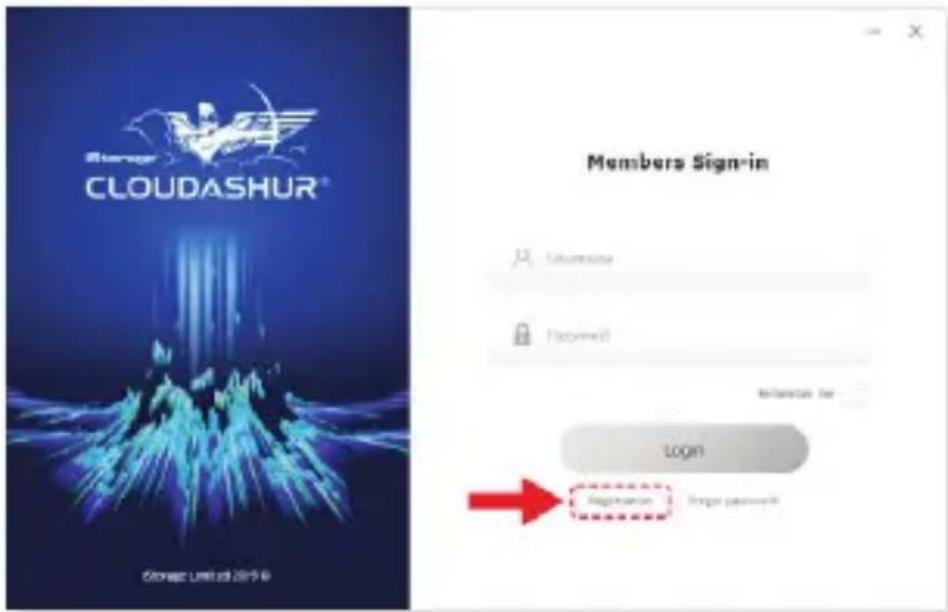
Image 1: Windows App - Login form
Step 03
To 'Register your cloudAshur' (image 2: Windows App - Registration Form) complete the fields under 'New User'. Follow the same method if using macOS client App.
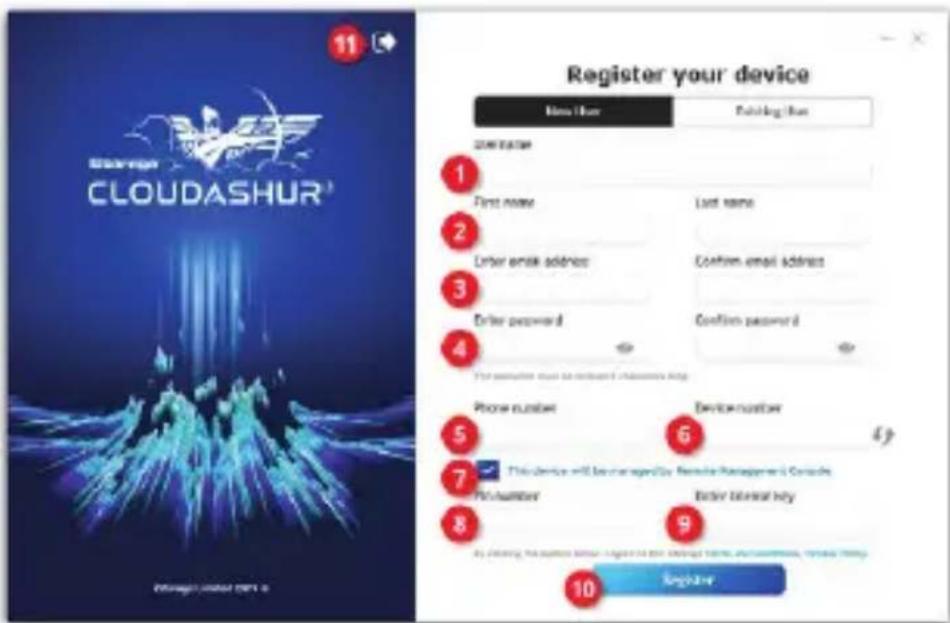
Image 2: Windows App - Registration form
-
Enter a 'Username'.
-
Enter your 'First' and 'Last' name.
-
Enter and confirm your 'Email Address'
-
Enter and confirm your 'Password' - your password must range from 8 to 64 characters in length.
-
Enter your 'Phone number'
-
The 'Device number' will be automatically detected if your cloudAshur module is unlocked and connected to your computer (solid GREEN LED). If the device number has not been detected, click on the refresh button, to detect.
-
If your cloudAshur module is to be Enterprise Registered, issued to you by your organisation's Administrator, make sure to check the checkbox (as in above image 2: WindowsApp - Registration Form). If your cloudAshur is to be Personal Registered leave the checkbox unchecked, skip steps 8 and 9 and proceed to step 10.
-
Enter the 'PIN' emailed to you by your Administrator (Enterprise Registration Only)
-
Enter the 'License Key' emailed to you by your Administrator (Enterprise Registration Only)
-
Click the 'Register' button to complete the registration process.
-
Click on the forward button → to login (step 4).
Step 04
Enter your 'Username' and 'Password' and then click the 'Login' button (image 3: Windows App - Login Form). Follow the same method if using macOS client App.
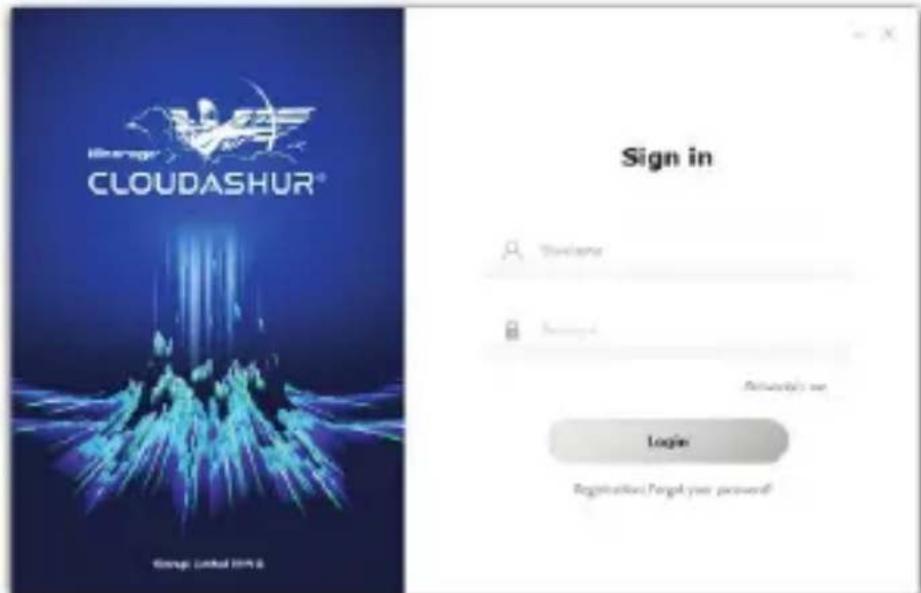
Image 3: Windows App - Login form
Step 05
After 'Sign in' your cloudAshur virtual drive will open. To add your cloud folder/s and local folders to your cloudAshur virtual drive, click the cloudAshur icon 📄 in your system tray (Windows - bottom right corner of your screen) or menu bar (macOS - top of your screen) once to open the preferences menu and then click on the '+' symbol to browse and select your cloud folder/s and any local folder/s (image 4: Windows App - Browse For Folder). Follow the same method if using macOS client App.
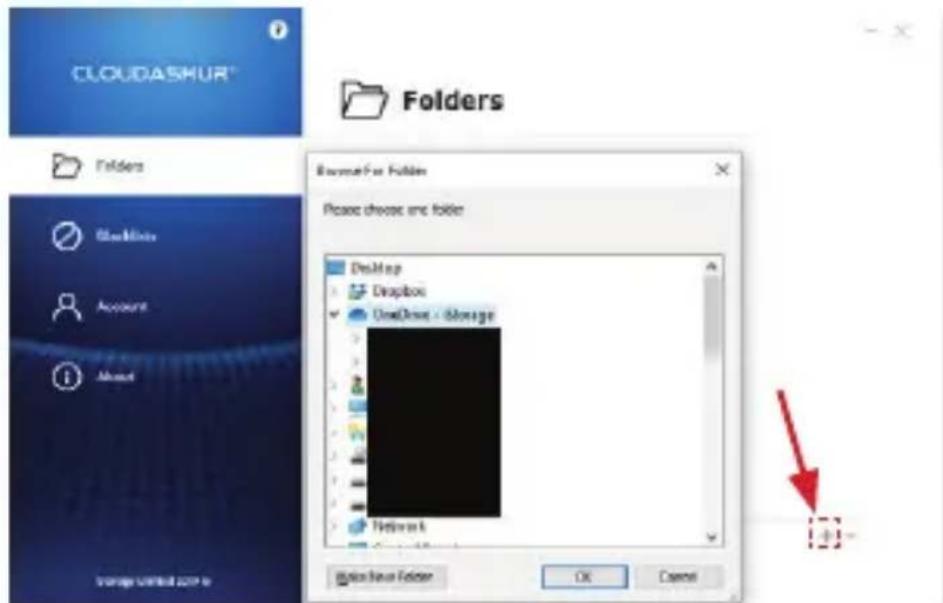
Image 4: Windows App - Browse for folder
Step 06
After adding your cloud accounts and any local folder/s (image 5: Windows App - Folders), double click the cloudAshur icon 📄 in your system tray (Windows - bottom right corner of your screen) or menu bar (macOS - top of your screen) to open your cloudAshur virtual drive (image 6).
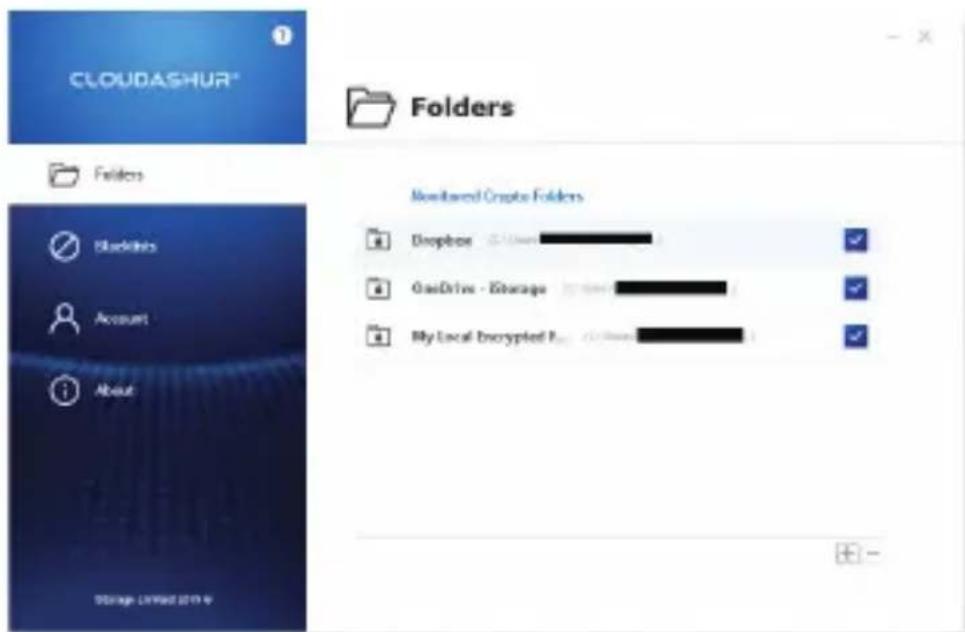
Image 5: Windows App - Folders
Step 07
Within your cloudAshur virtual drive, click on your cloud/local folder to open, in this case, 'OneDrive - iStorage' (image 6: Windows App - cloudAshur Virtual Drive). Follow the same method if using macOS client App.
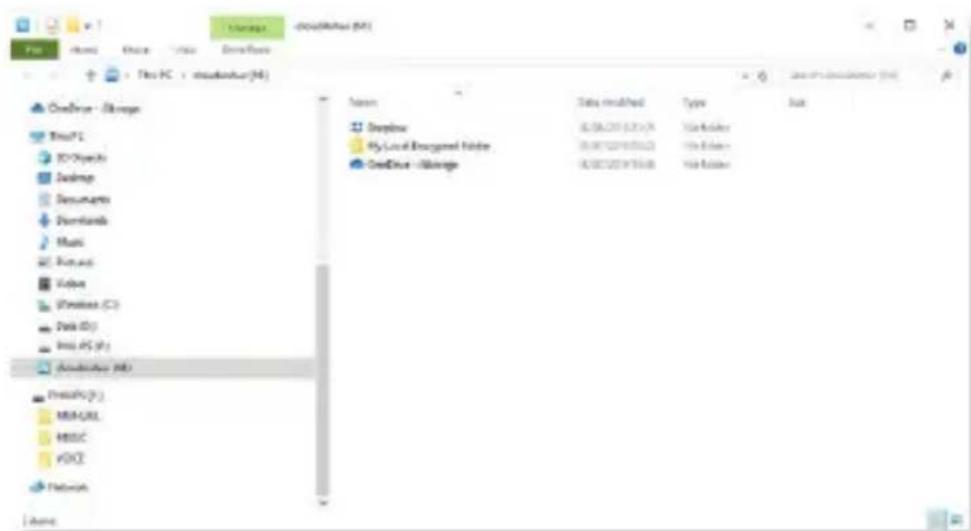
Image 6: Windows App - cloudAshur Virtual Drive
Step 08
Drag and drop or copy and paste your files to your cloudAshur virtual drive and a green unlocked padlock symbol will appear on the bottom left hand corner of each file (as seen in image 7: Windows App - cloudAshur virtual drive with encrypted files) indicating the files have been encrypted but can be accessed through your virtual drive. Meanwhile the same files are encrypted when accessed directly from your cloud account.
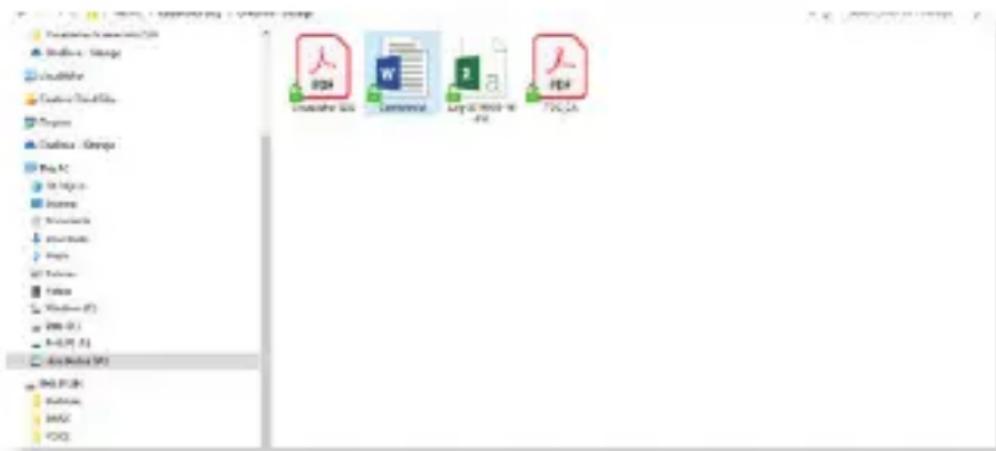
Image 7: Windows App - cloudAshur virtual drive with encrypted files
To benefit from free lifetime support, please register your iStorage product here:
https://istorage-uk.com/product-registration-form/
iStorage
CLOUDASHUR®
iStorage Product Disclaimer and Warranty
iStorage warrants that on delivery and for a period of 36 months from delivery, its Products shall be free from material defects. However, this warranty does not apply in the circumstances described below. iStorage warrants that the Products comply with the standards listed in the relevant data sheet on our website at the time you place your order.
These warranties do not apply to any defect in the Products arising from:
- fair wear and tear;
- wilful damage, abnormal storage or working conditions, accident, negligence by you or by any third party;
- if you or a third party fail(s) to operate or use the Products in accordance with the user instructions;
- any alteration or repair by you or by a third party who is not one of our authorised repairers; or
- any specification provided by you.
Under these warranties we will, at our option, either repair, replace, or refund you for, any Products found to have material defects, provided that upon delivery:
- you inspect the Products to check whether they have any material defects; and
- you test the encryption mechanism in the Products.
We shall not be liable for any material defects or defects in the encryption mechanism of the Products ascertainable upon inspection on delivery unless you notify such defects to us within 30 days of delivery. We shall not be liable for any material defects or defects in the encryption mechanism of the Products which are not ascertainable upon inspection on delivery unless you notify such defects to us within 7 days of the time when you discover or ought to have become aware of such defects. We shall not be liable under these warranties if you make or anyone else makes any further use of the Products after discovering a defect. Upon notification of any defect, you should return the defective product to us. If you are a business, you will be responsible for the transportation costs incurred by you in sending any Products or parts of the Products to us under the warranty, and we will be responsible for any transportation costs we incur in sending you a repaired or replacement Product. If you are a consumer, please see our terms and conditions.
Products returned must be in the original packaging and in clean condition. Products returned otherwise will, at the Company's discretion, either be refused or a further additional fee charged to cover the additional costs involved. Products returned for repair under warranty must be accompanied by a copy of the original invoice, or must quote the original invoice number and date of purchase.
If you are a consumer, this warranty is in addition to your legal rights in relation to Products that are faulty or not as described. Advice about your legal rights is available from your local Citizens' Advice Bureau or Trading Standards office.
The warranties set out in this clause apply only to the original purchaser of a Product from iStorage or an iStorage authorized reseller or distributor. These warranties are non-transferable.
EXCEPT FOR THE LIMITED WARRANTY PROVIDED HEREIN, AND TO THE EXTENT PERMITTED BY LAW, ISTORAGE DISCLAIMS ALL WARRANTIES, EXPRESS OR IMPLIED, INCLUDING ALL WARRANTIES OF MERCHANTABILITY; FITNESS FOR A PARTICULAR PURPOSE, NONINFRINGEMENT. ISTORAGE DOES NOT WARRANT THAT THE PRODUCT WILL OPERATE ERROR-FREE. TO THE EXTENT THAT ANY IMPLIED WARRANTIES MAY NONETHELESS EXIST BY OPERATION OF LAW, ANY SUCH WARRANTIES ARE LIMITED TO THE DURATION OF THIS WARRANTY. REPAIR OR REPLACEMENT OF THIS PRODUCT, AS PROVIDED HEREIN, IS YOUR EXCLUSIVE REMEDY.
IN NO EVENT SHALL ISTORAGE BE LIABLE FOR ANY LOSS OR ANTICIPATED PROFITS, OR ANY INCIDENTAL, PUNITIVE, EXEMPLARY, SPECIAL, RELIANCE OR CONSEQUENTIAL DAMAGES, INCLUDING, BUT NOT LIMITED TO, LOST REVENUES, LOST PROFITS, LOSS OF USE OF SOFTWARE, DATA LOSS, OTHER LOSS OR RECOVERY OF DATA, DAMAGE TO PROPERTY, AND THIRD-PARTY CLAIMS, ARISING OUT OF ANY THEORY OF RECOVERY, INCLUDING WARRANTY, CONTRACT, STATUTORY OR TORT, REGARDLESS OF WHETHER IT WAS ADVISED OF THE POSSIBILITY OF SUCH DAMAGES. NOTWITHSTANDING THE TERM OF ANY LIMITED WARRANTY OR ANY WARRANTY IMPLIED BY LAW, OR IN THE EVENT THAT ANY LIMITED WARRANTY FAILS OF ITS ESSENTIAL PURPOSE, IN NO EVENT WILL ISTORAGE'S ENTIRE LIABILITY EXCEED THE PURCHASE PRICE OF THIS PRODUCT. | 4823-2548-5683.3
CLOUDASHUR®
Quick Start Guide v1.3
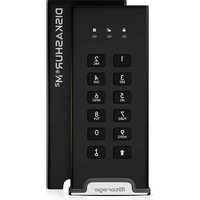
Brand : iStorage
Model : cloudAshur SHARE
Category : Secure USB Drive