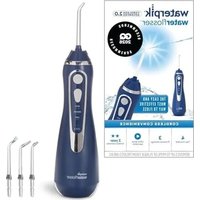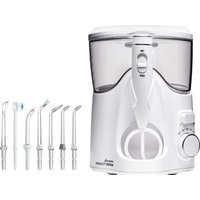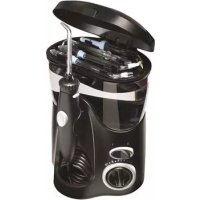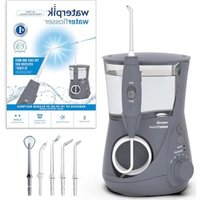
WP-667 - Interdental brush Waterpik - Free user manual and instructions
Find the device manual for free WP-667 Waterpik in PDF.


| Product Type | Interdental brush (oral irrigator) |
| Brand | Waterpik |
| Model | WP-667 |
| Power supply | 120 V, 60 Hz |
| Adjustable pressure | Yes, 10 levels |
| Operating modes | Floss and Massage |
| Built-in timer | Yes, pause at 30 sec then 1 min (can be disabled) |
| Auto shut-off | Yes, after 5 minutes of continuous use |
| Reservoir capacity | 650 ml |
| Included tips (depending on model) | Orthodontic tip, Pik Pocket, Plaque Seeker, toothbrush tip, classic jet, tongue cleaner |
| Tip storage | Under the reservoir cover |
| Reservoir cleaning | Dishwasher safe (top rack) |
| Recommended descaling | Every 1 to 3 months with white vinegar |
| Warranty | 2-year limited (consumables excluded) |
| Manufacturing | Designed and tested in USA, made in China |
| User serviceable parts | None |
| Safety | Do not use in bath, do not immerse, unplug if dropped in water |
Frequently Asked Questions - WP-667 Waterpik
User questions about WP-667 Waterpik
0 question about this device. Answer the ones you know or ask your own.
Ask a new question about this device
Download the instructions for your Interdental brush in PDF format for free! Find your manual WP-667 - Waterpik and take your electronic device back in hand. On this page are published all the documents necessary for the use of your device. WP-667 by Waterpik.
USER MANUAL WP-667 Waterpik
Waterpik® Water Flosser Model WP-600 Series
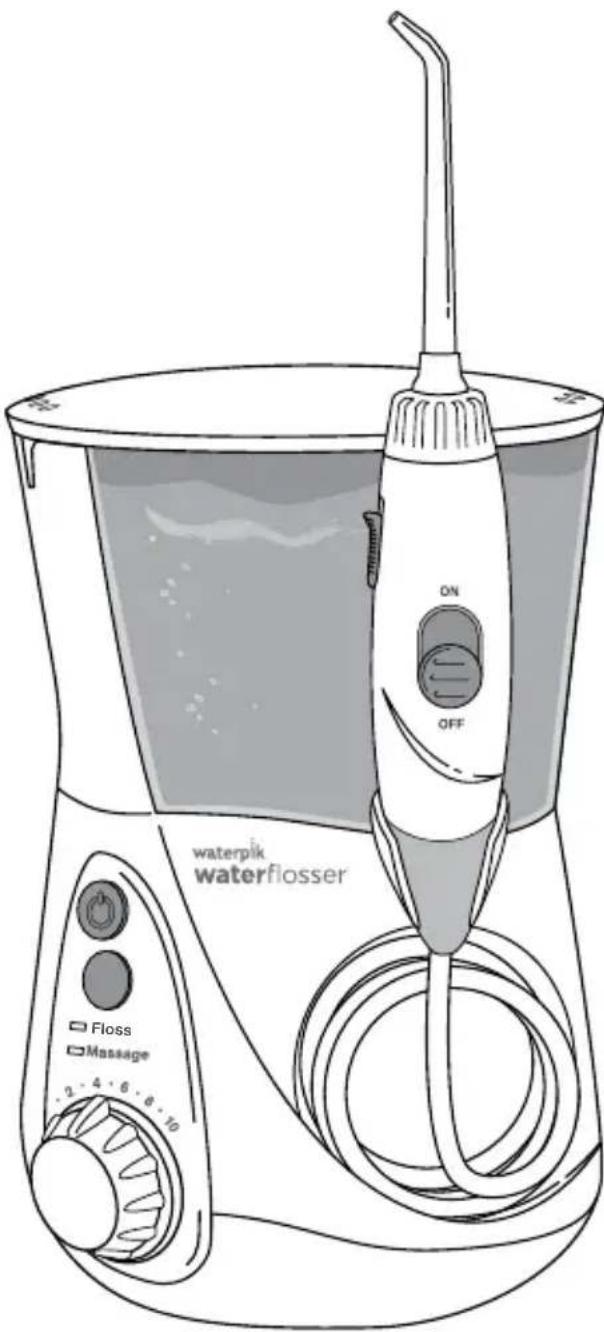
text_image
waterpik waterflosser Floss Massage 2 · 4 · 6 · 8 · 10 ON OFFMundusche Waterpik®
Modells WP-600 Serie
When using electrical products, especially when children are present, basic safety precautions should always be followed, including the following:
READ ALL INSTRUCTIONS BEFORE USING.
DANGER:
To reduce the risk of electrocution:
- Do not handle plug with wet hands.
- Do not place in or drop into water or other liquid.
- Do not use while bathing.
- Do not place or store product where it can fall or be pulled into a tub or sink.
- Do not reach for a product that has fallen into water. Unplug immediately.
- Check the power supply cord for damage before the first use and during the life of the product.
WARNING:
To reduce the risk of burns, electrocution, fire, or injury to persons:
- If product is opened/disassembled for ANY reason, warranty is VOID.
- Do not use this product if it has a damaged cord or plug, if it is not working properly, if it has been dropped or damaged, or dropped into water. Contact Water Pik, Inc. via email at InternationalService@waterpik.com.
- Do not direct water under the tongue, into the ear, nose or other delicate areas. This product is capable of producing pressures that may cause serious damage in these areas.
- Use this product only as indicated in these instructions or as recommended by your dental professional.
-
Only use tips and accessories recommended by Water Pik, Inc.
-
Do not drop or insert any foreign object into any opening or hose.
- Keep electrical cord away from heated surfaces.
- Do not use outdoors or operate where aerosol (spray) products are being used or where oxygen is being administered.
- Do not use iodine or water insoluble concentrated essential oils in this product. Use of these can reduce performance and will shorten the life of the product. Use of these products may void warranty.
- Fill reservoir with water or other dental professional recommended solution only.
- Remove any oral jewelry prior to use of this product.
- Do not use if you have an open wound on your tongue or in your mouth.
- If your physician or cardiologist has advised you to receive antibiotic premedication before dental procedures, you should consult your dentist before using this instrument or any other oral hygiene aid.
- If the Pik Pocket™ tip (not included in all models) separates from the shaft for any reason, discard tip and shaft and replace with new Pik Pocket™ tip (PP-100E).
- Do not use this product for more than 5 minutes in each two-hour period.
-
Unit will shut off automatically after 5 minutes of continuous usage.
-
Closely instruct and supervise children 8 years and above and individuals with special needs in the proper use of the Water Flosser.
- Children should be supervised to ensure that they do not play with the appliance.
- There are no consumer serviceable parts in this appliance and it does not require maintenance.
- Fill Water Flosser reservoir with warm water or other dental professional recommended solutions only.
SAVE THESE INSTRUCTIONS
TABLE OF CONTENTS
Product Description 5
Getting Started 6
Cleaning and Troubleshooting Your Waterpik® Water Flosser 9
Limited Two-Year Warranty 10
- Dual purpose covered lid
- Reservoir
- Tip storage under lid
- Power button
- Mode selector button
- LED mode indicators
- Pressure control dial
- Exchangeable tips
- Rotating control knob
- Tip eject button
- Water on/off switch
- Handle
- Water hose
- Base
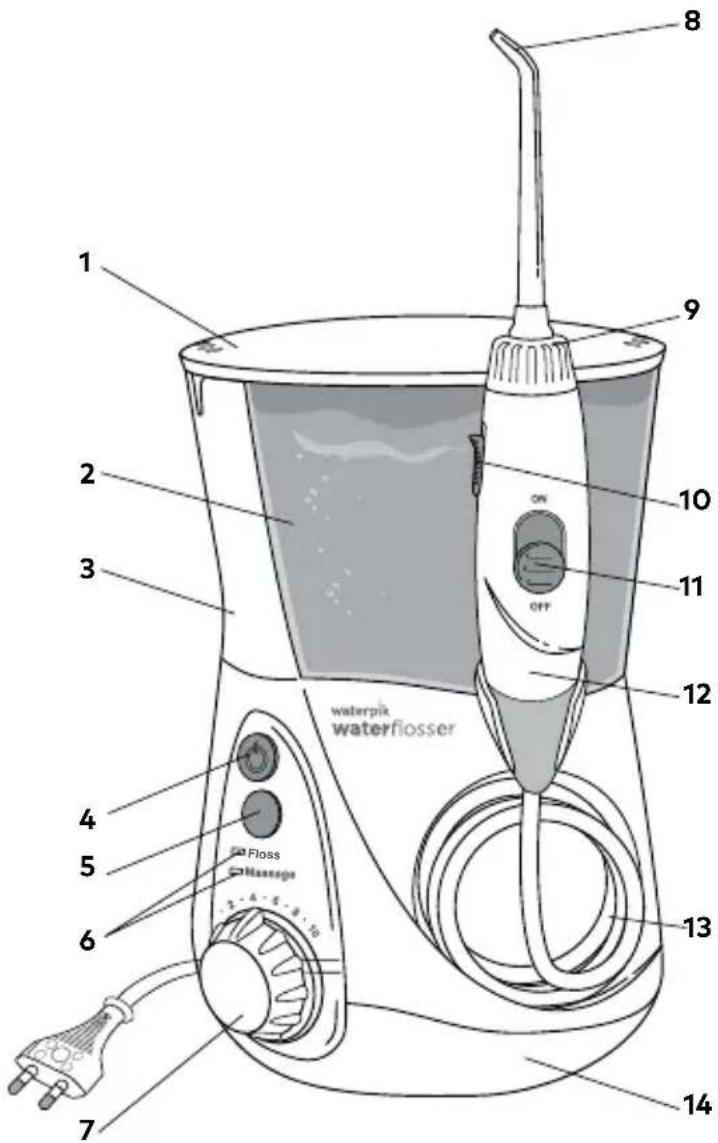
text_image
waterpik waterflosser 1 2 3 4 5 6 7 8 9 10 11 12 13 14 Floss GaugeTIPS
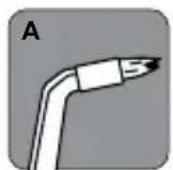
A. Orthodontic Tip*
- Braces/General Use
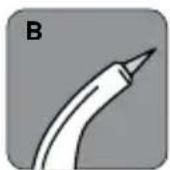
B. Pik Pocket™ Tip*
- Periodontal Pockets/Furcations
C. Plaque Seeker™ Tip*
- Implants/Crowns/Bridges/
Retainers/General Use
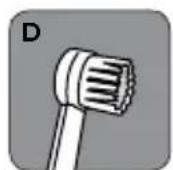
D. Toothbrush Tip*
- General Use
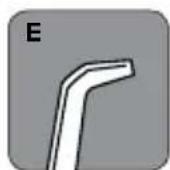
E. Classic Jet Tip**
- General Use
F. Tongue Cleaner**
- Fresher Breath
NOT ALL TIPS INCLUDED IN ALL MODELS

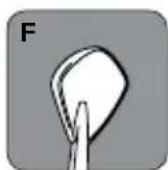
*Replace Every 3 months **Replace Every 6 months
text_image
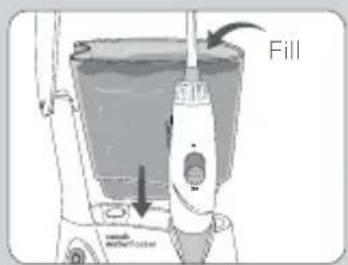
Fill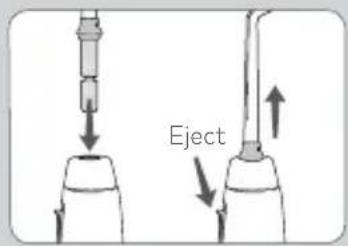
text_image
Eject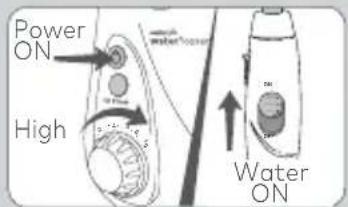
text_image
Power ON High Water ON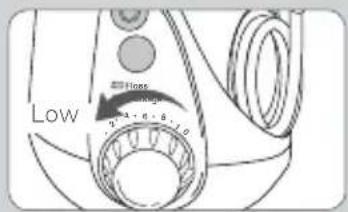
text_image
Low 2.5 - 6.8 - 1.0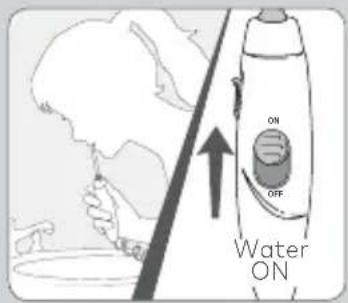
text_image
ON OFF Water ON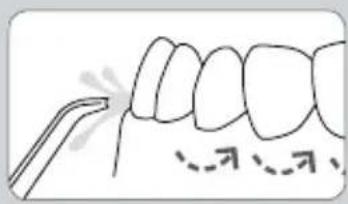
text_image
Diagram showing dental alignment with labeled tooth structures and a tool pointing to specific teeth areasPowering the Unit
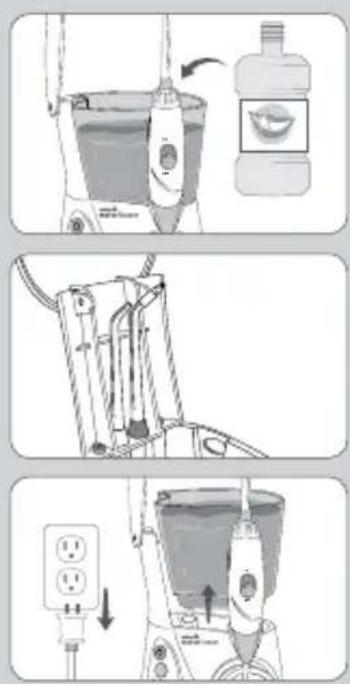
Plug the cord into an electrical outlet.
Preparing the Reservoir
Lift the reservoir lid, remove the reservoir, and fill with lukewarm water. Replace the reservoir over the base and press down firmly and close the lid.
Inserting and Removing Tips
Insert tip into the center of the Water Flosser handle, pressing down firmly until the tip clicks into place. The colored ring will be flush with the top of the handle if the tip is correctly locked into place. To remove tip from the handle push the tip eject button on the handle.
Prime Unit (First Time Use Only)
Set pressure control dial on base to pressure setting No.10, point the handle and tip into sink. Turn power and water ON until water flows from the tip. Turn Power OFF.
Adjusting the Pressure Setting
Turn the pressure control dial on the base of the unit to the lowest setting for first-time use. Gradually increase pressure over time to the setting you prefer – or as instructed by your dental professional.
Using the Water Flosser
Always place the tip in your mouth before turning the water ON. Turn power on, lean over sink and slightly close lips enough to prevent splashing while still allowing water to flow from mouth into the sink. Turn water switch ON. When finished, turn water switch and power OFF. During use you can stop the flow of water by sliding the water switch on handle to the OFF position.
NOTE: Motor will continue to run.
For best results, start with back teeth and work toward the front teeth. Direct the stream at a 90-degree angle to your gumline with tip in mouth. Glide tip along gumline and pause briefly between teeth. Continue until you have cleaned the inside and outside of both the upper and lower teeth.
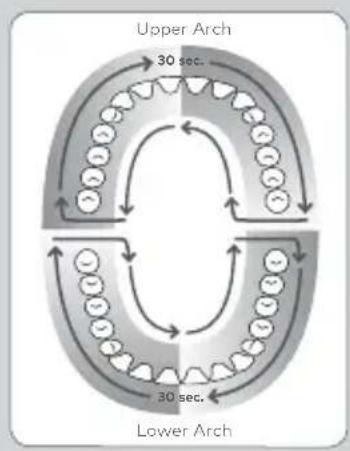
text_image
Upper Arch 30 sec. Lower Arch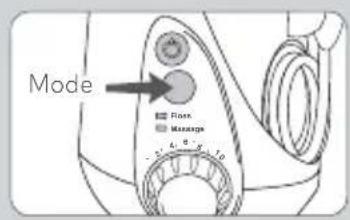
text_image
Mode Floor Massage 1.0 2.0 3.0 4.0One-Minute Timer/30-second Pacer (Floss Mode Only)
The Water Flosser will create a short pause at 30-seconds, to remind you to move to the other arch of your mouth and another short pause at 1-minute to signal you have reached the recommended cleaning time. The unit will continue to run without pauses until the unit is turned off. Depending on the pressure setting, some water will remain in the reservoir after 1-minute.
Timer may be deactivated if desired. Steps to deactivate:
- While unit is off, press the mode button once to wake the unit up.
One of the LEDs should light up.
- Press and hold the mode button for approximately 3-seconds until the Massage Mode light blinks. The timer is now deactivated.
If you wish to reactivate the timer:
-
While unit is off, press the mode button once to wake the unit up. One of the LEDs should light up.
-
Press and hold the mode button for approximately 3-seconds until the Floss Mode light blinks. The timer is now activated.
Or unplug unit to reset to factory settings.
Hydro-Pulse Massage Mode
Hydro-Pulse Massage offers a unique water pulsation pattern designed to enhance gum stimulation. For best results, use the Floss Mode as instructed. After using Floss Mode for 1-minute, switch the unit to Massage Mode, adjust pressure as desired, and aim the water stream at your gums and massage throughout your mouth.
To determine in which mode the unit is set while it is off simply press mode button and the LED light will indicate current mode. To change mode, press mode button again. You may also press the mode button while unit is on to change mode during use.
When Finished
Turn the power OFF. Empty any liquid left in the reservoir. Unplug the unit.
NOTE: If you used mouthwash or other solution besides water, see "Using Mouthwash and Other Solutions" section.
NOTE: NOT ALL TIPS INCLUDED WITH ALL MODELS.
TIP USAGE
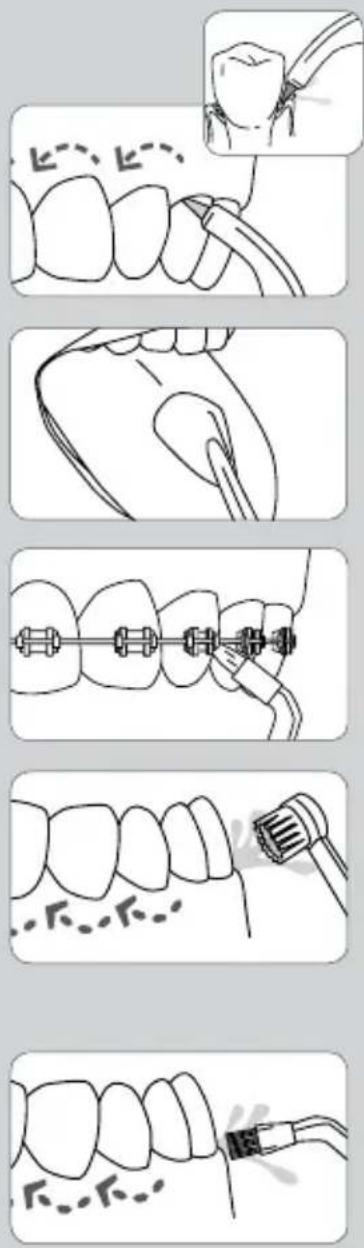
Pik Pocket™ Tip
The Pik Pocket™ tip is specifically designed to deliver water or anti-bacterial solutions deep into periodontal pockets.
To use the Pik Pocket™ tip, set the unit to the lowest pressure setting. Place the soft tip against a tooth at a 45-degree angle and gently place the tip under the gumline, into the pocket.
Tongue Cleaner Tip
Set to lowest pressure setting, place tip in the center/middle of your tongue about half way back. Pull forward with light pressure. Increase pressure as you prefer.
Orthodontic Tip
To use the orthodontic tip, gently glide tip along gumline, pausing briefly to lightly brush area between teeth and all around orthodontic bracket, before proceeding to the next tooth.
Toothbrush Tip
Place the toothbrush tip in mouth with the brush head on the tooth at the gumline.
The toothbrush tip can be used with or without toothpaste. Using a light pressure (bristles should not bend) massage the brush back and forth with very short strokes – much like you would with a manual toothbrush.
Plaque Seeker™ Tip
To use the Plaque Seeker™ tip, place the tip close to the teeth so that the bristles are gently touching the teeth. Gently glide tip along gumline, pausing briefly between teeth to gently brush and allow the water to flow between the teeth.
Using Mouthwash and Other Solutions
Your Waterpik® Water Flosser can be used to deliver mouthwash and antibacterial solutions. After using any special solution, rinse unit to prevent clogging by partially filling reservoir with warm water and running unit with tip pointed into sink until unit is empty.
Accessory Storage
Accessory tip storage for your two most frequently used tips is under the reservoir lid and can be easily accessed by removing the reservoir.
Cleaning
Before cleaning, unplug from the electrical outlet. Clean the product when necessary by using a soft cloth and mild non-abrasive cleanser.
The water reservoir is removable for easy cleaning and is top rack dishwasher safe.
Removing Hard Water Deposits / General Cleaning
Hard water deposits may build up in your unit, depending on the mineral content of you water. If left unattended, it can hinder performance. Cleaning internal parts: add 2 tablespoons of white vinegar to a full reservoir of warm water. Point the handle and tip into sink. Turn unit ON and run until reservoir is empty. Rinse by repeating with a full reservoir of clean warm water.
This process should be done every 1 to 3 months to ensure optimal performance.
Leakage
If leaking due to a damaged hose, please email
InternationalService@Waterpik.com
Still have questions? Email us at InternationalService@Waterpik.com
Service Maintenance
Waterpik® Water Flossers have no consumer-serviceable electrical items and do not require routine service maintenance. For all your warranty and accessory needs, please email InternationalService@Waterpik.com. Please do not ship product to Waterpik International, Inc. offices, this will delay service.
Refer to the serial and model numbers in all correspondence. These numbers are located on the back of the handle and bottom of the reservoir respectively.
Water Pik, Inc. warrants to the original purchaser/owner of this product that it is free from defects in materials and workmanship for two years from date of purchase. Save your receipt as your proof of purchase date.
Water Pik, Inc. reserves the right to request the product to be returned for analysis to confirm the claim falls within our warranty policy. We will replace any part of the product, which in our opinion is defective, provided the product has not been abused, misused, altered or damaged after purchase and was used according to these instructions. For repair or replacement services provided for by the guarantee, please contact, via email, InternationalService@Waterpik.com. Upon request of the consumer, a copy of the guarantee will be provided by email or mail. This limited warranty excludes accessories or consumable parts such as tips, brush heads, etc.
This warranty gives you specific legal rights. You may also have other rights that vary depending on the law in your place of residence. Contact Water Pik, Inc. via email at InternationalService@Waterpik.com
Mode Massage hydro-pulsage
Embout Plaque Seeker™
text_image
Diagram showing a hand-pulling device with a bottle and a magnified view of its mouth, likely illustrating a cleaning or cleaning process.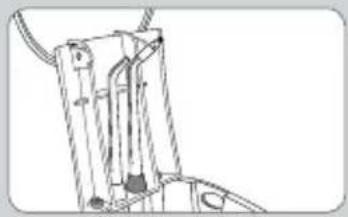
natural_image
Technical line drawing of a mechanical assembly with no visible text or symbols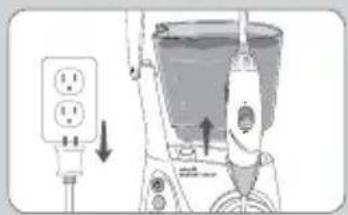
natural_image
Diagram of a medical or industrial device with an electrical outlet and directional arrows indicating movement (no text or symbols present)text_image
Diagram showing dental alignment with a tool and dashed line indicating specific teeth positionsC. Plaque Seeker™ Tip*
C. Ponta Plaque Seeker™*
Ponta Plaque Seeker™
text_image
Diagram showing dental alignment with a tool and dashed line indicating specific tooth positionsПитание устройства
text_image
Diagram illustrating dental procedure with labeled arrows and magnified detail showing tool insertion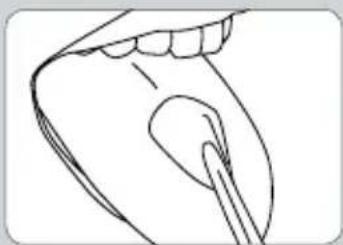
natural_image
Line drawing of a human mouth with a brush applying powder (no text or symbols)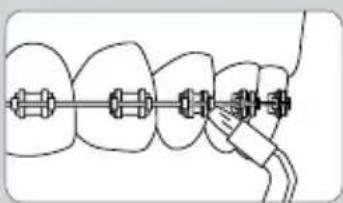
natural_image
Diagram of dental braces with a finger, showing alignment and alignment process (no text or symbols)
natural_image
Illustration of a tooth with a brush applying material to the gum (no text or symbols)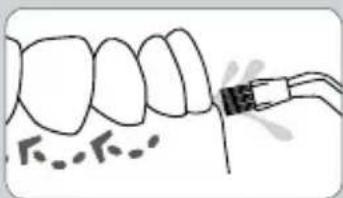
natural_image
Diagram of a dental procedure showing tooth alignment and tool placement (no text or labels)is a subsidiary of Church
& Dwight Co., Inc.
1730 East Prospect Road
Fort Collins, CO 80553-0001 USA
844-821-4873
www.waterpik.com
Waterpik, International, Inc.
is a subsidiary of Church
& Dwight Co., Inc.
Castle Court,
41 London Road Reigate,
Surrey RH2 9RJ
United Kingdom
Designed and Tested in the USA. Made in China.