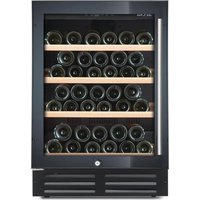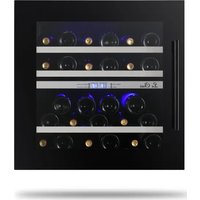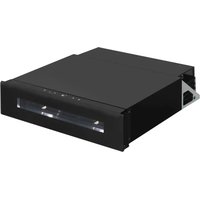
LMN50V - Wine cellar LE CHAI - Free user manual and instructions
Find the device manual for free LMN50V LE CHAI in PDF.


User questions about LMN50V LE CHAI
0 question about this device. Answer the ones you know or ask your own.
Ask a new question about this device
Download the instructions for your Wine cellar in PDF format for free! Find your manual LMN50V - LE CHAI and take your electronic device back in hand. On this page are published all the documents necessary for the use of your device. LMN50V by LE CHAI.
USER MANUAL LMN50V LE CHAI
EN- Table of contents
GUIDELINES CONCERNING THE SAFETY OF USE 3 INSTALLATION AND OPERATING CONDITIONS OF THE APPLIANCE 5
CLIMATE RANGE
PRACTICAL EVERYDAY TIPS 7 DISPOSAL OF OLD APPLIANCE 8 USE AND CONTROLS 9
THE CONTROLS OF YOUR UNIT
VENTILATION GAPS 12 CARE AND CLEANING 13
REMOVING THE SHELVES 13
CLEANING 13
REMOVING DRAWER 13
TROUBLESHOOTING 13
IF THE APPLIANCE IS NOT WORKING, CHECK 13
THE APPLIANCE IS WORKING, BUT NOT VERY WELL, CHECK 14
THE APPLIANCE IS NOISY, CHECK 14
THE LIGHT DOES NOT WORK, CHECK 14
THE DOOR WILL NOT CLOSE PROPERLY, CHECK 14
THE DISPLAY SHOWS "E1" OR "E2" 14
EPREL 14
WARRANTY AND AFTER SALES SERVICE 15
WARRANTY 15
GUIDELINES CONCERNING THE SAFETY OF USE
- The appliance is intended for household use only.
- The manufacturer reserves the right to introduce changes which do not affect the operation of the appliance.
- The Manufacturer shall not be held liable for damage arising from the failure to observe the instructions contained in this manual.
- Keep this manual for future reference, or to pass it over to the next user.
- This appliance is not intended for use by persons (including children) with limited physical or mental capabilities and persons who lack experience or familiarity with the appliance.
- Do not allow children to use the appliance. Do not allow them to play with the appliance. They must not climb inside the drawers and swing on the doors.
- The appliance operates properly at the ambient temperature (see product fiche). Do not use it in the cellar, unheated summer cottage during autumn and winter.
- When placing, moving, lifting the appliance, do not hold the door handles, do not pull the condenser at the rear part of the refrigerator and do not touch the compressor unit.
- Pull the plug out from the mains socket before each maintenance activity. Do not pull on the cord, but hold the body of the plug instead.
- The "cracking" sound, which the appliance may emit is caused by the expansion and contraction of parts as a result of temperature variations.
-
For safety reasons do not repair the appliance yourself. Repairs carried out by persons who do not have the required qualifications may result in serious danger for the user of the appliance.
-
Make sure you do not damage the cooling system, by puncturing the refrigerant pipes in the evaporator or breaking the pipes. The refrigerant is flammable. If the refrigerant makes contact with the eyes, rinse them with clean water and call for medical assistance immediately.
- Important! If the power cord is damaged, it should be replaced by the manufacturer or specialist repair centre or a qualified person in order to avoid danger.
- When performing activities, such as cleaning, maintenance or moving, the appliance must be completely disconnected from power supply (by pulling the plug out from the socket)
- This appliance can be used by children aged 8 years and older or by persons with physical, mental or sensory handicaps, or by those who are inexperienced or unfamiliar with the appliance, provided they are supervised or have been instructed how to safely use the appliance and are familiar with risks associated with the use of the appliance. Ensure that children do not play with the appliance. Cleaning and maintenance of the appliance should not be performed by children unless they are 8 years or older and are supervised by a competent person.
- Do not clean the appliance with steam
- Keep the appliance and its power cord away from children under 8 years old.
- Do not immerse the power cord or plug in water.
- Keep cord away from heated surfaces.
- Do not allow the connection cord hanging over the edge of a table or counter.
- Do not use any electrical appliances inside the chamber
- Do not use any tools to speed up the defrosting process
-
Regularly clean the ventilation openings (in case of built-in appliances or those installed under the worktop)
-
This appliance is not designed to be controlled by electronic timers or other devices that cut off power directly or remotely.
- In case of accidental spillage of liquids on electrical components, immediately unplug your appliance from the power supply.
- Make sure that the power cord is not crushed or damaged during installation.
- Disable the appliance before disposing of it. Unplug the appliance from the power supply and cut off the power cord. To prevent children or animals from being trapped in the appliance, remove the doors, hinges and locks.
- Note: If the appliance does not have a freezer compartment ( * ), it is not suitable for freezing foodstuffs.
- Pursuant to Commission Regulation (EU) 2019/2019, the minimum availability period for spare parts necessary to repair the appliance is 7 or 10 years depending on the type and purpose of the spare part.
- The list of spare parts and the ordering procedure are available on the websites of the manufacturer, importer or an authorized representative.
INSTALLATION AND OPERATING CONDITIONS OF THE APPLIANCE
- Connect the appliance to the power supply 24 hours after unpacking and setting in the final location.
- Take the product out of the package, remove the scotch tape protecting the door and the equipment. Any remaining adhesive stains may be removed with a mild washing agent.
- Clean the interior surface of the cooler and the elements of the equipment with a washing agent dissolved in lukewarm water, then wipe it dry.
- Place the cooler on an even, flat and stable surface, in dry, aired and shaded room, far from the heat sources such as: oven, hob, central heating radiators, central heating pipes, hot water installation, etc.
- On the exterior surface of the product may be a protective foil, this foils should be removed.
-
Make sure the appliance is placed in a horizontal position by screwing in the 2 adjustable front legs (fig. 1)
-
Keep free space on the sides and rear of the appliance (see installation drawing)
- When you install your wine cooler inside a furniture cabinet, make sure that the ventilation grille located in the bottom of the appliance is not blocked.
- Odours may be released when you first start your appliance. It will dissipate when the interior of the appliance cools down
- When you first start your wine cooler, the compressor will run continuously until the desired temperature is reached inside the chamber
- When you unplug your appliance from the power supply, it is recommended to wait 5 minutes before you plug it back in. This will reduce the risk of damage to the compressor.
- On selected models, the correct temperature will be shown on the display only a few hours after the wine cooler has been put into operation
- This appliance should be connected to AC 220-240V 50Hz supply socket. The socket must be fitted properly, and must be supplied with an earthing conduit and a 10A fuse.
- It is a legal requirement that the appliance is properly earthed. The manufacturer will not be held liable for any damage or injury which may result from the failure to fulfil this requirement.
- Do not use adapters, multiple sockets and two-wire extension leads. If it is necessary to use the extension lead, it must be equipped with a protection ring and a single socket and must have a VDE/GS safety certificate.
- If an extension lead is used (with a protection ring and safety certificate), its socket must be located at a safe distance, away from the sinks, and must not be in a place where it could be flooded by water or waste water.
- Make sure the appliance can be easily disconnected from the mains, either by pulling the plug out of the mains socket, or by switching the two-pole switch off.
Climate range
The information about the climate range of the appliance is provided on the rated plate. It indicates at which ambient temperature (that is, room temperature, in which the appliance is working) the operation of the appliance is optimal (proper).
Climate class Allowable ambient temperature
| SN | Extended Temperate | This refrigeration appliance is intended for use at an ambient temperature ranging between 10°C and 32°C |
| N Temperate | This refrigeration appliance is intended for use at an ambient temperature ranging between 16 °C and 32°C | |
| ST Subtropical | This refrigeration appliance is intended for use at an ambient temperature ranging between 16 °C and 38 °C | |
| T Tropical | This refrigeration appliance is intended for use at an ambient temperature ranging between 16 °C and 43 °C | |
PRACTICAL EVERYDAY TIPS
- If the light inside the appliance remains turned on, keep in mind that the temperature inside the appliance will be higher
- Temperature inside the appliance depends on the amount and type of stored wine bottles
- To ensure user safety and high quality of stored wine, do not install the appliance in damp rooms
- Store wine bottles in designated spaces
- Your wine cooler has a limited capacity. Do not place more bottles in your wine cooler than recommended in specification
- Do not open the wine cooler door if it is not necessary
- Do not cover the shelves with aluminium foil or other material. This blocks the air circulation inside the appliance
- To avoid damage to the door seal, make sure that the door is completely open before pulling out the shelf. The shelves should be inserted as far as possible, otherwise the shelf may deform and damage the door seal.
- Do not extend the loaded shelves beyond the extension limit (about 1/3 of the shelf length)
- This appliance is designed for storing bottles of wine. Do not use it for any other purpose.
- Temperature stability is very important when storing wine.
- Exposing your wine cooler to sunlight, significant temperature fluctuations, high humidity and vibrations may cause the wine to go bad.
- In periods of high humidity, condensed water vapour may appear on the outer surfaces of the glass door. To prevent this, install the appliance in a dry, adequately ventilated room.
- Selected models have an 'external handle. You need to install it on your own. Do not use electric tools for this purpose (fig. 3^* ). To do this, pull the door seal slightly to the side and place the screws on the inside of the door. Align the handle with the holes on the outside of the door and tighten the screws with a screwdriver. Reinstall the door seal.
- The maximum capacity of the appliance is given in the product sheet enclosed with the wine cooler. This capacity applies to standard 0.75 litre bottles of Bordeaux.
- Selected models have an Anti-tip kit. Install it according to the enclosed diagram (fig. 6*).
- This refrigeration appliance is intended for use as a built-in appliance.
- To achieve the most effective food preservation for the longest possible time and to avoid wasting any food, position the products as shown in Figure 12. In addition, this figure illustrates the layout of drawers, baskets and shelves, which allows the most efficient use of energy.
- Optimal temperature and storage conditions will extend product shelf life and optimize electricity consumption. Optimal storage temperature range should be stated on the food product packaging.
DISPOSAL OF OLD APPLIANCE
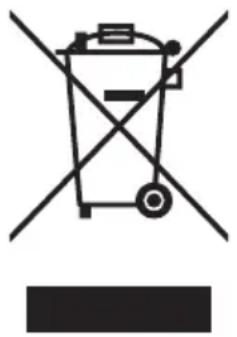
In accordance with European Directive 2012/19/EU and local legislation regarding used electrical and electronic goods, this appliance is marked with the symbol of the crossed-out waste container. This marking indicates that the appliance must not be disposed of together with other household waste after it has been used. The user is obliged to hand it
over to waste collection centre collecting used electrical and electronic goods. The collectors, including local collection points, shops and local authority departments provide recycling schemes. Proper handling of used electrical and electronic goods helps avoid environmental and health hazards resulting from the presence of dangerous components and the inappropriate storage and processing of such goods.
USE AND CONTROLS

The Controls of Your Unit
POWER
To turn the appliance off, lightly touch and hold the ① key for 5 seconds until temperature display goes out. To turn the appliance on, lightly touch and hold the ① key for 1 second until temperature display lights up. NOTE: Pressing the ① key once can switch off the audible alarm when the alarm is on.
LIGHT
Used to turn the inner light on/off
UP +
Used to increase (warm) the set temperature by 1^ / 1^ .
DOWN -
Used to decrease (cool) the set temperature by 1^ / 1^ .
^aF / ^bC Selector
Set the temperature to be displayed in degree Fahrenheit or degree Celsius
Display
Display the digital temperature and service indicators.
Indicator Light / Multi-key Function
The indicator light is the dot located at the bottom right corner of the display. The indicator light will be on when a multi-key function is selected. To perform a multi-key function, touch and hold the first key, then touch the rest key for at least 5 seconds and then release all the keys.
Child Lock
If in 2 minutes or longer without touching any key, the child lock will be activated automatically. To cancel the lock, touch the UP and DOWN keys simultaneously for at least 5 seconds.
Setting the Temperature Control
-
The unit has a single adjustable temperature zone. The temperature can be set between 5^ and 20^ (41°F and 68°F). It can be used as a wine maturing cabinet or a wine serving cabinet. The recommended temperature setting range for maturing wine is between 11^ and 14^ (52°F and 57°F). The recommended temperature setting range for serving white wine is between 5^ and 10^ (41°F and 50°F) and the recommended temperature setting range for serving red wine is between 15^ and 20^ (58°F and 68°F).
-
When the unit is plugged in for the first time, the unit will power up automatically to the preset defaults. The temperature preset at the factory is 12^ ( 54^ ) (ideal maturing temperature).
-
You can set the temperature as required by touching the UP or DOWN key. When you touch either key at the first time, the display will show the last temperature set previously. The temperature will increase 1^ / 1^ if you touch the UP key once, or the temperature will decrease 1^ / 1^ if you touch the DOWN key once. The display flashes while you make the setting.
-
After the temperature has been set, the display shows the current inner temperature.
-
To view the set temperature at any time, touch the UP or DOWN key and the set temperature will temporarily flash in the display for 5 seconds. Then the display shows the current inner temperature again.
TEMPERATURE DISPLAY
During normal operation, the temperature display on the control panel shows the temperature inside the appliance. The temperature display will flash if
-
A different temperature is being set,
-
The temperature in the zone deviates by more than 5^ ( 9^ ) from the set temperature.
The temperature display flashing ensures that the temperature cannot rise or fall unnoticed and impair the wine.
TEMPERATURE MEMORY FUNCTION
In the event of a power interruption (power surge, breaker switch, etc.), the unit remembers the previous temperature settings. When the power is recovered, the cabinet temperature will go back the same setting temperature as before the power interruption.
TEMPERATURE ALARM
An audible alarm will sound if the temperature rises or falls outside the temperature range. The temperature display will flash at the same time. The temperature the appliance is set at determines the temperature the appliance recognizes as being too warm or too cool.
The audible alarm will sound and the temperature display will flash:
- When you switch the appliance on, if the temperature inside the appliance is very different from the temperature set.
- When there has been a lengthy interruption to the power supply.
- When too many items have been put into the unit at one time. Or too much ambient air flowed in when rearranging and removing storage items.
When the door is not been closed tightly. - The appliance is faulty.
The audible alarm will be automatically silenced, the temperature display stops flashing when the set temperature is reached again. However, if the noise disturbs you, you can switch the audible alarm off before this if you wish by touching the POWER key once. The alarm will stop. The relevant temperature display continues to flash until the set temperature has been reached. The display then lights up constantly and the alarm system is fully active again.
DOOR ALARM
If the door has been left open for more than 60 seconds, the audible alarm will sound. Closing the door or touching the POWER key once can switch off the audible alarm.
INTERIOR LIGHT
The interior lighting makes it easy to view your wine labels and enhances the display of your collection. Touching the LIGHT key toggles between 2 modes of operation for the interior lights: functional (default) mode and showcase mode. If you are in functional (default) mode, the lights will turn on only when the door is open. The interior light will go out approx. 5 seconds after the door is closed. If you are in showcase mode, the lights will be on whether or not the door is open.
DYNACLIMA / SILENT MODES
The appliance has two different running modes: DynaClima and Silent modes.
The DYNACLIMA (Dynamic Climate) mode enables the relative humidity inside the unit and the temperature to be distributed evenly around the interior so you can store all your wine under exactly the same excellent conditions. If you would like to use the unit to store wine long term, the DYNACLIMA mode is a must. This will create a continuous climate in the cabinet which imitates that of a wine cellar.
In the DYNACLIMA mode, the interior fan circulates the inside air evenly even when the set temperature is reached. To change to DYNACLIMA mode, touch and hold the DOWN key for approximately five seconds. The wine cellar will beep five times to confirm DYNACLIMA mode is on. To change to SILENT mode (Also known as energy saving mode), touch and hold the UP key for approximately five seconds. The wine cellar will beep three times to confirm SILENT (default) mode is on.
SABBATH MODE
Sabbath mode is available for the observance of certain religious holidays. This mode turns off the displays, interior light, sensor tones and audible alarms and prevents them from turning on again. Normal cooling operations will still take place.
To initiate Sabbath mode, touch the POWER and ^ F keys simultaneously for at least 5 seconds. The displays and interior lights will go out to confirm the Sabbath mode is ON.
Sabbath mode can be canceled by repeating the above process. The Sabbath Mode will automatically turn off after 48 hours.
VENTILATION GAPS
If there is any gap at the top of unit or between the rear wall of unit and housing rear plate, use the provided sponge to seal as below figure to create the ventilation channel.
WARNING: If the ventilation gaps given are not observed, the compressor will run more frequently and for longer periods. This will result in increased energy consumption and a higher operating temperature for the compressor. This may, in turn, cause damage to the compressor. It is essential to observe the ventilation gaps given.
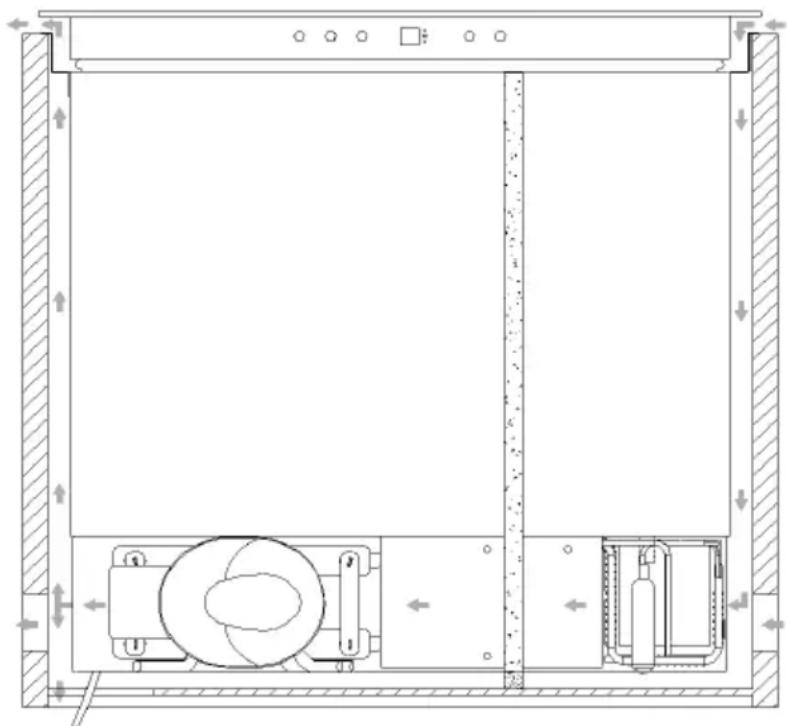
Figure 7:
CARE AND CLEANING
Always disconnect the appliance from the mains electrical supply before any cleaning or maintenance.
Removing the shelves
-
To remove a shelf from the wine cooler, first remove all bottles from the shelf, then pull the shelf forwards until the groove on either side of the shelf is level with the plastic peg on either side of the cabinet (as shown in fig 5). Then lift the shelf up and pull forwards.
-
To replace the shelves, follow the steps above in reverse order.
Cleaning
- Do not use abrasive products or detergents. After washing, rinse and dry thoroughly.
- The exterior of the appliance and the door seal should be cleaned using mild soapy water and dried thoroughly.
- The interior cabinet should be cleaned using a solution of bicarbonate of soda and lukewarm water.
- Clean the shelves separately by hand using soap and water. Do not put them in the dishwasher.
- Ensure that the cloth is only moist when cleaning the control panel and electrical parts, and that all water is thoroughly dried off before reconnecting the power.
- Once cleaning is complete, reconnect the mains electrical supply.
- If the appliance is not to be used for prolonged periods of time, unplug and clean the appliance thoroughly. The door should be left slightly ajar to prevent the formation of odours or condensation
REMOVING DRAWER
To remove the drawer, extend the drawer out of the rail compartment until it stops and remove all bottles from the drawer. Remove the screw to fix the cable cover to the drawer at the left side as Figure 1 and remove the cable cover. Then disconnect the cable to the drawer.
Press the left slide release lever down and at the same time lift the corresponding right slide lever up and pull the drawer out until it is free of tracks and the cabinet as Figure 2.
In order to replace the shelf, repeat this procedure in reverse.
TROUBLESHOOTING
If you have any problems with your appliance, you should check the troubleshooting guide prior to calling Call Center to prevent unnecessary service calls and potential cost.
If the appliance is not working, check
- There is power to the appliance
-
The house fuses or circuit breakers are intact and the fuse in the plug has not blown.
-
The plug socket is functioning correctly. To check this, plug another electrical appliance in to see if the socket is working.
- The ambient temperature is between 16^ C to 32^ C .
The appliance is working, but not very well, check
- The appliance is not overloaded.
- The thermostat is set to an appropriate temperature.
- The door is closing properly.
- The door gasket is sealing properly
- There is enough ventilation at the side and rear walls.
- The ambient temperature is between 16^ C to 32^ C .
The appliance is noisy, check
- The appliance is level and stable.
- The cooling gas will make some noise, even when the compressor is not running.
- During operation, it is normal for the fan to run, even when the compressor is not running.
The light does not work, check
There is power to the appliance.
- The house fuses or circuit breakers are intact and the fuse in the plug has not blown.
- The light button is not set to off.
Please note:
The LED lighting cannot be replaced without a service call
The door will not close properly, check
The appliance is level and stable.
- If the door has been removed, it may not have been correctly refitted.
The door seal is dirty.
- The shelves are not positioned correctly.
The display shows "E1" or "E2"
- The temperature sensor has failed. Please contact Call Center
EPREL
For more information about the product, please refer to the EU EPREL Product Database at https://eprel.ec.europa.eu. For more information, please use your mobile device to scan the QR code on the energy label or enter the product model listed on the energy label in the EPREL search engine https://eprel.ec.europa.eu/
WARRANTY AND AFTER SALES SERVICE
Repairs and spare parts available
The manufacturer's warranty is applicable for this device for a period of 5 years.
In the event of a malfunction during this period, any request for support must be made to the after-sales service of your dealer.
Outside the warranty period, any information regarding professional repair services or ordering original spare parts may be obtained by contacting your dealer.
In accordance with the Ecodesign Regulation, spare parts will be available for at least 7 years from the date of purchase of your device.
GEBRAUCHSANWEISUNG
Le Chai
Weinklimaschrank
LMN50V
5 Flasker max
GARANTIE, NACHVERKAUF-SERVICE 32
GARANTIE 32
SICHERHEITSHINWEISE
ALS OP DE DISPLAY "E1" OF "E2" BRANDT 65
EPREL 65
GARANTIE, SERVICE 66
GARANTIE 66
Kinderslot (Child Lock)
VENTILATIEOPENGEN IN ACHT TE NEMEN
If the temperature in the compact oven is set to over 100^ , this can influence the temperature in the wine drawer.