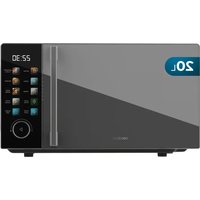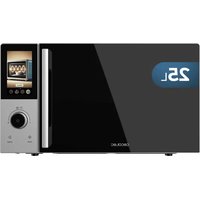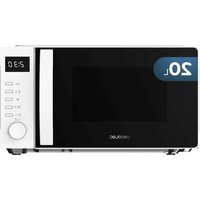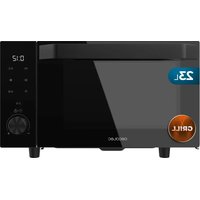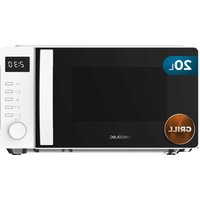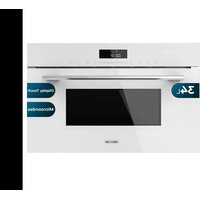
Bolero Hexa MW703800 - Microwave Oven CECOTEC - Free user manual and instructions
Find the device manual for free Bolero Hexa MW703800 CECOTEC in PDF.


User questions about Bolero Hexa MW703800 CECOTEC
0 question about this device. Answer the ones you know or ask your own.
Ask a new question about this device
Download the instructions for your Microwave Oven in PDF format for free! Find your manual Bolero Hexa MW703800 - CECOTEC and take your electronic device back in hand. On this page are published all the documents necessary for the use of your device. Bolero Hexa MW703800 by CECOTEC.
USER MANUAL Bolero Hexa MW703800 CECOTEC
natural_image
Modern kitchen oven with digital display and control panel, no visible text or symbols on main subjectbolero
IMPORTANT SAFETY INSTRUCTIONS 9
INSTRUCTIONS DE SÉCURITÉ IMPORTANTES 13
-
Parts and components 60
-
Before use 60
-
Installation 61
-
Operation 64
-
Cleaning and maintenance 67
-
Troubleshooting 68
-
Technical specifications 69
-
Disposal of old electrical and electronic appliances 69
-
Technical support and warranty 70
-
Copyright 70
SOMMAIRE
IMPORTANT SAFETY INSTRUCTIONS
READ CAREFULLY AND KEEP FOR FUTURE REFERENCE
Read these instructions thoroughly before using the device.
Keep this instruction manual for future reference or new users.
- This appliance can be used by children aged 8 years and above and persons with reduced physical, sensory, or mental capabilities or lack of experience and knowledge if they have been given supervision or instruction concerning use of the appliance in a safe way and understand the hazards involved. Children must not play with the appliance. Cleaning and user maintenance should not be carried out by unsupervised children.
- This appliance is designed for domestic use only and is not intended for bars, restaurants, farmhouses, hotels, motels, and offices.
- This symbol means 'Caution: hot surface.' The temperature of the accessible surfaces may be high when the appliance is in operation.
- The appliance heats up during use. Avoid touching the heating elements inside.
- WARNING: all accessible parts of the appliance and the appliance itself may heat up during use. Do not touch the heating elements. Children under 8 years of age should be kept away from the appliance unless continuously supervised.
- Do not use abrasive cleaners or sharp metal scrapers to clean the oven door glass, as it may scratch the surface and cause subsequent glass breakage.
-
Never clean the appliance with steam cleaners.
-
WARNING: Make sure that the appliance is unplugged from the mains before replacing the lightbulb to avoid any risk of electric shock.
- Do not install the appliance behind a decorative panel to avoid overheating.
- Incorrect repairs can be dangerous. Refer only to authorised technical personnel for repairs and replacement of damaged power cables. If the appliance is defective, unplug it from the power supply or switch off your home circuit breaker. Contact the official Cecotec Technical Support Service.
- The appliance is not intended to be operated by means of an external timer or a separate remote-control system.
- Open the appliance door carefully. Keep children away from the appliance.
- If the door glass is damaged, it could crack. Do not use glass scrapers, cleaning agents, or abrasive detergents to clean the appliance door.
- The appliance hinges move when opening and close the door: be careful not to get caught. Keep hands away from hinges.
- If you store flammable items inside the oven, they may catch fire. Never store flammable items inside the oven. Never open the door of the appliance if there is smoke inside. Unplug the appliance from the mains or switch off the circuit breaker of your home.
-
The control panel and control elements use fixed magnets. These can affect electronic implants, such as pacemakers or insulin pumps. Users with electronic implants must stay at least at 10 cm from the control panel.
-
Do not allow aluminium foil to come into contact with the glass door. This could cause permanent discolouration of the glass door.
- Do not use silicone frying pans, nor lids with silicone covers or silicone accessories. This could damage the oven sensor.
- Moisture inside the oven for a long period of time could cause corrosion. Allow the appliance to dry after every use. Do not store wet food inside the oven while it is closed for long periods of time. Do not store food in the oven.
- When baking cakes with particularly juicy fruit, do not overfill the baking tray. If fruit juice drips from the baking tray, it could cause permanent stains. Use a deep tray if possible.
- If the gaskets are dirty, the appliance door will not close properly during operation. This could damage the front part of the adjacent appliances and furniture. Make sure that the gaskets are always clean.
- Do not sit on the appliance door or place or hang objects on it. Do not place tableware or accessories on the appliance door.
- Do not transport or hold the appliance by the door handle. The door handle cannot withstand the weight of the appliance and could break.
- If you use residual heat when the oven is off to keep food warm, you can create a high moisture content inside the oven. This could lead to condensation and corrosion damage in the appliance, as well as damage to your kitchen.
- WARNING: if the door or the door gaskets are damaged, the oven should not be used until repaired by authorised personnel.
- WARNING: it is dangerous for anyone other than a qualified person to perform maintenance or repair tasks involving
the removal of a cover that provides protection against exposure to microwave energy.
- WARNING: liquids and other foods should not be heated up in sealed containers, as they may explode.
- When heating food in plastic or paper containers, keep an eye on the oven as there is possibility of ignition.
- This appliance is intended for heating up beverages and food. The drying of food or clothing and heating-up of pillows, shoes, sponges, wet clothes, and similar items may lead to injury, ignition, or fire.
- If smoke is emitted, stop, or unplug the appliance and keep the door closed to extinguish any flames.
- Microwave heating of beverages may result in a boiling cooking action. For this reason, precautions must be taken when handling the container.
- Metal food and beverage containers must not be used during microwave cooking.
- The contents of bottles and jars of baby food should be swirled or shaken, and the temperature should be checked before consumption to avoid burns.
- Eggs in their shell and whole hard-boiled eggs should not be heated in microwave ovens since they may explode even after microwave heating has ended.
- The appliance must be cleaned regularly, and you must remove any food remains.
- Failure to keep the appliance clean could lead to deterioration of the surface and could adversely affect the shelf life of the device and lead to hazards.
- WARNING: When the device is being used in combined mode, children should only use the oven under adult supervision, due to the temperatures generated.
INSTRUCTIONS DE SÉCURITÉ IMPORTANTES
LISEZ ATTENTIVEMENT ET CONSERVEZ POUR UNE RÉFÉRENCE FUTURE
A. Control panel
B. Turntable shaft
C. Viewing window
D. Door
E. Safety door-interlock system
F. Inside of the appliance
Icons. Fig. 2
- Microwave mode
- Functions
- Clock/timer
- Decrease icon (down)
- Setting slider
- Increase icon (up)
- Pre-set menu
- Lock/Cancel
- Start/+30Sec/Confirm
Display. Fig. 3
- Microwave indicator light
- Fermentation indicator light
- Defrost indicator light
- Fast preheating function indicator light
- Rotisserie function indicator light
- Lock indicator light
- Inner light icon
NOTE:
the graphics in this manual are schematic representations and may not exactly match the device.
2. BEFORE USE
- This appliance is packaged in a way as to protect it during transport. Take the device out of its box and remove all packaging materials. You can keep the original box and other packaging elements in a safe place. This will help you prevent damage to the device when
transporting it in the future. In case the original packaging is disposed of, make sure all packaging materials are recycled accordingly.
- Make sure all parts and components are included and in good conditions. If there is any piece missing or in bad conditions, contact the official Cecotec Technical Support Service immediately.
Box content
- Oven
- Glass turntable
- Turntable ring assembly
- Higher wire rack (for grilling and toasting bread or as a stand for shallow dishes)
- Turntable shaft
- Instruction manual
3. INSTALLATION
Installation and connection
- This product is designed exclusively for installation as a built-in appliance. It is not designed for use on worktops or inside cabinets.
- Read installation instructions carefully.
- The appliance must be installed in a wall cabinet or shelf with a width of 60 cm.
- The appliance is fitted with a plug and must only be connected to a properly installed earthed socket.
- The mains supply must correspond to the information on the rating plate of the appliance.
- Installation of the socket and replacement of the connection cable must only be carried out by a qualified electrician. If the plug is not accessible after the installation of the appliance, fit a single-pole isolating switch on one side with a contact distance of at least 3 mm.
- Adapters, multidirectional power strips and extension cords must not be used. Overloading can cause a fire hazard.
- The accessible surface of the device can reach high temperatures during and after operation.
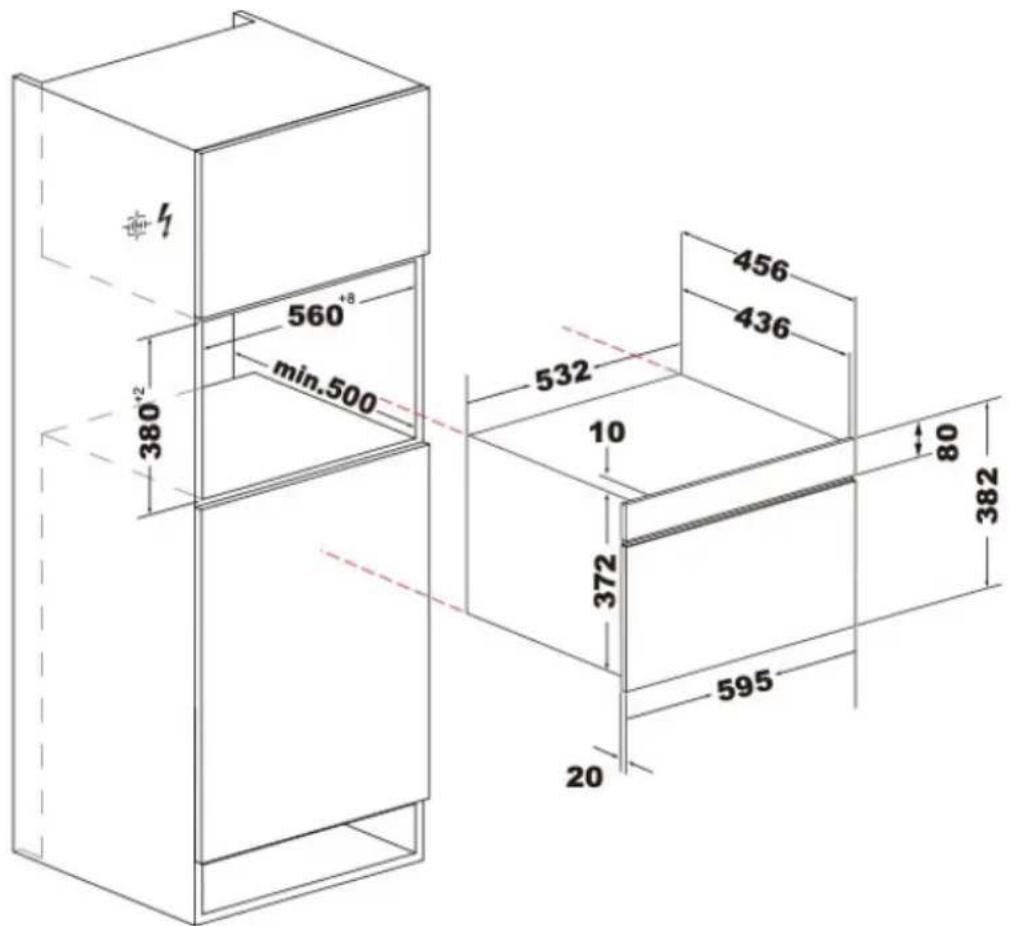
- In figure 6, you can see the dimensions required for the installation. Dimensions are in mm.
- The furniture in which the appliance is installed must be heat-resistant up to 95 °C.
- The minimum installation height must be 85 cm.
- Do not transport or hold the appliance by the door handle. The door handle cannot withstand the weight of the appliance and could break.
ENGLISH
Installation
- Insert the oven into the selected cabinet, making sure that it is in the centre of the opening. Ensure that the oven is level and correctly positioned before continuing with the installation process.
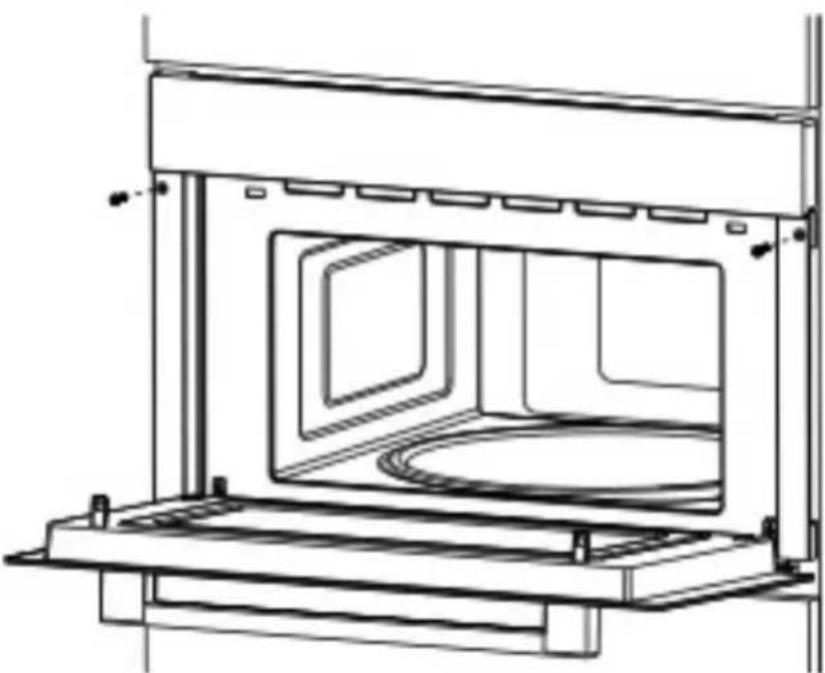
- Once the oven is in its proper position, proceed to securely fasten it in the cabinet. Open the oven door and use the screws provided to secure it in place. Fig. 7
Important
It is essential that you do not twist the connection cable during installation of the built-in oven.
Clean the inside of the microwave oven and put the turntable back in place. If you are installing for the first time, be sure to remove all packaging and shipping tape from the turntable shaft. Also clean the accessories.
Installing the turntable. Fig. 5
- Turn the turntable ring assembly in the corresponding hole.
- Place the turntable on top of the ring. Fit the lower grooves in the centre of the turntable between the three shaft rollers.
- Make sure that the turntable fits on the shaft and that it is correctly positioned in the inner hole of the appliance. The shaft rollers must fit into the holes integrated at the bottom of the turntable.
Note:
- Never use the appliance without the turntable. Make sure it is properly placed. The turntable can rotate either clockwise or counterclockwise.
- Never place the turntable upside down. The rotary motion of the turntable must never be blocked.
- The glass turntable, shaft assembly and turntable must always be installed prior to operation.
- Food and containers must always be placed on the glass turntable.
- If the glass turntable or the turntable ring assembly cracks or breaks, please contact the official Cecotec Technical Support Service.
Microwave-safe materials
| Utensils Notes | |
| Browning dish Follow the manufacturer's instructions. The bottom of thebrowning dish must be at least 5 mm above the turntable.Incorrect use can cause the turntable to break. | |
| Dinnerware Microwave-safe only. Follow the manufacturer's instructions. Do not use broken or chopped dishes. |
| Glass jars Always remove the lid. Only use them to heat food until warm. Most glass jars are not heat resistant and may break. |
| Glassware Only heat res stant oven glassware. Make sure that there are no metal decorations. Do not use broken or chipped plates. |
| Oven cooking bags Follow the manufacturer's instructions. Do not close with metal clip. Make slits to allow steam to escape. |
| Paper plates and cups Only use them for short-term cooking/heating. Do not leave the oven unattended while cooking. |
| Paper towels Use them to cover food for reheating and absorbing fat. Only use with supervision for short-term cooking. |
| Vegetable paper Use it as a cover to prevent splashing or as a steam wrap. |
| Plastic Microwave-safe only. Follow the manufacturer's instructions. It should be labelled as "microwave safe". Some plastic containers become soft as the food inside gets warmer. "Boil-in bags" and tightly closed plastic bags should be cut, perforated, or ventilated according to the instructions on the package. |
| Film paper Microwave-safe only. Use it to cover food during cooking to retain moisture. Do not allow plastic wrap to touch food. |
| Thermometers Microwave-safe only (meat and candy thermometers). |
| Wax paper Use as a cover to prevent splashing and retain moisture. |
Materials not suitable for microwave ovens
| Utensils Notes | |
| Aluminium tray May cause arcing. Transfer food into microwave-safe dish. | |
| Food carton with metal handle | May cause arcing. Transfer food into microwave-safe dish. |
| Metal or metal-trimmed utensils | The metal protects the food from microwave energy. Metal decorative elements could bend. |
| Metal closures May cause arcing and could cause a fire in the microwave. | |
| Paper bags May cause a fire in the microwave. | |
ENGLISH
| Polystyrene foam lt may melt or contaminate the liquid inside when exposed to high temperature. | |
| Wood Wood may dry out when used in the microwave and may crack or brake. |
4. OPERATION
1 Setting the time
1) Press the clock/timer icon once, "00:00" will appear on the display.
2) Use the adjustment slider or press the increase/decrease icons to adjust the value of the hours, which must be between 0 and 23.
3) Press the icon again to confirm.
4) Use the adjustment slider or the increase/decrease icons to adjust the minutes. The configurable time is from 0 to 59 minutes.
5) Press the icon again to confirm.
2 Timer
1) Press the clock/timer icon twice, "00:00" will appear on the display.
2) Use the adjustment slider or press the increase/decrease icons to set the time, which must be between 0:05 and 95:00 minutes.
3) Press the Start/+30secs/Confirm to confirm.
3 Microwave
| Power level 100% 8 | 0% 50% | 30% 10% | |||
| Display P10 P8 P5 | P3 | P1 |
1) In standby mode, press the microwave icon ≈, "P10" will appear on the display.
2) Press the ≈icon repeatedly to adjust the power level. There are 5 power levels available.
3) Use the adjustment slider or the increase/decrease icons to set the cooking time.
4) Press the Start/+30secs/Confirm icon to start cooking.
4 Grill
1) Press the ≡ function icon once, "G-1" will appear on the display.
2) Use the adjustment slider or the increase/decrease icons to set the cooking time.
3) Press the Start/+30secs/Confirm icon to start cooking.
Note: when half of the cooking time has elapsed, the appliance will beep to remind you to turn the food. Otherwise, the microwave oven will continue operating.
5 Combined mode
1) Press the ≡ function icon once, "G-1" will appear on the display. Press the ≡ function icon repeatedly to set the desired power level. "C1", "C2", "C3" and "C4" shall be displayed in that order.
2) Use the adjustment slider or the increase/decrease icons to set the cooking time.
3) Press the Start/+30secs/Confirm icon to start cooking.
The modes are combined as shown in the table below:
| C-1 Microwave 55% Grill 45% | |
| C-2 Microwave 36% Grill 64% |
6 Defrost by weight
1) Press the ≡ function icon three times, "0.1 kg" will appear on the display.
2) Use the adjustment slider or press the increase/decrease icons to set the weight, which must be between 100 g and 2 kg.
3) Press the Start/+30secs/Confirm icon to start the defrosting process.
7 Defrost by time
1) Press the ≡ function icon four times, "1:00" will appear on the display.
2) Use the adjustment slider or the increase/decrease icons to set the cooking time.
3) Press the Start/+30secs/Confirm icon to start the defrosting process.
Note: when half of the cooking time has elapsed, the appliance will beep to remind you to turn the food. Otherwise, the microwave oven will continue operating.
8 Quick cooking
1) In standby mode, press the Start/+30secs/Confirm 📋 icon to cook food at 100% power level for 30 seconds. Each time you press the 📋 icon, time will increase by 30 seconds. The maximum time value is 95 minutes.
Note: Quick cooking cannot be set in the defrost by weight mode or pre-set menu.
9 Safety child lock
You can use this function to prevent children from accidentally turning on the oven.
ENGLISH
Activating the child lock
In standby mode, press and hold the lock/cancel icon for three seconds. You will hear a long beep and the child lock indicator light will light up on the display.
Deactivating the child lock
In child lock mode, press and hold the lock/cancel icon for three seconds. You will hear a long beep.
10 Query function
1) If the clock has been set, the current time will be displayed for three seconds by pressing the Clock/Timer icon in the cooking state.
11 Pre-set menu
1) In standby mode, press the pre-set menu icon, "A-1" will appear on the display.
2) Press the icon repeatedly to select the desired menu. There are 10 automatic menus available.
3) Use the adjustment slider or the increase/decrease icons to set the weight of the food.
4) Press the Start/+30secs/Confirm icon to start cooking.
Automatic menus table
| MENU WEIGHT (g) DIS | PLAY POWER | ||
| A1 POTATOES | 1 (230 g approx.) 1 | P100 | |
| 2 (460 g approx.) 2 | |||
| 3 (690 g approx.) 3 | |||
| A2 MEAT | 150 g 150 g | P80 | |
| 300 g 300 g | |||
| 450 g 450 g | |||
| 600 g 600 g | |||
| A3 FISH | 150 g 150 g | P80 | |
| 250 g 250 g | |||
| 350 g 350 g | |||
| 450 g 450 g | |||
| 650 g 650 g | |||
| A4 VEGETABLES | 150 g 150 g | P100 | |
| 350 g 350 g | |||
| 500 g 500 g | |||
| A5 BEVERAGES | 1 cup (240 g) 1 | P100 | |
| 2 cups (480 g) 2 | |||
| 3 cups (720 g) 3 | |||
| A6 PASTA | 50 g (cold water 450 g) | 50 g | P80 |
| 100 g (cold water 800 g) | 100 g | ||
| 150 g (cold water 1200 g) | 150 g | ||
| A7 POP-CORN | 100 g 100 g P100 | ||
| A8 PIZZA 200 g 200 g | P100/G-1 | ||
| 400 g 400 g |
5. CLEANING AND MAINTENANCE
- With careful care and cleaning, your oven will maintain its appearance and stay in good condition. Next, you have some instructions on cleaning and care of the product.
- Risk of electric shock. Moisture entering the device may cause an electric shock. Do not use high-pressure or steam cleaners.
- Risk of burns. Never clean the device immediately after switching it off. Allow it to cool down.
- Risk of serious damage to health. The microwaves energy can exit if the door of the oven or the gasket door are damaged. Never use the appliance if the door or door gasket is damaged, contact the official Cecotec Technical Support Service.
- Be sure to unplug the appliance from the mains.
- After using it, wipe the inside of the microwave oven with a slightly damp cloth.
- Wash the accessories with soap and water.
- The frame, door seal and adjacent parts should be carefully cleaned with a damp cloth when dirty.
- Do not use abrasive cleaners or sharp metal scrapers to clean the oven door glass, as they may scratch the surface, which could cause the glass to break.
ENGLISH
Note:
Slight differences in colour in the front part of the device are caused by the use of different materials, like glass, plastic, and metal.
Cleaning advice
To facilitate the cleaning of the oven interior walls: Put half a lemon in a bowl, add 300 ml of water and heat at 100% power in the microwave for 10 minutes. Clean the outside of the appliance with a soft, dry cloth.
6. TROUBLESHOOTING
- Malfunctions often have simple explanations. Check the trouble table before contacting the Technical Support Service.
- Risk of electric shock! Incorrect repairs can be dangerous. Contact the official Cecotec Technical Support Service.
| Normal | |
| The microwave oven interferes with TV reception | Radio and TV reception may be interfered with when the microwave oven is in operation. It is similar to interference from small electrical appliances such as mixers, vacuum cleaners, and electric fans. |
| Dim microwave light | In low power microwave cooking, the oven light may become dim. |
| Steam builds up in the door and hot air escapes from the ventilation grilles | During cooking, steam comes out from food. Most of it will come out through the ventilation grilles. But it can accumulate in cold places such as the oven door. |
| Problem Cause Solution | ||
| The appliance does not switch on | The power cable is not plugged in correctly. | Unplug the appliance and plug it in again after 10 seconds. |
| Fuse blown or faulty residual current circuit breaker. | Contact the official Cecotec Technical Support Service. | |
| Problem with the output voltage of the power socket. | Test the plug with another electrical appliance. | |
| The appliance does not heat up | The microwave oven door is not properly closed. | Close the door correctly. |
7. TECHNICAL SPECIFICATIONS
Product reference: 02838 / 02839 / 02840
Product: Hexa MW703800 Glass Black / Bolero Hexa MW703800 Glass White / Bolero Hexa
MW703800 Glass Grey
Rated voltage: 230 V\~
Rated frequency: 50 Hz
Rated input power (microwave): 1450 W
Rated output power (microwave): 900 W
Rated input power (Grill): 1100 W
Microwave frequency: 2450 MHz
Technical specifications may change without prior notification to improve product quality.
Made in China | Designed in Spain
8. DISPOSAL OF OLD ELECTRICAL AND ELECTRONIC APPLIANCES
This symbol indicates that, according to the applicable regulations, the product and/or batteries must be disposed of separately from household waste. When this product reaches the end of its shelf life, you should dispose of the cells/batteries/accumulators and take them to a collection point designated by the local authorities.
Consumers must contact their local authorities or retailer for information concerning the correct disposal of old appliances and/or their batteries.
Compliance with the above guidelines will help protecting the environment.
ENGLISH
9. TECHNICAL SUPPORT AND WARRANTY
Cecotec shall be liable to the end user or consumer for any lack of conformity that exists at the time of delivery of the product under the terms, conditions, and deadlines established by the applicable regulations.
It is recommended that repairs be carried out by qualified personnel.
If at any moment you detect any problem with your product or have any doubt, do not hesitate to contact the official Cecotec Technical Support Service at +34 96 321 07 28.
10. COPYRIGHT
The intellectual property rights over the texts in this manual belong to CECOTEC INNOVACIONES, S.L. All rights reserved. The contents of this publication may not, in whole or in part, be reproduced, stored in a retrieval system, transmitted, or distributed by any means (electronic, mechanical, photocopying, recording or similar) without the prior authorization of CECOTEC INNOVACIONES, S.L.
1. PIÈCES ET COMPOSANTS
Img. 1
6. PROBLEEMOPLOSSING
text_image
Technical diagram showing three labeled components of a mechanical assembly with dashed lines indicating alignment or force direction.
natural_image
Line drawing of a simple kitchen oven with a circular vent and side-mounted dish (no text or symbols)Fig./Img./Abb./Afb./Rys. 5
text_image
560⁺⁸ min.500 380⁺² 532 10 456 436 372 80 382 595 20Fig./Img./Abb./Afb./Rys. 6
natural_image
Technical line drawing of a microwave oven with internal compartments and mounting base (no text or symbols)Fig./Img./Abb./Afb./Rys. 7
www.cecotec.es