
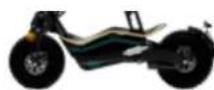
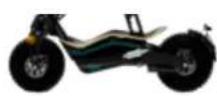
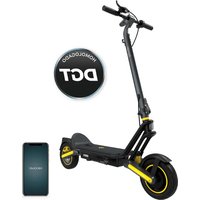
Outsider DemiGod Makalu - Scooter CECOTEC - Free user manual and instructions
Find the device manual for free Outsider DemiGod Makalu CECOTEC in PDF.

| Product type | Electric scooter |
| Brand | Cecotec |
| Model | Outsider DemiGod Makalu |
| Reference | 07027 |
| Power supply | 220-240 V ~ 50/60 Hz |
| Maximum power | 1600 W |
| Battery type | Lithium-ion, 48 V, 12000 mAh |
| Maximum load | 110 kg |
| Number of users | 1 person |
| Brakes | Front brake and rear brake (cable) |
| Throttle | Right twist grip |
| Speedometer | Yes, digital |
| Headlights | Front and rear |
| Rearview mirrors | 2, mounted on handlebar |
| Adjustable seat | Yes, adjustable height |
| Adjustable handlebar | Yes, adjustable height and distance |
| Drive chain | Yes, adjustable tension |
| Recommended safety equipment | Helmet, gloves, goggles, knee pads, elbow pads |
| Warranty | 2 years (excluding wear parts) |
| Origin | Made in China, designed in Spain |
| Vehicle dimensions | Not specified in the manual |
| Vehicle weight | Not specified in the manual |
Frequently Asked Questions - Outsider DemiGod Makalu CECOTEC
User questions about Outsider DemiGod Makalu CECOTEC
0 question about this device. Answer the ones you know or ask your own.
Ask a new question about this device
Download the instructions for your Scooter in PDF format for free! Find your manual Outsider DemiGod Makalu - CECOTEC and take your electronic device back in hand. On this page are published all the documents necessary for the use of your device. Outsider DemiGod Makalu by CECOTEC.
USER MANUAL Outsider DemiGod Makalu CECOTEC
Outsider DemiGod Makalu
Manual de instrucciones Instruction manual Manuel d'instructions Bedienungsanleitung Manuale di istruzioni Manual de instruções Instructiehandleiding Instrukcja obstugi

natural_image
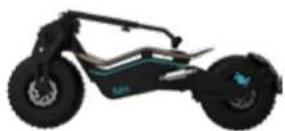
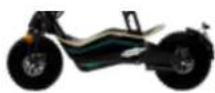
Illustration of a CECOPEC electric scooter with visible wheels and exhaust trails, set against a stylized mountain backdrop (no text or symbols on the vehicle itself)Outsider Demiged Makalu
ÍNDICE
- Parts and components 04
2 Warning 09 - Safety Instructions 31
- Product assembly 32
- Operation 39
- Cleaning and maintenance 40
- Troubleshooting 41
- Technical specifications 42
- Disposal of old electrical appliances 42
- Technical support service and warranty 43
SOMMAIRE
ES
EN
- Key switch
- Handlebar height adjustment
- Handlebar lock lever
- Board
- Front shock absorber
- Rear shock absorber
- Saddle
- Front brake calliper
- Rear brake calliper
- Handlebar
-
Drive chain
-
Saddle-height adjustment
- Handlebar clearance adjustment
- Headlight
- Rear light
- Speedometer
- Rear-view window (x2)
- Light bracket
- License bracket
- Reflectors
- Front brake lever
- Rear brake lever
FR
- Throttle grip
- Battery-level indicator
- Hom/light
- Speedometer
- Rear-view window (x2)
DE
natural_image
Simple line drawing of a person riding a bicycle with motion arrows indicating movement (no text or symbols)ES - Evite subir o bajar escaleras con el palinete. EN - Avoid riding up and down the stairs with the scooter. FR - Evitez de monter ou de descendre des escaliers avec la trotlinette. DE - Vermeiden Sie, Treppen mit dem Scooter hinauf- und hirunterzustelgen. ET - Evitare salire o scendere le scale con il monopattino. PT - Evite subir ou deser escadas com a trotineta. NL - Vermid het optiopen of afdalen van trappen met de step. PL - Unikej poruszania się po schodach na hutajnodze.
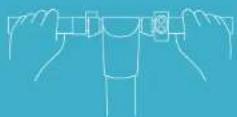
ES - Circule siempre con las dos manos sobre el manillar. EN - Always drive the scooter holding the handlebar with both hands. FR - Lorsque vous circulez, vos deux mains doivent toujours se trouver sur le guilón. DE - Fahren Sie immer mit den zwei Händen auf der Lenkstange. IT - Circolare siempre con le due mani sut manubrio. PT - Circule siempre com as duas mãos no volante. NL - Rijd altijd met twee handen aan het stuur. PL - Potczas jazdy zawsze trzymaj kierownice ociema rekami.
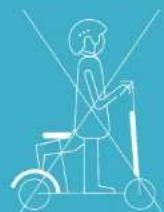
ES • No conduzca el patinete con un solo pie EN • Do not use the scooter with just one foot on the footrest. FR • Lorsque vous circulez, vos cieux pieds doivent toujours se trouver sur le repose pieds, DE • Fanren Sie immer mit beiden Fußen auf der Trittiache. IT • Non guidare l monopattino con un solo piede PT • Enquanto estiver a circular, certifique-se de ler os dois pés no apolo para pès. NL • Rijd niet met slechts een voet op de step. PL • Podczas (azdy stawaj na platformie oblie nog).
natural_image
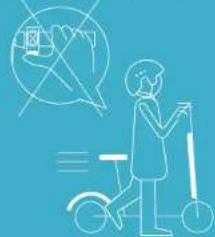
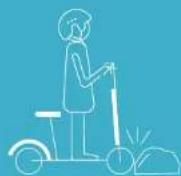
Illustration of a person using a scooter with a hand gesture and crossed-out phone (no text or symbols)ES • No presione el acelerador cuando camine junto al palinete. EN • Do not activate the throttle while walking next to the scooter, FR • N'appuyez pas sur l'acceleraleur lorsque vous marchez a côte de la trottinete. DE • Drucken Sie den Gashebel nicht während sie neben dem Scooter laufen. IT • Non premere l'acceleratore quando cammina con il monopattino. PT • Não pressione o acelerador quanto estiver ao lado da trotineta. NL • Druk niet op de versoetier als u naast de step loopt. PL • Nie używaj aceleratora, kiedy idar prowadzisz hulajnoge obok.
natural_image
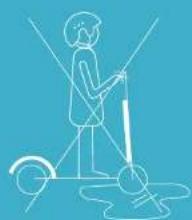
Simple line drawing of a person using a mobility device (no text or symbols)ES - No conduzca sobre charcos ni superficies mojadas. EN - Do not ride through puddles or other wet surfaces. FR - Ne conduizez pas sur des flacues ni sur des surfaces mouillées. DE - Fahren Sie nicht auf Pfützen oder nasse Ober flachen. IT - Non condurre su pozzanighere ni superfici bagnate. PT - Não conduza sobre poças de agua nem em pavimentos mothados. NL - Rild niet door plassen of natte oppervlakken. PL - Nie przezezdaj przez katuze ani inne mokre powierzchnie.

natural_image
Simple line drawing of a person riding an electric scooter with a starburst symbol above (no text or symbols)natural_image
Illustration of a person riding a scooter with an airplane flying nearby, next to a segmented bar and arrow (no text or symbols)ES • Comience a frenar a suficiente distancia de obstáculos, curvas y áreas donde cambie et tipo de suelo. Recuerde soltar el acelerador antes de frenar. EN • Start braking at enough distance from obstacles, curves and from areas where the type of floor changes. Remember to release the throttle before braking. FR • Commencez à freiner a une distance suffisante de l'obstacie du village ou de la zone où le type de sol change. Rappelcz-vous de relächer l'accélérateur avant de freiner DE • Beginnen Sie mit dem Brensen in ausreichendem Abstand von Hincornissen, Kurven und Bereichen, in denen sich der Bodentyp ändert. Denken Sie daran, den Gashelei vor dem Bremsen loszulassen. IT • Cominciare a frenare ad una distancia suficiente da evitare ostacoli, curve e zone che differiscono in quanto a pavimentazion. Ricordarsi di lasciare andere l'acceleratore prima di frenare. PT • Comece a travar a suficiente distancia dos obstáculos, curvas e áreas que muden de nivel. Lembre-se de soltar o acelerador antes de travar. NL • -Begin met remmen od voldoende afstane van obstakels, bochten en gebieden met een veränderende ondergrond. Vergeet niet om de versneller los te laten alvorans te reminen. PL • Rozpocznił hamowanie w odpowiednio dużei odległości od przeszkód, zakrątów czy miejsc zmlany nawierzchni. Pamiętaj o zwolnienlu akceleratora przed naciśnięciem hamulca.

natural_image
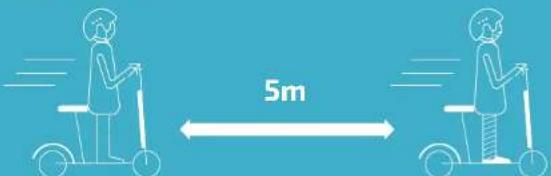
Line drawing of a person riding an electric scooter with motion lines indicating speed (no text or symbols)ES • No circule a alta velocidad sobre obstáculos como escalones, bordillos o badenes. EN • Do not ride fast on stairs, curbs or speed humps. FR • No circulez pas à vitesses élevées sur des obstacles comme des marches, des bords, des cassis, ... DE • Hellen Sie einen Sicherheitssabstand von mindestens 5 m zwischen dem Gerät und anderen Fahrzeugen ein. IT • Non circolare ad alta velocità su postacoli quali scaloni, bordo dossi. PT • Não circule a alta velocidade sobre obstáculos como lombas. NL • Rijd niet met hoge snelheid over obstakels zoals treden, stoepranden of verkeersdrempels. PL • Zmniejsz prędkość, gdy przejeżdzasz przez przeszkody, takie jak krawężnik, uskoki podłoże czy progi zwalniające.
ES • No golpee obstáculos con las ruedas. EN • Avoid hitting obstacles with the wheels. FR • No choquez pas avec les roues contre des obstacles. DE • Schlagen Sie keinen Gegenstand mit den Reifen. IT • Non colpire ostacoli con le ruote. PT • Não choque em obstáculos. NL • Raak geen obstakels met de wielen PL • Nie uderzaj ooonami o przeszkody.
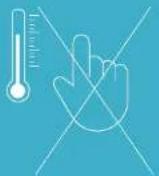
ES • No toque el motor del buje inmediatamente después de circular, podría estar a alta temperatura. EN • Do not touch the product's motor immediately after riding it. It could burn. FR • Ne touchez pas le moteur imméciatement après avoir concut, sa température pourrait être très élevée. DE • Berühren Sie nicht den Motor unmittelbar nach dem Gebrauch da er bei hoher Temperatur sein könnte. IT • Non toccare il motore subito dopo aver guidato, potrebbe troversi ad una temperatura elevata PT • Não toque no motor imediatamente depois de circular, poderia estar a altas temperaturas. NL • Raak de motorbehuizing niet aan direct na gebruik van de step, omdat de motor warm zou kunnen zijn PL • Nie dotykaj silnika przez jakiś czes po zakończeniu jazdy gdyz może być gorący.
natural_image
Close-up of a mechanical assembly with metallic components and a blue tool, no visible text or symbols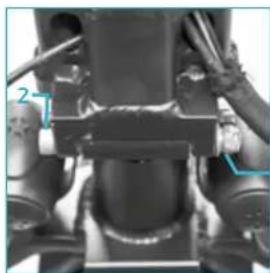
natural_image
Mechanical assembly diagram showing a mechanical component with labeled parts (no readable text or symbols)1
natural_image
Close-up of a mechanical device with articulated legs and suspension components (no visible text or symbols)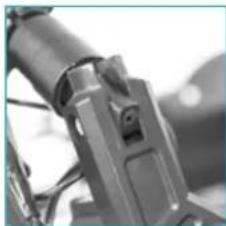
natural_image
Close-up of a mechanical component with no visible text or symbolsnatural_image
Close-up of a hand holding a black mechanical component with a screw and nut (no visible text or symbols)AJUSTE DE LA ALTURA DEL MANILLAR
natural_image
Close-up of a metallic knob with a star-shaped cutout on a dark surface (no text or symbols visible)natural_image
Close-up of a metallic mechanical component mounted on a striped surface (no visible text or symbols)2021

ESPAÑOL
natural_image
Close-up of a mechanical component with a circular feature and mounting holes (no visible text or symbols)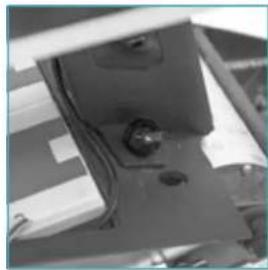
natural_image
Close-up of a mechanical component with visible wiring and mounting holes (no text or symbols)natural_image
Close-up of a bicycle brake lever with labeled component A (no text or symbols on the lever itself)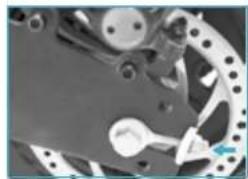
natural_image
Close-up of mechanical components with no visible text or symbolsB

1
ESPAÑOL
ESPAÑOL
natural_image
Mechanical component diagram showing a rotating wheel and mounting bracket (no text or symbols)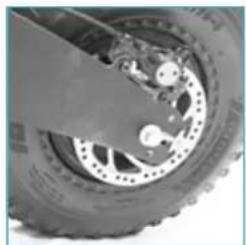
natural_image
Close-up of a car tire with visible mechanical components and disc brake (no text or symbols)AJUSTE DE LA ALTURA DEL SILLÍN
natural_image
Close-up of a mechanical component with layered surfaces and a textured base (no visible text or symbols)2223

natural_image
Close-up of a car wheel and dashboard with a blue arrow pointing to the side (no visible text or symbols)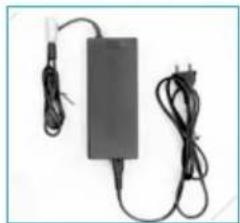
natural_image
Electric charger with black cable and power cord, no visible text or symbolsAVISO:
3. SAFETY INSTRUCTIONS
Read these instructions thoroughly before using the appliance. Keep this instruction manual for future reference or new users.
- Cecotec will not assume any responsibility resulting from product misuse or from not complying with traffic regulations and with this instruction manual.
• This electric scooter is not a toy. Use it with competence, attention and respect for others and yourself.
- Check local current regulations on the use of these kind of products before riding it and make sure to comply with local traffic regulations. Drive in a civilized way and pay attention to people and obstacles around in order to avoid accidents.
• Always use the recommended clothing helmet (fastened), glasses, gloves, shoes, knee pads and elbow pads suitable for this use.
- The vehicle measures must be proportional to the user. The person riding it must be able to place both feet easily on the ground while sitting on the saddle.
- When stopping or parking the vehicle, make sure to do it on a flat and save surface.
• The maximum load allowed by the product is 110 kg.
- It is not allowed to use the product with more than 1 person at a time.
- The misuse of the product or the non-compliance of this instruction manual can cause serious injury or even death.
- For any serious reparation not described in this manual, contact the Technical Support Service of Cecotec. Do not try to repair the product by yourself.
- Do not leave the battery near fire or near heat sources. Avoid using defective batteries.
- Do not sit or allow anyone to sit on the product while it is still.
- Do not ride the vehicle at night.
- If the user that is going to use the product is not familiar with riding this type of vehicles. It is recommended that an adult teaches before first use:
-
Acceleration
-
Deceleration
-
Braking
-
Basic riding principles
- Before each use, check the brakes, the pressure and condition of the tires and the throttle. If any unusual noise or fault is detected, do not use the product and contact the Technical Support Service of Cecotec.
• Any alteration of the product is not allowed, as this can change its performance or damage its structure causing injuries.
• Make sure to turn off the product before parking it.
- Do not ride the vehicle under rain, snow or wet conditions.
ENGLISH
- Avoid the vehicle's electric parts from getting into contact with water or other liquids. Avoid riding it near rivers or lakes.
- Supervise young children to make sure that they do not play with the appliance. Close supervision is necessary when the appliance is being used by or near children.
CORRECT USE OF THE VEHICLE
- Do not wear loose clothing, scarves, necklaces or other objects with chains or long laces.
- Do not drive with objects in your pockets.
- Do not drive with objects in your hands or mouth.
- Do not carry other people or objects on the vehicle.
- Do not place your feet on the ground while driving.
- Do not get off the vehicle during movement.
- Do not carry out jumps or stunts with the vehicle.
- Do not read, write, eat or drink while riding.
- Do not listen to music while riding the vehicle.
- Avoid riding the vehicle on unstable or dangerous surfaces such as roads with holes or with different heights.
- Do not drive under the effect of drugs or alcohol, when feeling sleepy or when your state of consciousness and reaction capacity could be altered.
- Do not ride the vehicle in strange positions and do not use your feet to brake.
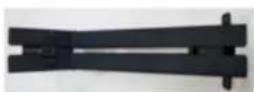
4. PRODUCT ASSEMBLY AND ADJUSTMENT
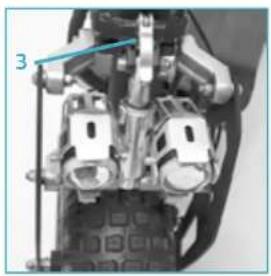
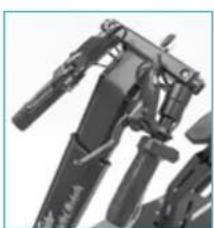
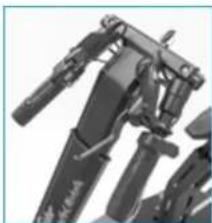
OPENING OF THE HANDLEBAR
- The vehicle is shipped folded with the handlebar disassembled.
3233

ENGLISH
- First, unscrew nut 1 and remove screw 2.
- Place the handlebar and insert screw 2 with locking nut 1.
- Lift the handlebar and press the shutter spring 3, to place the handlebar's neck in its correct position.
- Insert the fixing lever in its groove and rotate it until it is properly locked.
natural_image
Close-up of a mechanical assembly with no visible text or symbols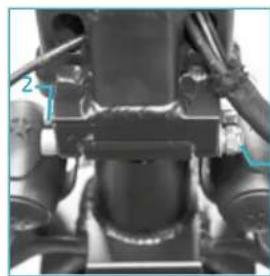
natural_image
Close-up of mechanical components with no visible text or symbolsNOTE: to fold the handlebar again, carry out these steps in reverse order.
ASSEMBLING THE HANDLEBAR GRIPS
Once the handlebar is assembled vertically, the grips are suspended as shown on the following figure.
natural_image
Close-up of a mechanical device with attached lever and handle (no visible text or symbols)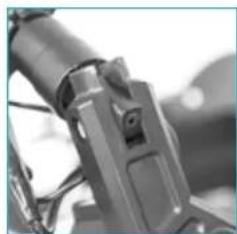
natural_image
Close-up of a mechanical component with metallic parts and mounting brackets (no visible text or symbols)- Hold the left grip and pull it up until it is inserted into its position.

ENGLISH
- Repeat the before step with the right grip (the one with the throttle).
natural_image
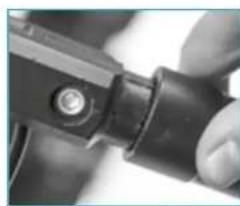
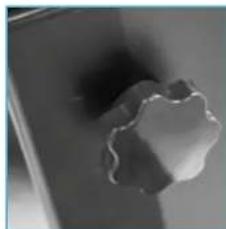
Close-up of a hand holding a black mechanical component with a screw (no visible text or symbols)- Turn the height-adjustment wheel anticlockwise and raise or lower the handlebar stem.
- Once it is adjusted to the desired height, turn the wheel clockwise to fix it. Make sure the handlebar is tight.
natural_image
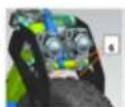
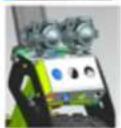
Close-up of a metallic knob with a star-shaped knob (no text or symbols visible)ACCESSING AND ACTIVATING THE BATTERY AND ENGINE
The battery and engine are already installed and connected. To access to any of these, lift the board. To activate the electric circuit, insert the fuse supplied.
natural_image
Close-up of a car's wheel and suspension components (no visible text or symbols)3435 Outsider Semiferal Makala
ENGLISH
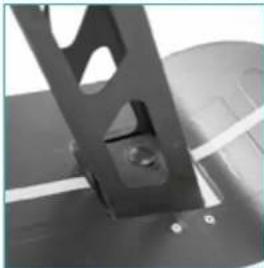
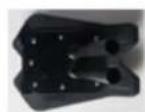
ASSEMBLING THE SADDLE
- Pass the seat post through the hole in the table and align it with the corresponding screws on the main body.
- When aligned, secure the seat post with nuts, one on each side.
natural_image
Close-up of a mechanical component with a black bracket and circular cutout, no visible text or symbols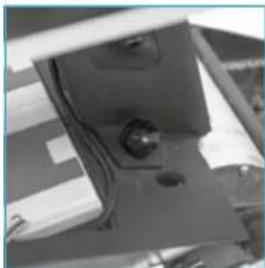
natural_image
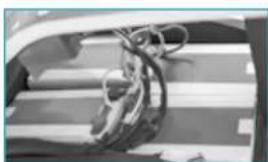
Close-up of a mechanical component with a central knob and attached wires (no visible text or symbols)- Next, run the rear seatlight cable through the inside of the saddle and tighten it with the clamps.
- Finally, attach the saddle to the seat post.
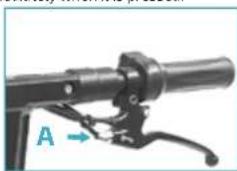
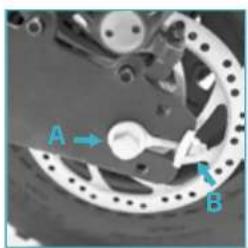
Both brakes require periodic adjustment.
- The brake must be at a 5 or 6-mm distance from the handlebar grip.
- Place yourself on the vehicle to verify the distance between the handlebar grip and the brake.
- If the distance exceeds the recommended one, turn the washer on the brake (A) to adjust it.
- To adjust the brake cable's tension, adjust the screw (B) on the rear wheel. This will allow the wheel to spin freely when the brake is not operated and will allow the vehicle to stop immediately when it is pressed.
natural_image
Close-up of a bicycle brake lever with handle and lever (no text or symbols visible)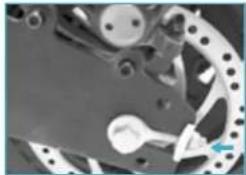
natural_image
Close-up of mechanical components with no visible text or symbolsB
Outsider
ENGLISH
ENGLISH
NOTE: after each adjustment, lighten the locknut.
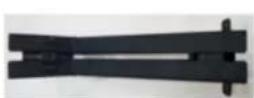
TIGHTENING THE CHAIN
Check periodically the transmission chain's tension and keep it clean of deposited dirt. To tighten or loosen it:
1. Loosen nut A and turn nut B to restore the correct chain tension.
2. Repeat this step on the same nut located on the opposite side.
3. Check the wheels are aligned and tighten nut A.
natural_image
Mechanical component diagram showing a rotating wheel and gear assembly (no text or symbols)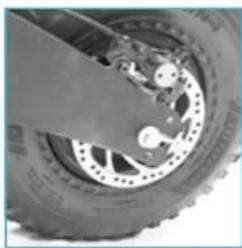
natural_image
Close-up of a car tire with brake calipers and wheel rim (no visible text or symbols)ADJUSTING THE HEIGHT OF THE SADDLE
To adjust the height of the saddle, unlock lever 1, lower or raise the saddle to the desired position. Once the saddle is placed at the desired height, lock lever 1 back.
natural_image
Close-up of a mechanical component with layered surfaces and mounting holes (no visible text or symbols)3637

ELECTRIC SCOOTER ASSEMBLY (APPROVAL KIT)
- Parts and components
Seat support
Saddle
Instruction manual
Main body
Charger
Headlight bracket
Speedometer bracket
Speedometer
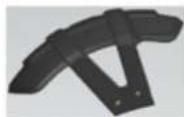
Rear fender bracket


License plate holder light
Tool kit
Rear view mirror
License plate bracket with
- Before use
• Take the product out of the box and remove all packaging materials.
• Make sure all parts and accessories are included and in good conditions. If not, contact immediately the Technical Support Service of Cecotec.

ENGLISH
ENGLISH
- Assembly
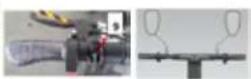
3.1. Headlight assembly
The scooter's headlights are installed in the position shown below by default.
In order to install the headlights in the correct position, first loosen the screws marked as number 6 and remove them. Then, use 4 M5*16 hexagonal screws and the 4 flanged lock nuts to fix the headlight bracket and mount the headlights on it as shown on the picture.
Note: Some of the headlight parts have no use and must be removed. Please remove the parts shown on the picture below:
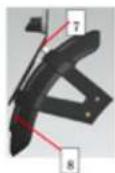
3.2. License plate bracket with light assembly
To install the license plate bracket, add a bushing a change both screws.
Change both screw marked as 7 and 8 with 2 M6*30 hexagonal screws. Then, connect the cable of the license bracket's light to the cable coming from the scooter's board.
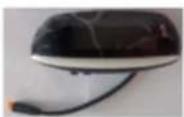
3.3. Rear-view mirror assembly
To install the rear-view mirrors, just insert them in the holes located on the handlebar and screw them tightly. Once they have been screwed, cover the lower part with the trim.
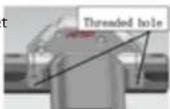
3.4. Speedometer assembly
To install the speedometer, first assemble the speedometer bracket onto the handlebar. To do so, screw 2 M6*10 hexagonal cap head screws onto the 2 threaded holes on the back of the handlebar as shown on the picture.
Then, use 2 M4*10 hexagonal cap head screws to fix the speedometer onto the speedometer bracket.
3839

Finally, connect the speedometer cable to the cable on the scooter's stem.
5. OPERATION
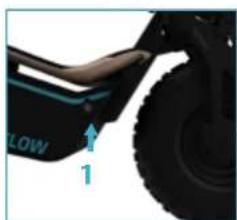
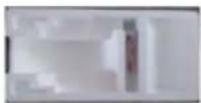
BATTERY CHARGING
NOTE: make sure the device is turned off.
- Open the charging port's (1) cover located on the right side of the vehicle and insert the 3-contact power adapter's end.
- Connect the other power adapter's end to a wall power supply. The light indicator will turn red during charge and will turn green when fully charged.
natural_image
Close-up of a black motorcycle's wheel and side arm, showing tire and seat details (no text or symbols)
natural_image
Electric charger with attached cables and power cord (no visible text or symbols)NOTE:
- The device comes already charged, but it is recommended to charge it for 6-8 hours before the first use.
- It is also recommended to charge it after each use and before storing it.
• To avoid the battery from damaging, do not allow the vehicle to fully discharge.

ENGLISH
ENGLISH
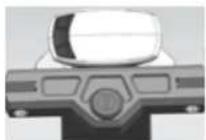
STARTING UP
- Insert the key and turn it clockwise to start the vehicle.

natural_image
Close-up of a camera control knob with 'On' and 'Off' labels (no additional text or symbols)THROTTLE AND BRAKE CONTROL
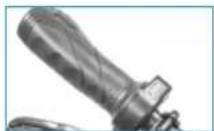
The throttle and front brake are located on the right handlebar grip.
- Rotate the throttle towards yourself to increase speed and release to decrease it.
- Press the brake lever on the right side of the handlebar to brake with the front wheel.
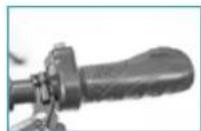
- The rear brake is located on the left side of the handlebar. Press it to brake with the rear wheel.
NOTE: do not turn the throttle suddenly. Rotate it slowly to avoid accidents.
6. CLEANING AND MAINTENANCE
Cleaning
- Clean the vehicle with a soft cloth, water and soap if necessary.
• After cleaning, dry thoroughly any metal parts subject to corrosion, oxidation, etc. - The chain unit must be thoroughly cleaned and dried periodically to maintain the device in good conditions for as long as possible.
- Lubricate the pivot points on the suspension.
OVERALL MAINTENANCE
- Maintenance should always be performed by qualified personnel.
• Always use spare parts provided by Cecotec. - Any type of reparation must be carried out with the vehicle on the stand and turned off.
4041

CHECKS TO BE CARRIED OUT
• After a fall, check that the throttle grip operates correctly. To do so, try to accelerate and decelerate a few times.
- From time to time, check that the brakes operate properly. To do so, move the vehicle pushing it manually and brake suddenly to ensure they respond.
- Check all the parts of the vehicle are in place and securely assembled.
- Check the screws and chain tension.
- Check the wear of the tyres and their pressure.
- Check the wear of the brakes and the throttle cables
7. TROUBLESHOOTING
| ERROR CAUSE SOLUTION | ||
| The engine does not work. | The battery is not connected. | Check the connectors. |
| The battery is low. Recharge the battery. | ||
| Electrical problem. Check all connectors. | ||
| The rear wheel does not rotate. | The transmission chain is broken. | Replace the drive chain. |
| Engine error. | Check the engine. | |
| The engine switches off during use. | Engine overheating. | Release the throttle and wait until it cools down. |
| After charging, the vehicle turns off. | The battery is not fully charged. | Recharge the battery. |

ENGLISH
ENGLISH
| The vehicle emits unusual noises when accelerating. | Loose drive chain. Tension the drive chain. | |
| Battery error. The battery is old | d or does not work properly. | Replace the battery. |
| The battery is frozen. Place the battery in a warm place until it recovers its normal temperature. | ||
| The vehicle stops suddenly while in use. | Fuse error. Replace the fuse. | |
| The cable is damaged. | Check and repair or replace the cable. | |
| The battery does not charge. | low battery. | Replace the battery. |
| Broken battery charger. | Replace the battery charger. | |
8. TECHNICAL SPECIFICATIONS
Outsider DemiGod Makalu
Model No.: 07027
220-240V - 50/60Hz
Battery: 48 V, 12000 mAh
Maximum power: 1500 W
Made in China | Designed in Spain
9. DISPOSAL OF OLD ELECTRICAL APPLIANCES

The European directive 2012/19/EU on Waste Electrical and Electronic Equipment
(WEEE), specifies that old household electrical appliances must not be disposed of with the normal unsorted municipal waste. Old appliances must be collected separately, in order to optimize the recovery and recycling of the materials they contain, and reduce the impact on human health and the environment.
The crossed out 'wheeled bin' symbol on the product reminds you of your obligation to dispose of the appliance correctly. If the product has a built-in battery or uses batteries, they should be removed from the appliance and disposed of appropriately.
Consumers must contact their local authorities or retailer for information concerning the correct disposal of old appliances and/or their batteries.
4243

10. TECHNICAL SUPPORT SERVICE AND WARRANTY
This product is under warranty for 2 years from the date of purchase, as long as the proof of purchase is submitted, the product is in perfect physical condition, and it has been given proper use, as explained in this Instruction manual.
The warranty will not cover the following situations:
• The product has been used for purposes other than those intended for it, misused, beaten, exposed to moisture, immersed in liquid or corrosive substances, as well as any other fault attributable to the customer.
- The product has been disassembled, modified, or repaired by persons, not authorised by the official Technical Support Service of Cecotec.
- Faults deriving from the normal wear and tear of its parts, due to use.
The warranty service covers every manufacturing defects of your appliance for 2 years, based on current legislation, except consumable parts. In the event of misuse, the warranty will not apply.
If at any moment you detect any problem with your product or have any doubt, do not hesitate to contact Cecotec Technical Support Service at +34 963 210 728.

FRANÇAIS
FRANÇAIS
3. INSTRUCTIONS DE SÉCURITÉ
natural_image
Close-up of a mechanical assembly with no visible text or symbols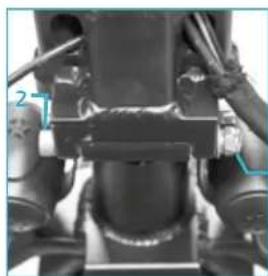
natural_image
Mechanical assembly diagram showing a cylindrical component with attached parts and labeled parts (no readable text or symbols)4547 Outsider Simulated Nevada

natural_image
Close-up of a black mechanical device with attached lever and handle (no visible text or symbols)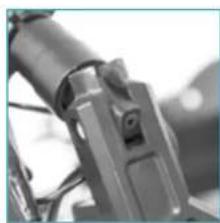
natural_image
Close-up of a mechanical component with no visible text or symbols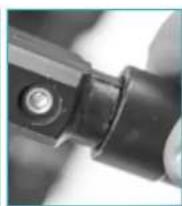
natural_image
Close-up of a metallic knob with a star-shaped cutout (no text or symbols visible)ACCÈS ET ACTIVATION DE LA BATTERIE ET DU MOTEUR
natural_image
Close-up of a metallic object wrapped in wires against a striped background (no visible text or symbols)Outsider Dongqai Minzulu
FRANÇAIS
FRANÇAIS
PLACER LA SELLE
natural_image
Close-up of a mechanical component with a triangular bracket and central hole (no visible text or symbols)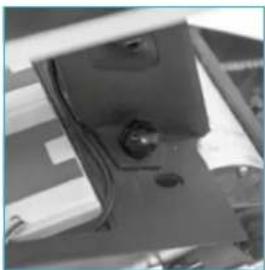
natural_image
Close-up of a mechanical component with wires and a central knob (no visible text or symbols)natural_image
Close-up of a bicycle brake lever with labeled component A (no text or symbols on the lever itself)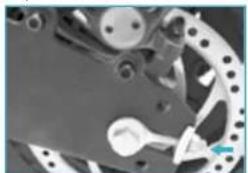
natural_image
Mechanical assembly diagram showing gears and components (no visible text or labels)B
4849 Outsider Sensified Nature
natural_image
Mechanical component diagram showing a rotating wheel and flange assembly (no text or symbols)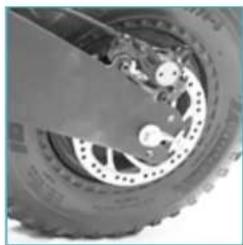
natural_image
Close-up of a car tire with brake calipers and wheel rim (no visible text or symbols)natural_image
Close-up of a mechanical component with layered structure (no visible text or symbols)Outsider Dongyin, Rwanda
FRANÇAIS
FRANÇAIS
MONTAGE DE LA TROTTINETTE ÉLECTRIQUE (KIT D'HOMOLOGATION)
- Parts and components
Support de siège
Selle
natural_image
Close-up of a black and white vehicle wheel with a blue arrow pointing to the side (no visible text or symbols)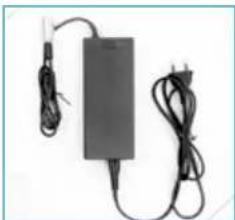
natural_image
Black rectangular electronic device with attached cables and power cord (no visible text or symbols)NOTES :
natural_image
Close-up of a mechanical assembly with no visible text or symbols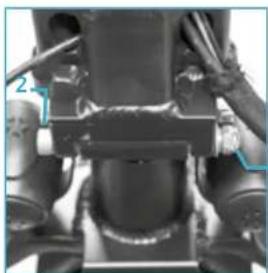
natural_image
Close-up of mechanical components with no visible text or symbolsnatural_image
Close-up of mechanical components including a bipod and lever assembly (no visible text or symbols)natural_image
Close-up of a metallic door with a small, flower-shaped cutout on the handle (no text or symbols visible)natural_image
Close-up of mechanical components with mounting holes and a central bracket (no visible text or symbols)natural_image
Close-up of a bicycle lever handle and lever mechanism (no text or symbols visible)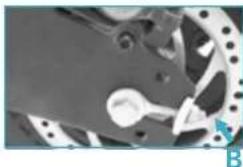
natural_image
Close-up of a mechanical component with a circular housing and perforated base (no visible text or symbols)
DEUTSCH
DEUTSCH
natural_image
Mechanical component diagram showing a rotating wheel and flange assembly (no text or symbols)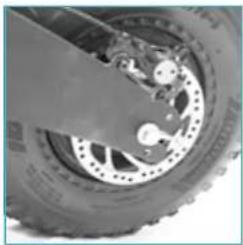
natural_image
Close-up of a car tire and brake system with visible components (no text or symbols)SATTELVERSTELLUNG
natural_image
Close-up of a mechanical component with layered structure (no visible text or symbols)6263

MONTAGE DES E-SCOOTERS (HOMOLOGATIONS-KIT)
- Parts and components
Sattelstütze
Sattel
Bedienungsanleitung
Hauptkörper
Ladegerät
natural_image
Close-up of a black motorcycle's wheel and side arm, showing tire and seat details (no text or symbols visible)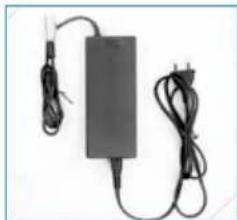
natural_image
Black rectangular electronic device with attached cables and power plug (no visible text or symbols)HINWEIS:
natural_image
Close-up of a camera control knob with 'On' and 'Off' labels (no additional text or symbols)
DEUTSCH
DEUTSCH
BESCHLEUNIG- UND BREMSKONTROLLE
APERTURA DEL MANUBRIO
natural_image
Close-up of a mechanical assembly with no visible text or symbols
natural_image
Close-up of mechanical components with no visible text or symbolsnatural_image
Close-up of a mechanical device with attached lever and handle (no visible text or symbols)
natural_image
Close-up of a mechanical component with no visible text or symbols
natural_image
Close-up of a metallic object with a star-shaped indentation on a surface (no text or symbols visible)natural_image
Close-up of a mechanical component with a black bracket and circular cutout, no visible text or symbols
natural_image
Close-up of a mechanical component with wires and a central circular feature (no visible text or symbols)natural_image
Close-up of a bicycle brake lever handle and lever mechanism (no text or symbols visible)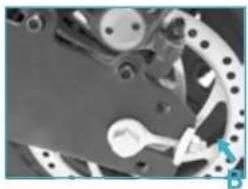
natural_image
Close-up of mechanical components with no visible text or symbols7475
Outsider Benedal Mabada
natural_image
Close-up of a car tire and brake system with visible components (no text or symbols)REGOLAZIONE DELL'ALTEZZA DEL SELLINO
natural_image
Close-up of a mechanical component with no visible text or symbolsOutsider
ITALIANO
ITALIANO
natural_image
Close-up of a black and white vehicle's wheel and side panel, showing a blue arrow labeled '1' pointing to the side (no readable text or symbols beyond the label)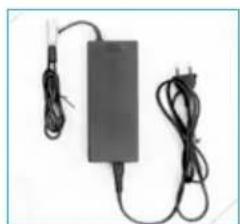
natural_image
Electric charger with attached cables and power cord (no visible text or symbols)AVVISO:
natural_image
Close-up of a camera control knob with 'on' and 'off' labels (no additional text or symbols)CONTROLLO ACCELERATORE E FRENI
natural_image
Close-up mechanical assembly showing gears and shafts (no visible text or symbols)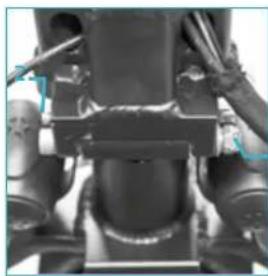
natural_image
Close-up of mechanical components with no visible text or symbolsnatural_image
Close-up of a mechanical device with bipods and levers (no visible text or symbols)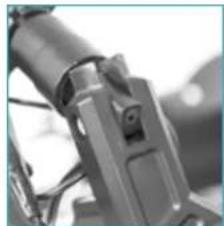
natural_image
Close-up of a mechanical component with no visible text or symbolsnatural_image
Close-up of a hand holding a black mechanical component with a screw (no visible text or symbols)AJUSTE EM ALTURA DO VOLANTE
natural_image
Close-up of a metallic knob with a star-shaped cutout (no text or symbols visible)ACEDER E ATIVAR A BATERIA E O MOTOR
natural_image
Close-up of a metallic mechanical component with a curved handle and circular base, set against a striped background (no visible text or symbols)8687
Outsider Sominated Markets
PORTUGUÊS
COLOCAR O ASSENTO
natural_image
Close-up of a mechanical component with a black bracket and circular cutout, no visible text or symbols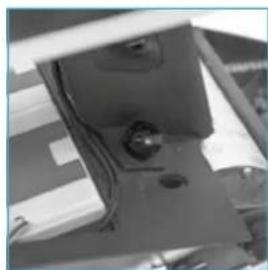
natural_image
Close-up of a mechanical component with visible wiring and mounting holes (no text or symbols)natural_image
Close-up of a bicycle brake lever with handle and lever (no text or symbols visible)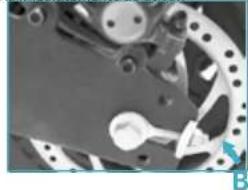
natural_image
Close-up of a mechanical assembly with gears and a central hub (no visible text or symbols)B
Outsider
PORTUGUÊS
PORTUGUÊS
natural_image
Close-up of a car tire with brake calipers and wheel rim (no visible text or symbols)natural_image
Close-up of a mechanical component with no visible text or symbolsaaa

MONTAGEM DA TROTINETA ELÉTRICA (KIT DE HOMOLOGAÇÃO)
- Peças e componentes
natural_image
Close-up of a black off-road vehicle's wheel and side arm, showing tire and seat details (no text or symbols visible)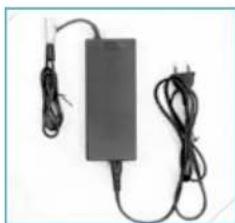
natural_image
Black rectangular electronic device with attached cables and power cord (no visible text or symbols)AVISO:
natural_image
Close-up of a camera control knob with 'on' and 'off' labels (no additional text or symbols)Outsider Unspecified Markets
PORTUGUÊS
PORTUGUÊS
CONTROLO SOBRE O ACELERADOR E OS TRAVÕES
natural_image
Mechanical assembly diagram showing motor components and a numbered component (no readable text or symbols)
natural_image
Mechanical assembly diagram showing a mechanical component with labeled parts 1 and 2 (no text or symbols beyond labels)9899 Outsider Serving Makala
natural_image
Close-up of a mechanical device with bipods and lever mechanism (no visible text or symbols)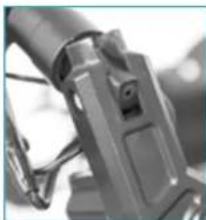
natural_image
Close-up of a mechanical component with no visible text or symbols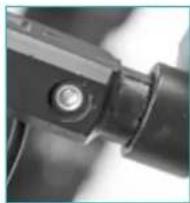
natural_image
Close-up of a metallic knob with a star-shaped knob (no text or symbols visible)TOEGANG EN ACTIVITATIE VAN DE BATTERIJ EN DE MOTOR
natural_image
Close-up of a mechanical component with a black bracket and circular features (no visible text or symbols)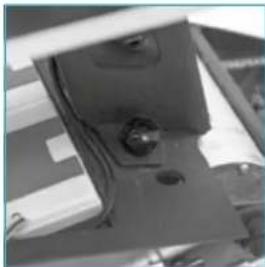
natural_image
Close-up of a mechanical component with a central circular feature and surrounding wires (no visible text or symbols)natural_image
Close-up of a mechanical lever handle and lever mechanism (no text or symbols visible)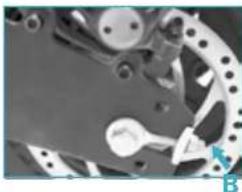
natural_image
Close-up of mechanical components with no visible text or symbolsnatural_image
Close-up of a car tire with brake calipers and wheel rim (no visible text or symbols)100/01 Outsider Simulated Bohalo
Outsider Dongqol. Makala
NEDERLANDS
NEDERLANDS
DE HOOGTE VAN HET ZADEL VERSTELLEN.
natural_image
Close-up of a mechanical component with layered structure (no visible text or symbols)MONTAGE ELEKTRISCHE SCOOTER (HOMOLOGATIEKIT)
104/05 Outsider Limited North
natural_image
Close-up of a car's wheel and side arm with a blue arrow pointing to the wheel (no text or symbols visible)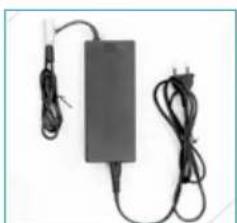
natural_image
Electric charger with attached cable and power outlet (no visible text or symbols)OPMERKING:
natural_image
Close-up of a mechanical assembly with metallic components and a blue tool, no visible text or symbols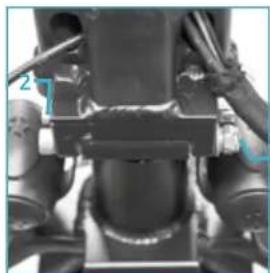
natural_image
Close-up of mechanical components with no visible text or symbols112113 Outsider Simplified Mobile
natural_image
Close-up of a black mechanical device with attached lever and handle (no visible text or symbols)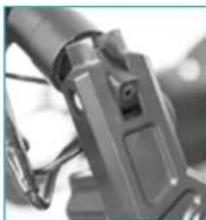
natural_image
Close-up of a mechanical component with no visible text or symbols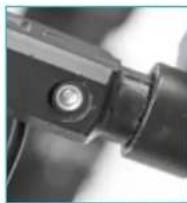
natural_image
Close-up of a metallic knob with a star-shaped knob (no text or symbols visible)DOJŚCIE DO BATERII I SILNIKA ORAZ ICH AKTYWACJA
natural_image
Close-up of a mechanical component with a black bracket and circular cutout, no visible text or symbols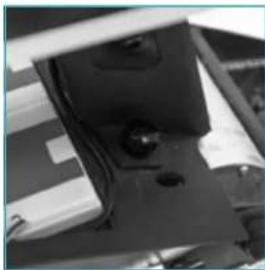
natural_image
Close-up of a mechanical component with no visible text or symbolsnatural_image
Close-up of a black bicycle brake lever with a blue arrow and label 'A' pointing to the handle (no text or symbols on the lever itself)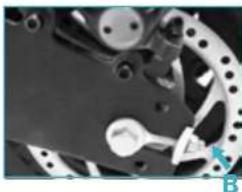
natural_image
Close-up of mechanical components with no visible text or symbolsnatural_image
Mechanical component with labeled parts A and B, showing a circular housing and mechanical assembly (no text or symbols beyond labels)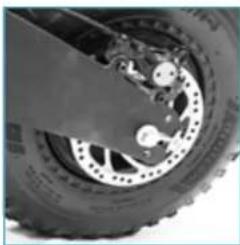
natural_image
Close-up of a car tire with brake calipers and wheel rim (no visible text or symbols)POLSKI
POLSKI
REGULACJA WYSOKOŚCI SIODEŁKA
natural_image
Close-up of a mechanical component with layered structure (no visible text or symbols)INSTRUKCJA MONTAŻU HULAJNOGI ELEKTRYCZNEJ (ZESTAW HOMOLOGACYJNY)
- Części komponenty
Podpora slodetka
Slodetka
Instrukcja obstugi
Korpus główny
Ladowarka

118119 Outsider Serving Mahala
natural_image
Close-up of a black tire with a blue angle indicator and 'FLOW' label, no readable text or symbols beyond the arrow.
natural_image
Electric charger with attached cable and power cord (no visible text or symbols)Uwaga:
natural_image
Close-up of a camera control knob with 'on' and 'off' labels (no additional text or symbols)Outsider
POLSKI
POLSKI
UŻYWANIE AKCELERATORA I HAMULCÓW
10. GWARANCJA I OBSŁUGA KLIENTA
natural_image
Side profile of a black electric scooter with teal accents, displayed against a light blue and gray background (no text or symbols visible)

- Outsider DemiGod Makalu
- Outsider Demiged Makalu
- ÍNDICE
- SOMMAIRE
- ES
- EN
- FR
- DE
- AJUSTE DE LA ALTURA DEL MANILLAR
- AJUSTE DE LA ALTURA DEL SILLÍN
- SAFETY INSTRUCTIONS
- ENGLISH
- CORRECT USE OF THE VEHICLE
- PRODUCT ASSEMBLY AND ADJUSTMENT
- OPENING OF THE HANDLEBAR
- ASSEMBLING THE HANDLEBAR GRIPS
- ACCESSING AND ACTIVATING THE BATTERY AND ENGINE
- ASSEMBLING THE SADDLE
- TIGHTENING THE CHAIN
- ADJUSTING THE HEIGHT OF THE SADDLE
- ELECTRIC SCOOTER ASSEMBLY (APPROVAL KIT)
- OPERATION
- BATTERY CHARGING
- STARTING UP
- THROTTLE AND BRAKE CONTROL
- CLEANING AND MAINTENANCE
- Cleaning
- OVERALL MAINTENANCE
- CHECKS TO BE CARRIED OUT
- TROUBLESHOOTING
- TECHNICAL SPECIFICATIONS
- DISPOSAL OF OLD ELECTRICAL APPLIANCES
- TECHNICAL SUPPORT SERVICE AND WARRANTY
- INSTRUCTIONS DE SÉCURITÉ
- ACCÈS ET ACTIVATION DE LA BATTERIE ET DU MOTEUR
- PLACER LA SELLE
- MONTAGE DE LA TROTTINETTE ÉLECTRIQUE (KIT D'HOMOLOGATION)
- NOTES :
- SATTELVERSTELLUNG
- MONTAGE DES E-SCOOTERS (HOMOLOGATIONS-KIT)
- HINWEIS:
- BESCHLEUNIG- UND BREMSKONTROLLE
- APERTURA DEL MANUBRIO
- REGOLAZIONE DELL'ALTEZZA DEL SELLINO
- AVVISO:
- CONTROLLO ACCELERATORE E FRENI
- AJUSTE EM ALTURA DO VOLANTE
- ACEDER E ATIVAR A BATERIA E O MOTOR
- PORTUGUÊS
- COLOCAR O ASSENTO
- MONTAGEM DA TROTINETA ELÉTRICA (KIT DE HOMOLOGAÇÃO)
- AVISO:
- CONTROLO SOBRE O ACELERADOR E OS TRAVÕES
- TOEGANG EN ACTIVITATIE VAN DE BATTERIJ EN DE MOTOR
- DE HOOGTE VAN HET ZADEL VERSTELLEN.
- MONTAGE ELEKTRISCHE SCOOTER (HOMOLOGATIEKIT)
- OPMERKING:
- DOJŚCIE DO BATERII I SILNIKA ORAZ ICH AKTYWACJA
- REGULACJA WYSOKOŚCI SIODEŁKA
- INSTRUKCJA MONTAŻU HULAJNOGI ELEKTRYCZNEJ (ZESTAW HOMOLOGACYJNY)
- Uwaga:
- UŻYWANIE AKCELERATORA I HAMULCÓW
- GWARANCJA I OBSŁUGA KLIENTA
Brand : CECOTEC
Model : Outsider DemiGod Makalu
Category : Scooter