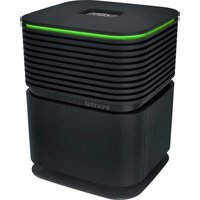
Aerostyle Compact AP735 - Air purifier Venta - Free user manual and instructions
Find the device manual for free Aerostyle Compact AP735 Venta in PDF.


| Product Type | Air Purifier |
| Model | Aerostyle Compact AP735 |
| Dimensions (W × D × H) | 34 x 33 x 44 cm |
| Weight | approx. 6.8 kg |
| Power Supply Voltage | 100 to 240 V~, 50/60 Hz |
| Power Consumption (Normal) | 4 / 6 / 8 / 13 / 21 W |
| Power Consumption (Turbo) | 60 W |
| Noise Level (min-max) | 22 to 45 dB (A) |
| Noise Level (Turbo) | 55 dB (A) |
| Recommended Room Area | up to 75 m² (light pollution) |
| Filter Type | VENTA standard 1-ply filter |
| Filter Lifetime | approx. 1 year (24/7 operation) |
| Sensors | PM2.5 |
| Speed Levels | 5 + Auto + Turbo + Sleep |
| WiFi Connectivity | 2.4 GHz (802.11 b/g/n) |
| App Control | Smart Life (iOS 11+ / Android 6+) |
| Compatible Voice Assistant | Google Assistant, Amazon Alexa |
| Display | Interactive Touchscreen |
| Air Quality Indicator | Colors (green, yellow, orange, red) |
| LED Strip | Multicolor with brightness adjustment |
| Filter Maintenance | Vacuum every 4 weeks (SERVICE indicator) |
Frequently Asked Questions - Aerostyle Compact AP735 Venta
User questions about Aerostyle Compact AP735 Venta
0 question about this device. Answer the ones you know or ask your own.
Ask a new question about this device
Download the instructions for your Air purifier in PDF format for free! Find your manual Aerostyle Compact AP735 - Venta and take your electronic device back in hand. On this page are published all the documents necessary for the use of your device. Aerostyle Compact AP735 by Venta.
USER MANUAL Aerostyle Compact AP735 Venta
VIELEN DANK!
ÜBERSICHT
2
3
4
5
6
7
DISPLAY
2
3
4
3 Sec.
Service
1
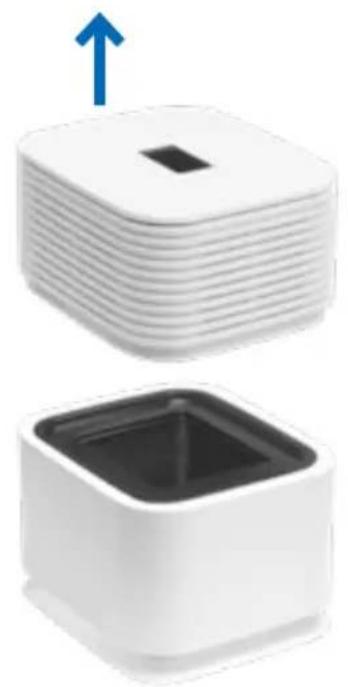
2
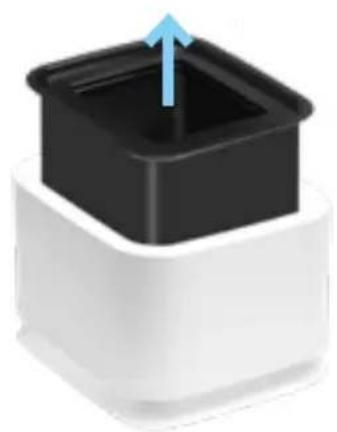
3
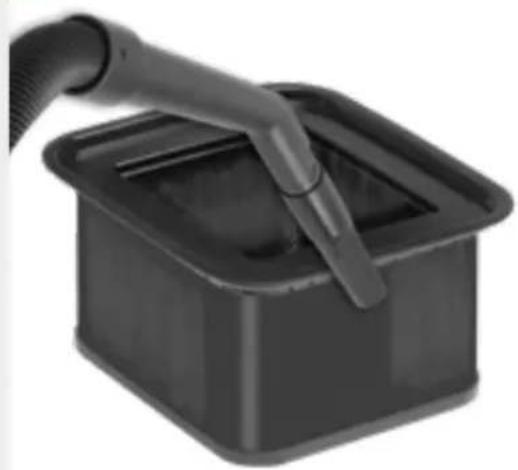
4
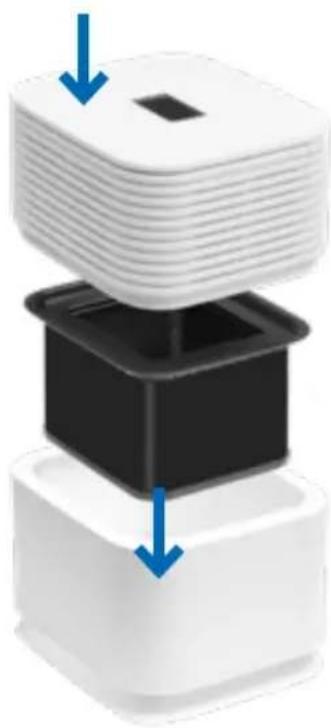
5
3 Sec.
We are convinced that this VENTA model will exceed your expectations and we hope you will enjoy it.
Please register your VENTA unit: www.venta-air.com
DE



DEAR CUSTOMER,
The powerful AeroStyle Compact Air Purifier reduces fine dust, viruses and formaldehyde gases in indoor air. With its AirFlow 360 technology, it provides highly efficient air purification performance with even distribution of purified air without annoying drafts. At the same time, HEPA Performance technology ensures consistent and high air purification efficiency.
SYMBOLS USED

Caution: Danger to the integrity of health and product.

Read the operating instructions carefully and follow them!

The device complies with the CE, UKCA and FCC markings.

This device complies with protection class II.
TABLE OF CONTENTS
Safety Instructions 21
Intended use 22
Warranty
Scope of delivery 23
Description
Putting into operation 24
Display
Operation
Wifi / Hotspot 29
Configuration & smart life app 30
Cleaning / Maintenance 31
23 Technical data 34
Cleaning the device 34
23 Accessories
Data protection 35
26 Disposal
Disposal 35
27 What if...?
What if...? 36

SAFETY INSTRUCTIONS
Please read this operating manual in its entirety, keep it for later reference and note all safety instructions as well as instructions for the proper use of the appliance. You can find the latest version of the operating manual on our website www.venta-air.com
- This appliance is suitable for use by children over the age of 8 years and people with restricted physical, sensory, or mental capacities or lack of experience and knowledge, providing they are supervised or have received instructions on the safe use of the appliance and understand the existing hazards.
- Read the operating instructions completely before putting the appliance into operation and keep them for later reference.
• The appliance is not a toy for children. - Cleaning and user maintenance may not be performed by children under the age of 8 years or without supervision.
- Keep the appliance and its power cable out of the reach of children under the age of 8 years.
- Improper use can damage the appliance and cause physical injuries.
- Plug the appliance into suitable power outlets only – the mains voltage must correspond to the nameplate data on the appliance.
- Never use the appliance if it has a damaged power cable.
- Disconnect the power supply before every cleaning or maintenance operation and before transportation of the appliance.
- Never use the appliance if it has been dropped or damaged in any other way.
- Electrical appliances should only be repaired by professional specialists. Amateur repairs could result in considerable danger to the user.
- Do not sit on the appliance and do not place any objects on it.
- Do not put any foreign objects into the appliance.
- Never immerse the appliance in water or any other liquid.
- Never disconnect the power supply by pulling on the cable or with wet hands.
- The appliance should only be operated when it is completely assembled.
- Place the appliance on a stable surface which is flat and dry.
- Set up the appliance so that it cannot be knocked over, and so that no one can trip over it or the cable.
- Leave at least the following distances from other objects and walls:
- At the front and above: 50 cm
- At the left and right: 20 cm
- At the back: 5 cm
• Maximum installation altitude: 2000 meters
- Never cover or block the vents to prevent overheating/damage to the appliance.
- Unplug the power supply unit from the socket when you are not using the appliance
INTENDED USE
This Venta appliance is a domestic appliance for improving indoor air quality in homes, offices and leisure facilities. The appliance is not suitable for outdoor areas. Any other use or modification of the appliance is considered to be improper use. Venta is not liable for damage or injuries resulting from improper use.
Using the appliance for something other than the intended purpose can endanger health and lives. This includes use under the following conditions:
- in rooms or locations where there is risk of explosion and/or where there is an aggressive atmosphere.
- in rooms where there is a high concentration of solvents.
- in the vicinity of swimming pools or other wet areas.
WARRANTY
Due to its high quality, Venta-Luftwäscher GmbH warrants that this product will be free from defects for a period of two years from the date of purchase, provided it is used properly. Should a material or processing defect occur, please contact the VENTA service team or your dealer. VENTA's general warranty conditions also apply: www.venta-air.com
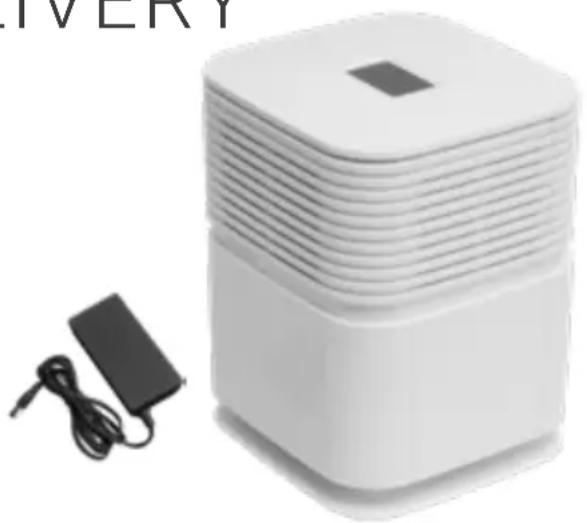
SCOPE OF DELIVERY
1 × Quick start guide
1 × Safety instructions
1 × VENTA Air Purifier
1 × Filter unit (integrated in the device)
1 × Power supply
DESCRIPTION
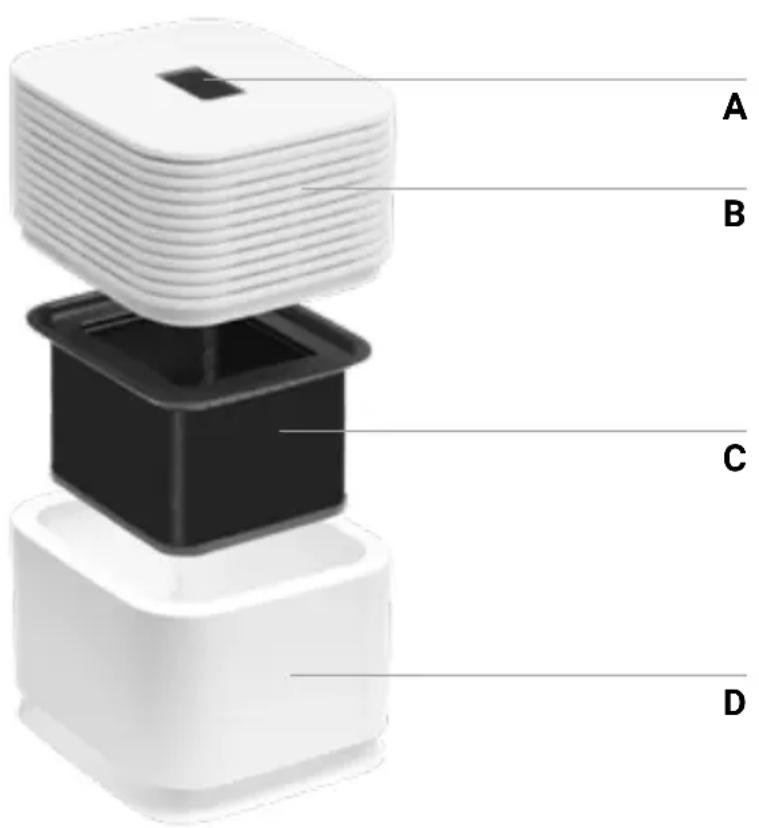
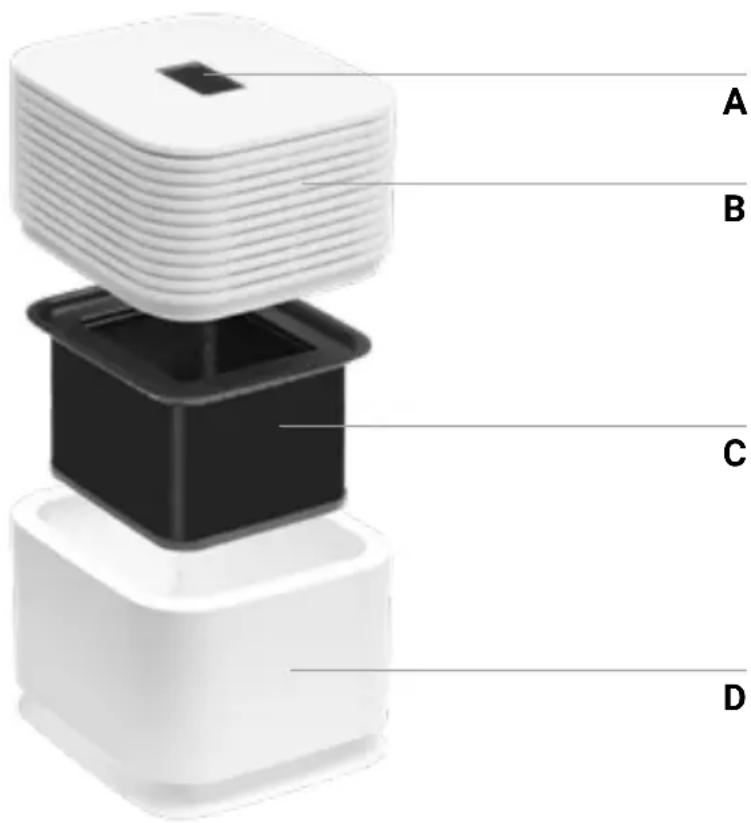
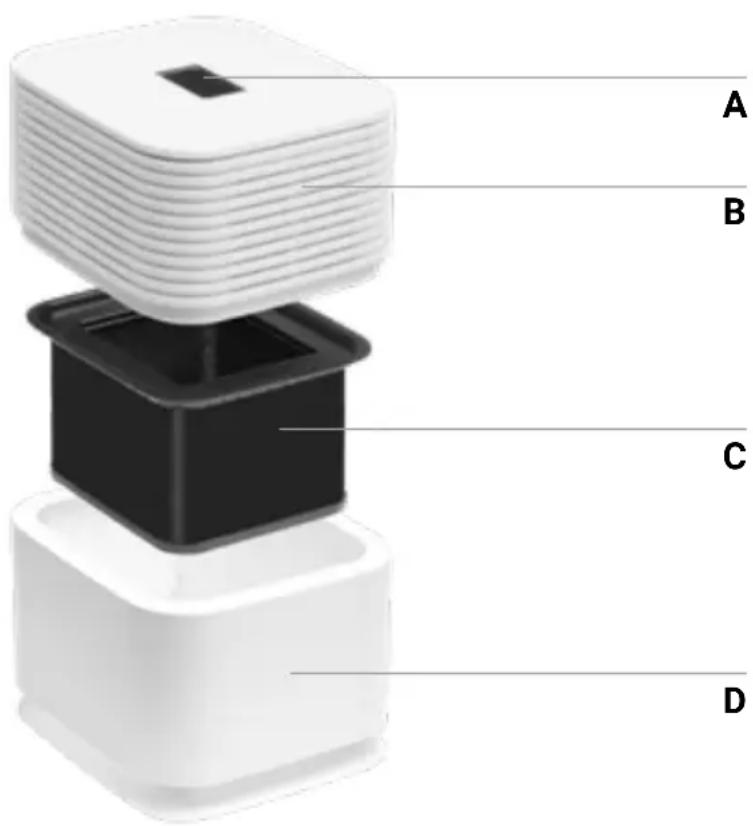
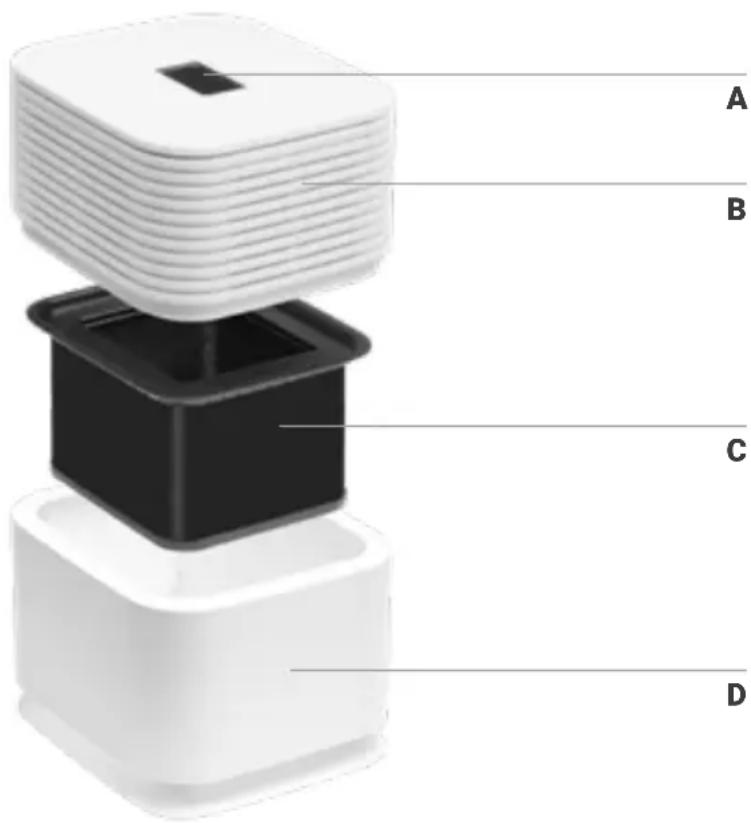
A Display
B Upper part of the unit
C Filter unit
D Lower part of unit
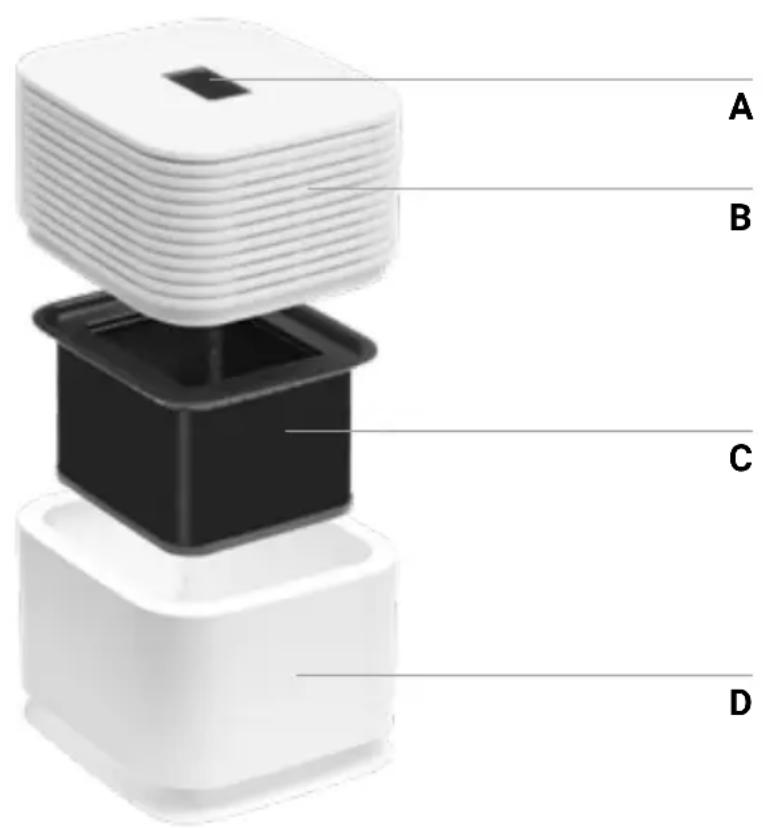
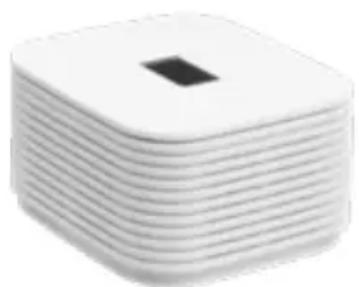
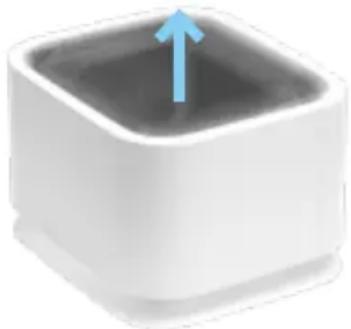
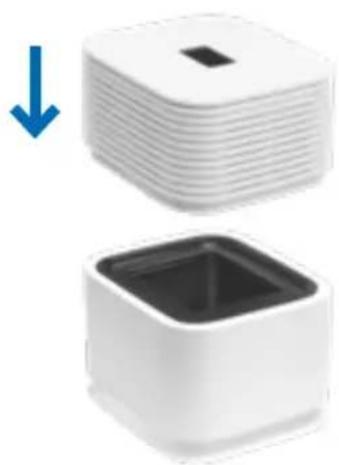
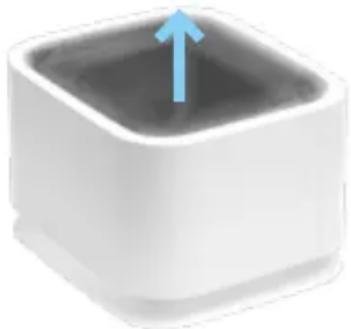
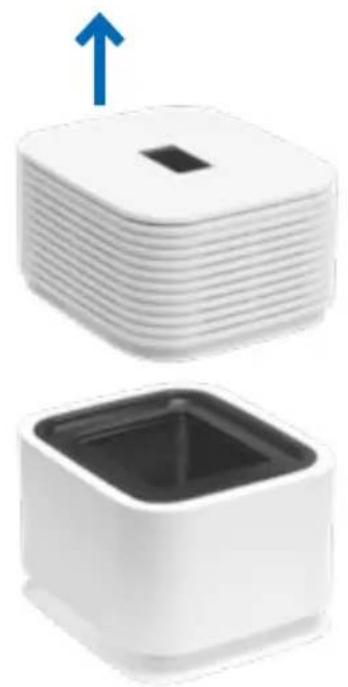
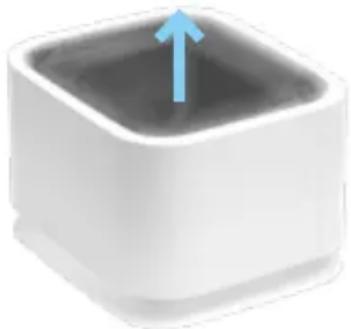
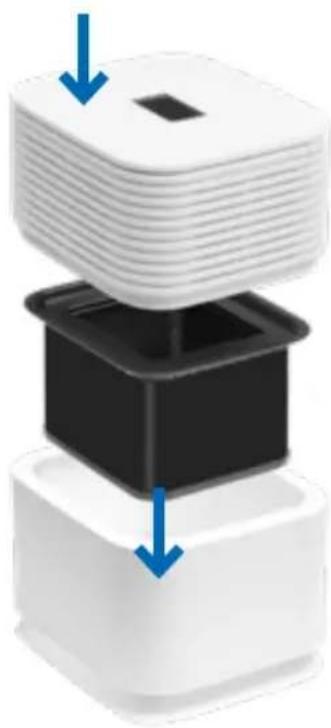
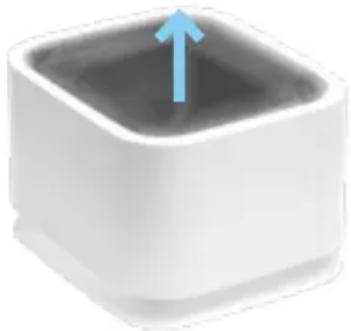
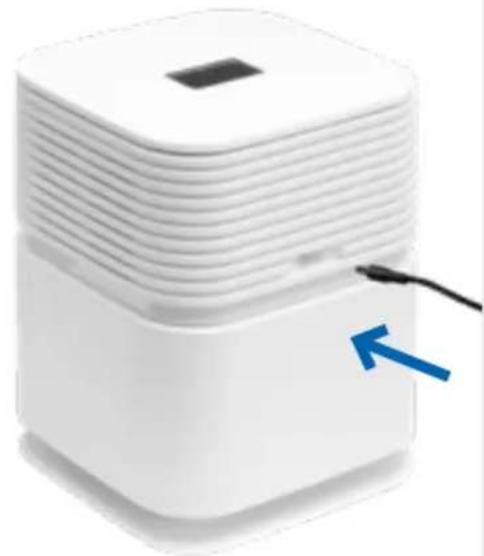
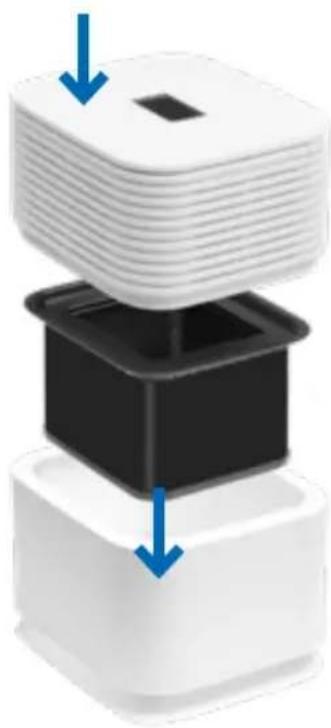
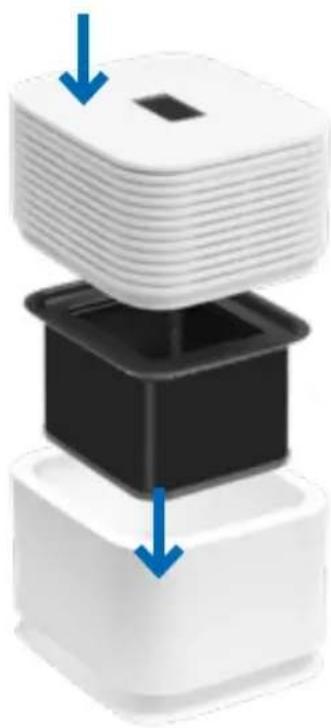
1 Remove the appliance from its packaging and set it up. Remove the upper part of the appliance (B).
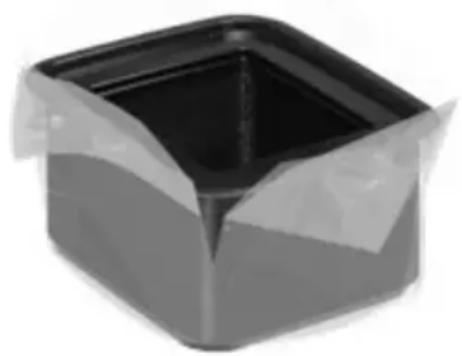
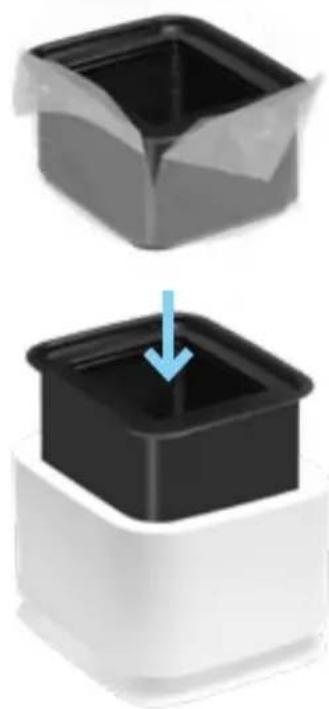
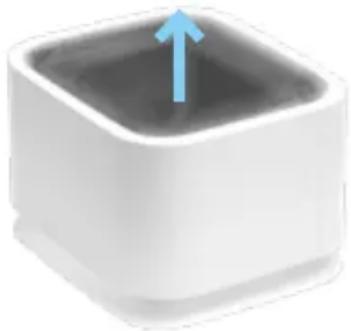
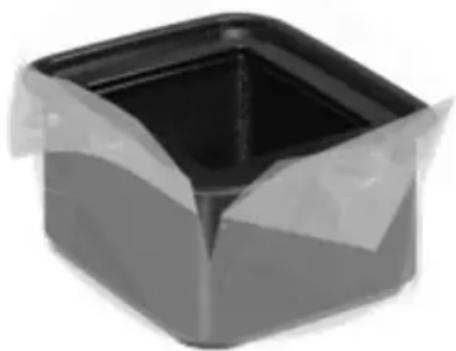
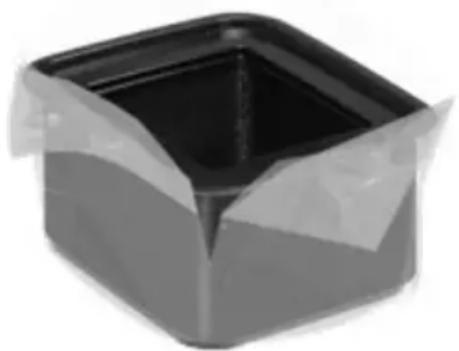
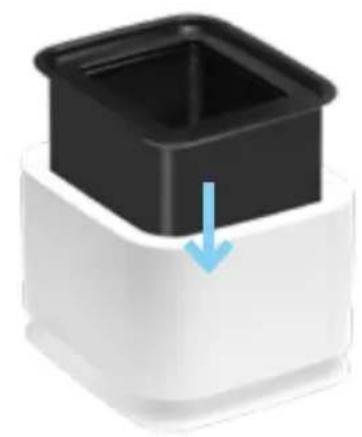
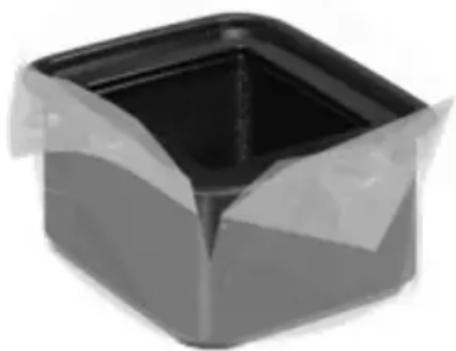
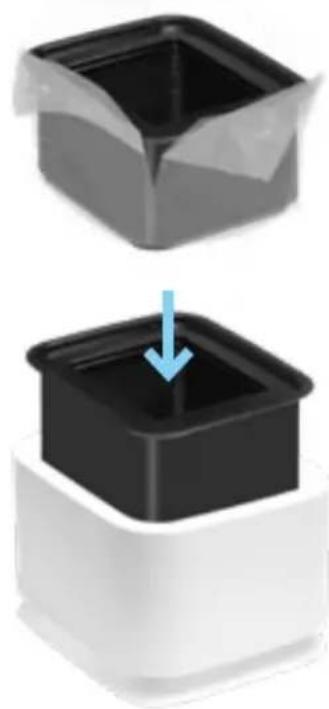
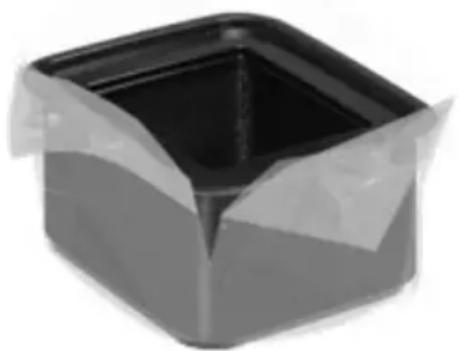
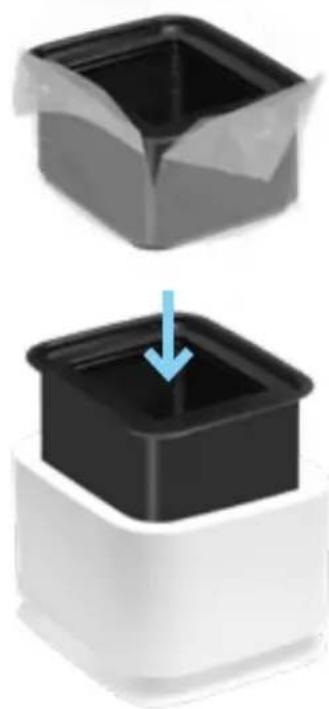
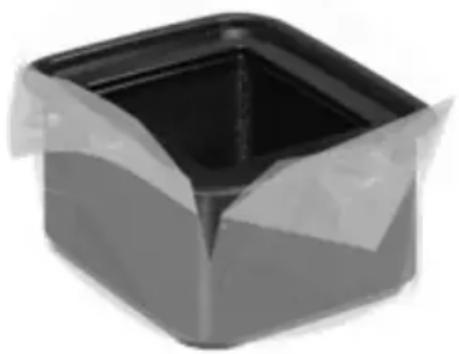
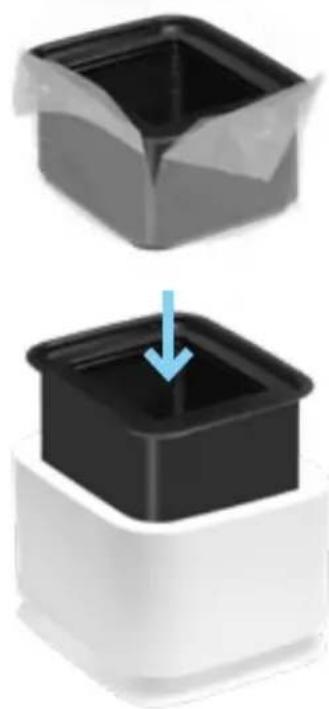
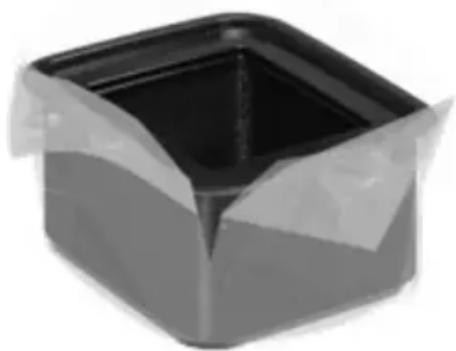
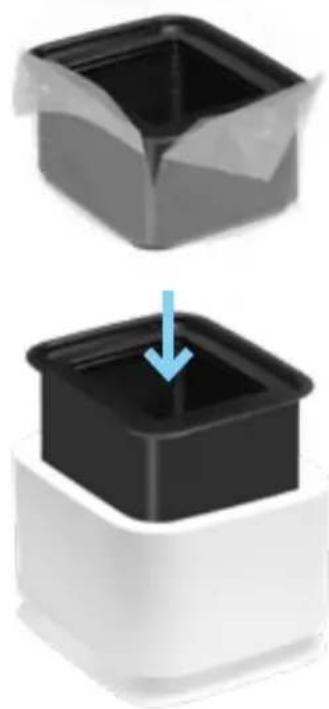
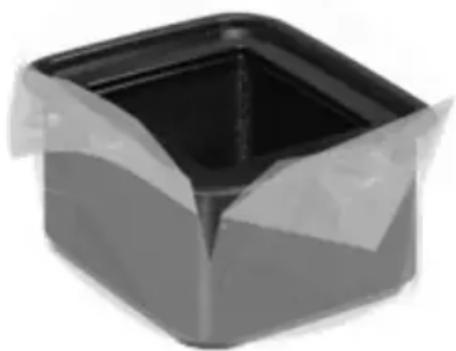
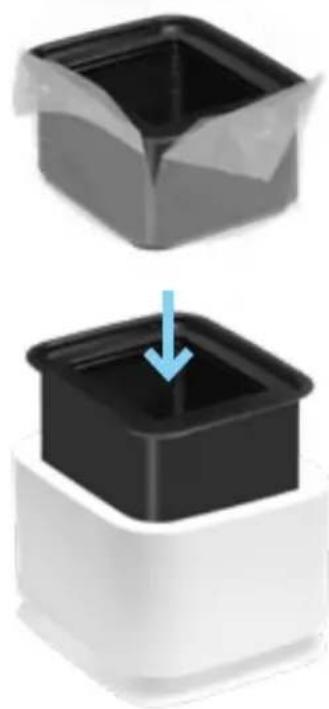
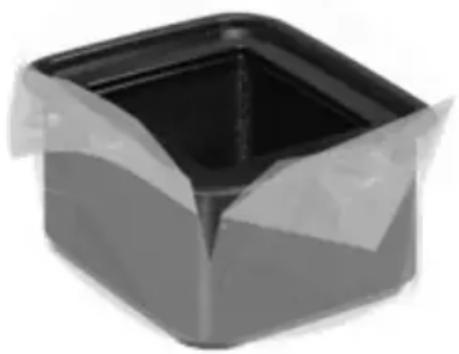
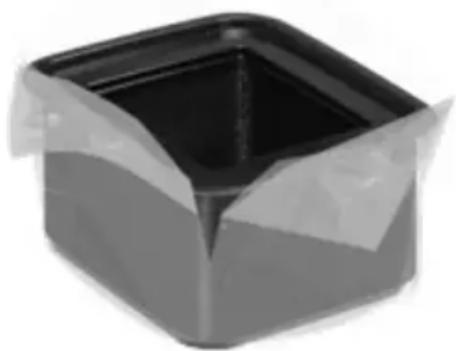
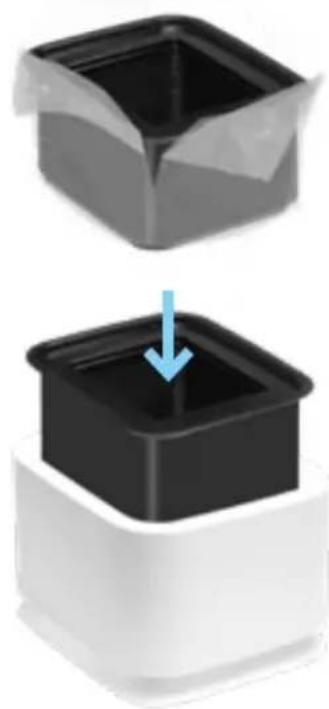
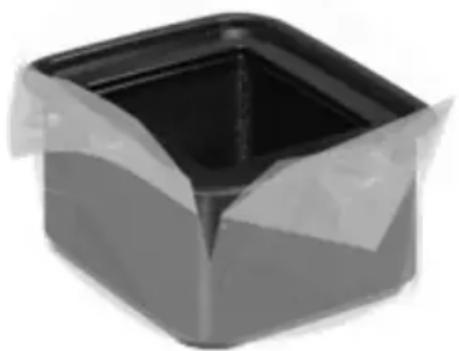
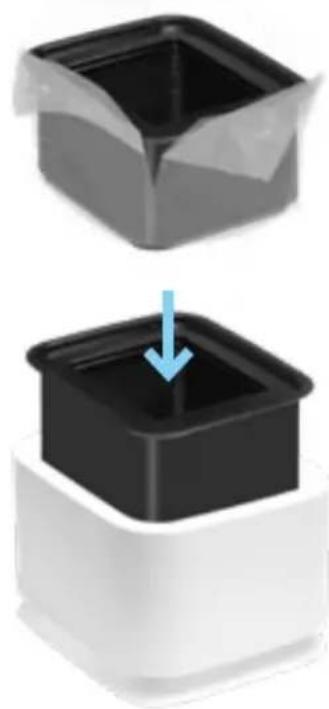
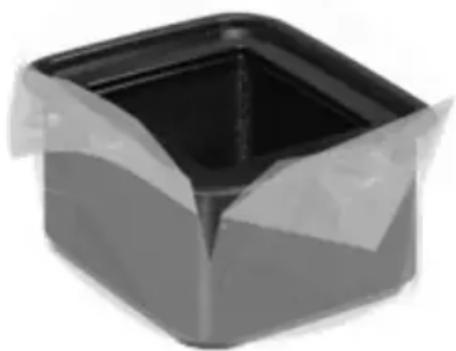
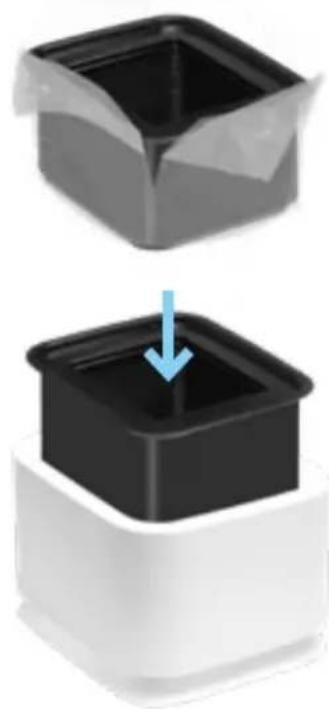
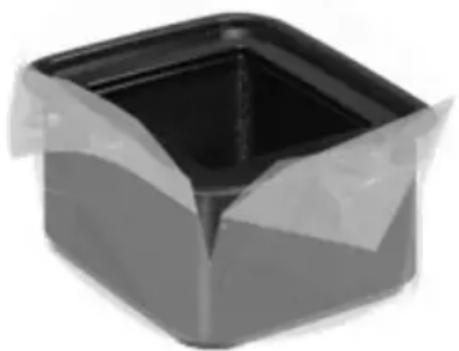
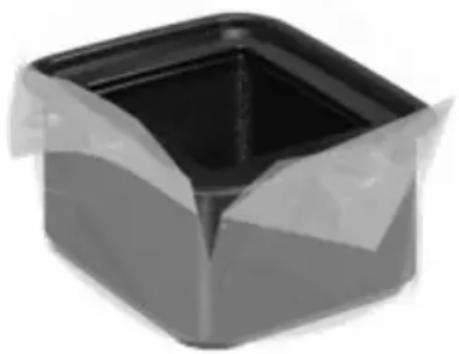
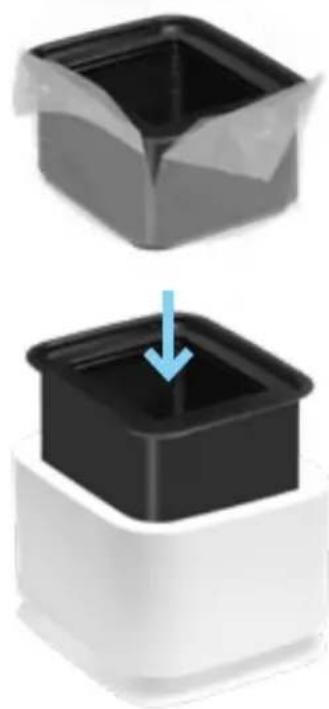
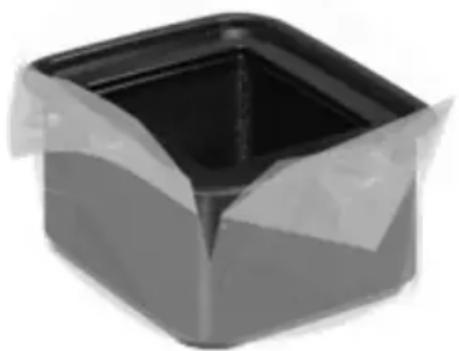
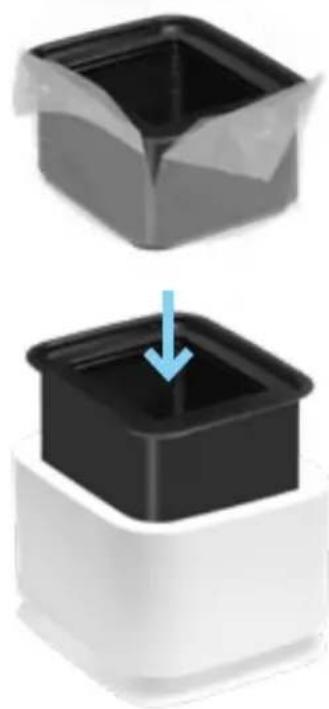
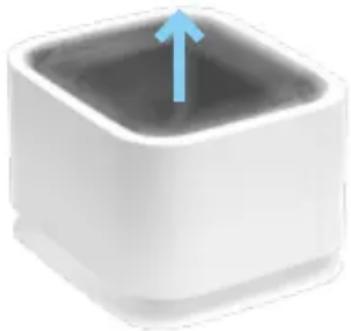
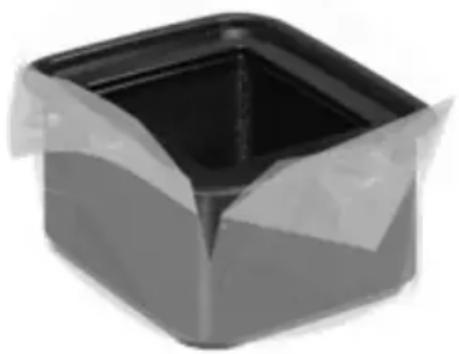
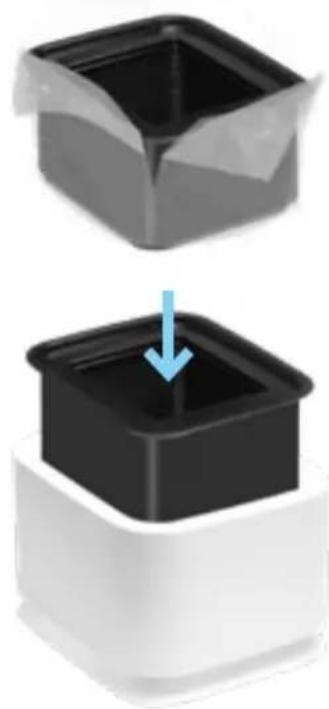
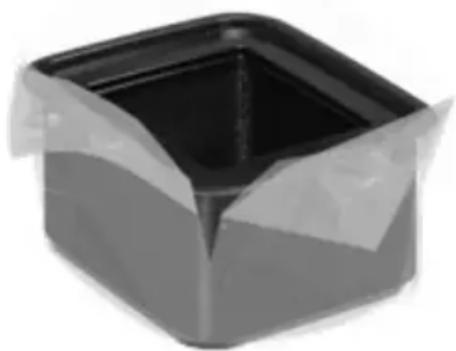
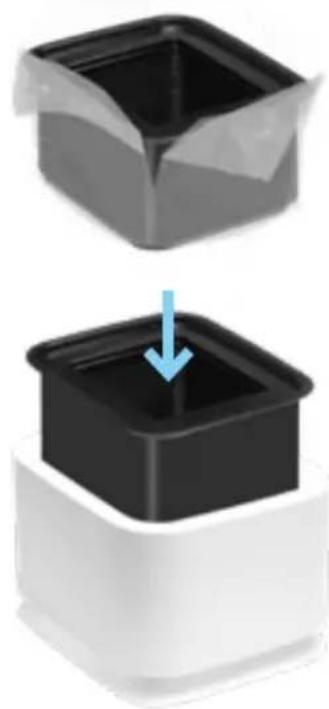
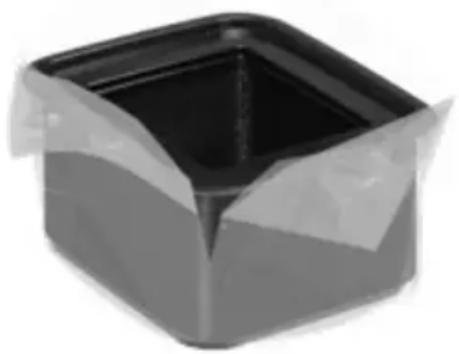
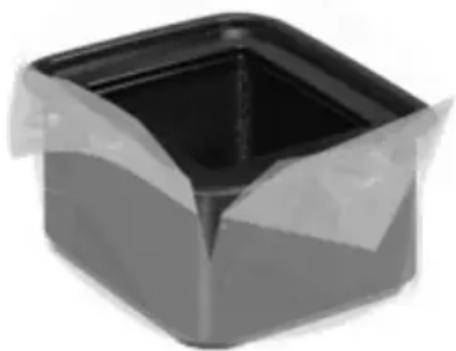
2 Remove the packaged filter unit (C) from the lower part of the appliance (D). Remove the Remove the film from the filter unit.
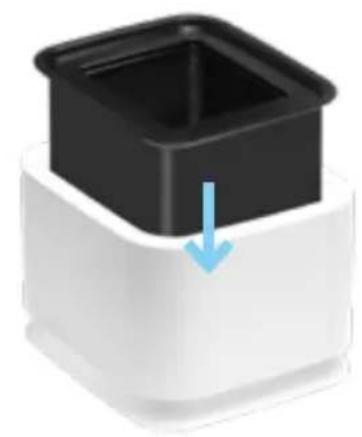
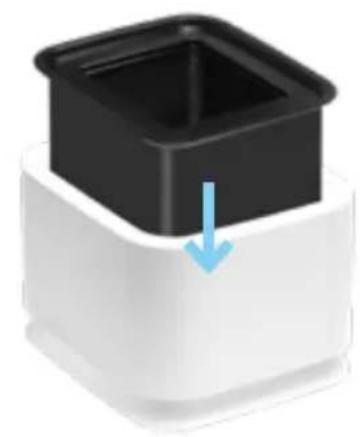
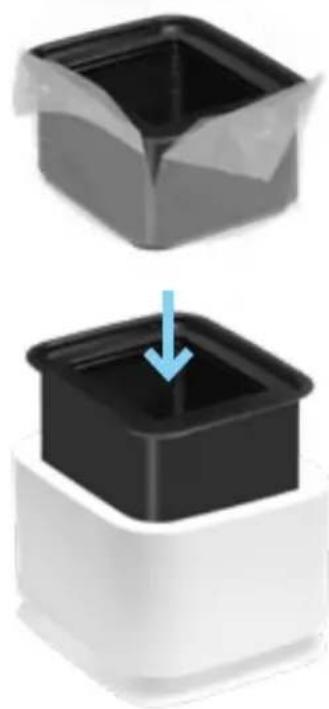
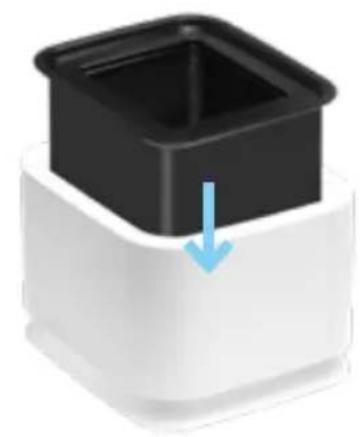
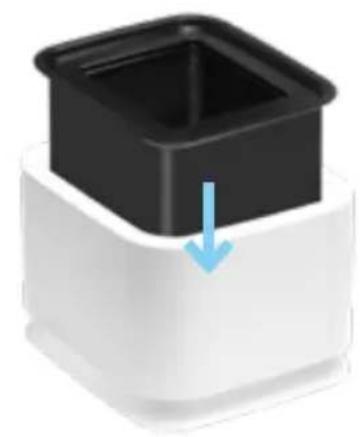
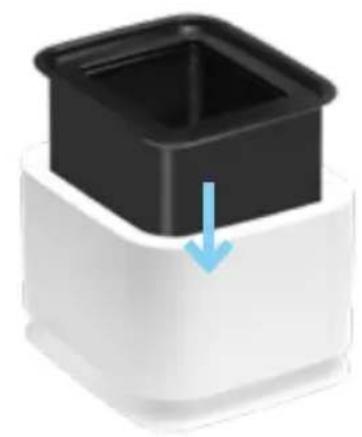
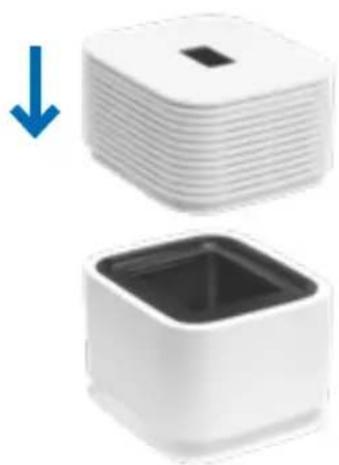
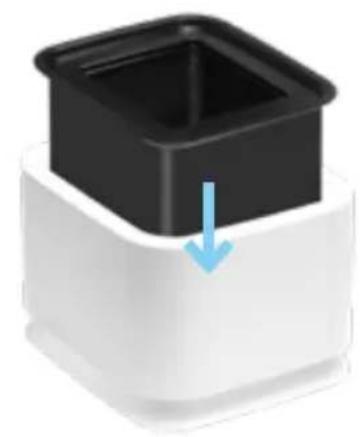
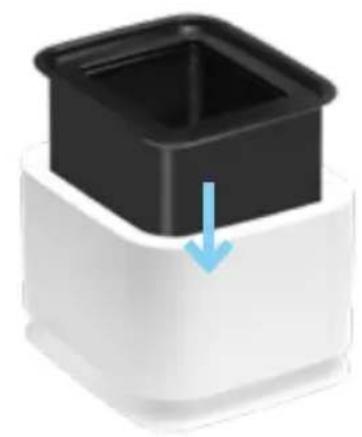
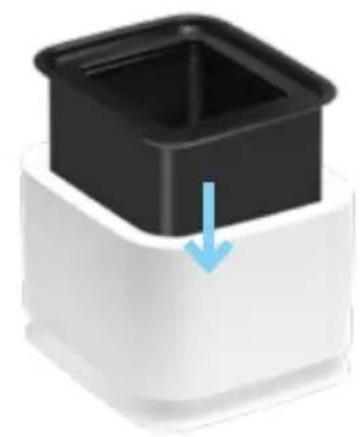
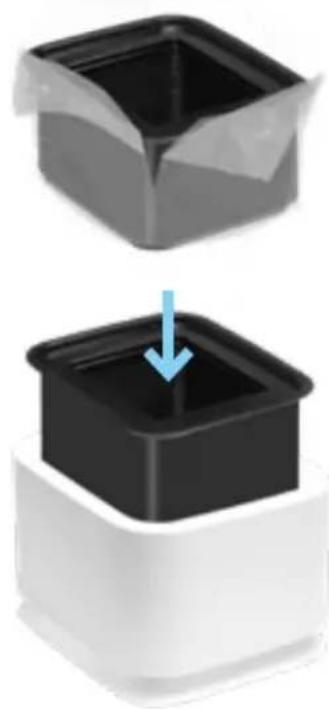
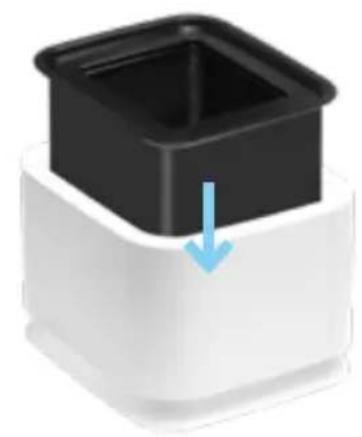
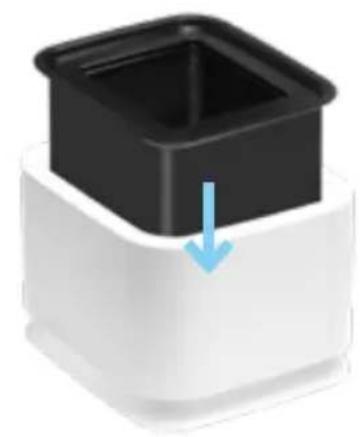
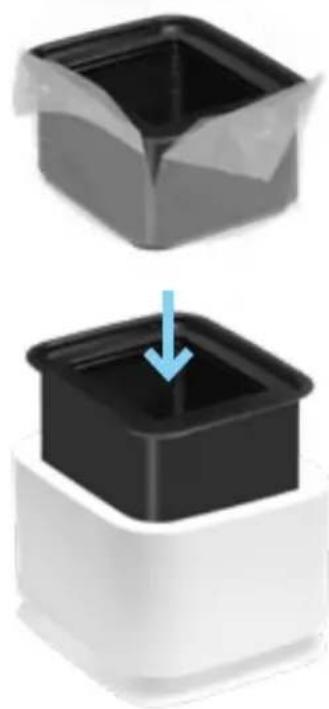
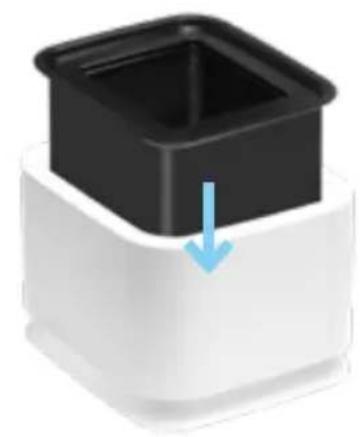
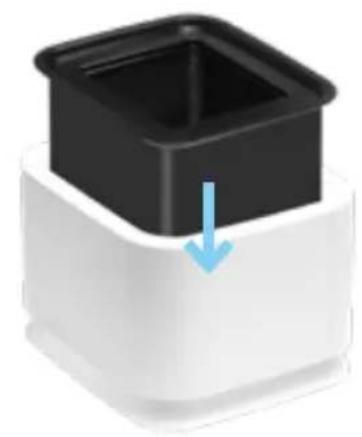
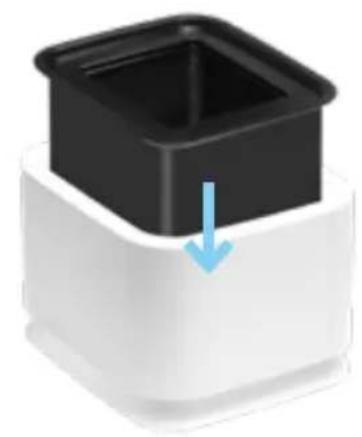
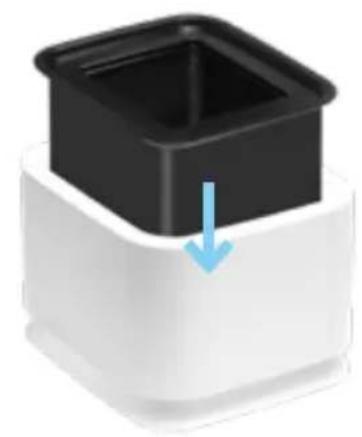
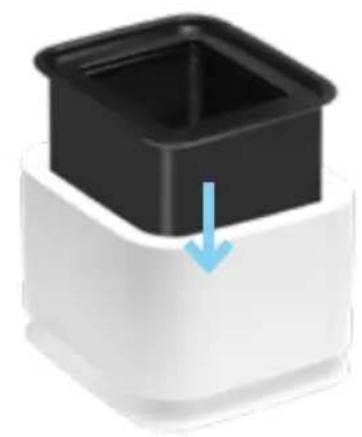
3 Place the filter unit freed from the foil unit (C) into the lower part of the appliance (D).
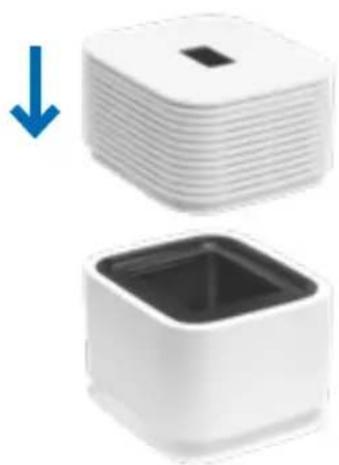
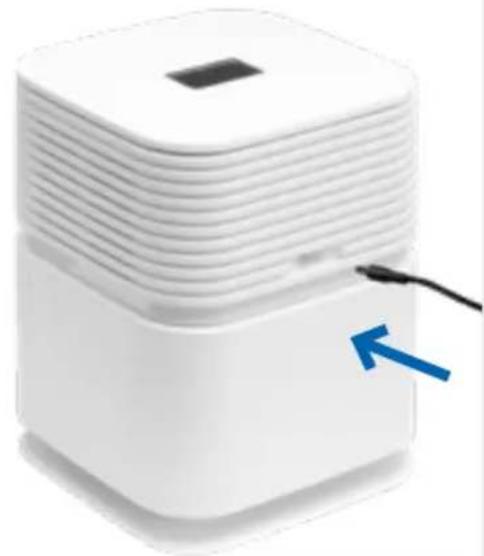
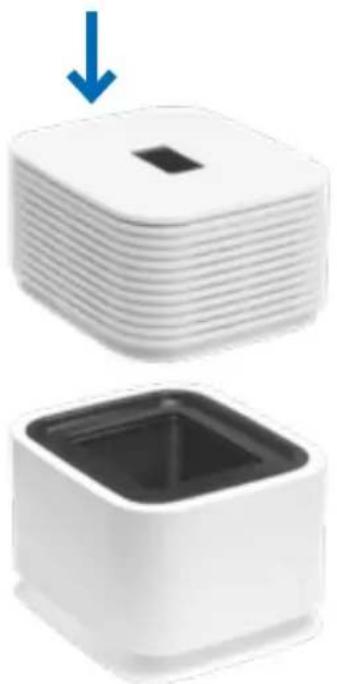
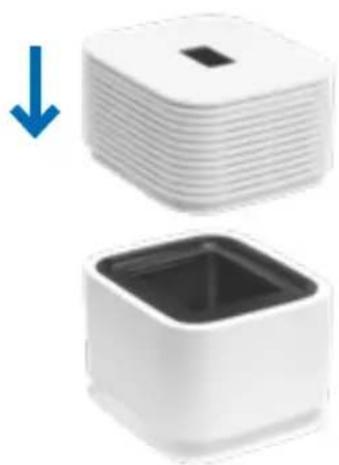
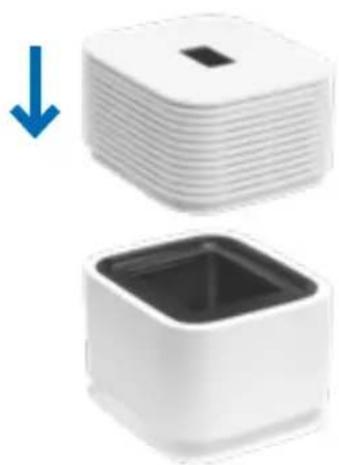
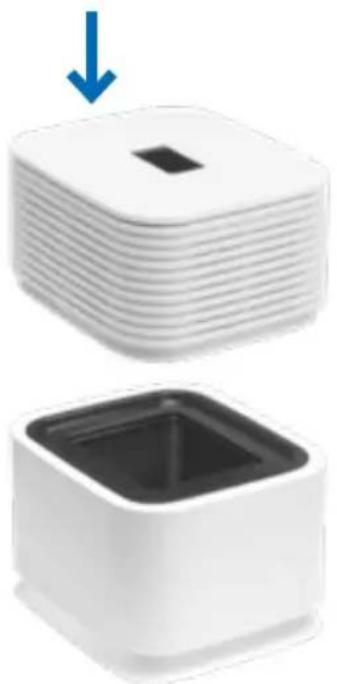
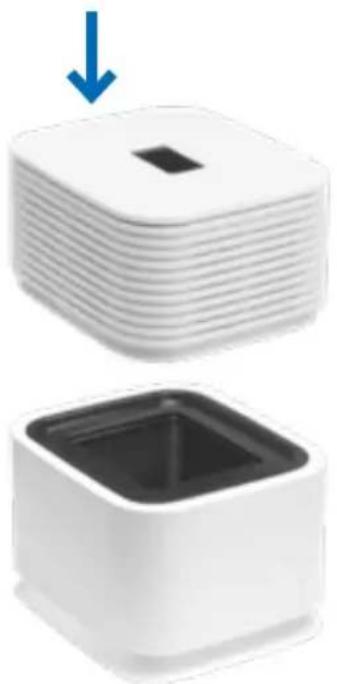
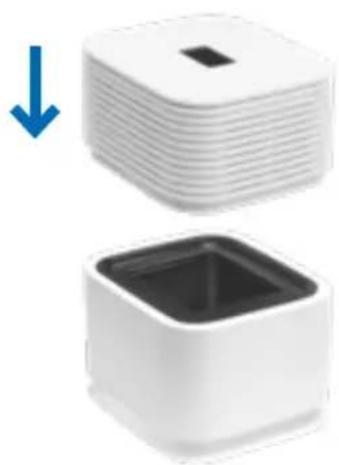
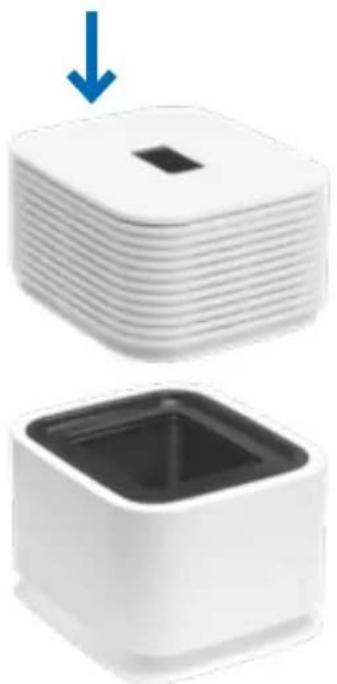
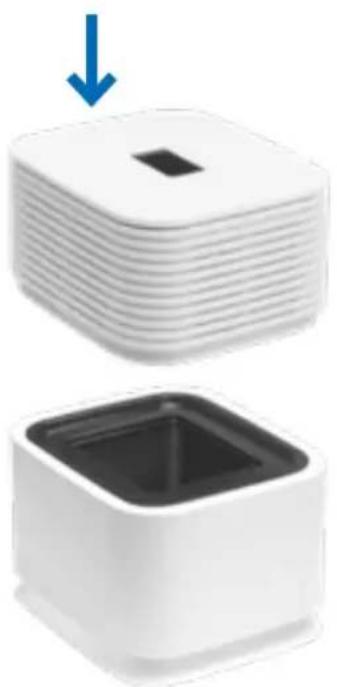
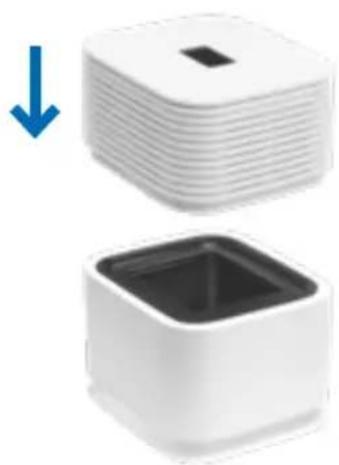
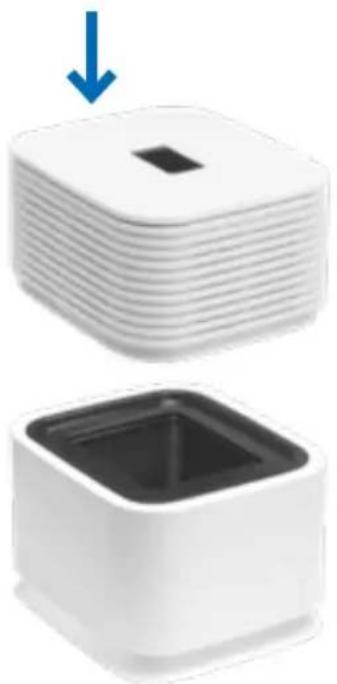
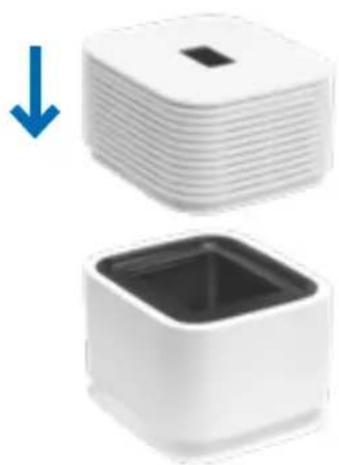
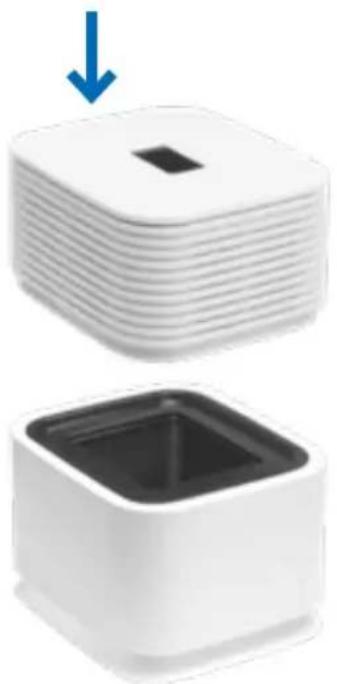
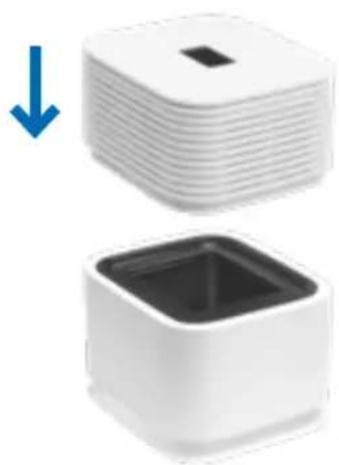
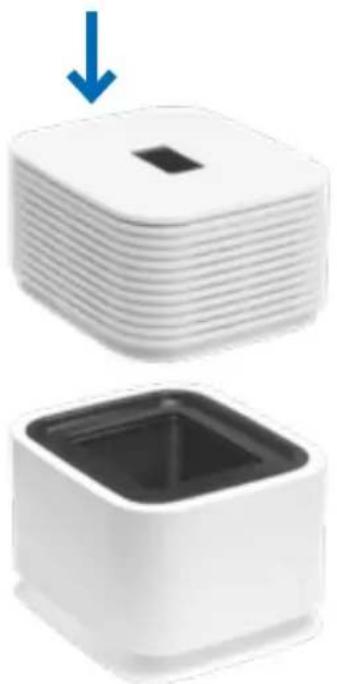
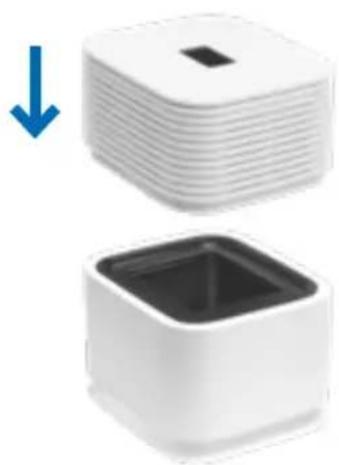
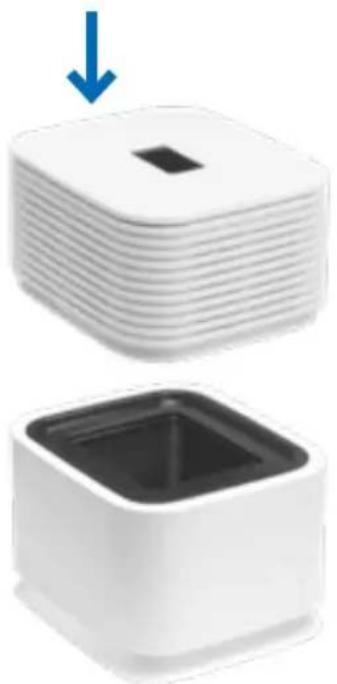
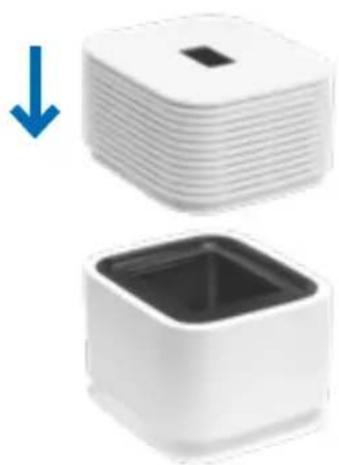
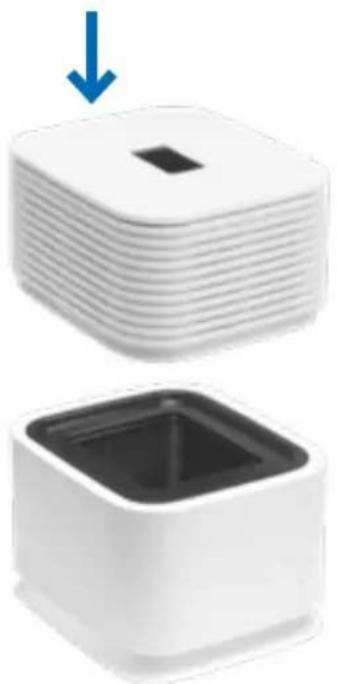
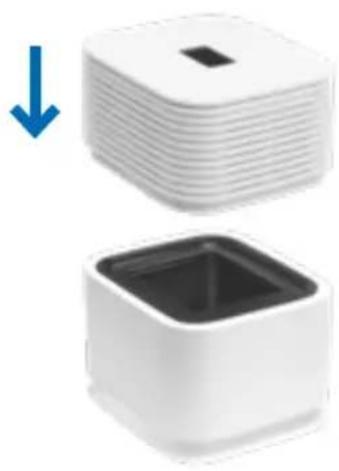
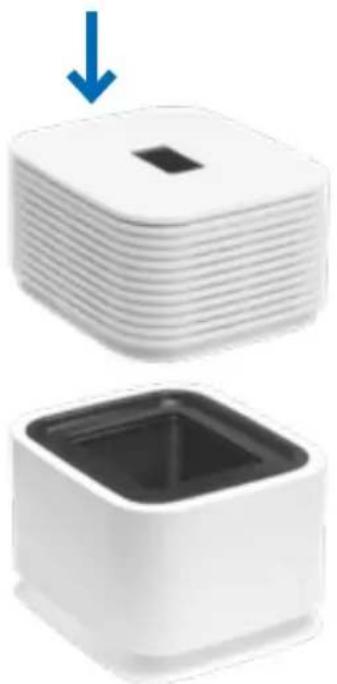
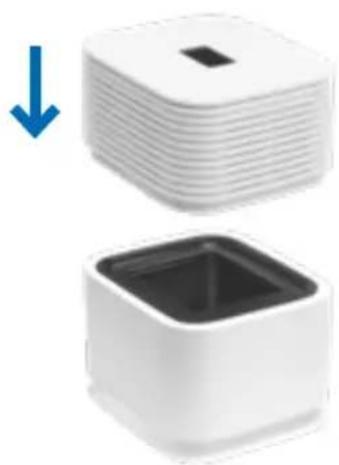
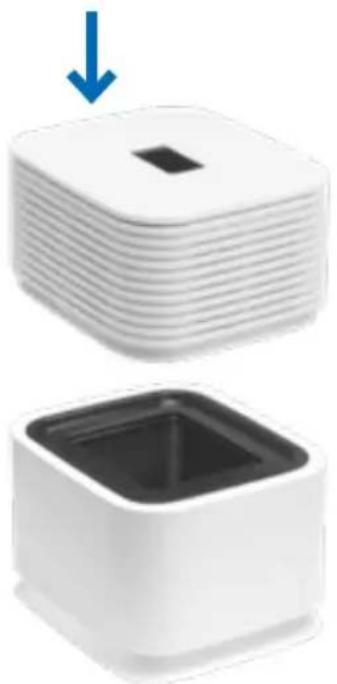
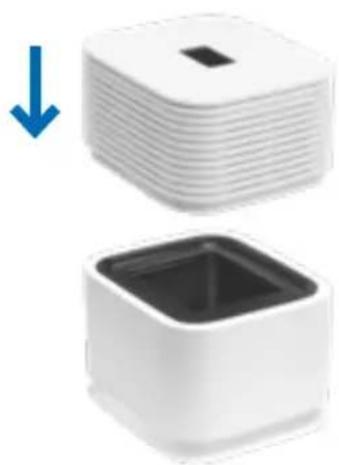
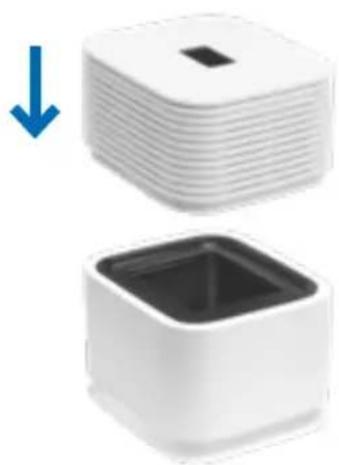
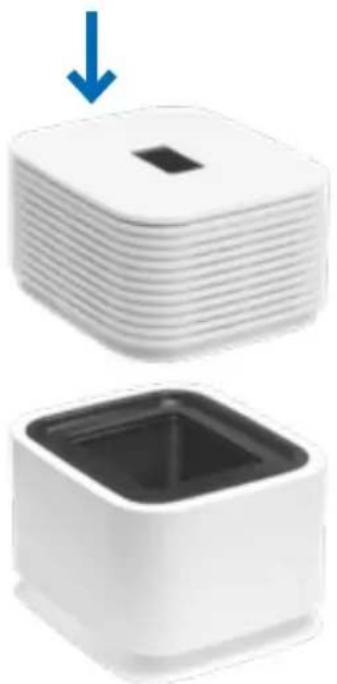
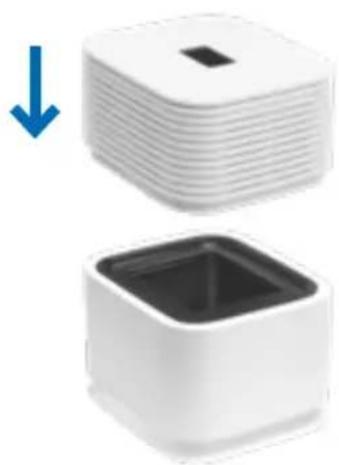
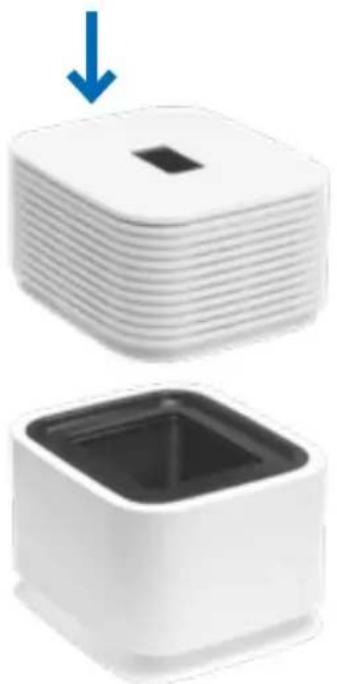
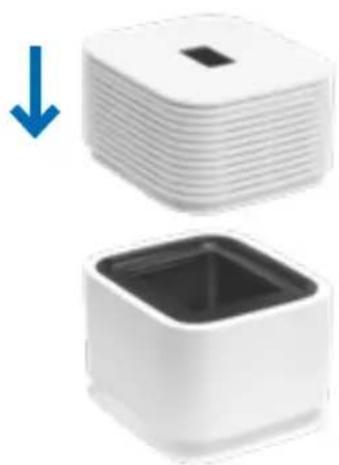
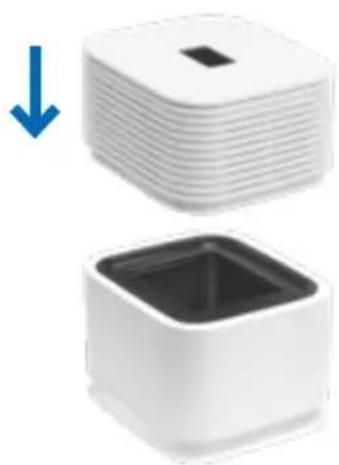
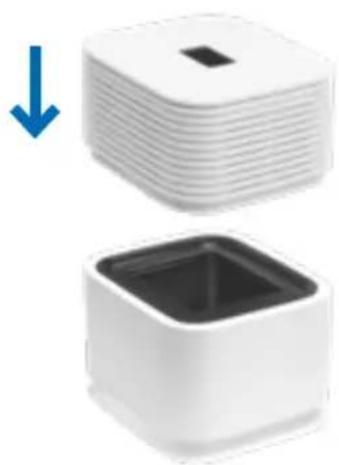
4 Place the upper part of the appliance (B) onto the lower part of the appliance (D).
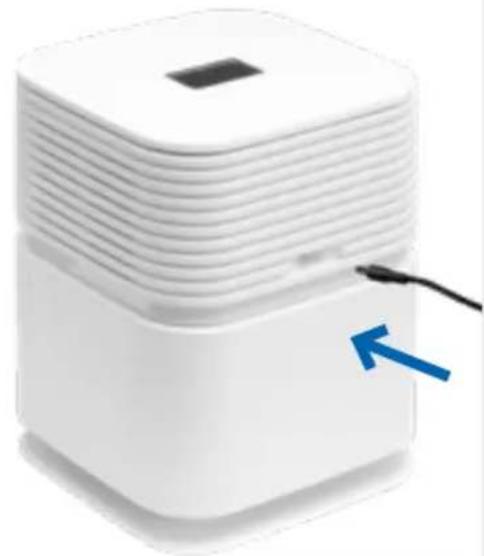
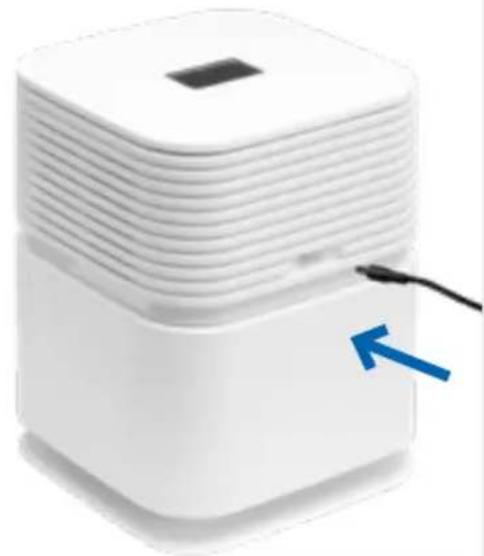
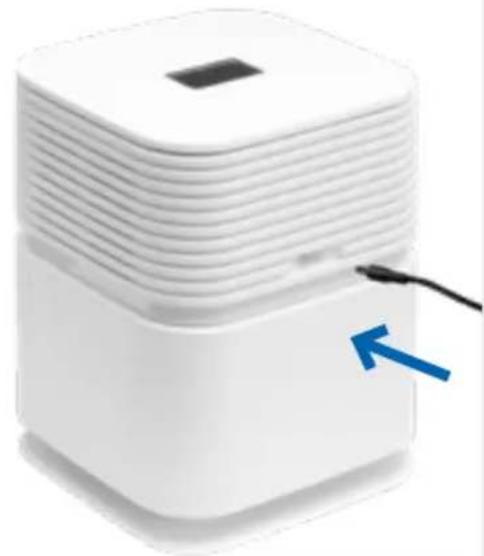
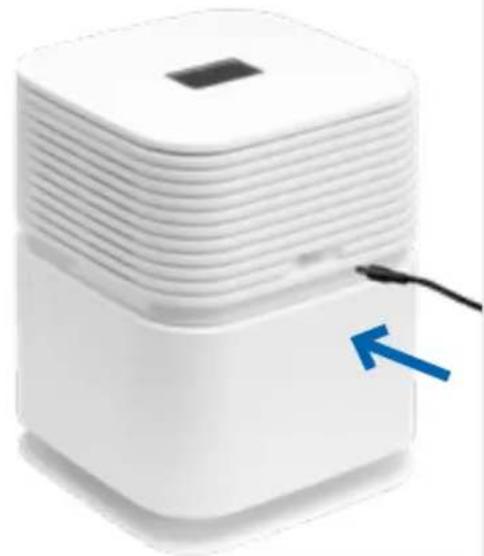
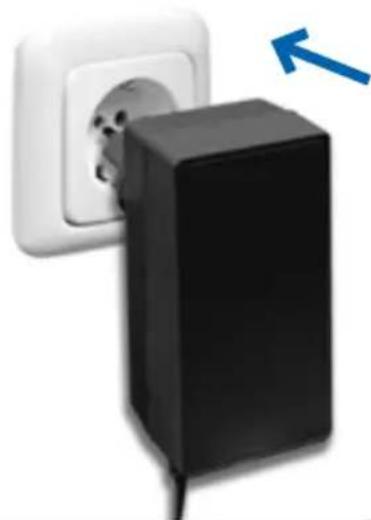
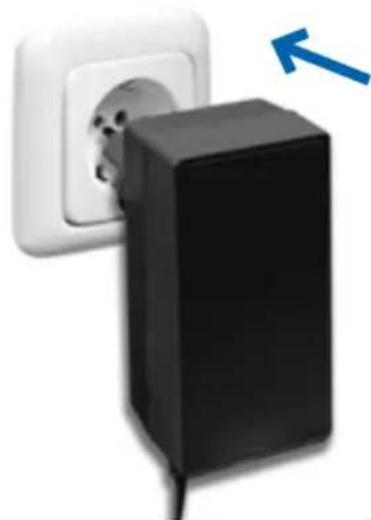
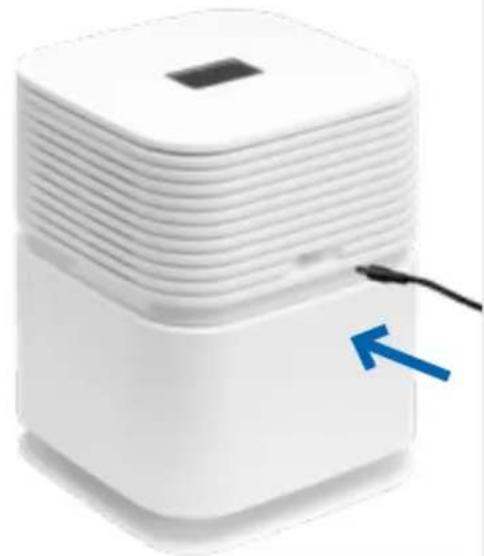
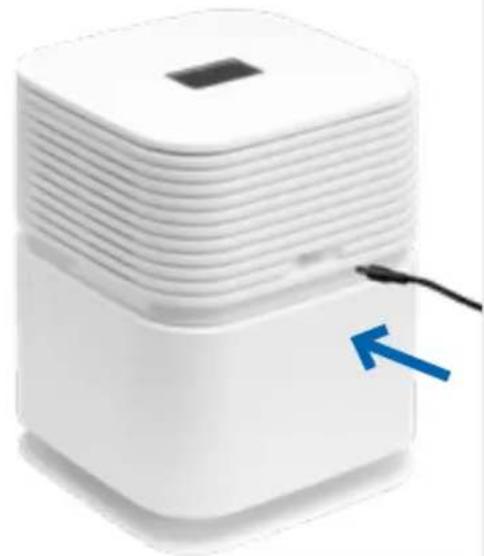
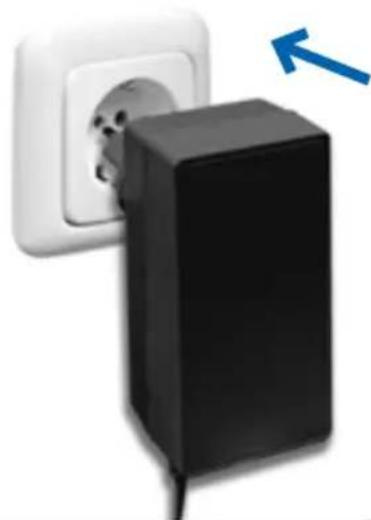
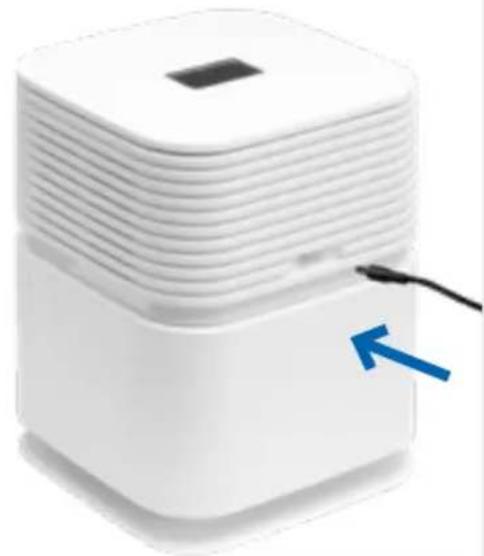
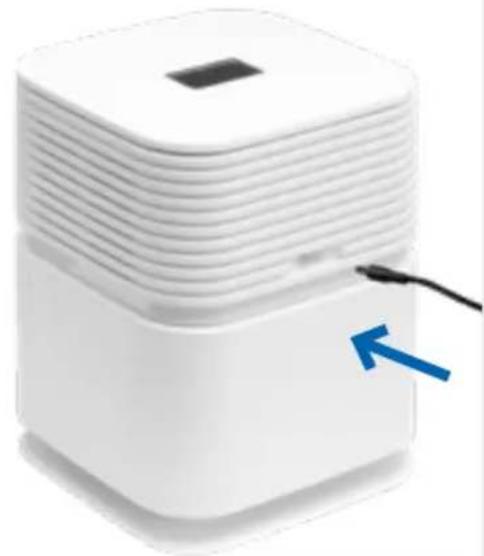
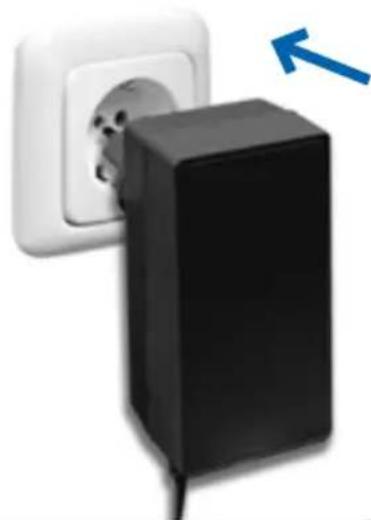
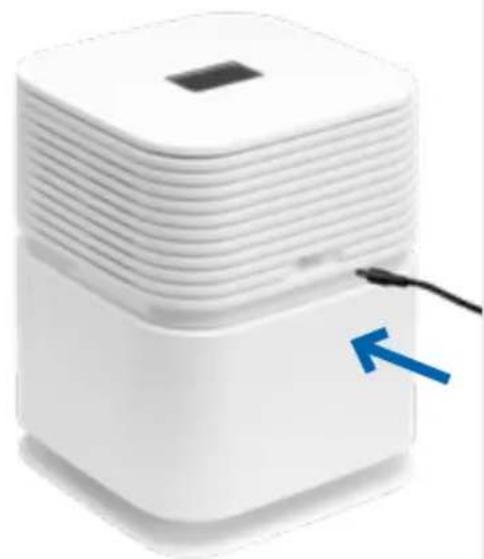
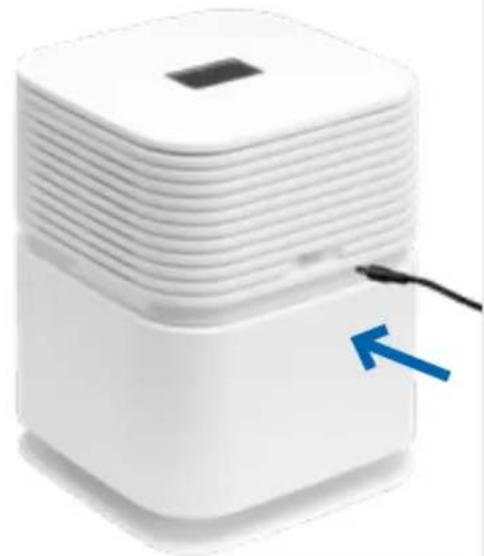
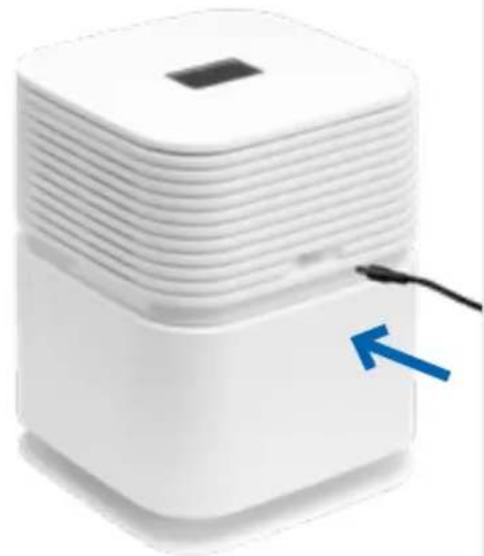
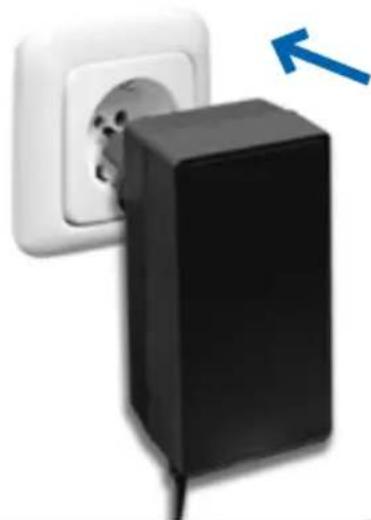
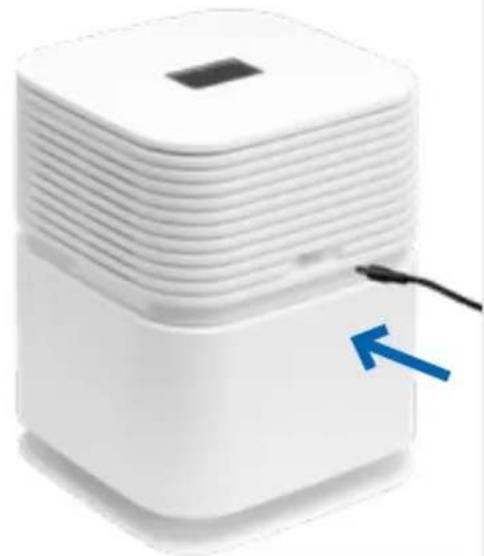
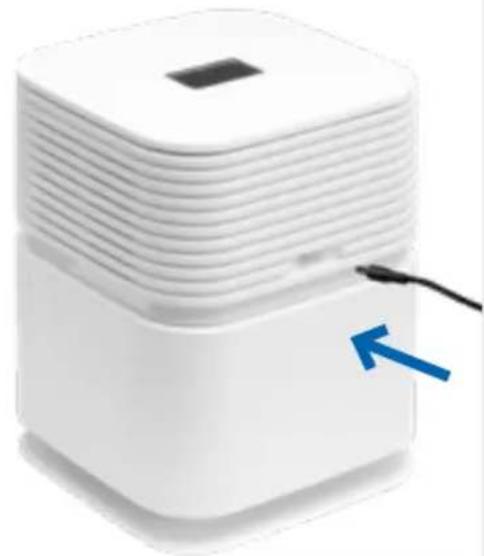
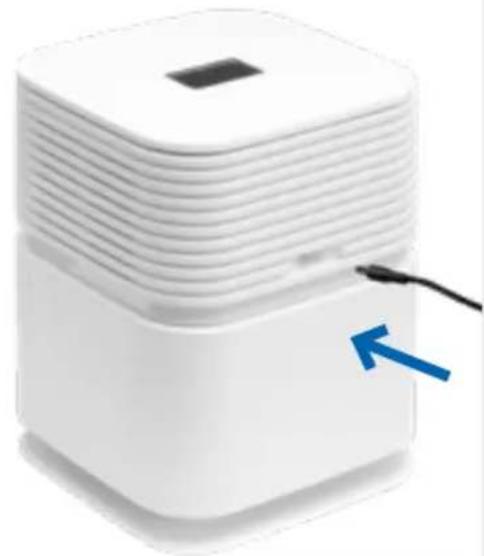
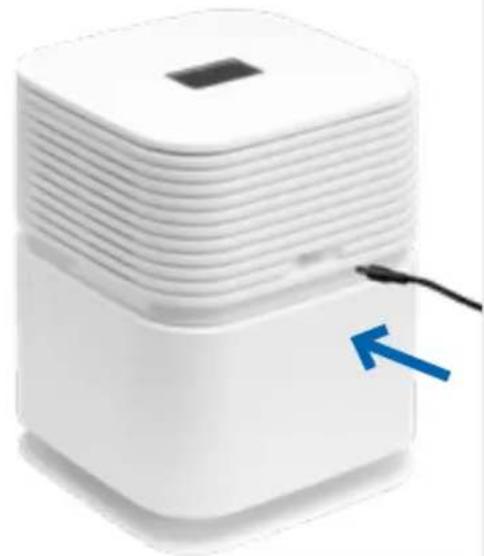
5 Connect the power supply unit to the socket on the back of the upper part of the device (B).
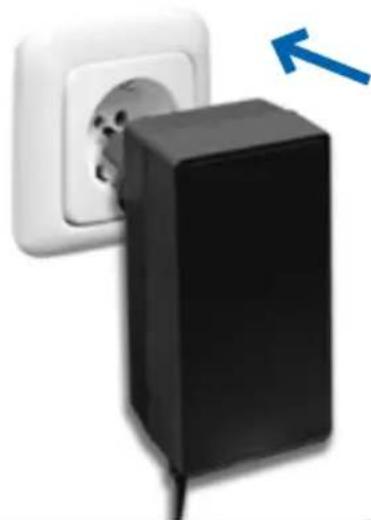
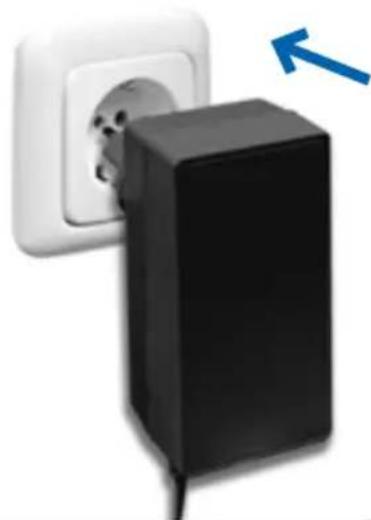
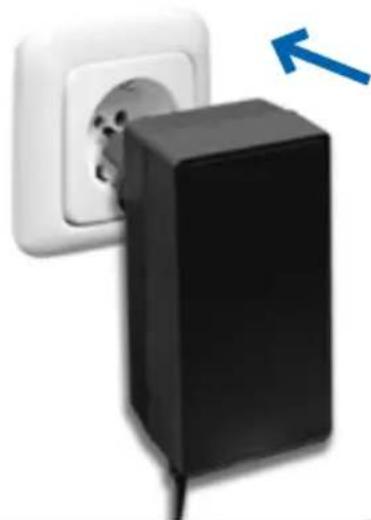
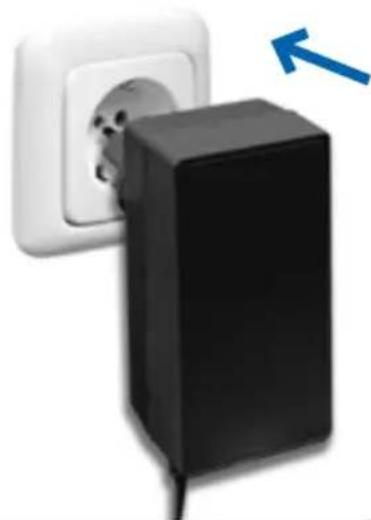
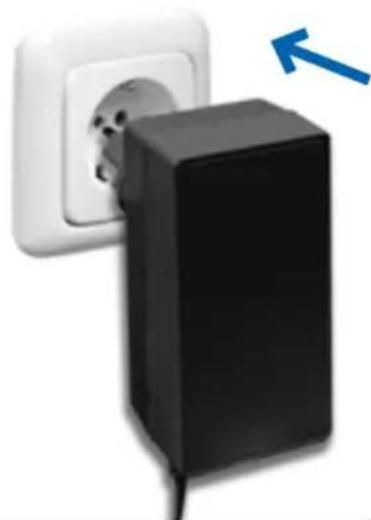
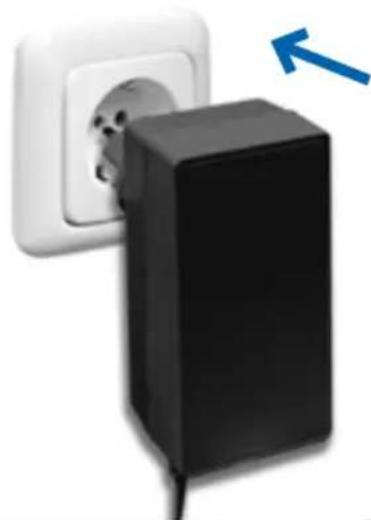
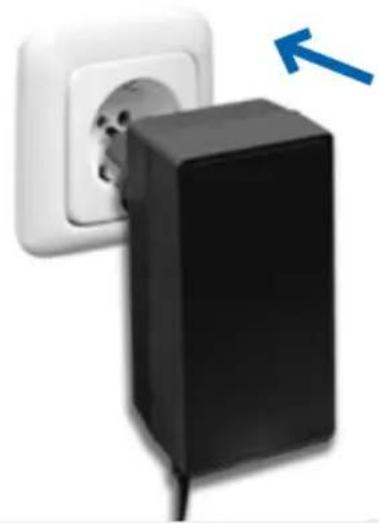
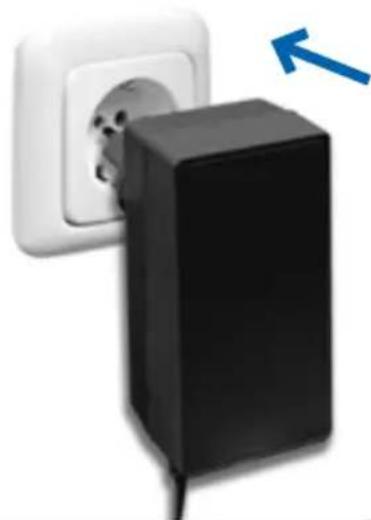
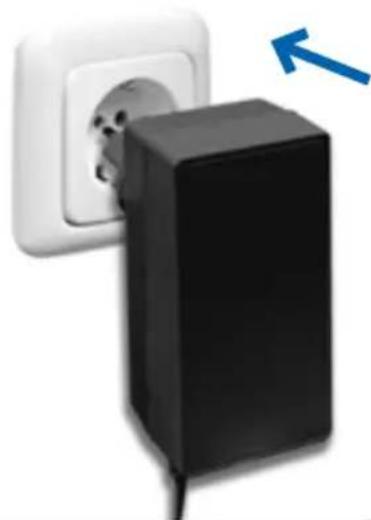
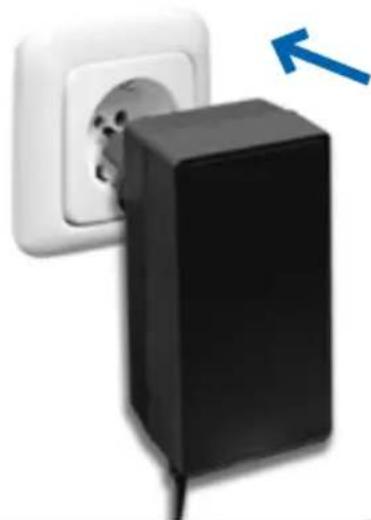
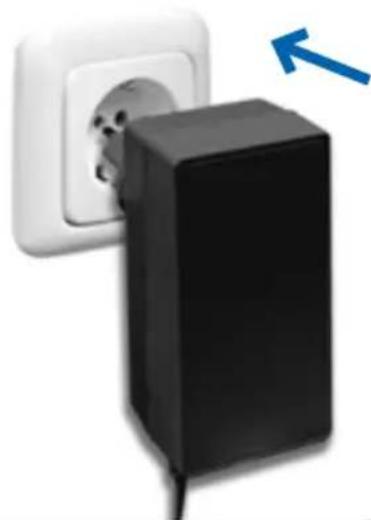
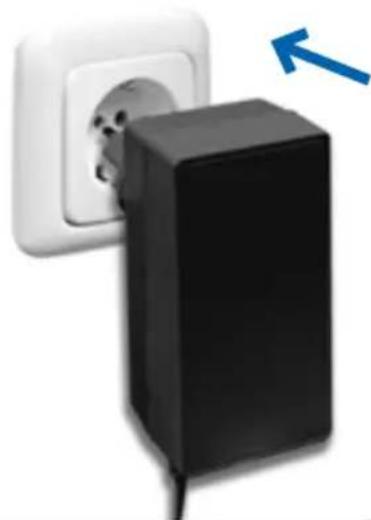
6 Make sure that the power supply complies with the specifications listed in the specifications. Connect the power supply unit to the mains.
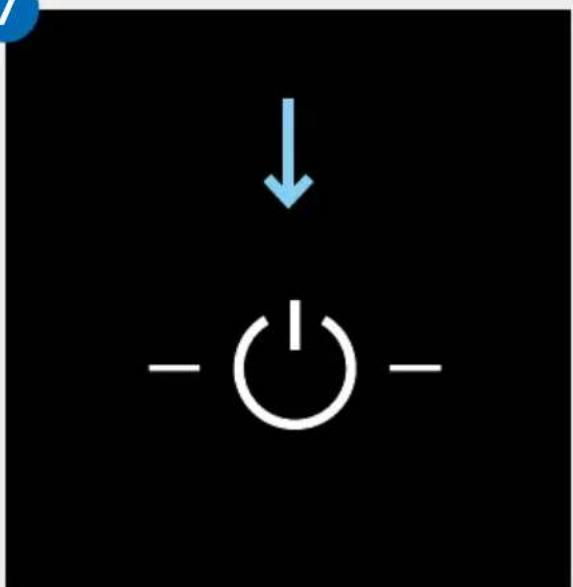
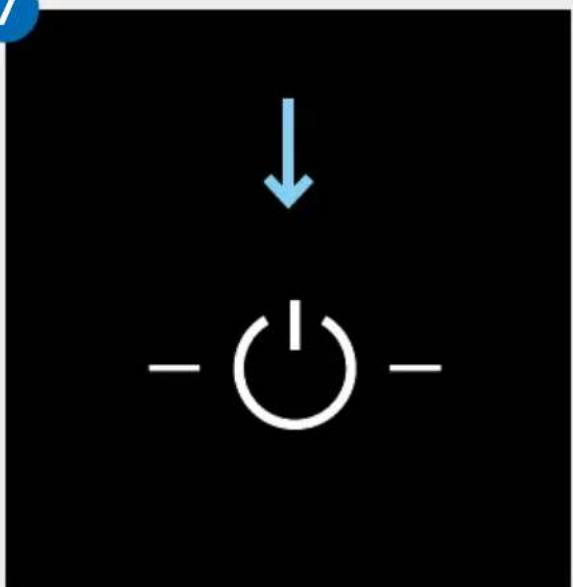
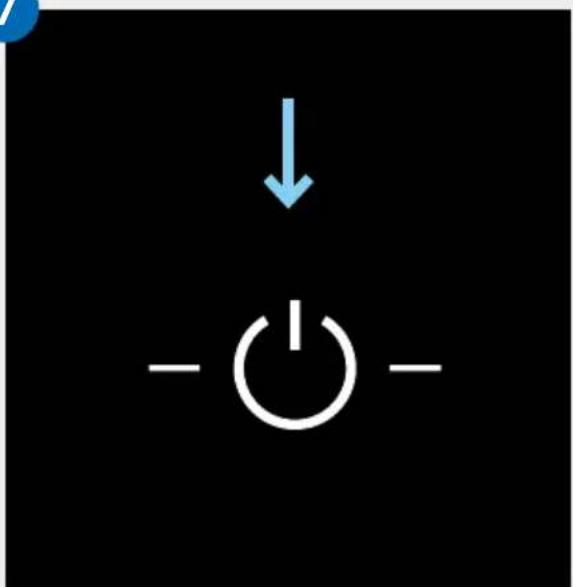
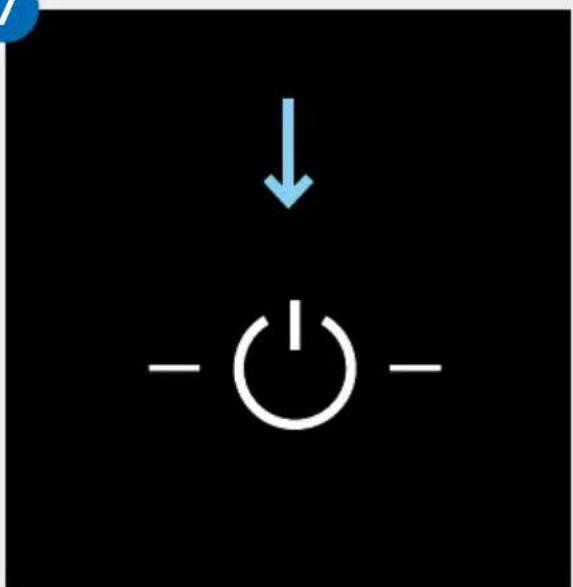
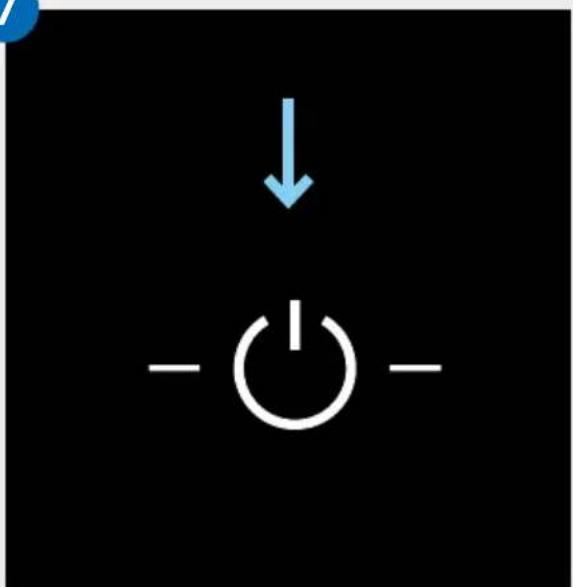
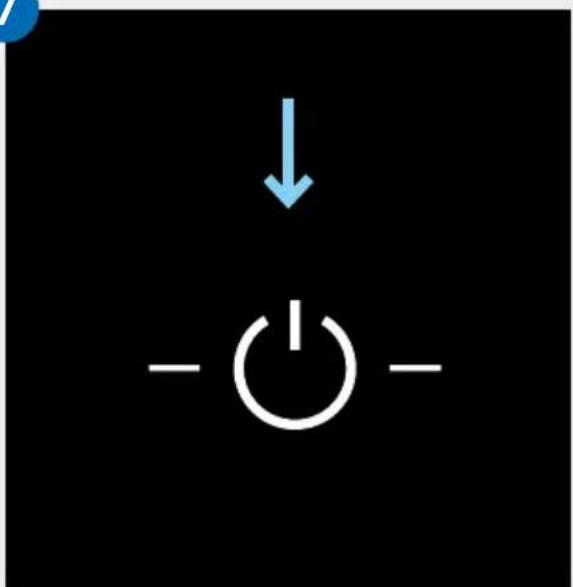
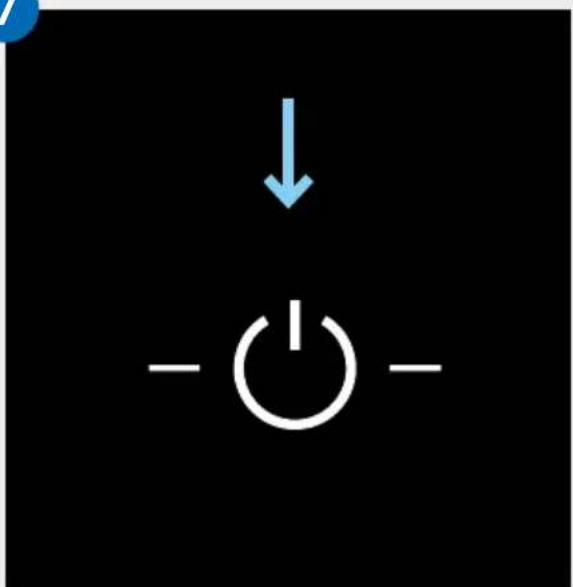
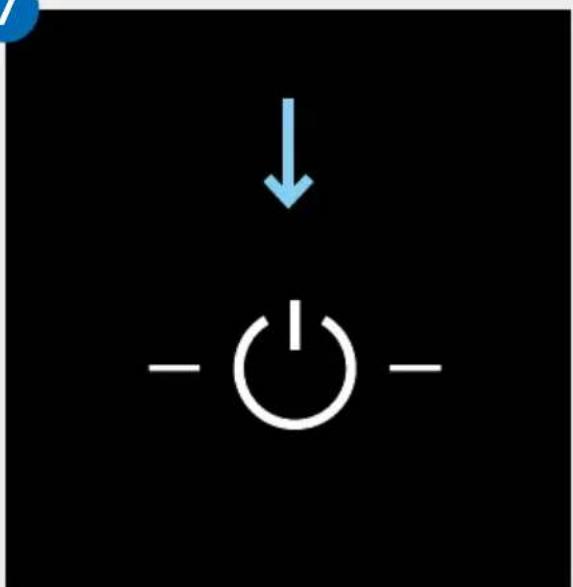
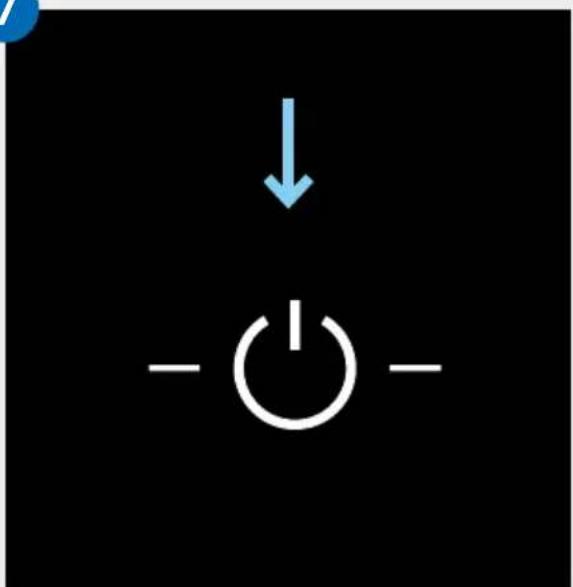
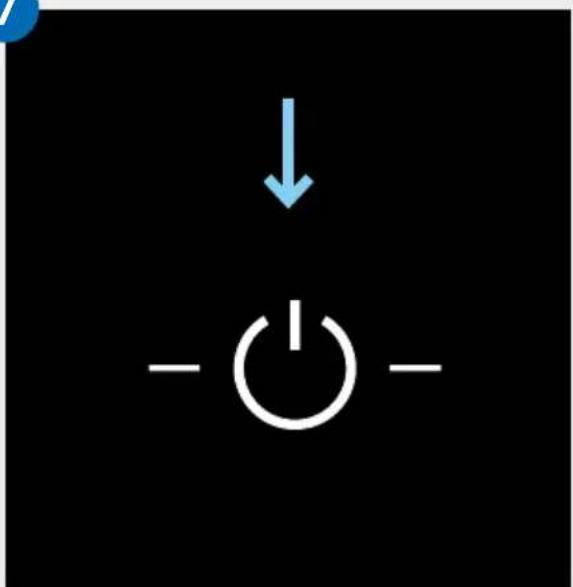
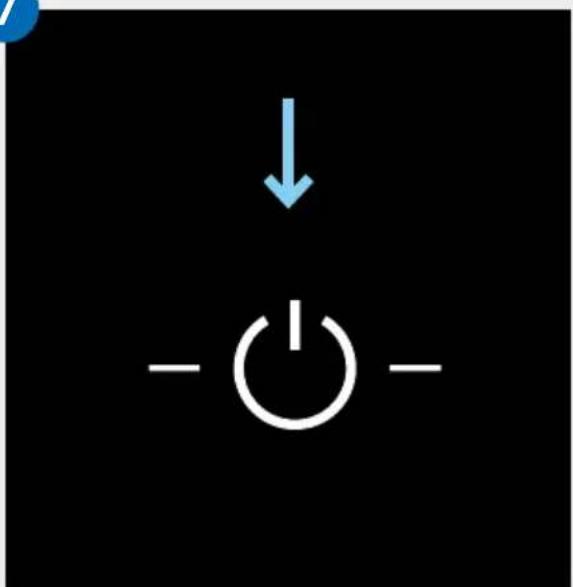
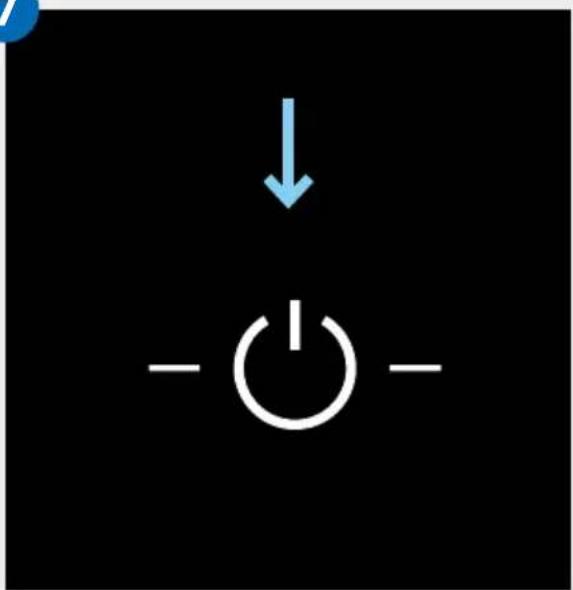
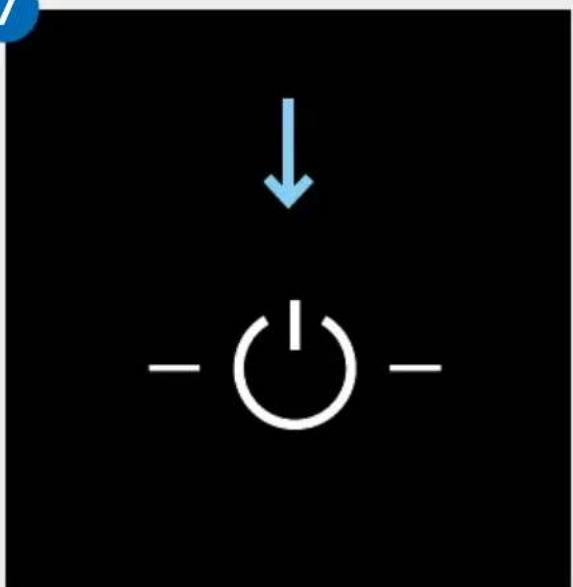
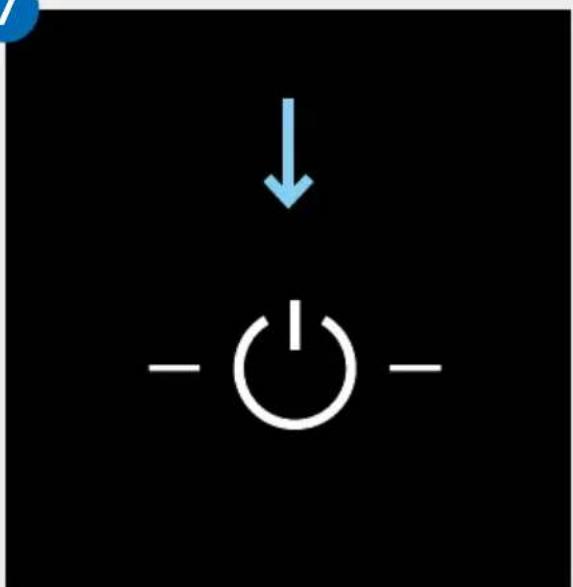
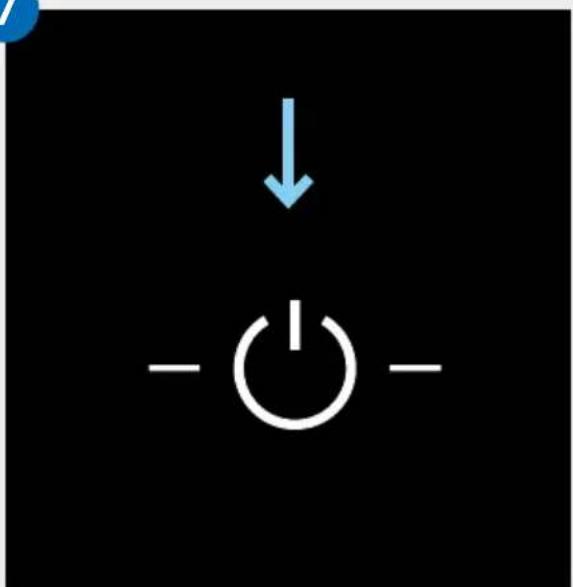
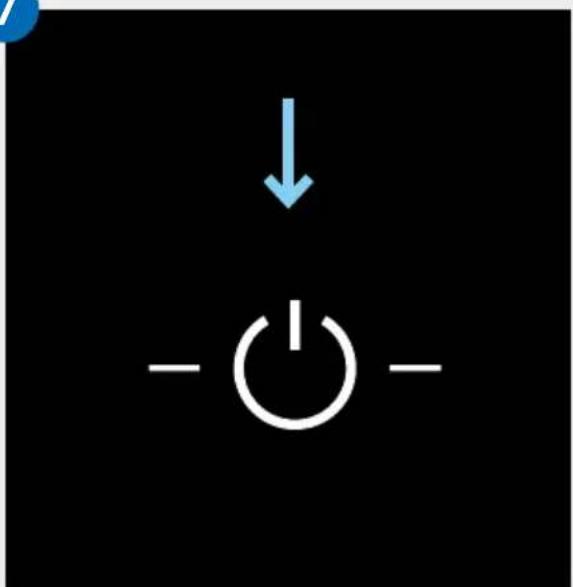
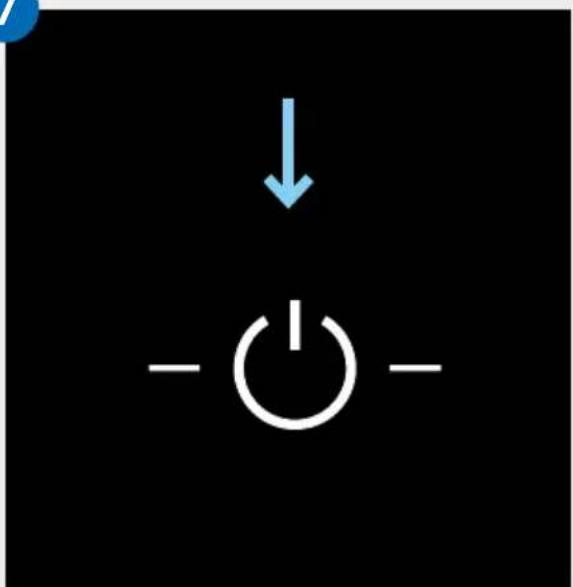
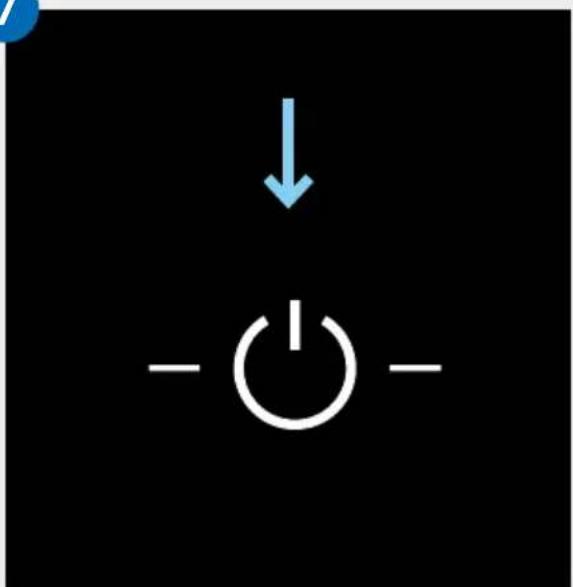
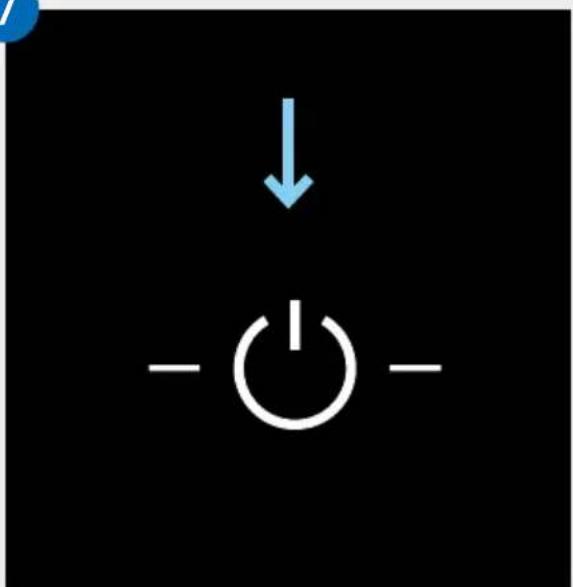
7 When the device is connected to the mains, the power button lights up to switch the device on and off. A short touch on the power button will turn the device on.
You can find out how to connect the device to your smartphone or tablet in the "Configuration Smart Life App" section.
1
2
3
4
5
6
7
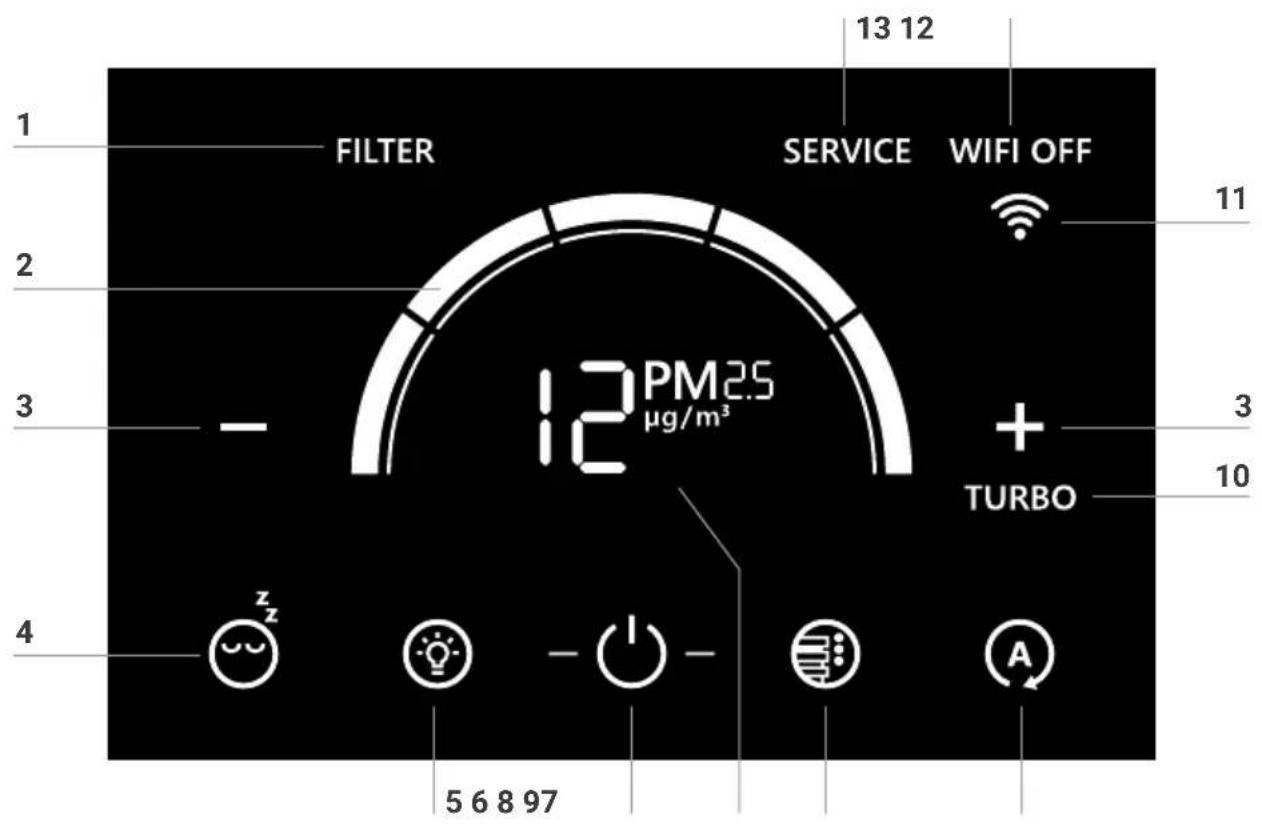
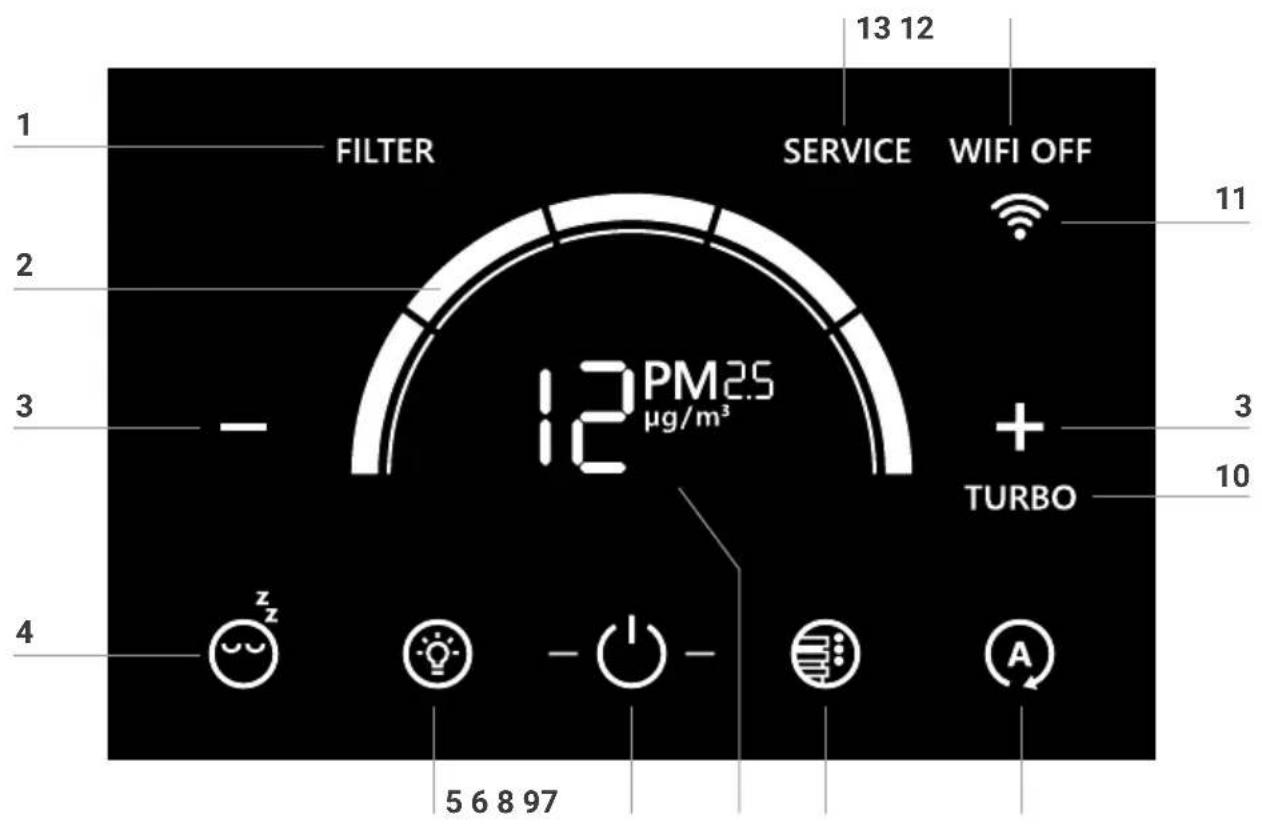
DISPLAY
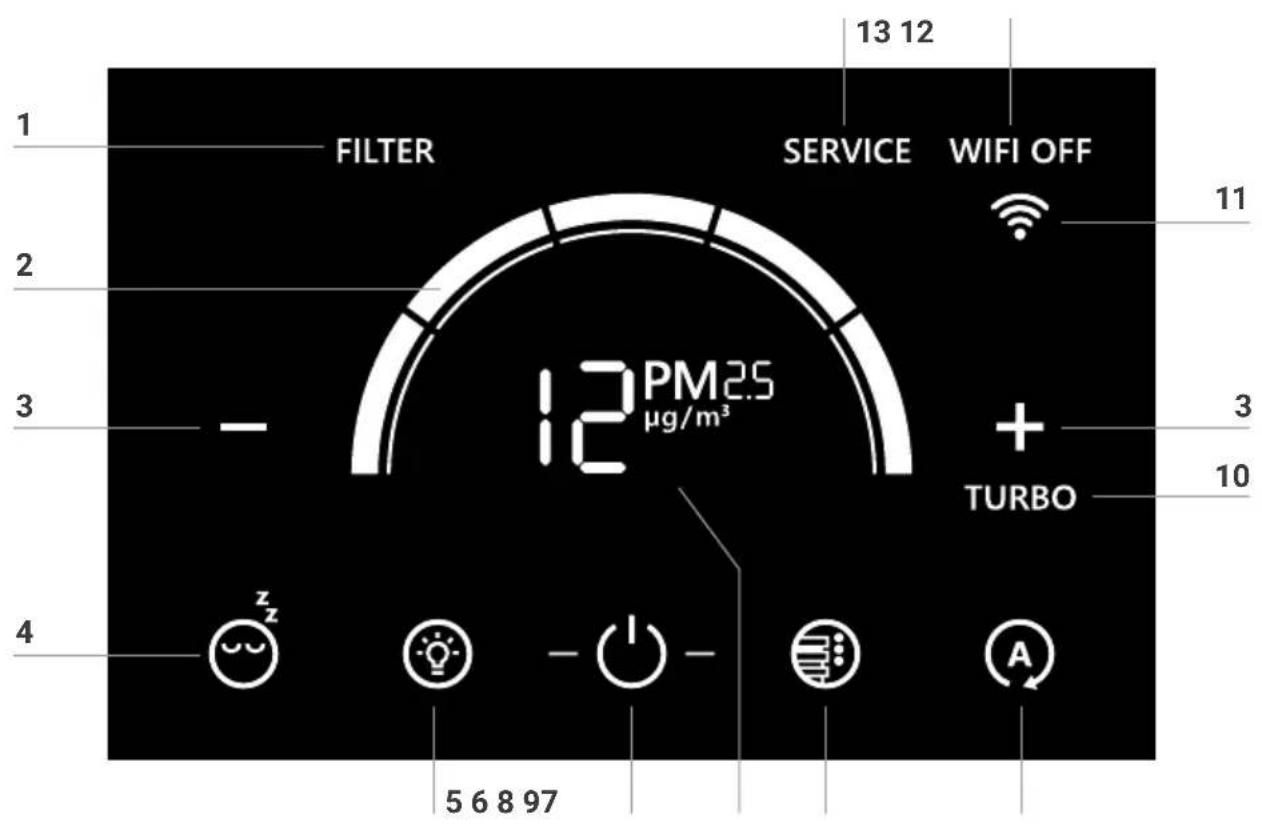
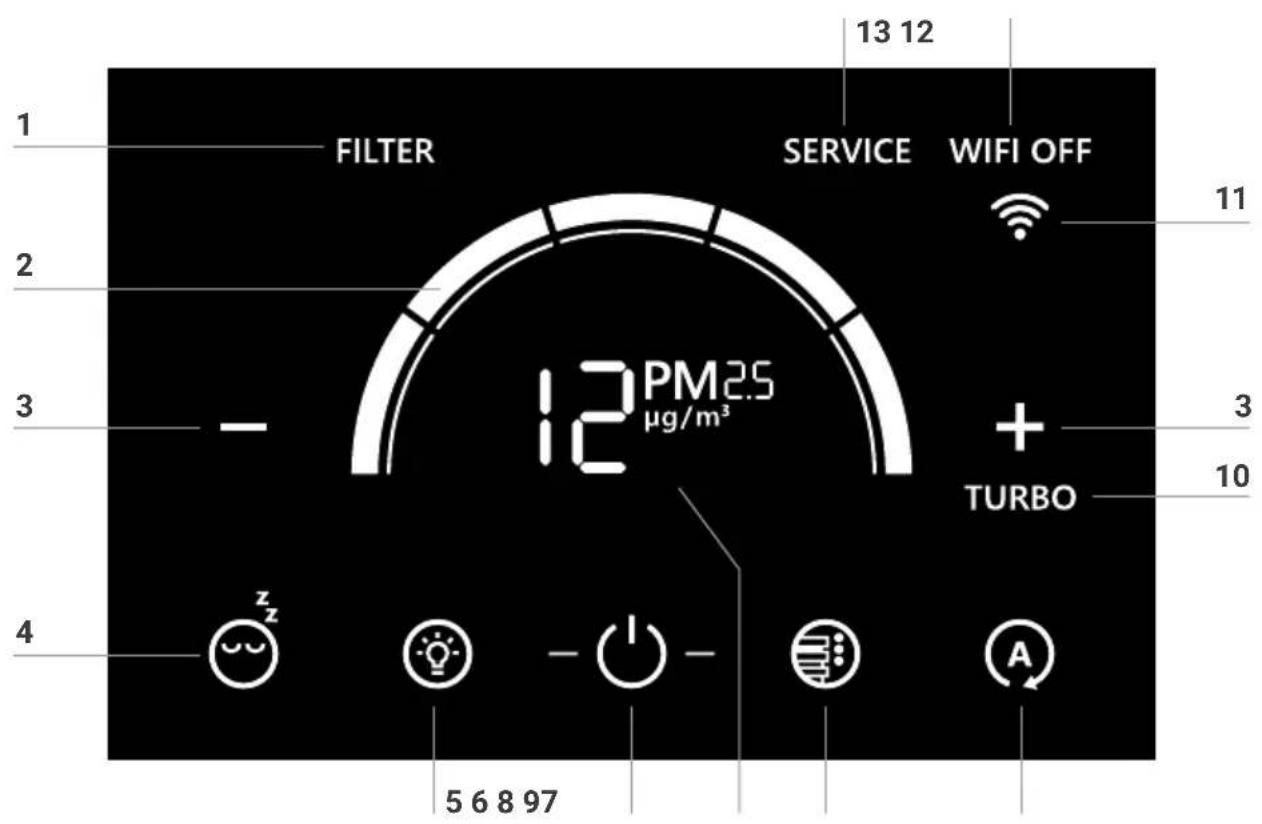
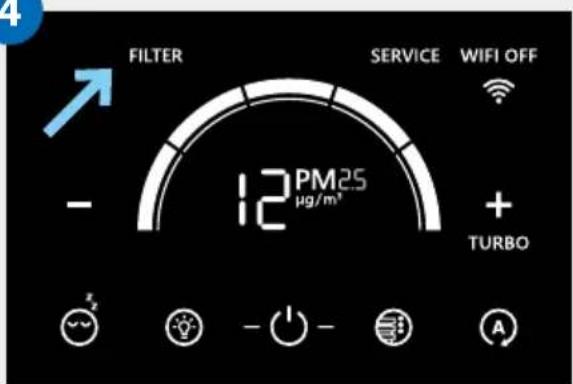
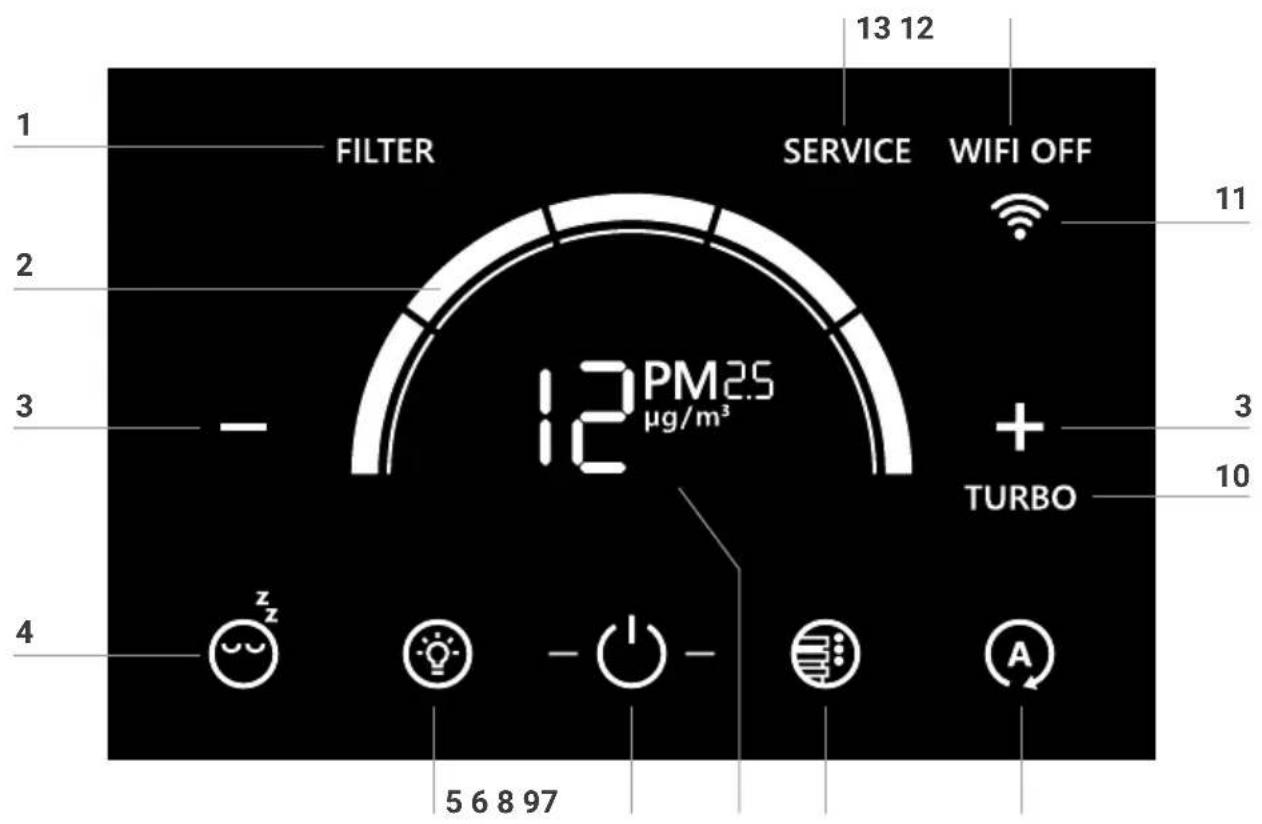
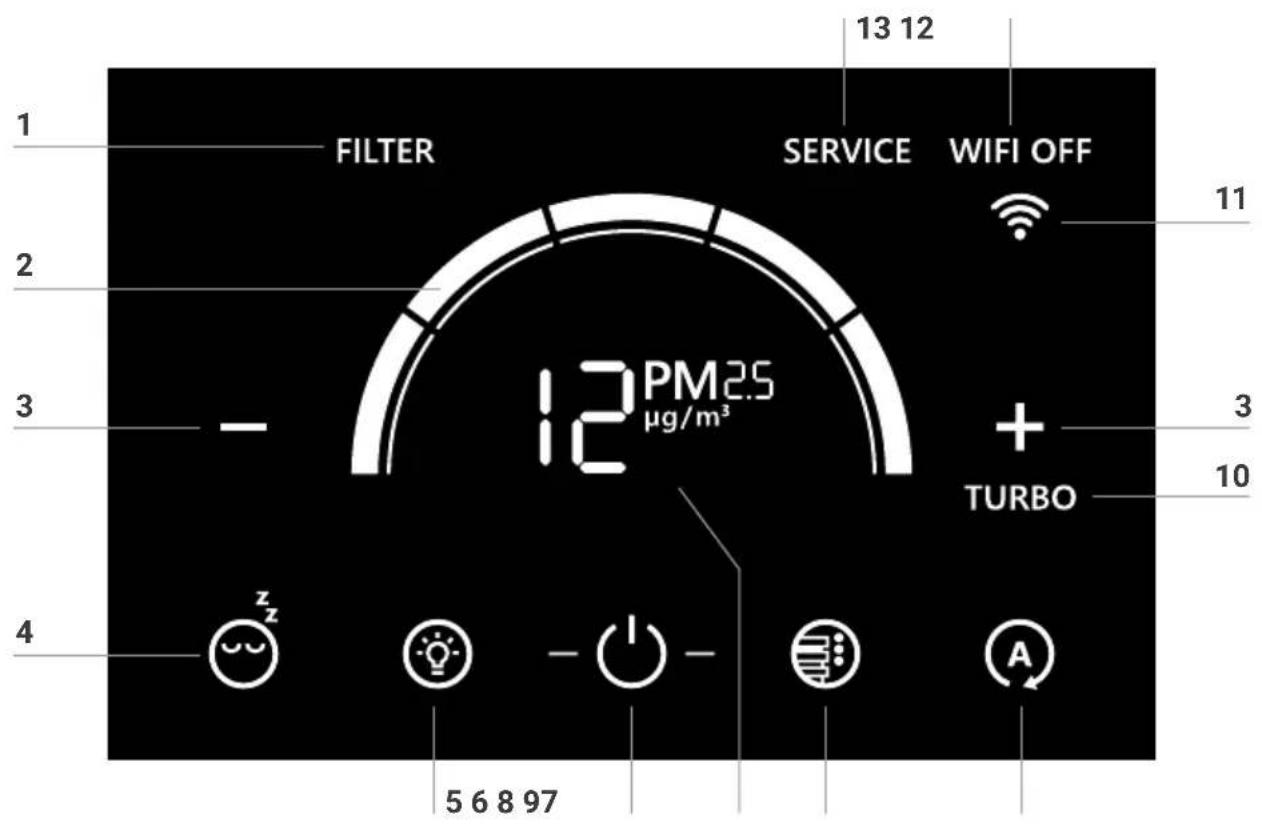
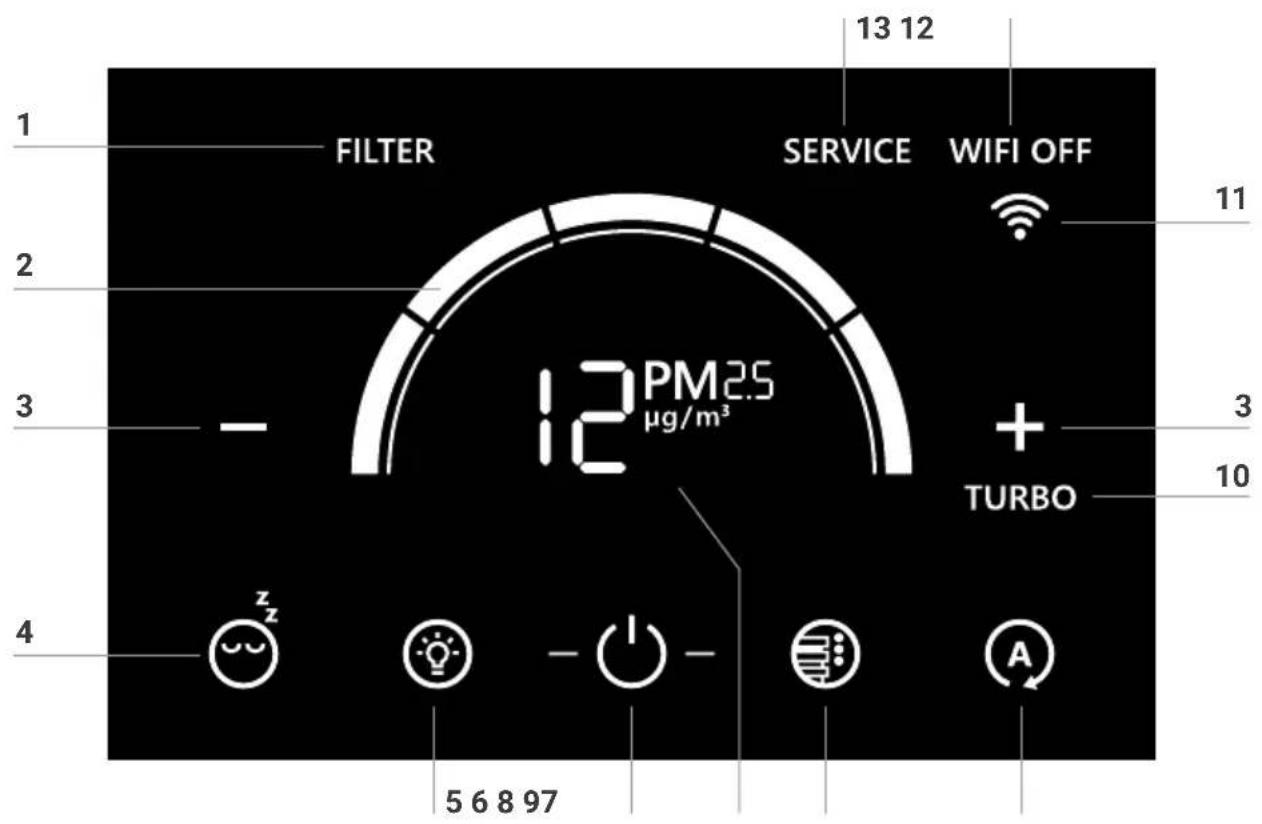
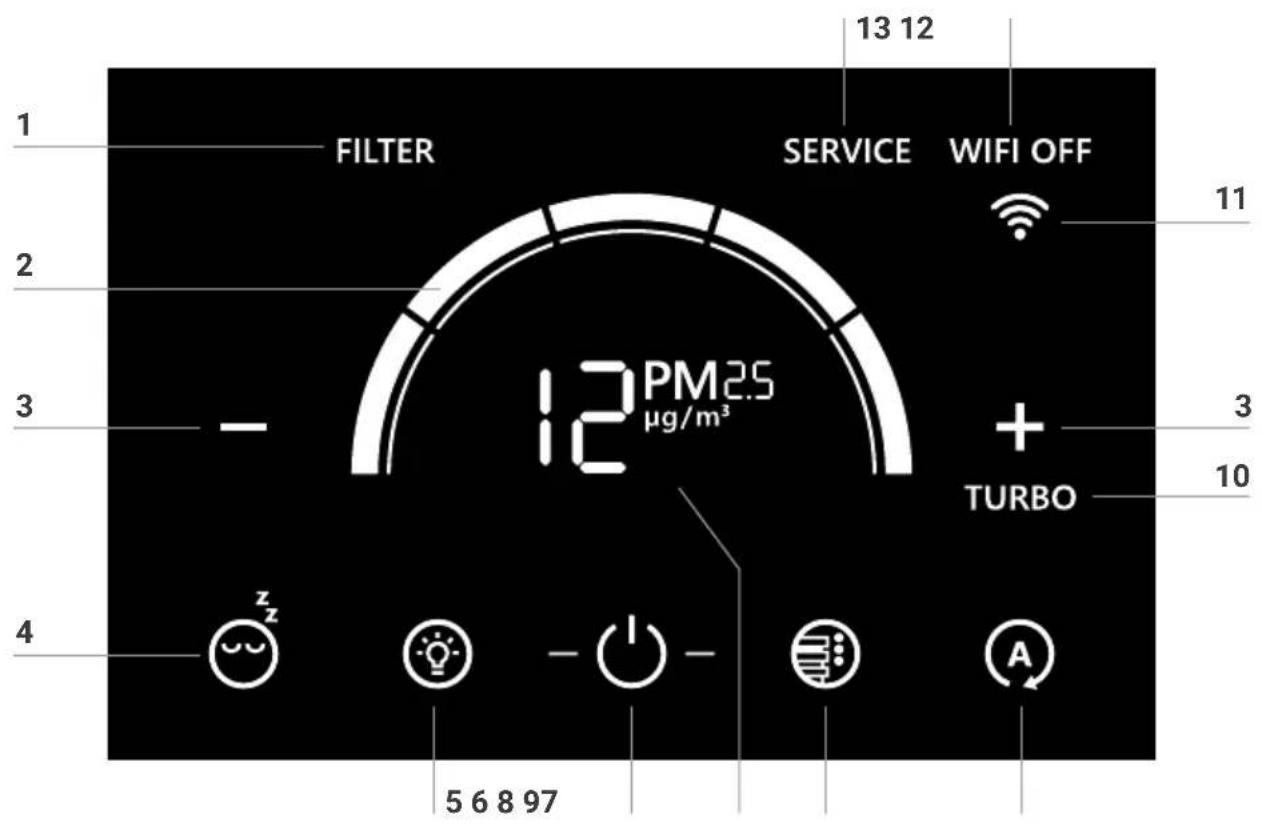
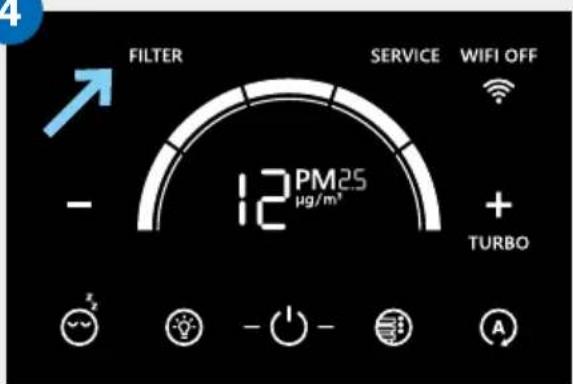
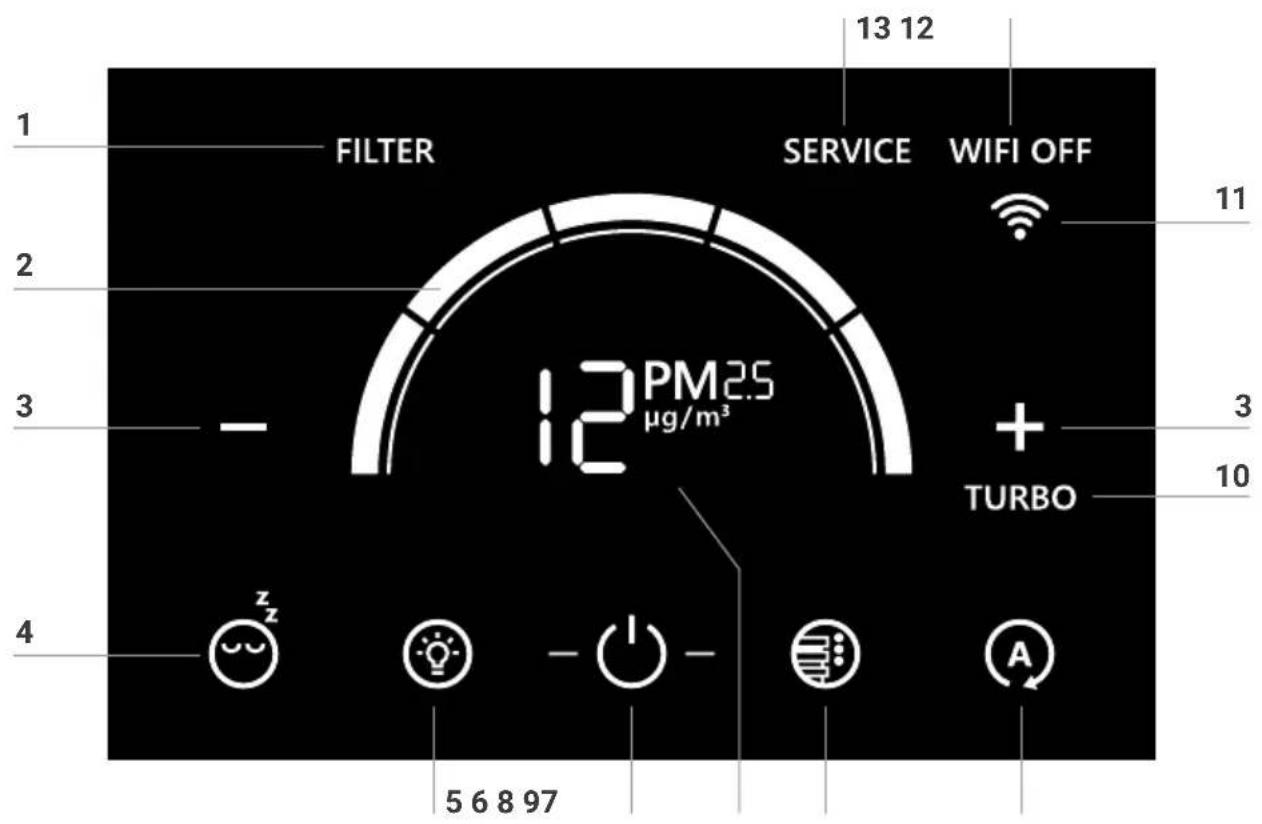
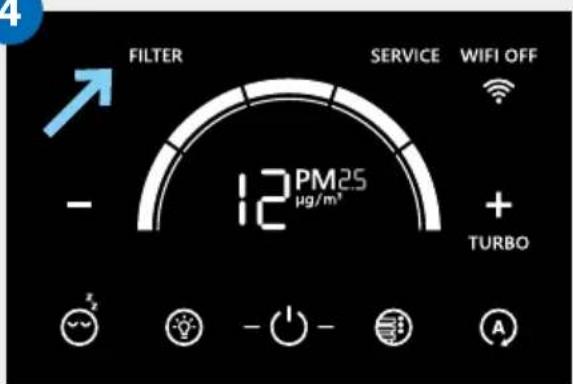
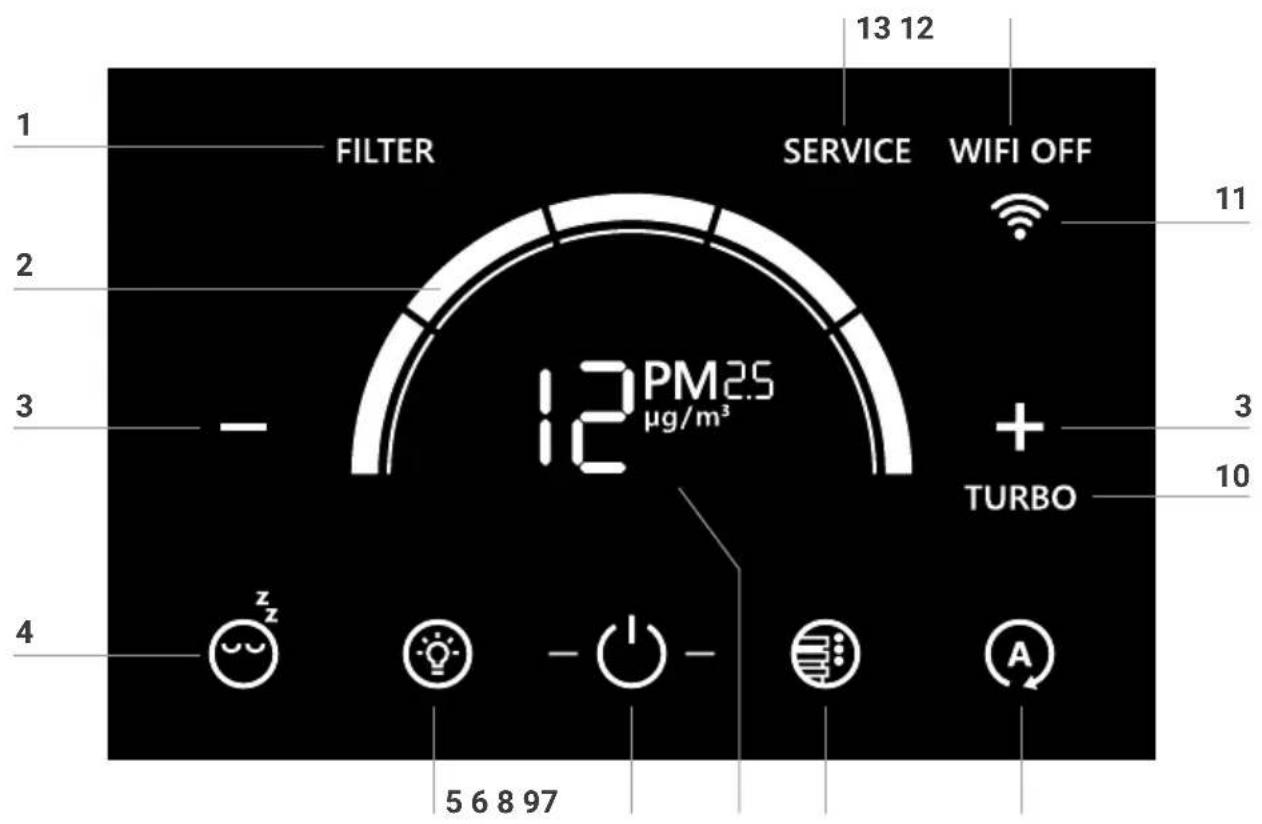
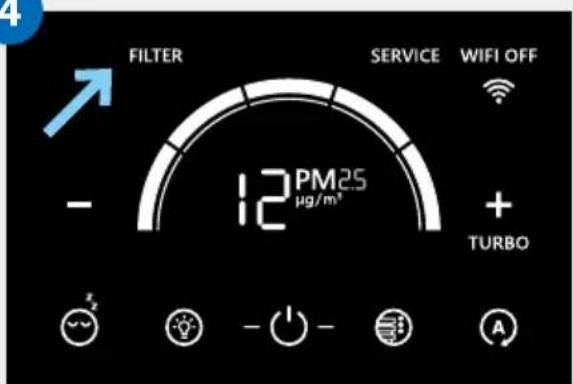
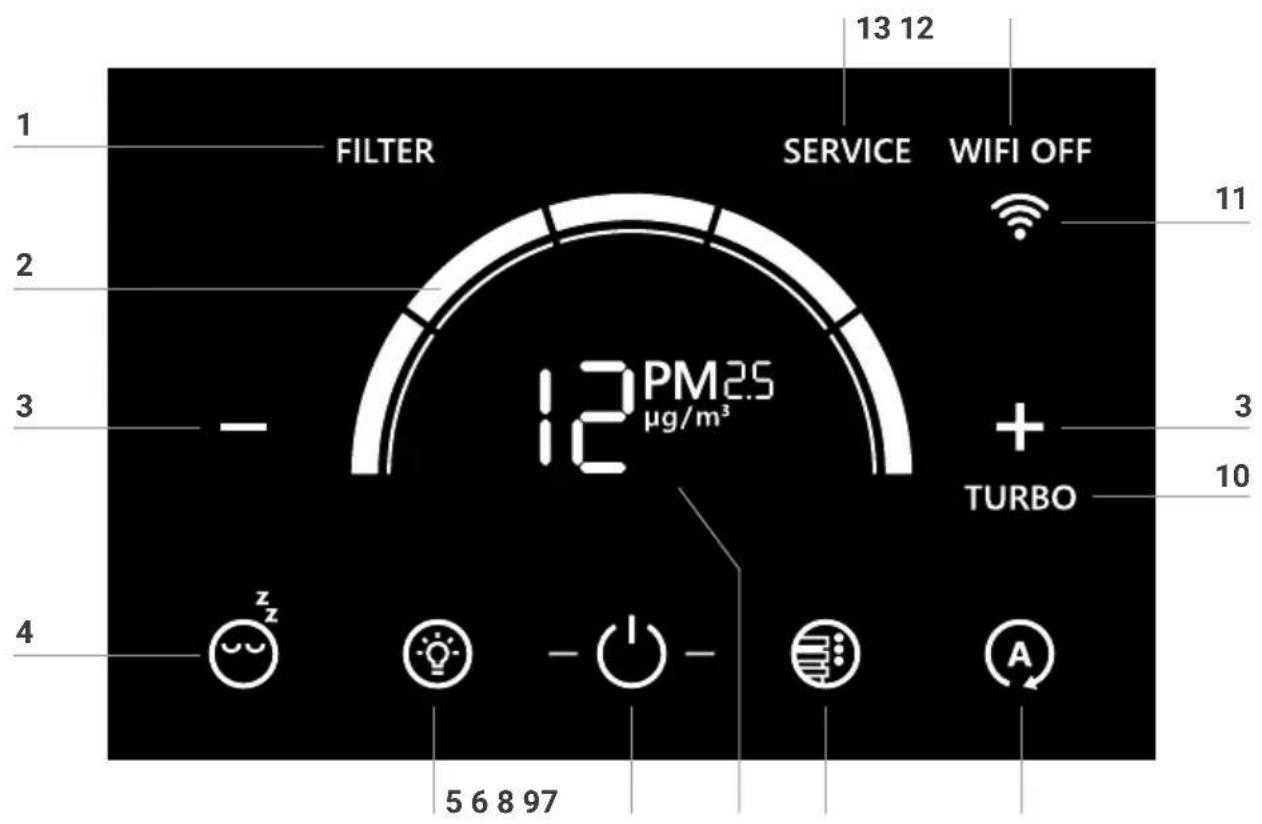
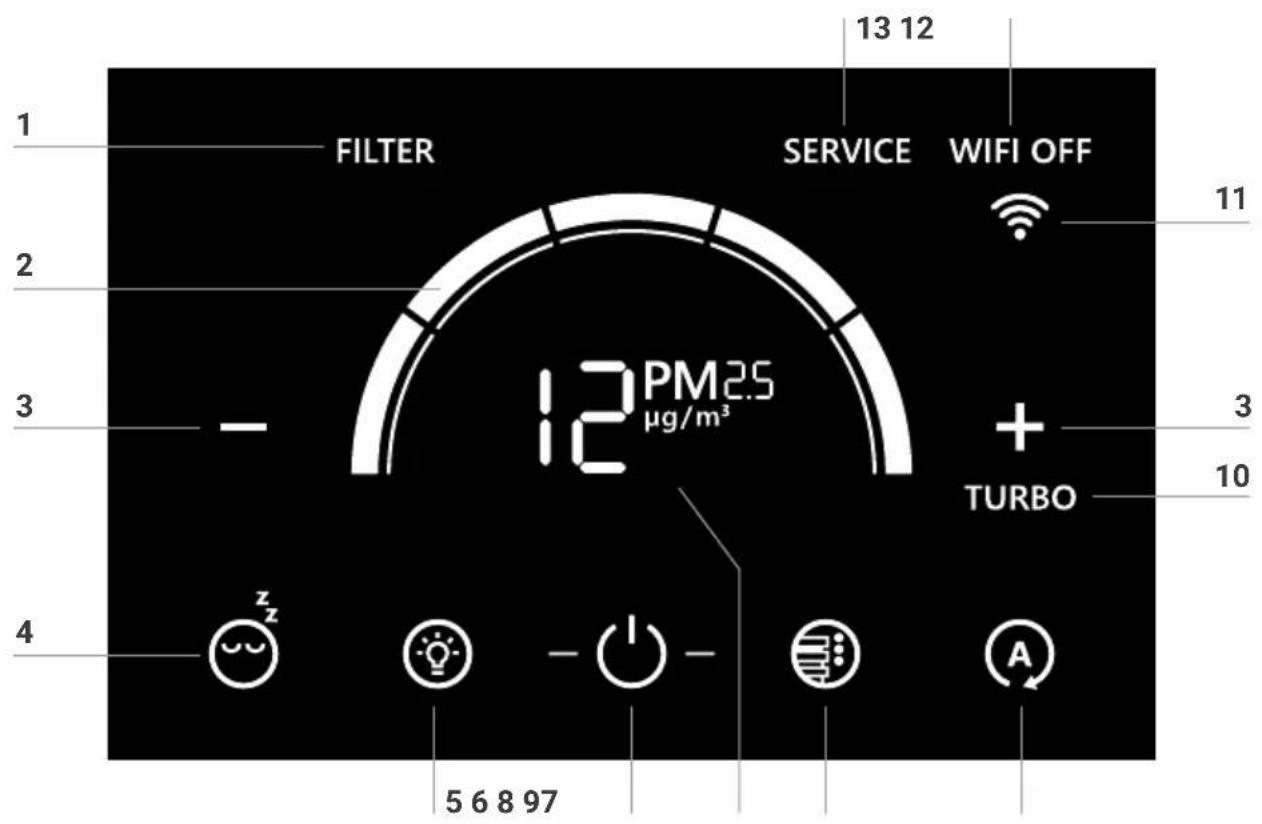
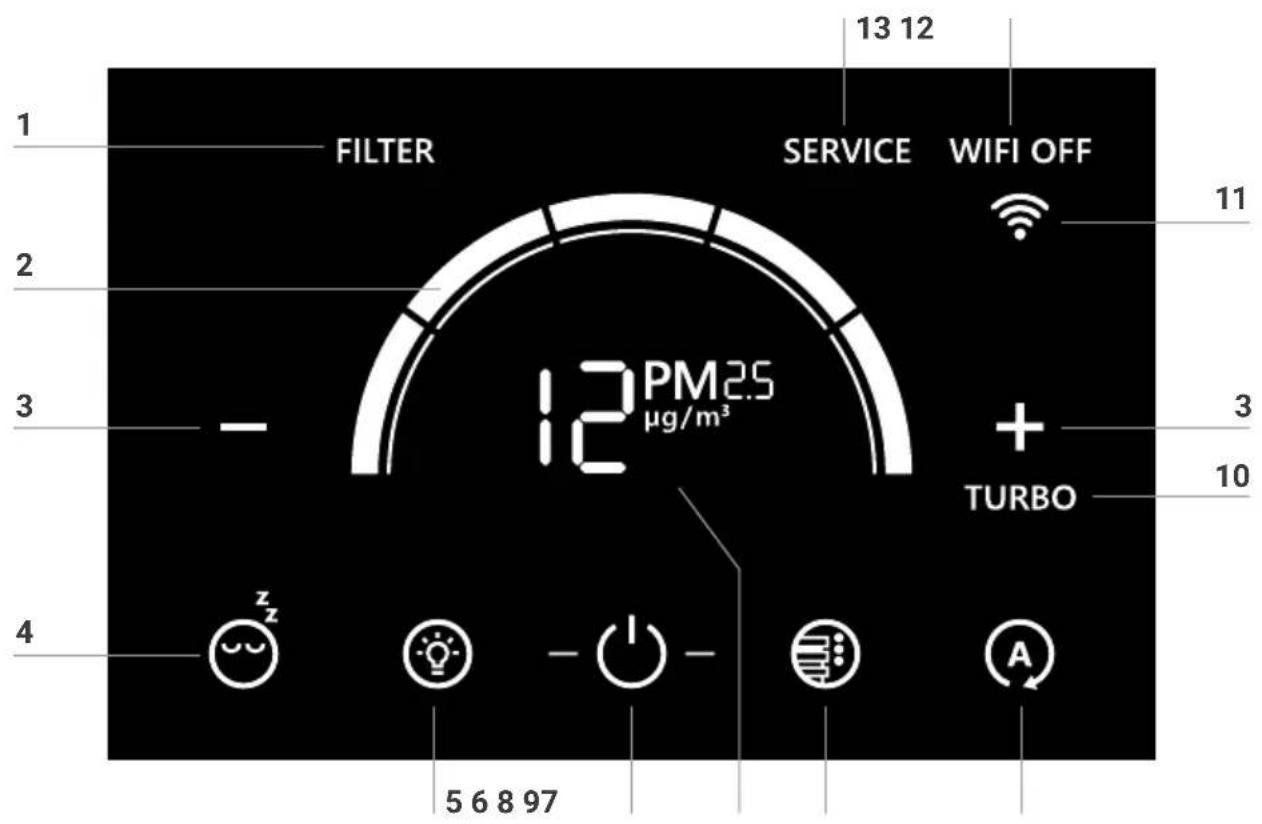
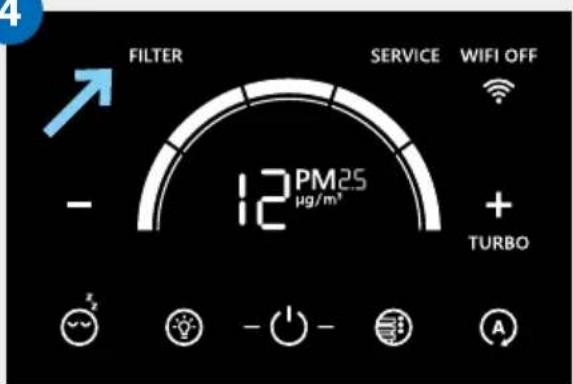
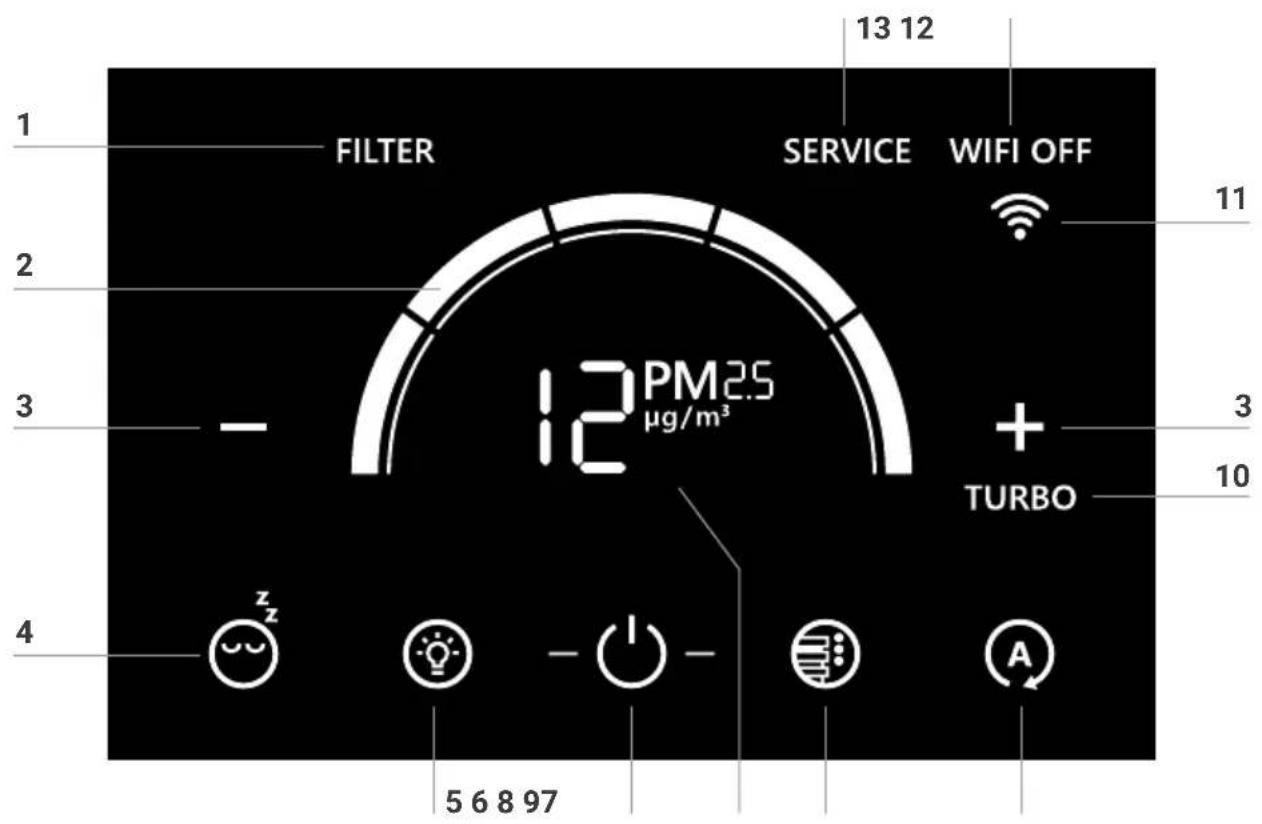
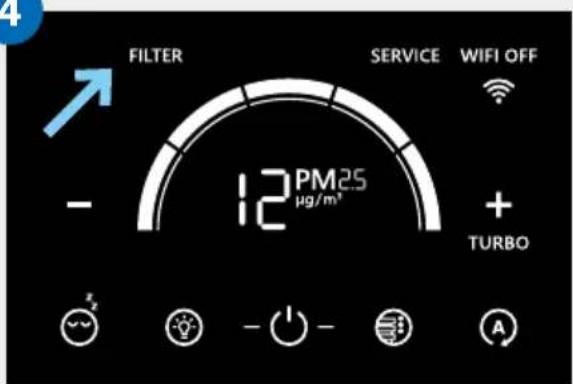
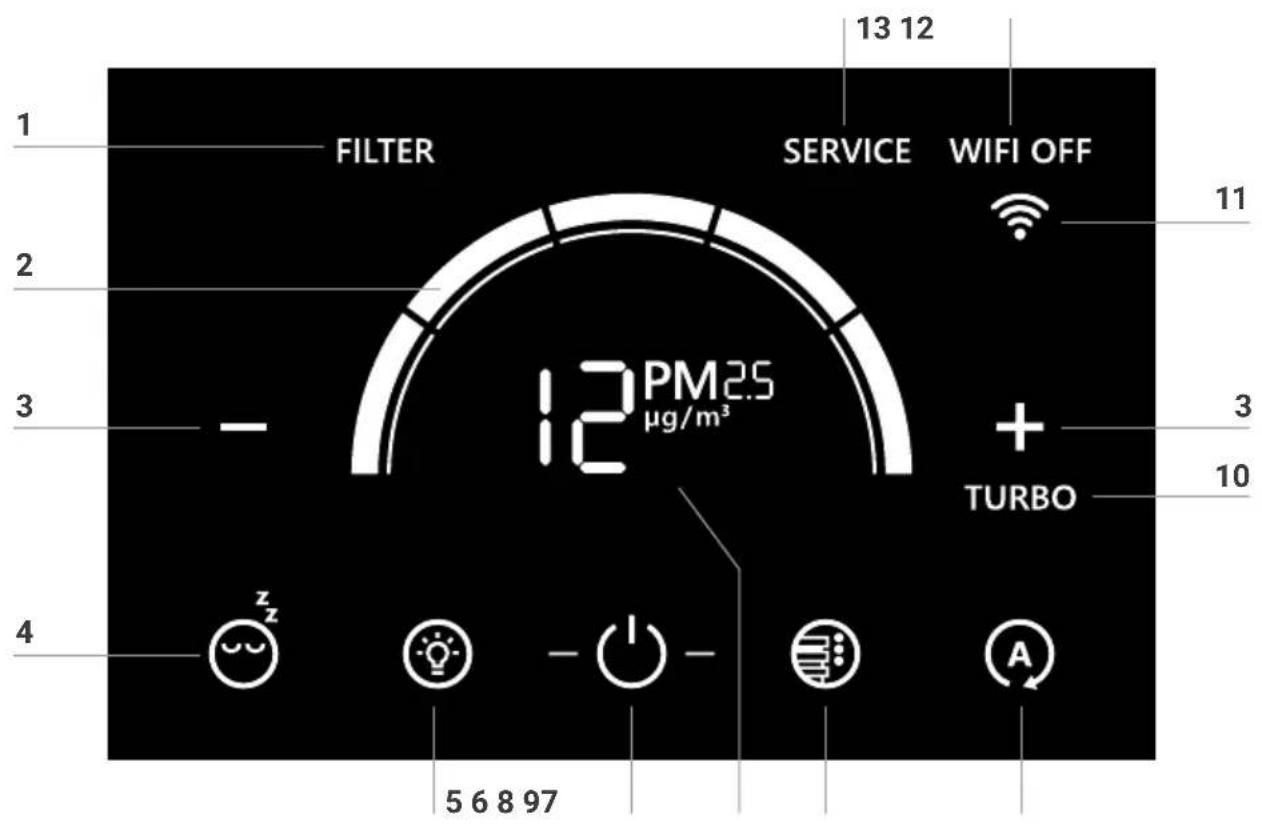
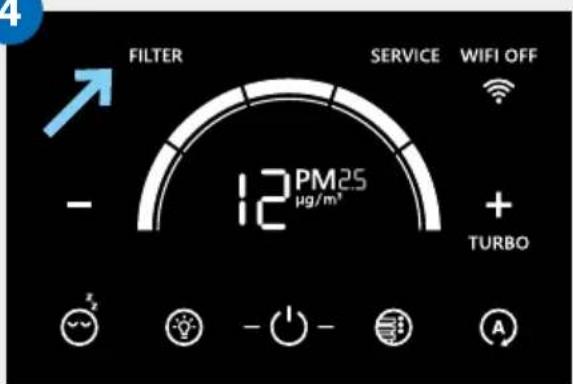
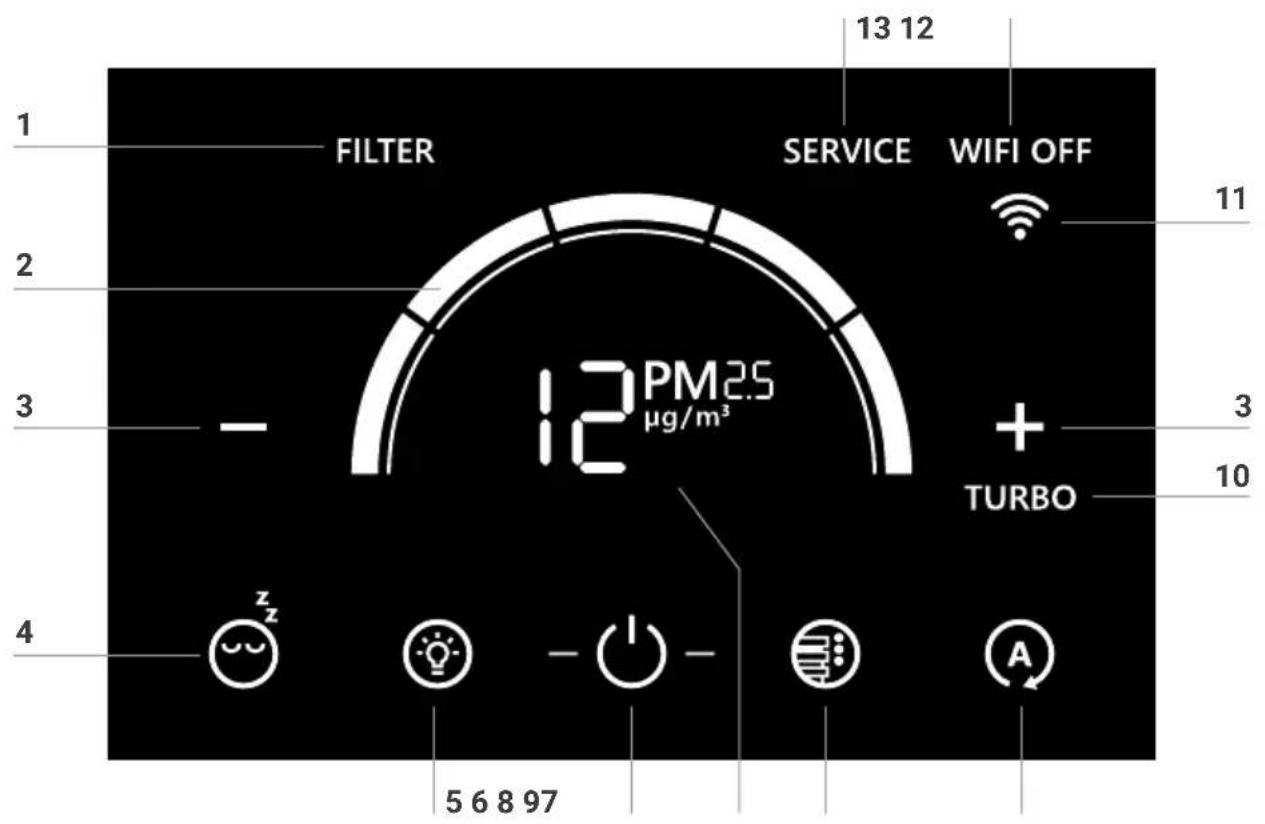
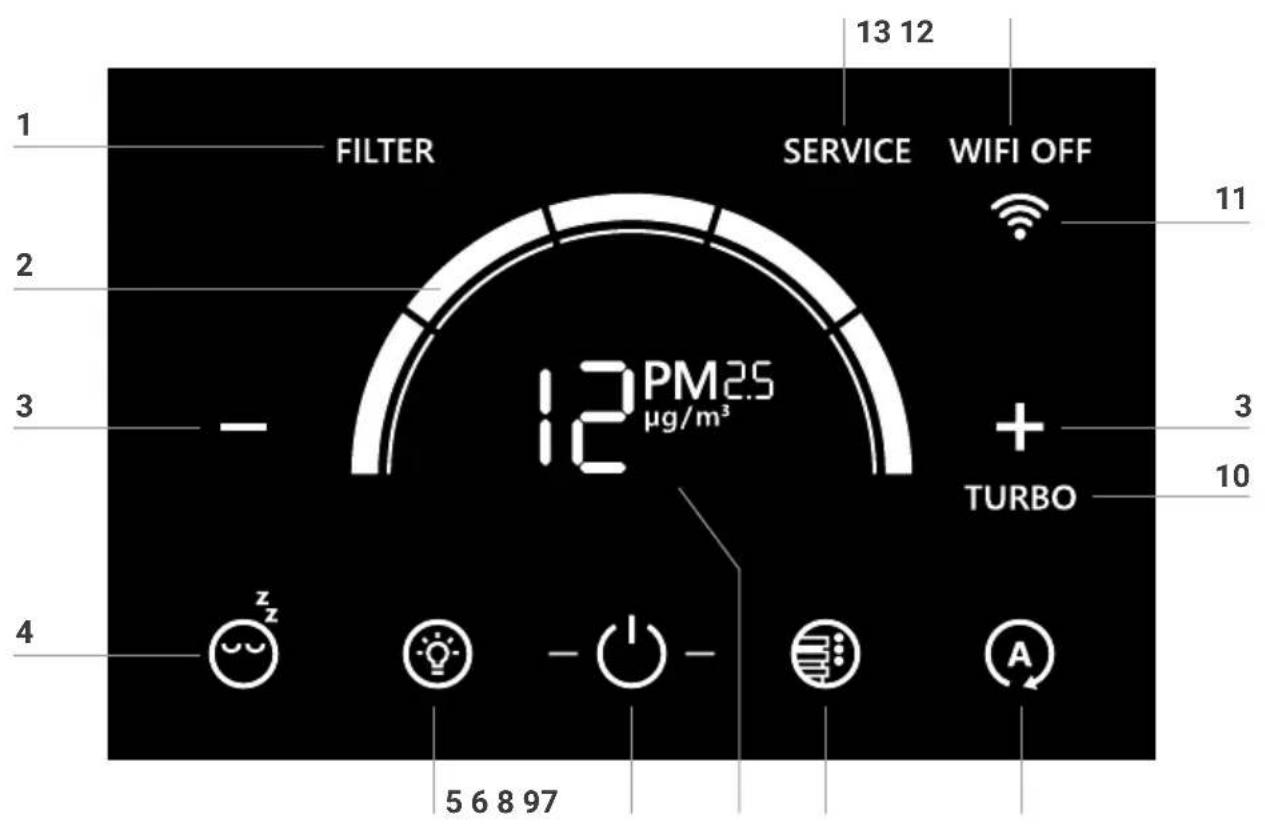
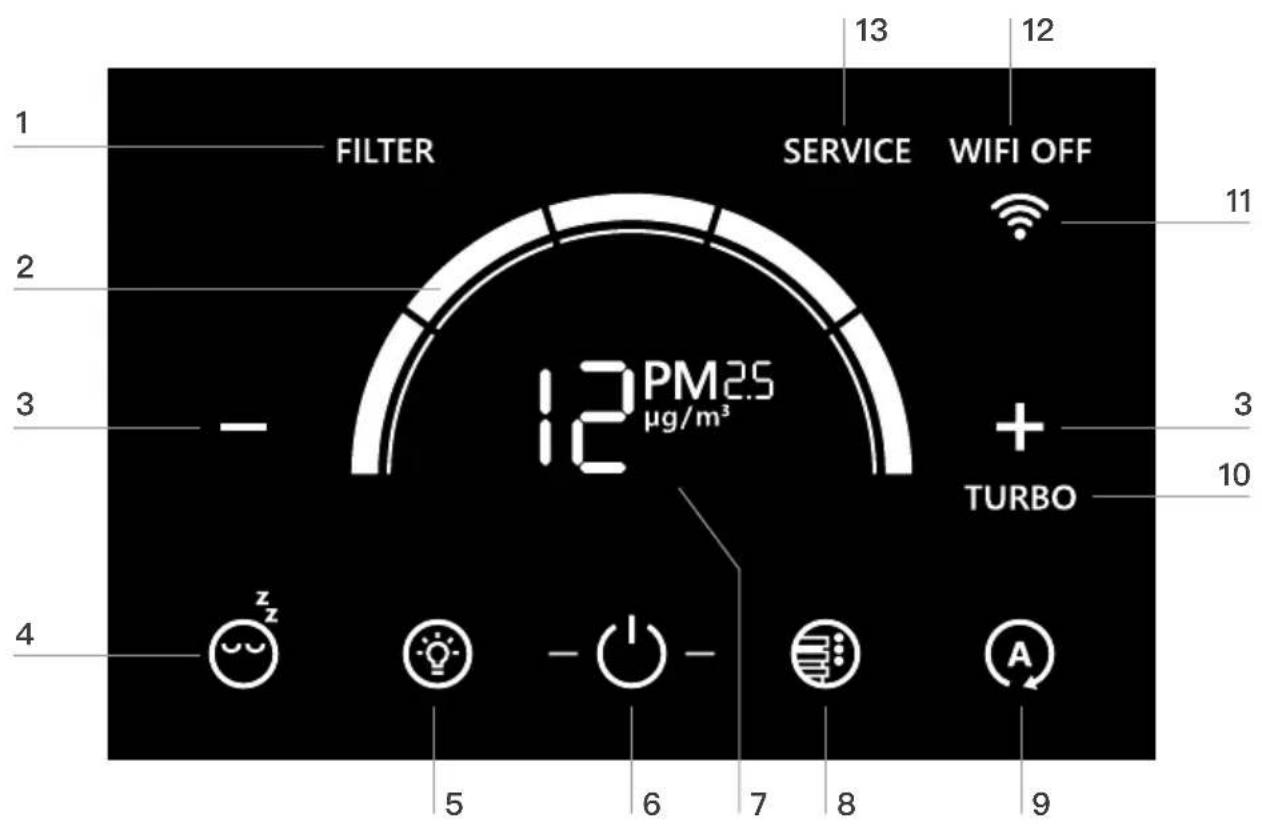
1 Filter change necessary
2 Speed level
3 Regulation of the speed level: + higher / - lower
4 Sleep mode button
5 LED band ON/OFF – regulate brightness
6 Switching the device on/off
7 Air quality
8 Select LED colors
9 Automatic mode button
10 Turbo mode
11 WiFi status
12 WiFi ON/OFF button
13 Maintenance required
OPERATION
Display Function
| Switching the device on or off (6)Briefly touching the button ⏻(6) switches the device on or off. | |
 | Speed stage (2)Five speed levels can be activated. The speed steps are displayed as a ring segment. As the speed level increases, the next ring segment increases in a clockwise direction. Level 1 is shown here. |
 | Regulation of the speed level (3)Briefly touching the + button increases the fan speed up to and including the maximum speed “Turbo”.Briefly touching the - button decreases the fan speed. |
 | Turbo (10)The maximum fan speed is switched on by touching the + button again after switching the highest speed level. The turbo indicator (10) lights up continuously in the display. The maximum fan speed is switched off by touching the - button. The turbo indicator (10) in the display goes out. |
 | Automatic mode (9)Is switched on or off by briefly touching the Ⓐ button (9).On: Button Ⓐ flashes continuously. Depending on the air quality in the room, the device automatically regulates the fan levels.Off: Button Ⓐ lights up continuously. Unit runs with set fan speed 1 - 5. |
 | Sleep mode (4)Switched on by a short touch ⚙ and switched off again by touching for 3 seconds.On: The unit switches to speed level 1. The LED band is switched off. Only the Sleep mode button (4) and the on/off button (5) lights up, with reduced brightness.By briefly touching the Sleep mode button (4), the following displays/ functions are available for approx. 5 seconds:• + and - buttons (3) for changing the speed level 1• WiFi can be switched on/off• LED band (5) can be switched on/off and dimmed.• LED colors (8) can be changed.Off: To exit Sleep mode, press and hold the Sleep mode button (4) for approx. 3 seconds. All displays/functions light up in normal brightness and are available. The device runs at the set speed level. |

Air quality
Color display µg/m3 PM2.5 AQI US Meaning
| Green 0-12 0-50 Good | |||
| Yellow 12,1-35,4 51-100 Moderate | |||
| Orange | 35,5-55,4 | 101-150 | Unhealthy for sensitive persons |
| Red | 55,5-150,4 | 151-200 | Unhealthy |
| Red | 150,5-250,4 | 201-300 | Very unhealthy |
| Red | ≥ 250,5 | 301-500 | Dangerous |
From a particle measured value greater than 99 µg/m3 , the display shows “Hi”.

LED band (5)
Is switched on or off by a short touch.
Set the desired brightness:
- Touch the LED strip button (5) and hold for approx. 3 seconds until the LED strip button (5) and the air quality indicator (7) flash. The + and - buttons (3) change the brightness in 8 levels.
- Touch the LED strip button (5) again and hold for approx. 3 seconds until it lights up constantly again.

LED colors (8)
Can be selected by briefly touching them.
Retrieve the current air quality in the room (air quality):
On: Touch and hold the LED colors button (8) for 3 seconds. The word "air quality" in the air quality display (7) lights up constantly. The LED band provides color information about the current air quality in the room. For the color description and its exact meaning, please refer to the table in the "Air quality" section.
Off: Briefly touch the LED colors button (8) again. The "air quality" lettering in the air quality display (7) goes out. The LED strip lights up in the selected color.
Color information of the LED strip
Constant glow:
Flawless device operation.
A blue running light moves along the LED strip:
The firmware is being updated.
The following messages appear when maintenance is required:
Display Function
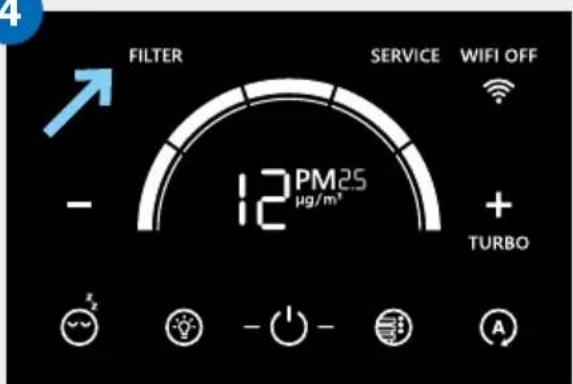
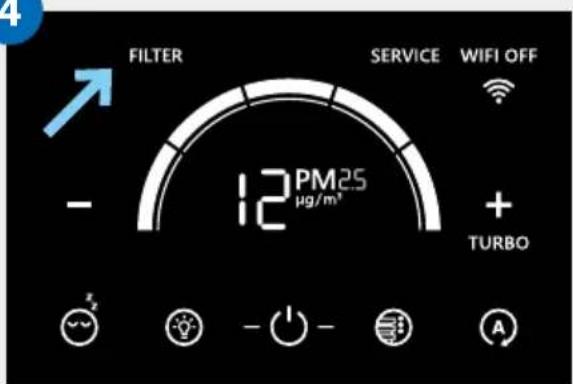
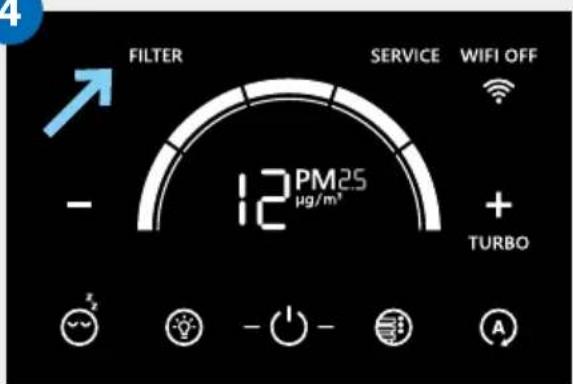
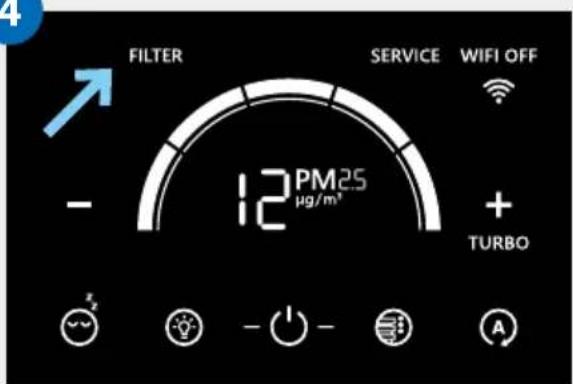
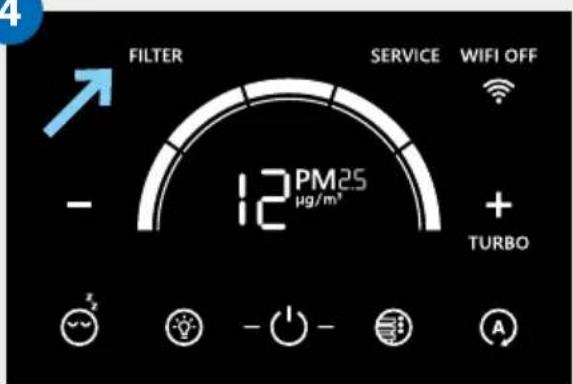
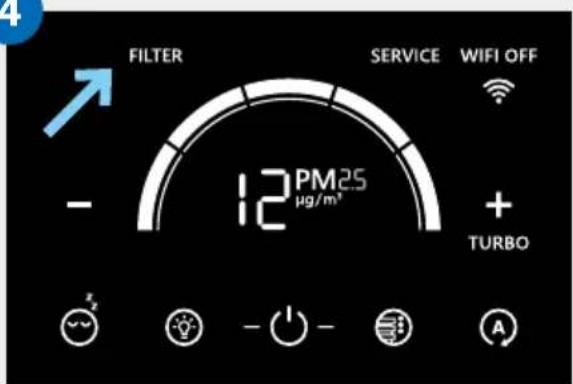
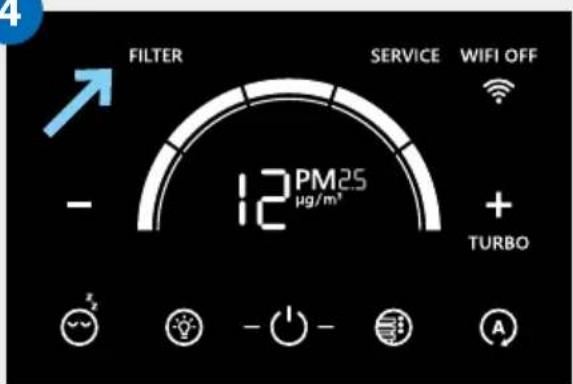
| FILTER | Filters (1)The filters must be changed (see chapter “Cleaning & Maintenance” section “Changing the filters”). |
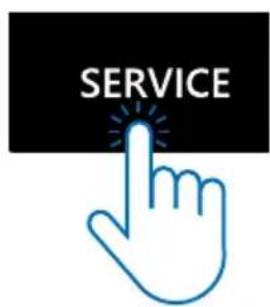
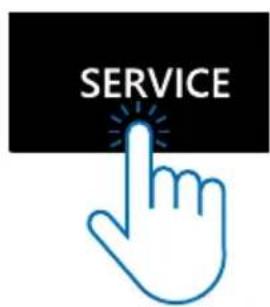
| SERVICE | Service (13)The filter must be vacuumed (see chapter “Cleaning & care” section “Service”). |
WIFI / HOTSPOT
Display Function
| WiFi connectionActivated and deactivated by briefly touching the WiFi icon (11). | |
| WiFi connection is activated: | |
| WiFi symbol (11) flashes: The WiFi connection is disconnected / The device is waiting for a WiFi connection. | |
| The lower two segments of the WiFi symbol (11) light up constantly, the upper two light up one after the other: WiFi connection to the cloud is established. | |
| WiFi symbol (11) lights up constantly: WiFi connection to the cloud successfully established. | |
| The VENTA device is in hotspot mode:The dot lights up continuously and the three reception bars appear in ascending order: The VENTA device is in hotspot mode and is ready for setup in the Smart Life app. | |
| WIFI OFF | WiFi connection is deactivated:WiFi Off (12) lights up: WiFi module is not sending or receiving data and is not connected to any network or device. |
CONFIGURATION & SMART LIFE APP



Hotspot mode
During initial startup, the device is automatically in hotspot mode. The hotspot mode can be activated at any time by touching and holding the WiFi symbol (11) for 3 seconds. Hotspot mode is activated when the three reception bars of the WiFi symbol light up in succession from bottom to top in the display .
Activating WLAN
Make sure your smartphone or tablet is connected to your home WLAN network and Bluetooth is turned on.

Install "Smart Life - Smart Living" App
Install the free "Smart Life – Smart Living" app on your smartphone.
Set up WiFi
After you have downloaded and installed the "Smart Life – Smart Living" app, please open the app.
- Create a user account and log in.
- Tap "Add device" if your device appears in the app. Otherwise, tap +, "Add device", "Small home appliance", "Humidifier (BLE +Wi-Fi)". Select your WiFi and enter the WiFi password.
Please make sure that ...
- the device is assigned a radio network in the 2.4 GHz band by your router. Unfortunately, radio networks in the 5 GHz band are not supported.
- Your router supports 802.11b/g/n.
- iOS version 11.0 or higher or Android version 6.0 or higher is installed. If necessary, update the operating system of your smartphone or tablet.
If problems occur during WiFi setup, please refer to the corresponding section in the "What if ...?" chapter. Further information at: www.venta-air.com
CLEANING / MAINTENANCE
Caution! Make sure that the device is switched off and the power supply is disconnected from the socket during all measures! Use a protective mask and gloves! Pack the used VENTA filter in a bag and dispose of it in the household waste.
Change filter
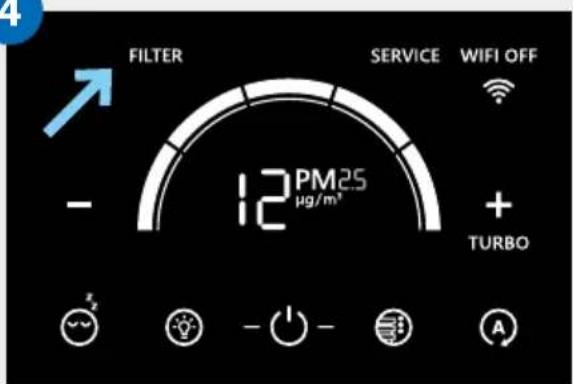
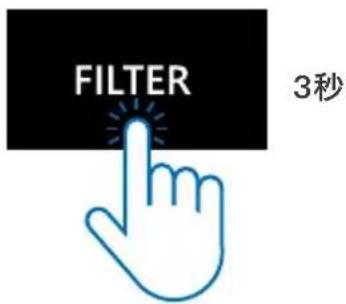
The service life of the VENTA filter is approx. 1 year (at 24-hour continuous operation). The filter service life depends on the number of operating hours and the air quality in the room. The FILTER indicator (1) indicates when the filter needs to be changed.
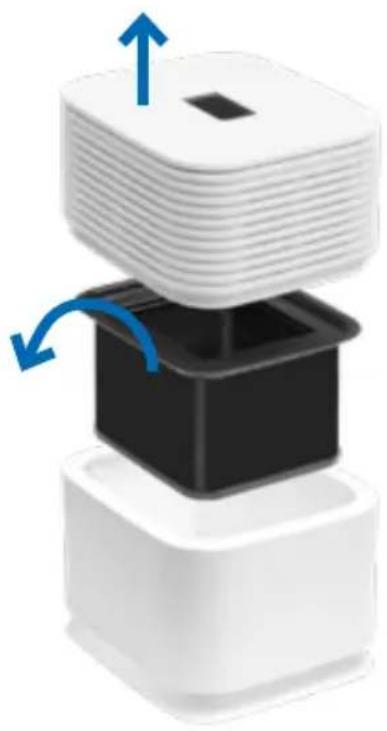
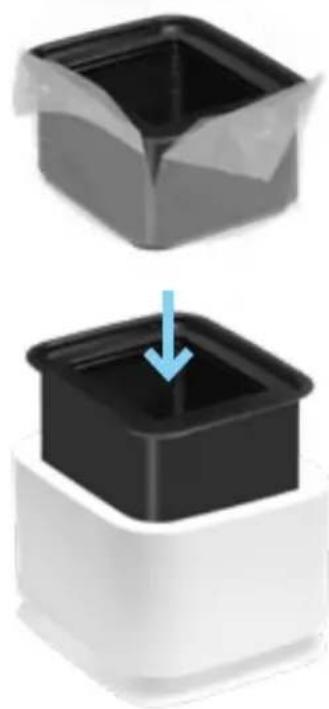
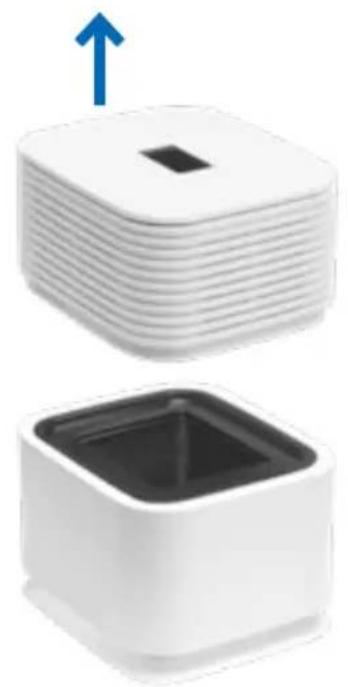
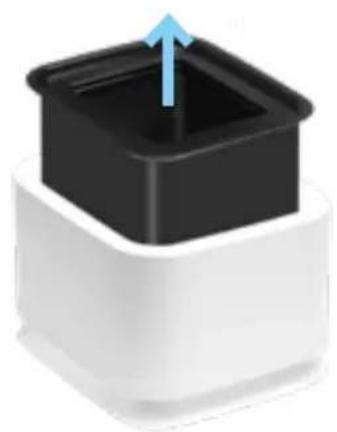
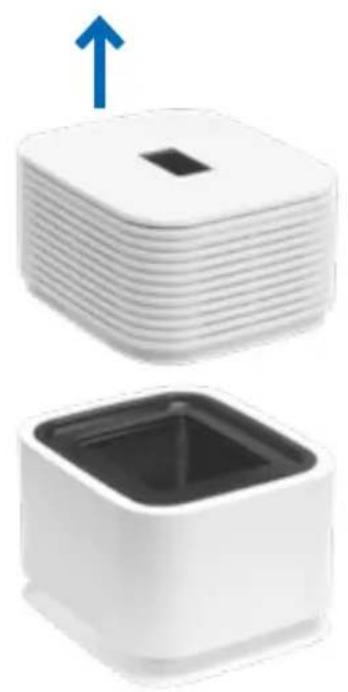
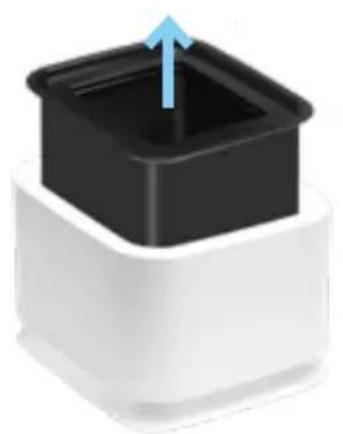
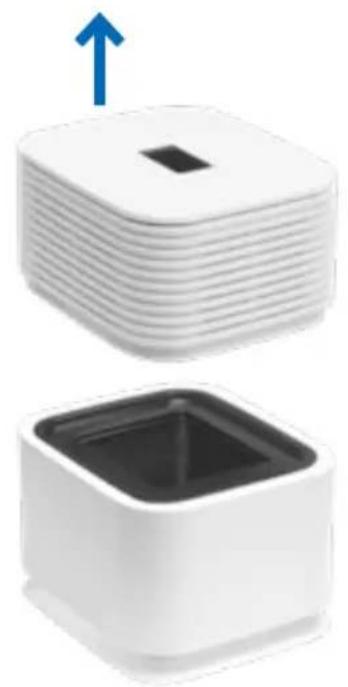
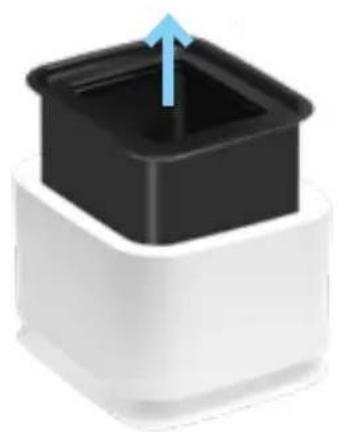
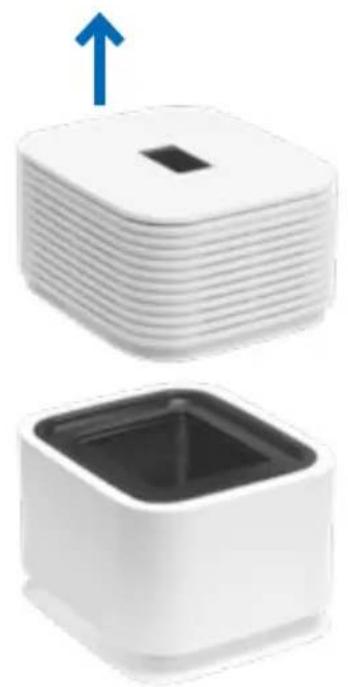
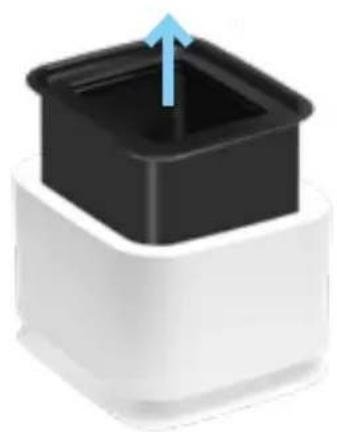
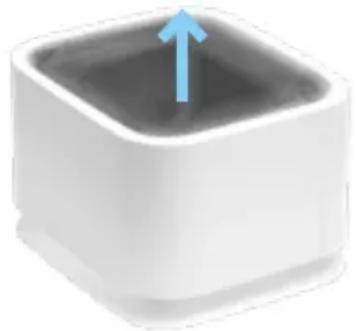
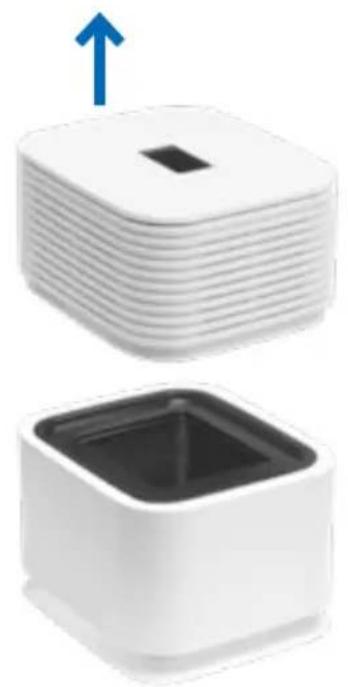
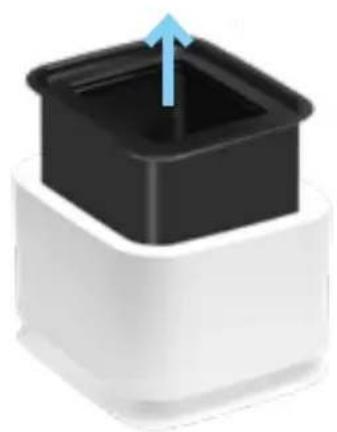
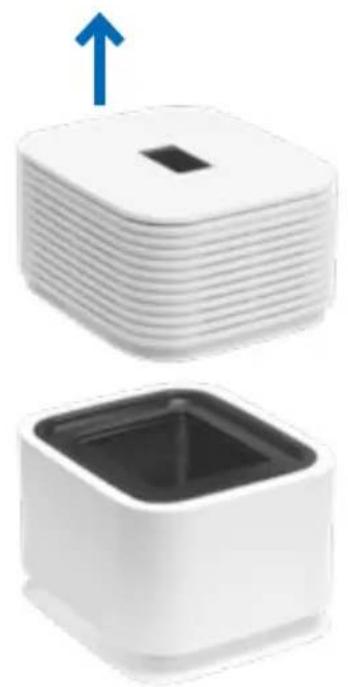
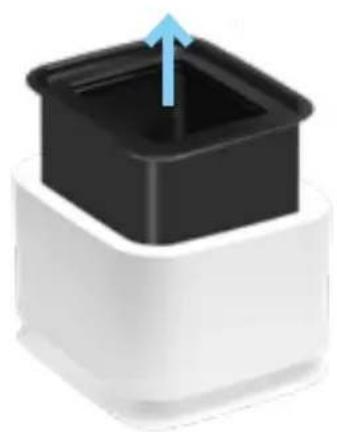
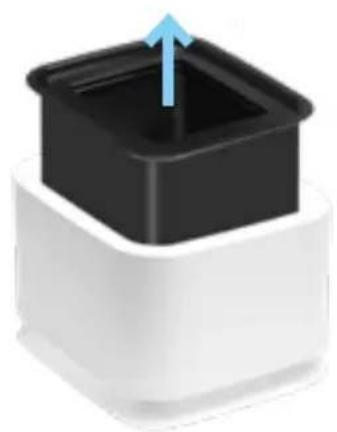
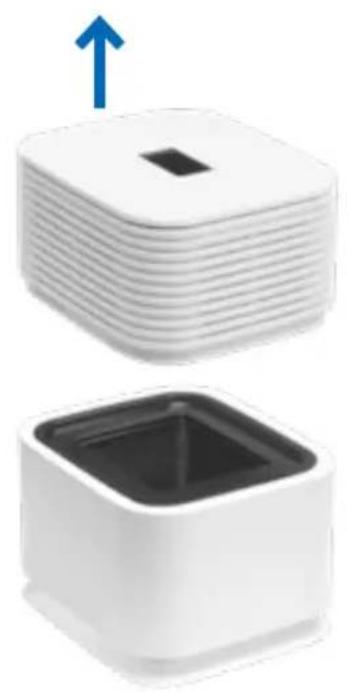
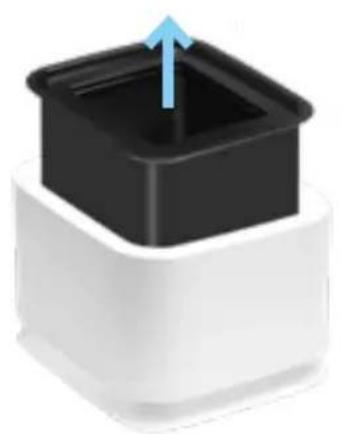
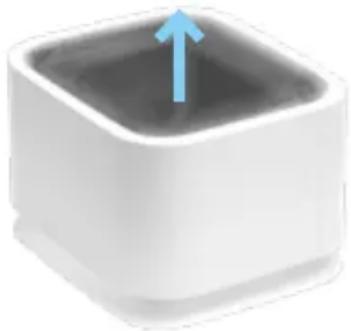
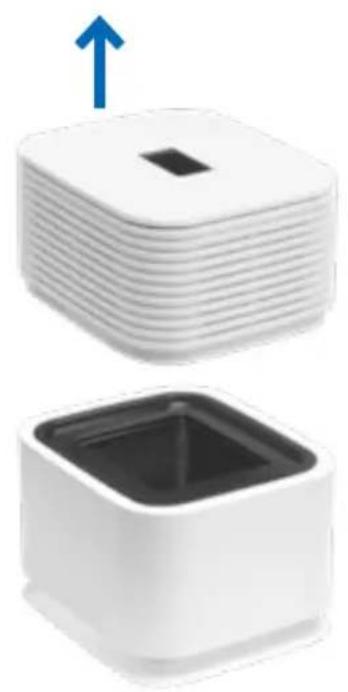
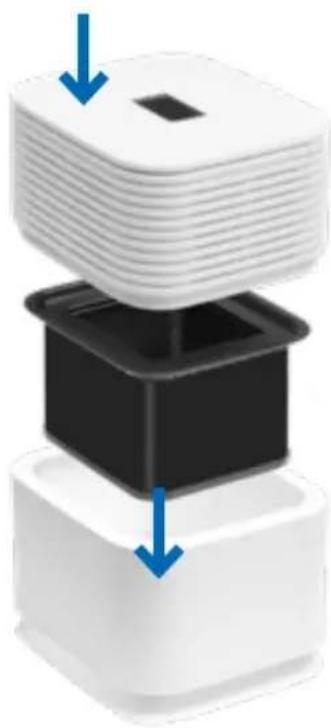
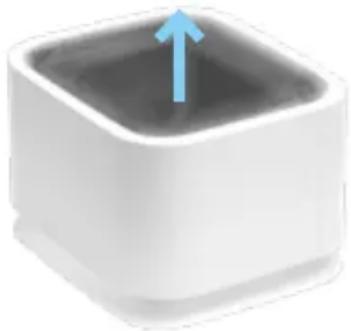
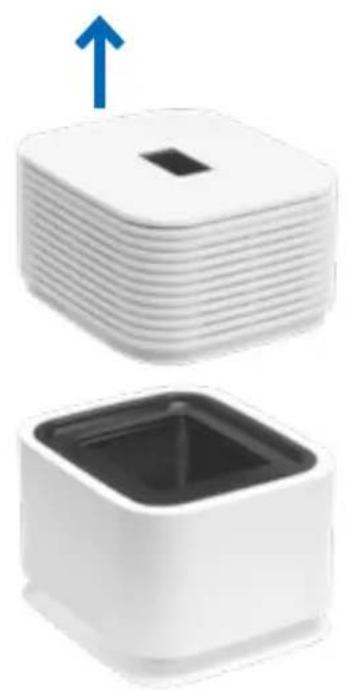
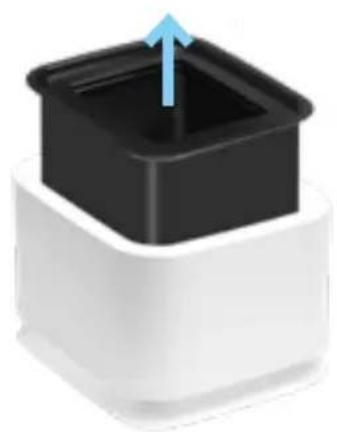
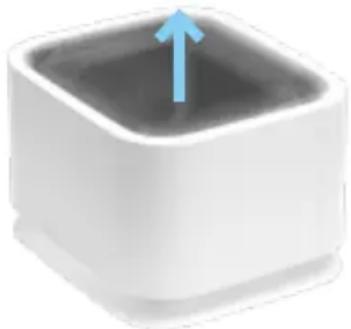
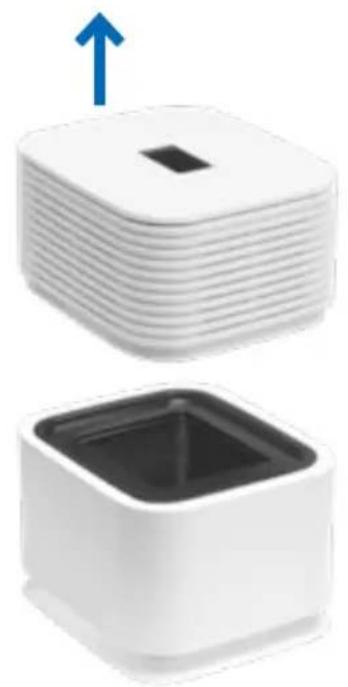
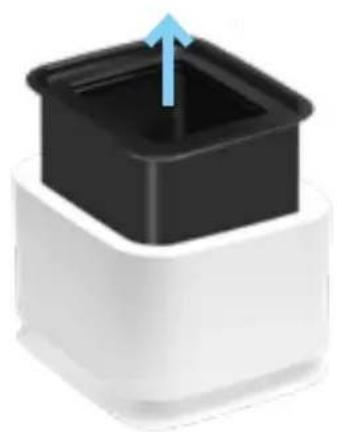
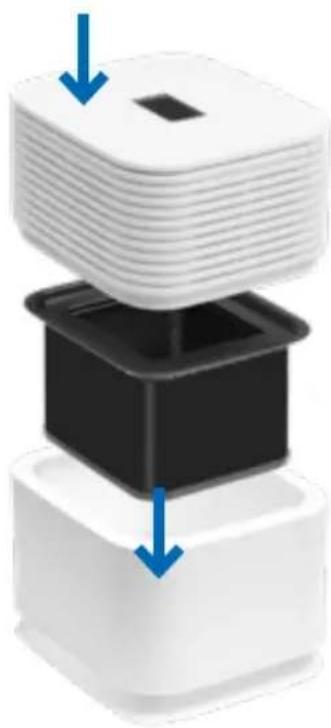
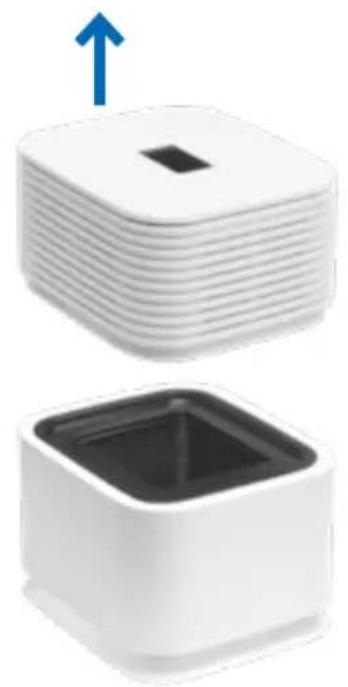
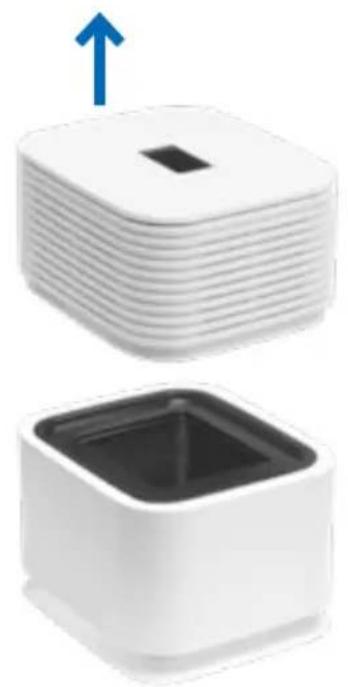
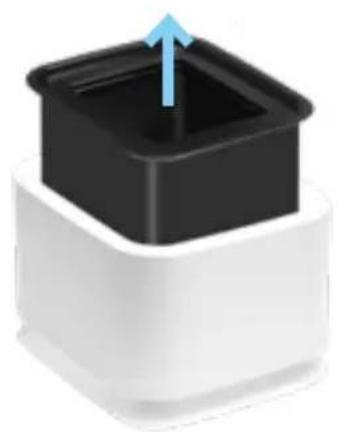
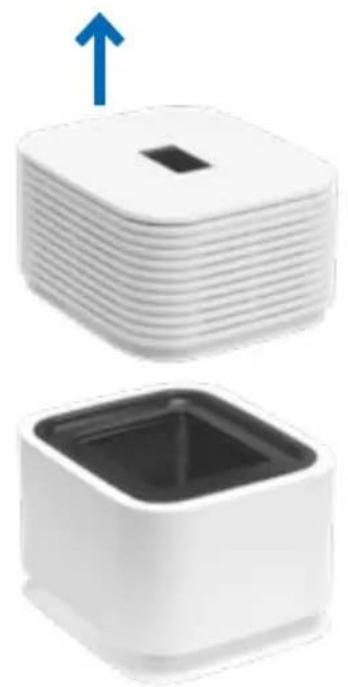
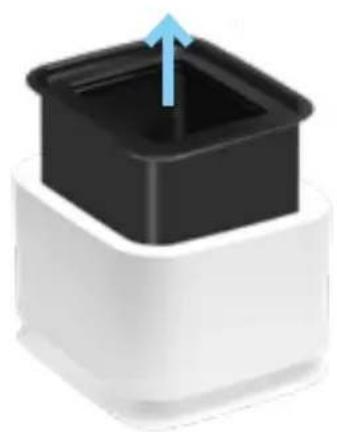
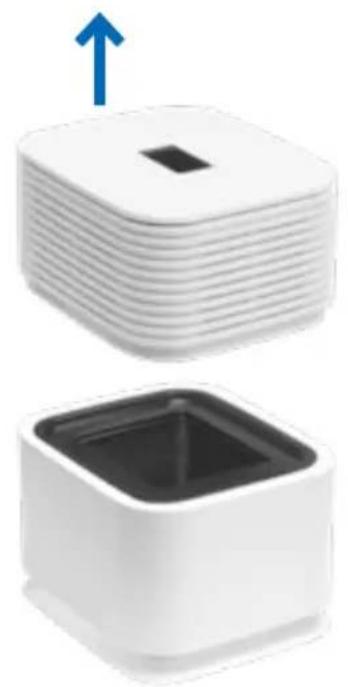
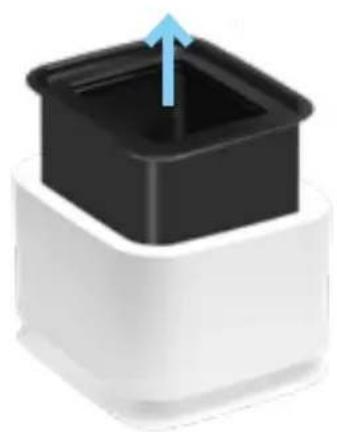
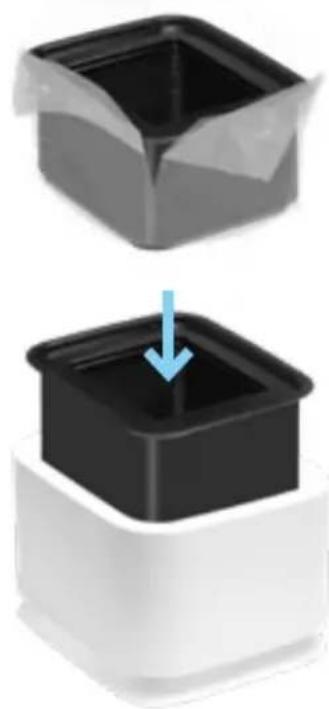
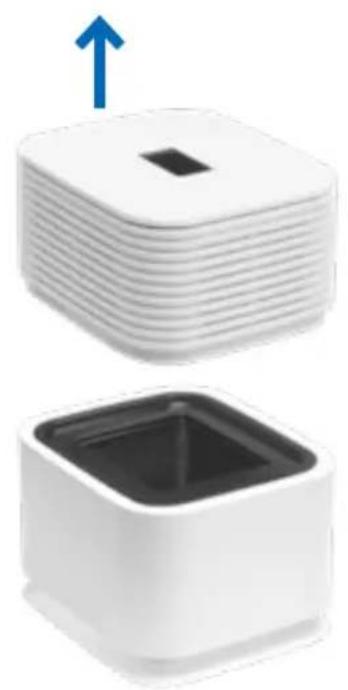
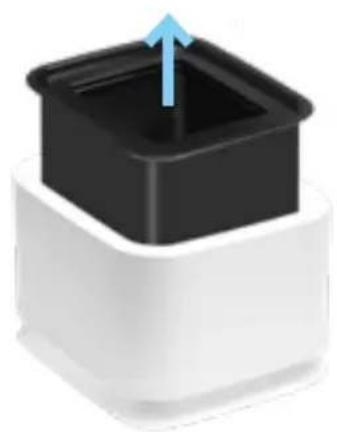
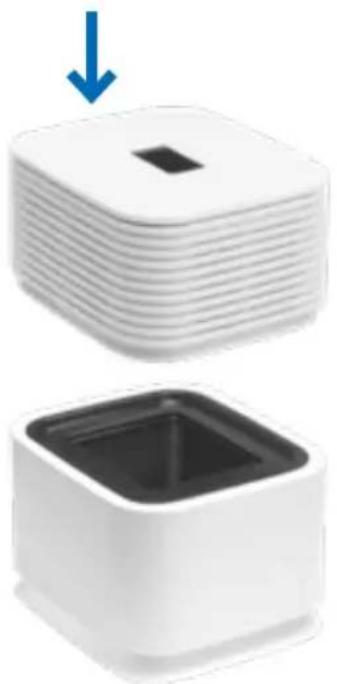
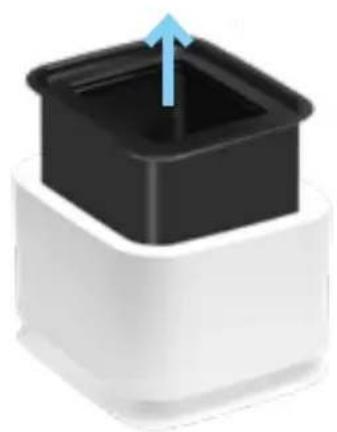
1 Remove the upper part of the unit. Remove the filter unit from the lower part of the device.
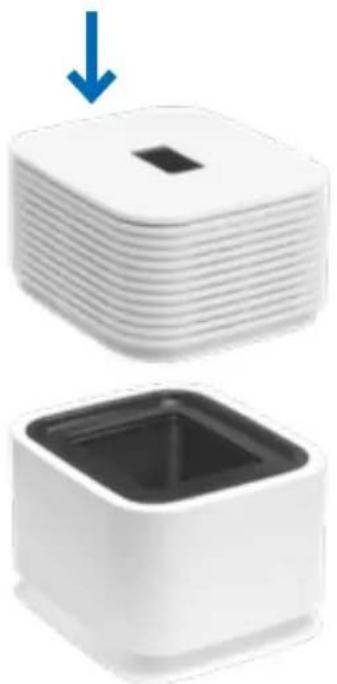
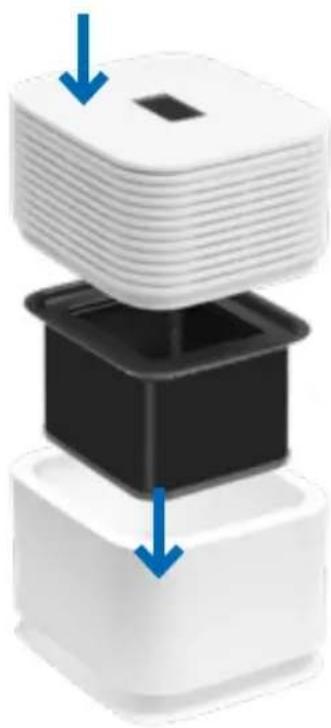
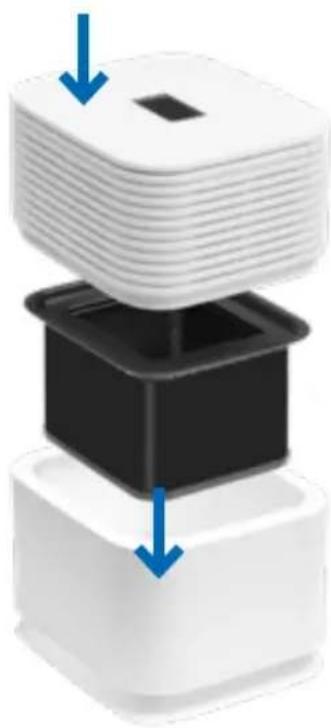
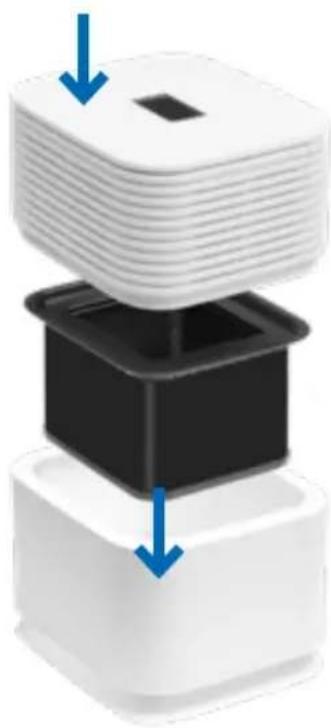
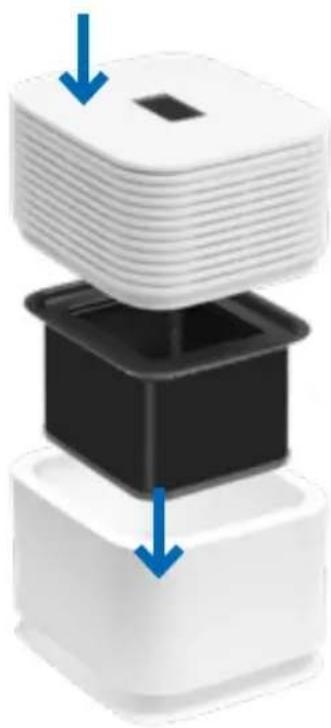
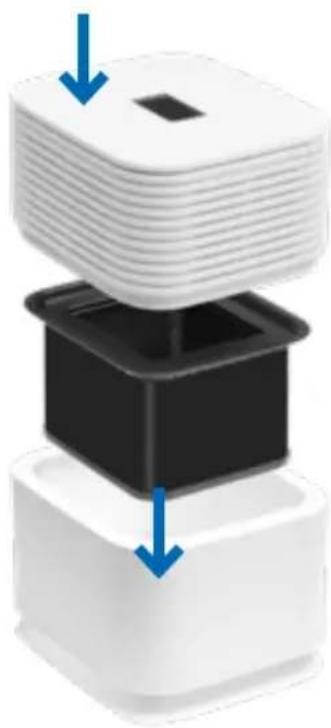
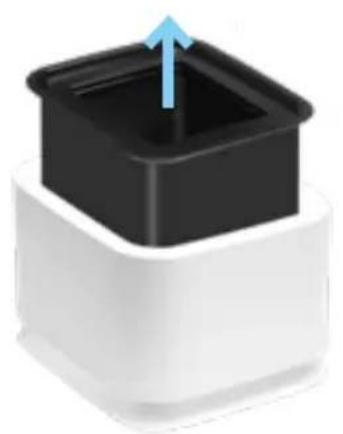
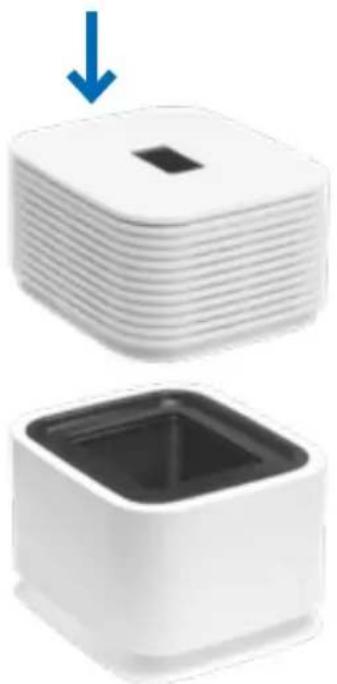
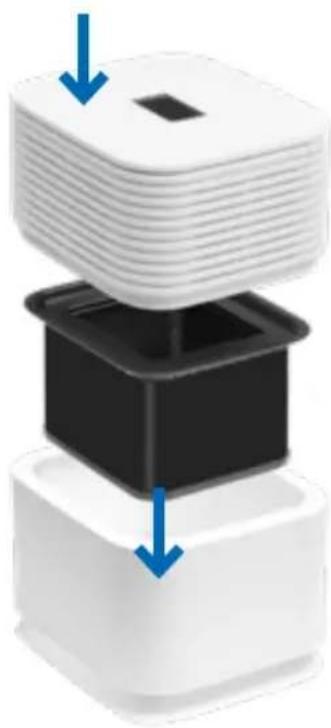
2 Remove the new filter unit and insert it into the lower part of the device.
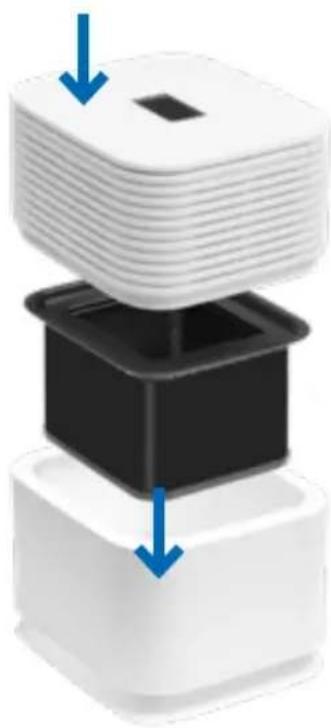
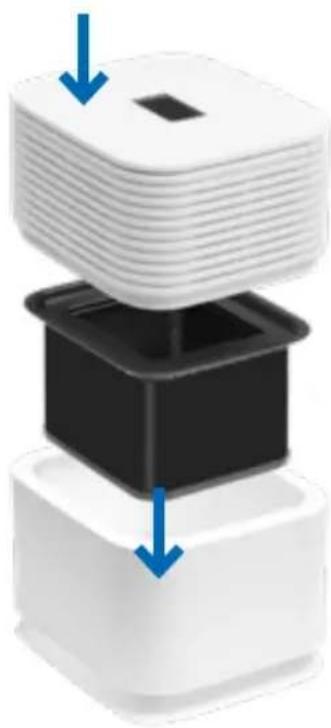
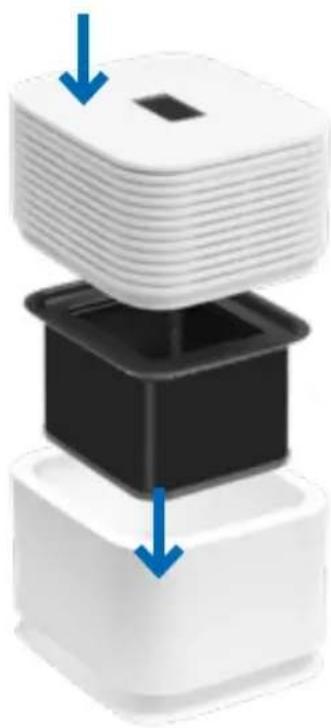
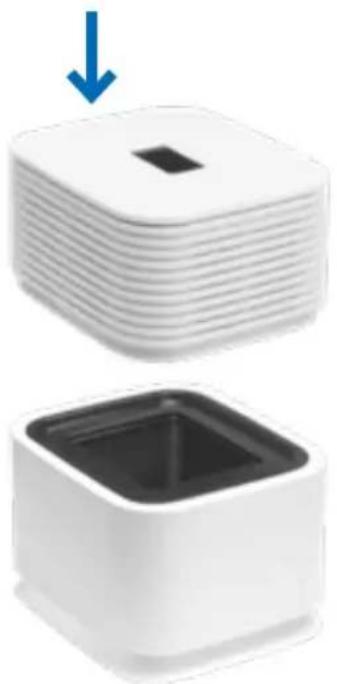
3 Reassemble the unit and put it into operation.
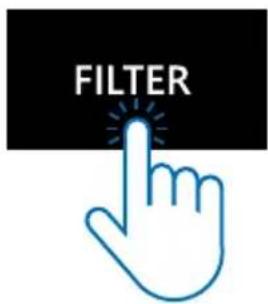
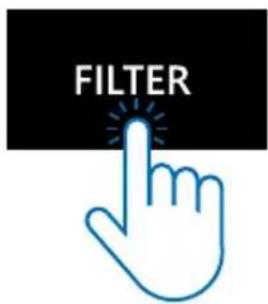
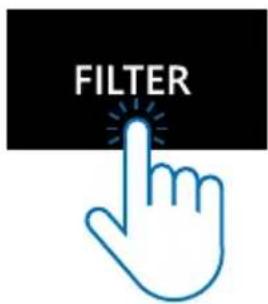
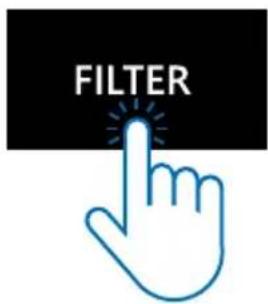
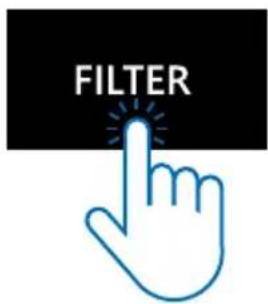
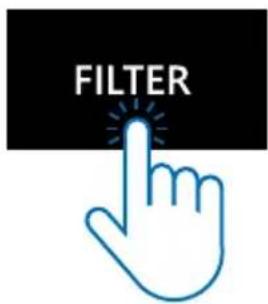
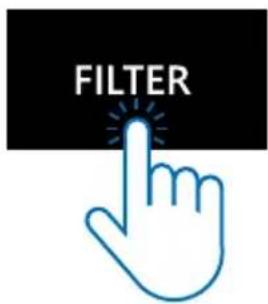
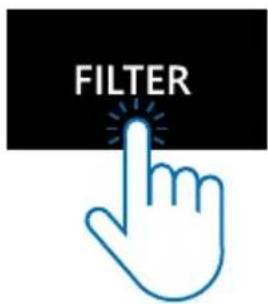
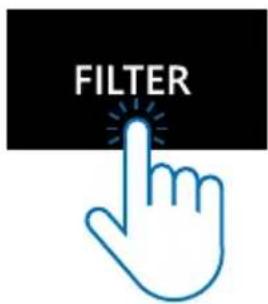
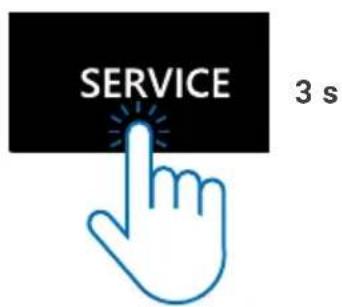
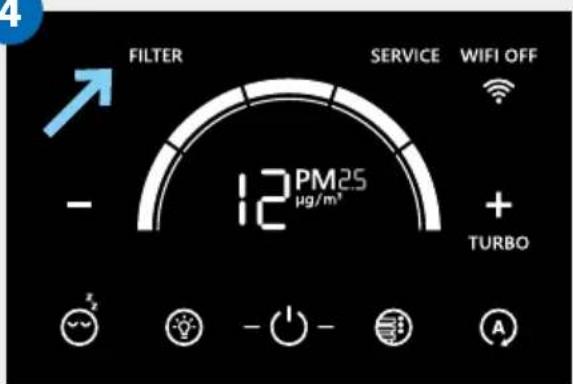
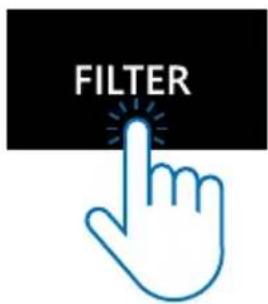
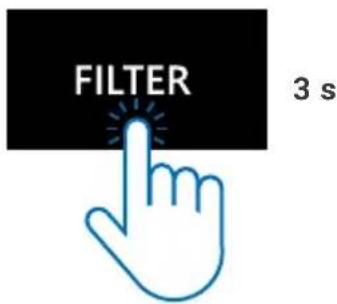
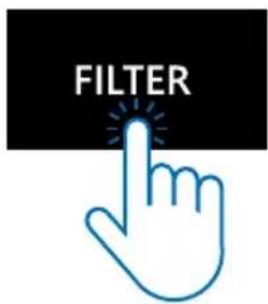
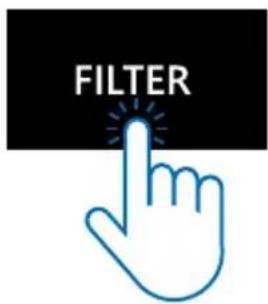
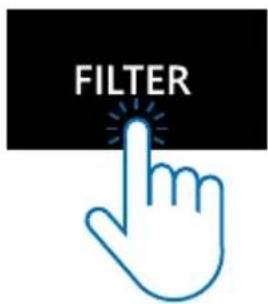
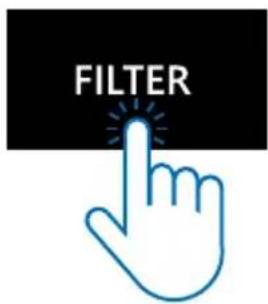
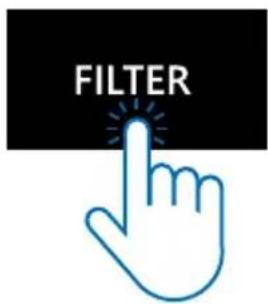
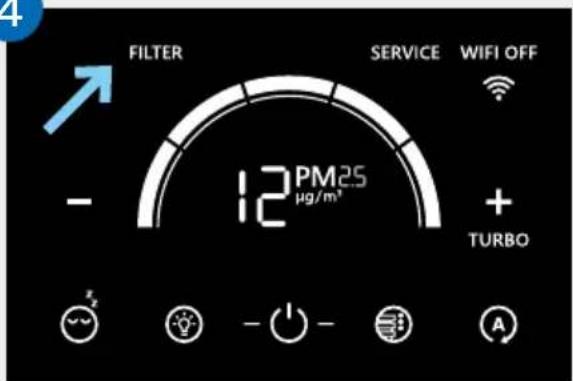
4 Touch the FILTER display (1) and hold it for approx. 3 seconds until it goes out.
Service
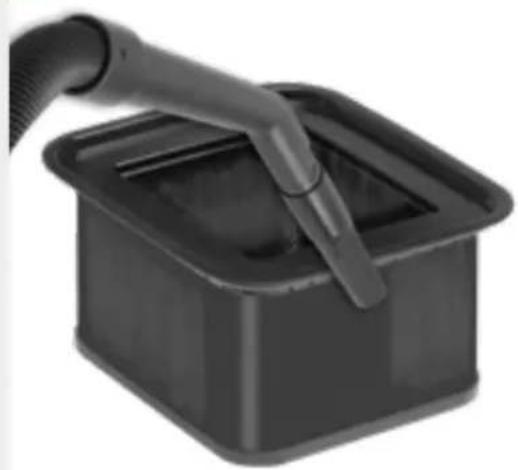
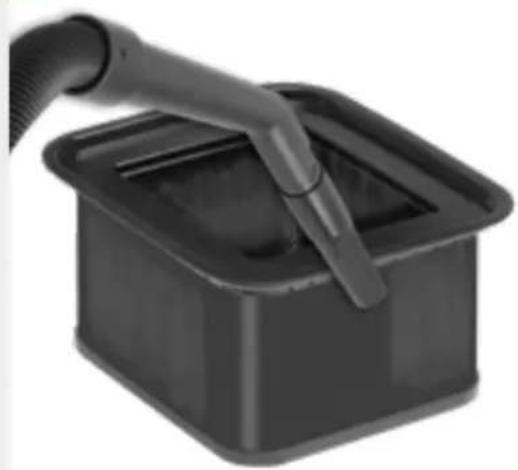
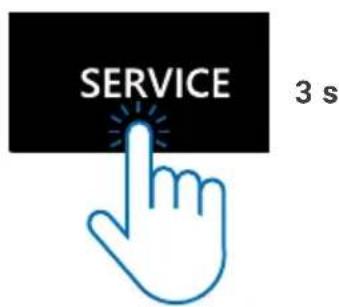
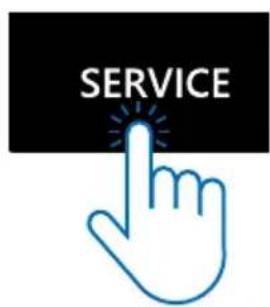
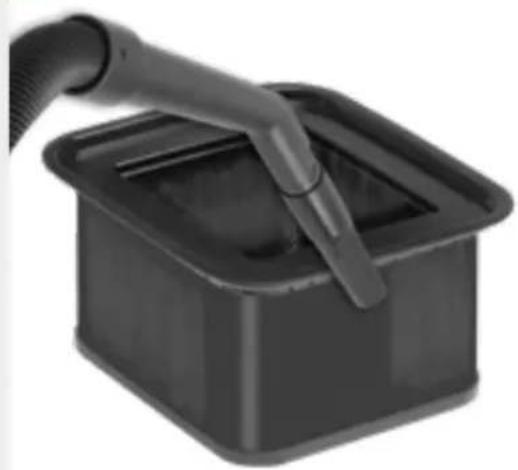
To ensure perfectly hygienic continuous operation, the SERVICE indicator (13) reminds you to carry out this measure every 4 weeks.
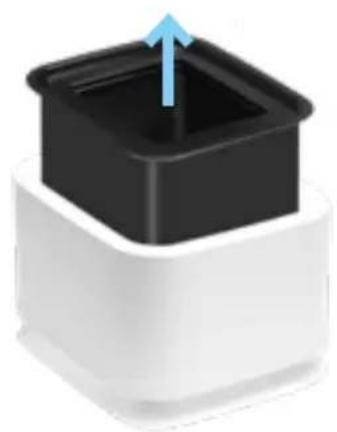
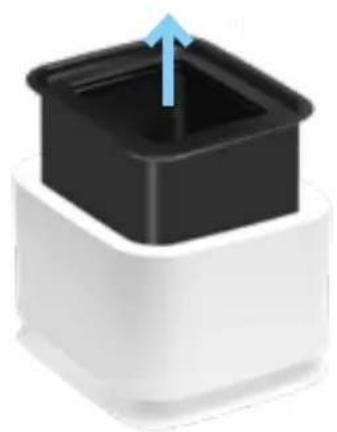
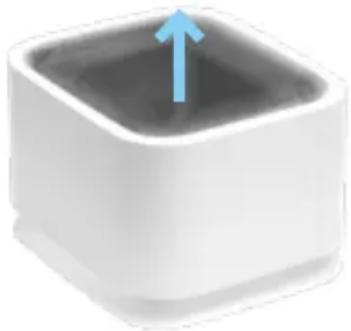
1 Remove the upper part of the unit.
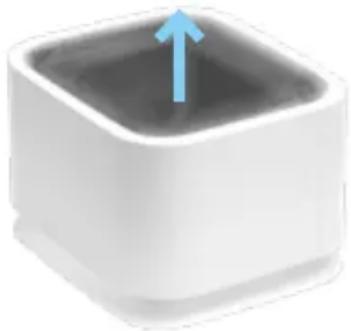
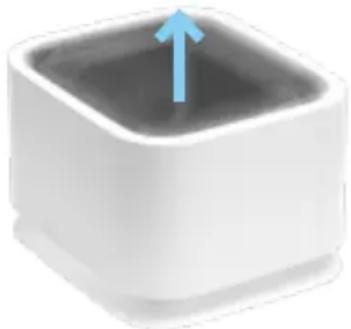
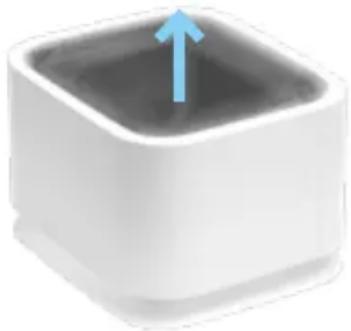
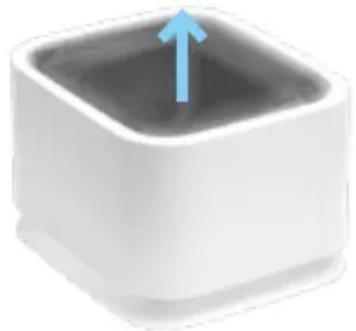
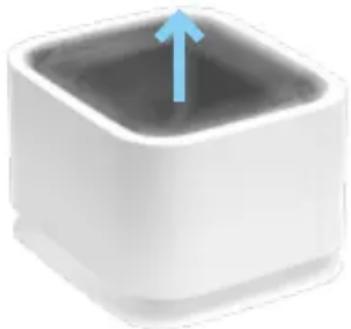
2 Remove the filter unit from the lower part.
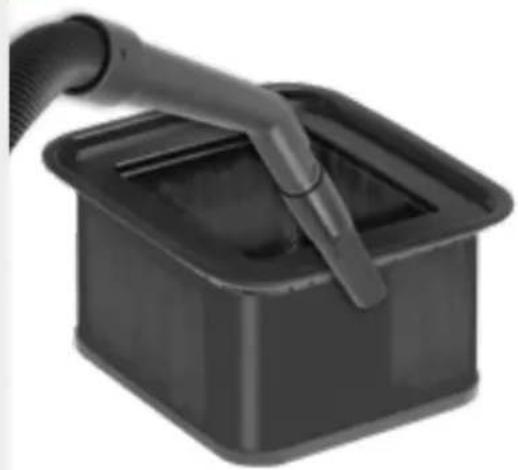
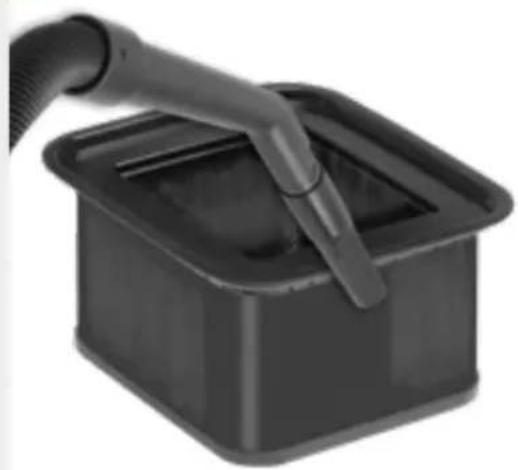
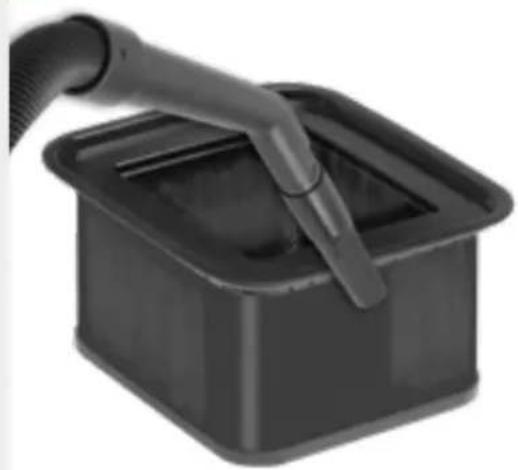
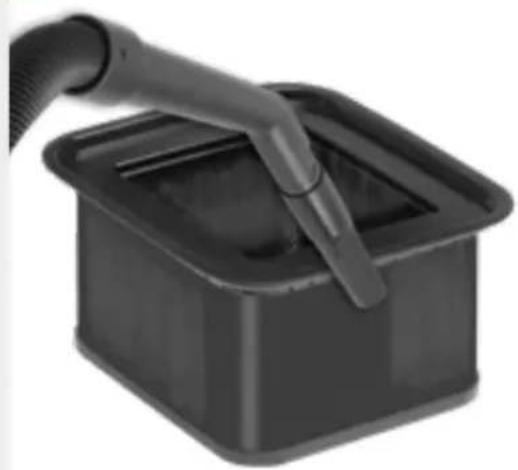
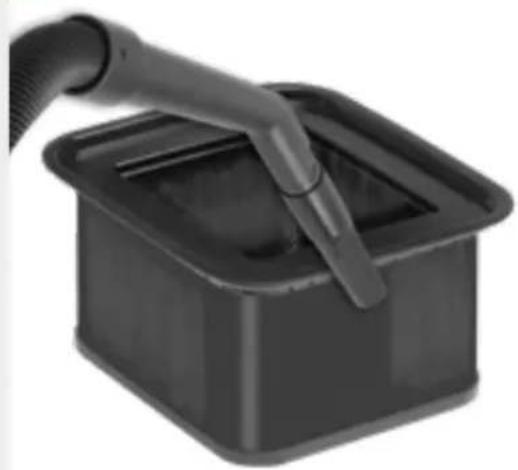
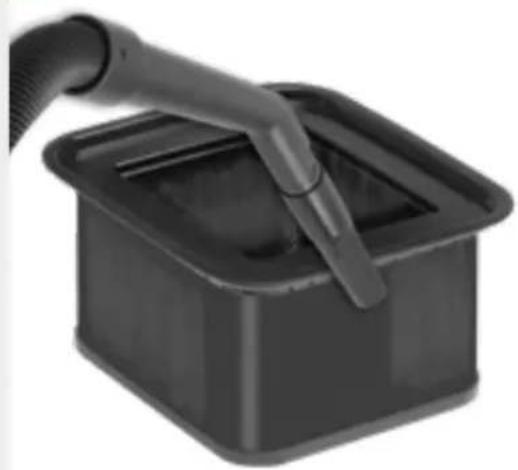
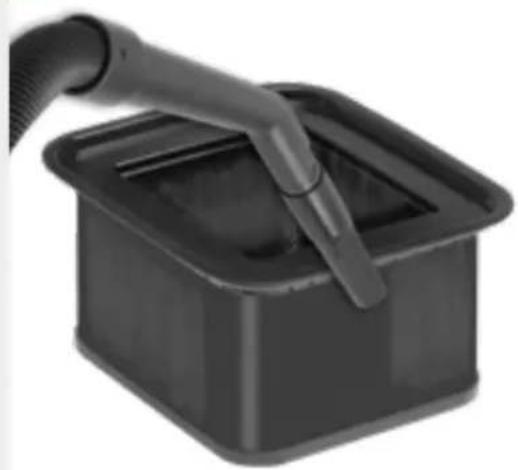
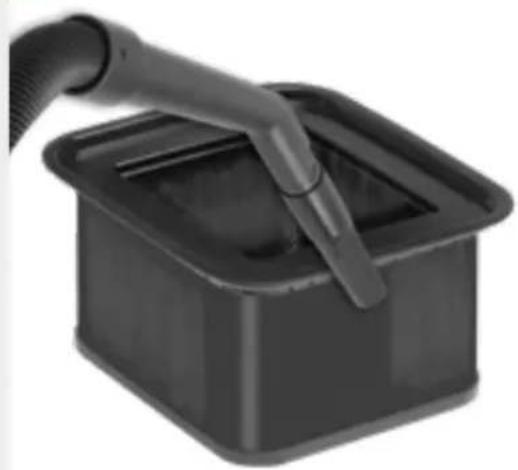
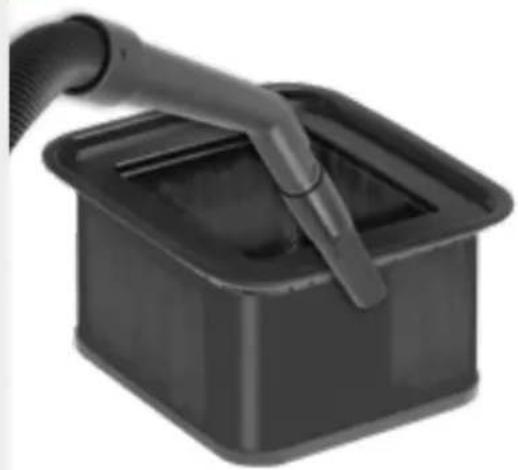
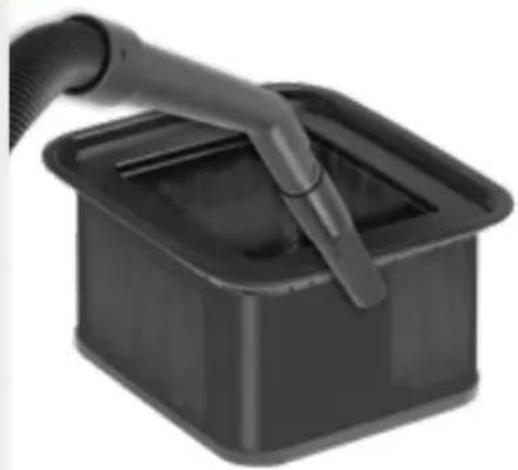
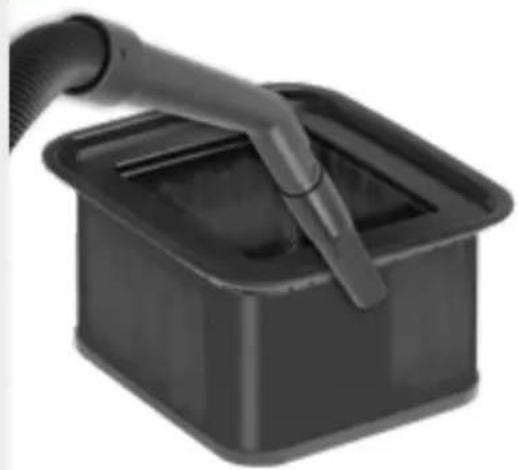
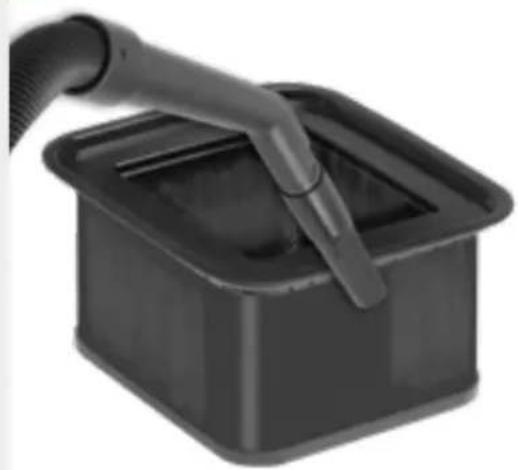
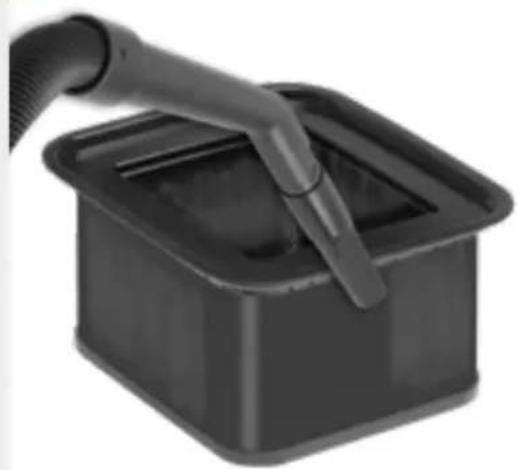
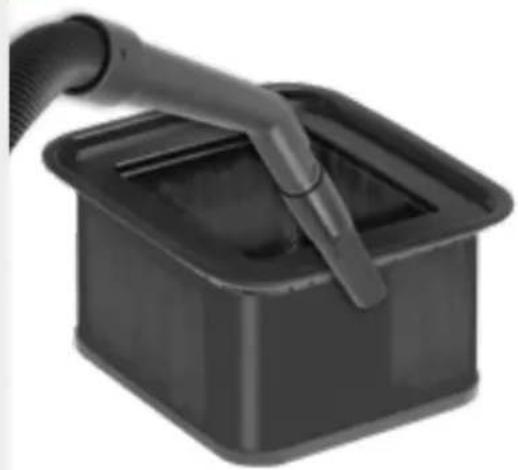
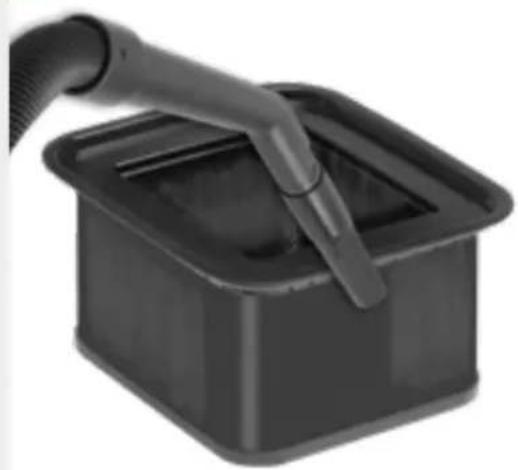
3 Vacuum the inner walls of the filter unit.
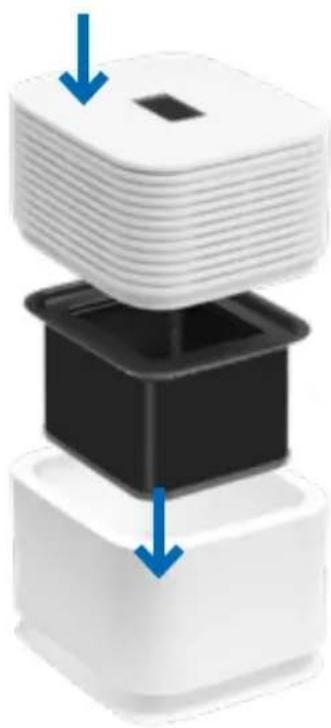
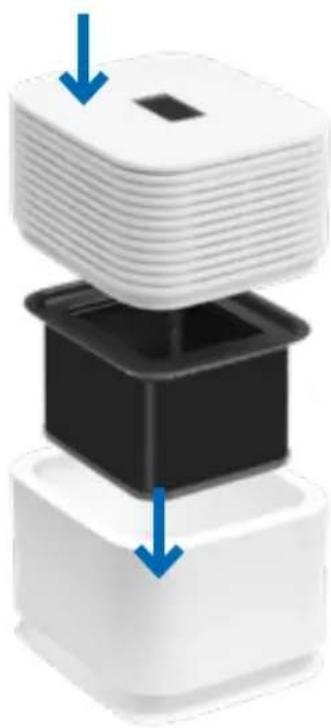
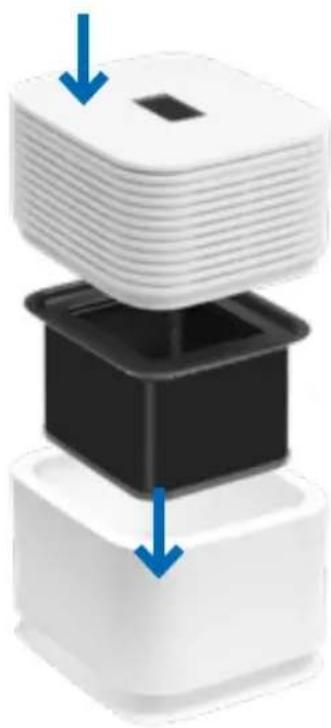
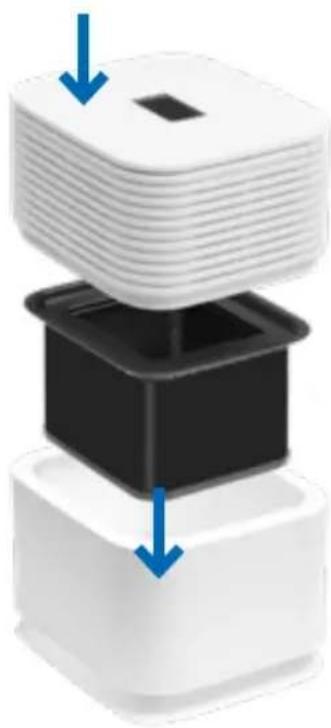
4 Replace the filter unit and put on the upper part of the unit.
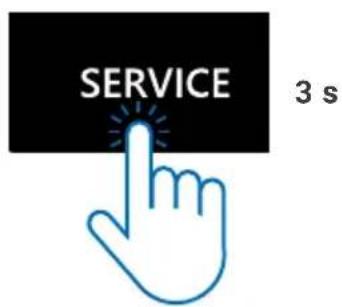
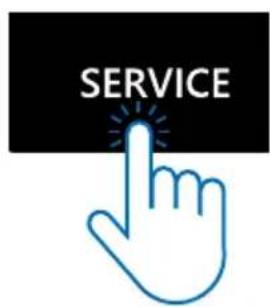
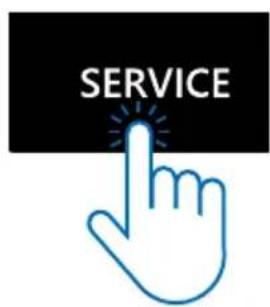
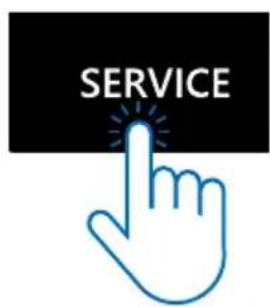
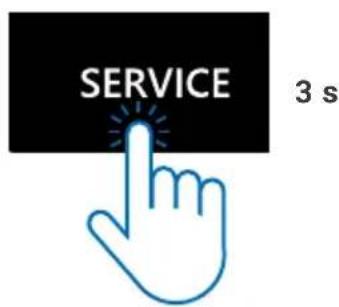
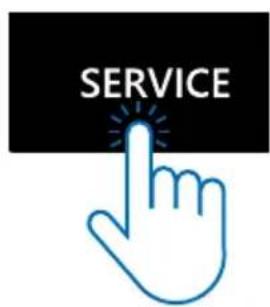
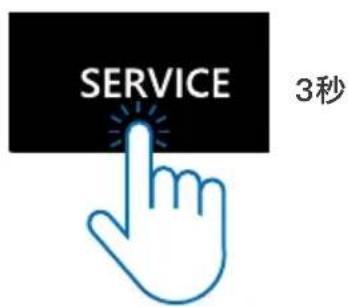
5 Touch the SERVICE display (13) and hold it for approx. 3 seconds until it goes out.
Reset-Menu
The maintenance actions can always be carried out if necessary, even if they are not displayed.
Touch the On/Off button ⏻(6) and hold for approx. 3 seconds until the display flashes and FILTER, CLEANING and SERVICE appear on the display. Now touch the measures that have been carried out and hold for approx. 3 sec. until they go out.
Then touch the flashing On/Off button ⏻ (6). It now lights up continuously again. The next reminders for the measures performed are now displayed again in rotation.
Change filter
1
2
3
4
3 Sec.
Service
1
2
3
4
5
3 Sec.
CLEANING THE DEVICE

Caution! Make sure that the device is switched off and the power supply is disconnected from the socket during all measures!
Cleaning the upper part of the device
Clean the upper part of the device with a dry cloth/cleaning brush or a slightly damp cloth!
Caution! The upper part of the device must not be cleaned under running water! Please do not use any cleaning agents.
Cleaning the display
Only clean the display with a dry cloth or a display cleaning cloth!
Caution! The display must not be cleaned wet or too moist! Please do not use any cleaning agents.
TECHNICAL DATA
| Model AP730/AP735 | |
| Colors white / black | |
| Room size suitability* up to 75 m2 | |
| Interactive touch display standard | |
| App Control / Voice assistant standard WiFi / Google, Alexa | |
| Measurement sensors Air quality PM2.5 | |
| VENTA-Filter standard 1-fold | |
| Power levels 5 + Automatik + TURBO + Sleep | |
| Noise level 22 / 27 / 34 / 40 / 45 dB (SPL) | |
| Noise level TURBO 55 dB (SPL) | |
| Power consumption | 4 / 6 / 8 / 13 / 21 W |
| Power consumption TURBO | 60 W |
| Mains voltage | 100-240 V~, 50/60 Hz |
| Dimensions (L × W × H) | 34 × 33 × 44 cm |
| Weight | approx. 6,8 kg |
| WLAN frequency range | 2412 - 2480 MHz |
| WLAN transmitting power | max 20 dBm |
* with standard 2.5 m ceilings
Room size suitability depending on the room air load:
- Indoor air pollution Light: room size suitability up to approx. 75 m² (>AQI 0 - 100).
- Indoor air pollution Medium: room size suitability up to approx. 50 m² (>AQI 101 - 200)
- Indoor air pollution Heavy: room size suitability up to approx. 25 m² (>AQI 201 - 500)
Subject to modifications and errors.
ACCESSORIES
Accessories can be ordered by phone or online at www.venta-air.com.
DATA PROTECTION
Your data will be processed by VENTA-Luftwäscher GmbH confidentially. Further information on the subject of data protection you can find in our data protection guidelines at: www.venta-air.com
DISPOSAL
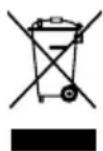
The "crossed-out wheeled garbage can" symbol requires the separate disposal of waste electrical and electronic equipment (WEEE). Such equipment may contain hazardous and environmentally dangerous substances.
These devices must be disposed of at a designated collection point for the
recycling of electrical and electronic devices and must not be disposed of in unsorted municipal waste. By doing so, you are helping to protect resources and the environment. For further information, please contact your local authorities.
Make sure that all personal data is deleted before is deleted before disposing of the appliance. If you reset your networked Venta appliance to the factory factory settings and delete all saved WLAN settings and delete all saved please proceed as follows: In standby mode, press and hold the power button for 5 seconds to reset the device to factory settings.

The packaging material can be recycled. Please dispose of the packaging in an environmentally friendly manner and take it to the recycling collection.
Children must never play with plastic bags and packaging material as there is a risk of injury or suffocation. Store such material safely or dispose of it in an environmentally friendly manner.
WHAT IF...?
... the ON/OFF button (6) does not appear in the display?
Please check whether the power supply is connected to a suitable outlet.
... the ON/OFF button (6) does not appear in the display although the power supply is connected to the mains?
Please check whether the power supply is connected to a suitable outlet.
... the display shows "Hi" instead of the particle measurement value (PM)?
The particle measured value is greater than 99 µm/m3 .
... white fields are visible in the background when touching the display?
The phenomenon is caused by electrostatic charges in dry rooms, does not represent a defect and does not affect the device. The white fields disappear after a short time.
... no WiFi connection can be established?
Please make sure that the device is assigned a radio network in the 2.4 GHz band by your router. Unfortunately, radio networks in the 5GHz band are not supported. Your router should also support the IEEE 802.11b/g/n transmission standards. The operating system iOS from version 11.0 or Android from version 6.0 must be installed. If necessary, update the operating system of your smartphone or tablet.
... only the ON/OFF button (6) and a sleeping face (4) are shown in the display?
This is not an error, but the sleep mode, in which the device should not be disturbing.. The device runs at the lowest speed and lights up with reduced brightness. Press the Sleep mode button (4) (the sleeping face) for 3 seconds. After that, the device runs normally again.
MERCI BEAUCOUP!
Configuration & application Smart Life 47
DESCRIPTION
2
3
4
5
6
7
ÉCRAN
2
3
4


Maintenance
1
2
3
4
5
NETTOYAGE DE L'APPAREIL

DESCRIZIONE
2
3
4
5
6
7
DISPLAY
CONFIGURA- ZIONE E APP SMART LIFE



Modalità hotspot
2
3
4
3 Sec.
Assistenza
1
2
3
4
5
3 Sec.
BESCHRIJVING
2
3
4
5
6
7
DISPLAY
CONFIGURATIE & SMART LIFE-APP



Hotspot-modus
2
3
4
3 seconden
Service
1
2
3
4
5
3 seconden
HET APPARAAT REINIGEN

DESCRIPCIÓN
2
3
4
5

6
7
PANTALLA
2
3
4
3 segundos
Mantenimiento
1
2
3
4
5

3 segundos
LIMPIEZA DEL APARATO

ОПИСАНИЕ
A
B
C
D
2
3
4
5
6
7
ДИСПЛЕЙ
2
3
4
3 сек.
2
3
4
5
3 сек.
ОЧИСТКА УСТРОЙСТВА

OPIS

2
3
4
5
6
7
WYŚWIETLACZ
KONFIGURACJA I APLIKACJA SMART LIFE



Tryb hotspot
2
3
4
3 sekundy
SERVICE
1
2
3
4
5
3 sekundy
CZYSZCZENIE URZĄDZENIA

⚠ INSTRUCTIUNI DE SIGURANTĂ
PUNEREA ÎN FUNCTIUNE
2
3
4
5
6

7
AFIŞAJ

2
3
4

3 Sec.
Întreținere
1
2
3
4
5
3 Sec.
CURĂȚAREA DISPOZITIVULUI

OPIS
2
3
4
5
6
7
DISPLEJ
2
3
4
3 s
Servis
1
2
3
4
5
ČISTENIE ZARIADENIA

UVEDENÍ DO PROVOZU
2
3

4
5

6
7
DISPLEJ
KONFIGURACE A APLIKACE SMART LIFE



Režim hotspot
2
3
4
3 s
Servis
1
2
3
4
5
ČIŠTĚNÍ ZAŘÍZENÍ


KÄYTTÖÖNOTTO
2
3

4
5
6
7
NÄYTTÖ
2
3
4
3 sekuntia.
Huolto
1
2
3
4
5
3 sekuntia.
LAITTEEN PUHDISTAMINEN

KIRJELDUS
2
3
4
5
6
7
EKRAAN
2
3
4
Teenindamine
1
2
3
4
5
SEADME PUHASTAMINE

СИПАТТАМАСЫ
2
3
4
5
6
7
ДИСПЛЕЙ
2
3
4
3 сек.
Кызмет көрсету
1
2
3
4
5
3 сек.
КУРЫЛГЫНЫ ТАЗАЛАУ

APRAŠYMAS
2
3
4
5
6
7
EKRANAS
2
3
4
3s
Techninė priežiūra
1
2
3
4
5
PRIETAISO VALYMAS

LIETOŠANAS SĀKŠANA
2
3

4
5
6
7
DISPLEJS
2
3
4
3 sekundes
Apkalpe
1
2
3
4
5
3 sekundes
IERİCES TİRİŞANA

KETERANGAN
A Paparan
B Bahagian atas unit
C Unit penapis
D Bahagian bawah unit

MEMULAKAN OPERASI

2
3
4
5
6
7
PAPARAN
KONFIGURASI & AP SMART LIFE



Mod hotspot
2
3

4

3 Saat
Servis
1
2
3
4
5
3 Saat
MEMBERSIHKAN PERANTI

产品描述
2
3
4
5
6
7
显示界面
2
3
4
3 Sec.
服务
1
2
3
4
5
3 Sec.
设备清洁

注意!
使用手順
初回使用の前
2
3
4
5
6

7
ディスプレイ
2

3
4
お手入れ
1

2
3
4
5
デバイスの清掃

www.venta-air.com/Service/Service-Support/
VENTA WORLD WIDE
www.venta-air.com/en_de/Venta-worldwide/
BENELUX
Venta Benelux B.V.
1111 North Plaza Drive, Suite 715
Schaumburg, IL 60173
No. 27, Jalan PP 11/4,
Alam Perdana Industrial Park,
Taman Putra Perdana, 47130
Puchong, Selangor, Malaysia
Tel.: +603-8322 6628
Fax: +603-8322 6066
info@gasales.com.my
RUSSIA
Venta Russia TSK IMPORT
Nihonbashi Daiei Building 7F
1-2-6 Muromachi Nihonbashi
Chuo-ku, Tokyo 103-0022
090-4129-0399
venta_support@kikuyalogi.com
www.venta-air.jp
MONGOLIA
AERIS LLC, SUITE 316, Barilga
Architecture Building, Chinggis
Avenue, Oron Suuts Street,
2nd horoo, Khan-Uul district,
Ulaanbaatar, Mongolia 17032
Tel.: +976-99101185,
+976-99096696
sales@aeris.mn
www.aeris.mn
SOUTH AFRICA
EUROCARE Wellness
5 Star Business Park, Unit 2,
Persimmon Close, Honeydew,
Johannesburg
Südafrika
Tel.: +27 11 888 3255
Fax:+27118889874
info@eurocarewellness.co.za
KROATIEN
MR servis d.o.o.
Dugoselska cesta 5
10370 Rugvica, Kroatien
Tel.: +385060535355
info@mrservis.hr
mrservis.hr
SOUTH KOREA
VENTA KOREA CO., LTD.
3/F., Seojin Bldg., 754,
Seolleung-ro, Gangnam-Gu,
Seoul 135-948, Korea
Tel.: +82 22 03 40 114
Fax: +82 22 03 40 119


- VIELEN DANK
- ÜBERSICHT
- DISPLAY
- SERVICE
- DEAR CUSTOMER
- SYMBOLS USED
- TABLE OF CONTENTS
- SAFETY INSTRUCTIONS
- INTENDED USE
- WARRANTY
- SCOPE OF DELIVERY
- DESCRIPTION
- OPERATION
- AIR QUALITY
- LED BAND (5)
- SET THE DESIRED BRIGHTNESS
- LED COLORS (8)
- RETRIEVE THE CURRENT AIR QUALITY IN THE ROOM (AIR QUALITY)
- COLOR INFORMATION OF THE LED STRIP
- CONSTANT GLOW
- A BLUE RUNNING LIGHT MOVES ALONG THE LED STRIP
- WIFI / HOTSPOT
- CONFIGURATION & SMART LIFE APP
- HOTSPOT MODE
- ACTIVATING WLAN
- INSTALL "SMART LIFE - SMART LIVING" APP
- SET UP WIFI
- PLEASE MAKE SURE THAT
- CLEANING / MAINTENANCE
- CHANGE FILTER
- RESET-MENU
- CLEANING THE DEVICE
- CLEANING THE UPPER PART OF THE DEVICE
- CLEANING THE DISPLAY
- TECHNICAL DATA
- ACCESSORIES
- DATA PROTECTION
- DISPOSAL
- WHAT IF
- MERCI BEAUCOUP
- ÉCRAN
- MAINTENANCE
- NETTOYAGE DE L'APPAREIL
- DESCRIZIONE
- CONFIGURA- ZIONE E APP SMART LIFE
- MODALITÀ HOTSPOT
- ASSISTENZA
- BESCHRIJVING
- CONFIGURATIE & SMART LIFE-APP
- HOTSPOT-MODUS
- HET APPARAAT REINIGEN
- DESCRIPCIÓN
- PANTALLA
- MANTENIMIENTO
- LIMPIEZA DEL APARATO
- ОПИСАНИЕ
- ДИСПЛЕЙ
- ОЧИСТКА УСТРОЙСТВА
- OPIS
- WYŚWIETLACZ
- KONFIGURACJA I APLIKACJA SMART LIFE
- TRYB HOTSPOT
- CZYSZCZENIE URZĄDZENIA
- ⚠ INSTRUCTIUNI DE SIGURANTĂ
- PUNEREA ÎN FUNCTIUNE
- AFIŞAJ
- ÎNTREȚINERE
- CURĂȚAREA DISPOZITIVULUI
- DISPLEJ
- SERVIS
- ČISTENIE ZARIADENIA
- UVEDENÍ DO PROVOZU
- KONFIGURACE A APLIKACE SMART LIFE
- REŽIM HOTSPOT
- ČIŠTĚNÍ ZAŘÍZENÍ
- KÄYTTÖÖNOTTO
- NÄYTTÖ
- HUOLTO
- LAITTEEN PUHDISTAMINEN
- KIRJELDUS
- EKRAAN
- TEENINDAMINE
- SEADME PUHASTAMINE
- СИПАТТАМАСЫ
- КЫЗМЕТ КӨРСЕТУ
- КУРЫЛГЫНЫ ТАЗАЛАУ
- APRAŠYMAS
- EKRANAS
- TECHNINĖ PRIEŽIŪRA
- PRIETAISO VALYMAS
- LIETOŠANAS SĀKŠANA
- DISPLEJS
- APKALPE
- IERİCES TİRİŞANA
- KETERANGAN
- MEMULAKAN OPERASI
- PAPARAN
- KONFIGURASI & AP SMART LIFE
- MOD HOTSPOT
- MEMBERSIHKAN PERANTI
- 产品描述
- 显示界面
- 设备清洁
- 注意
- 使用手順
- 初回使用の前
- ディスプレイ
- お手入れ
- デバイスの清掃
- VENTA WORLD WIDE
- BENELUX
- RUSSIA
- MONGOLIA
- SOUTH AFRICA
- KROATIEN
- SOUTH KOREA
Brand : Venta
Model : Aerostyle Compact AP735
Category : Air purifier