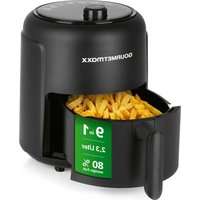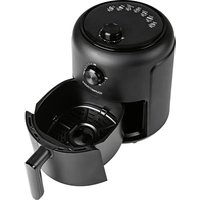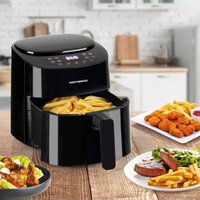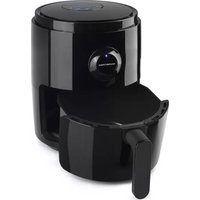
03000 - Deep fryer Gourmetmaxx - Free user manual and instructions
Find the device manual for free 03000 Gourmetmaxx in PDF.


User questions about 03000 Gourmetmaxx
0 question about this device. Answer the ones you know or ask your own.
Ask a new question about this device
Download the instructions for your Deep fryer in PDF format for free! Find your manual 03000 - Gourmetmaxx and take your electronic device back in hand. On this page are published all the documents necessary for the use of your device. 03000 by Gourmetmaxx.
USER MANUAL 03000 Gourmetmaxx
Before Initial Use 18
Set-Up and Connection 19
Accessories 19
Tips 19
Use 20
Cleaning and Storage 21
Troubleshooting 21
Disposal 22
Technical Data 22
Recipe Ideas 23

IMPORTANTNOTICES! PLEASE KEEP FOR REFERENCE!
ITEMS SUPPLIED
1 x hot air frying machine (main unit)
1 x drawer
1 x rack
1 x operating instructions
Check the items supplied for completeness and the components for transport damage. If you find any damage, do not use the device but contact our customer service department.
Remove any possible films, stickers or transport protection from the device.
Never remove the rating plate and any possible warnings!
AT A GLANCE
(Picture A)
1 Ventilation slots
2 Connecting cable
3 Rack
4 Drawer with handle
5 In the cooking chamber: heating element and fan
6 Control panel
7 Main unit
(Picture B)
8 "Baking" programme symbol
9 "Fan on" symbol
10 "Poultry" programme symbol
11 "Heating on" symbol
12 "Meat" programme symbol
13 Display (temperature, time, status)
14 "Fish" programme symbol
15 "Increase temperature" field
16 "Reduce temperature" field
17 "Select programme" field
18 "Reduce cooking time" field
19 "Increase cooking time" field
20 "On / Off" field
21 "Chips" programme symbol
22 "Shrimps" programme symbol
Dear Customer,
We are delighted that you have chosen the digital hot air frying machine from MAXXMEE.
This device will allow you to discover how easy it now is to fry and prepare food. The clever combination of fast-circulating hot air and a heating element requires much less time, energy and fat than conventional devices. You can even prepare frozen chips with no oil at all. This hot air frying machine also offers you 6 preset programmes for extra-simple preparation of lots of kitchen classics with guaranteed success every time. Simply select the programme, wait for the beep ... and enjoy!
If you have any questions about the device and about spare parts/accessories, contact the customer service department via our website: www.dspro.de/kundenservice
We hope you have a lot of fun with your digital hot air frying machine from MAXXMEE.
Information About the Operating Instructions
Before using the device for the first time, please read through these operating instructions carefully and keep them for future reference and other users. They form an integral part of the device. The manufacturer and importer do not accept any liability if the information in these operating instructions is not complied with.
SYMBOLS


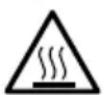
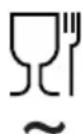
Danger symbols: These symbols indicate possible dangers. Read the associated safety notices carefully and follow them.
Supplementary information
Read the operating instructions before use!
Caution: hot surfaces!
Suitable for use with food.
Alternating current
SIGNAL WORDS
Signal words indicate hazards if the associated notices are not followed.
DANGER – high risk, results in serious injury or death
WARNING – medium risk, may result in serious injury or death
CAUTION – low risk, may result in minor or moderate injury
NOTICE – may result in risk of damage to material
INTENDED USE
■ The device is intended to be used for grilling, baking, defrosting and warming up food.
■ The device operates with hot air. It is not a conventional fryer in which food is deep-fried using oil.
■ The device is not suitable for preparing liquid dishes such as soups, sauces or stews!
■ The device is for personal use only and is not intended for commercial
or domestic-like applications, e.g. in hotels, bed and breakfasts, offices, staff kitchens or similar places.
■ Use the device only for the specified purpose and as described in the operating instructions. Any other use is deemed to be improper.
■ The warranty does not cover faults caused by incorrect handling, damage or attempted repairs. The same applies to normal wear and tear.
SAFETY NOTICES

WARNING: Note all safety notices, instructions, illustrations and technical data provided with this device. Failure to follow the safety notices and instructions may result in electric shock, fire and / or injuries.
This device may be used by children aged 8 and over and by people with reduced physical, sensory or mental abilities or a lack of experience and/or knowledge if they are supervised or have received instruction on how to use the device safely and have understood the dangers resulting from failure to comply with the relevant safety precautions.
■ Children must not play with the device.
■ Cleaning and user maintenance must not be carried out by children, unless they are older than 8 years of age and are supervised.
■ Children younger than 8 years of age and animals must be kept away from the device and the connecting cable.
■ Never immerse the main unit and the connecting cable in water or other liquids, and ensure that these components cannot fall into water or become wet. There is a danger of electric shock!
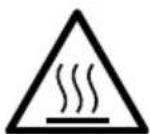
CAUTION: hot surfaces!
The device and accessories will become very hot during use. Do not come into contact with heated parts while or after using the device! Only ever touch the handle
and the control panel while the device is in operation or immediately after it has been switched off. Wait until the device has cooled down fully before it is transported, cleaned or stored away. Use oven gloves when handling the hot accessories.
- Do not pour any liquids (e.g. oil or water) directly into the device or the drawer or place a liquid-filled vessel into the device. It works exclusively with hot air.
■ The device must always be disconnected from the mains power when it is left unattended and before transporting or cleaning the device.
- Do not make any modifications to the device. Also do not replace the connecting cable yourself. If the device, the connecting cable or the accessories of the device are damaged, they must be replaced by the manufacturer, customer service department or a specialist workshop in order to avoid any hazards.
■ The device is not designed to be operated with an external timer or a separate remote control system.
■ Follow the instructions in the "Cleaning and Storage" chapter!
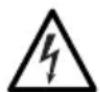
DANGER – Danger of Electric Shock
■ Use and store the device only in closed rooms.
■ Do not use and store the device in rooms with high humidity.
■ Never touch the device and the connecting cable with wet hands when the device is connected to the mains power.
If the device falls into water while it is connected to the mains power, pull the mains plug out of the plug socket immediately. Only after this should you retrieve the device from the water. Never attempt to pull it out of the water while it is connected to the mains power!
If the device has fallen into water or other liquids, do not use it. Before using it again, have it checked by the manufacturer, customer service department or an authorised distributor in order to avoid possible hazards.

WARNING – Danger of Fire
■ Do not operate the device in the vicinity of combustible material. Do not place any combustible materials (e.g. cardboard, paper, plastic) on or in the device.
- Do not connect the device along with other consumers (with a high wattage) to a multiple socket in order to prevent overloading and a possible short circuit (fire).
■ Do not use any extension cables.
EN
- Do not cover the device during operation in order to prevent it from catching fire. Do not insert anything into the ventilation openings of the device and make sure that they do not become clogged.
In the event of a fire: Do not extinguish with water! Smother the flames with a fireproof blanket or a suitable fire extinguisher.

WARNING – Danger of Injury
- Keep children and animals away from the packaging material. There is a danger of suffocation.
■ Make sure that the connecting cable is always kept out of the reach of small children and animals. There is a danger of strangulation.
■ Make sure that the connecting cable does not present a trip hazard. It may not hang down from the surface on which the device is placed in order to prevent the device from being pulled down.
■ Hot steam can escape from the device during operation and when the drawer is pulled out. You should therefore keep your head and hands out of the danger zone. There is a danger of scalding from heat, hot steam or condensation.
NOTICE – Risk of Damage to Material and Property
■ Make sure that the steam which emerges does not come into direct contact with electrical devices and equipment containing electrical components.
If a fault occurs during operation, pull out the mains plug. Otherwise always switch off the device first before the mains plug is pulled out.
■ Always pull the mains plug and never the mains cable when disconnecting the device from the mains power.
■ Do not pull or carry the device by the connecting cable.
■ Protect the device from other heat sources, naked flames, persistent moisture, direct sunlight or impacts.
- Keep the device in a dry place at temperatures of between 0 and 40°C.
■ Never place objects on the device or the connecting cable.
■ Use only original accessories from the manufacturer in order to guarantee that there is no interference that may prevent the device from working and to avoid possible damage.
BEFORE INITIAL USE
- Wipe down the device with a clean, damp cloth. Clean the drawer (4) and the rack (3) with detergent and warm water. The rack is also dishwasher-safe.
- The device should be used for the first time without any food in it as it may produce some smoke or odours due to coating residues. To do this, follow the instructions in the "Set-Up and Connection" and "Use" chapters and allow the device to heat up on the highest temperature setting for approx. 15 to 20 minutes without any food in it.
- Then clean it again (see the "Cleaning and Storage" chapter).
SET-UP AND CONNECTION
Please Note!
-
Do not place the device below kitchen wall units or similar cupboards. The rising steam could cause damage to them!
■ Only connect the device to a plug socket that is properly installed and matches the technical data of the device. The plug socket must also be readily accessible after connection so that the connection to the mains can quickly be isolated.
■ Never place the device on a soft surface. The ventilation openings on the bottom of the device must not be covered. Otherwise it could overheat and be damaged.
■ Make sure that the connecting cable is not squashed, bent or laid over sharp edges and does not come into contact with hot surfaces (e.g. of the device). -
Place the device on the kitchen unit or another dry, clean, flat and heat-resistant work surface. Ensure there is sufficient clear space on all sides (at least 20 cm to the sides and 50 cm above).
- Completely unwind the connecting cable (2) and plug it into a properly installed plug socket that is easily accessible.
- Place the device on the kitchen unit or another dry, clean, flat and heat-resistant work surface. Ensure there is sufficient clear space on all sides (at least 20 cm to the sides and 50 cm above).
- Completely unwind the connecting cable (2) and plug it into a properly installed plug socket that is easily accessible.
ACCESSORIES
Drawer
The food is prepared in the drawer (4). It must be inserted in the main unit (7) when the device is put into operation.
Rack
The rack (3) should be inserted in the drawer (4) when the device is in use so that the air circulation function is not impaired.
A small casserole or baking tin can also be placed on the rack for baking.
TIPS
- Generally no oil or only a small amount of oil is required for preparing food. You can add oil to your food to enhance the taste by spraying your food with a little oil from the oil atomiser.
- The cooking time is dependent on the size and quantity of the food and on the cooking temperature. However, in general the cooking time is shorter than in a conventional oven. Start with a shorter cooking time and then adapt the cooking time to your personal taste.
- When preparing mass-produced frozen products, you should follow the times and temperatures specified by the manufacturer. Before the specified cooking time elapses, check whether the food is already cooked through because the cooking time can be slightly shorter than in a conventional oven.
- With some food (e.g. chips and similar items), it is advisable to mix the food around from time to time to obtain an even cooking result.
USE
This device operates with hot air. It is not a conventional fryer in which food is deep-fried using lots of oil! In general, you can prepare all dishes that can also be prepared in a conventional fan oven. For good results, read through the "Tips" chapter.
Please Note!
■ Do not use the device for longer than 3 hours without a break.
■ Do not use the device without any food in the drawer.
■ Do not place food that is still wrapped in cling film or plastic bags into the device.
■ The device must not be moved during operation.
■ Make sure that the food does not come into contact with the heating element of the device. Do not exceed the MAX marking in the drawer.
- Fill the drawer no more than 23 full so that the hot air can circulate optimally inside the cooking chamber.
■ Make sure that foodstuffs containing oil and fats are not overheated.
If smoke rises from the device, pull out the mains plug immediately. One exception is the first time the device is used without any food (see the "Before Initial Use" chapter).
■ Always place the drawer and the rack if applicable on a heat-resistant surface after use.
- Get ready the food that is to be prepared.
- Place the rack (3) on its silicone feet in the drawer (4) (Picture C).
- Place the food in the drawer.
- Insert the drawer into the main unit (7).
-
Connect the device to a plug socket. The control panel (6) is activated and the field (20) lights up.
-
Keep touching the field ⏻ until the fields (15 to 19) and the display (13) of the control panel are activated. The cooking time in minutes and the cooking temperature in °C flash alternately.
-
Adjust the cooking time and temperature either manually or select one of the 6 programmes (chips, shrimps, baking, poultry, meat, fish) with a preset duration and temperature in each case:
To set the temperature (80°C to 200°C) touch the field 16 or 15 and to set the cooking time (up to 60 minutes) touch the field 18 or 19.

To scroll through the values quickly, leave your finger on the respective field.
To select a programme, keep touching the field M (17) until the symbol for the programme you want lights up.

The times and temperatures which are set for the programmes are merely suggestions. They should be manually adjusted if necessary to ensure that the food (in particular poultry) is fully cooked.
-
Touch the field ⏻ briefly to start the cooking process.
-
If the cooking process is to be interrupted, touch the field briefly. The settings can now also be changed. This is not possible while the device is running.
-
If the drawer is pulled out, the cooking process is interrupted. It resumes after the drawer is inserted.
To switch off the device prematurely, keep touching the field until "OFF" is displayed on the control panel. -
Once the set cooking time has elapsed, a beep sounds and the device switches off automatically. "OFF" appears on the control panel. The fan continues to run for a little while. All displays then go out, apart from the field 🔊
- Pull the drawer out of the main unit by the handle and place it down on a heat-resistant surface.
- Take the food out of the drawer.
- Allow the device and accessories to cool down and then clean them (see the "Cleaning and Storage" chapter).
CLEANING AND STORAGE
Please Note!
■ The main unit and the drawer are not dishwasher-safe.
- Do not use any sharp or abrasive cleaning agents or cleaning pads. These may damage the surfaces.
Clean the drawer (4), the rack (3) and if necessary the main unit (7) after every use to prevent germ formation and to prevent food residues from burning on. Do not allow any food residues to dry on.
- Make sure that the device has been disconnected from the mains power.
-
Rinse the drawer and the rack with detergent and warm water. Allow any burned-on food to soak in warm water with a little detergent beforehand. The rack can be cleaned in the dish-washer.
-
If the heating element (5) is dirty, wipe it down with water and use a little detergent if necessary.
-
Wipe down the main unit and the connecting cable (2) with a damp cloth if necessary.
-
Allow all parts to dry completely or dry them off.
-
Store the device and all accessories away in a clean, dry location that is out of the reach of children and animals when not in use for a prolonged period.
TROUBLESHOOTING
If the device does not work properly, check whether you are able to rectify the problem yourself. If the problem cannot be solved with the steps below, contact the customer service department.

Do not attempt to repair an electrical device yourself!
The device does not work.
The mains plug is not inserted in the plug socket correctly.
▶ Correct the fit of the mains plug.
The plug socket is defective.
▶ Try another plug socket.
There is no mains voltage.
▶ Check the fuse of the mains connection.
The drawer (4) is not fitted correctly in the main unit (7).
The drawer must be fully inserted in the main unit so that the device can start the heating process.
The overheating protection has been triggered.
▶ Pull the mains plug out of the plug socket and allow the device to cool down completely. Then try again.
The fuse in the fuse box is triggered.
Too many devices connected to the same circuit.
▶ Reduce the number of devices in the circuit.
The food has not been cooked evenly.
Different items of food with different cooking times have been prepared at the same time.
▶ Place food with a longer cooking time in the device first, then add ingredients with a shorter cooking time later.
Items of food which require different cooking temperatures have been prepared at the same time.
▶ Prepare items of food with different cooking temperatures one after the other.
The set cooking time was too short or the temperature too low.
▶ Increase the cooking time or temperature.
The drawer (4) is too full.
▶ Reduce the amount of food. Fill the drawer no more than 23 full with food.
The items of food are piled on top of one another.
▶ Spread the food and mix it around from time to time.
Chips made from fresh potatoes are not crispy.
The potatoes contain too much water.
▶ Cut the potatoes into narrower pieces. Dab the potato pieces dry with
some kitchen towel and then trickle a little cooking oil over them.
During use, an unpleasant smell is detected. /Smoke emerges from the device.
The device is dirty.
▶ Follow the instructions in the "Cleaning and Storage" chapter.
The device is being used for the first time.
▶ A smell often develops when new devices are first used. The smell should disappear once the device has been used several times.
Too much oil or fat.
Remove excess oil or fat.
DISPOSAL

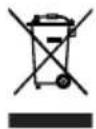
Dispose of the packaging material in an environmentally friendly manner so that it can be recycled.
This device is governed by the European Directive 2012/19/EU on waste electrical and electronic equipment (WEEE). Do not dispose of this device as normal domestic waste, but rather in an environmentally friendly manner via an officially approved waste disposal company.
TECHNICAL DATA
Article number: 03000
Model number: AF-260A-1300
Power supply: 220 - 240 V \~ 50/60 Hz
Power: 1300W
Protection class: I
Capacity: max. 3 litres
Temperature setting: 80°C to 200°C
Timer: up to 60 minutes
ID of the operating instructions: Z 03000 M DS V1 0920 md
All rights reserved.
CE
RECIPE IDEAS
Notes on Cooking Time and Cooking Temperature
Be aware that the specified cooking times and temperatures are averages. As ingredients differ due to their origin, size, shape and brand, we cannot guarantee the optimum setting for the ingredients. The actual cooking times may therefore vary depending on the portion size. Make sure prior to serving that the food, in particular poultry, is fully cooked through!
Homemade Chips
Ingredients:
Potatoes (waxy)
A little oil (if necessary)
To taste Salt
Preparation:
- Peel the potatoes and cut them into sticks of equal size.
- Thoroughly wash the potato sticks and then dry them off.
- If necessary, add a little oil to the potatoes and mix in.

It is not essential to add oil. However, adding oil will make the chips crispier and give them a more intense flavour.
- Start the "Chips" programme.
- Mix around the chips after 8 minutes.
- Cook for another 7 minutes.
The chips are cooked when they are golden brown.
Tips:
- Mix your favourite herbs and spices into the oil before adding it. This will allow you for example to prepare tasty curry or paprika-flavoured chips. There are no limits to your imagination.
- Depending on how thick you cut your potatoes, you can vary between potato wedges and thick or thin chips. The thicker the potatoes are cut, the longer the cooking time.
- Use waxy potatoes. Young potatoes contain more water and therefore take longer to cook and it is possible that they may not go as crispy.
- Wash the chopped-up potatoes with cold, clear water to remove any excess starch in the potatoes. IMPORTANT: Then thoroughly dry the potatoes. The less moisture is present, the crispier the chips will become.
- Preboiled potatoes will cook more evenly! Cut the potatoes into sticks and preboil them for around five minutes. This will prevent the chips from being crispy on the outside but not fully cooked on the inside.
Sweet Potato Chips
Ingredients:
Sweet potatoes (peeled)
To taste Sea salt
Preparation:
- Cut the sweet potatoes into wafer-thin slices.
- Add salt to the sweet potatoes to suit your taste. We recommend not using too much salt. You can add more salt later on if the chips are not salty enough.
- Select the "Chips" programme and reduce the cooking time to 5 minutes.
- When the cooking time is up, mix around the sweet potato chips.
- Cook for another 5 minutes.
The sweet potato chips are cooked when they are golden brown.
Pieces of Chicken in Breadcrumbs
Ingredients:
2 Chicken thighs or wings
For the breadcrumb coating:
approx. ½ cup Breadcrumbs
1 - 2 Egg white
2 tbsp. Paprika powder
1 Garlic clove
1 tsp. Sea salt
1 tsp. Rosemary

The recipe can be individually modified by adding your favourite herbs and spices.
Preparation:
-
Peel the garlic and squeeze through the garlic press.
-
Mix together the garlic, paprika powder, sea salt, rosemary and breadcrumbs.
-
Separate off the egg and pour the egg white into a separate bowl.
-
Dip the chicken pieces in the egg white and then roll them in the bread-crumb coating.
-
Start the "Poultry" programme.
-
Turn all the chicken pieces when the programme finishes.
-
Set the timer to another 15 - 20 minutes.
Check whether the chicken pieces are cooked before eating them.
Coconut Prawns
Ingredients:
12 Prawns (peeled and cleaned)
For the breadcrumb coating:
approx. 12 cup Flour
approx. ½ cup Coconut Flakes
approx. 12 cup Breadcrumbs
1 - 2 Egg white
Preparation:
-
Add the coconut flakes and the breadcrumbs in a ratio of 1:1 to a small bowl and mix the ingredients together.
-
Pour the flour into a separate bowl.
-
Separate off the egg and pour the egg white into a separate bowl.
-
First roll the prawns in the flour, then dunk them in the egg white and then roll them in the coconut flake breadcrumb coating.
-
Start the "Shrimps" programme.
-
After 10 minutes, check whether the prawns are cooked. They are ready for serving when they have developed a lovely golden brown colour.
Cod Fillet with Garlic Herb Crust
Ingredients:
approx. 100 g Cod fillet
1 - 2 Egg white
1 Garlic clove
1 tbsp. Chopped basil
1 tsp. Paprika powder
To taste Sea salt, pepper approx. 1/2 cup Breadcrumbs
Preparation:
-
Peel the garlic and squeeze through the garlic press.
-
Mix together the garlic, the rest of the herbs and breadcrumbs in a bowl.
-
Separate off the egg and pour the egg white into a separate bowl.
-
Dip the cod fillet in the egg white and then roll it in the garlic herb bread-crumb coating.
-
Start the "Fish" programme.
-
After approx. 10 minutes, turn the cod fillet.
-
Cook for another 5 – 8 minutes.
Courgette Sticks
Ingredients:
1 Courgette
For the breadcrumb coating: approx. 12 cup Flour approx. 12 cup Breadcrumbs
1 - 2 Eggs
Preparation:
- Cut the courgette into small sticks.
- Place the egg, flour and breadcrumbs into separate small bowls.
- Whisk the egg.
- First roll the courgette sticks in the flour, then dunk them in the egg and finally roll them in the breadcrumb coating.
- Select the "Chips" programme and set the timer to approx. 12 – 17 minutes. Extend or reduce the cooking time if necessary, depending on whether you want the vegetables to be crunchy or soft.
Apple Turnovers
Ingredients:
1 - 2 Apples
1 roll Puff pastry from the refrigerated cabinet
50 g Brown sugar
2 tbsp. Flour
1 - 2 tbsp. Lemon juice
To taste Cinnamon
Preparation:
- Peel the apples, remove the cores and cut them into small pieces.
- Mix together the pieces of apple, flour, sugar and lemon juice and add cinnamon to taste.
- Roll out the puff pastry and divide it into pastry squares with an edge approx. 10 cm long.
- Spread one tablespoon of the filling onto the pastry squares.
- Brush a little water onto the edge of the pastry and fold it up into triangles. Firmly press down the edge of the pastry.
- Select the "Baking" programme and reduce the cooking time to approx. 13 – 15 minutes.
The apple turnovers should be golden brown, extend the cooking time by 5 – 10 minutes if necessary if the apple turnovers are too light in colour.
SOMMAIRE
Composition 26
Aperçu général 26
Symboles 27
WAARSCHUWING – Brandgevaar
WAARSCHUWING – Verwon- dingsgevaar
De contactdoos is defect.
De lade (4) is te vol.