VK 1093/143M2 - Surveillance Camera GROTHE - Free user manual and instructions
Find the device manual for free VK 1093/143M2 GROTHE in PDF.


User questions about VK 1093/143M2 GROTHE
0 question about this device. Answer the ones you know or ask your own.
Ask a new question about this device
Download the instructions for your Surveillance Camera in PDF format for free! Find your manual VK 1093/143M2 - GROTHE and take your electronic device back in hand. On this page are published all the documents necessary for the use of your device. VK 1093/143M2 by GROTHE.
USER MANUAL VK 1093/143M2 GROTHE
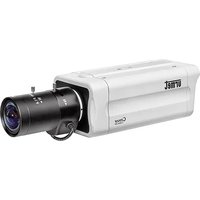
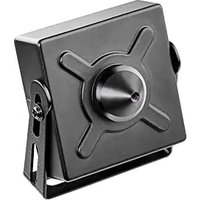
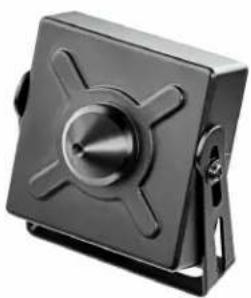
Square Camera IP 3.3mm
natural_image
Close-up of a black square mechanical component with a central knob and mounting bracket (no visible text or symbols)Sch./Ref./Typ/Réf. 1093/143M2
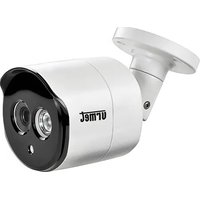
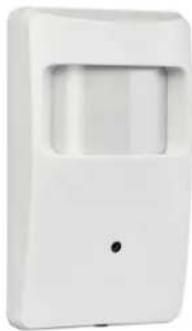
PIR Sensor Camera IP 3.7mm
natural_image
White rectangular device with a black dot on the side, resembling a smart water heater or display unit (no text or symbols visible)Sch./Ref./Typ/Réf. 1099/204
GUIDA RAPIDA
QUICK MANUAL
SCHNELLANLEITUNG
GUIDE RAPIDE
ITALIANO
2 Installation Ref. 1093/143M2....8
3 Installation Ref. 1099/204....8
4 IP Camera Configurations 9
4.1 Connection to IP network with DHCP service 9
DEUTSCH
1 Generelle Informationen.... 11
1.1 Warnungen.... 11
2 Installation Typ. 1093/143M2....12
3 Installation Typ. 1099/204 12
text_image
Internet Options General Security Privacy Content Connections Programs Advanced Select a zone to show or change security settings. Internet Local Internet Trusted sites Restricted zones Internet This zone is for Internet settings, except those listed in trusted and restricted zones. Security level for this zone Customs Custom settings: - To change the settings, click Custom level. - To use the recommended settings, did Default level. Custom level... Default level Reset all zones to default level OK Cancel Apply Security Settings - Internet Zone Settings Active controls and players - Allow properly shared PC will control to run without prior - Enable - Allow Scripts - Enable - Prompt - Automatic prompting for Active controls - Enable - Enable - Binary and script behaviors - Advanced order approved - Enable - Enable *Times offset after you start Internet Explorer Reset custom settings Add OK Print Reset... OK Cancel\*NOTA BENE
natural_image
Potted green plant with leafy leaves in a white pot, displayed on a screen interface (no text or symbols visible)Thank you for purchasing this product.
This quick start guide was written to help you set up the following URMET IP cameras rapidly and easily: Ref. 1093/143M2 - Ref. 1099/204.
Read this quick start guide which contains information for correct, safe use carefully before using the device.
Keep this guide at hand so that you can refer to it when needed.
1.1 WARNINGS
Electricity
Before connecting to electrical outlet, verify the electrical specifications of the device are suitable for the available power source.
We suggest to connect the device to electrical outlet via a switch disconnector.
In case of misfunctioning, disconnect electrical power from the general switch.
➢ Use only the provided power supply.
Safety precautions
Do not expose the device to rain or humidity and do not insert any solid or liquid object in it to prevent the risk of fire or electrocution. In these events disconnect the device from the electrical outlet and call technical assistance to check it.
Do not open the device. Any repair must be made by qualified personnel or by calling the nearest authorized technical assistance center.
Keep the device away from children to prevent any, even involuntary, damaging.
Do not touch the device with wet hands as it might cause electrical shock or mechanical damages.
If the device falls down while working or if the salesbox is damaged, do not continue using it. If usage is continued under such circumstances electrical shocks might take place. Contact the authorized retailer or installer.
Installation precautions
Do not install the camera in places with possible exposure to rain or humidity without the proper protective case.
Do not point the camera directly to sunlight or other intense sources of light, even when turned off. The subject of recording must not be against the light.
Do not point the camera against reflective objects.
Some light conditions (such as fluorescent color) can affect the recorded colors.
➢ Use AUTO-IRIS lens when operating the camera in changing light environments.
Do not use this device on any unstable support such as lurching or sloping table to prevent the device from falling and be damaged.
If water or any other material should penetrate the camera, stop using it as it might cause fire or electrical shock and contact the authorized retailer or installer.
Do not cover the device with any cloth while using to prevent deformation of the external part and inner components heating which might provoke fire, electrical shock or mechanical damages.
Do not put magnets or magnetized objects close to the device to prevent functional anomalies.
➢ Do not use this device in presence of smoke, steam, humidity, dust or intense vibrations.
Do not use the device shortly after moving it from warm to cold environment and vice versa. After moving the device wait three hours before using it: this time is necessary for the device to adapt to the new environment (temperature, humidity, etc.).
Usage precautions
➢ Check the device is not damaged after removing the packaging.
➢ Check the working environment is not too humid and the temperature is within the indicated range.
Do not point the camera against sunlight to prevent sensor damages.
Device cleaning
➢ Use a dry cloth to remove dust and dirt from the device.
If dirt cannot be removed with a dry cloth, use a humid cloth and a neutral cleanser.
Do not use spray cleanser for device cleaning. Do not use volatile liquids such as gasoline, alcohol, solvents etc. or chemical treated cloth to clean the device to prevent deformations, damages or scars on the finishing paint.
➢ Disconnect the device from the electrical outlet before cleaning.
Video recording
This device is not designed as a burglar system but mainly to transmit and record video images. URMET S.p.A. is not in any way responsible for loss or damages of the user consequent to theft.
Before using the device, record a demo video to verify the correct functionality of this feature. URMET S.p.A. is not in any way responsible for loss of recorded data consequent to wrong setting or usage, device misfunctioning or failure.
This device is composed by electronic precision components. Do not hit the device while recording as it might affect the video.
Privacy and Copyright
The IP camera is designed for surveillance systems. Video recording is subject to the laws applicable to the Country where used. It is forbidden to record images with Copyright.
The User is responsible to check and respect all local laws and norms for video signal recording. The manufacturer is NOT in any way liable for any usage of the product which might result not compliant to the relevant norms.
Firmware upgrade
➢ Refer to URMET S.p.A. Customer Service Technical Assistance periodically to check availability of firmware upgrades.
Network configuration
Camera default setting is DHCP mode. If the network does not support dynamic addressing (DHCP), the device will automatically switch to factory IP 192.168.1.168. Use Urmet "Easy Tool" software to modify the IP address and other network settings to prevent any conflict with other devices on the network.
Network connections
When connecting a PC (using Software Client or Browser), any video channel on the PC will be using "unicast" connection (TCP, RTP, UDP).
The device can support up to 5 "unicast" connections so it is possible to show the video on maximum 5 remote devices (PC or smartphone) at the same time depending on the available network band.
2 INSTALLATION REF. 1093/143M2
1 Make sure that no units are powered before starting the installation procedure.
2 Position the bracket to frame the required picture and fix it to the wall or other flat surface.
3 Connect the LAN cable from IP camera to switch or PC.
4 Power the camera.
3 INSTALLATION REF. 1099/204
1 Make sure that no units are powered before starting the installation procedure.
2 Identify the suitable position for shooting the selected images (the camera is put inside the PIR case and the images are shot though the tiny hole on the front part).
3 In order to remove the sensor cover, unscrew and press on the fixing snap.
4 Identify the internal predispositions to fix the device and make the correct hole.
5 Once the device is fixed, put the cover on the base, screw and lock it.
6 Connect the LAN cable from IP camera to switch or PC.
7 Power the camera.
4 IP CAMERA CONFIGURATIONS
The camera must be configured for the home or office network after it has been powered.
It is advisable to install and configure one camera at a time if you are installing multiple cameras on the same network.
4.1 CONNECTION TO IP NETWORK WITH DHCP SERVICE
For Quick installation about IP camera with dynamic host configuration (DHCP) on the network will be assigned an IP address automatically. IF DHCP Service is not supported, the default IP Address of IP Camera will be 192.168.1.168. Here follow the steps for the IP Camera first installation:
- Install the Software "Easy Tool" provided by CD and follow the installation instructions displayed at monitor.
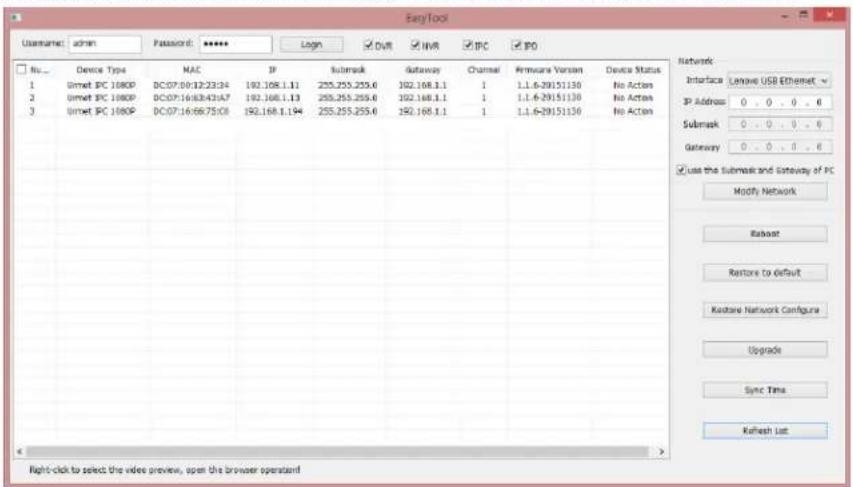
- Launch the "Easy Tool" Software, selecting EasyTool.exe it will be displayed automatically IP Address, Subnet Mask, Gateway, and MAC Address for each IP Camera detected in LAN, as shown in picture below. In order to display Firmware Version it is necessary to insert correct username and password
text_image
EasyTool Username: admin Password: **** Login DUR IWR IPC IPO No... Device Type MAC IP Submask Gateway Channel Firmware Version Device Status 1 Umet IPC 1800P DC:07:09:12:23:24 192.168.1.11 255.255.255.0 392.168.1.1 1 1.1.6-29151130 No Action 2 Umet IPC 1800P DC:07:16:08:43:A7 192.168.1.13 255.255.255.0 392.168.1.1 1 1.1.6-29151130 No Action 3 Umet IPC 1800P DC:07:16:06:75:C8 192.168.1.194 255.255.255.0 392.168.1.1 1 1.1.6-29151130 No Action Network Interface Lenovo USB Ethernet IP Address 0 . 0 . 0 . 0 Submask 0 . 0 . 0 . 0 Gateway 0 . 0 . 0 . 0 ✓ Use the Submask and Gateway of PC Modify Network Raster Restore to default Kuatare Network Configure Upgrade Sync Time Refresh List Right-click to select the video preview, open the browser operator!If the searched IP address and PC IP address are not in the same network segment, user may modify IP address, subnet mask, and other parameters of IP camera by using Easy Tool software.
First select the device to modify IP address and then input new IP address, subnet mask, gateway (subnet mask and gateway can be inherited by PC) and username/password. Click Modify Network to change IP address of the device.
\*IMPORTANT NOTE
Default IP of IP camera is "192.168.1.168", username is "admin", password is "admin", media port number is "6066" and command port "6060".
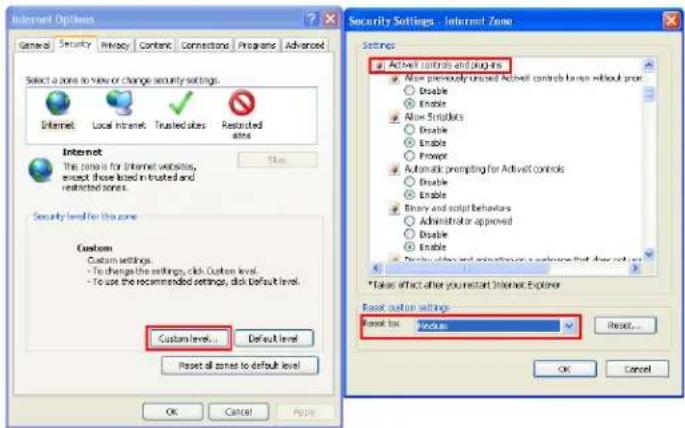
- After detected IP Camera, push right button of the mouse and click "open in IE", and will be opened a Web Page. If the installation of an ActiveX component is required, follow these steps.
Before connecting the PC you need to configure IE protection as follows:
From Internet Explorer Menu select Tools -> Internet Options -> Security or Protection (depending on different Internet Explorer versions)
“Properties – Internet Protection” window will be displayed. Select “Safe websites”.
Click "Websites...".
Input camera IP address in "Add website to area" and press "Add".
\*Please note
Do not thick "Request server check (https:) for all area websites".
➢ Press "OK" or "Close".
Select "Customized Level" and check:
- "Enabled" or "Ask confirmation" is selected for "Initialize and run ActiveX control script not marked as safe"
- "Enabled" or "Ask confirmation" is selected for "Download ActiveX control without electronic signature"
Press "OK" to confirm and close Internet Options menu.
Install Active X from Internet Explorer.
text_image
Internet Options General Security Privacy Content Connections Programs Advanced Select a zone to view or change security settings. Internet Local Intranet Trusted sites Restricted sites Internet This zone for Internet websites, except those listed in trusted and restricted zones. Security level for the zone Custom Custom settings. - To change the settings, click Custom level. - To use the recommended settings, click Default level. Custom level... Default level Reset all zones to default level OK Cancel Apply Security Settings - Internet Zone Settings ActiveX controls and plug-in - Now previously unsigned ActiveX controls for non-unbound prior - Enable - Enable - Enable - Enable - Enable - Enable - Enable - Enable - Enable - Enable - Enable Binary and script behaviors - Administrator approved - Enable - Enable * Takes what other your instant Internet Explorer Reset custom settings Reset box: Module Reset... OK Cancel※Please note
Procedure for Internet Explorer 11 on Win 7/8 OS:
Using Win 7 or Win 8 open IE Browser and select Tools -> Settings Compatibility View"
➢ Add camera IP address in the pop up window.
➢ Check all compatibility options. Select "Display all websites in Compatibility view" option.
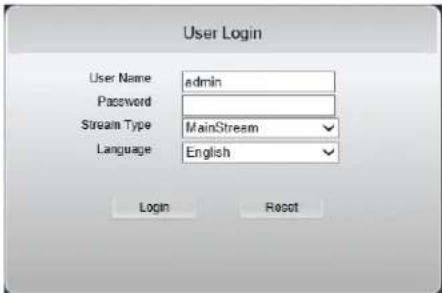
- At the end of Active X installation the login screen will be displayed where it is possible to select the Username (Default: admin), Password (Default: admin), Stream Type (Main Stream, Sub Stream, Mobile Stream) and Language.
text_image
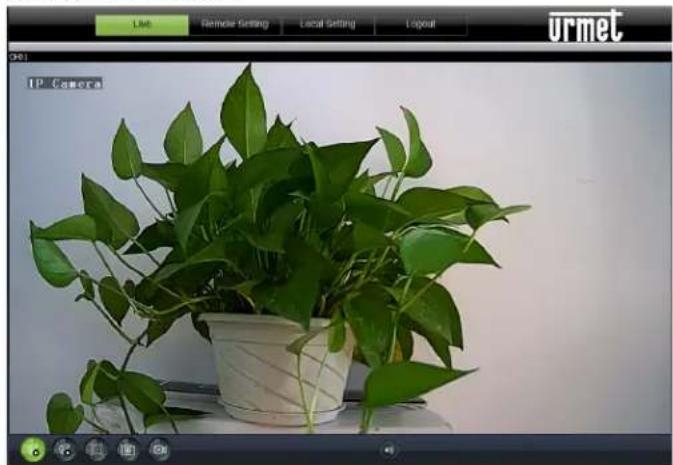
User Login User Name admin Password Stream Type MainStream Language English Login Reset- Select "Login" in order to enter in LIVE screen.
natural_image
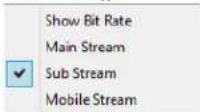
Potted green leafy plant in a white pot, displayed within a software interface window (no text on plant or pot)- Press right mouse button to select the stream to display (Main Stream, Sub Stream or Mobile Stream) and to show bitrate.
1 GENERELLE INFORMATIONEN
Sehr geehrte Kunden
text_image
Internet Options General Security Privacy Content Connections Programs Advanced Select a zone to view or change security settings. Internet Local Inside Trusted sites Restricted sites Internet This zone is for Internet websites, except those listed in trusted and restricted zones. Security level for this zone Custom Custom settings. To change the settings, click Custom level. To use the recommended settings, click Default level. Custom level... Default level Reset all zones to default level Reset custom settings Reset to: Medium Options: Active controls and plugins Allow previously unused Active controls to run without prior Enable Enable Allow prompts Enable Enable Prompt Automatic prompting for Active controls Enable Enable Binary and script behaviors Administrator approved Enable Enable Reset optimal and automatic on a software that does not use *Sales effect after your instant Internet Explorer Reset custom settings Reset to: Medium Reset... OK Cancel Apply\*BEACHTEN
natural_image
Potted green leafy plant in a white pot, displayed within a software interface window (no text on plant or pots)Camera default setting is DHCP mode. If the network does not support dynamic addressing (DHCP), the device will automatically switch to factory IP 192.168.1.168. Use Urmet "Easy Tool" software to modify the IP address and other network settings to prevent any conflict with other devices on the network.
text_image
Internet Options Select a zone to view or change security settings. Internet Local/remote Trusted sites Restricted sites Internet This zone is for Internet settings, except those listed in traded and restricted sites. Security level for this zone Customs Custom settings. - To change the settings, click Custom level. - To use the recommended settings, click Default level. Custom level... Default level Reset all zones to default level OK Cancel Help Security Settings - Internet Zone Settings Active controls and updates After previously installed update controls to run without prior Enable Enable Enable Controls Enable Enable Prompt Automatic prompting for Active controls Enable Enable Binary and script behaviors Administrator approved Enable Enable Create other and optimization approaches that does not use *Take effect after you wait at Internet Explorer Reset custom settings Reset to: Select Reset... OK Cancelnatural_image
Potted green leafy plant in a white pot, displayed within a browser window (no text or symbols on the plant itself)Quick guide and complete user manual of the product are available at the following link:
Quick guide and complete user manual of the product are also available for DOWNLOAD from the URMET website under the section USER MANUALS.