
S503XX - Sweeper Vonroc - Free user manual and instructions
Find the device manual for free S503XX Vonroc in PDF.

| Product type | Manual sweeper (non-motorized) |
| Brand | Vonroc |
| Model | S503XX |
| Intended use | Sweeping dirt and debris on outdoor surfaces, domestic use |
| Sweeping width | 650 mm |
| Collection bin capacity | 18 litres |
| Weight | 10 kg |
| Bin material | Plastic (reasonable estimate) |
| Telescopic handle | Yes, height adjustable (2 positions) |
| Foldable handle | Yes, for vertical storage |
| Side brushes included | Yes, 2 removable side brushes |
| Sweeping mechanism | Wheel drive (brush rotation when pushing) |
| Routine maintenance | Regular cleaning of brushes and bin; use a damp cloth and mild soap |
| Important safety instructions | Do not use in explosive environment; do not sweep liquids, hot or hazardous substances; wear gloves when emptying the bin |
| Warranty | Statutory warranty against defects in parts and workmanship |
Frequently Asked Questions - S503XX Vonroc
User questions about S503XX Vonroc
0 question about this device. Answer the ones you know or ask your own.
Ask a new question about this device
Download the instructions for your Sweeper in PDF format for free! Find your manual S503XX - Vonroc and take your electronic device back in hand. On this page are published all the documents necessary for the use of your device. S503XX by Vonroc.
USER MANUAL S503XX Vonroc
natural_image
White silhouette of a manual lawn mower on black background (no text or symbols)EN Original Instructions 06
natural_image
Close-up of a hand holding a circular brushstroke brush next to a mechanical component, with arrows indicating motion direction (no text or symbols)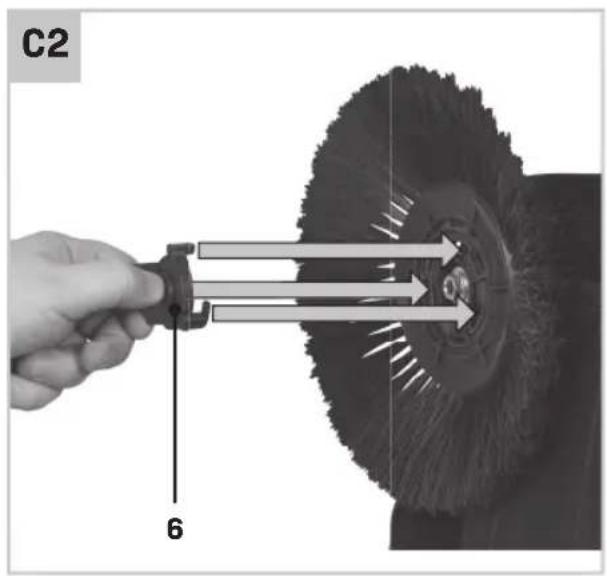

natural_image
Close-up of a black brush head with radial bristles and a circular arrow indicating rotation (no text or symbols)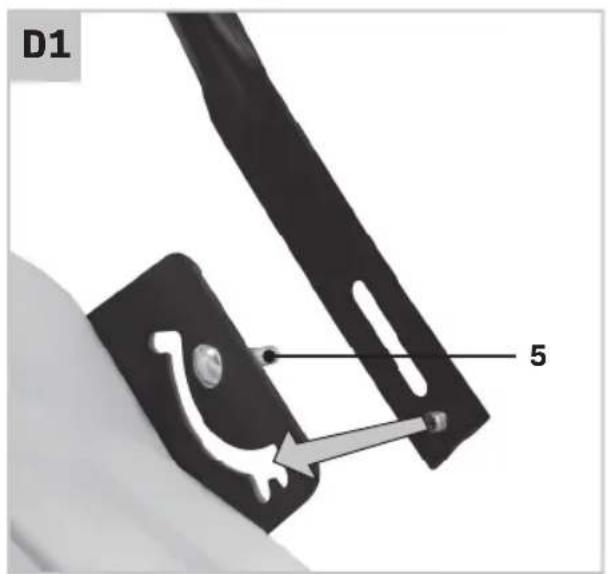

natural_image
Close-up of a hand adjusting a mechanical clamp or bracket component, with labeled parts D2 and 3 (no text or symbols on the main subject)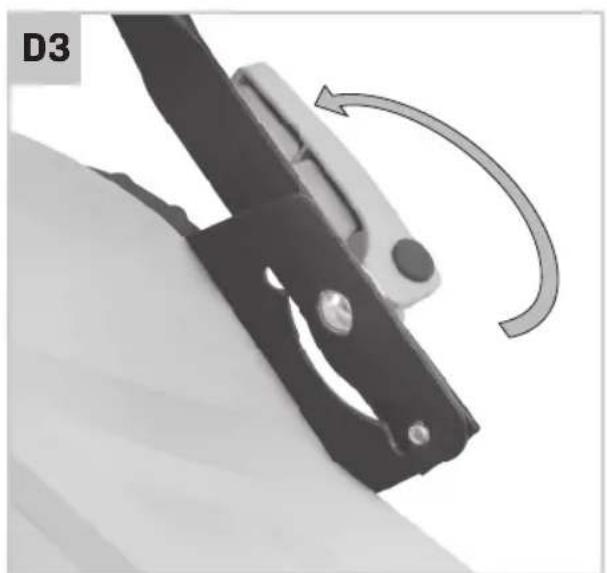
natural_image
Close-up of a mechanical clamp or bracket component with a curved arrow indicating rotation (no text or symbols)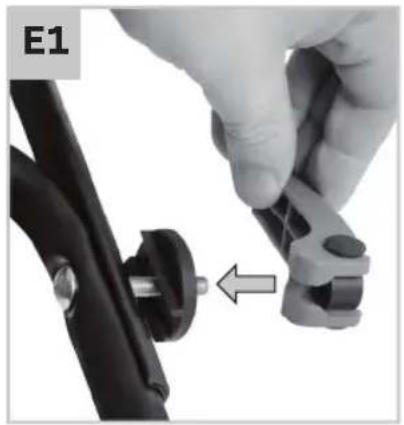
natural_image
Close-up of a hand adjusting a mechanical clamp or bracket component, with an arrow indicating the adjustment (no text or symbols visible)
natural_image
Close-up of a black metal bracket with mounting holes and a metallic clip, labeled E2 in the corner (no text or symbols on the main subject)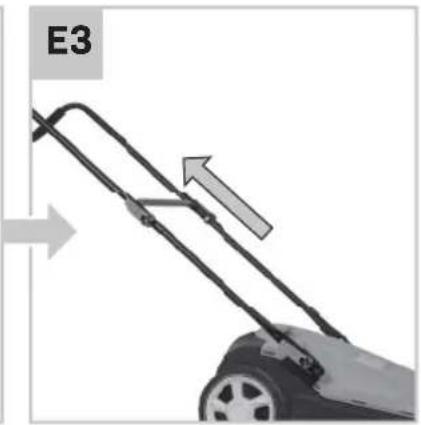
natural_image
Lhouette of a lawn mower with an arrow indicating motion direction (no text or symbols)
natural_image
Close-up of a black cable with a metallic clip attached, labeled 'E4' in the top-left corner (no other text or symbols)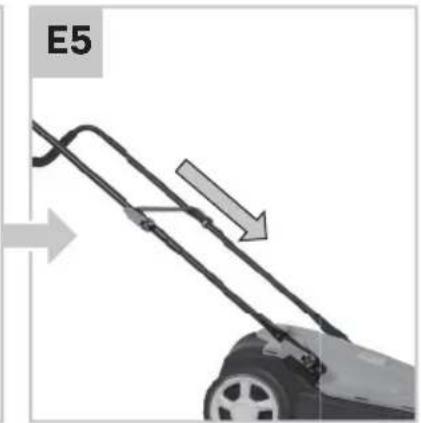
natural_image
Diagram of a lawn mower with a directional arrow indicating motion (no text or symbols)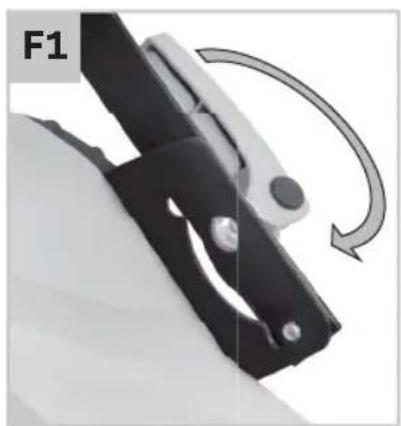
natural_image
Close-up of a mechanical clamp or clip with a curved arrow indicating rotation (no text or symbols)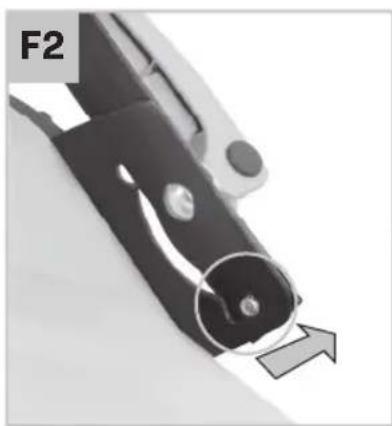
natural_image
Close-up of a mechanical tool with a circular component and an arrow indicating direction (no text or symbols)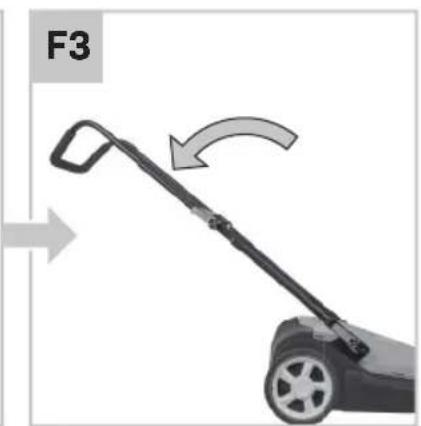
natural_image
Diagram of a lawn mower with an arrow indicating clockwise motion (no text or symbols)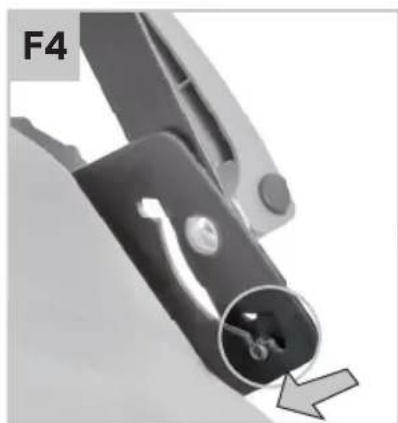
natural_image
Close-up of a black plastic clip with a circular opening and an arrow pointing to it, labeled 'F4' in the top-left corner (no other text or symbols)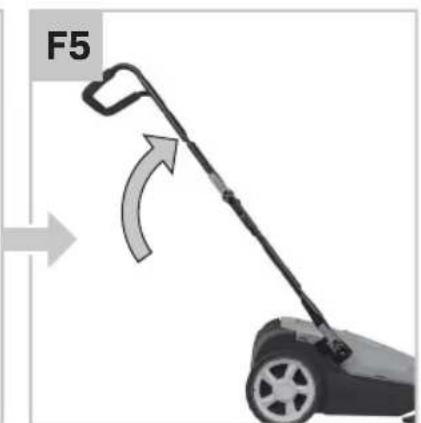
natural_image
Diagram of a lawn mower with an arrow indicating clockwise motion (no text or symbols)UONROC
natural_image
Mechanical component with a curved arrow indicating rotation or motion, no visible text or symbols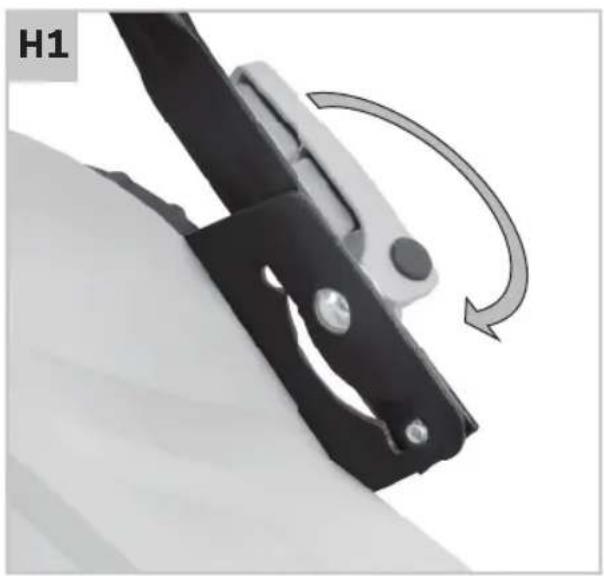
natural_image
Close-up of a black metal clamp tool with a curved arrow indicating rotational motion (no text or symbols)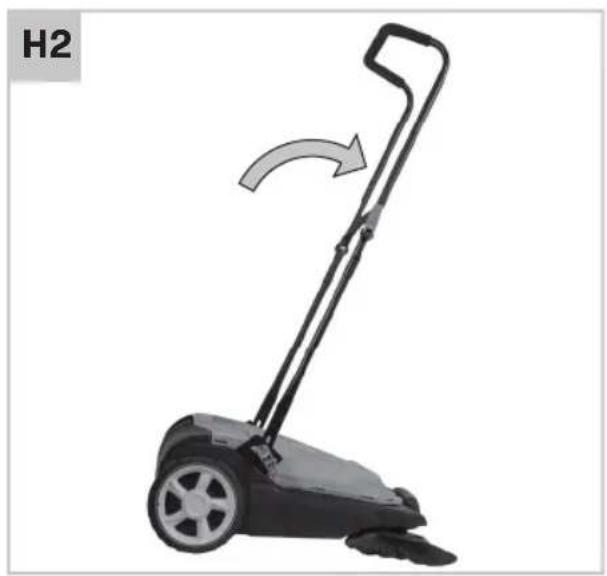
natural_image
Mechanical lawn mower with a curved arrow indicating rotational motion (no text or symbols)
natural_image
Black lawn mower with handle and wheels, labeled H3 in top-left corner (no other text or symbols)
natural_image
Black and white photo of a manual lawn mower with a handle and wheels (no text or symbols visible)1. SAFETY INSTRUCTIONS
Read the enclosed safety warnings, the additional safety warnings and the instructions. Failure to follow the safety warnings and the instructions may result in electric shock, fire and/or serious injury. Save the safety warnings and the instructions for future reference.
The following symbols are used in the user manual or on the product:

Read the instruction manual

Risk of personal injury
ADDITIONAL SAFETY INSTRUCTION

Warning: risk of being squeezed or hurt at the belts, side brushes, container, pushing handle
- The appliance may not be operated in explosive atmospheres
- The appliance must be checked to ensure that it is in proper working order and is operating safely prior to use. Otherwise, the appliance must not be used.
- The appliance is not suitable for sweeping up liquids
- The appliance is not suitable for sweeping up hazardous substances
- Do not sweep up any hot or burning substances, such as cigarettes, match sticks or similar objects
- Wear safety gloves when removing glass, metal or other materials from the waste container
- Never sweep up explosive liquids, combustible gasses or undiluted acids and solvents. This includes petrol, paint thinner or heating oil which can generate explosive fumes or mixtures upon contact with the air. Acetone, undiluted acids and solvents must be avoided because they can harm the materials on the machine.
- The operator must use the appliance properly. The operator must consider the local conditions and pay attention to third parties, children in particular, when working with the appliance.
2. MACHINE INFORMATION
Intended use
This product has been designed to sweep up dirt and debris from outdoor surfaces. The appliance is designed for domestic use only. The sweeper may not be used to sweep up flammable liquids, acids and solvents, hot or burning substances or other hazardous materials. The appliance is to be used only for its prescribed purpose. Any other use is deemed to be a case of misuse.
TECHNICAL SPECIFICATIONS
| Model No. PS503XX | |
| Sweeping Width 650 mm | |
| Container capacity 18 liter | |
| Weight 10 kg |
DESCRIPTION
The numbers in the text refer to the diagrams on pages 2-5.
- Upperhandle
- Lowerhandle
- Handle fastening knob
4.Sidebrush
5.Container - Brush fastening knob
- Handle fastening bolt
3. ASSEMBLY
Attaching the brushes (Fig. B, C1, C2, C3)
- Remove the side brushes (4) from the container (5) (Fig. B)
- Place the side brushes (4) on the sweeper (Fig. C1)
- Use the supplied knobs (6) to secure the brushes in place (Fig. C2, C3)
Assembling the lower handle (Fig. D1, D2, D3)
- Attach the lower handle (2) to the sweeper body (Fig. D1)
- Use the supplied knobs (3) and bolts (7) to fixate the lower handle (Fig. D2, D3). Note that there are three possible positions for the lower handle. The lower handle position may be adjusted after the assembly of the sweeper is complete.
Assembling the upper handle (Fig. E1, E2, E3, E4, E5)
- Attach the upper handle (1) to the lower handle (2) (Fig. E1)
- Use the supplied knobs (3) and bolts (7) to fixate the upper handle (Fig E2, E3 / E4, E5). Note that there are two possible height options for the upper handle.
4. OPERATION

Be careful during operation of the appliance. The underside of the sweeper contains moving parts such as belts, pulleys and brushes which will start moving when the sweeper is pushed along.
Adjusting the handle (Fig. F1, F2, F3, F4, F5)
- Loosen the knobs (3) on both sides of the handle. Note: the knobs need only be loosened to allow some movement of the handle. Do not completely remove the knobs (3) and bolts (7) from the sweeper. (Fig. F1)
- Pull the handle up slightly, then adjust the handle to the desired position. Push the handle down slightly to secure it in one of the two possible positions. (Fig. F2, F3 / F4, F5)
- Fasten the knobs (3) to fixate the handle
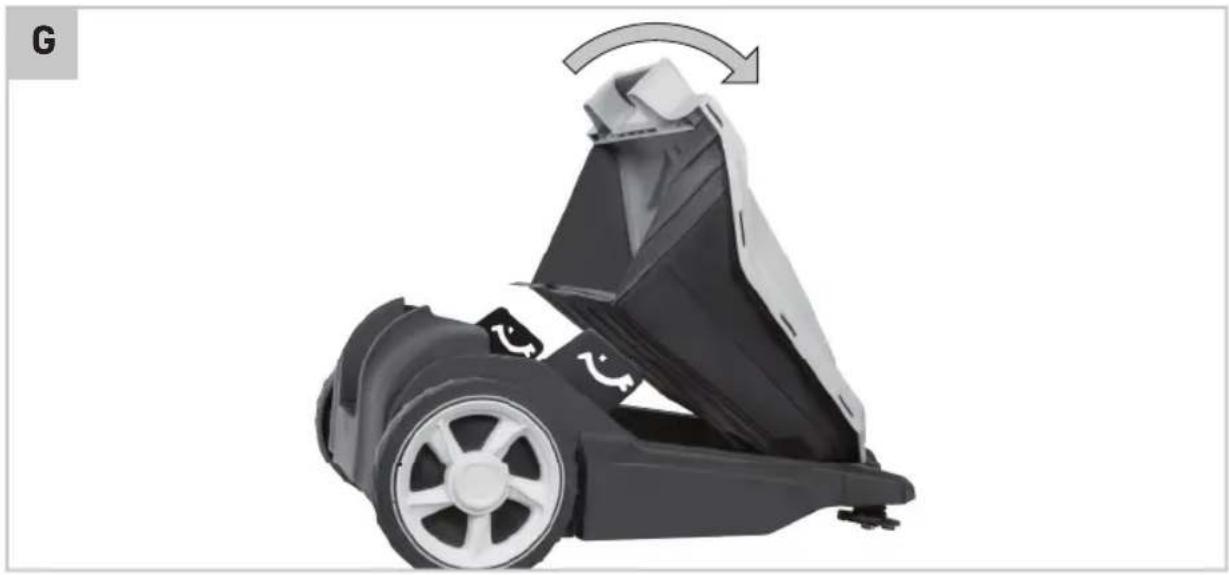
Emptying the container (Fig. G)
- Remove the container (5) by pulling the handle
- Empty the contents of the container in a suitable waste bin
- Place the container (5) back onto the sweeper
Folding the handle for storage (Fig. H1, H2, H3, H4)
- Loosen the knobs (3) on both sides of the handle. Note: the knobs need only be loosened to allow some movement of the handle. Do not completely remove the knobs (3) and bolts (7) from the sweeper. (Fig. H1)
- Pull the handle up slightly, then move the handle forwards to fold it onto the sweeper. (Fig. H2)
- Fasten the knobs (3) to fixate the handle in the folded position (Fig. H3)
- With the handle folded down the sweeper can be easily stored in vertical position (Fig. H4)
5. MAINTENANCE
This sweeper has been designed to operate over a long period of time with a minimum of maintenance.
Continuous satisfactory operation depends upon proper care and regular cleaning.
- Keep the sweeper clean and dry.
- Regularly remove stuck debris from the brushes
- To clean the sweeper, use only mild soap and a damp cloth. Do not use any abrasive or solvent-based cleaner. Do not immerse the sweeper in water.
WARRANTY
VONROC products are developed to the highest quality standards and are guaranteed free of defects in both materials and workmanship for the period lawfully stipulated starting from the date of original purchase. Should the product develop any failure during this period due to defective material and/or workmanship then contact VONROC directly. The following circumstances are excluded from this guarantee:
- Repairs and or alterations have been made or attempted to the machine by unauthorized service centers;
- Normal wear and tear;
- The tool has been abused, misused or improperly maintained;
- Non-original spare parts have been used.
This constitutes the sole warranty made by company either expressed or implied. There are no other warranties expressed or implied which extend beyond the face hereof, herein, including the implied warranties of merchantability and fitness for a particular purpose. In no event shall VONROC be liable for any incidental or consequential damages. The dealers remedies shall be limited to repair or replacement of nonconforming units or parts.
The product and the user manual are subject to change. Specifications can be changed without further notice.